1
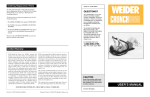
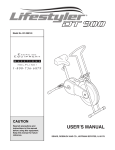
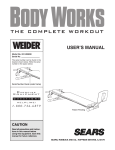
Model No. 831.280781
USERÕS MANUAL
Important
Precautions
¥ Read all precautions and instructions in this manual before using
this equipment. Save this manual
for future reference.
¥ As you exercise, keep the small of
your back on the exercise mat; it
may be necessary to raise your hips
slightly.
¥ Keep your head on the headrest as
you exercise.
¥ If you feel faint, dizzy, or short of
breath at any time while exercising,
stop immediately and begin cooling
down.
¥ Before you begin this or any exercise program, consult your physician. This is especially important
for persons over the age of 35 or
persons with pre-existing health
problems. SEARS assumes no
responsibility for personal injury
or property damage sustained by
or through the use of this product.
Patent Pending
SEARS, ROEBUCK AND CO., HOFFMAN ESTATES, IL 60179
Before You Begin
AssemblyÑCont.
Congratulations for purchasing the innovative
PROFORM¨ AB RESISTER. The AB RESISTER is
designed to shape your upper abs, obliques, and lower
abs to give you a firm, flat stomach, in only minutes a
day. The unique AB RESISTER supports your head and
neck as you exercise, and helps you maintain correct
form for maximum results. Used as part of a fitness program that includes regular aerobic exercise and a proper
diet, the AB RESISTER will help you to look better,
feel better, and enjoy the benefits of better fitness.
2. Attach a Side
Frame (11) to the
Frame (3) with two
3 1/4Ó Screws (13), a
Frame Spacer (12),
and two 1/4Ó Barrel
Nuts (14). Repeat
this step on the other
side of the Frame.
3. Press the indicated Button (15) and
slide the Right
Resistance Spring
(6) onto the Frame
(3). Move the
Resistance Spring
back and forth until
the Button snaps
into one of the three
holes. Repeat this
step for the left side
of the Frame.
Place all parts in a cleared area and remove the packing
materials; do not dispose of the packing materials until
assembly is completed. Assembly requires your standard
screwdriver
, phillips screwdriver
and rubber mallet
(not included).
Attach the Headrest (2)
to the Frame (3) with
two 1 3/4Ó Screws (9)
and two Rubber Feet
(10).
4. Press the two
Buttons (15) in the
Handle (1). Slide the
Handle into the Side
Frames (11). Be
sure to insert the
Handle straight or
it may bind. It may
be helpful to rock
the Handle from
side to side slightly
as you insert it.
1
2
10
9
1a
2
Lay the exercise mat
on the floor with the
wide end near the
headrest.
10
9
11
3
5
12
14
Assembly
3
13
5
Make sure that the
Foam Pads (5) are
positioned as shown in drawing.
Before you use the AB RESISTER, please read this
manual carefully. In addition, be sure to view the
included videocassette. If you have additional questions,
please call our toll-free HELPLINE at 1-800-736-6879,
Monday through Saturday, 7 a.m. until 7 p.m. Central
Time (excluding holidays). To help us assist you quickly, please note the product model number before calling;
the model number is 831.280781.
1. Before attaching
the Headrest (2) see
drawing 1a for the
proper orientation.
Make sure that when
assembled the
tapered end of the
Headrest points
slightly up and away
from the Frame (3)
as shown.
2
3
2
3
7
3
6
15
4
1
15
11
How to Use the AB RESISTER
Suggested Stretches
Begin and end each workout with a few minutes of
stretching. Stretching prepares the body for exercise by
increasing the body temperature, heart rate, and circulation. After exercise, stretching allows the heart rate to
return to normal and the muscles to cool down gradually. Stretching is also effective for increasing flexibility.
The correct form for three basic stretches is shown
below. Move slowly as you stretchÑnever bounce.
The AB
Upper
RESISTER
Abdominals
offers a variety
of exercises
Oblique
that shape your
Abdominals
upper abdominals, oblique
Lower
abdominals,
Abdominals
and lower
abdominals.
The photographs in this manual show the correct form for each
exercise.
1. Hamstring Stretch
Extend one leg
and rest the
opposite foot
against it as
shown. Reach
toward your
toes and hold
for 15 counts.
Repeat 3 times
for each leg.
The exercises in this manual are divided into four
groups: Beginning, Intermediate, Advanced, and Expert.
Start with the beginning exercises, and progress at your
own pace. Be careful not to overdo it during the first
few weeks of your exercise program. It is better to
increase the number of repetitions you do than to
advance to more difficult exercises too quickly. The
intensity of each exercise can be varied by changing the
position of the springs (see ADJUSTING THE RESISTANCE on page 7), or by changing the position of your
hands on the handle. The lower your hands are positioned, the more difficult the exercise will be.
2. Toe Touch Stretch
Stand with
your knees
bent slightly as
shown. Relax
your back and
shoulders as
you reach
down toward
your toes. Hold
for 15 counts.
Repeat 3 times.
To get the most from your exercise, proper form is
important. As you perform each repetition, use your
abdominal muscles to pull yourself up, allowing the AB
RESISTER to roll with you. Keep your head on the
headrest and the small of your back on the exercise mat.
If necessary, raise your hips slightly.
Always begin and end each workout with a few minutes
of stretching. Remember to keep plenty of water nearby
as you exercise and drink periodically to avoid dehydration. If you feel faint, dizzy, or short of breath at any
time while exercising, stop immediately and begin
cooling down.
3. Quadriceps Stretch
Place one hand
against a wall
and grasp one
foot with your
other hand as
shown. Hold
your foot as
close to your
buttocks as
possible, and
hold for 15
counts. Repeat
3 times for
each leg.
WARNING: Before you begin this or any exercise program, consult your physician. This is
especially important for persons over the age of
35 or persons with pre-existing health problems.
SEARS assumes no responsibility for personal
injury or property damage sustained by or
through the use of this product.
3
Beginning Exercises
Intermediate Exercises
Be sure to stretch for a few minutes before you begin.
As your abdominal muscles become stronger, and you
can comfortably perform several repetitions of the
beginning exercises, it is time to move on to the intermediate exercises. Remember to stretch for a few minutes before you begin.
1. Basic Crunch
This exercise
1
targets the
upper abdominals. Lie on
the exercise
mat and bend
your knees as
shown. Hold
the handle as
shown. Curl
up to about a
45¡ angle, and then lower yourself to the starting position. This completes one repetition. Perform 10 to 15
repetitions.
4. Raised-knee Crunch with Knees Held to Chest
This exercise
4
focuses on
the upper
abdominals.
Lie on the
exercise mat
and bring
your knees
toward your
chest as
shown. Curl
up to about a 45¡ angle, and then lower yourself to the
starting position. Keep your knees raised throughout the
exercise. Complete 10 to 15 repetitions.
2. Basic Crunch with Raised Feet
This exercise
2
focuses on the
lower abdominals. This
exercise
should be performed in the
same way as
the Basic
Crunch, but
your feet
should be held about one inch off the floor during the
exercise. Complete 10 to 15 repetitions.
This exercise can also be performed by resting your feet
on a chair.
5. Raised-knee Crunch with Knees Lifted to Chest
This exercise
targets the
lower abdominals. The
starting position is shown
in photograph
5a. Curl up to
about a 45¡
angle, bringing your
knees toward
your chest at
the same
time; then
return to the
starting position. Perform
10 to 15 repetitions.
3. Basic Oblique Crunch
This exercise
3
is for the
oblique
abdominals.
Perform this
exercise in the
same way as
the Basic
Crunch, but
turn your
knees to the
side as shown. Complete 5 to 7 repetitions, change your
knees to the opposite side, and then perform another 5
to 7 repetitions.
4
5a
5b
Intermediate ExercisesÐCont.
Advanced ExercisesÐCont.
6. Raised-knee Oblique Crunch
8. Advanced Raised-knee Crunch
This exercise
6
focuses on the
oblique
abdominals.
Bend your
knees, lay
them to one
side, and hold
your legs just
off the floor.
Curl up to
about a 45¡ angle, then return to the starting position.
Hold your legs stationary throughout the exercise.
Complete 5 to 7 repetitions, change your knees to the
opposite side, and then perform another 5 to 7 repetitions.
This exercise
8a
focuses on the
lower abdominals.
Straighten
your legs and
hold them just
off the floor
as shown in
photograph
8a. Curl up to
8b
about a 45¡
angle, bringing your
knees toward
your chest as
shown in photograph 8b;
then return to
the starting
position.
Complete 10 to 15 repetitions.
Advanced Exercises
The following exercises are designed to further improve
your strength, tone, and flexibility. Remember to stretch
for a few minutes before you begin.
9. Advanced Oblique Leg Crunch
This exercise
9a
targets the
oblique
abdominals.
Straighten
your legs and
hold them just
off the floor
as shown in
photograph
9a. Curl up to
9b
about a 45¡
angle, bending your
knees and
bringing them
to the side as
shown in photograph 9b;
then return to
the starting
position. Complete 10 to 15 repetitions, alternating sides
with each repetition.
7. ÒLÓ-Crunch
This exercise
7
is for the
upper abdominals.
Straighten
your legs and
raise them as
shown. Curl
up to about a
45¡ angle, and
then lower
yourself to the
starting position. Keep
your legs
raised
throughout
the exercise.
Complete 10 to 15 repetitions.
5
Expert Exercises
Expert ExercisesÐCont.
12. Reverse Trunk
The expert exercises should be done only after you can
comfortably perform the advanced exercises.
This exercise
12a
focuses on
the oblique
abdominals.
Straighten
your legs and
raise them as
shown in
photograph
12a. Curl up
to about a 45¡
angle. This is
12b
the starting
position.
Lower your
legs to the
side as shown
in photograph
12b; then
return to the
starting position. Complete 10 to 15 repetitions, alternating sides
with each repetition.
10. Bicycle Ab Crunch
This exercise
10a
focuses on
the lower
abdominals.
Straighten
your legs and
hold them
just off the
floor as
shown in
photograph
10b
10a. Curl up
to about a 45¡
angle, bending one knee
and raising it
as shown in
photograph
10b; then
return to the
starting position. Complete 10 to 15 repetitions, alternating legs
with each repetition.
13. Scissors
This exercise
13a
focuses on
the upper and
lower abdominals. Hold
your legs in
the position
shown in
photograph
13a. Curl up
to about a 45¡
13b
angle. This is
the starting
position.
Cross your
ankles as
shown in
photograph
13b; then
return to the
starting position. Complete 10 to 15 repetitions, alternately crossing
the right ankle above the left, and then the left ankle
above the right.
11. Jackknife
This exercise
targets the
lower abdominals.
Straighten
your legs and
hold them just
off the floor
as shown in
photograph
11a. Curl up
to about a 45¡
angle, raising
both legs as
shown in photograph 11b;
then return to
the starting
position.
Complete 10
to 15 repetitions.
11a
11b
6
Adjusting the Resistance
Part List/Exploded Drawing
To vary the
intensity of
your exercise
on the AB
RESISTER,
the position of
the springs can
be adjusted.
There are three
different positions. Press the button on one side of the frame as
shown above. Slide the spring forward or backward until
the button snaps into a different hole in the spring.
Adjust the position of the other spring in the same way.
Moving the springs towards the AB RESISTER decreases the resistance. Make sure that the buttons are in
the same holes in both springs.
Storage and Maintenance
Key No.
Part No.
Qty.
1
2
3
4
5
6
7
8
9
10
11
12
13
14
15
16
17
18
19
133134
131345
132780
121642
130657
133133
133132
131346
133350
126650
132724
132674
132839
132704
110632
132723
131348
132910
131417
1
1
1
4
2
1
1
1
2
2
2
2
4
4
4
1
1
1
2
Description
Handle w/Foam Grip
Headrest
Frame
Round Inner Cap
Foam Pad
Right Resistance Spring
Left Resistance Spring
Exercise Mat
1 3/4Ó Screw
Rubber Foot
Side Frame
Frame Spacer
3 1/4Ó Screw
1/4Ó Barrel Nut
Button Spring Clip
Foam Grip
Training Videocassette
UserÕs Manual
Endcap
831.280781 R0896A
When you are not using the AB RESISTER, the handle
can be removed for more compact storage.
5
16
To remove the
handle, press
the buttons on
the handle and
slide the handle out of the
side frames. Be
sure to pull
the handle
straight out or
it could bind.
1
13
15
2
4
3
11
12
10
4
7
11
4
15
14
6
19
9
17
The AB RESISTER can be wiped clean with a damp
cloth and mild, non-abrasive detergent. Do not use solvents.
8
M
A
N
U
A
L
U
S
E
R
ÕS
PA
TE
T
NT
PE
Im
ND
p
IN
o
¥
G
rt
Re
an
fu ad
tu all
t
¥
re
As
P
re pr
re
sli yo
fer ec
gh u
¥
ca
en autio
Ke tly ex
ce
u
ex ep . er
. ns
cis
ti
er yo
¥
an
o
e,
If cis ur
d
n
ke
ins
do yo e. he
s
ep
wn u fee
tru
ad
th
Be
. l
cti
e
on
so for
fai
sm
on
th
pe ns e
nt
s
all
e
in
rso ov yo
, diz
he
of
u
th
ad
na er be
yo
is
zy
re
l inj the gin
, or
ur
ma
st
ba
ur age th
nu
as
sh
ck
y of is
al
yo
or
or
be
on
t
u
35 or
of
pr
an
for
th
br
op or y
e
e
ea
er pe ex
us
ex
th
ty rso er
ing
er
cis
da ns cis
at
th
ma wi e pr
e
an
is
ma
y
ge th og
eq
tim
t;
uip
su pr ra
it
e
sta e-e m,
me
ma
wh
ine xis co
nt
y
ile
d tin ns
be
. Sa
ex
by g ult
ne
er
ve
or he yo
ce
cis
th
ssa
th alth ur
ing
is
ro pr ph
ry
ma
, sto
ug ob ys
to
nu
h lem ici
p
ra
th
al
an
im
ise
e s. .
for
me
us
Th
yo
e IC is
dia
ur
of ON
is
tel
hip
th
y
is as esp
s
an
pr su ec
d
od me ial
be
uc s ly
gin
t. no im
re po
co
sp rta
oli
on
ng
sib nt
ilit for
y pe
for r-
No
¥
1-8
00
-9
99
-3
75
6
el
od
M
Q
U
E
S
T
IO
N
S
?
. PF
M
C2
As
02
to a
60
fac pr ma
th tio ov nu
we ere n. iding fac
tu
fac wi ar If
ou tio ll e mi yo comp rer,
r n gu ssi u ha
fac th ar
let we
TO
tor ro an ng ve e cu are
DE AV
ug tee or qu
TO LA OI y. h yo da est sto comm
dir
HO OU YS D
ma ion me
ec u co
r itt
Th T
, UN
t mp ge s, or sa ed
as
tom e LI R PL NE
d
tis
TO EA
sis let pa if ate er tra NE
tan e rts
LL SE CE
ine
as ho d .
ce satis ,
CU
sis t tec -F CA SS
RE
fro AR
tan lin
ST
LL Y
hn
e
m
E
OM ce wi ici
Mo
CU DI
, ll
n.
ER fre pr ans
ST RE
ÐF
e ov on
OM CT
of
HO
ri.
ch ide ou
,
ER
T
6
ar im r
a.m
LI
ge me cu
NE
to di- s.Ð6
:
yo
p.
u.
m
.
MS
18
Note: Specifications are subject to change without notice.
7
Model No. 831.280781
QUESTIONS?
If you find that:
¥ you need help assembling or
operating the PROFORM¨ AB
RESISTER
¥ a part is missing
¥ or you need to schedule repair
service
All replacement parts are available for immediate purchase or
special order when you visit your nearest SEARS Service Center. To
request service or to order parts by telephone, call the toll-free numbers listed at the left.
When requesting help or service, or ordering parts, please be prepared
to provide the following information:
¥ The NAME OF THE PRODUCT (PROFORM¨ AB RESISTER)
¥ The MODEL NUMBER OF THE PRODUCT (831.280781)
¥ The PART NUMBER OF THE PART (see page 7 of this manual)
¥ The DESCRIPTION OF THE PART (see page 7 of this manual)
call our toll-free HELPLINE
1-800-736-6879
MondayÐSaturday, 7 amÐ7 pm
Central Time (excluding holidays)
REPLACEMENT
PARTS
If parts become worn and need to
be replaced, call the following tollfree number
1-800-FON-PART
(1-800-366-7278)
Full 90-day Warranty
For 90 days from the date of purchase, if failure occurs due to defect in material or workmanship in this
SEARS AB RESISTER EXERCISER, contact the nearest SEARS Service Center throughout the United
States and SEARS will repair or replace the AB RESISTER EXERCISER, free of charge.
This warranty does not apply when the AB RESISTER EXERCISER is used commercially or for rental purposes.
This warranty gives you specific legal rights, and you may also have other rights which vary from state to
state.
SEARS, ROEBUCK AND CO., DEPT. 817WA, HOFFMAN ESTATES, IL 60179
Part No. 132910 F02763-C R0896A
Printed in CANADA © 1996 Sears, Roebuck and Co.