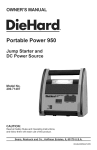
1
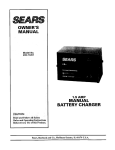
8EE/ S
OWNER'S
MANUAL
Model No.
200.71202
1.5 AMP
FULLY AUTOMATIC
ONBOARD
BATTERY CHARGER
MAINTAINER
CAUTION:
Read
and Follow
All Safety
Rules and Operating
Instructions
Before Every Use of this Product.
Sears,
Roebuck
and Co., Hoffman
Estates,
IL 60179
U.S.A.
Table Of Contents
Warranty ...................................................................
Important Safety Instructions ..................................
Before Using Your Battery Charger ........................
Plugging it in ..........................................................
Extension cords .....................................................
1
2
3
3
3
Using Your Battery Charger ....................................
What to expect from your charger ........................
Installing the charger ............................................
Preparing your battery to be charged ...................
Charging your battery ..........................................
Charging indicators ..............................................
Maintenance and care ..........................................
Please read this Owner's Manual before using your Battery Charger
The Sears model 200.71202 Fully Automatic Onboard Battery Charger/Maintainer, offers features to accommodate the needs for home or light commercial use. This manual will show you how to use your charger
safely and effectively. Please read and follow these instructions and precautions carefully.
Warranty
FULL TWO-YEAR WARRANTY
If, within two years from the date of purchase, this battery charger fails due to a defect in materials or workmanship,
simplyRETURN IT TO THE NEAREST SEARS STORE IN THE UNITED STATES, and Sears willrepair or replace
it, free of charge.
This warranty gives you specific legal rights, and you may also have other rights which vary from state to state.
Sears, Roebuck and Co., Dept 817WA,
Hoffman Estates, IL 60179
4
4
4
5
5
6
6
Important
Safety
Instructions
- SAVE THESE INSTRUCTIONS
• Read all instructions and cautions pdnted on the
battery charger, battery, and vehicle or equipment
using battery.
-
• Do not disassemble charger. Take it to a qualified
service professional if service or repair is required.
Incorrect assembly may result in fire or electrical
shock.
• Use charger only on lead-acid type rechargeable
batteries, such as those used in cars, trucks, tractom, airplanes, vans, RV's, trolling motors, etc.
This charger is not intended to supply power to
a low voltage electrical system other than in an
automotive application.
• To reduce risk of electrical shock, unplug the
charger from the outlet before attempting any
maintenance or cleaning.
• Use only attachments recommended or sold by
manufacturer. The use of attachments not recommended by the manufacturer may result in fire,
electric shock, or injury.
Help us help
Remember:
you
• Place charger as far away from battery being charged
as the charger cables will permit.
• Never charge a frozen battery. If battery fluid (electrolyte) becomes frozen, bring battery into a warm area
to thaw before you begin charging.
• Never allow battery acid to drip on charger when
reading specific gravity or filling battery.
• Never operate charger if it has received a hard blow,
been dropped, or otherwise damaged. Take itto a
qualified professional for inspection and repair.
• Never pull out the plug by the cord when unplugging
the charger. Pulling on the cord may cause damage
to the cord or the plug.
• Do not operate the charger if it has a damaged
power cord or plug. Have the cord replaced.
• Never set a battery on top of the charger.
• Never place charger directly above battery being
charged.
• Never use charger for charging dry-cell batteries that
are commonly used with home appliances. These
batteries may burst and cause personal injury.
Personal
Safety
• Never crank engine with charger attached to battery
and 120 volt line.
Precautions
For your own personal safety, please follow the following
precautions:
• Remove all personal metal items from your body,
such as rings, bracelets, necklaces, and watches
while working with a lead-acid battery. A battery can
produce a short circuit current high enough to weld
a ring (or the like) to metal, causing a severe burn.
• Wear complete eye and clothing protection when
working with lead-acid batteries.
• Be sure that someone is within range of your voice
to come to your aid if needed while you work with or
are near a lead-acid battery.
• Have plenty of fresh water and soap nearby for use
in case battery acid contacts your eyes, skin, or clothing. if this happens, wash immediately with soap and
water. Then get medical attention.
• Take care not to drop any metal tool or metal object
onto the battery. This may spark or short circuit the
battery or another electrical device that may cause an
explosion.
• Always operate your battery charger in an open, well
ventilated area.
• Never smoke or allow a spark or flame in the vicinity
of the battery or engine. Batteries generate explosive
gases.
• Avoid touching your eyes while working with a
battery. Acid particles (corrosion) may get into your
eyes. If this occurs, flush eyes immediately with
running cold water for at least ten minutes. Then
immediately get medical attention.
• Neutralize any acid spills thoroughly with baking soda
before attempting to clean up.
2
Before Using Your Battery Charger
It is important to understand your charger's requirements.
requirements and how to prepare a battery for charging.
Plugging
This section will tell you about your charger's electrical
it in
Electrical Shock Hazard
Be sure that the power cord fits properly into the
outlet. If not, have a qualified electrician install a
proper outlet. Never alter the AC cord or plug
provided. Improper connection can result in
electrical shock.
Your charger should be grounded to reduce the risk
of electrical shock.
Your charger is equipped with an electrical cord that has
an equipment grounding conductor and a grounding
plug designed to be used on a 120 volt circuit.
The cord must be connected to an outlet that has been
properly installed and grounded rn accordance with all
local codes and ordinances.
A TEMPORARY adapter may be used to connect the
charger to a two-pole outlet if a properly grounded outlet
is not available. Use the adapter ONLY until a properly
grounded outlet can be installed by a qualified
electrician.
®
DANGER: Before using an adapter as illustrated, be
certain that the center screw of the outlet plate is
grounded. The green colored grounding clip of the
adapter must be attached by a screw to a properly
grounded outlet. If unsure whether outlet is properly
grounded, contact a professional electrician. If
necessary, replace the original outlet cover screw with a
longer one that will secure the grounding clip to the
outlet cover and make a ground connection to the
grounded outlet.
Extension
cords
MINIMUM RECOMMENDED
Improper extension cords present a risk of fire or electric
shock. Follow these guidelines for using an extension
cord:
• The pins on the charger's power cord must fit firmly
into the extension cord, and the extension cord
must fit firmly into the receptacle.
Length of Cord, in Feet
25
50
100
150
AWG* Size of Cord
18
18
18
16
"AVVG=American
• Use only 3-conductor (grounded) extension cord
when necessary.
• The extension cord must be properly wired and in
good electrical condition.
• The wire size must be large enough for its length
as specified in the following chart.
3
EXTENSION CORD
'Wire Gauge
Using Your Battery Charger
For best results from your battery charger, learn to use it properly. This section tells how to install the charger and
how to charge a battery in or out of the vehicle.
What to expect
from your charger.
Your charger is designed for use with 12-volt batteries
only. It has a control circuit designed to stop the
charging process when a battery reaches full charge.
This same circuit requires that a battery have at least 1
volt of charge to start the charging process.
Completely discharged batteries must be brought to this
minimum state-of-charge before this charger will
operate.
The charger is designed to:
•
maintain the charge level of 12-volt batteries used in
seasonal or special-purpose vehicles or engines
stored for long periods such as RVs, farm and
construction equipment, snowmobiles and the like.
•
improve 12-volt battery performance during cold
weather.
Installing
the charger
Location
Your charger can be mounted on a sheet-metal fender
well near the battery.
The charger comes with a two-piece mounting bracket,
two bolts, and two nuts. Position the charger on the
selected location to be sure that the leads reach the
battery terminals.
Mounting
Figure 1 illustrates the charger mounting brackets.
Figure 2 illustrates surface mounting of the charger to the
fender well. if using the nut and bolt provided, drill two
holes between 3/16" and 1/4" in diameter. (For alignment
of holes use one of the brackets as a template.) If the
backside of the mounting surface is hard to reach, you
may consider using two 1/2" sheet-metal screws instead
of nut and bolt, drill a pilot hole if required, drill holes
between 1/8" and 5/32". CAUTION: Do not drill or puncture battery.
Electrical installations - Route and secure supply cord and
output wiring away form gas line, carburetor or other hot,
sharp or moving and pinch parts to avoid damage to the
insulation. Secure the AC cord and plug to a cable or
frame using a self locking cable tie or equivalent.
J
I"
Figure I
Figure 2
Preparing
your
battery
to be charged
It is important that you read and follow these guidelines
while you are preparing to charge your battery.
•
Make su re that you have a 12 volt lead-acid battery.
•
Clean the battery terminals. Be careful to keep
corrosion from getting in or around your eyes.
•
If you have a battery with removable cell caps, if
required, add distilled water to each cell until the
battery acid reaches the level indicated by the
manufacturer. This will help purge excessive gases
from the cells. Be careful not to overfill. If you
have a sealed battery without cell caps, no action is
necessary. Continue to the next step listed below.
•
Take time to read all battery manufacturer's
specific precautions, such as removing or not
Charging
your battery
ALWAYS DISCONNECT CHARGER FROM POWER I
SOURCE WHEN CONNECTING OR
I
DISCONNECTING CHARGER TO OR FROM
BATTERY.
Charging
1.
2.
3.
4.
5.
removing cell caps while charging, and recommended rates of charge.
•
Wear safety glasses. See additional "Personal
Safety Precautions" on page 2.
•
Be sure that the area around the battery is wellventilated while it is being charged.
•
If it is necessary to remove the battery from the
vehicle to charge it, always remove the grounded
terminal from the battery first. A spark may be
caused if all accessories in the vehicle are not
completely turned off.
NOTE: A marine battery installed in a boat must be
removed and charged on shore.
Charging a battery outside the vehicle:
1.
2.
a battery in the vehicle:
Arrange the power cord and charging leads
carefully to avoid damage that could be caused by
the hood, door, or moving engine parts.
Keep your hands, leads and power cord clear of fan
blades, belts, pulleys, and other parts that can cause
injury.
Check the polarity of the battery posts as indicated
on the battery case: POSITIVE (POS, P, or +) and
NEGATIVE (NEG. N or -). NOTE: The positive post
on top-post batteries is usually larger than the negative post.
Identify which battery post is ground or connected to
the chassis. THE NEGATIVE POST IS
NORMALLY THE ONE THAT IS GROUNDED.
On a negative grounded system:
Connect the red (POSITIVE) charger lead to the
ungrounded POSITIVE (POS, P, +) cable connection to the battery. Then connect the black (NEGATIVE) lead to the grounded NEGATIVE (NEG, N, -)
connection.
On a positive grounded system:
Connect the black (NEGATIVE) battery charger lead
to the NEGATIVE (NEG, N, -) connection to the battery. Then connect the red (POSITIVE) lead to the
to the grounded POSITVE (POS, P, +) connection.
IMPORTANT: Wear safety glasses and face away
from the battery while making connections.
3.
When removing battery, disconnect grounded terminal first. Be sure all accessories are turned off.
Check the polarity of the battery posts as indicated
on the battery case: POSITIVE (POS, P, +) and
NEGATIVE (NEG, N, -).
NOTE: On top-post batteries, the positive battery terminal usually has a larger diameter than the negative
one.
Connect the red (POSITIVE) charger lead to the
POSITIVE post of the battery, then connect
NEGATIVE (-) black lead ring terminal to the
NEGATIVE (-) post of the battery. DO NOT face
battery when making final connection. Note: For top
or side-post batteries, you will need to purchase
connectors at an automotive accessory outlet.
TOP-POST ADAPTER
REQUIRED FOR CONNECTION
SIDE-POST ADAPTER
REQUIRED FOR CONNECTION
Charging
indicators
Red and green lights indicate charger activity. When the charger is operating, indicator lights will show current
activity:
CONDITION
Green
off
No power supply. Check connection to power source. Check lead connectons.
Green
On
AC power is connected.
Red
On
Battery voltage is about 14 volts and charging has stopped.
Red
Off
Battery voltage has dropped and charging has resumed
Maintenance
and care
Very little maintence is needed. Keep the connections free of corrosion and accumulated soil.
6
SE/A S
OWNER'S
MANUAL
1.5 AMP
FULLY AUTOMATIC
ONBOARD
BATTERY CHARGER
MAINTAINER
Model No.
200.71202
For informationabout troubleshooting
Calltoll-freefromanywhere
intheU.S.A.
7amto4:30pmCSTMondaythroughFriday
1-800-SEARS-64
(1-800-732-7764)
Forthe repair or replacement
parts you need
Call7 am- 7 pro,7 daysaweek
1-800-366-PART
(1-800-366-7278)
Forthe locationof a Sears Repair.....=
ServiceCenter in your area
Call24hoursa day,
7 daysaweek
1-800-488-1222
When requesting service or
ordering parts, always provide
the following information:
• Product Type
• Model Number
• Part Number
• Part Description
0000000507-499
SEARS
America's Repair Specialists