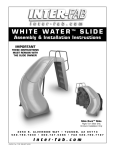
1
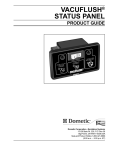
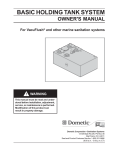
VACUUM
HOLDING TANK
OWNER’S MANUAL
!
WARNING
This manual must be read and understood before installation, adjustment,
service, or maintenance is performed. Modification of this product
can result in property damage.
Dometic Corporation • Sanitation Systems
13128 State Rt 226, PO Box 38
Big Prairie, OH 44611
SeaLand Product Customer Service: 1-800-321-9886
(8:00 a.m. - 5:00 p.m. ET)
1
TABLE OF CONTENTS
Each toilet series consists of several models, allowing
for a multitude of installation variations: a rear discharge
standard height unit, a bottom discharge standard height
unit, and a bottom discharge low-profile unit designed to
fit on a platform.
Product Features . . . . . . . . . . . . . . . . . . . . . . . . . . . . 2
Major Components . . . . . . . . . . . . . . . . . . . . . . . . . . 2
Principles of Operation . . . . . . . . . . . . . . . . . . . . . . . 3
System Layout . . . . . . . . . . . . . . . . . . . . . . . . . . . . . . 3
Component Locating Procedure . . . . . . . . . . . . . . . . 4
Key Installation Points . . . . . . . . . . . . . . . . . . . . . . . . 4
Installation of Components . . . . . . . . . . . . . . . . . . . . 5
Winterizing . . . . . . . . . . . . . . . . . . . . . . . . . . . . . . . . 6
Troubleshooting Guide . . . . . . . . . . . . . . . . . . . . 6 - 7
Dimensional Specifications . . . . . . . . . . . . . . . . . . . . 7
Manufacturer’s One-Year Limited Warranty . . . . . . . 8
The vacuum toilet must be purchased separately;
it is not included with the VHT.
VACUUM HOLDING TANK (VHT)
The VHT produces and stores vacuum between flushes.
The vacuum holding tank is made of highly durable polyethylene. The pump is integrally connected with
the vacuum tank. The vacuum pump is electric and draws
only 2 to 4 amps of current at 12 VDC.
One vacuum holding tank is required for each toilet.
Two or more toilets cannot be connected to one VHT.
PRODUCT FEATURES
The VHT contains the pre-set pressure differential switch
control that turns the pump on and off when the proper
level of vacuum is created.
The Vacuum Holding Tank (VHT) brings the
technology, comfort and efficiency of Dometic’s
renowned VacuFlush® vacuum sanitation systems to
smaller boats in an easy-to-use, and easy-to-maintain
package.
A unique component on the VHT is the Vacuum Relief
Valve (VRV). The VRV prevents excessive vacuum from
accumulating in the tank. The VRV is calibrated to open
at 13" of vacuum and close at 11" of vacuum. This feature is beneficial during pump-outs.
Simple Installation
• All system components are “installation ready.”
The VHT system comes equipped with a full level float
switch. This float switch is wired directly to an automatic
shutdown relay. The relay prohibits the vacuum pump
from generating vacuum once the tank is full. A full level
indicator light should be wired to the full float, by the
installer. If a full level indicator light was not installed,
order part number 318714 from Dometic. The indicator
light is not part of the basic system.
• No solvent bonding is required.
• Removable hose insert fittings make hose installation
simple.
• Vacuum pump and switch are pre-wired at factory.
• Easy to mount.
Reliability is Built-In
• No impellers or macerators. Motor can run without
burning up.
VACUUM HOSE
To complete a VacuFlush installation, OdorSafe® Sanitation Hose or rigid PVC pipe (Schedule 40 or heavier)
must be used. OdorSafe hose is specially formulated to
provide up to 16 times greater resistance to malodors
than other “no-odor” marine hoses.
MAJOR COMPONENTS
The Vacuum Holding Tank (VHT) system consists of a
VacuFlush toilet or EcoVac™ toilet and the Model VHT
Vacuum Holding Tank. The VHT is a unique combination of the vacuum tank, vacuum pump and holding tank
components used in a standard VacuFlush toilet
system.
VACUUM TOILETS
The VacuFlush 500 series features a large householdsize bowl and seat. The VacuFlush 1000 series also
features a deep bowl with an adult-sized seat. The
EcoVac series offers space-saving models with adultsized seats. All come with an attractive, easy-to-use flush
pedal.
2
IMPORTANT:
Before pumping out the VHT, it
is recommended that the power to the system be
turned off. Then, flush the toilet. This releases the
stored vacuum in the tank, thus, allowing the
dockside pump to empty the waste out more easily.
If the dockside pump has low suction capability,
you may need to flush the toilet a second time
during the pump out.
PRINCIPLES OF OPERATION
VacuFlush systems use a small amount of water (one
pint to one quart) and the vacuum that is generated by
the vacuum pump to flush. Each toilet must be connected to a pressurized water system. Fresh water is
recommended and will result in an odor-free bathroom.
If seawater is used, the water should be filtered.
No complicated user instructions are required. Lifting the
flush lever adds water to the bowl. Pressing the flush
lever (or pulling the flush lever on a 106 toilet) opens a
mechanical seal that allows the vacuum force to pull the
waste from the bowl as clean water rinses the bowl. The
vacuum moves the waste (at approximately 7 feet [2.1
m] per second) through a one-inch opening in the toilet
base. Incoming air fragments the waste as it passes
through the base opening. This process eliminates the
need for macerators or mechanical motors in the toilet
base.
The Vacuum Relief Valve (VRV) will automatically open
at 13" of vacuum and is spring loaded to close at 11" of
vacuum to prevent leaking during normal operation.
SYSTEM LAYOUT
The Vacuum Holding Tank (VHT) system can be installed
on most boats that presently use a portable, manual or
electric toilet. The following procedure will be helpful:
1. Review the typical system layout to get a general
idea of how the system will operate and what discharge
options will be considered (see Figure 1).
Next, the waste is transferred into the Vacuum Holding
Tank (VHT). System vacuum is monitored by a vacuum
switch that is located on the outside of the VHT. When
the switch senses a drop in vacuum in the system, it
automatically signals the pump to energize and bring
the vacuum back to operating level. This process is normally completed in about one minute.
2. Draw or obtain a layout of the boat which allows the
location of head compartments, bulkheads, engine space,
tanks, through-hull fittings, etc. This layout should include
top views and side views and show relative distances
and heights with reasonable accuracy.
3. Use the information in the Component Locating
Procedure section to help select the best locations for
your boat layout.
In a properly operating system, the stored vacuum will
“leak” down between flushes, causing the vacuum pump
to run for a short period. The pump should not run more
than once every three (3) hours after the last flush.
4. Routing of vacuum hose should be considered when
selecting a location for the toilet and the (VHT). A
maximum of 20 feet (6.1 m) of hose can be used between the toilet and the VHT.
An “On-Off” night switch can be installed to silence the
vacuum pump during sleeping hours. The VacuFlush
Status Panel, an optional accessory, features an integral circuit breaker that provides a convenient night
switch.
5. Before starting the actual installation, carefully review the Key Installation Points.
Figure 1
3
COMPONENT LOCATING PROCEDURE
Component
Check
Location
Vacuum Toilet
Bathroom
compartment or
under berth.
1.
2.
3.
4.
5.
6.
Check dimensions of mounting space above and below floor.
Determine best toilet discharge connection: above floor, out rear or below floor.
Allow at least ½-inch (1.3 cm) clearance between toilet rear and wall.
Make sure compartment, shower and vanity doors will clear toilet bowl.
Check location nearest cold water line.
Water line must be at least ½-inch ID and provide a minimum flow of two (2)
gallons per minute (7.6 liters per minute).
7. Water valve assembly for 106 toilet can be positioned any distance horizontally from
the toilet but must be at least 6 in. (15.24 cm) above the top of the toilet bowl rim.
8. Check clearances to side wall for installation of flush lever cover and back wall
for best clearance.
Vacuum Holding
Tank (VHT)
Any space that
permits access to
remove the entire
unit.
1. The vacuum holding tank (VHT) inlet must be located no more than 20 feet (6.1 m)
from the toilet discharge.
2. The VHT inlet must not be located more than 3 feet (.9 m) above the outlet of
the toilet. (NOTE: The lower the tank, the better the system efficiency.)
3. The VHT must be mounted in a horizontal position.
4. The VHT must not be exposed to temperatures over 120°F. Do not place near
heat sources such as engine manifolds, water heaters, generators, etc.
Mounting space must provide for free air flow.
Vacuum Hose
and Fittings
Use only OdorSafe hose and
SeaLand fittings.
They are made to
fit together.
1. OdorSafe Sanitation Hose must be used; it is sized to use SeaLand fittings in the
system, minimizing vacuum leakage.
2. It is important that restrictions in the vacuum hose be kept to a minimum.
Where a bend must occur in a hose run, the radius of the bend must not be
less than 6 inches (15.24 cm). If a tighter radius is required, use a SeaLand 90°
bend kit to assure a clog-free transition.
KEY INSTALLATION POINTS
4. Hose…Too Much, Too Little
Try to avoid unnecessary hose runs that result in
excessive bends or loops. Excessive hose reduces
vacuum transfer efficiency. Hose should be securely tied
down every three feet. Too little hose length also causes
problems by forcing the hose into tight bends or kinks.
Always leave a small amount of extra hose length for
future maintenance. The distance between the toilet and
the Vacuum Holding Tank (VHT) may not exceed 20 feet
(6.1 m).
The VacuFlush system operates on a unique and uncommon principle – powerful, instantaneous vacuum
force. As a result, certain installation points must be
stressed because they are the most common sources of
incorrect installation.
1. Leaks at Fitting Joints
One benefit of vacuum operation is that leaks are inward
and will not cause drippage of sewage. Vacuum leaks
result in frequent cycling of the vacuum pump which
causes unnecessary wear on the motor and gear drive.
Most vacuum leaks occur at fitting joints. Care should be
taken to assemble fitting joints per the instructions.
Allow time in your installation schedule to give cemented
fittings, if used, time to cure before manipulating them.
Also, a proper PVC cleaner or primer must be applied
prior to cementing fittings.
5. Hose… Wrong Type
To complete a VacuFlush installation, OdorSafe Sanitation Hose or rigid PVC pipe (Schedule 40 or heavier)
must be used.
6. Hose… Odor Permeation
Avoid low spots in hose or sections where waste will
remain for very long periods. Waste trapped in hose will
produce gases in the final stage of decomposition that
are very difficult to contain. If possible, have hose from
the toilet drain into the VHT.
2. Cementing Hose to Fittings
Never cement hose to fittings. The SeaLand custom hose
adapter is specifically designed to fit precisely into the
OdorSafe Hose. The hose will slide easily on the fitting if
it is lubricated with liquid dishwashing detergent and
twisted clockwise when attached.
7. Protecting Toilet and Preventing Objects from
Falling into System During Installation.
After mounting toilet and attaching seat and lid assembly, slide seat assembly carton over seat and lid. Next,
place toilet box down over toilet. This will ensure additional protection to the toilet after installation.
3. Locating Components in Accessible Spaces
Never locate a component of the vacuum system in a
space which is inaccessible or difficult to reach.
Failure to follow recommended procedures that result
in any of the above problems will invalidate component
warranty.
4
INSTALLATION OF COMPONENTS
1. Installing the Toilet
4. Mounting the Vacuum Holding Tank
For VacuFlush and EcoVac toilet mounting, follow the
instructions in the VacuFlush Installation Guide.
The Vacuum Holding Tank (VHT) can be located in any
accessible space as long as the 1-1/2 inch hose is not
longer than 20 feet (6.1 m) and its inlet is not higher than
3 feet (.9 m) from the toilet outlet. The VHT must be
mounted horizontally.
2. Routing and Installing Hose
Before attaching the vacuum hose to a fitting, place two
hose clamps over hose end. (All connections must be
double clamped.) Apply liquid dishwashing soap to outside of hose connector and inside hose. Twist hose
clockwise as it is pushed onto adapter (see Figure 2).
Hose end should be flush against the fitting shoulder
when properly installed (see Figure 3). Twist the hose
counter-clockwise before placing it onto the fitting. This
will ease installation. All joints should be double clamped
with high quality stainless steel clamps. Make sure clamp
mechanisms are 180° from each other when tight
(see Figure 3). Failure to follow these procedures will
result in vacuum leaks.
Mounting spindles are provided for securing the VHT in
areas that prevent access to the rear mounting feet on
the VHT.
Position the VHT in the space intended. If using mounting spindles, mark holes at rear of tank. After holes are
marked, remove VHT and secure (3) of the spindles provided to the mounting surface using (3) #12 x 1-1/2 inch
long pan head wood screws. Slide the VHT back so
mounting spindles fit into slots on tank (see Figure 4).
Secure the tank by using the (3) remaining spindles and
(3) #12 x 1-1/2 inch long pan head wood screws on remaining tank mounts.
If not using the mounting spindles, secure the VHT with
(8) #12 x 1-1/2 inch long pan head wood screws and (8)
flat washers on all (8) tank mounts. NOTE: The VHT must
be secured by at least (6) of the (8) mounting feet.
Figure 2
Once the VHT is in place, connect hose from toilet.
(NOTE: Hose insert elbow fittings can be removed from
VHT.)
5. Making Electrical Connections
See the “Wiring Diagram” section of this manual.
Figure 3
6. Completing the Installation
Complete installation of discharge hose from outlet of VHT
to a discharge deck fitting or overboard discharge pump.
Figure 4
3. Connecting the Toilet Water Supply Lines
The water supply inlet must connect to an adapter which
will adapt to the 1/2-inch MPT connection on the toilet
water valve. (This adapter can be found through a local
supplier or through Dometic.) The water supply must
provide a minimum flow of two (2) gallons per minute
(7.6 liters per minute).
5
WINTERIZING
6. Drain potable water tank.
At the end of each boating season, the VacuFlush system
must be winterized for storage. The following procedure
should be used:
7.
Add freshwater antifreeze to potable water tank.
3. Shut off water supply to toilet, remove waterline.
8. Flush potable water antifreeze and water mixture
through toilet and into the vacuum holding tank. Each
installation is different so amounts may vary. User
discretion is required to assure adequate protection.
4. Press flush lever until all water is drained from toilet.
9. Pump out vacuum holding tank.
5. Turn off electrical power.
10. Turn off electrical power.
1. Thoroughly flush system with fresh water.
2. Pump out holding tank.
To use antifreeze, repeat Steps 1 and 2 above and
continue as follows:
CAUTION: The use of freshwater antifreeze that
contains alcohol will result in damage to your sanitation system. Only use propylene glycol freshwater antifreeze that does not contain alcohol.
TROUBLESHOOTING GUIDE
Possible Cause
Problem
1. Pump running too much
between flushes.
Service Instructions
a. Flush ball in toilet leaks.
b. Vacuum line leak.
c. Foreign material has fouled
air pump valves.
d. Pump diaphragm worn or
damaged.
e. Duckbill valve in discharge
fitting stuck open.
2. Toilet will not flush.
(No vacuum.)
a. Pump will not run.
b. Plugged vacuum line.
c. Plugged pump valve.
d. Vacuum pump discharge or
intake lines plugged.
a. Leave small amount of water in toilet. If water is
sucked from bowl, refer to “Troubleshooting
Guide” in VacuFlush Owner’s Manual.
b. Tighten all hose connections at pump, vacuum tank,
holding tank, and toilet.
c. Disassemble air pump and inspect under the
two flat disk valves. If foreign material is
present, remove debris and reassemble air pump.
d. Inspect diaphragm in pump for small hole or rip.
Replace if necessary.
e. Disassemble discharge outlet and inspect
duckbill valve. Clean or repair if necessary.
a. See problem 3.
b. Blockage usually at base of toilet below flush
valve. You may have to disconnect line and clear.
c. Inspect and clean pump valves. Replace if needed.
d. Disassemble lines and clean.
e. Faulty motor.
a. Check input power, circuit breaker and fuse.
b. Tighten or reconnect wires at pump and
vacuum tank.
c. Make certain wires at vacuum switch are
connected to the “B” terminals.
d. To check vacuum switch, short across “B” terminals
with jumper wire.
e. Replace motor.
4. Pump will not shut off.
a.
b.
c.
d.
a.
b.
c.
d.
5. Pump is making a
loud noise.
a. Loose set screw in crank
assembly.
b. Pump bearing is worn.
c. Dirt or debris in pump body.
3. Pump will not run.
NOTE: If sound of pump is
disruptive at night, an “On-Off”
switch may be easily added to the
system. The VacuFlush Status
Panel features an integral circuit
breaker which also serves as a
night switch. (#500012, 12 VDC;
#500024, 24 VDC)
a. No power.
b. Loose or broken electrical
wiring.
c. Improper electrical
connections.
d. Faulty vacuum switch.
Insufficient vacuum.
Excessive vacuum leak.
Faulty vacuum switch.
Improper wiring.
d. Worn or defective motor.
e. Motor loose from mounting
bracket.
6
Verify pump pulls minimum 10 inches Hg of vacuum.
See problem 1.
To check switch, remove one “B” terminal wire.
Check wiring. Refer to Wiring Diagram.
a. Remove cover from pump and check crank
assembly setscrew for tightness.
b. Check pump bearing for wear. Replace if needed.
c. Disassemble air pump assembly and inspect
inside of pump body for foreign objects.
d. Replace motor assembly.
e. Tighten the two (2) nuts securing the motor to
the mounting bracket.
TROUBLESHOOTING GUIDE
Problem
6. Pump running too slow,
overheating, blowing
fuses or circuit breakers.
Possible Cause
Service Instructions
a. Check input power for low voltage.
b. Tighten or reconnect wires.
a. Improper voltage.
b. Loose or broken electrical
wiring.
c. Improper wire size.
d. Gear motor worn or defective.
e. Tank is overfilled – air pump
forced to pump water.
c. Wire size too small – check
electrical diagram for proper wire
size for voltage of pump used.
d. Check motor and replace if necessary.
e. Disassemble air pump and empty out water.
7. Difficulty in emptying
waste from holding
tank.
a. The dockside pump is very
weak and has low suction
capability.
a. Turn off the power to the VHT system. Flush
the toilet, releasing all the stored vacuum. Begin
pumping out. Repeat flushing if the dockside pump
begins having trouble emptying out the waste.
8. Pump emits odor.
a. Worn, torn, or punctured
pump diaphragm.
a. Replace pump diaphragm.
9. System emits odor.
a. Check for improper flexible
hose.
a. Replace hose where necessary. Replacement
hose should be marked “OdorSafe.”
Important Owner Information: OdorSafe® Sanitation Hose is formulated for transfer of sanitary waste
only. Do not allow the following items in system: Strong acids or caustic chemicals (example: drain openers), petroleum solvents or fuels, alcohol-based products (example: alcohol-based antifreeze), pine oilbased products (example: Pinesol® cleaner). Use of products containing these substances will void
warranty on hose.
DIMENSIONAL SPECIFICATIONS
7
MANUFACTURER’S ONE-YEAR LIMITED WARRANTY
Dometic warrants, to the original purchaser only, that this product, if used for personal, family or household purposes, is free from
defects in material and workmanship for a period of one year from the date of purchase.
If this Dometic product is placed in commercial or business use, it will be warranted, to the original purchaser only, to be free of
defects in material and workmanship for a period of ninety (90) days from the date of purchase.
Dometic reserves the right to replace or repair any part of this product that proves, upon inspection by Dometic, to be defective in
material or workmanship. All labor and transportation costs or charges incidental to warranty service are to be borne by the
purchaser-user.
EXCLUSIONS
IN NO EVENT SHALL DOMETIC BE LIABLE FOR INCIDENTAL OR CONSEQUENTIAL DAMAGES, FOR DAMAGES RESULTING FROM IMPROPER INSTALLATION, OR FOR DAMAGES CAUSED BY NEGLECT, ABUSE, ALTERATION OR USE OF
UNAUTHORIZED COMPONENTS. ALL IMPLIED WARRANTIES, INCLUDING ANY IMPLIED WARRANTY OF MERCHANTABILITY OR FITNESS FOR ANY PARTICULAR PURPOSE, ARE LIMITED TO A PERIOD OF ONE YEAR FROM DATE OF
PURCHASE.
IMPLIED WARRANTIES
No person is authorized to change, add to, or create any warranty or obligation other than that set forth herein.
Implied warranties, including those of merchantability and fitness for a particular purpose, are limited to one (1) year from the date
of purchase for products used for personal, family or household purposes, and ninety (90) days from the date of purchase for
products placed in commercial or business use.
OTHER RIGHTS
Some states do not allow limitations on the duration of an implied warranty and some states do not allow exclusions or limitations
regarding incidental or consequential damages; so, the above limitations may not apply to you. This warranty gives you specific
legal rights, and you may have other rights which may vary from state to state.
To obtain warranty service, first contact your local dealer from whom you purchased this product.
Dometic Corporation • Sanitation Systems
13128 State Rt 226, PO Box 38
Big Prairie, OH 44611
SeaLand Product Customer Service: 1-800-321-9886
(8:00 a.m. - 5:00 p.m. ET)
® Registered; ™ Trademark of Dometic Corporation
® Uniseal is a registered trademark of Injection Plastics, Inc.
© 2002 Dometic Corporation
600343026
10/03
8