1
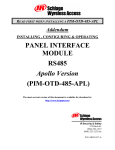
READ FIRST WHEN INSTALLING A PIM-485-16-TD-NXT
Addendum
INSTALLING , CONFIGURING & OPERATING
PANEL INTERFACE
MODULE
RS485
NexSentry Star I/II Version
(PIM-485-16-TD-NXT)
The most current version of this document is available for download at:
http://www.irsupport.net
IR Security & Safety
575 Birch St.
(866) 322-1237
(866) 322-1233 fax
P/N: M053-016-A
575 Birch St.
Forestville, Ct 06010
(866) 322-1237
(866) 322-1233 Fax
World Wide Web
http://www.irsupport.net
Copyright © 2003-2004 Ingersoll-Rand, all rights reserved.
No part of this document can be reproduced, transmitted, or transcribed in any form by electrical, mechanical, optical, manual, or
otherwise without the prior written consent of Ingersoll-Rand. Ingersoll-Rand reserves the right to alter or revise the content of
this document as needed to support future product revisions, without obligation to notify any persons of specific changes.
The use of trademarks, trade names, or other product identification is solely for reference purposes. All other product brand
names are trademarks or registered trademarks of their respective holders.
Ingersoll-Rand believes the information in this document to be accurate and reliable. Ingersoll-Rand does not guarantee results
from the use of this information. Ingersoll-Rand assumes no responsibility, obligation, or liability for the information presented in
this document.
IR Security & Safety
P/N: M053-016-A
575 Birch St., Forestville, Connecticut 06010 / (860) 584-9158 / (860) 584-2136 fax
http://www.irsupport.net
Page 2 of 15
INSTALLATION & OPERATING
INSTRUCTIONS
TABLE OF CONTENTS
1.
2.
Wyreless Access™ System (WAS)......................................................................................................................4
1.1
Overview .......................................................................................................................................................4
1.2
Panel Interface Module-RS485-NexSentry (PIM-485-16-TD-NXT) ............................................................5
Installing the PIM-485-16-TD-NXT...................................................................................................................8
2.1
Configuring the PIM-485-16-TD-NXT to Emulate DR42xx DigiReaders....................................................8
2.2
Connecting the PIM-485-16-TD-NXT to a Star I/II Access Control Unit...................................................10
2.3
Linking the PIM-485-16-TD-NXT to WAPMs ...........................................................................................11
2.4
PIM-485-16-TD-NXT Card Formats...........................................................................................................12
2.5
PIM-485-16-TD-NXT Alarms.....................................................................................................................12
2.6
What Happens if the PIM-485-16-TD-NXT Loses DC Power....................................................................12
2.7
Using the PIM-485-16-TD-NXT Reset Switch ...........................................................................................12
3.
Contacting Schlage ............................................................................................................................................13
4.
FCC Compliance & Warnings..........................................................................................................................14
5.
4.1
FCC Compliance .........................................................................................................................................14
4.2
Warnings......................................................................................................................................................14
Revision History.................................................................................................................................................15
IR Security & Safety
P/N: M053-016-A
575 Birch St., Forestville, Connecticut 06010 / (860) 584-9158 / (860) 584-2136 fax
http://www.irsupport.net
Page 3 of 15
1. Wyreless Access™ System (WAS)
1.1 Overview
Every access control system that uses Wyreless AccessTM contains two different types of modules (Figure
1-1):
•
at least one Wyreless Panel Interface Module (WPIM), and
•
at least one Wyreless Access Point Module (WAPM)
Figure 1-1 – Wyreless Access System Block Diagram
The WPIM is wired to the access control panel and ideally is installed very close to the access control
panel. The WPIMs installation location is determined by the location of the WAPMs with which it will
communicate using RF.
The WAPM is installed at the access point where access will be controlled and/or monitored. Depending
on the application and which WAPM is used, some wiring at the access control point may be required.
Regardless of which WPIM or WAPM module is used, the communication link between the WPIM and
WAPM is always RF.
This manual describes the installation and operation of a Panel Interface Module-RS485-NexSentry
(PIM-485-16-TD-NXT), a WPIM.
IR Security & Safety
P/N: M053-016-A
575 Birch St., Forestville, Connecticut 06010 / (860) 584-9158 / (860) 584-2136 fax
http://www.irsupport.net
Page 4 of 15
1.2 Panel Interface Module-RS485-NexSentry (PIM-485-16-TD-NXT)
The Panel Interface Module-RS485-NexSentry (PIM-485-16-TD-NXT) is a product in Schlage’s
Wyreless Panel Interface Module (WPIM) category. The PIM-485-16-TD-NXT is the wireless interface
to a NexSentry Star I or Star II Access Control Unit (Figure 1-2).
Figure 1-2 – PIM-485-16-TD-NXT Block Diagram
Up to 16 (8 for a Star I) PIM-485-16-TD-NXT can be connected via a 2 wire polled, RS-485 interface to
a Star I/II.
Each PIM-485-16-TD-NXT can emulate up to 16 DR42xx DigiReaders, therefore a PIM-485-xx-NEX
can control from 1 to 16 WAPM’s (1 to 8 for a Star I).
The Schlage Configuration & Demonstration Tool (CDT) is used to determine what RS-485 polling
addresses each PIM-485-16-TD-NXT will emulate.
NOTE: This manual is to be used in addition to the PIM Installation Manual (M053-001-xxx) and
the Wyreless Access System Configuring and Operating Manual (M053-007-xxx).
There are four steps to installing a PIM-485-16-TD-NXT:
1.
Using the PIM Installation manual (M053-001-xxx) determine the optimum PIM-485-16-TD-NXT
mounting location and permanently mount the PIM-485-16-TD-NXT in that location.
2.
Using the NexSentry Star Access Control Unit User Guide manual (6600062B) for a Star I or the
NexSentry Star II Access Control Unit User Guide manual (6600058A) for a Star II, mount the Star
I/II Access Control Unit and connect it to the PC that will be running either a terminal emulator (Star
I) or the NexSentry software (Star II)
Note: Make certain that that Star I/II Terminal Block TB1 is configured for the S-NET
communication protocol.
3.
Using this manual configure & connect the PIM-485-16-TD-NXT to the Star I/II Access Control
Unit (section 2.1, page 8).
4.
Using this manual, link the PIM-485-16-TD-NXT to all the WAPMs it will control (section 2.3, page
11).
IR Security & Safety
P/N: M053-016-A
575 Birch St., Forestville, Connecticut 06010 / (860) 584-9158 / (860) 584-2136 fax
http://www.irsupport.net
Page 5 of 15
The PIM-485-16-TD-NXT can be ordered with one of three possible enclosures. The xx in the PIM-48516-TD-NXT sales model number indicates the maximum number of WAPM’s that can be controlled by
that sales model. Table 1-1 & Table 1-2 shows the PIM-485-16-TD-NXT sales model and its major
specifications.
Sales
Models
PIM-485-16-TD-NXT
Closed
Enclosure
Opened
Enclosure
Antenna
internal “c”
or
remote
(ANT-REMOTE)
(ANT-6DB-FLAT)
Table 1-1 – PIM-485-16-TD-NXT Sales Model
IR Security & Safety
P/N: M053-016-A
575 Birch St., Forestville, Connecticut 06010 / (860) 584-9158 / (860) 584-2136 fax
http://www.irsupport.net
Page 6 of 15
MAXIMUM
ACCESS CONTROL PANEL
NUMBER LOCATION
INTERFACE/DESCRIPTION
OF WAPMs
MODEL
ENCLOSURE
PIM-485-16-TD-NXT
plastic
16
ANT-REMOTE
plastic
n/a
ANT-6DB-FLAT
plastic
n/a
indoor
RS485
indoor
outdoor
indoor
outdoor
Optional remote omnidirectional antenna
Optional remote 6db gain
directional antenna
Table 1-2- PIM-485-16-TD-NXT Sales Model Table
IR Security & Safety
P/N: M053-016-A
575 Birch St., Forestville, Connecticut 06010 / (860) 584-9158 / (860) 584-2136 fax
http://www.irsupport.net
Page 7 of 15
2. Installing the PIM-485-16-TD-NXT
2.1 Configuring the PIM-485-16-TD-NXT to Emulate DR42xx DigiReaders
The Schlage Configuration & Demonstration Tool (CDT, version 1.4 or higher) must be used to
configure each PIM-485-16-TD-NXT to emulate the desired number and address of DR42xx
DigiReaders.
The PIM-485-16-TD-NXT must be connected to the PC running the CDT using a serial connection
(either RS485 or RS232).
Once the PIM-485-16-TD-NXT is connected to the PC and the CDT is running, the Addresses tab on the
CDT’s PIM panel is used to configure the PIM-485-16-TD-NXT’s emulation addresses. There are four
fields on the Addresses tab: Unique, Addr Lo, Addr Hi, & MIRO. The Unique field shows the PIM-48516-TD-NXT unique address and should never be changed without instructions from Schlage Technical
Support. The Addr Lo indicates the lowest device address that the PIM-485-16-TD-NXT will emulate
and Addr Hi indicates the highest. The MIRO indicates which group of 8 the device will be in. (The
MIRO number will increment automatically when the number of linked devices is greater than 8.) Table
2-1 shows the allowable range of values for the Addr Lo, Addr Hi, & MIRO fields on the CDT Addresses
tab.
PIM Model
PIMx-485-16-NEX
PIMx-485-16-NEX
Star Model
I
II
Addr Lo
0-15
0-15
Addr Hi
0-15
0-15
MIRO
2-9
2-17
Table 2-1 – CDT Addr Lo, Addr Hi, & MIRO Fields Range of Values
After setting the Addr Lo & Addr Hi fields to the desired values, click the Set button to send these values
to the PIMx-485-x-NEX.
Rules for setting Addr Lo & Addr Hi:
♦ Addr Hi must always be equal to or greater than Addr Lo
♦ For multiple PIM-485-16-TD-NXT’s on the same S-NET there cannot be any address
overlap, in other words on the same S-NET there can be only one PIM-485-16-TD-NXT
emulating a specific DR42xx DigiReaders address.
♦ The DR42xx DigiReader addresses emulated by a PIM-x-485-x-NEX must be consecutive.
♦ A MIRO number must be unique to one PIM. While one PIM can emulate two MIRO’s, one
MIRO cannot be emulated by more than one PIM
♦ The ADDR LO and ADDR HI set the DR42XX DigiReaders addresses. This address along
with the MIRO number fixes the addressing of the Door Position Switch, Request to Exit,
and Output Relay as shown in Table 2-2, below.
IR Security & Safety
P/N: M053-016-A
575 Birch St., Forestville, Connecticut 06010 / (860) 584-9158 / (860) 584-2136 fax
http://www.irsupport.net
Page 8 of 15
ADDR/READER
MIRO
0
1
2
3
4
5
6
7
8
9
10
11
12
13
14
15
x
x
x
x
x
x
x
x
x+1
x+1
x+1
x+1
x+1
x+1
x+1
x+1
Door Position Switch
1
3
5
6
9
11
13
15
1
3
5
6
9
11
13
15
Point Numbers
Request to Exit
2
4
6
8
10
12
14
16
2
4
6
8
10
12
14
16
Strike Relay
1
2
3
4
5
6
7
8
1
2
3
4
5
6
7
8
Table 2-2 - PIM, MIRO, Reader, Point Number Association for one PIM
IR Security & Safety
P/N: M053-016-A
575 Birch St., Forestville, Connecticut 06010 / (860) 584-9158 / (860) 584-2136 fax
http://www.irsupport.net
Page 9 of 15
2.2 Connecting the PIM-485-16-TD-NXT to a Star I/II Access Control
Unit
Note: Make certain that that Star I/II Terminal Block TB1 is configured for the S-NET
communication protocol.
2.2.1 PIM-485-16-TD-NXT using an Original PIM PCB
Star I/II – TB1
SNET A
SNET B
PIM-485-16-TD-NXT – J6
A
B
Table 2-3 – RS485 Connection: Original PIM PCB & RAMM
2.2.2 PIM-485-16-TD-NXT using a RS485 PIM PCB
Star I/II – TB1
SNET A
SNET B
PIM-485-16-TD-NXT – J6
TA- & RATB+ & RB+
Table 2-4 – RS485 Connection: RS485 PIM PCB & RAMM
Note: The Star I/II has a 2 wire RS-485 interface therefore the PIM’s J6 TA- & RA- must be
connected and the PIM’s J6 TB+ & RB+ must be connected.
IR Security & Safety
P/N: M053-016-A
575 Birch St., Forestville, Connecticut 06010 / (860) 584-9158 / (860) 584-2136 fax
http://www.irsupport.net
Page 10 of 15
2.3 Linking the PIM-485-16-TD-NXT to WAPMs
2.3.1 How to Set an RF Channel
One of fifteen RF channels can be set using DIP switch SW7 on the PIM. Table 2-5 shows how to set
SW7 to select the desired RF channel:
Channel
1
1
2
3
4
5
6
7
8
9
10
11
12
13
14
15
Switch 1
up
up
up
up
up
up
up
up
down
down
down
down
down
down
down
down
Switch 2
up
up
up
up
down
down
down
down
up
up
up
up
down
down
down
down
Switch 3
up
up
down
down
up
up
down
down
up
up
down
down
up
up
down
down
Switch 4
Up
down
Up
down
Up
down
Up
down
Up
down
Up
down
Up
down
Up
down
Table 2-5 – DIP Switch Setting to Select the RF Channel
NOTE: The first two switch settings select Channel 1.
2.3.2 Linking WAPM’s using the Configuration & Demonstration Tool (CDT)
The Schlage CDT can be used to link WAPM’s to a PIM-485-16-TD-NXT. Refer to the CDT
The PIM-485-16-TD-NXT must be connected to the PC running the CDT using a serial connection
(either RS485 or RS232).
Once the PIM-485-16-TD-NXT is connected to the PC and the CDT is running the Link tab on the
CDT’s PIM panel is used to control the PIM-485-16-TD-NXT’s Link Mode. The Panel field needs to
be set to indicate which WAPM is to be linked. Table 2-6 shows the allowable range of values for the
Panel field on the CDT Link tab.
PIM Model
PIMx-485-16-NEX
Panel Field
0-15
Table 2-6 – CDT Panel Field Range of Values
IR Security & Safety
P/N: M053-016-A
575 Birch St., Forestville, Connecticut 06010 / (860) 584-9158 / (860) 584-2136 fax
http://www.irsupport.net
Page 11 of 15
2.4 PIM-485-16-TD-NXT Card Formats
The PIM-485-16-TD-NXT accepts a 26 bit Wiegand format, strips off the two parity bits and the eight bit
facility code field, the resulting 16 bit card number field is sent to the STAR I/II controller for further
processing.
2.5 PIM-485-16-TD-NXT Alarms
THIS FEATURE HAS NOT BEEN IMPLEMENTED YET.
Each WAPM linked to a PIM-485-16-TD-NXT can report five different types of alarms: low battery,
reader tamper, loss of RF communications, lock motor stall, and PIM tamper. The PIM-485-16-TD-NXT
reports these alarms using specific NexSentry alarm addresses as shown in Table 2-7.
Alarm
NexSentry Alarms
Reported as
Label
Low Battery
Reader Tamper
Loss of Communications
Lock Motor Stall
PIM Tamper
Table 2-7 – NexSentry Alarms Generated by a PIM-485-16-TD-NXT
2.6 What Happens if the PIM-485-16-TD-NXT Loses DC Power
All of the configuration and linking information is stored in non-volatile memory in the PIM-485-16-TDNXT. Therefore if PIM-485-16-TD-NXT DC power is lost or cycled, upon restoring DC power, the PIM
will continue operation with the same configuration and linking information. There is no need to reconfigure or re-link.
2.7 Using the PIM-485-16-TD-NXT Reset Switch
The Reset Switch, S3, is used if the PIM-485-16-TD-NXT does not seem to be working properly.
Pressing the Reset Switch has the same effect as cycling DC power to the PIM-485-16-TD-NXT.
IR Security & Safety
P/N: M053-016-A
575 Birch St., Forestville, Connecticut 06010 / (860) 584-9158 / (860) 584-2136 fax
http://www.irsupport.net
Page 12 of 15
3. Contacting Schlage
For questions regarding Wyreless Access™:
[email protected]
[email protected]
[email protected]
www.recognition-source.com
(630) 762-4450
(630) 762-4444 fax
IR Security & Safety
P/N: M053-016-A
575 Birch St., Forestville, Connecticut 06010 / (860) 584-9158 / (860) 584-2136 fax
http://www.irsupport.net
Page 13 of 15
4. FCC Compliance & Warnings
4.1 FCC Compliance
•
This device has been authorized by the FCC Rules and Industry Canada.
•
This device complies with the limits for a Class B digital device and a Class B intentional radiator,
pursuant to Part 15 of the FCC Rules and with RSS-210 of Industry Canada. Operation is subject to
the following two conditions: (1) This device may cause harmful interference, and (2) this device
must accept any interference received, including interference that may cause undesired operation.
•
The Wyreless Access System Component must be installed by qualified professionals or contractors
in accordance with FCC part 15.203, Antenna Requirements.
•
Do not use any antenna other than the one provided with the unit.
4.2 Warnings
•
RF Exposure - To comply with FCC RF exposure requirements for mobile transmitting devices this
transmitter should only be used or installed at locations where there is normally at least a 20 cm
separation between the antenna and all persons.
•
Do not co-locate and operate in conjunction with any other antenna or transmitter.
•
Use only the Battery Pack specified in this instruction manual.
•
Do not subject Battery Pack to fire or high temperatures.
•
Do not attempt to recharge, short out or disassemble Battery Pack.
•
Follow local regulations for alkaline battery disposal.
•
Immediately remove the batteries and discontinue use if:
- the product is impacted after which the interior is exposed, or
- the product emits a strange smell, heat, or smoke.
•
Changes or modifications not expressly approved by Schlage, could void the users authority to
operate the equipment.
IR Security & Safety
P/N: M053-016-A
575 Birch St., Forestville, Connecticut 06010 / (860) 584-9158 / (860) 584-2136 fax
http://www.irsupport.net
Page 14 of 15
5. Revision History
Version
X001
X001.1
001
002
Date
07/03/02
09/06/02
09/12/02
01/13/04
Changes
preliminary in house release for comments
updated Configuring and Linking sections for new CDT version
released for publication
added Star II/PIM/CDT addressing information/rules, removed obsolete sales
models, added new sales model PIM-485-16-TD-NXT, added card format section
IR Security & Safety
P/N: M053-016-A
575 Birch St., Forestville, Connecticut 06010 / (860) 584-9158 / (860) 584-2136 fax
http://www.irsupport.net
Page 15 of 15