1
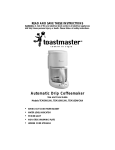
READ AND SAVE THESE INSTRUCTIONS
WARNING: A risk of fire and electrical shock exists in all electrical appliances and may cause personal injury or death.
Please follow all safety instructions.
Automatic Drip Coffeemaker
IMPORTANT SAFEGUARDS
When using electrical appliances, basic safety precautions should
always be followed to reduce the risk of fire, electric shock and
injury to persons, including the following:
• Read all instructions before using appliance.
• Do not touch hot surfaces. Use handles or knobs.
• Do not immerse cord, plug or appliance in water or other liquid.
See instructions for cleaning.
• Close supervision is necessary when this appliance is used
near children.
• This appliance is not for use by children.
• Unplug from outlet when not in use. Unplug and allow to cool
before putting on or taking off parts, and before cleaning appliance.
• To disconnect, switch OFF, then remove plug from wall outlet.
• Do not operate any damaged appliance. Do not operate with a
damaged cord or plug, or after the appliance malfunctions, or
has been dropped or damaged in any manner. Return appliance to the nearest authorized service center for examination,
repair, electrical or mechanical adjustment.
• Use attachments only if recommended by the manufacturer.
• Do not use outdoors, or while standing in a damp area.
• Do not let cord hang over edge of table or counter or touch hot
surfaces.
• Do not place on or near a hot gas or electric burner or in a heated oven.
• Only use appliance as indicated in these instructions.
• Be certain lids are securely in place before operating appliance.
• Keep lid on carafe while serving coffee and brewing.
• This carafe is designed for use with this appliance only. It must
never be used on a range top.
• Do not set a hot carafe on a wet or cold surface.
• Do not use a cracked carafe or a carafe having a loose or weakened handle.
• Do not clean carafe with abrasive cleansers, steel wool pads, or
other abrasive material.
• Do not remove filter basket or lids during brewing cycles, scalding may occur.
• Do not remove carafe from hot plate while liquid is dripping from
basket.
• Allow filter basket to cool before removing it from coffeemaker.
• Do not p our liquid other than water and the cleaning solution
specified in this manual into the water reservoir. (See instructions for cleaning the coffeemaker.)
2
• Do not move entire unit when carafe contains hot liquid.
• WARNING: Do not remove bottom cover. No user serviceable
parts inside. Repair must be done by authorized service personnel only.
SAVE THESE INSTRUCTIONS
THIS APPLIANCE IS FOR HOUSEHOLD USE ONLY
CAUTION: A short power supply cord is provided to reduce the risk
of personal injury resulting from becoming entangled in or tripping
over a longer cord. Extension cords are available from local hardware
stores and may be used if care is exercised in their use. If an extension cord is required, special care and caution is necessary. Also the
cord must be: (1) marked with an electrical rating of 125 V, and at least
13 A., 1625 W., and (2) the cord must be arranged so that it will not
drape over the countertop or tabletop where it can be pulled on by
children or tripped over accidentally.
POLARIZED PLUG: This appliance has a polarized plug, (one blade
is wider than the other). As a safety feature to reduce the risk of electrical shock, this plug is intended to fit in a polarized outlet only one
way. If the plug does not fit fully in the outlet, reverse the plug. If it still
does not fit, contact a qualified electrician. Do not attempt to defeat
this safety feature.
ELECTRIC POWER: If the electric circuit is overloaded with other
appliances, your appliance may not operate properly. It should be
operated on a separate electric circuit from other operating appliances.
Product may vary slightly from illustration
3
BEFORE USING YOUR COFFEEMAKER
Before preparing coffee in your new coffeemaker, thoroughly clean the
carafe, carafe lid, removable filter basket, and water chamber cover in hot,
sudsy water. Rinse and dry. Replace disassembled parts. Clean the inside
of the coffeemaker by brewing two full carafes of tap water (see “BREWING
INSTRUCTIONS”). Do not place coffee in filter basket for this initial cleaning. Note: At the end of first cycle, turn coffeemaker “OFF” and wait ten minutes. Turn unit “ON” and brew second carafe of water.
SPECIAL CARE FOR YOUR CARAFE
A damaged carafe may result in possible burns from hot liquid. To avoid
breaking the carafe:
• Do not allow all liquid to evaporate from carafe. Do not heat carafe when
empty.
• Discard if damaged in any manner. A chip or crack could result in breakage or contaminate liquid contents with glass particles. To order new
carafe contact Consumer Service.
• Never use abrasive scouring pads or cleaners as they may scratch and
weaken the glass.
• Do not place carafe on or near a hot gas or electric burner, in a heated
oven, or in a microwave oven.
• Avoid rough handling and sharp blows.
COFFEE FILTERS
Number 2 cone-shaped paper filters are available locally at grocery stores
and where coffeemakers are sold. The use of basket-style filters is not recommended, since they do not conform to the shape of the filter basket and
may cause coffee to back up and spill over during brewing.
COFFEE YIELD
Note: A 5-ounce cup is the American industry standard and is used by most
coffeemaker manufacturers. To fill up your favorite mug, fill coffeemaker
water chamber with enough water for 2 cups (10 ounces).
BREWING INSTRUCTIONS
1. Plug coffeemaker into any 120V ~ 60Hz outlet.
2. Fill carafe with cold tap water and pour into water chamber. Markings
on the carafe indicate level of water required to brew desired number
of cups or use the markings on the water level indicator. Not less than
two cups is recommended when using 5-cup and 10-cup units.
Note: The amount of brewed coffee will always be less than the
amount of water placed into coffeemaker, since 10% is absorbed by
coffee grounds and filter.
3. Place coffee filter in filter basket. Use a #2 paper cone filter. Measure
4
4.
5.
6.
7.
8.
9.
10.
11.
one level teaspoon of drip or regular grind coffee for each cup of coffee desired. For stronger or milder coffee, adjust amount of coffee to
suit your taste.
Return filter basket to closed position.
Place carafe on warming plate.
Switch control to “ON.”
If you wish to serve a cup of coffee before brew cycle is completed,
simply remove carafe from warming plate. Dripping will automatically
cease. Return carafe to position on warming plate within 45 seconds;
dripping will resume.
Upon completion of the brew cycle, wait about one minute until the
brew drip from the filter basket into the carafe has stopped. Carafe lid
should be kept in place to facilitate safe serving and help keep coffee
at proper serving temperature.
To keep coffee hot, return carafe to the warming plate after serving.
The warming plate will automatically cycle to maintain ideal serving
temperature as long as the coffeemaker is on.
Switch to “OFF” when carafe is empty or when unit is not in use.
To brew another carafe of coffee, turn unit “OFF” and wait 10 minutes
to allow heating element to cool. Important: If unit is not allowed to
cool before immediate repeated use, water placed in water chamber
may become overheated and a spray of steam could be released from
opening, creating a risk of burns.
BREWING A SECOND POT OF COFFEE
As mentioned above, it is recommended that the coffeemaker should be in
“OFF” position for 10 minutes between cycles, in order to allow unit to cool.
While unit is in “OFF” position, dispose of used coffee filter, and rinse carafe
and filter basket in water. Place a fresh filter in basket. Repeat brewing procedure.
HINTS FOR GREAT TASTING COFFEE
• A clean coffeemaker is essential for making great tasting coffee. Regular
cleaning, as specified in “CARE AND CLEANING OF YOUR COFFEEMAKER” is highly recommended.
• Always use fresh, cold water in your coffeemaker.
• Finer grinds, such as drip and ADC coffee, promote fuller extraction and
provide rich, full-bodied coffee. Regular grind will require slightly more coffee per cup to provide the strength of a finer grind.
• Store coffee in a cool, dry place. Once coffee has been opened, keep it
tightly sealed in the refrigerator to maintain freshness.
• For optimum flavor, buy whole beans and grind them just before brewing.
• Do not re-use coffee grounds since this will greatly impair coffee flavor.
• Reheating coffee is not recommended. Coffee is at its peak flavor immediately after brewing.
• Small oil droplets on the surface of brewed coffee is due to the extraction
of oil from the coffee grounds. Oiliness may occur more frequently if heavily roasted coffees are used.Over-extraction may also cause oiliness, indicating a need to clean your coffeemaker.
5
CARE AND CLEANING OF YOUR COFFEEMAKER
Always make sure coffeemaker is unplugged and warming plate is cool
before attempting to clean.After daily use, the filter basket and carafe should
be washed in hot, sudsy water, rinsed and dried.Wipe exterior with a damp
cloth to remove superficial stains. For stubborn stains, use a nylon or plastic pad with a non-abrasive cleanser. Do not use metal scouring pads or
abrasive cleansers.
Special cleaning of your coffeemaker is recommended at least once a
month, depending on frequency of use and quality of water used in the unit.
If water in your area is especially hard, the following cleaning procedure
should be performed every two weeks, since minerals in water can detract
from the flavor of the coffee and possibly lengthen brew time.
1. Fill carafe with one part white vinegar to three parts cold water. Pour
water and vinegar solution into the water chamber.
2. Place a paper filter in the filter basket and swing to closed position.
Place carafe on warming plate. Plug into a 120V ~ 60Hz outlet and
switch control to “ON.” During cleaning, more steam will occur than
during normal brewing.
3. Keep the coffeemaker on until carafe is half full. Switch control to
“OFF.” When liquid stops dripping from filter basket into the carafe,
remove the basket and carafe and allow liquid to cool in the carafe for
15 minutes. When cooled, pour liquid back into the water chamber.
4. Replace basket and return carafe to warming plate.
5. Switch control to “ON.” Repeat procedure, allowing all the cleaning
solution to empty into the carafe. After dripping has stopped, discard
contents of carafe.
6. After allowing coffeemaker to cool for 10 minutes, rinse it out by brewing a carafe full of cold water. Make sure to insert a fresh filter into the
filter basket before brewing.
7. At end of the brew cycle, switch control to “OFF.” Discard water in the
carafe. Remove used filter and wash carafe and filter basket in hot
sudsy water. Dry parts.
8. When coffeemaker has cooled, wipe exterior with a dry cloth.
Any servicing requiring disassembly other than the above cleaning
must be performed by an authorized service center.
6
IMPORTANT NOTICE
If any parts are missing or defective,
DO NOT return this product.
Please call our Customer Service Department for assistance.
800-233-9054 Monday - Friday 9:00 am - 5:00 pm CST
Thank You
ONE-YEAR LIMITED WARRANTY
This Salton, Inc. product warranty extends to the original consumer purchaser of the product.
Warranty Duration: This product is warranted to the original consumer purchaser for a period of one
(1) year from the original purchase date.
Warranty Coverage: This product is warranted against defective materials or workmanship. This warranty is void if the product has been damaged by accident, in shipment, unreasonable use, misuse,
neglect, improper service, commercial use, repairs by unauthorized personnel or other causes not
arising out of defects in materials or workmanship. This warranty is effective only if the product is purchased and operated in the USA, and does not extend to any units which have been used in violation
of written instructions furnished by Salton, Inc., or to units which have been altered or modified or to
damage to products or parts thereof which have had the serial number removed, altered, defaced or
rendered illegible.
Warranty Disclaimers: This warranty is in lieu of all warranties expressed or implied and no representative or person is authorized to assume for Salton, Inc. any other liability in connection with the
sale of our products. There shall be no claims for defects or failure of performance or product failure
under any theory of tort, contract or commercial law including, but not limited to, negligence, gross
negligence, strict liability, breach of warranty and breach of contract.
Warranty Performance: During the above one-year warranty period, a product with a defect will be
either repaired or replaced with a reconditioned comparable model (at Salton, Inc. option) when the
product is returned to the Salton, Inc. facility within the warranty period and an additional one-month
period. No charge will be made for such repair or replacement.
Service and Repair
Should the appliance malfunction, you should first call toll-free 1-800-233-9054 between the hours of
9:00 am and 5:00 pm Central Standard Time and ask for CUSTOMER SERVICE stating that you are
a consumer with a problem.
In-Warranty Service (USA) for an appliance covered under the warranty period, no charge is made
for service or postage.
In-Warranty Service (Canada) for an appliance covered under the warranty period, no charge is
made for service or postage. Please return the product insured, packaged with sufficient protection,
and postage and insurance prepaid to the address listed below. Customs duty/brokerage fee, if any,
must be paid by the consumer.
Out-of-Warranty Service: A flat rate charge by model is made for out-of-warranty service. Include
$15.00 (U.S.) for return shipping and handling.
Salton, Inc. cannot assume responsibility for loss or damage during incoming shipment. For your protection, carefully package the product for shipment and insure it with the carrier. Be sure to enclose
7
the following items with your appliance: any accessories related to your problem; your full return
address and daytime phone number; a note describing the problem you experienced; a copy of your
sales receipt or other proof of purchase to determine warranty status. C.O.D. shipments cannot be
accepted.
Return the appliance to:
ATTN: Repair Department, Salton, Inc.
708 South Missouri St.
Macon,MO 63552
Consumer Service: 1-800-233-9054
Consumer Parts:1-800-947-3745
Hours: 9:00 a.m. - 5:00 p.m. CST
For more information on Salton, Inc. products:
visit our website: URL http://www.salton-maxim.com or
E-mail us at SALTON [email protected]
This Melitta product is distributed and serviced by Salton, Inc.
Printed in China
©1999 Salton, Inc.
®Reg. T.M.of a company of the Melitta Group
Part No. 60492