1
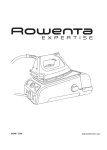
032621 - IC7100 - 50/03
instructions for use
1 • UNDERSTANDING YOUR IRONING CENTRE
14
12
11
15
1
3
13
5
7
6
9
8
4
10
2
12
1.
2.
3.
4.
5.
6.
7.
6
Iron
Electric power cord (iron + board)
Steam cord
Steam cord support
Iron rest-plate
Removable water tank
Iron, power cord and steam cord storage
space
8. Control panel
9. Steam generator screw-clamps
7
13
10. Wheels (rubber-coated to protect delicate
floors)
11. Feet
12. Semi-automatic opening lever (use only to
open the board)
13. Board closing and height adjuster lever
(use this lever to close the board)
14. Heated, active ironing area with ironing
board cover
15. Suction-blower unit
ENG
a) Control panel
RESTART button (Restarts heating of
the boiler during use)
Green "Steam
ready" light
Red "Water tank
empty" light
Board fan control button
Steam output
control dial
suction
blown air
Main ironing centre power On/Off (O/I)
switch (Controls board + generator)
b) Heated board with suction and blown-air functions
Board heats up automatically when the ironing centre
is switched on.
Suction function
Inside the board, the suction fan sucks air through the board.
Blown air function
Inside the board, the blower fan blows air through the board.
d) Steam generator
c) Iron
Humid steam
button
Steam cord
Iron, power cord and steam cord
storage compartment catches
Rubber pads
Steam control
button
Cord outlets
Screw-clamps
Soleplate temperature
control dial
Temperature
control light
Boiler (inside compartment)
2 • PREPARING YOUR IRONING CENTRE
1. Always place your ironing board on the floor in a horizontal position. (1)
2. Hold down the ironing board feet under one of your own feet. (2)
3. Use your hand to press the semi-automatic opening lever located underneath the front end of
the board, then raise the board to the required height (2).
4. If the board is too high for comfort, adjust its position using the adjuster lever (3).
5. Lift up and remove the water tank.
6. Unscrew the water tank cap.
7. Fill the water tank, taking care not to exceed the maximum level. (4)
8. Replace the cap on the water tank.
9. Replace the water tank in its housing, pressing down until it clicks into place (5).
(2)
(1)
98 cm
70 cm
(3)
(4)
(5)
Suitable water:
Your steam generator has been designed to operate using untreated tap water. However, if
your water is very hard, mix 50 % untreated tap water with 50 % distilled water.
The ironing centre comes with a tester that can be used to test the hardness of the water.
Unsuitable water:
Do not add anything to the contents of the removable water tank, and do not use water
from clothes-dryers, scented or softened water, water from refrigerators, batteries or air
conditioners, pure distilled water, pure demineralised water or rainwater, as these types of
water contain organic waste or mineral elements that become concentrated when heated
and cause spitting, brown staining or premature wear to the appliance.
ENG
3 • USING YOUR IRONING CENTRE
1.
Open the storage compartment cover by lifting the catches located on each
side of the iron rest-plate (6).
2. Remove the iron, steam cord and electric power cord from the storage compartment. (7)
3. Insert the power cord and steam cord in the cut-outs located on the sides of
the storage compartment. The ironing centre can be configured for left- or
right-handed use.
(6)
4. Close the storage compartment cover and place the iron on its rest-plate (8).
Warning : Your ironing centre is equipped with a safety device which cuts the power supply
when the iron is stored in its compartment.
To switch the iron on again, it is imperative that the iron is removed from its storage compartment first.
5. For maximum ironing comfort, fit the steam cord support in its mounting and feed the steam
cord through the support loop (9).
6. Connect the power cord to an earthed mains socket.
7. Switch on the main On/Off (O/I) switch (located on the control panel on the ironing board)
(10 - 1 ). The green light on the control panel will start to flash and the boiler will heat up
(10 - 2 ). When the green light stops flashing (after approximately 2 minutes), the steam supply
is ready.
2
(7)
(8)
(9)
(10)
1
When you switch on your ironing centre, the ironing board surface heats up automatically,
eliminating any risk of steam condensing. Your ironing board's surface will reach its operating
temperature in approximately 7 minutes. This does not prevent you from starting your ironing
as soon as the steam supply is ready (after 2 minutes).
• The first time you use your ironing centre, some fumes and a harmless smell may be released.
They will not affect use and will quickly disappear.
• After about a minute, and at regular intervals during use, your appliance's electric pump will
inject water into the boiler. It makes a noise, but this is quite normal.
4 • OPERATING THE CONTROL PANEL
- Flashing green light: Water is heating in the boiler.
- Continuous green light: The steam supply is ready for use.
- Continuous red light: The water tank is empty.
- RESTART button: Press this button to restart boiler heating, whenever you have stopped to refill
the water tank (see chapter 9).
5 • SUCTION AND BLOWN-AIR FUNCTIONS
Your ironing centre is equipped with a range of professional ironing features.
In addition to an automatically heated ironing board surface, your appliance is equipped with
fans providing suction and blown-air functions which ensure outstanding ironing quality.
a) Suction and blown-air fan control button
BLOWN AIR position
Position O (no ventilation)
SUCTION position
b) The benefits of the suction and blown-air functions include
BLOWN-AIR
FUNCTION:
When you switch the control button to the blown-air position, the blower
system is activated, creating an air cushion between the board and fabric. The
blown-air function is recommended for:
- Ironing delicate fabrics (e.g. silk or wool);
- Preventing accidental creases on large and medium-sized items
(e.g. tablecloths, sheets or jacket backs);
- Avoiding "buffing" fabrics, and preventing lines and seam marks.
SUCTION
FUNCTION:
When you switch the control button to the suction position, the suction system is
activated, creating a downward airflow. The suction function is recommended for:
- Holding items in place on the ironing surface;
- Clearly marking creases (e.g. trouser creases);
- Ironing thick fabrics (e.g. denim and linen);
- Eliminating any residual moisture;
- Preventing steam from escaping while you are ironing.
c) Tips for using the suction and blown-air functions according to the type
of fabric
BLOWN AIR
SUCTION
Delicate fabrics: silk, synthetic materials
Delicate finishes: gathers, frills, glitter, embroidery, lace, etc.
Linings and seams: jacket linings, double-layered delicate fabrics, etc.
Thick and heavy fabrics: cotton, denim, corduroy, linen, tweed, wool, etc.
Creases and turn-ups: pleated skirts, trouser turn-ups, knife pleats, etc.
Lined finishes: cuffs, collars, waistbands, hems, button-holes, shirt back pleats, etc.
For a more detailed explanation, please refer to the enclosed booklet entitled "Ironing Tips", inside
the box.
ENG
6 • STEAM IRONING
1. Set the iron's temperature control selector according to the type of fabric to be ironed (11)
2. The iron temperature control light will light up.
Important: The ironing centre is ready when the iron temperature control light goes out and
when the green “steam ready light” on the board's control panel stays continuous.
It is perfectly normal for the iron temperature control and boiler lights to switch on and off during
use, according to the heating requirements. This does not prevent you from continuing to iron in
the usual way.
3. Adjust the steam output (using the steam output control dial located on the control panel) (12).
●
(11)
Synthetics (low temperature)
●●
Silk/Wool (medium temperature)
●●●
Cotton/Linen (high temperature)
(12)
Set the iron’s temperature control and steam output control dial according to the type
of fabric to be ironed :
Fabric type
Iron temperature
control setting
Steam output control
dial setting
Synthetics
●
Low temperature
Silk / Wool
●●
Medium temperature
Cotton / Linen
●●●
High temperature
We advise you to begin by ironing any fabrics requiring a low temperature
setting, e.g. synthetics (●)
To obtain steam, press on the steam control button located beneath the iron
handle (13).
The flow of steam will stop when you release the button.
With delicate fabrics (●), press the steam control button under the iron
handle intermittently, to avoid possible water droplets appearing with the
steam.
(13)
Recommendations:
• Before you begin using the iron, or if you have not used any steam for a few minutes, press the
steam control button several times in a row, holding the iron away from your clothes.
This will enable any cold water to be removed from the steam-circuit.
• Iron temperature control setting:
- Start with any fabrics to be ironed at a low temperature (•), and finish with those which need
higher temperatures (• • • or Max).
- Mixed-fibre fabrics: Set the ironing temperature to the setting for the most delicate fabric.
- Woollen garments : Press the iron’s steam control button intermittently to produce short
bursts of steam, without placing the iron on the garment itself.
• Steam output control dial setting:
- Thick fabrics: Increase the steam output setting.
- Low temperature ironing: Set the steam output control dial to the low position.
• Dry ironing: Do not press the steam control button under the iron handle.
• If you are using starch, it should be sprayed onto the reverse side of the fabric to be ironed.
• Ironing board cover:
We recommend ironing the ironing board cover with a very hot iron before you use it for the
first time. For perfect results every time, only replace with a Rowenta ironing board cover
available from our authorised service dealers.
7 • VERTICAL STEAM IRONING
1.
Set the iron temperature control and the steam output control dial (located
on the control panel) to the maximum position.
2. Hang the garment on a coat hanger and hold the fabric slightly taut with
one hand.
As steam is very hot, never attempt to remove creases from a garment
while it is being worn - always hang garments on a coat hanger.
3. Holding the iron in a vertical, tilted position, press in one second bursts on (14)
the steam control button (located beneath the iron handle) while moving
the iron from top to bottom (14).
Recommendations: With fabrics other than linen or cotton, hold the iron a few centimetres
away from the garment, to avoid burning the fabric.
8 • HUMID STEAM FUNCTION
Press the humid steam button (15) two or three times to obtain a steam
boost as required:
- When ironing thick fabrics,
- In order to eliminate unwanted creases,
- For powerful vertical crease removal.
(15)
Important: Use the humid steam function very carefully because of the exceptional power
of the steam that may cause burns.
ENG
9 • WHAT TO DO IF THE RED "WATER TANK EMPTY" LIGHT
COMES ON
You can use your steam generator indefinitely, thanks to its removable water
tank.
The red light (16: 1 ) comes on when there is no more steam. The removable
water tank is empty.
1. Unscrew the water tank cap.
2. Lift up and remove the water tank.
3. Fill the water tank.
4. Replace the cap.
5. Replace the water tank in its housing, pressing down until it clicks into
place (17).
6. Press the boiler RESTART button (16: 2 ) on the control panel to continue
your ironing.
1
2
(16)
(17)
10 • MAINTAINING YOUR IRONING CENTRE
•
•
•
•
Before cleaning your appliance, ensure that it is unplugged and that the soleplate and the
iron rest-plate have cooled down.
Do not use any cleaning or descaling products when cleaning the soleplate or boiler.
Never hold the iron or steam generator under the tap.
Do not place the iron on a metal rest, as this could damage it.
Place it instead on the supplied rest-plate, which is fitted with non-slip pads and is designed to
withstand high temperatures.
a) Removable water tank
Empty and rinse the removable water tank (18)
b) Iron soleplate
(18)
We recommend that you clean the soleplate using the Rowenta soleplate cleaning stick available
from Rowenta Approved Service Centres (see After Sales Service chart for addresses).
The iron's high quality soleplate protects your laundry and makes ironing smoother.
When you are not ironing, you should always place the iron on its rest-plate; never stand the iron
on its heel.
Do not place the iron on rough surfaces. Do not scratch or scrape the soleplate. Never clean it
with corrosive or abrasive agents.
Never iron over zips or rivets eg on jeans.
c) Ironing board and iron
Clean the plastic parts of the iron and the ironing board legs occasionally by wiping with a damp
cloth.
d) Ironing board cover
•
We recommend ironing the ironing board cover with a very hot iron before
you use it for the first time.
•
Washing instructions: machine-washable at 40°C.
•
Removing the cover:
1. Loosen the drawstring by pulling the fastener downward (19).
2. You can now remove the cover.
•
Replacing the cover:
1. Check that the drawstring is loose by pulling the fastener downward.
2. Spread out the cover, wrapping it all round the board.
3. Tighten the drawstring by moving the fastener upwards.
•
Replacement ironing board covers are available. Product reference: ZD 7200.
(19)
11 • RINSING OUT THE BOILER
Important :
•
•
To extend the life of your boiler and to avoid any build-up of scale, it is essential to rinse
out the boiler after every 10 uses. If your water is hard, you should rinse the boiler more
frequently.
Never use descaling agents when rinsing out the boiler, as they could damage it.
a) Rinsing the boiler using the rinsing accessory
For easier and more effective boiler rinsing, we recommend using the rinsing accessory supplied
with your ironing station (20).
It will make rinsing the boiler easier as the steam generator will require less handling.
Your rinsing accessory has been designed to fit a wide range of taps. It is supplied with two types
of membrane (21) (a) (b). Choose the one best suited to your tap.
(a)
(20)
(21)
(b)
Before rinsing your steam generator, you MUST let your ironing station cool for 2 hours, to
prevent any risk of burns.
Recommendation:
To avoid the need to wait, we recommend rinsing the boiler before you start your ironing
session.
ENG
1.
2.
3.
4.
5.
6.
7.
8.
9.
10.
Completely unscrew the clamping knobs located on each side of the steam generator unit
(22).
Handle the steam generator unit with care. Slide it gently backwards (23 - 1 ). There are stops
to prevent the steam generator from sliding too far. When it reaches the stops, lift the steam
generator slightly, holding it firmly with both hands until it has been completely removed
(23 - 2 ).
Place your steam generator on the edge of your sink.
Use a coin to unscrew the boiler drain plug (24).
Insert the plastic nozzle of the rinsing pipe into the hole in the boiler, and gently twist clockwise until it locks. The outlet of the nozzle should be positioned over the sink (25).
Connect the rubber end of the rinsing pipe to the cold tap (26).
Gradually turn on the tap to provide a moderate flow of cold water through the rinsing pipe
for approximately one minute (27).
Turn off the tap and remove the rinsing pipe.
Replace the boiler drain plug and tighten using a coin.
Replace the steam generator in its housing and tighten the two steam generator unit clamps.
2
1
(22)
(23)
(25)
(26)
(24)
(27)
If neither of the rubber membranes fits your tap, refer to the procedure described in paragraph b)
below:
b) Rinsing the boiler without using the rinsing accessory
Before rinsing your steam generator, you MUST let your ironing station cool for 2 hours,
to prevent any risk of burns.
Recommendation:
To avoid the need to wait, we recommend rinsing the boiler before you start your ironing
session.
1.
Completely unscrew the clamping knobs located on each side of the steam generator unit
(22).
2. Handle the steam generator unit with care. Slide it gently backwards (23 - 1 ). There are stops to
prevent the steam generator from sliding too far. When it reaches the stops, lift the steam generator slightly, holding it firmly with both hands until it has been completely removed (23 - 2 ).
3. Place your steam generator on the edge of your sink.
4. Use a coin to unscrew the boiler drain plug (24).
5. Hold the steam generator in a tilted position and use a
jug to pour 1/4 litre of water into the boiler. (28)
6. Gently shake the unit for a few seconds, then
completely empty it over a container or your sink. (29)
For best results, we recommend that this operation is
done twice.
(29)
7. Replace the boiler drain plug and tighten using a coin.
8. Replace the steam generator in its housing and tighten the two steam generator unit clamps.
(28)
12 • PUTTING YOUR IRONING CENTRE AWAY
1. Switch off your ironing centre by pressing the main On/Off (O/I) switch.
2. Take care to unplug the appliance from the mains socket.
3. You can now store your iron in its storage compartment, even if the
soleplate is still hot (30).
Never leave the iron in its storage compartment with the ironing centre
plugged in.
4. Close the storage compartment cover.
(30)
13 • FOLDING YOUR IRONING BOARD
Lift the board-adjuster lever (31) and simultaneously press the board down until it is folded
completely flat on the floor (32).
CLICK !!
CLIC
(31)
(32)
14 • TRANSPORT AND STORAGE
• Once folded, carry the ironing board by its legs, with
the control panel facing
downward (33).
The board's back feet are
fitted with wheels to allow
(33)
easy movement.
If you accidentally touch the board-opening lever, replace the board on the
floor and check that it is correctly latched.
• To store the ironing centre, lift the board into the vertical position, again
with the control panel facing downward (34).
• It is normal for the feet to open very slightly. This allows the rubber pads to
touch the floor, enabling your ironing station to stand upright unsupported.
(34)
27 cm
ENG
15 • SAFETY INSTRUCTIONS
• Your ironing centre is an electrical appliance: It should only be used for its intended purpose, and
under normal conditions. It is designed for domestic use only.
It is fitted with two safety systems: a safety valve that releases any excess steam in the event of a
malfunction and a thermal fuse to prevent overheating.
• Check that your mains supply is the same voltage as shown on the appliance's rating plate.
• This appliance complies with EU regulations 73/23/EEC and 89/336/EEC.
• Completely remove the power cord from its housing before plugging it into an earthed socket.
• Always plug your ironing centre into:
- An electrical installation with a voltage between 220 V and 240 V AC. Connecting to the wrong
voltage may cause irreparable damage and will invalidate your guarantee.
- An earthed power socket. If you are using an extension lead, ensure that it is correctly rated
(minimum 13A) with an earth, and is fully extended.
• Never use the steam generator separately from the board.
• Should the electric power cord or the iron's steam cord become damaged, it must be replaced by a
Rowenta Approved Service Centre to avoid the risk of injury.
Caution:
• Your iron's soleplate and the rest-plate can become very hot and cause burns. Take care not to touch
them while hot.
• Your appliance releases steam, which can cause burns.
• Handle your iron with care, particularly when using the vertical steam function.
• Never direct steam toward people or animals.
• Take care to ensure that you do not come into contact with electrical cords with the hot iron soleplate.
• Keep your ironing station out of the reach of children.
• Never leave the appliance unattended:
- while it is plugged into a power socket;
- until it has cooled down (approximately 1 hour after use).
• Never unplug the appliance by pulling on the power cord.
• Always unplug your appliance:
- Before rinsing out the boiler,
- Before cleaning it,
- After each use.
• Never leave the iron in its storage compartment with the ironing centre's power cord plugged in and
the main switch is lit.
• Before unscrewing the boiler drain plug, always wait until the steam generator is cold (unplugged for
at least 2 hours).
• Never fill the boiler through the drain hole, except when rinsing it.
• Never immerse your steam generator in water or any other liquid. Never hold it under a running tap.
• If the appliance falls, receives a violent blow or is not operating correctly, do not dismantle it; have it
examined at a Rowenta Approved Service Centre in order to prevent any danger.
• If you lose or damage the boiler drain plug, have it replaced at a Rowenta Approved Service Centre.
• Always place the iron with the soleplate down on the iron rest-plate, never resting on its heel.
16 • GUARANTEE
• Rowenta offers a contractual warranty covering the appliance from the date of purchase for a period
which may differ according to statutory requirements in each country. Please refer to the literature
enclosed with your appliance.
• The ironing board cover is not protected under this guarantee.
• The product has been designed for domestic use only. Any commercial use, inappropriate use or
failure to comply with the instructions, the manufacturer accepts no responsibility and the guarantee
will not apply.
17 • TROUBLESHOOTING PROBLEMS WITH YOUR IRONING CENTRE
PROBLEM
POSSIBLE CAUSES
SOLUTIONS
. The iron temperature
control light and the main
On/Off (O/I) switch are not
lit.
. The appliance is not switched on.
. Check that the appliance is correctly
plugged in and press the main On/Off
(O/I) switch on the control panel.
. To switch the iron on again, it is
imperative that the iron is removed
from its storage compartment first.
. Water runs through the
holes in the soleplate.
. You are using the steam control
button before the iron is hot enough.
. Your ironing centre is equipped with
a safety device which cuts the power
when the iron is stored in its
compartment.
. Water has condensed in the pipes
because you are using steam for the
first time or because you have not
used any for some time.
. Decrease the steam output when ironing at low temperature (steam output control dial on the control panel).
. Wait for the iron temperature control
light to go out before pressing the
steam control button.
. Hold the iron away from the ironing
board and press the steam control
button until the iron begins to
produce steam.
. White steaks come
through the holes
in the soleplate.
. Your boiler has a build-up of scale
because it is not rinsed out regularly.
. Brown streaks come
through the holes in the
soleplate and stain the
linen.
. You are using chemical descaling
agents or additives in the water for
ironing.
. The soleplate is dirty or
brown, and may stain the
linen.
. You are ironing at too high a
temperature.
. You are using starch.
. Refer to our temperature setting
recommendations.
. Always spray starch onto the reverse
side of the fabric to be ironed.
. There is little or no steam.
. The boiler is not working, or the red
light comes on even though there is
still water left.
. Check that the removable water tank
is securely in place and press the
RESTART button on the control panel
to resume boiler heating.
. Fill the removable water tank and
press the RESTART button on the
control panel to resume boiler
heating.
. Increase the steam output (using the
control dial on the control panel).
. Never add such products in the
removable water tank or in the boiler
(see our recommendations regarding
the water to be used).
. Your linen has not been rinsed suffi. Ensure linen is rinsed thoroughly to
ciently or you have ironed a new garremove any soap deposits or chemiment before washing it.
cals on new garments which may be
sucked up by the iron.
. The removable water tank is empty
(the red "water tank empty" light is
on).
. The steam output control dial is set
at a minimum.
. Water escapes from around
the removable water tank's
cap when the ironing is
stored upright.
. Rinse out the boiler after every 10
uses. (See chapter 11).
If your water is hard, rinse the boiler
more frequently.
. The removable water tank’s cap has
not been tightened correctly.
. Tighten the water tank's cap.
. Water runs from the under- . You did not run the suction function
side of the ironing board.
enough before putting your ironing
station away.
. Before putting your ironing station
away, leave the main switch on for
4 to 5 minutes, then run the suction
fan for a few minutes to remove any
condensed steam.
. Steam escapes from below . The appliance is faulty.
the steam generator unit.
. Stop using your ironing station and
contact an Approved Service Centre.
. Your ironing board is still
not hot 10 minutes after
being switched on.
. The appliance is faulty.
. Contact an Approved Service Centre
. The fan unit does not make . The appliance is faulty.
any noise.
. Contact an Approved Service Centre
If you have any further problems or queries, please contact our Customer Relations Team first for expert help and
advice. Our " PREMIER SERVICE " is available to you by calling the exclusive number below :
HELPLINE : 0800 083 1190 – UK
(01) 6774176 – Ireland
Or, consult our web site : www.rowenta.co.uk