1
USER‘S
GUIDE
RP-7983/RP-7984
PORTABLE STEREO SYSTEM
Important Information Required by Federal Communications
Commission Concerning Radio Frequency Interference
This device generates and uses radio frequency (RF) energy, and if not installed and used properly, this
equipment may cause interference to radio and television reception.
This equipment has been type tested and found to comply with the limits for a Class B Computing Device
in accordance with the specifications in Subpart J of Part 15 of FCC Rules. These rules are designed to
provide reasonable protection against radio and television interference in a residential installation.
However, there is no guarantee that interference will not occur in a particular installation.
If this equipment does cause interference to radio or television reception (which you can determine by
turning the equipment off and on), try to correct the interference by one or more of the following
measures:
• Reorient the receiving antenna (that is, the antenna for the radio or television that is “receiving” the
interference).
• Move the unit away from the equipment that is receiving interference.
• Plug the unit into a different wall outlet so that the unit and the equipment receiving interference are
on different branch circuits.
If these measures do not eliminate the interference, please consult your dealer or an experienced radio/
television technician for additional suggestions. Also, the Federal Communications Commission has
prepared a helpful booklet, “How To Identify and Resolve Radio TV Interference Problems.” This booklet is
available from the U.S. Government Printing Office, Washington, DC 20402. Please specify stock number
004-000-00345-4 when ordering copies
Precautions
• Never open the cabinet under any circumstances. Never operate this product with
the cabinet removed. Any repairs or internal adjustments should be made only by a
trained service technician.
Important Battery Information
• If you’re not going to use your player for a month or more, be sure to remove batteries because they can
leak and damage the unit.
• Dispose of batteries in the proper manner, according to federal, state, and local regulations.
• Any battery may leak electrolyte if mixed with a different battery type, if inserted incorrectly, if all
batteries are not replaced at the same time, if disposed of in fire, or if an attempt is made to charge a
battery not intended to be recharged.
• Discard leaky batteries immediately. Leaking batteries can cause skin burns or other personal injury.
Service Information
This product should be serviced only by those specially trained in appropriate servicing techniques.
• Do not touch the player with wet hands. If any liquid enters the player cabinet, take the player to a
trained service technician for inspection.
• This Compact Disc Player uses a laser to read the music on the disc. The laser mechanism corresponds
to the cartridge and stylus of a traditional record player. Although this product incorporates a laser pick-up
lens, it is completely safe when operated according to directions.
For Your Safety
The AC power plug is polarized (one blade is wider than the other) and only fits into AC power outlets one
way. If the plug won’t go into the outlet completely, turn the plug over and try to insert it the other way.
If it still won’t fit, contact a qualified electrician to change the outlet, or use a different one. Do not
attempt to bypass this safety feature.
For Your Records
In the event that service should be required, you may need both the Model number and the serial number.
In the space below, record the date and place of purchase, and the serial number:
Model No. RP-7983B/RP-7984A
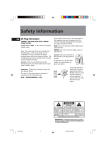
CAUTION
RISK OF ELECTRIC SHOCK
DO NOT OPEN
Date of Purchase ________________
Place of Purchase _______________
Serial No. _______________________
WARNING: TO PREVENT FIRE
OR ELECTRICAL SHOCK HAZARD,
DO NOT EXPOSE THIS PRODUCT
TO RAIN OR MOISTURE.
THE LIGHTNING
FLASH AND ARROWHEAD WITHIN THE
TRIANGLE IS A
WA R N I N G S I G N
ALERTING YOU OF
"DANGEROUS
VOLTAGE" INSIDE
THE PRODUCT.
CAUTION: TO REDUCE THE
RISK OF ELECTRIC SHOCK,
DO NOT REMOVE COVER
(OR BACK). NO USERS E RV I C E A B L E PA R T S I N SIDE. REFER SERVICING
TO QUALIFIED SERVICE
PERSONNEL.
THE EXCLAMATION
POINT WITHIN THE
TRIANGLE IS A
WARNING
SIGN
ALERTING YOU OF
I M P O R T A N T
INSTRUCTIONS
A C C O M PA N Y I N G
T H E P R O D U C T.
SEE MARKING ON BOTTOM / BACK OF PRODUCT
Where to Start
Owning an RCA portable stereo system is like having a
component stereo that you can take with you just about
anywhere, giving you flexibility and convenience (not to
mention great sound).
Looking for a Good Read?
You won’t find this instruction book on the best seller list, but
it does contain a lot of information that you should know
before using your portable stereo.
I know that you want to use your stereo, not read about it, but
you really should read the section, “First Things First,” to make
sure you get it hooked up correctly; then, as you have time, you
can read about all of the great features of this stereo.
If you have any questions, be sure to check the Troubleshooting
Tips section, the Index, or the Table of Contents to help you find
the answer.
Table of Contents
First Things First ...................................................2
Powering Up ........................................................................... 2
Speaker Hookup .................................................................... 2
headphones ........................................................................... 3
antennas ................................................................................. 3
General Controls ............................................................... 3
the display .............................................................................. 4
Using the Radio...................................................... 5
Using the CD Player .............................................. 6
Loading and Playing Discs .............................................7
Shuffling Play Order .........................................................7
Repeating Play Order .........................................................7
Programming Play Order .............................................. 8
Using the Cassette Deck ......................................9
Playing Cassette Tapes ...................................................... 9
Recording on Cassette Tapes ...................................... 10
The Remote control (RP-7984 Only) ............. 11
Care and Maintenance .................................... 13
Troubleshooting Tips ....................................... 14
Index ......................................................................... 15
WARRANTY ............................................................... 16
Two Products
One User’s Guide
RP-7983 – no remote
RP-7984 – with remote
This instruction book covers
two different models. Please
note the model number of your
unit; the RP-7984 has a remote
control and the RP-7983
doesn’t have one. If you have a
remote control, please read the
Remote Control section on
page 11.
First Things First
RECORD
PLAY
Before you start, you to need to know a couple of things.
REWIND
F FORWARD
STOP/EJECT
PAUSE
MULTI FUNCTION DISPLAY
STEREO REPEAT 1 ALL PROGRAM SHUFFLE PLAY PAUSE
FM
kHz
CD
TAPE
AM
MHz
TRACK
MUTE
PRESET
VOLUME
MW
SEEK
SCAN
RADIO
ROCK JAZZ VOCAL FLAT
VOLUME
TUNING
PHONES
BAND
Powering Up
CD
SEEK/SCAN FM MONO
RADIO
TUNER PRESETS
1
3
2
Digital EQ
TAPE
5
4
M
PLAY/PAUSE
SHUFFLE
REPEAT
TRACK/
SEARCH
PROGRAM
STOP
OPEN
This portable stereo operates on battery or AC power.
Battery Power
Insert 8 D-sized alkaline batteries into the battery
compartment as shown the back of the main unit,
and you can take your stereo just about anywhere.
AC Power
Plug the power supply cord into the AC power jack on the
back of the unit and into an AC power outlet that accepts the
polarized plug (one blade wider than the other).
VOL
MUTE
VOL
POWER
FUNCTION
DIG EQ
PRESET
CUST EQ
BAND
SEEK•SCAN
TRACK•TUNE
SHUFFLE
REPEAT
PLAY•PAUSE
STOP
AC power supply cord
Remote Control
RP-7984 ONLY
Speaker Hookup
RIGHT SPEAKER
+
LEFT SPEAKER
–
–
+
To speaker terminals on main cabinet back:
1. Press down on the tab␣ to open the red terminal and insert
the red wire (+) into the terminal.
2. Press down on the tab␣ to open the black terminal and
insert the black wire (–) into the terminal.
3. Ensure left speaker wires are connected to left speaker
terminal and right speaker wires are connected to right
speaker terminal.
Black
wires
Detaching the Speakers from main unit
1. Disconnect the speaker wires from the main cabinet
terminals.
2. Press on the tab securing the speaker to the base unit and
then slide the speaker up until it comes off of the unit.
3. Reattach the speaker wires to main cabinet speaker
terminal as described in “Speaker Hookup.”
Attaching Speakers to the main cabinet
1. Slide the speaker down the side rail on cabinet side.
2. Speaker release tab locks in place.
2
WARNING:
Be sure to follow the speaker hookup
instructions carefully; the system can
be damaged if speakers are
improperly connected.
Headphones
To listen to your stereo with headphones (not included), use
the 3.5 mm PHONES jack on the front of the unit. Make sure
that you turn down the volume before you put on the
headphones; then increase the volume to the desired level
after they are in place.
Antennas
Since the AM antenna is built in; adjusting the position of the
unit may help AM reception.
The FM whip antenna on the back of the unit can be
extended and rotated for better FM reception.
General Controls
You’ve chosen a power source and hooked up the speakers.
Now you need to know about the buttons and controls that
are common to all components of the stereo: the radio, tape
deck and CD player.
Power light
Function
Control
Volume
control
Power
button
Digital EQ
Display
MULTI FUNCTION DISPLAY
Power Button
STEREO REPEAT 1 ALL PROGRAM SHUFFLE PLAY PAUSE
CD
FM
kHz
TAPE
AM
MHz
TRACK
MUTE
Press the POWER button to turn on the unit (the POWER light
on the front of the unit comes on). The display activates and
the system begins operating from the last sound source
used—the radio, the tape deck, or the CD player.
PRESET
VOLUME
MW
SEEK
SCAN
RADIO
ROCK JAZZ VOCAL FLAT
VOLUME
TUNING
PHONES
BAND
DISC
SEEK/SCAN FM MONO
RADIO
TUNER PRESETS
1
3
2
Digital EQ
TAPE
5
4
M
PLAY/PAUSE
Function Control
SHUFFLE
REPEAT
TRACK/
SEARCH
PROGRAM
STOP
OPEN
Press the Function Control to choose the function you want
to use: RADIO, DISC, or TAPE. Your selection is reflected in
the display.
Volume
Press VOLUME + (up) or – (down) to increase or decrease the
volume level.
preset Digital EQ
The Digital EQ button controls the preset equalizer settings.
The display always shows the current preset EQ setting.
Keep pressing and releasing the Digital EQ button until the
preset setting you want (ROCK, JAZZ, VOCAL, or FLAT)
appears in the display.
3
The Liquid crystal Display
MULTI FUNCTION DISPLAY
STEREO REPEAT 1 ALL PROGRAM SHUFFLE PLAY PAUSE
CD
FM
kHz
AM
MHz
TAPE
TRACK
MUTE
PRESET
VOLUME
MW
SEEK
SCAN
RADIO
ROCK JAZZ VOCAL FLAT
VOLUME
TUNING
PHONES
BAND
DISC
SEEK/SCAN FM MONO
RADIO
TUNER PRESETS
1
3
2
Don’t Worry...It Won’t Bite
Digital EQ
TAPE
5
4
So you think the display looks
intimidating. Don’t worry, you
won’t see all of this stuff at the
same time—you’ll only see what
you need to see.
M
PLAY/PAUSE
SHUFFLE
REPEAT
TRACK/
SEARCH
PROGRAM
STOP
OPEN
Note: the display is back lit for model
RP-7984 only.
Function
indicator
RADIO
CD
TAPE
TRACK
Mute
indicator
MUTE
CD Mode indicators
REPEAT 1 ALL PROGRAM SHUFFLE PLAY PAUSE
FM
kHz
AM
MHz
STEREO
PRESET
VOLUME
Radio Band
indicator
SEEK
SCAN
FLAT ROCK VOCAL JAZZ
SEEK/SCAN
indicator
Number indicator for:
• Preset radio stations
• Track
• Volume level
• Custom EQ level (RP-7984). See page 12.
FM Stereo indicator
Digital EQ indicator
Tuner indicator:
• Radio station
• CD playing time
• Display Messages
• Custom EQ band (RP-7984). See page 12.
The following list of display information is presented in alphabetical order and corresponds to the items
in the preceding graphic.
CD Mode Indicators: Show the current CD function mode.
Digital EQ Indicator: Shows which preset option you have chosen
(ROCK, JAZZ, VOCAL, or FLAT).
FM Stereo Indicator: Displayed when you are receiving stations in FM Stereo mode. (The station must be
broadcasting in stereo as well.)
Function Indicator: Shows the current function (RADIO, DISC, or TAPE).
Mute: Displayed when you press MUTE on remote control (RP-7984 only) or when you set volume control
on the unit to 00 position.
Number Indicator: Depending on the current mode, shows the preset number for radio stations, the
track number of a CD, or displays the volume setting when adjusting the volume or custom EQ levels (RP7984 only).
Radio Band Indicator: Shows the current radio band.
SEEK/SCAN Indicator: SEEK or SCAN is displayed depending on which method of radio tuning you are
using.
Tuner Indicator: Shows information such as radio station frequency, CD playing time, and display
messages.
4
Using the Radio
Not only does the digital tuner help you tune in radio
stations more easily, it also lets you preset as many as
five AM and five FM radio stations for easy access.
MULTI FUNCTION DISPLAY
RADIO
FM
MHz
STEREO
Tuning In Radio Stations
PRESET
After you choose the radio feature by pressing RADIO on the
Function Control, you can do the following:
•
Press the BAND button to change the radio band to AM
or FM.
•
Press the TUNING buttons to change the radio station.
•
To turn on the Seek feature, which locates the next
station, press and quickly release the SEEK/SCAN button.
•
•
To turn on the Scan feature which searches for stations,
press and momentarily hold the SEEK/SCAN button
before releasing it. When a station is found, the Scan
feature allows you to listen for a few seconds and then
moves to the next station. When you find a station you
like, press the SEEK/SCAN button again to choose that
station.
Press the FM/MONO button to listen to FM stations in
either mono or stereo (STEREO appears in the display
when listening to FM stereo).
Note that AM stations are broadcast in mono only and
that the FM radio station must be transmitting in stereo
for you to receive it in stereo.
Digital EQ
TUNING
BAND
DISC
SEEK/SCAN FM MONO
RADIO
TUNER PRESETS
1
3
2
TAPE
5
4
M
Playing Hide and Seek
Sometimes the Seek and Scan features
might not locate an available station
because the signal is not strong
enough. If you know the frequency of
the station you’re looking for, you
might want to use the TUNING
buttons instead.
Storing Radio Stations in
Memory
Preset up to five AM and five FM stations for easy access.
1. Choose the radio band and station.
2. Press M (the Memory Preset button). The PRESET
indicator and the station frequency blink in the display.
3. Press one of the five TUNER PRESETS buttons to store the
radio station frequency in that preset location.
Recalling Preset Stations
Weak Reception?
If the reception of an FM station
transmitting in stereo is weak, the
STEREO indicator might fade in and
out. Adjusting the FM whip antenna
can help. If not, changing from FM
Stereo to FM Mono might improve
reception (just remember that you’ll
no longer be listening in stereo).
1. Choose the radio band (AM or FM).
2. Press the appropriate TUNER PRESETS button (the
PRESET number appears in the display).
5
Using the CD Player
Combined with features such as Shuffle, Repeat, and
Programmed play, you have lots of options for playing CDs.
Look for this Logo
Knowing Your Buttons
You can play 3" and 5"
compact discs that have
this logo.
The following buttons are used for basic CD operation:
PLAY/PAUSE
— This button works as a toggle switch:
press to begin play, press again to pause play.
TRACK/SEARCH
•
•
and
DISC
In Stop mode— Press to move to the beginning of the
preceding or following track.
RADIO
In Play or Pause mode — Press and release to move to
the beginning of the preceding or following track. Press
and hold to search within a track.
STOP
PLAY/PAUSE
SHUFFLE
REPEAT
— Press to stop play.
When the power is on, the display tells you what’s going on
with your system. (See “Display” section, page 4)
CD Display Messages
The following messages appear in the display to tell you what the CD
player is doing:
Meaning
DISC (CD) function is active. (Note:
is an icon)
CD drawer is in (closed).
CD drawer is out (open).
No disc is in the tray or the disc is damaged or
unreadable.
REPEAT 1 ALL
SHUFFLE PLAY
No tracks are programmed (applies to Program
mode).
Program is full (applies to Program mode). This is
displayed for three seconds when the last track is
programmed.
Program has been cleared (erased) from memory
(applies to Program mode).
Reading CD’s table of contents (how many tracks
it has and the total time for the disc). This
information is displayed in Stop mode.
6
TRACK/
SEARCH
PROGRAM
OPEN
The Display
Message
TAPE
STOP
Loading and Playing CDs
1. Select the CD function by pressing DISC on the Function
Control.
2. Press the OPEN
button to open the CD drawer.
Play mode indicator
REPEAT 1 ALL
TRACK
3. Place a CD into the tray with the label facing up.
4. Press the OPEN
5. Press PLAY/PAUSE
6. Press STOP
VOCAL
button again to close the CD drawer.
to begin play.
to stop disc play.
The current track number and the elapsed time of the track
appear in the display while the track is playing.
Shuffle mode indicator
Shuffling Play Order
Turning on the Shuffle feature causes the tracks to play in a
random order.
•
Press the SHUFFLE button to start random track play.
(The Shuffle mode indicator appears in the display while
the feature is active.)
•
Press the SHUFFLE button a second time to turn off the
feature.
SHUFFLE PLAY
CD
TRACK
VOCAL
You Can’t Shuffle a Program
The Shuffle feature is not available
during Program mode. If you press
SHUFFLE while in Program mode, the
CD player will exit the program and
start “shuffling” (playing tracks in
random order).
Repeating Play Order
Use the REPEAT button to repeat one track or an entire CD.
•
Press the REPEAT button once to repeat the current track
(REPEAT 1 appears in the display).
•
Press REPEAT a second time to repeat all tracks (REPEAT
ALL appears in the display).
•
Press REPEAT a third time to turn off the feature.
In Shuffle mode:
•
SHUFFLE PLAY PAUSE
CD
Press the REPEAT button once to repeat the current track
(REPEAT 1 appears in the display).
•
Press REPEAT a second time to repeat all tracks in a
different shuffle order (REPEAT ALL appears in the
display).
•
Press REPEAT a third time to turn off the feature.
REPEAT 1 ALL
CD
TRACK
VOCAL
REPEAT 1 ALL
CD
TRACK
VOCAL
In Program mode:
•
Press the REPEAT button once to repeat the current track
(REPEAT 1 appears in the display).
•
Press REPEAT a second time to repeat the program
(REPEAT ALL appears in the display).
•
Press REPEAT a third time to turn off the feature.
7
Program mode indicator
Programming Play Order
1. Press the PROGRAM button to enter Program mode.
•
- - Pr:01 appears in the display indicating that this is
the first programmed track.
2. Press TRACK/SEARCH
or
to choose a track.
(PROGRAM begins flashing in the display.)
3. Press PROGRAM to save the track in the program
memory. (PROGRAM stops flashing in the display.)
REPEAT 1 ALL PROGRAM SHUFFLE PLAY
CD
TRACK
Track number
Program number
4. Repeat steps 2-4 above to program up to 20 tracks.
•
Pr FuLL appears in the display for three seconds
when the program is full; then the first program
is displayed.
5. Press PLAY/PAUSE
to begin programmed play.
6. To stop playing the current programmed track, press
STOP
once.
7. To delete a program, press and hold the PROGRAM
button until Pr CLr appears in the display. This deletes
the program, but does not exit you from program mode.
8. To exit program mode, press STOP
What’s Program Mode?
Pressing the PROGRAM button
puts you into Program mode
(PROGRAM appears at the top of
the display). In this mode, you can
program tracks, edit the program,
or you can play tracks you’ve
already programmed.
twice.
Editing the Program
To edit a program, the unit must be stopped and in
Program mode.
1. Press PROGRAM to move to the next program number
until you get to the programmed track you want to
change (Track 7, Program 01 in the example to the right).
2. Press TRACK/SEARCH
or
to choose a track
(Track 10 in the example to the right)
3. Press PROGRAM to change the current programmed
track to the one you just selected. (Track 7 is changed to
track 10 in the example to the right.)
REPEAT 1 ALL PROGRAM SHUFFLE PLAY
CD
TRACK
Track 7 is the first programmed track
REPEAT 1 ALL PROGRAM SHUFFLE PLAY
CD
TRACK
Track 10 replaces Track 7 as the first programmed
track.
Clearing the Program
To clear the program from memory, press and hold the
PROGRAM button. Pr CLr appears in the display.
REPEAT 1 ALL PROGRAM SHUFFLE PLAY PAUSE
CD
TRACK
Note: The program will also be cleared from memory if
you turn off the unit or press OPEN
to open the CD
drawer.
8
You can clear a program from memory by
pressing and holding the PROGRAM button
until Pr CLr appears in the display.
Using the Cassette tape player
RECORD
PLAY
REWIND
F FORWARD
STOP/EJECT
PAUSE
Understanding the Buttons
If you know what each button does, it’s easy to figure out how to operate the tape deck.
RECORD — Press to record from the radio or the CD player.
PLAY — Press to play a cassette.
REWIND — From stop mode, press to rewind the tape toward the beginning.
F. FORWARD — From stop mode, press to advance the tape toward the end.
STOP/EJECT — Press to stop current tape activity, or to open the cassette compartment door when no
buttons are active.
PAUSE — Press to interrupt tape play or record mode. Press a second time to resume tape play or tape
record mode.
Playing Cassette Tapes
1. Press TAPE on the Function Control.
2. Press STOP/EJECT to open the cassette compartment door.
3. Insert a cassette tape into the door with the top of the tape going in first.
4. Close the door securely.
5. Press REWIND or F. FORWARD to move tape to the desired starting point.
6. Press PLAY to begin playing the tape.
9
Recording on Cassette Tapes
Pause for a Moment
You can record programs from the radio or the CD player.
Just set up the system to use whichever option you choose,
and then record it. For best results, use normal bias cassette
tapes.
Using the PAUSE button on the
cassette deck instead of the STOP
button to momentarily interrupt
recording gives you a much cleaner
sounding recording when you play it
back later.
Recording from the Radio
1. Insert a cassette tape into the tape deck.
2. Choose the RADIO function and select a radio station.
3. Press the RECORD button to begin recording.
4. Press STOP/EJECT to end recording.
Recording from the Cd player
Quit Slacking
1. Insert a cassette tape into the tape deck.
A little bit of slack in your tapes
can cause scratches on the tape, or
worse yet, the tape could break. If
you notice some slack in the tape,
use a pencil to
tighten it up
before you
insert it.
2. Choose the DISC function.
3. Insert the CD you want to record. You can start with any
track on a disc (or you can create a program
to record).
4. Press PLAY/PAUSE
and pause disc play).
on the CD player twice (to begin
A
5. Press the RECORD button on the cassette deck to begin
recording.
6. Press PLAY/PAUSE
on the CD player.
A
A
60
A
When you record new material, the cassette deck records
over whatever is on a tape. To protect a tape from accidental
erasure, break off one or both plastic tabs (one for each
tape side) on the top of the cassette tape. If you decide later
to record on the tape, seal the hole with a piece of
cellophane tape.
A
Erase Protection
We’re on the Level
The built-in Automatic Level Control
automatically sets the input level for
optimum recording sound. You can
listen to, and even adjust the volume
setting without affecting the quality
of the recording.
10
Using the REMOTE CONTROL
(Model RP-7984 ONLY)
Installing Batteries
1. Slide the battery cover in the direction of the arrow and lift.
2. Install 2 “AAA” batteries (not included). Face batteries in
the direction indicated on the back.
3. Slide the cover firmly back into place.
2X AAA
MADE
1.5V
O
IN CHINA
P
E
N
2X AA
1.5V
MADE
The buttons
IN CHINA
Your remote control operates many of your portable stereo’s
features. All of the buttons on the remote (except the volume
and stop buttons) are used to “toggle” through a list of
selections. For example, the POWER button toggles between on
and off. Press POWER once and the unit turns on, press it again
and the unit turns off. If you’re confused, check the display to
see what “toggle” you’re in!
POWER: Turns unit on and off.
VOL
MUTE
VOL (Volume up and down buttons): Control sound level.
VOL
MUTE: Suspends the output of sound (press MUTE again to
restore sound).
FUNCTION: Selects RADIO, DISC, or TAPE.
POWER
DIG EQ: (Digital Equalizer): Selects preset equalizer settings
(JAZZ, ROCK, VOCAL, or FLAT).
CUST EQ (Customized Equalizer): Press to create and use a
personalized equalizer setting. See “Custom EQ Setting” on the
next page to learn how to use this feature.
FUNCTION
DIG EQ
BAND (RADIO function): Selects AM and FM.
PRESET
CUST EQ
PRESET (RADIO function): Selects preset radio stations (five
stations for AM and five stations for FM).
BAND
SEEK•SCAN
SEEK•SCAN (RADIO function): Press and release to activate the
Seek feature. Press and momentarily hold to activate the Scan
feature which searches for stations continually. When using
Scan feature, press the button again to choose that station.
TRACK•TUNE
SHUFFLE
REPEAT
PLAY•PAUSE
STOP
TRACK•TUNE forward and reverse buttons (RADIO and DISC
function): Serve as Track/Search (forward and reverse) controls in CD
mode. Serve as Tuning up and down controls in RADIO mode.
SHUFFLE (DISC function): Activates Shuffle mode.
REPEAT (DISC function): Selects Repeat 1 when you press once or
Repeat All when you press it twice (press a third time to turn off
Repeat feature).
PLAY•PAUSE: Plays CD and pauses play of the CD.
STOP (DISC function): Stops play.
11
CUSTOM EQ Setting (RP-7984 ONLY)
The Custom EQ feature enables the listener to keep a personalized electronic equalizer setting in memory.
To create your Custom EQ setting you must use the remote control.
1. Press CUST EQ button on the remote. USEr appears in
the display. All preset EQ icons turn off.
CD
2. Press CUST EQ again. The first band 200 (bass) appears in
the display.
3. Press the VOL (volume) up and down buttons to adjust
the level.
4. Press CUST EQ when you’re satisfied with the setting for
first band and the second band 2.0 KHz (mid) appears in
the display.
CD
5. Press the VOL (volume) up and down buttons to adjust
the level.
6. Press CUST EQ when you’re satisfied with the setting for
second band and the third band 10.0 KHz (treble)
appears in the display.
kHz
CD
7. Press the VOL (volume) up and down buttons to adjust
the level.
8.
When you’re finished creating your customized setting,
your portable stereo will automatically save the setting
and the display will return to its previous state after
several seconds.
kHz
CD
To select your Custom EQ setting, you must use the remote
control.
1. Press CUST EQ on the remote. USEr appears in the display.
NOTE: Once you are in Custom Equalizer mode, pressing CUST EQ scrolls through the three equalizer bands (USEr
does not appear in display). You can adjust any one of them with the volume buttons. To use one of the preset
equalizer selections, press DIG EQ on the remote or the Digital EQ button on the unit.
HEADPHONE SAFETY
For your comfort, health and safety, be sure to observe the following guidelines when using headphones:
Hearing Comfort & Well Being
• Always turn volume down to the minimum setting before plugging in the headphones.
• Don’t listen at a high volume.
• Hearing experts advise against extended continuous listening through a headset.
• If you experience a ringing in your ears, reduce volume or discontinue use.
Safety
• Don’t use headphones while operating a motorized vehicle. This can create a traffic hazard and is illegal in
many areas.
• Do not use headphones in potentially hazardous situations.
• Even if your headset is an open-air type designed to let you hear outside sounds, don’t turn up the volume
so high that you can’t hear what’s around you.
12
Care and Maintenance
CLEANING THE EXTERIOR
•
Disconnect the system from AC power before cleaning the exterior of the unit with a soft dust cloth.
HANDLING COMPACT DISCS
•
•
Do not touch the signal surfaces. Hold by the edges, or by one edge and the hole.
Do not affix labels or adhesive tape to the label surfaces. Also, do not scratch or damage the label.
•
Discs rotate at high speeds inside the player. Do not use damaged (cracked or warped) discs.
CLEANING COMPACT DISCS
•
Dirty discs can cause poor sound quality. Always keep discs clean by wiping them gently with a soft
cloth from the inner edge toward the outer perimeter.
•
If a disc becomes dirty, wet a soft cloth in water, wring it out well, wipe the dirt away gently, and then
remove any water drops with a dry cloth.
•
Do not use record cleaning sprays or anti-static agents on discs. Also, never clean discs with benzene,
thinner, or other volatile solvents which may cause damage to the disc surface.
TAPE CARE
•
Don’t expose tapes to sunlight or store in hot places. High temperatures may warp the shell or
damage the tape itself.
•
•
Keep cassettes in their boxes when not in use.
Cassette tapes can be erased by magnetic fields produced by magnets, electric motors, electrical
transformers, and other devices. Keep tapes away from magnets and magnetic fields.
CLEANING THE TAPE HEADS
Iron oxide particles from the magnetic tape can build up on the parts that come in contact with the
tape. These deposits can cause incomplete erasure, muffled playback sound, and might prevent
automatic stop.
Always unplug the power cord before cleaning, and allow 30 minutes drying time when using a liquid
cleaner. Clean the heads after every 25 hours of use.
To clean the cassette tape player, open the compartment door,
push the PLAY button and gently clean the heads, capstan, and
pinch wheel with a head cleaner.
• Demagnetize the head occasionally with a head
demagnetizing
cassette (available from many audio equipment stores).
•
Clean these parts
Never use any metal objects on or near the tape heads. Do not
allow any cleaning material to fall into the tape assembly.
13
Troubleshooting Tips
14
Problem
Solution
System doesn’t turn on
• Make sure power cord is securely plugged into the AC power outlet (or
that the batteries are fresh).
• When operating on batteries, make sure the AC power cord is unplugged
from the AC power jack on the back of the main unit.
• Unplug the unit for a moment, and then plug it back in.
• Check the outlet by plugging in another device.
No sound
•
•
•
•
Poor radio reception
• Adjust the FM whip antenna for better FM reception .
• Rotate the unit to achieve better AM reception.
• Try turning off electrical appliances near the unit, such as hair dryers,
vacuum cleaners, or fluorescent lights.
CD doesn’t play
•
•
•
•
•
CD sound skips
• Clean the disc (as explained in “Care and Maintenance”).
• Check disc for warping, scratches, or other damage.
• Check for vibration or shock that may affect the unit; move system if
necessary.
Distorted or noisy recordings
• Inspect the recording head and clean it if necessary.
• Demagnetize recording head (as explained in “Care and Maintenance”).
Remote control won't work
• Be sure the unit is plugged into a working AC outlet.
• Press POWER button to assure that the system is on.
• Press the FUNCTION button on the remote until desired function is
selected: CD, TAPE, or RADIO.
• Replace batteries if they are weak. Assure that batteries are installed in
the directions indicated on the back of the remote.
• Point the remote control directly at the remote sensor while pressing
buttons.
• Move closer to system while using the remote control.
• Move any obstacles between the remote and the system.
Adjust volume setting.
Press MUTE on the remote (Model RP-7984 only).
Check for proper connection of speaker wires.
Make sure you’ve selected the correct function: CD, TAPE, or RADIO
Make sure the tray contains a disc.
Try another disc.
Make sure that disc’s label is facing up.
Make sure that Pause mode is not activated.
Make sure DISC function is selected.
Index
A
M-P
AC Power 2
Antenna 3
MEMORY button 5
POWER button 3
Numeric Indicator 4
PLAY/PAUSE
button 6
POWER button 3
PRESET buttons 5
PRESET indicator 5
PROGRAM button 8
Program edit 8
Programming play order 8
B
BAND button 5
Battery Power 2
C
Cassette deck 9
Cassette Deck Buttons
FAST FORWARD 9
PAUSE 9
PLAY 9
RECORD 9
REWIND 9
STOP/EJECT 9
R
Radio Band Indicator 4
Radio station presets 5
Recording on Cassette Tapes 10
Remote control 11
REPEAT button 7
Repeating Play Order 7
CD Buttons
PLAY/PAUSE
SHUFFLE 7
STOP
6
TRACK/SEARCH
6
and
Cleaning the Tape Heads 13
Compact discs 3" and 5" 6
Custom EQ Setting 12
D
Digital EQ button 3
Digital EQ Indicator 4
Display 4, 6
E
Editing a program 8
Erase Protection 10
F
FM Stereo Indicator 4
FM/MONO button 5
Function Control 3
Function Indicator 4
6
S
Seek/Scan feature 5, 11
SEEK/SCAN button 5, 11
SEEK/SCAN Indicator 4
SHUFFLE button 7
Shuffling Play Order 7
Speakers
connecting 2
detaching 2
STOP button 6
Storing Radio Stations in Memory 5
T
TRACK/SEARCH button 6
Troubleshooting Guide 14
TUNING buttons 5
Tuning In Radio Stations 5
changing radio bands 5
tuning in stations 5
H
Headphones 3
V
L
VOLUME control 3
Loading and playing CDs 7
15
LIMITED WARRANTY
What your warranty covers:
• Any defect in materials or workmanship.
For how long after your purchase:
• One year.
(The warranty for rental units begins with the first rental.)
What we will do:
• Provide you with a new, or at our option, a refurbished unit.
• The exchange unit is under warranty for the remainder of the original product’s warranty period.
How to make a warranty claim:
• Properly pack your unit. Include any cables, etc., which were originally provided with the product. We recommend
using the original carton and packing materials.
• Include in the package evidence of purchase date such as the bill of sale. Also print your name and address and a
description of the defect. Send standard UPS or its equivalent to:
Thomson Consumer Electronics, Inc.
Product Exchange Center
32 Spur Drive
El Paso, Texas 79906
• Pay any charges billed to you by the Exchange Center for service not covered by the warranty.
• A new or refurbished unit will be shipped to you prepaid freight.
What your warranty does not cover:
• Customer instruction. (Your Owner’s Manual provides information regarding operating instructions and user
controls. For additional information, ask your dealer.)
• Installation and set-up service adjustments.
• Batteries.
• Damage from misuse or neglect.
• Products which have been modified or incorporated into other products.
• Products purchased or serviced outside the USA.
• Acts of God, such as but not limited to lightning damage.
Product Registration:
• Please complete and mail the Product Registration Card packed with your unit. It will make it easier to contact you
should it ever be necessary. The return of the card is not required for warranty coverage.
How state law relates to this warranty:
• This warranty gives you specific legal rights, and you may have other rights which vary from state to state.
If you purchased your product outside the USA:
• This warranty does not apply. Contact your dealer for warranty information.
Model RP-7983B/RP-7984A
343A6965-0001 (E/S Rev. 0)
96-06
Printed in Malaysia
P.O. Box 1976, Indianapolis, IN 46206
© 1996 Thomson Consumer Electronics, Inc.
Trademark(s) ® Registered
Marca(s) ® Registrada(s)