Transcript
Portable STEREO
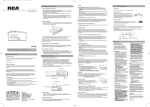
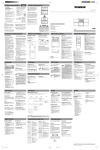
Before you begin
Using the CD Player
AC power jack
Care and Maintenance
FUNCTION Switch:
CD, TAPE, RADIO
BASS BOOST
BAND Switch
CONTINUOUS TAPE PLAY
Cleaning the Exterior
1. Slide the function switch to TAPE.
•
2. Insert a cassette into each tape deck.
TUNING
Wheel Knob
3. Press PLAY
on tape deck A.
4. Press PLAY
and then PAUSE
Handling CDs
on tape deck B.
When the tape on tape deck A finishes, the tape in tape deck B starts automatically.
VOLUME
FM 88
COMPACT DISC
AM 530
92
600
AM
2
1
MONO STEREO
NORMAL HIGH
100
1000
104
1400
Do not touch the signal surfaces. Hold by the edges, or by one edge and the hole.
•
Do not affix labels or adhesive tape to the label surfaces. Also, do not scratch or damage the
label.
•
CDs rotate at high speeds inside the player. Do not use damaged (cracked or warped) CDs.
1700
Quit Slacking
MAX
MIN
•
108
FM
TAPE RADIO CD
FUNCTION
96
800
Disconnect the system from AC power before cleaning the exterior of the unit with a soft dust
cloth.
OPEN
A little bit of slack in your tapes can cause scratches
on the tape, or worse yet, the tape could break. If you
notice some slack in the tape, use a pencil to tighten it
up before you insert it.
CD drawer OPEN
Loading A CD
PAUSE
I2
REPEAT
ONE
REPEAT
ALL
1. Move the FUNCTION switch to CD.
REPEAT
With the auto stop feature, the cassette tape automatically stops when it reaches the
end; so don't worry if you fall asleep.
2. Press OPEN to open the CD door.
3. Place a CD into the tray with the label facing up. You can
play 3" or 5" compact discs
Display
4. Close the CD door by gently pushing down on it until secure.
(The display shows the number of tracks on the CD.)
Recording on Cassette Tapes
to begin play
Erase Protection
to temporarily stop the CD.
Note: Press PLAY/PAUSE
again to resume
PAUSE indicator lights. Press PLAY/PAUSE
playing the CD. PAUSE indicator turns off.
When you record new material, the cassette deck records
over whatever is on a tape. To protect a tape from
accidental erasure, break off one or both plastic tabs
(one for each tape side) on the top of the cassette tape.
If you decide later to record on the tape, seal the hole
with a piece of cellophane tape.
2. Adjust VOLUME to a comfortable level.
FCC INFORMATION
This device complies with Part 15 of the FCC Rules. Operation is subject to the following two conditions: (1)
This device may not cause harmful interference, and (2) this device must accept any interference received,
including interference that may cause undesired operation.
In accordance with FCC requirements, changes or modifications not expressly approved by Thomson
Consumer Electronics could void the user’s authority to operate this product.
This device generates and uses radio frequency (RF) energy, and if not installed and used properly, this
equipment may cause interference to radio and television reception.
If this equipment does cause interference to radio or television reception (which you can determine by
turning the equipment off and on), try to correct the interference by one or more of the following measures:
•
Reorient the receiving antenna (that is, the antenna for the radio or television that is “receiving” the
interference).
•
Move the unit away from the equipment that is receiving interference.
•
Plug the unit into a different wall outlet so that the unit and the equipment receiving interference are
on different branch circuits.
If these measures do not eliminate the interference, please consult your dealer or an experienced radio/
television technician for additional suggestions. Also, the Federal Communications Commission has prepared
a helpful booklet, “How To Identify and Resolve Radio TV Interference Problems.” This booklet is available
from the U.S. Government Printing Office, Washington, DC 20402. Please specify stock number 004-00000345-4 when ordering copies.
3. Press STOP to stop playing the CD before all tracks have
played. Wait a few seconds for the CD to stop turning, then
press OPEN to open the CD compartment door and remove
the CD.
Powering Up
AC Power
Plug the power supply cord into the AC power jack on the back of the unit,
and into an AC power outlet that accepts the polarized plug (one blade
wider than the other).
•
Press and release TRACK
•
Press and release TRACK
current track. Press TRACK
previous tracks.
Don’t expose tapes to sunlight or store in hot places. High temperatures may warp the shell or
damage the tape itself.
•
Keep cassettes in their boxes when not in use.
•
Cassette tapes can be erased by magnetic fields produced by magnets, electric motors, electrical
transformers, and other devices. Keep tapes away from magnets and magnetic fields.
Always unplug the power cord before cleaning, and allow 30 minutes drying time when using a
liquid cleaner.
to go to the next track.
to go to the beginning of the
again to skip backward to the
Recording from the Radio
•
Demagnetize the head occasionally with a head demagnetizing cassette (available from many
audio equipment stores).
1. Insert a cassette tape into the tape deck B and close door.
•
Never use any metal objects on or near the tape heads.
Do not allow any cleaning material to fall into the tape assembly.
2. Move the FUNCTION switch to RADIO and select a radio station.
REPEAT button
3. Press REC
to begin recording. RECORD and PLAY lock down.
4. Press STOP/EJECT
to end recording.
Troubleshooting Tips
Radio Recording Tips
Repeat Play order
Insert 8 D-sized alkaline batteries (not supplied) and you can take your
stereo just about anywhere. Open the battery compartment door on the
back of the unit by pressing down on the two tabs and pulling out the
cover. Insert batteries as shown on the back of the unit.
Batteries Don't last Forever
PAUSE
•
Press the REPEAT button once to repeat the current track
(REPEAT ONE indicator lights).
•
Press REPEAT a second time to repeat all tracks
(REPEAT ALL indicator lights).
•
Press REPEAT a third time to turn off the feature.
•
I
REPEAT
ONE
REPEAT
ALL
REPEAT
•
To reduce or eliminate a whistling sound that may be produced
when recording AM broadcasts, try the different AM BEAT
settings on the top of the unit (1 or 2).
CD Problems
To temporarily pause the recording, press PAUSE on the cassette
deck. Press PAUSE again to resume recording.
Problem
Solutions
System does not turn on
• Make sure AC power plug is secure in the outlet, and outlet
has power.
• If using batteries be sure the AC line cord is unplugged.
Recording from CDS
If you're not going to use the stereo for more than a month, be sure to take the
batteries out, or they might leak and cause you all kinds of problems.
This product complies with DHHS Rules 21 CFR Subchapter J. Applicable at the date of manufacture.
•
Clean heads after every 25 hours of use.
Note: For TRACK to operate, the unit must be in the CD play
mode.
Battery Power
Do not use record cleaning sprays or antistatic agents on CDs. Also, never clean CDs with
benzene, thinner, or other volatile solvents which may cause damage to the CD's surface.
Clean these parts
Searching Through a cd
This portable stereo operates on battery or AC power.
•
To clean a cassette tape, open the compartment door, push the PLAY button and gently clean the
heads, capstan, and pinch wheel with a head cleaner.
A
1. Press PLAY/PAUSE
If a CD becomes dirty, wet a soft cloth in water, wring it out well, wipe the dirt away gently,
and then remove any water drops with a dry cloth.
Iron oxide particles from the magnetic tape can build up on the parts that come in contact with the
tape. These deposits can cause incomplete erasure, muffled playback sound, and might prevent
automatic stop.
A
RP-7948
•
Cleaning the Tape Heads
You can record programs from the radio, CDs, or from
another cassette. All you do is to set up the system to
use whichever option you choose, and then record it.
Playing a CD
Dirty CDs can cause poor sound quality. Always keep CDs clean by wiping them gently with a
soft cloth from the inner edge toward the outer perimeter.
A
Battery compartment
•
Tape Care
Don't Worry if You Fall Asleep
60
Antenna
A
OR
Cleaning CDs
A
• Batteries may be dead. Install new batteries.
CD in place but unit won’t play
1. Insert a cassette tape into the tape deck B and close the door.
• Make sure CD label is facing up.
2. Move the FUNCTION switch to CD.
The FM whip antenna on the back of the unit can be extended and rotated for better FM
reception.
5. Press the REC
BAND Switch
VOLUME
FM 88
COMPACT DISC
2
1
MONO STEREO
AM
FUNCTION
MIN
VOLUME
FM 88
COMPACT DISC
2
1
MONO STEREO
NORMAL HIGH
AM 530
AM
TAPE RADIO CD
FUNCTION
MIN
92
600
96
800
100
1000
104
STOP/EJECT
FFWD
REW
TRACK
108
1400
100
1000
104
1400
108
FM
PLAY
PAUSE
PAUSE
REPEAT
ONE
1700
STOP/EJECT
FFWD
REW
PLAY/PAUSE
Radio & Tape Problems
RECORDING FROM ANOTHER CASSETTE
Problem
Solutions
Poor radio reception
• Electrical interference in your home can cause poor
reception. Move the unit away from electrical appliances,
especially those with motors (such as hair dryers and
vacuum cleaners), or transformers (such as fluorescent
lamps).
• If FM reception is poor, make sure FM whip antenna is fully
extended.
• If AM reception is poor, reposition or turn the unit for
better reception.
Distorted or noisy recordings
• Tape heads are dirty; clean them.
Dubbing Speed switch
1. Select the TAPE function.
PLAY
REC
STOP
REPEAT
REPEAT
ALL
on the CD player.
Two speed options are available. Use the DUBBING SPEED switch
to activate high or low speed dubbing of tapes.
2. Insert the pre-recorded tape you want to dub into tape
deck A, and set it to the point in the tape at which you want
the recording to begin; then press both the PLAY and PAUSE
buttons.
VOLUME
FM
MAX
DISC•CASSETTE
HIGH SPEED DUBBING
OPEN
VOLUME
PLAY
A B
P L A Y• R E C
3. Insert a blank tape into the tape deck B; then press both the
REC and PAUSE buttons.
4. Press PAUSE
recording.
on both decks at the same time to begin
2
1
MONO STEREO
NORMAL HIGH
• Tape is damaged. Try another tape.
TAPE RADIO CD
FUNCTION
MIN
MAX
Record button won’t depress
BAND Switch – Move the switch to select AM or FM
Precautions
•
Never open the cabinet under any circumstances. Never operate this product with the cabinet removed.
Any repairs or internal adjustments should be made only by a trained service technician.
•
Do not touch the player with wet hands. If any liquid enters the player cabinet, take the player to a
trained service technician for inspection.
•
This Compact Disc Player uses a laser to read the music on the CD. The laser mechanism corresponds to
the cartridge and stylus of a traditional record player. Although this product incorporates a laser pick-up
lens, it is completely safe when operated according to directions.
For Your Safety
The AC power plug is polarized (one blade is wider than the other) and only fits into AC
power outlets one way. If the plug won’t go into the outlet completely, turn the plug over and
try to insert it the other way. If it still won’t fit, contact a qualified electrician to change the
outlet, or use a different one. Do not attempt to bypass this safety feature.
•
If you’re not going to use your portable stereo for a month or more, be sure to remove batteries because
they can leak and cause damage.
•
Dispose of batteries in the proper manner, according to federal, state, and local regulations.
•
Any battery may leak electrolyte if mixed with a different battery type, if inserted incorrectly, if all
batteries are not replaced at the same time, if disposed of in fire, or if an attempt is made to charge a
battery not intended to be recharged.
•
Discard leaky batteries immediately. Leaking batteries can cause skin burns or other personal injury.
Service Information
This product should be serviced only by those specially trained in appropriate servicing techniques.
VOLUME – Turn the volume control to increase or decrease volume to desired level.
BASS BOOST – Turn on BASS BOOST (located on the left side of the unit) by sliding switch down
to the LOW position for enhanced bass effect. Turn off BASS BOOST to the HIGH position for
normal bass sound.
AM BEAT, DUBBING, FM MODE, Switch – When in AM mode, allows you to switch between two
positions for BEAT CUT. When dubbing a tape, allows you to switch between high speed and
regular speed dubbing. When in FM MODE, allows you to switch between stereo and mono
modes.
In the event that service should be required, you may need both the Model number and the serial number.
In the space below, record the date and place of purchase, and the serial number:
Move the FUNCTION switch to RADIO to turn the radio on.
•
Set BAND to AM or FM.
•
Tune in desired station by turning the tuning wheel knob.
•
To turn off the radio, move FUNCTION switch to TAPE (power OFF position).
FM Guidelines
To listen to FM stereo, set the FM MODE control on the top of the unit to STEREO.
Note that AM stations are broadcast in mono only, and that the FM radio station must be
transmitting in stereo for you to receive the broadcast in stereo.
Weak Reception?
If the reception of an FM station transmitting in stereo is weak. Adjusting the FM
whip antenna may help. If not, changing from FM Stereo to Mono might improve
reception, just remember that you’ll no longer be listening in stereo.
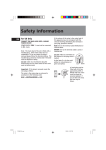
CAUTION
RISK OF ELECTRIC SHOCK
DO NOT OPEN
WARNING: TO PREVENT FIRE
OR ELECTRICAL SHOCK HAZARD,
DO NOT EXPOSE THIS PRODUCT
TO RAIN OR MOISTURE.
THE LIGHTNING
FLASH AND ARROWHEAD WITHIN THE
TRIANGLE IS A
WA R N I N G S I G N
ALERTING YOU OF
"DANGEROUS
VOLTAGE" INSIDE
THE PRODUCT.
CAUTION: TO REDUCE THE
RISK OF ELECTRIC SHOCK,
DO NOT REMOVE COVER
(OR BACK). NO USERS E RV I C E A B L E PA R T S I N SIDE. REFER SERVICING
TO QUALIFIED SERVICE
PERSONNEL.
THE EXCLAMATION
POINT WITHIN THE
TRIANGLE IS A
WARNING
SIGN
ALERTING YOU OF
I M P O R T A N T
INSTRUCTIONS
A C C O M PA N Y I N G
T H E P R O D U C T.
SEE MARKING ON BOTTOM / BACK OF PRODUCT
We're on the level
The built-in Automatic Level Control automatically sets the input level for optimum
recording sound. You can listen to and even adjust the volume setting of the radio
without affecting the quality of the recording-just don't change the station.
STOP/EJECT
— Press to stop current tape activity, or to open the cassette compartment door
when no buttons are active.
REW
FFWD
REC
(Rewind) — From stop mode, press to rewind the tape toward the beginning.
(Fast Forward) — From stop mode, press to advance the tape toward the end.
— Press to play cassettes.
(Record) — (for Deck B only) Press to record from the radio or CDs or another tape.
Tuning In Radio Stations
Date of Purchase _______________________
Serial No. _______________________________
PAUSE — Press to interrupt tape play or record mode. Press a second time to resume tape play
or tape record mode.
DUBBING SPEED — (on top of unit) Use to speed up tape-to-tape recording.
Model No. RP-7948
Place of Purchase _______________________
If you know what each button does, it’s easy to figure out how to operate the tape decks.
PLAY
•
For Your Records
• Tabs on edge of cassette may be missing or broken. If you
want to record on that cassette, cover the holes with
removable tape.
FUNCTION Switch – Move the switch to select which part of the portable stereo you want to use;
RADIO, TAPE, or CD.
Using the Radio
Important Battery Information
• CD may be damaged or dirty; check CD.
• Make sure the unit is on a secure spot. Vibration or jarring
can cause the CD to skip.
1700
OPEN
PAUSE
P.O. Box 1976, Indianapolis, IN 46206
© 1996 Thomson Consumer Electronics, Inc.
Trademark(s) ® Registered
Marca(s) Registrada(s)
96
800
MAX
TUNING Wheel Knob
Model RP-7948
347A8213-0001 (Rev. 0 E/S)
96-10
Printed in China
92
600
TAPE RADIO CD
BASS BOOST
NORMAL HIGH
AM 530
CD skips
button on the cassette deck to begin recording.
6. Press PLAY/PAUSE
general controls
FUNCTION Switch:
CD, TAPE, RADIO
• Make sure Pause mode is not activated.
twice to place a CD in PAUSE mode, then set
4. Press PLAY/PAUSE
it to the desired track (Track search does not work in the STOP
mode).
The AM antenna is built in, so adjusting the position of the unit may help AM reception.
AM BEAT, DUBBING,
FM MODE Switch
• Make sure CD is clean.
3. Insert the CD to be recorded.
Using the Tape Player
Antennas
• Make sure FUNCTION switch is set to CD.
Playing a Cassette TapE
You can play cassettes from either of the two tape decks.
1. Move the FUNCTION switch to TAPE.
2. Press STOP/EJECT
to open the cassette compartment doors.
3. Insert cassette tape into the compartment with the open edge facing up and the full reel on
the right.
4. Close the door securely.
5. Press REW
or FFWD
to move tape to the desired starting point.
6. Press PLAY
to begin playing the tape.
Wipe Out!!!
The easiest way to erase a tape is to tape over it. Just make sure that it's the right
tape before you begin, because once it's gone, it's gone for good.
LIMITED WARRANTY
What your warranty covers:
• Any defect in materials or workmanship.
For how long after your purchase:
• One year.
(The warranty for rental units begins with the first rental.)
What we will do:
• Provide you with a new, or at our option, a refurbished unit.
•
The exchange unit is under warranty for the remainder of the original product’s warranty period.
How to make a warranty claim:
• Properly pack your unit. Include any cables, etc., which were originally provided with the product. We
recommend using the original carton and packing materials.
• Include in the package evidence of purchase date such as the bill of sale. Also print your name and
address and a description of the defect. Send standard UPS or its equivalent to:
Thomson Consumer Electronics, Inc.
Product Exchange Center
32 Spur Drive
El Paso, Texas 79906
• Pay any charges billed to you by the Exchange Center for service not covered by the warranty.
• A new or refurbished unit will be shipped to you prepaid freight.
What your warranty does not cover:
• Customer instruction. (Your Owner’s Manual provides information regarding operating instructions and
user controls. For additional information, ask your dealer.)
• Installation and set-up service adjustments.
• Batteries.
• Damage from misuse or neglect.
• Products which have been modified or incorporated into other products.
• Products purchased or serviced outside the USA.
• Acts of God, such as but not limited to lightning damage.
Product Registration:
• Please complete and mail the Product Registration Card packed with your unit. It will make it easier to
contact you should it ever be necessary. The return of the card is not required for warranty coverage.
How state law relates to this warranty:
• This warranty gives you specific legal rights, and you may have other rights which vary from state to state.
If you purchased your product outside the USA:
• This warranty does not apply. Contact your dealer for warranty information.