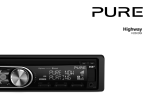
1
Safety information
Please read through these operating instructions
so you will know how to operate Highway properly.
After you have finished reading the instructions,
keep this manual in a safe place for future
reference.
Precautions
Use only in a 12-volt DC negative-ground
electrical system.
Disconnect the vehicle’s negative battery
terminal while mounting and connecting the
unit.
When replacing the fuse, be sure to use one
with an identical amperage rating.
Using a fuse with a higher amperage rating
may cause serious damage to the unit.
DO NOT attempt to disassemble the unit. Laser
beams from the optical pickup are dangerous
to the eyes.
Make sure that no pins or other objects get
inside the unit as this may cause malfunctions,
or create safety hazards such as electric
shocks or laser beam exposure.
If you have parked the car for a long time in
hot or cold weather, wait until the temperature
in the car becomes normal before operating
Highway.
Keep the volume at a level where you can still
hear outside warning sounds (horns sirens,
etc.).
Stop the car before performing any complex
operations.
2
CD notes
Note
Playing a defective or dusty CD can cause
dropouts in sound.
Handle the disc by holding its inner and outer
edges.
Do not touch the surface of the unlabelled side of the disc
Do not attach any seal, label or data protection
sheet to either side of a disc.
Do not expose a CD to direct sunlight or
excessive heat.
Wipe a dirty CD from the centre outwards with
a cleaning cloth.
Never use solvents such as benzine or alcohol.
Highway can not play 3-inch ( 8cm ) CDs.
Never attempt to insert a 3-inch CD with
an adapter or other irregularly shaped CD.
Highway may not be able to eject it, resulting in
a malfunction.
In addition to ordinary CDs, Highway can also
play back CD-R/CD-RW/MP3/UDF/CD-TEXT
discs.
To provide a clear demonstration and an alternative
for easy understanding of the operation of this unit,
graphic illustrations are sometimes used. However,
this illustration is not necessary printed as the
actual image found on the unit.
Caution
Please power off Highway and return it to the aftersales service centre or dealer /distributor that you
purchased Highway from if one of the following
symptoms occurs:
(1) Water or other obstacle enters Highway;
(2) Smoke;
(3) Highway emits a burning smell.
Thank you for choosing Highway H240Di. This manual will get you up and running in no time, and explains
how to make the most of your Highway H240Di. We’re constantly improving and adding new features to our
products. To take advantage of any enhancements made since your product was shipped, please visit www.pure.com where you can check for any updated versions of software and download the latest version
of this user guide in PDF format.
VOL
SEL
TOP
INT
RPT
3
Contents
Warranty information
5
Getting started
5
Front panel controls
6
Using your Highway
6
Removing and fitting the detachable front
Imagination Technologies Limited makes no representation or warranties with respect to the content of this document and specifically
disclaims any implied warranties of merchantability or fitness for any particular purpose. Further, Imagination Technologies Limited
reserves the right to revise this publication and to make changes in it from time to time without obligation of Imagination Technologies
Limited to notify any person or organization of such revisions or changes.
6
Listening to digital radio
7
Listening to FM or MW radio
Copyright
8
Listening to a CD or USB drive
10
Listening to iPod or iPhone content
12
Setup options
12
FM radio options
13
General options
14
Adjusting audio settings
Imagination Technologies Limited. warrants to the end user that this product will be free from defects in materials and workmanship in
the course of normal use for a period of two years from the date of purchase. This guarantee covers breakdowns due to manufacturing or
design faults; it does not apply in cases such as accidental damage, however caused, wear and tear, negligence, adjustment, modification
or repair not authorised by us.
Please visit www.pure.com/register to register your product with us. Should you have a problem with your unit please contact your
supplier or contact Pure Support at the address shown on the rear of this manual. If you need to return your product please use the
original packaging and include all parts and accessories. We reserve the right to refuse incomplete or badly packaged returns.
panel
Disclaimer
Copyright 2013 by Imagination Technologies Limited. All rights reserved. No part of this publication may be copied or distributed,
transmitted, transcribed, stored in a retrieval system, or translated into any human or computer language, in any form or by any means,
electronic, mechanical, magnetic, manual or otherwise, or disclosed to third parties without the express written permission of Imagination
Technologies Limited.
Trademarks
Highway H240Di, Pure, the Pure logo, EcoPlus, the EcoPlus logo, Imagination Technologies, and the Imagination Technologies logo are
trademarks or registered trademarks of Imagination Technologies Limited, iPod and iPhone are trademarks of Apple Inc., registered in the
U.S. and other countries. Version 3 April 2013
“Made for iPod,” and “Made for iPhone” mean that an electronic accessory has been designed to connect
specifically to iPod, or iPhone, respectively, and has been certified by the developer to meet Apple performance
standards.
Apple is not responsible for the operation of this device or its compliance with safety and regulatory standards.
Please note that the use of this accessory with iPod or iPhone may affect wireless performance.
iPhone and iPod are trademarks of Apple Inc., registered in the U.S. and other countries.
15Appendix
15
Electrical connections
16
Installation guide
17
Carrying out a factory reset
17
Removing the Highway head unit
18Troubleshooting
19Specifications
4
Getting started
Front panel controls
VOL
SEL
TOP
1. Press to eject disc.
2.Power/Mute
3. Toggle the audio source
4. Sound effect setting
5. RADIO mode (FM only):
- Preset scan
- Auto store (long press)
DAB mode – Autotune
6. Unlock the front panel.
7. Display switch
- Adjust system setup (long press)
8. Band switch:
- RADIO mode – FM1 > FM2 > FM3 > MW
- DAB mode – D1 > D2 > D3
9. Adjust volume level / Confirm (press)
INT
RPT
10.Button 1: Play / Pause / Top play (long press) / Preset station 1
Button 2: Scan play / Preset station 2.
Button 3: Repeat play / Preset station 3.
Button 4: Random play / Preset station 4.
Button 5: Previous folder / Preset station 5.
/MP3 and WMA tracks -10 down (long press)
Button 6: Next folder / Preset station 6.
/MP3 and WMA tracks +10 up (long press)
11.Aux-in socket
12.USB connector
13.CD mode – Previous / next track
RADIO mode – Manual tune (short press) Seek + / - (long press)
DAB mode – Previous / next station
14.Disc slot
15.RADIO mode – PTY select
CD mode – No function
DAB mode – No function
AUX mode – No function
iPod mode – iPod menu
CD/USB MP3 and WMA mode – Folder search
16.DAB button – Press to toggle between digital radio and previously used audio source
17.Traffic announcement
5
Using your Highway
Removing and fitting the
detachable front panel
Listening to digital radio
To h e l p i m p ro v e s e c u r i t y , H i g h w a y h a s a
detachable front panel so you can take it with you
whenever you leave your car.
Note: To prevent damage, place the front panel in
the protective case whenever you remove the front
panel from the head unit.
Press DAB once, or Source repeatedly until ‘DAB’ is
displayed on the screen.
Selecting digital radio as playing source
Press the
or
buttons to scroll through the
list of stations and press the VOLUME dial to select.
Choosing a digital radio band
Removing the detachable
panel
1. Press the
button.
2. H old the loose part of the
panel and remove from the
head unit.
1
1
Highway includes a BAND button that you can press
to change the stations that are allocated to the six
preset buttons. There are three bands available for
digital radio, allowing you to store up to 18 digital
radio presets. Press BAND to select band D1, D2
or D3.
2
2
Storing and selecting presets
Manually storing a preset
Fitting the detachable
panel
1. L ine up the groove on the
right side of the face panel
with the slot on the unit.
2. P ress down the left side of
the face plate until it clicks
into the panel slot.
Changing digital stations
2
2
Tune into the digital radio station you want to store.
Press and hold one of the numbered preset buttons
(1-6) to store it in the memory.
1
1
Recalling a preset
To tune to a preset, press the corresponding button
on Highway (1 to 6).
Carrying out an autotune
The autotune function scans all digital radio
frequencies and automatically adds any new stations
found to the station list. To carry out an autotune,
press the PS/AS button.
Note: Highway will remove any inactive stations
from the station list during an autotune.
6
Changing the information shown on
screen
In digital radio mode, Highway displays two rows
of text. The first row always displays the name of
the radio station.
You can toggle the information that is displayed on
the second row by pressing the DISP button.
Highway can display the current time, scrolling text,
programme type (PTY) information, multiplex (MUX),
band information and frequency.
Listening to FM or MW radio
Press SOURCE repeatedly until ‘TUNER’ is
displayed on the screen.
Changing FM or MW stations
Manual tuning
Press the
or
or lower station.
buttons to tune in to a higher
Seek tuning
or
buttons to seek to
Press and hold the
the next or previous radio station that has a strong
signal.
Note: To stop seek tuning, repeat the steps above
or press any other button that has a radio function.
Choosing an FM or MW radio band
Highway includes a BAND button that you can
press to change the stations that are allocated to
the six preset buttons. In FM there are three bands
available, allowing you to store up to 18 FM presets.
In MW there is only one band available, allowing
you to store up to 6 presets. Press BAND to select
either FM1, FM2, FM3 or MW.
Storing and selecting presets
Manually storing a preset
Auto storing presets
You can use the auto store function to automatically
populate your presets with radio stations that are
detected by Highway.
Press and hold the PS/AS button (1 sec.) to start
automatic station search.
To stop auto store, press any button that has a
radio function.
Notes: If you start the auto store function in an
FM band, the auto store function will automatically
populate the presets in all the FM bands (FM1, FM2
and FM3). If you start the auto store function in the
MW band, the auto store function will automatically
populate the presets in the MW band.
Changing the information shown on
screen
In FM mode, Highway displays two rows of text.
The first row will display RDS information if it is
available. If there is no RDS information, the band
and frequency will display.
You can toggle the information that is displayed
on the second row by pressing the DISP button.
Highway can display the current time, scrolling text
(if available), programme type (PTY) information,
and band and frequency.
Preset scan
You can use the preset scan function to listen
to ten seconds of audio from each of the radio
stations stored in your presets.
1. P ress the PS/AS button to begin the preset
scan.
2. Press the PS/AS button again when you hear a
station that you want to listen to.
Note: Pressing the PS/AS button for more than
one second will start the auto store function, which
will overwrite all your presets.
Tune into the FM or MW radio station that you
want to store. Press and hold one of the numbered
preset buttons (1-6) to store it in the memory.
Recalling a preset
To tune to a preset, press the corresponding button
on Highway (1 to 6).
7
Listening to a CD or USB drive
Inserting a USB drive
Highway can play audio CDs and MP3 and WMA
files that are stored on a CD or USB drive.
Note: Highway cannot play AAC files stored on a
CD or USB drive.
When connecting a USB
device, the unit will read the
files automatically.
Loading a CD
Insert
a CD into the centre of the CD SLOT
with the label facing upwards. The CD will play
automatically after it has been loaded.
Notes:
•Never insert foreign objects into the CD SLOT.
•If the CD is not inserted easily, there may be
another CD in the mechanism or the unit may
require a service.
•Some CD-R/CD-RW discs may not be usable.
•CD-ROMs and discs without the following marks
cannot be played by this unit:
TEXT
Ejecting a CD
Press the
button to eject a CD.
Notes:
•Forcing a CD into the unit can damage the CD.
•If a CD (12 cm) is left ejected for 15 seconds, the
CD is automatically reloaded.
Listening to a CD that is already loaded
in Highway
Press the SOURCE button to select CD/MP3
mode.
When Highway enters CD/MP3 mode, the CD will
play automatically.
8
Playback controls for an audio CD and MP3/
WMA tracks saved to a CD or USB drive
Insert a USB device into the
USB connector.
1
1
button.
Rewind
Press and hold the
button.
* For MP3/WMA discs, there may be a slight delay
when searching and skipping between tracks.
Removing a USB drive
Before removing a USB drive,
select another source or
turn off the power to avoid
damaging the USB device.
For more information on
listening to MP3 or WMA files
see the following section.
Fast-forward
Press and hold the
2
2
Pausing playback
Press the 1 button to pause playback. Whilst playback
is paused, ‘PAUSE’ will appear on the display.
To resume playback , press the 1 button again.
Skipping to the next track
Press the
button to skip to the beginning of the
next track.
If you are listening to an MP3/WMA file, press and
hold the 6 button (1 sec.) to move ahead 10 tracks.
Playing the previous track
button within the first 10 seconds of
Press the
the track to go to the previous track.
Playing the beginning of a track
Press the button after the first 10 seconds of the
track to go to the start of the track.
For MP3/WMA files, press and hold the 5 button (1
sec.) to move back 10 tracks.
Listening to the first track on a CD or USB drive
Highway features a function called Top that allows
you to listen to the first track on the CD that is
currently playing. To listen to the first track on the CD
that is currently playing, press and hold the 1 button
(1 sec.).
Note: If you are listening to an MP3/WMA file,
pressing the 1 button will play the first track on the
CD or USB drive.
Intro function
If listening to an audio CD, you can use the intro
function to play the first 10 seconds of the next track
and the rest of the tracks on the CD in sequential
order.
If listening to an MP3 or WMA file, this function
allows you to play the first 10 seconds of all the MP3
or WMA tracks on a CD or USB drive.
To use the intro function, press the 2 button during
playback. The ‘SCN’ icon will display on the screen
when the intro function is enabled.
To turn the intro function off, press the 2 button.
Repeat play function
If listening to an audio CD, you can use the repeat
play function to play the current track repeatedly.
Press the 3 button to toggle the repeat function on
‘RPT ON’ and off ‘RPT OFF’.
If you are listening to an MP3/WMA file, press the 3
button to choose one of the following repeat options:
TRK RPT: Repeats the current track.
Random play function
If listening to an audio CD, you can use the random
play function to play all the tracks on the CD in a
random order.
If listening to an MP3 or WMA file, you can use the
random play function to play all the MP3 or WMA
files on the CD or USB drive in a random order.
Press the 4 button to toggle the random play
function on ‘RDM ON’ and off ‘RDM OFF’.
Displaying title data
Highway can display the title data for MP3 and
WMA files.
If the CYCLE setting is OFF (see page 13), you
can press the DISP button to change the title data
displayed on the screen. Highway can display the
following data about the MP3 or WMA file:
File name > Folder name > Track Title > Album >
Artist > File ...
Notes:
•If the MP3/WMA file has no ID3 tag, ‘NO TITLE‘
will appear on the display.
Using the search function
Highway can search for MP3 or WMA files stored
on a CD or USB drive.
1. Press the MENU button to see the FOLD SCH
option.
2. Press the VOLUME dial to enter the folder list
search.
3. Turn the VOLUME dial to select the folder that you
want to search in.
4. Press the VOLUME dial to see the file list on the
display.
5. Turn the VOLUME dial to choose a track and
press to play.
Selecting a folder
You can select the folder that contains the MP3/
WMA files you want to listen to. Highway will start
to play all the tracks stored in the folder, starting
from the first track.
To move to the next folder, press the 6 button.
To move to the previous folder, press the 5 button.
Press the
or
button to change tracks within
a folder.
FOLD RPT: Repeats all the tracks in the current
folder.
RPT OFF: No tracks repeated.
9
Notes about listening to WMA/MP3 files
Logical format (File system):
Disabling DRM (Digital Rights Management)
1. When writing MP3/WMA files to a CD-R disc
or CD-RW disc, please select either “ISO9660
level 1, 2 or Joliet” or Apple ISO as the writing
software format. Normal playback might not
be possible if the disc is recorded in any other
format.
Highway will not play any WMA files if they are
DRM (Digital Rights Management) enabled. If you
want to play a WMA file on Highway, you will need
to disable DRM.
If using Windows Media Player 9/10/11, click on
Tools > Options > Copy Music tab. Under Copy
settings, un-check the Copy protect music.
checkbox, then reconstruct the files.
Personally constructed WMA files are used at your
own responsibility.
File extensions:
1. Always add a file extension “.MP3”, “.WMA” to
an MP3, WMA file by using single byte letters. If
you add a file extension other than specified or
forget to add the file extension, the file cannot
be played.
2. Files without MP3/WMA data will not play. The
files will play with no audio if you attempt to play
files without the MP3/WMA data.
2. The folder name and file name can be displayed
as the title during MP3/WMA playback.
However, the title must be within 30 single byte
alphabetical letters and numerals (including an
extension).
3. Do not name a folder with the same name as a
file within that folder.
Folder structure:
You cannot play a disc that contains folders with
more than eight hierarchical levels.
Number of files or folders:
1. Up to 999 files can be recognised per folder.
Up to 3000 files can be played.
* When VBR files are played, the play time display
may differ depending on the play location.
2. T
racks are played in the order that they were
recorded onto a disc. (Tracks may not always
be played in the order displayed on a computer.)
* When MP3/WMA files are played, very little or
no sound will play between tunes.
3. Some noise may occur depending on the type
of encoder software used while recording.
Listening to iPod or iPhone content
Connecting an iPod and iPhone
Connect an iPod or iPhone* to the USB connector.
After connecting an iPod/iPhone, you will be able
to control all playback functions and view all the
information about the track’s stored on your iPod/
iPhone using Highway’s controls.
Listening to audio from an iPod or iPhone
You can listen to audio from any music or videos
stored on your iPod. To listen to audio from your
iPod:
1.Press the MENU button.
2.Turn and press the VOLUME dial to select
‘MUSIC’ or ‘VIDEO’.
3.If you selected ‘MUSIC’, turn and press the
VOLUME dial to select either ‘PLAY LISTS’,
‘ARTISTS’, ‘ALBUMS’, ‘SONGS’, ‘GENRES’ or
‘COMPOSERS’.
If you selected ‘VIDEO’, turn and press the
VOLUME dial to select either ‘MOVIES’, ‘MUSIC
VIDEOS’, ‘TV SHOWS’, ‘VIDEO PODCASTS’, or
‘RENTALS’.
Note: When you play a video file, Highway
can only play the audio from the video and not
display any image content.
4.Turn and press the VOLUME dial to select the
item that you want to listen to.
Note: The items listed in VIDEO MENU vary
depending on what model of iPod you have
connected and the language used.
*Supports most iPod and iPhone models. For the latest information, check the compatibility table on our website: www.pure.com/products/ipod-compatibility.
10
Searching for content on your iPod/
iPhone
Highway lets you search for content using
alphabetical letters. To search for content:
1.Press the MENU button to select the iPod menu
mode.
2.Turn the VOLUME dial to specify whether you
want to search for ‘MUSIC’ or ‘VIDEO’ content.
3.If you selected ‘MUSIC’, turn the VOLUME
dial to select either ‘PLAY LISTS’, ‘ARTISTS’,
‘ALBUMS’, ‘SONGS’, ‘GENRES’ or
‘COMPOSERS’.
If you selected ‘VIDEO’, turn the VOLUME dial
to select either ‘MOVIES’, ‘MUSIC VIDEOS’, ‘TV
SHOWS’, ‘VIDEO PODCASTS’, or ‘RENTALS’.
4.Press the VOLUME dial to display all the
contents that match the selected category.
5.Press and hold the DISP button (1 sec).
6.Turn the VOLUME dial to specify a letter to
search for.
7.Press the DISP button again to start searching.
8.Press the VOLUME dial to confirm.
Repeat play function
You can use the repeat play function to play
the track currently being played on your iPod
repeatedly.
Press the 3 button to specify one of the following
repeat options:
RPT ONE: Repeats the current track.
RPT ALL: Repeats all the tracks in the current folder.
Random play (Shuffle) function
Album Shuffle
To play all the albums stored on your iPod or
iPhone in a random order, press the 4 button until
‘RDM ALBUM’ is displayed on the screen.
Song Shuffle
To play the tracks in the folder you are currently
listening to on your iPod or iPhone in a random
order, press the 4 button until ‘RDM SONG’ is
displayed on the screen.
Disabling the Shuffle function
To disable the shuffle function, press the 4 button
until ‘RDM OFF’ is displayed on the screen.
Using your iPod/iPhone to select tracks
on your Highway
Highway allows you to use your iPod/iPhone to
select the tracks that are playing on Highway. This
function is known as simple control (S-CTRL).
This setting is disabled by default.
To enable your iPod/iPhone to select tracks on
Highway:
1.Press and hold the DISP button to enter system
setup.
2.Press
or
button to scroll to ‘S-CTRL’.
3.Turn and press the VOLUME dial to turn S-CTRL
‘ON’ or ‘OFF’. Select ‘ON’ to enable your iPod
to control Highway’s iPod/iPhone functions. Select
‘OFF’ to disable the S-CTRL function.
Notes:
•Be patient when selecting tracks on Highway with
your iPod/iPhone as there may be a slight delay.
•Do not try to select tracks on Highway using your
iPod and the controls on the head unit at the
same time.
•Some iPod models do not support the S-CTRL
function. Consult your nearest dealer or the Pure
website to confirm which models do not support
S-CTRL.
11
Setup options
FM radio options
Local seeking
You can use the local seeking function so that
Highway only tunes into radio stations with a strong
signal.
To enable or disable the local seeking function:
1.Press and hold the DISP button on the front
panel until ‘CLOCK’ is displayed on the screen.
2.Use the
button to scroll to ‘DX/LO’.
3.Turn and press the VOLUME dial to select either
‘LOCAL’ (enable) or ‘DX’ (disable).
Note: The number of radio stations that can be
received will decrease when local seeking function
is enabled.
Radio Data System
Highway has a built-in Radio Data System (RDS)
decoder system that supports broadcast stations
transmitting RDS data.
RDS settings
AF function
The AF function switches to an alter native
frequency on the same network in order to
maintain optimum reception. This setting is ON by
default.
1.P ress and hold the DISP button on the front
panel until ‘CLOCK’ is displayed on the screen.
2.Press the
or
buttons to scroll to ‘AF’.
3.Turn the VOLUME dial to select ‘ON’ or ‘OFF’.
When the AF function is enabled, the AF indicator
will appear on the display.
12
REG (Regional programme) function
When the REG function is ON, Highway will
automatically tune into the station with the strongest
signal within the specified region using the AF control.
If this function is OFF and the regional area changes
as you drive, Highway will tune into a station within
the current region. This setting is ON by default.
Notes:
•This function is disabled when Highway is tuned
into a national station, such as BBC R2.
•T he REG function ON/OFF setting only applies
when the AF function is ON.
1.Press and hold the DISP button on the front panel
until ‘CLOCK’ is displayed on the screen.
2.Press the
or
buttons to scroll to ‘REG’.
3.Turn the VOLUME dial to select ON or OFF.
Manually tuning to a regional station in the same
network
You can manually tune to a regional station in the
same network when the AF function is ON and the
REG function is OFF.
Note: This function can be used when a regional
broadcast of the same network is received.
TA (Traffic Announcement)
In TA standby mode (‘TA’ icon is lit on the display),
Highway will wait for a TA signal from any available
FM station that is in range. When Highway receives
a TA or EON traffic signal, Highway will automatically
tune into the FM station it has found with a traffic
announcement. When the traffic announcement has
finished, Highway will automatically tune back to the
last FM station you were listening to.
To disable TA mode, either during or outside an
active traffic announcement, press the TA button
once. This will switch TA mode off. To switch TA
mode back on, press the TA button again.
Setting the TA standby mode
Press the TA button to toggle the ‘TA’ icon on
and off. When the ‘TA’ icon is lit in the display.
Highway will remain in TA standby mode until a
traffic announcement is broadcast. When a traffic
announcement broadcast starts, ‘TRAF INF’ will
appear in the display.
PTY (Programme Type)
You can use the PTY (Programme Type) function
to search for radio broadcasts that match a certain
genre. In Europe there are thirty one predefined
programme type genres.
*Some countries do not currently broadcast PTY
information.
*In the TA standby mode, a TP station has priority
over a PTY broadcast station.
To use the PTY function to search for a particular
type of radio broadcast:
1.Press the MENU button.
2.Turn and press the VOLUME dial on the front panel to select the genre of the PTY broadcast that you want to search for.
Highway will start to search for a matching radio
broadcast and tune into the first radio station that
matches the specified PTY type.
Repeat the above steps to search for another
station that matches the specified PTY type.
General options
In any mode, press and hold the DISP button to
enter the system setup menu. Press the
or
buttons to scroll through the options, and turn the
VOLUME dial to adjust a setting.
REAR / S-W
If you are using Highway with an external amplifier,
you can use this setting to specify if you are
connecting the Rear line-outs to an external
amplifier connected to full range speakers (REAR)
or a Sub Woofer (S-WOOFER). See the diagram on
page 15 for more information.
CLOCK
1.Press the VOLUME dial.
Turn and press the VOLUME dial to select either
REAR or S-WOOFER.
2.The hour will flash on and off. Turn and press the
VOLUME dial to set the hour. Repeat to set the
minutes.
REAR: Select this option to provide an external
amplifier with a full range signal from the rear left
and right line-outs.
AUX SENS (AUX mode)
Turn and press the VOLUME dial to increase or decrease
the audio boost level for the AUX input. The available
options are LOW, MID or HIGH.
S-WOOFER: Select this option to allow
adjustments to be made to a dedicated subwoofer
amplifier from the EQ menu without affecting the
signal from the front line‑outs, or sound from the
built-in amplifier.
CYCLE: ON/OFF
This function is used to control how Highway
displays the track name, folder name, title, album,
and artist in CD/MP3, USB and iPod mode:
DIMMER: ON/OFF
Turn and press the VOLUME dial to toggle the
DIMMER setting ‘ON’ or ‘OFF’.
ON: Select this option to specify that the display
will automatically alternate between the TRACK,
FOLDER, TITLE, ALBUM and ARTIST.
OFF: Disables the dimmer setting so that the LCD
brightness is set to the maximum level.
Note: In IPod mode, the cycle option only alternates
the display between TITLE, ALBUM and ARTIST.
OFF: Select this option to stop the display from
automatically alternating between the TRACK,
FOLDER, FILE, ALBUM, TITLE, and ARTIST. To
change the information that is currently displaying
on the screen (Highway displays the Track name
by default, except for iPod mode), press the DISP
button.
12/24H
Turn and press the VOLUME dial to change the
time format to either ‘12HOURS’ or ‘24HOURS’.
CT: ON/OFF
Turn and press the VOLUME dial to toggle
automatic time updates from the digital or FM radio
signal ‘ON’ or ‘OFF’.
ON: The display brightness is dimmed.
BEEP: ON/OFF
Turn and press the VOLUME dial to toggle the
beep sound that is made when pressing a button
‘ON’ or ‘OFF’.
13
Adjusting audio settings
Press the EQ button to enter equalizer setting
mode. When you initially press EQ, the current EQ
setting is displayed. Turn the dial to change the
DSP EQ in the following order:
OFF > POP > ROCK > CLASSIC > JAZZ >
CUSTOM
Audio control settings
1. Press the EQ button.
2. Press the
or
button to select the audio
control setting that you want to adjust. The
available options are BALANCE > FADER >
LOUD > SUBW FRE > SUBW VOL.
1. Press the EQ button.
3. Turn and press the VOLUME dial to adjust the
value. The available values are for each option
are shown below:
2. Turn and press the VOLUME dial to select
‘CUSTOM’.
BALANCE: LEFT 1-7 > CENTRE > RIGHT 1-7
FADER: FRONT 1-7 > CENTRE > REAR 1-7
3. Press the
or
button to select the EQ
value that you want to change. The available
options are: BASS-G > BASS-F >BASS-Q
> MID-G > MID-F >MID-Q >TREBLE-G >
TREBLE-F.
LOUD: ON/OFF
Creating a custom EQ setting
4. Turn the VOLUME dial to adjust the value.
5. Press the
or
button to move to another
custom EQ setting or press the VOLUME dial if
you have finished.
14
SUBW FRE: THROUGH > 80 > 120 > 160
SUBW VOL: (-6) - (+6)
Appendix
Electrical connections
Wiring Diagram
Front Right Line-out (Red)
Front Left Line-out (White)
DAB ANTENNA
FM/MW ANTENNA
Rear Right Line-out (Red)
SUB OUT
Rear Left Line-out (White)
SUB OUT
1
3
4
5
6
7
8
1
3
4
5
6
7
8
B 2
A 2
Telemute
15
Installation guide
Installation notes
Preparing to install Highway
Highway can be installed in any dashboard that has
an opening matching the dimensions shown in the
diagram below. The dashboard needs to be 4.75mm
- 5.56mm thick in order to be able to support
Highway.
Note: Always insert the mounting sleeve into the
dashboard before fitting the head unit.
Installing a digital radio antenna
Highway is designed to work with an active digital
radio antenna. Before installing the Highway head
unit ensure that you have installed an appropriate
digital radio antenna in your vehicle. Refer to your
digital radio antenna installation guide for more
information.
Digital radio antenna setting
Highway features an SMB type digital radio
antenna connector and should be used with an
automotive antenna appropriate for your vehicle and
geographical area (e.g. band 3 for UK use).
An antenna is not supplied with the product in order
to allow an appropriate antenna to be used for your
specific vehicle needs.
16
Antenna power for Active Antennas:
As many automotive antennas have an amplifier
either built-in, or in-line with the cable connected
to the car stereo, this product provides power at
12 Volts along the centre of the digital antenna
connector (centre pin of SMB connector).
Most active automotive digital radio antennas work
on 12 Volts. However, some may be designed to
operate at other voltages, e.g. 5 Volts. The antenna
power output from the product is set to ‘Active’, i.e.
12 volts ON, from production (shown as ‘DAB ANT
ACTIVE’ in the system menu).
If your chosen antenna does not have an amplifier
(i.e. it is ‘PASSIVE’), please set the antenna power
to ‘PASSIVE’ using the following steps before
connecting the antenna to Highway:
1. Press and hold the DISP button until ‘CLOCK’
appears on the top line of the display. This
shows that you have entered the system menu.
2. Press the
button repeatedly until ‘DAB ANT’
appears on the top line of the display.
3. Turn the VOLUME dial until ’PASSIVE’ appears
on the second line of the display.
4. P ress the DISP button once to confirm the
new antenna setting and return to the previous
screen.
If your chosen antenna operates at a different
voltage to the 12 Volts supplied by Highway, then an
in-line voltage regulator must be used to correct the
voltage to the level required by the antenna BEFORE
connecting the antenna to Highway. The antenna
power should then be set to 'ACTIVE' using the
previous steps (Highway is set to 'ACTIVE' from the
factory).
Under no circumstances should a separate power
supply at either 12 volts, or any other voltage, be
provided in-line with the antenna connection with the
antenna power set to either 'ACTIVE', or 'PASSIVE'
as this will present power to the product through the
centre of the antenna cable and will cause damage
to the product not covered by the warranty.
WARNING - Connecting an active antenna that
is not designed to operate at 12 Volts to the SMB
Digital Radio Antenna Connector on this product
could cause damage to the antenna, or the product
that is not covered by the warranty.
1
2
Installing the Highway head unit
Installing the detachable panel
1.Insert the mounting sleeve into the dashboard.
Fix it firmly in place by folding down the metal
tabs.
2.Connect the audio, FM/MW antenna and
electrical cables to the back of Highway (see
page 15).
3.Install the detachable panel (see opposite) and
test Highway to check that all audio functions
are working properly.
4.Connect the digital antenna cable.
Note: See page 16 before connecting the digital antenna cable.
5.Remove the two protective screws on the top
of Highway so that the CD function works and
slide Highway into the mounting sleeve and
push to secure in place.
6. Attach the outer trim frame.
If you are not sure how to install this unit
correctly, contact a qualified technician.
Removing the Highway head unit
1.Line up the groove on the
right side of the face panel
with the slot on the unit.
2. Press down the left side of
the face plate until it clicks
into the panel slot.
1.Power off Highway.
2.
Remove the detachable panel as described on
page 6.
3.
Remove the outer trim frame.
4.
Insert the L-key removal tools into the slots on
the front of Highway until they lock (as shown
in the diagram below).
5.
Pull out Highway and disconnect all cables.
2
1
Carrying out a factory reset
1.Remove the detachable panel as described on
page 6.
2.
Press the RESET button with a pointed object
to reset Highway to factory settings.
3.
Replace the detachable panel as described on
page 6.
Note: Pressing the RESET button will erase the
clock setting and stored stations.
Mounting bolt
Rubber cushion
Remove the
two screws
Mounting sleeve
Main unit
Trim plate
17
Troubleshooting
The following checklist can help you solve any problems that you might encounter when using Highway. Before checking this list, check the connections and follow
all the instructions in this user guide. Do not use Highway if you see smoke or if there is a burning smell as this can cause a fire or electric shock. If this occurs stop
using Highway immediately and contact your reseller.
Problem
General
Highway will not switch on.
No sound
Highway’s screen does not work normally.
DISC mode
Highway will not play discs.
Possible cause
Solution
Car ignition is not on.
Turn your car key in the ignition.
Cable is not properly connected.
Check the cable connection.
Fuse has blown.
Replace the fuse with a new fuse of the same rating.
Volume is set to the minimum level or the mute Check the volume or switch the mute function off.
function is on.
Highway is unstable.
Press the RESET button.
The disc is inserted incorrectly.
The disc is dirty or damaged.
Mounting angle is over 30˚.
Mounting is unstable.
Disc must be inserted with the label side facing up. Clean
the disc and check for damage. Try another disc.
Adjust mounting angle to less than 30˚.
Mount the unit securely with the supplied parts.
TUNER mode
Unable to receive stations.
Poor quality reception of radio station.
The antenna is not connected properly.
The antenna is not fully extended or it is broken.
Preset stations are lost.
The battery cable is not properly connected.
Connect the antenna properly.
Fully extend the antenna and if broken, replace it with a new
one.
Connect the permanent live on the unit to the permanent
live on the vehicle.
USB mode
The USB device cannot be read.
The USB device may not be suitably formatted.
Sound skips due to vibration.
18
Check that the file system is in FAT or FAT32 format. Due to
different formats, some models of storage devices or MP3
players may not be compatible.
Specifications
General
Power supply:
Maximum power output:
Continuous power output:
Suitable speaker impedance:
Pre-Amp output voltage:
Fuse:
Dimensions(WxHxD):
Weight:
Aux-in:
FM Stereo Radio
12V DC (11V-16V)
Test voltage 14.4V, negative ground
55W x4 channels
20W x4 channels (4 ,10% T.H.D.)
4-8 ohm
2.0V (CD play mode: 1KHz, 0 dB, 10 K
15A
178x50x166mm
1.7kg
≥300mV
load)
1
4
1
L-key removal tool:
Trim plate:
Rubber cushion:
Operating instructions:
2
1
1
1
Frequency range:
Usable sensitivity (S/N=20dB):
Usable sensitivity (RF=-72 dBM):
Frequency response:
Stereo separation:
Signal/noise ratio:
DAB Band III:
174.928MHz ~ 239.200MHz
DAB Band L:
1452.960MHz ~ 1490.624MHz
-95dBM
20hz-20khz
≥50db
≥60db
Item
Min
Far off selectivity:
42dB
Adjacent channel rejection:
35dB
522-1620 KHz
30 dBμ
Disc Player
System:
Frequency response:
Signal/noise ratio:
Total harmonic distortion:
Wow and flutter:
Channel separation:
Digital (DAB) Radio
Frequency range:
87.5-108.0MHz (Europe)
8 dBμ
12 dBμ
30Hz-15kHz
30dB (1kHz)
50dB
70dB
55dB
AM(MW) Radio
Components
Mounting sleeve:
Machine screws M5x6mm:
Mounting bolt (50mm):
Frequency range:
Usable sensitivity:
Quieting sensitivity (S/N=50dB):
Frequency response:
Stereo separation:
Image response ratio:
IF response ratio:
Signal/noise ratio:
isc digital audio system
D
20Hz-20kHz
>80 dB
Less than 0.20% (1kHz)
Below measurable limits
>55 dB
MP3/WMA
Media format:
MP3
Sampling rate:
8 kHz-48 kHz
Bit rate:
32 kbps-320 kbps / VBR
File name, file folder and metadata character 30 characters (including
limit:
extension)
Max
60dB
40dB
WMA
N/A
32 kbps-196 kbps
30 characters (including
extension)
Note: Specifications and the design are subject to change without notice
due to improvements in technology.
19
www.pure.com
connect.pure.com
www.facebook.com/pure
Pure UK Headquarters
Imagination Technologies Limited
Home Park Estate
Kings Langley
Herts, WD4 8LZ
United Kingdom
www.pure.com
http://support.pure.com
Pure Australasia Pty Limited
PO Box 5049
Wonga Park
Victoria 3115
Australia
[email protected]
http://support.pure.com/au
104PD