1
Destination Menu
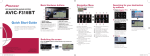
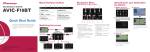
Screen switching overview
Searching for your destination
by address
Touch Destination on the “Top Menu” screen.
NAVIGATION AV SYSTEM
Top Menu (Classic Menu)
AVIC-F30BT
Quick Start Guide
1 Display the “Destination
This guide is intended to guide you through the basic functions of this
navigation system. For details, please refer to Operation Manual.
1
Basic hardware buttons
2
3
Menu” screen and touch
Address.
4
4 Touch OK.
Shortcut Menu
2 Select the country you
Destination Menu
Phone Menu
Basic items on the map
1
2
3
button
Press briefly to activate voice
operation.
Press and hold to mute the
AV (Audio and Video) source.
2VOL (+/–) button
Press to adjust the AV source
volume.
3HOME button
Press to display the “Top
Menu” screen.
1
Published by Pioneer Corporation.
Copyright © 2010 by Pioneer Corporation.
All rights reserved. <KYTZX> <10L00000>
4
5
1
6
4MODE button
Press to switch between the
map screen and the AV operation screen.
5TRK (◄/►) button
6h button
Press to display the
“Monitor Setup” screen.
Printed in Thailand
<CRB3604-A/N> EU
allows scrolling.
4
8
7
5
6
1 Name of the street to be
used (or next guidance point)
2 Current time
3 Estimated time of arrival
(default)
4 Current route
5 Current position
6 Street name that your vehicle
is travelling along
7Eco-Meter
8 Map control
9 Next direction of travel
5 Touch OK.
3 Input the information that
5 6
7 8
9
a
you want to set as the destination.
b
2
3 Dragging the map
9
desire.
AV operation screen
After searching for the destination, the Route confirmation
screen appears.
1 Searches for a location by
address
2 Calculates the route to your
home
3 Searches for a place such as
stores, restaurants, and
other facilities (Points Of
Interest – POI) in the database
4 Searches for POIs by using
the data on the SD memory
card
5 Stores and selects your
favourite locations
6 Returns to the previous
screen
7 Selects a previously routed
destination
8 Searches for a location by
coordinates
9 Cancels your current route
guidance
a Displays the current route
information
b Displays traffic information
Touch one of the options. After
narrowing down your destination, the Location confirmation
screen will appear.
The navigation system gives you
route guidance both visually and
by voice.
Setting route guidance volume
Using the radio (FM)
1 Touch the keys in the fol-
Scroll the screen by dragging an AV source icon up or down,
and tap FM on the AV operation screen.
lowing order on the “Top
Menu” screen.
2 Touch + or – to change
the volume of the route
guidance.
2
1
2 Tap or drag the key that you want to operate.
2
Pairing your phone Transferring
the phone book
1 Activate the Bluetooth
1
iPod operation screen
®
function on your phone.
2 Touch the keys in the fol-
2
Settings ➡ System Settings ➡ Volume
lowing order on the “Top
Menu” screen.
3
4
Settings ➡ Bluetooth Settings
For details about playable files, refer to Operation Manual.
select On.
5
List screen (e.g. song list)
1 Press the h button.
1 Press the h button.
2 Scans frequencies until a broadcast strong enough for good
reception is found by touching
and holding (seek tuning)
2 Touch SD Insert.
3 Insert an SD memory card
2 Touch Eject SD.
Playing your Apple iPod
into the SD card slot until
it clicks.
The LCD panel opens.
3 Press the middle of the
SD memory card gently
until it clicks.
You can control an iPod by connecting the USB interface cable for
iPod (CD-IU51V) (sold separately) to the navigation system.
1 Connect your iPod.
5 Press the h button.
a
1 Displays the artist name list
2 Displays the category list
3 Displays the album title list
4 Displays the song title list
5 Displays the genre list
out straight.
operate your mobile phone
to transfer the phone book
entries.
8
4 Pull the SD memory card
4 Press the h button.
7
3 Displays the detailed radio
text currently received
Ejecting an SD memory card
The “Monitor Setup” screen
appears.
6
3
1 Displays the current preset
frequency
Inserting an SD memory card
The “Monitor Setup” screen
appears.
on the “Phone Menu”
screen.
that the following
3 Touch Bluetooth On/Off to 3 Check
screen is displayed, and
Inserting and ejecting
an SD memory card
1 Connect the mobile phone.
2 Touch Contacts Transfer
USB and mini-jack
connector
USB interface cable
for iPod
The source changes and then playback will start.
6 Selects the song to play by
scrolling the keys up or
down. To play the song, tap it
7 Switches the list screen
between music and video
9
8 Returns to the iPod operation screen
4 Touch Registration on the
“Bluetooth Settings”
screen.
The system searches for and
lists nearby devices.
5 Touch your phone on the list.
When data transfer is finished, a message asking
whether you want to transfer
more data appears.
4 Touch No.
9 Starts playback by tapping
an item to select
a Selects a song by scrolling
the character tab up or
down. Tap the tab of the
character for the song title
that you want to display
6 Enter the PIN code from
your phone. (The default
code is 1111.)
When pairing succeeds, a
message will appear.
The transferred data is
imported to the navigation
system.