1
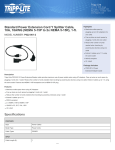
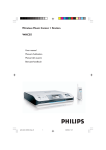
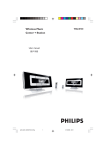
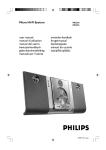
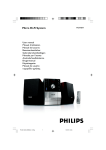
Wireless Music Station
WAS5
User manual
Manuel d'utilisation
Manual del usuario
Benutzerhandbuch
Gebruikershandleiding
Manuale per l'utente
Användarhandböckerna
Brugermanual
p001-p022_WAS5_Eng_22
1
9/30/2005, 16:47
Important notes for users in the
U.K.
Mains plug
This apparatus is fitted with an approved 13
Amp plug. To change a fuse in this type of plug
proceed as follows:
1
2
Remove fuse cover and fuse.
3
Refit the fuse cover.
Fix new fuse which should be a BS1362 5 Amp,
A.S.T.A. or BSI approved type.
If the fitted plug is not suitable for your socket
outlets, it should be cut off and an appropriate
plug fitted in its place.
If the mains plug contains a fuse, this should
have a value of 5 Amp. If a plug without a fuse
is used, the fuse at the distribution board
should not be greater than 5 Amp.
Note: The severed plug must be disposed of to
avoid a possible shock hazard should it be
inserted into a 13 Amp socket elsewhere.
Norge
Typeskilt finnes på apparatens underside.
Observer: Nettbryteren er sekundert
innkoplet. Den innebygde netdelen er
derfor ikke frakoplet nettet så lenge
apparatet er tilsluttet nettkontakten.
For å redusere faren for brann eller elektrisk
støt, skal apparatet ikke utsettes for regn eller
fuktighet.
Italia
DICHIARAZIONE DI CONFORMITA’
Si dichiara che l’apparecchio WAS5 Philips
risponde alle prescrizioni dell’art. 2 comma 1
del D.M. 28 Agosto 1995 n. 548.
Fatto a Eindhoven
How to connect a plug
The wires in the mains lead are coloured with
the following code: blue = neutral (N),
brown = live (L).
¶ As these colours may not correspond with the
colour markings identifying the terminals in
your plug, proceed as follows:0
– Connect the blue wire to the terminal
marked N or coloured black.
– Connect the brown wire to the terminal
marked L or coloured red.
– Do not connect either wire to the earth
terminal in the plug, marked E (or e) or
coloured green (or green and yellow).
Before replacing the plug cover, make certain
that the cord grip is clamped over the sheath
of the lead - not simply over the two wires.
Copyright in the U.K.
Recording and playback of material may
require consent. See Copyright Act 1956 and
The Performer’s Protection Acts 1958 to 1972.
Philips Consumer Electronics
Philips, Glaslaan 2
5616 JB Eindhoven, The Netherlands
DK
Bemærk: Netafbryderen er sekundært
indkoblet og ofbryder ikke strømmen
fra nettet. Den indbyggede netdel er
derfor tilsluttet til lysnettet så længe
netstikket sidder i stikkontakten.
S
Observera! Stömbrytaren är sekundärt
kopplad och bryter inte strömmen från
nätet. Den inbyggda nätdelen är
därför ansluten till elnätet så länge
stickproppen sitter i vägguttaget.
2
p001-p022_WAS5_Eng_22
2
9/30/2005, 16:48
Wireless Music Station WAS5
4
5
6
1
2
3
3
p001-p022_WAS5_Eng_22
3
9/30/2005, 16:48
Philips Consumer Electronics
HK- 0535-WAS5
(report No.)
EC DECLARATION OF CONFORMITY
We,
Philips Consumer Electronics
(manufacturerís name)
Philips, Glaslaan 2, 5616 JB Eindhoven, The Netherlands
(manufacturerís address)
declare under our responsibility that the electrical product:
Philips
WAS5 /22/05
(name)
(type or model)
Wireless Music Station
(product description)
to which this declaration relates is in conformity with the following standards:
EN55013 : 2001
EN 300 328 : 2003
EN55020 : 2002
EN 301 489-1 : 2002
EN 55022: 1998
EN 301 489-17: 2002
EN 55024: 1998
EN 50371
: 2002
EN 60950 : 2000
IEC Guide 112 : 2000
(title and/or number and date of issue of the standards)
following the provisions of R &TTE Directive 1999/5/EC ( incl. 89/336/EEC &
73/23/EEC & 93/68/EEC directives and is produced by a manufacturing organization on
ISO 9000 level.
Eindhoven,
September 2, 2005
Cor Luijks
Technology Manager
(place, date)
(signature, name and function)
4
p001-p022_WAS5_Eng_22
4
9/30/2005, 16:48
Please contact:
Mr. Bin Li
BLC Audio PDCC Development
5/F., Philips Electronics Building
5 Science Park East Avenue
Hong Kong Science Park
Shatin Hong Kong
Français
Français -------------------------------------------- 23
Español
Philips Electronics Hong Kong Ltd. hereby offers to
deliver or make available, upon request, for a
charge no more than the cost of physically
performing source distribution, a complete
machine-readable copy of the corresponding
source code of the Library on a medium
customarily used for software interchange.
English ------------------------------------------------ 6
Español --------------------------------------------- 41
Deutsch
LGPL Library written offer
This product contains Linux 2.4.27-vrsl, that is
made available under the GNU LGPL license
version 2.1 (hereafter called "the Library").
English
Index
Nederlands
Deutsch --------------------------------------------- 59
GPL Package written offer
This product contains Linux 2.4.27-vrsl, that is
made available under the GNU GPL license
version 2 (hereafter called "the Program").
Svenska ------------------------------------------- 113
Philips Electronics Hong Kong Ltd. hereby offers to
deliver or make available, upon request, for a
charge no more than the cost of physically
performing source distribution, a complete
machine-readable copy of the corresponding
source code of the Program on a medium
customarily used for software interchange.
Svenska
Italiano ---------------------------------------------- 95
Dansk
This offer is valid for a period of three years after
the date of purchase of this product.
Italiano
Nederlands ---------------------------------------- 77
Dansk --------------------------------------------- 130
Please contact:
Mr. Bin Li
BLC Audio PDCC Development
5/F., Philips Electronics Building
5 Science Park East Avenue
Hong Kong Science Park
Shatin Hong Kong
This offer is valid for a period of three years after
the date of purchase of this product.
5
p001-p022_WAS5_Eng_22
5
9/30/2005, 16:48
Contents
English
HD
General Information
About Wireless Music Station WAS5 .............
Supplied accessories ............................................
Philips on-line support ........................................
Environmental information ................................
Maintenance ..........................................................
Safety information ................................................
7
7
8
9
9
9
................................................................................ 18
UPnP
.......................................................................... 18-19
SLEEP
Controls
.......................................................................... 18-19
Controls on the Station .................................... 10
Station’s remote control ............................. 11-12
Reset
Reset ..................................................................... 20
Installation
Placing Center and Station ............................... 13
Mounting stand onto Station ........................... 13
Setting up Wi-Fi connection
between Center and Station ..................... 13-14
Rear connections ............................................... 14
Specifications ........................................... 21
Troubleshooting .................................... 22
Connecting to an audio system
Using AC power ................................................. 14
Preparation
Using the remote control ................................ 15
Using the navigation controls .......................... 15
Basic Functions
Switching to standby/on .................................... 16
Switch to Eco power/ on .................................. 16
Auto-standby ....................................................... 16
Switching the blue indicator on/off ................ 16
Display adjustment ............................................. 17
Selecting languages ............................................. 17
6
p001-p022_WAS5_Eng_22
6
9/30/2005, 16:48
About Wireless Music Station
WAS5
Up to 5 Stations can be connected to a WAC5
Center.
English
General Information
Supplied accessories
– Station’s remote control with
1 x CR2025 battery
– Station’s stand
– Station’s AC adaptor
– 1 x Audio cables
You can easily connect your WAS5 to your
existing home audio systems, such as the audio/
video receiver, home theatre system, mini/micro
system, or multimedia speaker boxes (with builtin amplifier) and audio amplifiers.
On WAC5’s hard disk, you can centrally store
audio CDs. All the stored music can be
wirelessly streamed, via Wi-Fi**, from Center
to connected Stations.
Now, you will have the freedom to enjoy and
share your favorite music around your home.
** Wi-Fi, or IEEE802.11 b/g, is the international leading
industry standard for wireless broadband networking. It
transfers digital data with wider range and bandwidth.
This set complies with the radio interference
requirements of the European Community.
Hereby Philips Consumer Electronics,
BG Home Entertainment Networks ,
declares that this product WAS5 is in
compliance with the essential requirements
and other relevant provisions of Directive
1999/5/EC.
CAUTION
Use of controls or adjustments or
performance of procedures other than
herein may result in hazardous radiation
exposure or other unsafe operation.
7
p001-p022_WAS5_Eng_22
7
9/30/2005, 16:48
General Information
English
Philips on-line support
Philips products have been designed and manufactured to the highest quality
standards. If your Philips WAS5 is not working correctly, we recommend you
check your User Manual to verify that your product is properly connected and
configured.
The web site for WAS5 support: www.philips.com/support offers you all
information you need to optimally enjoy your product, and about new additions
to this exciting range, to make your home entertainment experience even more
enjoyable.
Please visit: www.philips.com/support and enter your product name
(WAS5) to view:
● FAQ (Frequently Asked Questions)
● Latest user manuals and PC software manuals
● Firmware upgrade files for WAS5
● Latest PC software downloads
● Interactive troubleshooting
Since it is possible for you to upgrade your product, we recommend that you
register your product on www.philips.com/register so we can inform you as
soon as new free upgrades become available.
Enjoy your WAS5!
The model number is on the rear of the set.
8
p001-p022_WAS5_Eng_22
8
9/30/2005, 16:48
Environmental information
All unnecessary packaging has been omitted.
We have tried to make the packaging easy to
separate into three materials: cardboard (box),
polystyrene foam (buffer) and polyethylene (bags,
protective foam sheet).
Your system consists of materials which can be
recycled and reused if disassembled by a
specialized company. Please observe the local
regulations regarding the disposal of packaging
materials, exhausted batteries and old
equipment.
Disposal of your old product
Your product is designed and
manufactured with high quality materials
and components, which can be recycled
and reused.
When this crossed-out
wheeled bin symbol is
attached to a product it
means the product is
covered by the European
Directive 2002/96/EC
English
General Information
Maintenance
Cleaning the Set
● Use a soft cloth slightly moistened with a mild
detergent solution. Do not use a solution
containing alcohol, spirits, ammonia or abrasives.
Safety information
● Place the set on a flat, hard and stable surface.
● Do not expose the system, batteries or discs to
excessive moisture, rain, sand or heat sources
caused by heating equipment or direct sunlight.
● Place the sets in a location with adequate
ventilation to prevent internal heat build-up in
your system. Allow at least 10 cm (4 inches)
clearance from the rear and the top of the unit
and 5 cm (2 inches) from each side.
● The ventilation should not be impeded by
covering the ventilation openings with items,
such as newspapers table-cloths, curtains, etc.
● The apparatus shall not be exposed to dripping
or splashing.
● No objects filled with liquids, such as vases, shall
be placed on the apparatus.
● No naked flame sources, such as lighted candles,
should be placed on the apparatus.
Please inform yourself about the local
separate collection system for electrical
and electronic products.
● The mechanical parts of the set contain selflubricating bearings and must not be oiled or
lubricated.
Please act according to your local rules
and do not dispose of your old products
with your normal household waste.The
correct disposal of your old product will
help prevent potential negative
consequences for the environment and
human health.
9
p001-p022_WAS5_Eng_22
9
9/30/2005, 16:48
Controls (illustrations on page 3)
English
Controls on the Station ( front
panel)
1 STANDBY-ON/ ECO POWER
–
–
–
2
–
3
–
press briefly to switch Station on or
to standby mode;
press and hold to switch Station to
power-saving mode or on
Red indicator: lights up red when the set is
switched to Standby mode or power-saving
mode
MUSIC FOLLOWS ME
HD: moves music playback between Center
and Station or between Station and Station
IR
sensor for the infrared remote control
Helpful hints: Always point the remote control
towards this sensor.
Wi-Fi antenna
4
5 Display
–
shows status of Station
6 Blue indicator
–
lights up when the set is on
10
p001-p022_WAS5_Eng_22
10
9/30/2005, 16:48
7 Repeat
Station’s remote control
–
selects continuous playback
–
Shuffle
selects random playback
1
2
8 Sleep
%
$
3
9 Music Follows Me
–
HD: moves music playback between Center and
Station or between Station and Station
5
0
6
7
–
Same Artist
plays all the tracks of current Artist
–
Same Genre
plays all the tracks of current Genre
#
@
8
!
–
–
0
9
@
–
#
1
–
–
y
press briefly to switch the set to standby mode
press and hold to switch the set to Eco Power
mode or on
2 Center (used on Center)
–
–
–
–
selects HD source
In standby mode: switches the set on and selects
HD source
Tuner/Aux (used on Center)
selects the audio input from an additional
connected appliance
In standby mode: switches the set on and selects
the audio input from an additional connected
appliance
starts playback
–
Å
pauses playback
–
–
–
–
Dim
changes the brightness of display illumination
press and hold to turn the blue indicator on or
off
Menu
enters or exits setup menu
1 / 2 / 3 / 4
navigation controls (left, right, up, down) to scroll
through the option list
1
returns to previous option lists
3 / 4
skips/searches tracks/passage backward/forward
(in playback screen); fast scrolls the option list
2 / OK
confirms selection
$à/
–
%
32
–
ajusts/displays/switches off sleep timer
–
4
!
English
Controls
–
á
searches track passage backward/forward (in
playback screen)
O, P
skips tracks backward/forward (in playback
screen)
4Ç
–
stops playback
53
–
/ 4 Scroll
scroll the display screen upward or downward
6 View
–
toggles playback display and previous option list
11
p001-p022_WAS5_Eng_22
11
9/30/2005, 16:48
Installation
English
(for illustration only)
LINE OUT
DC
AC power cord
12
p001-p022_WAS5_Eng_22
12
9/30/2005, 16:48
Placing Center and Station
Setting up Wi-Fi connection
between Center and Station
IMPORTANT!
– Install your Center and Station near
the AC outlet and where the AC power
plug can be reached easily.
Take the following steps to optimize the
Wi-Fi connection between Center and
Station:
– Keep your Center and Station away
from the source of interference (wireless
routers, microwave ovens, DECT phones,
bluetooth devices, cordless phones,
other Wi-Fi products, etc.)
– Avoid placing your Center or Station
close to the plasma TV. It may result in
improper display on your Center’s 2-way
remote control.
– Keep Stations adequately apart or in
different angles (e.g. in different rooms
blocked by one wall). Within a distance
and angle (e.g. in the same room), your
Center’s remote control is powerful
enough to simultaneously operate
several Stations, which may also result in
improper display on the 2-way remote
control.
English
Installation
Up to 5 stations can be connected to a WAC5
Center.
1
2
3
4
5
On Center
Connect the Center to power supply
Switch on WAC5 Center and select HD source
To select Add New Station on Center
a. Press and hold STOP • MENU to enter the
MENU screen (or on remote control, press
MENU)
b. Use the navigation controls 3 or 4 and 2 to
enter Station Mgnt menu
c. In Station Mgnt menu, use the navigation
controls 3 or 4 and 2 to select
➜ You will enter the Installation Mode.
Searching for the station star ts
➜ Playback stops on the previously associated
Station if you are playing the HD source
On Station
Connect the station to power supply
Select your desired language: English, Français,
Español, Nederlands, Italiano and Deutsch
➜ “Searching for Center” appears
➜ The set enters Installation Mode
➜ The search for Center starts.
Mounting stand onto Station
WAS5 Station is equipped with a stand. To
mount the stand onto your Station,
1
2
Align the supplied stand to the slot at Station’s
bottom
Insert the stand into the slot firmly
On Center
6
Press STOP/Ç on the Center when all your
stations are found
IMPORTANT!
– Avoid thick walls. Your Center and Station should
never be blocked by 2 or more walls.
– Avoid placing the sets close to large metal
objects.
– For better Wi-Fi reception, turn the Wi-Fi
antenna, or adjust the location of your Center and
Station.
– indicates maximum reception
– indicates no reception
Helpful hints:
– Once inserted, the stand is undetachable.
13
p001-p022_WAS5_Eng_22
13
9/30/2005, 16:48
Installation
English
If there is interference in the neighborhood,
the set may pause during playback or
respond slowly to your operation. In such
cases
– Use the WEP* key when connecting your Center
and Station to an existing wireless PC network. See
the manual Connect to your PC: Option 2.
– Change the operating channel of your Center
and Station when connecting them to an existing
wireless PC network. To learn about how to change
channels, see the Owner’s manual of your router
and the manual Connect to your PC: Option
2.
– If possible, change the operating channels of the
other Wi-Fi devices at your home.
– Turn the above devices in different directions to
minimize interference.
* stands for Wired Equivalent Privacy. It is a
security protocol for wireless local area
network
3
Select AUX mode in the connected audio
system
Using AC power
1
2
Make sure all the connections have been made
before switching on the power supply
Connect the AC power cord to the wall socket.
This switches on the power supply
When Center or Station is switched to standby,
it is still consuming some power. To disconnect
the system from the power supply
completely, remove the power plug from
the wall socket.
The type plate is located on the rear of the
set.
For users in the U.K.: please follow the
instructions on page 2.
Rear connections
Warning:
Never make or change connections with
the mains supply switched on.
Connecting to an audio system
You can easily connect your WAS5 to your
existing home audio systems, such as the audio/
video receiver, home theatre system, mini/micro
system, or multimedia speaker boxes (with builtin amplifier) and audio amplifiers.
1
2
Insert the one-plug end of the audio cables
(supplied) to LINE OUT
Connect the two-plug end of the audio cables
to the AUX IN (or AUDIO IN) terminals of
the additional appliance, red plug to the to the
red socket AUX IN R and white plug to the
white socket AUX IN L
LINE OUT
DC
(for illustration only)
14
p001-p022_WAS5_Eng_22
14
9/30/2005, 16:48
Using the remote control
IMPORTANT!
– Remove the protective
plastic tab before using the
Station’s remote control.
– Always point the remote
control directly towards IR area .
To replace the battery
1
2
3
4
Using the navigation controls
When selecting options on the set’s screen, you
often need to use the navigation controls 1 / 2
/ 3 / 4.
1
2
3
4
Press and hold 1 as indicated
Press 3 / 4 to highlight an option
Enter its submenu by pressing 2
Press 1 to return to the previous option list
screen
Press OK or 2 to confirm
Simultaneously, pull the battery tray at 4
Remove the old battery and put a new CR2025
battery in place
Put back the battery tray
2
1
➠
3
CR 2
02
5
LI
TH
IUM
CAUTION!
– Remove the battery if it is exhausted
or will not be used for a long time.
– Batteries contain chemical substances,
so they should be disposed of properly.
15
p001-p022_WAS5_Eng_22
15
9/30/2005, 16:48
English
Preparation
Basic functions
English
Switching to standby/on
1
2
When the set is on, press STANDBY-ON/
ECO POWER to switch it to standby (or y
on the remote control)
➜ Display shows GoodBye
➜ The Red indicator lights up
➜ Center: The screen dims out. Display shows
Station Status screen and the number of stations
found
➜ Station: Display shows Center Status
screen and the number of centers found
➜ The Center Status screen is empty if no
center is found
Auto-standby
● When the set has reached the end of playback/
recording and remains in the stop position for
more than 5 minutes, the set will switch to
standby automatically to save power.
Switching the blue indicator on/
off
The blue indicator lights up when the set is
switched on.
● On the remote control, press and hold DIM to
turn the brightness on or off.
To switch on, press STANDBY-ON/ ECO
POWER (or y on the remote control)
➜ The set switches to the last source selected
➜ The Green indicator lights up
Switching to power-saving mode
In the power-saving Eco power mode, the set’s
display and Wi-Fi connection are turned off.
1
When the set is on, press and hold STANDBYON/ ECO POWER to switch it to Eco
power (or y on the remote control).
➜ The display is switched off
➜ The Red indicator lights up
2
To switch on, press and hold STANDBY-ON/
ECO POWER (or y on the remote control)
➜ The set switches to the last source selected
Helpful hints:
– In the standby/Eco power mode, the settings of
networking, display and language will be retained in
the set’s memory.
16
p001-p022_WAS5_Eng_22
16
9/30/2005, 16:48
Display adjustment
Selecting languages
You can adjust the display’s backlight and
contrast settings.
1
2
On the remote control, press MENU.
Use the navigation controls 3 or 4 and 2
to select Settings.
3
Press 3 or 4 and 2 to select Display.
4
English
Basic functions
Press 1 / 2 / 3 / 4 to select your
options:
1
2
3
4
On remote control, press MENU
Use the navigation controls 3 or 4 and 2
to select Settings
Use the navigation controls 3 or 4 and 2
to select Language
Press 3 or 4 and 2 to select:
English, French, Spanish, Dutch, Italian
and German.
Backlight:
Press 3 or 4 and 2 to select on or off ;
● You can also turn the backlight on or off by
pressing DIM on the remote control
Contrast:
Press 1 / 2 to reduce or enlarge the contrast.
17
p001-p022_WAS5_Eng_22
17
9/30/2005, 16:48
HD
UPnP
English
UPnP
On WAC5 Center is located a 80GB
hard disk, where music is centrally stored.
Via Wi-Fi, all the stored music can be
streamed and played on Station.
After connecting your WAS5 to an existing
network, you can set up a UPnP* server in the
network. Play from your WAS5 stations the
music collection either on the Center or on the
UPnP server.
* Univeral Plug and Play (UPnPTM) builds on
For the details on how to use WAS5 Station
together with Wireless Music Center, see the
user manual for WACS5.
standard networking technologies and provides
standardized protocols for a wide variety of
home and small business devices. It allows easy
interoperability of all the devices supporting the
the networking technologies.
Requirements for the UPnP server:
● The UPnP device has been connected to the
same network as WAS5.
● UPnP server software is installed (e.g. Philips
Media Manager, Musicmatch® ) and the UPnP
server function is enabled.
– With Philips Media Manager, the UPnP server
function is enabled by default.
To connect a UPnP server
If the WAS5 Station is now connected to
Center,
1
2
3
4
5
Check the Center is switched on or to standby
mode
Check your UPnP-enabled PC is switched on
– Switch off your firewall
Switch on the Station
To select Select Server on Station
a. On the remote control, press MENU
b. Use the navigation controls 3 or 4 and 2 to
select
➜ The Station ‘s display shows the list of servers
connected
➜ Server not found appears if there is no
UPnP server in the network
Use the navigation controls 3 or 4 and 2 to
select your desired server
➜ The Station ‘s display shows PC’s music as
it does on PC
If the WAS5 Station has ever been
connected to Center, but is now
disconnected from Center
1
Connect WAS5 to the power supply
➜ Display shows: “Connecting to Center...”
18
p001-p022_WAS5_Eng_22
18
9/30/2005, 16:48
2
3
4
SLEEP
To connect to a UPnP server, press MENU on
the remote control
➜ Display shows the selection screen of
Installation Mode or Select Server
SLEEP
You can set a certain period of time after which
the Station will switch to standby.
Use the navigation controls 3 or 4 and 2 to
select Select Server
➜ The Station ‘s display shows the list of servers
connected
➜ Server not found appears if there is no
UPnP server in the network
Use the navigation controls 3 or 4 and 2 to
select your desired server
➜ The Station ‘s display shows PC’s music as
it does on PC
1
To play music on a UPnP server
1
2
3
4
Check the WAS5 Station is switched on
Check the WAS5 Station is connected to a
UPnP server
➜ On the Station ‘s display shows PC’s music as
it does on PC
Press the navigation controls 3 or 4 and 2
to select your option
Press OK to start playback
2
On the remote control, press Sleep repeatedly
to select the desired time period options (in
minutes):
➜ Display shows in sequence: Sleep 15, 30,
45, 60, 90, 120, Off
➜ Display shows the selected option briefly and
Z
returns to its previous status. The icon Z appears
To view the time countdown to the standby
mode, press Sleep again
To deactivate the sleep timer, press Sleep
until Sleep Off is displayed.
or
Press STANDBY-ON/ ECO POWER to
switch the set to standby (or y on the remote
control)
Helpful hints:
– On WAS5’s UPnP mode, MUSIC FOLLOWS
ME and MUSIC BROADCAST are disabled.
19
p001-p022_WAS5_Eng_22
19
9/30/2005, 16:48
English
UPnP
Reset
English
If a Station is reset and the Center is not:
Reset
If desired, you can restore your Center or Station
to their default setting (including the network
setting).
When to reset Center or Station:
● Resetting Center or Station helps to re-establish
the connection between Center and Station.
● To change the way your Center connects to PC,
you need to reset the Center (see the Option 1,
Option 2 or Option 3 in manual Connect to
your PC)
1
2
3
4
5
6
Check the set is switched on (See Basic
functions, Switching on/to standby and
selecting functions, Switching to Eco
power/ on)
Press and hold STOP • MENU to enter the
MENU screen (or on the remote control, press
MENU)
● On the Center, select HD mode and then, enter
Installation Mode by:
a. Press MENU
b. Use the navigation controls 3 or 4 and 2 to
enter Station Mgnt menu
c. In Station Mgnt menu, use the navigation
controls 3 or 4 and 2 to select Add New
Station
➜ Searching for Stations starts
If both Center and Stations are reset:
● Do as you did in the first-time Wi-Fi connection
(see the user manual for WACS5: Installation,
Set up Wi-Fi connection between Center
and Station)
7
On Center, press STOPÇto exit Installation
Mode when all your Stations are found
Use the navigation controls 3 or 4 and 2
to enter Settings
Use the navigation controls 3 or 4 and 2
to enter Restore settings
Press 3 or 4 and 2 to select Yes
➜ The set is rebooted. Language selection
screen appears
Select your desired language: English, French,
Spanish, Dutch, Italian and German
➜ The set enters Installation Mode
➜ The search for Center or Stations starts. The
Wi-Fi connection is being re-established
If the Center is reset and Stations are
not reset:
● On the Stations, enter Installation Mode by:
a. Remove the Station’s power plug and then,
connect it to the power supply again
➜ “Connecting to Center” appears
b. Press MENU or STOP to enter the selection
screen of Installation Mode and Select
Server
c. Use the navigation controls 3 or 4 and 2 to
select Installation Mode
20
p001-p022_WAS5_Eng_22
20
9/30/2005, 16:48
English
Specifications
General
AC Power
WAS5 .................................. 120±10%-230V ±10%
Power consumption
Active
WAS5 ...................................................................... < 5W
Standby
WAS5 ...................................................................... < 3W
Eco Power Standby
WAS5 ........................................................................ < 1W
Dimensions (w x h x d)
WAS5 ....................................... 80 x 173 x 186mm
Weight
WAS5 ....................................................................... 0.5 kg
LINE OUT
Output level ............................................................. 900mV
Output impedance ................................................ 3.5k Ω
Distortion ................................................................... ≤ 0.5%
Channel difference ................................................. ≤ 3dB
Channel separation .............................................. ≥ 60dB
S/N ratio ................................................. ≥ 76 dBA (IEC)
Wireless
Wireless standard .................................................................
.......... 802.11g, backwards compatible to 802.11b
Wireless security ...................................................................
.................................... WEP (64 or 128bit), WPA-PSK
Frequency range 2412-2462 MHz (CH1-CH11)
Specifications and external appearance are
subject to change without notice.
21
p001-p022_WAS5_Eng_22
21
9/30/2005, 16:48
Troubleshooting
English
WARNING
Under no circumstances should you try to repair the system yourself, as this will
invalidate the warranty. Do not open the system as there is a risk of electric shock.
If a fault occurs, first check the points listed below before taking the system for repair. If
you are unable to remedy a problem by following these hints, consult your dealer or
Philips for help.
Problem
Solution
Wi-Fi connection:
During the first-time setup, Station’s
display shows “Searching for Center”
✔ Check you have placed the Center and Station
side by side on a flat and firm surface.
✔ Check you have connected the Center to power
supply.
✔ When adding a new station, check your center is
in Installation mode (See HD, Station
management).
✔ Turn off the wireless router nearby if there is
difficulty in connecting your Center and Station.
I get interference on my wireless (WiFi)
link between center and station.
The WACS 5 operate in the 2.4GHz radio
frequency spectrum. Many other household/IT
devices also operate in the frequency spectrum,
for example: microwave ovens, Dect phones,
Bluetooth devices like Bluetooth headphones,
computer mouse, wireless routers, cordless
phones, WiFi compatible printers, PDAs.
These devices can interfere with the WiFi link
between Center and Station, resulting in such
interference as the pause during playback , the
set’s slow response to your operation. The
severity of interference varies depending on the
extent of radiation from the device and the
strength of Wi-Fi signals in the position.
✔
✔
✔
✔
✔
Remote control:
The remote control does not function
properly.
If you are playing the set, stop playback and take
the appropriate measures as follows:
Keep the Center or Station at least 3 meters
away from such devices.
Use the WEP key when connecting your
Center and Station to an existing wireless PC
network. Refer to the owner’s manual of your
router and Option 2 in Connect to your
PC.
Change the operating channel of your Center
and Station when connecting them to an existing
wireless PC network. To learn about how to
change channels, see the manual Connect to
your PC.
If possible, change the operating channels of
the other Wi-Fi devices at your home.
Turn the devices in different directions to
minimize interference.
✔ Remove the protective plastic tab before using
the Station’s remote control.
✔ Reduce the distance between the remote
control and the set.
✔ Replace the battery.
✔ Point the remote control directly towards the IR
sensor.
22
p001-p022_WAS5_Eng_22
22
9/30/2005, 16:48