1
®
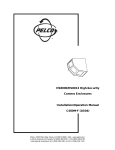
HS3000/HS3020
High-Security
Enclosures
Installation/
Operation Manual
C483M-E (9/97)
Pelco • 3500 Pelco Way, Clovis, CA 93612-5699 • USA • www.pelco.com
In North America and Canada: Tel (800) 289-9100 • FAX (800) 289-9150
International Customers: Tel (1-559) 292-1981 or FAX (1-559) 348-1120
CONTENTS
Section
Page
1.0 GENERAL .................................................................................................. 1
1.1 IMPORTANT SAFEGUARDS AND WARNINGS ............................... 1
1.2 UNPACKING INSTRUCTIONS .......................................................... 2
1.3 RECOMMENDED TOOLS ................................................................. 2
2.0 DESCRIPTION .......................................................................................... 3
2.1 MODELS ............................................................................................ 3
2.2 OPTIONS ........................................................................................... 3
3.0 INSTALLATION .......................................................................................... 4
4.0 MAINTENANCE ......................................................................................... 6
5.0 EXPLODED ASSEMBLY DRAWING ......................................................... 7
6.0 SPECIFICATIONS ..................................................................................... 8
7.0 WARRANTY AND RETURN INFORMATION ........................................... 10
LIST OF ILLUSTRATIONS
Figure
1
2
Page
HS3000/HS3020 Exploded Assembly Drawing ................................. 7
HS3000/HS3020 Dimension Drawing ................................................ 9
LIST OF TABLES
Table
A
B
C
Page
Video Coaxial Cable Wiring Distances .............................................. 5
24 VAC Wiring Distances ................................................................... 5
HS3000/HS3020 Exploded Assembly Parts List ............................... 7
REVISION HISTORY
Manual #
ii12
Date
Comments
C483M
8/89
Original manual, created for AH3000.
C483M
6/90
Rev. A. Manual revised/updated to reflect model
number change to HS3000.
C483M
5/91
Rev. B. Manual design revised.
C483M
12/91
Rev. C. Manual revised to reflect new HS3020 model
information, revised dimension drawing and revised
parts list.
C483M-D
9/95
Rev. D. Manual revised to include optional tamper
switch installation information; as well as new mounting
template and manual style.
C483M-E
2/96
Rev. E. Revised to include updated specification
description, installation instructions, and part numbers
for tamper switch update per ECO# 95-357.
9/97
Revised manual to new format. Added Tables A and B.
Added HS3020CA to list of options.
Pelco Manual C483M-E (9/97)
1.0 GENERAL
1.1 IMPORTANT SAFEGUARDS AND WARNINGS
Prior to installation and use of this product, the following WARNINGS should be
observed.
1.
Installation and servicing should only be done by Qualified Service Personnel
and conform to all Local codes.
2.
Unless the unit is specifically marked as a NEMA Type 3, 3R, 3S, 4, 4X, 6, or
6P enclosure, it is designed for indoor use only and it must not be installed
where exposed to rain and moisture.
3.
Only use replacement parts recommended by Pelco.
4.
The installation method and materials should be capable of supporting four
(4) times the weight of the enclosure, camera and lens combination.
5.
The camera and lens combination shall not exceed 40 lbs (18 kg).
The product and/or manual may bear the following marks:
This symbol indicates that dangerous voltage constituting a
risk of electric shock is present within this unit.
This symbol indicates that there are important operating and
maintenance instructions in the literature accompanying this
unit.
CAUTION:
RISK OF
ELECTRIC SHOCK.
DO NOT OPEN.
CAUTION:
TO REDUCE THE RISK OF ELECTRICAL SHOCK,
DO NOT REMOVE COVER. NO USERSERVICEABLE PARTS INSIDE. REFER SERVICING
TO QUALIFIED SERVICE PERSONNEL.
Please thoroughly familiarize yourself with the information
in this manual prior to installation and operation.
Pelco Manual C483M-E (9/97)
1
1.2 UNPACKING INSTRUCTIONS
Unpack and inspect all parts carefully.
The following parts are supplied:
1
1
1
2
2
2
Camera enclosure
1/4"-drive socket for tamper-resistant screws
7/64" Allen wrench
1/4-20 x 1/2" bolts
1/4" flat washers
1/4" split lock washers
Be sure to save the shipping carton and any inserts. They are the safest material in
which to make future shipments.
If an item appears to have been damaged in shipment, replace it properly in its
carton and contact the factory at 1-800-289-9100 or 1-559-292-1981 for a replacement. (International customers fax 1-559-348-1120 for authorization and instructions.)
If an item needs to be returned to the factory for repair, consult the WARRANTY
AND RETURN section of this manual for instructions.
1.3 RECOMMENDED TOOLS
Pelco does not supply basic tools needed for the installation process. The following
tools are recommended:
Hand tools
Drill
Coaxial cable stripper
BNC crimp tool
Wire cutter
Wire stripper
2
Pelco Manual C483M-E (9/97)
2.0 DESCRIPTION
The HS3000 Series is a high security camera enclosure designed for installations
such as ATM bank machines, prisons, detention cells, etc., requiring maximum
protection from vandalism. In addition, a factory-installed tamper switch is mounted
on the secured access cover.
Constructed from heavy-gauge steel, the HS3000 Series will accept most CCD
cameras with fixed focal length lenses ranging in size from 4mm to 75mm. There is
no exposed mounting hardware securing the HS3000 Series to its mounting surface. Opening the enclosure can only be accomplished with a specially designed
tool, eliminating the possibility of the enclosure being opened by unauthorized personnel. Designed to function as a wall or ceiling enclosure, the HS3000 Series
features two possible window positions. An impact-resistant, .25" (.63 cm) thick,
smoked Lexan™ window is supplied with the enclosure.
2.1 MODELS
HS3000
Medium sized, high-security camera enclosure, 10" (25.4 cm)
body.
HS3020
Same as HS3000 except 20" (50.8 cm) body.
2.2 OPTIONS
Pelco Manual C483M-E (9/97)
AH300010025
Window, clear, .25" (.63 cm) thick Lexan™.
HKHS3000
Heater kit, 120 VAC, 30 watts. Thermostatically controlled ON
at 40°F (4.44°C) and OFF at 60°F (15.56°C).
HKHS3024
Same as HKHS3000 except 24 VAC.
HS3020CA
Conduit adapter for HS3020.
3
3.0 INSTALLATION
Before installing the HS3000/HS3020 to a wall or ceiling, make certain that the
mounting surface is able to support four times the full load of the enclosure plus all
other equipment such as camera, lens, etc.
To mount the enclosure to a wall or ceiling, follow the steps outlined below.
NOTE: The four (4) fasteners required to secure the enclosure to
a wall mounting surface (minimum
3/8" [.952 cm] diameter recommended) are not supplied.
1.
Unscrew the screws and remove the cover using the special socket (fits 1/4"
drive) and Allen wrench that are provided.
2.
Knock out any of the three (3) cable entry holes desired on the enclosure
body.
3.
Mark and drill four (4) holes in the wall or ceiling for mounting the enclosure
and, as required, holes for cabling (see Figure 2 dimension drawing).
4.
Attach the enclosure with the required fasteners.
5.
Route all cables through the appropriate knockouts. Refer to Table A for the
type of video coaxial cable to use. If your camera will use 24 VAC power, refer
to Table B to determine the size of wire to use. If you are using conduit, attach
it to the enclosure.
6.
The tilt table consists of two (2) L-brackets. If the enclosure is mounted to a
wall, remove the outer L-bracket.
7.
Loosen the tilt table mounting bolt.
8.
Securely attach the camera/lens to the desired location on the tilt table using
the bolts, flat washers and split lock washers that are provided.
9.
Make all necessary electrical connections (video, camera power, etc.).
10. Wire the tamper switch. For a “Normally Open” circuit, use the “NO” and “common” terminals; for a “Normally Closed” circuit, use the “NC” and “common”
terminals. Remember that the switch will be pushed down when you replace
the cover.
11. Position the tilt table at the desired location and angle, and tighten the hardware.
12. Replace the cover.
13. Provide power to the camera and check for adequate video image.
4
Pelco Manual C483M-E (9/97)
Table A. Video Coaxial Cable Wiring Distances
Cable Type*
Maximum Distance
RG59
RG6
RG11
750 ft (229 m)
1,000 ft (305 m)
1,500 ft (457 m)
* Minimum cable requirements:
75 ohms impedance
All-copper center conductor
All-copper braided shield with 95% braid coverage
Table B. 24 VAC Wiring Distances
The following are the recommended maximum distances for 24 VAC applications
and are calculated with a 10-percent voltage drop. (10-percent is generally the
maximum allowable voltage drop for AC-powered devices.)
EXAMPLE: An enclosure that re22
10
20
NOTE: Distances are calculated
in feet; values in parentheses are
meters.
30
40
50
60
70
Total vA consumed
80
90
100
110
120
130
140
150
160
170
180
190
200
Pelco Manual C483M-E (9/97)
178
(54)
89
(27)
59
(17)
44
(13)
35
(10)
29
(8)
25
(7)
22
(6)
19
(5)
17
(5)
16
(4)
14
(4)
13
(3)
12
(3)
11
(3)
11
(3)
10
(3)
9
(2)
9
(2)
8
(2)
20
18
283 451
(86) (137)
141 225
(42) (68)
94 150
(28) (45)
70 112
(21) (34)
56
90
(17) (27)
47
75
(14) (22)
40
64
(12) (19)
35
56
(10) (17)
31
50
(9) (15)
28
45
(8) (13)
25
41
(7) (12)
23
37
(7) (11)
21
34
(6) (10)
20
32
(6)
(9)
18
30
(5)
(9)
17
28
(5)
(8)
16
26
(4)
(7)
15
25
(4)
(7)
14
23
(4)
(7)
14
22
(4)
(6)
16
14
12
10
716
(218)
358
(109)
238
(72)
179
(54)
143
(43)
119
(36)
102
(31)
89
(27)
79
(24)
71
(21)
65
(19)
59
(17)
55
(16)
51
(15)
47
(14)
44
(13)
42
(12)
39
(11)
37
(11)
35
(10)
1142
(348)
571
(174)
380
(115)
285
(86)
228
(69)
190
(57)
163
(49)
142
(43)
126
(38)
114
(34)
103
(31)
95
(28)
87
(26)
81
(24)
76
(23)
71
(21)
67
(20)
63
(19)
60
(18)
57
(17)
1811
(551)
905
(275)
603
(183)
452
(137)
362
(110)
301
(91)
258
(78)
226
(68)
201
(61)
181
(55)
164
(49)
150
(45)
139
(42)
129
(39)
120
(36)
113
(34)
106
(32)
100
(30)
95
(28)
90
(27)
2880
(877)
1440
(438)
960
(292)
720
(219)
576
(175)
480
(146)
411
(125)
360
(109)
320
(97)
288
(87)
261
(79)
240
(73)
221
(67)
205
(62)
192
(58)
180
(54)
169
(51)
160
(48)
151
(46)
144
(43)
Maximum distance from transformer to load
Wire Gauge
quires 80 vA and is installed 35 feet
(10 m) from the transformer would
require a minimum wire gauge of
20 Awg.
5
4.0 MAINTENANCE
Regularly scheduled maintenance will help prolong the operational life and appearance of the equipment.
Clean the plexiglass viewing window regularly with a soft cloth, using a mild, nonabrasive detergent and water solution to help maintain picture clarity.
6
Pelco Manual C483M-E (9/97)
5.0 EXPLODED ASSEMBLY DRAWING
Figure 1. HS3000/HS3020 Exploded Assembly Drawing
Table C. HS3000/HS3020 Exploded Assembly Parts List
Item
Quantity
1
2
1
1
3
4
2
1
5
6
7
8
9
10
2
1
1
2
1
11
12
13
5
10
1
1
2
Pelco Manual C483M-E (9/97)
Description
Window, Lexan™, smoked
Body (HS3000)
(HS3020)
End plate gasket
Cover (HS3000)
(HS3020)
Tilt table
Rear plate
Tilt table lock plate
Tamper-resistant screw
Socket tool for tamper-resistant screw
Body gasket (feet)
HS3000
HS3020
Tamper switch bracket
Tamper switch
Spacer (stand-off)
Part Number
AH300010005
AH30001000WA
HS30201000WA
AH300010015
AH30004002COMP
HS30204002COMP
AH30004004COMP
AH30004005COMP
AH30004006COMP
ZH1/4-20X.50SRT
ZTSOCKET10
EH550010030
EH550010030
HS30004113COMP
SWI1DM401
SPA800IL
7
6.0 SPECIFICATIONS
MECHANICAL
Window:
1/4" (.63 cm) thick, impact and abrasion resistant smoked
Lexan™ (1 f-stop attenuation)
Camera Mounting: Adjustable tilt table
Enclosure
Mounting:
Maximum
Camera/Lens
Size
Four (4) .390" (.99 cm) diameter holes on protected rear surface
Accepts camera/lens combinations
(including BNC connector) up to:
HS3000
3.75" H x 3.25" W x 9.00" L (9.52 cm x 8.25 cm x 22.86 cm)
HS3020
3.75" H x 3.25" W x 18.00" L (9.52 cm x 8.25 cm x 45.72 cm)
Security:
Tamper-resistant screws and N.O./N.C. switch contact on
cover
Tamper Switch:
Plunger type door switch with “pull to cheat” feature. N.O./N.C.
contacts clearly marked on body of switch.
DM electrical
rating:
10A, 125V. Plunger type with .20" (0.51 cm)
ELECTRICAL
Cable Entry:
Two (2) cable knockout holes on flat mounting surface
One (1) cable knockout hole on the end opposite the viewing
window
Knockouts are Ø.875-inch (2.22 cm) and will accept 1/2-inch
(1.27 cm) conduit
Tamper Switch:
1/4" (.63 cm) quick connect. N.O./N.C. clearly marked on switch
body. 10A, maximum switching current 125V, maximum switching voltage.
GENERAL
Construction:
Seam welded 14 GA (.074") steel
Finish:
Polyester powder coat
Security:
Two (2) tamper-resistant screws
Weight:
HS3000:
8 lbs (3.6 kg)
HS3020:
Dimensions:
16 lbs (7.2 kg)
See Figure 2
(Design and product specifications subject to change without notice.)
This equipment contains electrical or electronic components that must be recycled properly to comply with Directive 2002/96/EC of the European Union
regarding the disposal of waste electrical and electronic equipment (WEEE). Contact your local dealer for procedures for recycling this equipment.
8
Pelco Manual C483M-E (9/97)
Figure 2. HS3000/HS3020 Dimension Drawing
Pelco Manual C483M-E (9/97)
9
7.0 WARRANTY AND RETURN INFORMATION
WARRANTY
Pelco will repair or replace, without charge, any merchandise proved defective in material or
workmanship for a period of one year after the date of shipment.
Exceptions to this warranty are as noted below:
• Five years on FT/FR8000 Series fiber optic products.
• Three years on Genex® Series products (multiplexers, server, and keyboard).
• Three years on Camclosure® and fixed camera models, except the CC3701H-2, CC3701H-2X,
CC3751H-2, CC3651H-2X, MC3651H-2, and MC3651H-2X camera models, which have a fiveyear warranty.
• Two years on standard motorized or fixed focal length lenses.
• Two years on Legacy®, CM6700/CM6800/CM9700 Series matrix, and DF5/DF8 Series fixed
dome products.
• Two years on Spectra®, Esprit®, ExSite™, and PS20 scanners, including when used in
continuous motion applications.
• Two years on Esprit® and WW5700 Series window wiper (excluding wiper blades).
• Eighteen months on DX Series digital video recorders, NVR300 Series network video
recorders, and Endura ™ Series distributed network-based video products.
• One year (except video heads) on video cassette recorders (VCRs). Video heads will be
covered for a period of six months.
• Six months on all pan and tilts, scanners or preset lenses used in continuous motion applications
(that is, preset scan, tour and auto scan modes).
Pelco will warrant all replacement parts and repairs for 90 days from the date of Pelco shipment.
All goods requiring warranty repair shall be sent freight prepaid to Pelco, Clovis, California. Repairs
made necessary by reason of misuse, alteration, normal wear, or accident are not covered under
this warranty.
Pelco assumes no risk and shall be subject to no liability for damages or loss resulting from the
specific use or application made of the Products. Pelco’s liability for any claim, whether based on
breach of contract, negligence, infringement of any rights of any party or product liability, relating
to the Products shall not exceed the price paid by the Dealer to Pelco for such Products. In no event
will Pelco be liable for any special, incidental or consequential damages (including loss of use, loss
of profit and claims of third parties) however caused, whether by the negligence of Pelco or
otherwise.
The above warranty provides the Dealer with specific legal rights. The Dealer may also have
additional rights, which are subject to variation from state to state.
If a warranty repair is required, the Dealer must contact Pelco at (800) 289-9100 or (559) 292-1981
to obtain a Repair Authorization number (RA), and provide the following information:
1. Model and serial number
2. Date of shipment, P.O. number, Sales Order number, or Pelco invoice number
3. Details of the defect or problem
If there is a dispute regarding the warranty of a product which does not fall under the warranty
conditions stated above, please include a written explanation with the product when returned.
Method of return shipment shall be the same or equal to the method by which the item was received
by Pelco.
RETURNS
Pelco, the Pelco logo, Camclosure, Esprit,
Genex, Legacy, and Spectra are registered
trademarks of Pelco.
Endura and ExSite are trademarks of Pelco.
© Copyright 1997, Pelco. All rights reserved.
10
In order to expedite parts returned to the factory for repair or credit, please call the factory at (800)
289-9100 or (559) 292-1981 to obtain an authorization number (CA number if returned for credit,
and RA number if returned for repair).
All merchandise returned for credit may be subject to a 20% restocking and refurbishing charge.
Goods returned for repair or credit should be clearly identified with the assigned CA or RA number
and freight should be prepaid. Ship to the appropriate address below.
If you are located within the continental U.S., Alaska, Hawaii or Puerto Rico, send goods to:
Service Department
Pelco
3500 Pelco Way
Clovis, CA 93612-5699
If you are located outside the continental U.S., Alaska, Hawaii or Puerto Rico and are instructed
to return goods to the USA, you may do one of the following:
If the goods are to be sent by a COURIER SERVICE, send the goods to:
Pelco
3500 Pelco Way
Clovis, CA 93612-5699 USA
If the goods are to be sent by a FREIGHT FORWARDER, send the goods to:
Pelco c/o Expeditors
473 Eccles Avenue
South San Francisco, CA 94080 USA
Phone: 650-737-1700
Fax: 650-737-0933
Pelco Manual C483M-E (9/97)