1
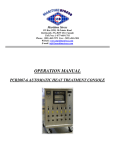
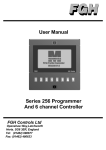
Maritime Stress PO Box 2898, 30 Estates Road Dartmouth, NS, B2W 4Y2, Canada Toll Free: 1-877-468-1781 Phone: (902) 468-7873 Fax: (902) 468-2304 Website: www.maritimestress.com E-mail: [email protected] OPERATION MANUAL PC2007-12 AUTOMATIC 12 WAY HEAT TREATMENT CONSOLE 2 INDEX PC2007-12 HEAT TREATMENT 12 WAY CONSOLE PC2007-12 Basic Six Way Heat Treatment Console Description, Page 3 Specifications – PC2007-12 Basic Heat Treatment Console, Page 4 Maintenance Requirements, Page 5 PC2007-12 Operating Instructions, Page 6, 7, & 8 P256 6 Channel Programmer Calibration Instructions, Page 9, 10 6600 Temperature Controller Calibration Instructions, Page 11, 12, 13 & 14 PC2007-12 Heat Treatment Console System Connections, Page 15 To change secondary and primary connections follows these instructions, Page 16 Spare parts PC2007-12 Way Heat Treatment Console, Page 17 PC2007-12 Automatic Heat Treatment Console REV 0, 07 www.maritimestress.com 3 PC2007-6 Twelve Way Heat Treatment Console: DESCRIPTION: The PC2007-12 automatic heat treatment console is designed to control various heat treatment processes by closely monitoring and adjusting the temperature rate of rise and fall, the soak temperature, set point and duration, on up to 12 zones. It incorporates the latest microprocessor based technology and is simple to set up and operate. Control setting is by means of push switches and an LCD screen provides visual indication of program position and output status at any time. SPECIFICATIONS – PC2007-12 Heat Treatment 12 way Console: Length: Width: Height: Weight: Material: Wheels: Handling: 44” 36” 38” Approx. 1275 lbs 12 gauge stainless steel cabinet 900 lbs capacity each with brake (4) (SS mounting brackets available upon request) Forklift access. Inputs: Voltage: Current: Power: Frequency: 480-565-575-604, 3 Phase 200 amp 130 KVA Isolated Copper Wound 60 Hz Output Per Zone: Zones: Voltage: Current: Power: Activation: Control per zone: 12 80 VAC, single phase 135 amps @ 80V 10.8 KVA 200 amp contactor Digital temperature controller or P256 programmer Control Circuit: Voltage: Current: Power: Auxiliary: 110 VAC, single phase 10 amp circuit breaker 1650 VA winding on power transformer 110 VAC supply, single phase PC2007-12 Automatic Heat Treatment Console REV 0, 07 www.maritimestress.com 4 6 x Digital Temperature Controller (6600): Temperature Range: Thermocouple: Resolution: 0-2200°F or 0-1200°C Type “K” Measurement 0.1 degrees / Display 1.0 degree 2 x 6 Channel Temperature Programmer/Controller (P256): Temperature Range: Thermocouple: Resolution: 0-2000°F or 0-1200°C Type “K” Measurement 0.1 degrees / Display 1.0 degree Amp Meter: Supplied by client Protection: 120-VAC Control Circuit: Heater Power: Console Power: Power Transformer: Cooling fan: 5 amp circuit breaker Isolation contactor for each zone 200/250 amp main circuit breaker 392°F (200°C) over temperature thermostat per phase 2 x 340 CFM - Thermally protected PC2007-12 Automatic Heat Treatment Console REV 0, 07 www.maritimestress.com 5 Maintenance Requirements: Inspection and Cleaning: ITEM INSPECTION FREQUENCY Contactors Temperature Controllers (6600) / Programmer (P256) Recorder (OPTIONAL) Burned or Pitted Calibration Every 6 months Every 12 months Calibration Every 12 months Recorder (OPTIONAL) System Cleanliness Main shaft Lubrication Every 6 months and cleaning Every 6 months System Electrical Loose connections Every 6 months Air Vents and fan Dust or dirt build up Every 3 months Check bolts and screws Loose Every 6 months PC2007-12 Automatic Heat Treatment Console REV 0, 07 www.maritimestress.com ACTION Clean or replace contacts Check accuracy and adjust if required Check accuracy and adjust if required Refer to page 19-2 in AH3000 Series manual Vacuum with power disconnected Tighten all terminal connections Clean with vacuum with power disconnected Tighten 6 PC2007-6 Twelve Way Heat Treatment Console Operating Instructions: 1. Switch 200 amp main circuit breaker to the “ON” position. 2. Make sure zones used are indicating the actual temperature on the programmer (P256) prior to start and then turn rocker switches to the “PRG” position. 3. Decide on the heat treatment specification and set as follows for both programmers: P256 Six Channel Digital Programmer a.) On start up. The display shows “Logo 256” and version number. It then reverts to the “Controller Overview”. The large number on the left hand side of each box shows the zone number. The small letter “a” or “m” on the right hand side indicates if the zone is in AUTO of MANUAL mode. The larger number below shows the temperature of the thermocouple in that zone. b.) By pushing the zone button once that display shows the manual set point for that zone. (It is recommended that this is set at about 10°C if no manual operation is required). The value is altered by use of the up - down buttons. c.) Push the zone button a second time, the display will show if the zone is in AUTO or MANUAL mode, this again can be altered by use of the up-down button. Set the zone in the “AUTO” mode. d.) Pushing the button a third time reverts the screen back to “Controller overview” (if no button is pushed for 20 seconds the screen automatically reverts to “Controller overview”). Set each zone to be used in the Automatic mode. e.) While in the “Controller Display” mode – push the “down” button once and the display will change to show the “Profile overview”. Note: The six numbered buttons have now changed their function 4. Push No. 1 button to display heating rate, adjust to requirements with up – down buttons. Push No. 1 again to revert to “Profile”. 5. Push No. 2 button to display “Soak Temperature”, adjust to requirements with up – down buttons. Push No. 2 again to revert to “Profile”. 6. Push No. 3 button to display “Soak Time”, adjust to requirements with up – down buttons. Note this display indicates dwell time in hours i.e.: 1.1 = 1 hour 6 minutes, 1.5 = 1 hour 30 minutes. Etc. Push No. 3 again to revert to “Profile”. 7. Push No. 4 button to display “Cooling Rate”, adjust to requirements with up – down buttons. Push No. 4 again to revert to “Profile”. 8. Push No. 5 button to display program “End Temperature”, adjust to requirements with up – down buttons. Push No. 6 button to display “Ready” and then press the “up” button to start the program. PC2007-12 Automatic Heat Treatment Console REV 0, 07 www.maritimestress.com 7 Note: P256 Programmer has a reverse thermocouple alarm feature which will turn off the zone if a thermocouple is accidentally reversed (this is a safety feature built-in to the P256 programmer/controller). Note: Any zone in “manual” mode will control to its set point regardless of the program profile. Starting the program will cause any zone set in “automatic” to follow the profile. The start temperature will be from the highest actual temperature of any zone in automatic. Any zone heating too slowly for the set heating profile will cause the program to go into a hold mode until that zone has caught up with the profile setting. On delivery, the hold band is set to 20°C so any zone running a profile that lags the set point by 20°C will start the hold. Once the program has started, the ‘down’ button can be used to alternate between programs “Profile Overview” or the “Controller Overview”. If a hold situation arises it will be displayed on either screen. For more detailed instructions refer to User Manual for 256 Programmer. 1. Make sure zones used are indicating the actual temperature on the controllers (6600) prior to start and then turn rocker switches to the “MAN” position. 2. Decide on the heat treatment specification and set as follows: 6600 Digital Temperature Controllers: Step 1: Press the scroll key (O) until rP appears, then set degrees per hour (Ramp-Rate) by using the up or down key. (^, v) Step 2: Press the up to down key (^, v) to set the Final Set-Point ie.) the bottom display *Note* When the controller temperature reaches the Final Set-Point it will hold that temperature continuously. Step 3: Make sure the SPrP (set point-ramp/Initial Set-Point) is the same as the actual temperature of the controller. If not, turn controller off then back on (by toggling the rocker switch, to off position, then back on CONT position). This will change the SPrP (Initial Set-Point) to the actual temperature. Step 4: For heating or cooling turn the Final Set-Point up or down and adjust Ramp-Rate (rP) as per requirements. Step 5: Turn percentage timer between 7-10 on scale if equipped. NOTE: When the controller is turned on, it automatically sets the SPrP (set point-ramp/Initial Set-Point) from the thermocouple (t/c) temperature. At this point in time it starts to count up or down to the Final Set-Point. The SPrP (set point-ramp/Initial Set-Point) cannot be changed manually, except by turning the controller off, then on. – ALWAYS: Change the Ramp-Rate before changing the Final Set-Point when changing stages. The controller cannot be paused/held at a temperature during the ramp stage, except by changing the Final Set-Point PC2007-12 Automatic Heat Treatment Console REV 0, 07 www.maritimestress.com 8 to the desired temperature. Step 1: Press the scroll key (O) until rP appears, then set degrees per hour (Ramp-Rate) by using the up or down key. (^, v) Step 2: Press the up to down key (^, v) to set the Final Set-Point ie.) the bottom display *Note* When the controller temperature reaches the Final Set-Point it will hold that temperature continuously. Step 3: Make sure the SPrP (set point-ramp/Initial Set-Point) is the same as the actual temperature of the controller. If not, turn controller off then back on (by toggling the rocker switch, to off position, then back on CONT position). This will change the SPrP (Initial Set-Point) to the actual temperature. Step 4: For heating or cooling turn the Final Set-Point up or down and adjust Ramp-Rate (rP) as per requirements. Step 5: Turn percentage timer between 7-10 on scale if equipped. NOTE: When the controller is turned on, it automatically sets the SPrP (set point-ramp/Initial Set-Point) from the thermocouple (t/c) temperature. At this point in time it starts to count up or down to the Final Set-Point. The SPrP (set point-ramp/Initial Set-Point) cannot be changed manually, except by turning the controller off, then on. – ALWAYS: Change the Ramp-Rate before changing the Final Set-Point when changing stages. The controller cannot be paused/held at a temperature during the ramp stage, except by changing the Final Set-Point to the desired temperature. PC2007-12 Automatic Heat Treatment Console REV 0, 07 www.maritimestress.com 9 P256 PROGRAMMER CALIBRATION INSTRUCTIONS: The P256 programmer has one common measuring circuit, which is used by all six of its thermocouple inputs. The measuring circuit is factory calibrated by the adjustment of two numbers that are held in the 256s non-volatile memory. One of the numbers, the zero constant, adjusts the measuring and cold-junction circuits zero offset. The other number, the span constant, adjusts the measuring circuits gain. The measuring circuit uses high-stability components and so should not need any further adjustment for many months. From time to time, however, it will be necessary to perform routine calibration checks and make adjustments to the instruments calibration. The following procedure should be used to make these adjustments. To calibrate the instrument on the bench you should connect a calibrator to thermocouple input 1 using type K compensating or extension wire. To calibrate the instrument in-situ you should disconnect thermocouple 1 and output 1 from the installation and connect the calibrator in its stead, again using type K wire. In both cases, switch the instrument on and leave it energised for about fifteen minutes to reach its operating temperature. Then briefly switch the instrument off for a few seconds and then switch back on. It will then show the opening logo on the screen for twenty seconds. During these twenty seconds you must enter the password using the front-panel buttons. The password is a fixed, five digit number that cannot be changed by the user. It would be wise to keep this password secret from all unauthorised persons. The password at this time is 1 1 1 7 2 (using the up arrow button for 7). If you have entered this correctly the logo will immediately disappear and be replaced with the calibration mode-opening screen. If you enter the wrong password there will be no effect and you will have to start over by switching the instrument off briefly again. The calibration mode-opening screen shows the following prompt: CALIBRATION MODE Connect calibrator to I/P1 Use comp cable. Repeat zero And span cal till both are OK Use V to exit cal mode. Use 1 for more.... To exit calibration mode press the down arrow button and normal instrument operation will resume. To continue with the calibration procedure press button 1 whereupon the screen changes to: ZERO CALIBRATION Value 00.7 Zk 05918 Set calibrator to 0 deg and Use ^v unit value = 0000.0 Use 1 for more... This shows the zero calibration screen for an instrument with a zero constant of 5918, which reads a temperature of +0.7 degrees for a calibrator input of 0.0 degrees. If this error is unacceptable it may be corrected by using the up or down buttons to change the zero constant until the value is shown as 0000.0. Note that the zero constant can only be set within the range 5700 to 6100. When you are sure that the zero calibration is correct then press button 1 and the screen will change to: PC2007-12 Automatic Heat Treatment Console REV 0, 07 www.maritimestress.com 10 SPAN CALIBRATION Value 999.1 Sk 33862 Set calibrator to 1000 deg and Use ^v until value = 1000.0 Use 1 for more... This shows the span calibration screen for an instrument with a span constant of 33862, which reads a temperature of 999.1 degrees for a calibrator input of 1000 degrees. If this error is unacceptable it may be corrected by using the up or down buttons to change the span constant until the value is shown as 1000.0. Note that the span constant can only be set within a range 32250 to 35650. When you are sure that the zero calibration is correct then press button 1 and the screen will change back to the operating screen. You should repeat the above sequence at least once since any changes that you make to the zero constant will alter the value displayed at span. Similarly any changes made to the span constant may have a small effect on the value displayed at zero. Before you make any changes to the constants you must leave sufficient time for the value to settle after you have set the calibrator. The 256 takes several seconds to achieve a steady reading after a step change to its input. Note that the above values of 0 and 1000 are for instruments set for degrees C, instruments set for degrees F use the corresponding values of 32 and 1800. When you are sure that the calibration is correct it is wise to make a note of both constants; a record is kept of the original constants at FGH. You may then leave calibration mode by going to the opening screen and then pressing the down button whereupon normal operation will resume. Note that there is no time-out in calibration mode so the instrument will remain in this mode indefinitely until you deliberately exit from it. PC2007-12 Automatic Heat Treatment Console REV 0, 07 www.maritimestress.com 11 6600 CONTROLLER CALIBRATIONINSTRUCTIONS: PC2007-12 Automatic Heat Treatment Console REV 0, 07 www.maritimestress.com 12 PC2007-12 Automatic Heat Treatment Console REV 0, 07 www.maritimestress.com 13 PC2007-12 Automatic Heat Treatment Console REV 0, 07 www.maritimestress.com 14 PC2007-12 Automatic Heat Treatment Console REV 0, 07 www.maritimestress.com 15 Thermocouple Cable Secondary Cable 3 way splitter Note: 3 way splitter The PC2007-12 connections for circuit number 1 shown. Circuit numbers 2 -12 are connected in the same manner CP10 CP10 Parallel connection of heaters Thermocouple Wire Maritime Stress Contracting Limited Toll Free: 1-877-468-1781 Phone: (902) 468-7873 Fax: (902) 468-2304 Website: www.maritimestress.com E-mail: [email protected] PC2007-12 Automatic Heat Treatment Console REV 0, 07 www.maritimestress.com CP10 TO CHANGE PRIMARY CONNECTIONS FOLLOWS THESE INSTRUCTIONS: 1. Switch off main breaker and disconnect primary power cable supply. 2. Loosen the primary power cable clamp. 3. Remove panel labelled “Back Panel” to change secondary and primary connections. 4. Change connections as per requirements and make sure the connections are tight. 5. Make sure nothing is left inside the enclosure. 6. Put the “Back Panel” back on. 7. Tighten the primary power cable clamp. 8. Hook up primary power cable supply and then switch on main breaker when ready. PC2007-12 Automatic Heat Treatment Console REV 0, 07 www.maritimestress.com 16 17 MS Part No. Description Of Part 900Wheel Wheels Swivel Caster (900 lb Capacity with brake) Simultaneous (12) 12 Channel Chino Digital Temperature Recorder (Optional) 6600 Digital Temperature Controller P256 6 Channel P256 programmer 130KVA #9 130 KVA - 3 Phase Isolated copper wound power transformer: Primary 480/575/600, 60 Hz Secondary 0/85 (Thermal trips per phase to prevent overload) Amp Meter Digital Amp Meter 0-200 amps Selector Switch Six Channel Selector Switch with Plate & Knob CT Current Transformer 0-200 amps A10 300 amp Female Panel Mount Socket Complete PP-20-KX Thermocouple Extension Cable A37-EL 200 amp contactor (100% Duty Cycle) A38 110 Volt Neon 52F7431 ON/OFF/On Rocker Switch Merlin 250 amp 250 amp - 3 phase Circuit Breaker with 120 volt uv Release 56F877 15 amp Circuit Breaker 56F876 10 amp Circuit Breaker F-A18 Female Thermocouple Panel Mount (Type “K”) Fan 340 CFM Cooling Fan 120 V 120 V Receptacle 96F4496 3 Pole Terminal Block #1 Tinned #1 Tinned Cable with lugs (please specify length) 90F7177 Lug 1/0 - 3/8 Hole 84F1876 Aluminium Lugs 3/8" Hole for 250 amp circuit breaker PC2007-12 Automatic Heat Treatment Console REV 0, 07 www.maritimestress.com