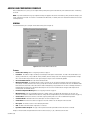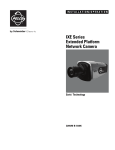
1
O P E R AT I O N / C O N F I G U R AT I O N
DS NVR and DS NVs
System Software
C3663M-B (11/09)
Contents
Introduction . . . . . . . . . . . . . . . . . . . . . . . . . . . . . . . . . . . . . . . . . . . . . . . . . . . . . . . . . . . . . . . . . . . . . . . . . . . . . . . . . . . . . . . . . . . . . . . . . . . . . . . . . . 7
Installing the Windows Operating System. . . . . . . . . . . . . . . . . . . . . . . . . . . . . . . . . . . . . . . . . . . . . . . . . . . . . . . . . . . . . . . . . . . . . . . . . . . . . . 7
DS NVs Software Installation. . . . . . . . . . . . . . . . . . . . . . . . . . . . . . . . . . . . . . . . . . . . . . . . . . . . . . . . . . . . . . . . . . . . . . . . . . . . . . . . . . . . . . . . 8
Server/VAU Software Installation. . . . . . . . . . . . . . . . . . . . . . . . . . . . . . . . . . . . . . . . . . . . . . . . . . . . . . . . . . . . . . . . . . . . . . . . . . . . . . . . 8
Digital Sentry Client/Admin Software. . . . . . . . . . . . . . . . . . . . . . . . . . . . . . . . . . . . . . . . . . . . . . . . . . . . . . . . . . . . . . . . . . . . . . . . . . . . . 9
TCP/IP Addresses. . . . . . . . . . . . . . . . . . . . . . . . . . . . . . . . . . . . . . . . . . . . . . . . . . . . . . . . . . . . . . . . . . . . . . . . . . . . . . . . . . . . . . . . . . . . . 9
DSAdmin . . . . . . . . . . . . . . . . . . . . . . . . . . . . . . . . . . . . . . . . . . . . . . . . . . . . . . . . . . . . . . . . . . . . . . . . . . . . . . . . . . . . . . . . . . . . . . . . . . . . . . . . . . . 10
DSAdmin Overview. . . . . . . . . . . . . . . . . . . . . . . . . . . . . . . . . . . . . . . . . . . . . . . . . . . . . . . . . . . . . . . . . . . . . . . . . . . . . . . . . . . . . . . . . . . . . . . 10
DSAdmin Directory Tree . . . . . . . . . . . . . . . . . . . . . . . . . . . . . . . . . . . . . . . . . . . . . . . . . . . . . . . . . . . . . . . . . . . . . . . . . . . . . . . . . . . . . . 10
Adding and Configuring Servers. . . . . . . . . . . . . . . . . . . . . . . . . . . . . . . . . . . . . . . . . . . . . . . . . . . . . . . . . . . . . . . . . . . . . . . . . . . . . . . . . . . . . 11
Adding and Configuring a VAU . . . . . . . . . . . . . . . . . . . . . . . . . . . . . . . . . . . . . . . . . . . . . . . . . . . . . . . . . . . . . . . . . . . . . . . . . . . . . . . . . . . . . 11
Configuring Serial Ports. . . . . . . . . . . . . . . . . . . . . . . . . . . . . . . . . . . . . . . . . . . . . . . . . . . . . . . . . . . . . . . . . . . . . . . . . . . . . . . . . . . . . . . 12
Configuring Storage Locations . . . . . . . . . . . . . . . . . . . . . . . . . . . . . . . . . . . . . . . . . . . . . . . . . . . . . . . . . . . . . . . . . . . . . . . . . . . . . . . . . 13
Configuring IP Cameras . . . . . . . . . . . . . . . . . . . . . . . . . . . . . . . . . . . . . . . . . . . . . . . . . . . . . . . . . . . . . . . . . . . . . . . . . . . . . . . . . . . . . . . 14
Network Storage. . . . . . . . . . . . . . . . . . . . . . . . . . . . . . . . . . . . . . . . . . . . . . . . . . . . . . . . . . . . . . . . . . . . . . . . . . . . . . . . . . . . . . . . . . . . . . . . . 15
Video Storage Options . . . . . . . . . . . . . . . . . . . . . . . . . . . . . . . . . . . . . . . . . . . . . . . . . . . . . . . . . . . . . . . . . . . . . . . . . . . . . . . . . . . . . . . . . . . . 16
Adding and Configuring Cameras. . . . . . . . . . . . . . . . . . . . . . . . . . . . . . . . . . . . . . . . . . . . . . . . . . . . . . . . . . . . . . . . . . . . . . . . . . . . . . . . . . . . 17
General. . . . . . . . . . . . . . . . . . . . . . . . . . . . . . . . . . . . . . . . . . . . . . . . . . . . . . . . . . . . . . . . . . . . . . . . . . . . . . . . . . . . . . . . . . . . . . . . . . . . 17
Motion . . . . . . . . . . . . . . . . . . . . . . . . . . . . . . . . . . . . . . . . . . . . . . . . . . . . . . . . . . . . . . . . . . . . . . . . . . . . . . . . . . . . . . . . . . . . . . . . . . . . 18
On Screen Display . . . . . . . . . . . . . . . . . . . . . . . . . . . . . . . . . . . . . . . . . . . . . . . . . . . . . . . . . . . . . . . . . . . . . . . . . . . . . . . . . . . . . . . . . . . 20
Time-lapse Storage . . . . . . . . . . . . . . . . . . . . . . . . . . . . . . . . . . . . . . . . . . . . . . . . . . . . . . . . . . . . . . . . . . . . . . . . . . . . . . . . . . . . . . . . . . 21
Motion Storage . . . . . . . . . . . . . . . . . . . . . . . . . . . . . . . . . . . . . . . . . . . . . . . . . . . . . . . . . . . . . . . . . . . . . . . . . . . . . . . . . . . . . . . . . . . . . 22
PTZ . . . . . . . . . . . . . . . . . . . . . . . . . . . . . . . . . . . . . . . . . . . . . . . . . . . . . . . . . . . . . . . . . . . . . . . . . . . . . . . . . . . . . . . . . . . . . . . . . . . . . . . 23
User Administration . . . . . . . . . . . . . . . . . . . . . . . . . . . . . . . . . . . . . . . . . . . . . . . . . . . . . . . . . . . . . . . . . . . . . . . . . . . . . . . . . . . . . . . . . . . . . . 24
Creating Users . . . . . . . . . . . . . . . . . . . . . . . . . . . . . . . . . . . . . . . . . . . . . . . . . . . . . . . . . . . . . . . . . . . . . . . . . . . . . . . . . . . . . . . . . . . . . . 24
Setting Up Account Management . . . . . . . . . . . . . . . . . . . . . . . . . . . . . . . . . . . . . . . . . . . . . . . . . . . . . . . . . . . . . . . . . . . . . . . . . . . . . . . 24
Assigning Permissions. . . . . . . . . . . . . . . . . . . . . . . . . . . . . . . . . . . . . . . . . . . . . . . . . . . . . . . . . . . . . . . . . . . . . . . . . . . . . . . . . . . . . . . . 25
Available Permissions . . . . . . . . . . . . . . . . . . . . . . . . . . . . . . . . . . . . . . . . . . . . . . . . . . . . . . . . . . . . . . . . . . . . . . . . . . . . . . . . . . . . . . . . 26
Assigning Camera Permissions . . . . . . . . . . . . . . . . . . . . . . . . . . . . . . . . . . . . . . . . . . . . . . . . . . . . . . . . . . . . . . . . . . . . . . . . . . . . . . . . . 27
Managing Users Across Multiple Systems . . . . . . . . . . . . . . . . . . . . . . . . . . . . . . . . . . . . . . . . . . . . . . . . . . . . . . . . . . . . . . . . . . . . . . . . 28
Camera Groups . . . . . . . . . . . . . . . . . . . . . . . . . . . . . . . . . . . . . . . . . . . . . . . . . . . . . . . . . . . . . . . . . . . . . . . . . . . . . . . . . . . . . . . . . . . . . . . . . . 29
Adding and Configuring Zones . . . . . . . . . . . . . . . . . . . . . . . . . . . . . . . . . . . . . . . . . . . . . . . . . . . . . . . . . . . . . . . . . . . . . . . . . . . . . . . . . . . . . . 30
Configuring Zones . . . . . . . . . . . . . . . . . . . . . . . . . . . . . . . . . . . . . . . . . . . . . . . . . . . . . . . . . . . . . . . . . . . . . . . . . . . . . . . . . . . . . . . . . . . 31
Cameras Directory . . . . . . . . . . . . . . . . . . . . . . . . . . . . . . . . . . . . . . . . . . . . . . . . . . . . . . . . . . . . . . . . . . . . . . . . . . . . . . . . . . . . . . . . . . . . . . . 33
Configuration Parameters. . . . . . . . . . . . . . . . . . . . . . . . . . . . . . . . . . . . . . . . . . . . . . . . . . . . . . . . . . . . . . . . . . . . . . . . . . . . . . . . . . . . . . . . . . 33
Throttle Exempt Addresses. . . . . . . . . . . . . . . . . . . . . . . . . . . . . . . . . . . . . . . . . . . . . . . . . . . . . . . . . . . . . . . . . . . . . . . . . . . . . . . . . . . . . . . . . 34
Email Notification . . . . . . . . . . . . . . . . . . . . . . . . . . . . . . . . . . . . . . . . . . . . . . . . . . . . . . . . . . . . . . . . . . . . . . . . . . . . . . . . . . . . . . . . . . . . . . . . 35
Digital Sentry Client Software. . . . . . . . . . . . . . . . . . . . . . . . . . . . . . . . . . . . . . . . . . . . . . . . . . . . . . . . . . . . . . . . . . . . . . . . . . . . . . . . . . . . . . . . . . . 36
Running Digital Sentry . . . . . . . . . . . . . . . . . . . . . . . . . . . . . . . . . . . . . . . . . . . . . . . . . . . . . . . . . . . . . . . . . . . . . . . . . . . . . . . . . . . . . . . . . . . . 36
Video Pane Configuration . . . . . . . . . . . . . . . . . . . . . . . . . . . . . . . . . . . . . . . . . . . . . . . . . . . . . . . . . . . . . . . . . . . . . . . . . . . . . . . . . . . . . . . . . . 37
Recording Mode Indicators . . . . . . . . . . . . . . . . . . . . . . . . . . . . . . . . . . . . . . . . . . . . . . . . . . . . . . . . . . . . . . . . . . . . . . . . . . . . . . . . . . . . 37
Quick Review . . . . . . . . . . . . . . . . . . . . . . . . . . . . . . . . . . . . . . . . . . . . . . . . . . . . . . . . . . . . . . . . . . . . . . . . . . . . . . . . . . . . . . . . . . . . . . . 37
Zooming Into Video . . . . . . . . . . . . . . . . . . . . . . . . . . . . . . . . . . . . . . . . . . . . . . . . . . . . . . . . . . . . . . . . . . . . . . . . . . . . . . . . . . . . . . . . . . 37
Digital PTZ . . . . . . . . . . . . . . . . . . . . . . . . . . . . . . . . . . . . . . . . . . . . . . . . . . . . . . . . . . . . . . . . . . . . . . . . . . . . . . . . . . . . . . . . . . . . . . . . . 38
Creating Local Groups . . . . . . . . . . . . . . . . . . . . . . . . . . . . . . . . . . . . . . . . . . . . . . . . . . . . . . . . . . . . . . . . . . . . . . . . . . . . . . . . . . . . . . . . 38
Camera Sequencing. . . . . . . . . . . . . . . . . . . . . . . . . . . . . . . . . . . . . . . . . . . . . . . . . . . . . . . . . . . . . . . . . . . . . . . . . . . . . . . . . . . . . . . . . . 38
Copying Local Configuration Information to Other Computers . . . . . . . . . . . . . . . . . . . . . . . . . . . . . . . . . . . . . . . . . . . . . . . . . . . . . . . . . 39
Video Controls Tab . . . . . . . . . . . . . . . . . . . . . . . . . . . . . . . . . . . . . . . . . . . . . . . . . . . . . . . . . . . . . . . . . . . . . . . . . . . . . . . . . . . . . . . . . . . . . . . 39
Manual Recording . . . . . . . . . . . . . . . . . . . . . . . . . . . . . . . . . . . . . . . . . . . . . . . . . . . . . . . . . . . . . . . . . . . . . . . . . . . . . . . . . . . . . . . . . . . 39
Cameras Tab . . . . . . . . . . . . . . . . . . . . . . . . . . . . . . . . . . . . . . . . . . . . . . . . . . . . . . . . . . . . . . . . . . . . . . . . . . . . . . . . . . . . . . . . . . . . . . . . . . . . 40
Print/Export Tab . . . . . . . . . . . . . . . . . . . . . . . . . . . . . . . . . . . . . . . . . . . . . . . . . . . . . . . . . . . . . . . . . . . . . . . . . . . . . . . . . . . . . . . . . . . . . . . . . 40
Exporting a Video Clip . . . . . . . . . . . . . . . . . . . . . . . . . . . . . . . . . . . . . . . . . . . . . . . . . . . . . . . . . . . . . . . . . . . . . . . . . . . . . . . . . . . . . . . . 41
Image Details Tab. . . . . . . . . . . . . . . . . . . . . . . . . . . . . . . . . . . . . . . . . . . . . . . . . . . . . . . . . . . . . . . . . . . . . . . . . . . . . . . . . . . . . . . . . . . . . . . . 41
Event History Page . . . . . . . . . . . . . . . . . . . . . . . . . . . . . . . . . . . . . . . . . . . . . . . . . . . . . . . . . . . . . . . . . . . . . . . . . . . . . . . . . . . . . . . . . . . . . . . 42
Searching for Logged Events . . . . . . . . . . . . . . . . . . . . . . . . . . . . . . . . . . . . . . . . . . . . . . . . . . . . . . . . . . . . . . . . . . . . . . . . . . . . . . . . . . . 42
Playing Back a Logged Event . . . . . . . . . . . . . . . . . . . . . . . . . . . . . . . . . . . . . . . . . . . . . . . . . . . . . . . . . . . . . . . . . . . . . . . . . . . . . . . . . . . 43
C3663M-B (11/09)
3
Recorded Video Page . . . . . . . . . . . . . . . . . . . . . . . . . . . . . . . . . . . . . . . . . . . . . . . . . . . . . . . . . . . . . . . . . . . . . . . . . . . . . . . . . . . . . . . . . . . . . 44
Searching for Recorded Video . . . . . . . . . . . . . . . . . . . . . . . . . . . . . . . . . . . . . . . . . . . . . . . . . . . . . . . . . . . . . . . . . . . . . . . . . . . . . . . . . . 44
Playing Back Recorded Video . . . . . . . . . . . . . . . . . . . . . . . . . . . . . . . . . . . . . . . . . . . . . . . . . . . . . . . . . . . . . . . . . . . . . . . . . . . . . . . . . . 45
Search Tab . . . . . . . . . . . . . . . . . . . . . . . . . . . . . . . . . . . . . . . . . . . . . . . . . . . . . . . . . . . . . . . . . . . . . . . . . . . . . . . . . . . . . . . . . . . . . . . . . . . . . 46
Smart Search . . . . . . . . . . . . . . . . . . . . . . . . . . . . . . . . . . . . . . . . . . . . . . . . . . . . . . . . . . . . . . . . . . . . . . . . . . . . . . . . . . . . . . . . . . . . . . . 46
Client Manager . . . . . . . . . . . . . . . . . . . . . . . . . . . . . . . . . . . . . . . . . . . . . . . . . . . . . . . . . . . . . . . . . . . . . . . . . . . . . . . . . . . . . . . . . . . . . . . . . . 47
Changing Passwords . . . . . . . . . . . . . . . . . . . . . . . . . . . . . . . . . . . . . . . . . . . . . . . . . . . . . . . . . . . . . . . . . . . . . . . . . . . . . . . . . . . . . . . . . 48
Viewing the Message Log . . . . . . . . . . . . . . . . . . . . . . . . . . . . . . . . . . . . . . . . . . . . . . . . . . . . . . . . . . . . . . . . . . . . . . . . . . . . . . . . . . . . . 48
Viewing Reports. . . . . . . . . . . . . . . . . . . . . . . . . . . . . . . . . . . . . . . . . . . . . . . . . . . . . . . . . . . . . . . . . . . . . . . . . . . . . . . . . . . . . . . . . . . . . 49
Client Startup Options . . . . . . . . . . . . . . . . . . . . . . . . . . . . . . . . . . . . . . . . . . . . . . . . . . . . . . . . . . . . . . . . . . . . . . . . . . . . . . . . . . . . . . . . 49
Adding and Deleting Systems . . . . . . . . . . . . . . . . . . . . . . . . . . . . . . . . . . . . . . . . . . . . . . . . . . . . . . . . . . . . . . . . . . . . . . . . . . . . . . . . . . 49
Viewing Messages . . . . . . . . . . . . . . . . . . . . . . . . . . . . . . . . . . . . . . . . . . . . . . . . . . . . . . . . . . . . . . . . . . . . . . . . . . . . . . . . . . . . . . . . . . . . . . . 50
Alarm Assessment . . . . . . . . . . . . . . . . . . . . . . . . . . . . . . . . . . . . . . . . . . . . . . . . . . . . . . . . . . . . . . . . . . . . . . . . . . . . . . . . . . . . . . . . . . . . . . . 51
Playing Back Current Alarms . . . . . . . . . . . . . . . . . . . . . . . . . . . . . . . . . . . . . . . . . . . . . . . . . . . . . . . . . . . . . . . . . . . . . . . . . . . . . . . . . . . 51
Acknowledging Alarms . . . . . . . . . . . . . . . . . . . . . . . . . . . . . . . . . . . . . . . . . . . . . . . . . . . . . . . . . . . . . . . . . . . . . . . . . . . . . . . . . . . . . . . 52
PTZ Control . . . . . . . . . . . . . . . . . . . . . . . . . . . . . . . . . . . . . . . . . . . . . . . . . . . . . . . . . . . . . . . . . . . . . . . . . . . . . . . . . . . . . . . . . . . . . . . . . . . . . 53
4
C3663M-B (11/09)
List of Illustrations
1
2
3
4
5
6
7
8
9
10
11
12
13
14
15
16
17
18
19
20
21
22
23
24
25
26
27
28
29
30
31
32
33
34
35
36
37
38
39
40
41
42
43
44
45
C3663M-B (11/09)
DSAdmin Directory Tree . . . . . . . . . . . . . . . . . . . . . . . . . . . . . . . . . . . . . . . . . . . . . . . . . . . . . . . . . . . . . . . . . . . . . . . . . . . . . . . . . . . . . . . . . . . 10
Add System Dialog Box . . . . . . . . . . . . . . . . . . . . . . . . . . . . . . . . . . . . . . . . . . . . . . . . . . . . . . . . . . . . . . . . . . . . . . . . . . . . . . . . . . . . . . . . . . . 11
Serial Ports Tab Within General Tab. . . . . . . . . . . . . . . . . . . . . . . . . . . . . . . . . . . . . . . . . . . . . . . . . . . . . . . . . . . . . . . . . . . . . . . . . . . . . . . . . . 12
Port Settings Tab for Serial Input Devices . . . . . . . . . . . . . . . . . . . . . . . . . . . . . . . . . . . . . . . . . . . . . . . . . . . . . . . . . . . . . . . . . . . . . . . . . . . . . 13
Storage Locations Tab . . . . . . . . . . . . . . . . . . . . . . . . . . . . . . . . . . . . . . . . . . . . . . . . . . . . . . . . . . . . . . . . . . . . . . . . . . . . . . . . . . . . . . . . . . . . 13
IP Cameras Tab with List of Connected IP Cameras. . . . . . . . . . . . . . . . . . . . . . . . . . . . . . . . . . . . . . . . . . . . . . . . . . . . . . . . . . . . . . . . . . . . . . 14
IP Camera Window for Configuring IP Cameras. . . . . . . . . . . . . . . . . . . . . . . . . . . . . . . . . . . . . . . . . . . . . . . . . . . . . . . . . . . . . . . . . . . . . . . . . 14
Network Storage Page . . . . . . . . . . . . . . . . . . . . . . . . . . . . . . . . . . . . . . . . . . . . . . . . . . . . . . . . . . . . . . . . . . . . . . . . . . . . . . . . . . . . . . . . . . . . 15
Video Storage Options . . . . . . . . . . . . . . . . . . . . . . . . . . . . . . . . . . . . . . . . . . . . . . . . . . . . . . . . . . . . . . . . . . . . . . . . . . . . . . . . . . . . . . . . . . . . 16
General Tab Within Cameras Tab . . . . . . . . . . . . . . . . . . . . . . . . . . . . . . . . . . . . . . . . . . . . . . . . . . . . . . . . . . . . . . . . . . . . . . . . . . . . . . . . . . . . 17
Motion Tab for Motion Settings and Masks . . . . . . . . . . . . . . . . . . . . . . . . . . . . . . . . . . . . . . . . . . . . . . . . . . . . . . . . . . . . . . . . . . . . . . . . . . . 18
On Screen Display Tab for Configuring Video Text. . . . . . . . . . . . . . . . . . . . . . . . . . . . . . . . . . . . . . . . . . . . . . . . . . . . . . . . . . . . . . . . . . . . . . . 20
Time-Lapse Storage Tab for Scheduling Continuous Recordings. . . . . . . . . . . . . . . . . . . . . . . . . . . . . . . . . . . . . . . . . . . . . . . . . . . . . . . . . . . . 21
Motion Storage Tab for Scheduling Motion Recording . . . . . . . . . . . . . . . . . . . . . . . . . . . . . . . . . . . . . . . . . . . . . . . . . . . . . . . . . . . . . . . . . . . 22
PTZ Tab for Configuring PTZ Cameras, Presets, and Tours. . . . . . . . . . . . . . . . . . . . . . . . . . . . . . . . . . . . . . . . . . . . . . . . . . . . . . . . . . . . . . . . . 23
Account Management Tab . . . . . . . . . . . . . . . . . . . . . . . . . . . . . . . . . . . . . . . . . . . . . . . . . . . . . . . . . . . . . . . . . . . . . . . . . . . . . . . . . . . . . . . . . 24
Change Password Dialog Box. . . . . . . . . . . . . . . . . . . . . . . . . . . . . . . . . . . . . . . . . . . . . . . . . . . . . . . . . . . . . . . . . . . . . . . . . . . . . . . . . . . . . . . 25
User Rights Tab for Assigning User Permissions to Functions. . . . . . . . . . . . . . . . . . . . . . . . . . . . . . . . . . . . . . . . . . . . . . . . . . . . . . . . . . . . . . 25
Camera Assignments Tab for Assigning Camera Permissions. . . . . . . . . . . . . . . . . . . . . . . . . . . . . . . . . . . . . . . . . . . . . . . . . . . . . . . . . . . . . . 27
Multiple Systems Tab . . . . . . . . . . . . . . . . . . . . . . . . . . . . . . . . . . . . . . . . . . . . . . . . . . . . . . . . . . . . . . . . . . . . . . . . . . . . . . . . . . . . . . . . . . . . . 28
User Details Window for System Administration . . . . . . . . . . . . . . . . . . . . . . . . . . . . . . . . . . . . . . . . . . . . . . . . . . . . . . . . . . . . . . . . . . . . . . . 28
Camera Groups Tab . . . . . . . . . . . . . . . . . . . . . . . . . . . . . . . . . . . . . . . . . . . . . . . . . . . . . . . . . . . . . . . . . . . . . . . . . . . . . . . . . . . . . . . . . . . . . . 29
Add Zone Dialog Box . . . . . . . . . . . . . . . . . . . . . . . . . . . . . . . . . . . . . . . . . . . . . . . . . . . . . . . . . . . . . . . . . . . . . . . . . . . . . . . . . . . . . . . . . . . . . 30
Cameras Tab for Assigning Cameras to Zones. . . . . . . . . . . . . . . . . . . . . . . . . . . . . . . . . . . . . . . . . . . . . . . . . . . . . . . . . . . . . . . . . . . . . . . . . . 31
Digital Inputs Tab for Assigning Input Points to Zones . . . . . . . . . . . . . . . . . . . . . . . . . . . . . . . . . . . . . . . . . . . . . . . . . . . . . . . . . . . . . . . . . . . 31
Video Motion Tab for Triggering Cameras in Zone. . . . . . . . . . . . . . . . . . . . . . . . . . . . . . . . . . . . . . . . . . . . . . . . . . . . . . . . . . . . . . . . . . . . . . . 32
Serial Input Tab for Sending Text Strings That Trigger Recordings . . . . . . . . . . . . . . . . . . . . . . . . . . . . . . . . . . . . . . . . . . . . . . . . . . . . . . . . . . 32
Add Email Account(s) Window . . . . . . . . . . . . . . . . . . . . . . . . . . . . . . . . . . . . . . . . . . . . . . . . . . . . . . . . . . . . . . . . . . . . . . . . . . . . . . . . . . . . . . 33
Configuration Parameters Window for Miscellaneous Settings . . . . . . . . . . . . . . . . . . . . . . . . . . . . . . . . . . . . . . . . . . . . . . . . . . . . . . . . . . . . 33
Throttle Exempt Addresses Window . . . . . . . . . . . . . . . . . . . . . . . . . . . . . . . . . . . . . . . . . . . . . . . . . . . . . . . . . . . . . . . . . . . . . . . . . . . . . . . . . 34
Email Notification Page . . . . . . . . . . . . . . . . . . . . . . . . . . . . . . . . . . . . . . . . . . . . . . . . . . . . . . . . . . . . . . . . . . . . . . . . . . . . . . . . . . . . . . . . . . . 35
Digital Sentry Main Menu . . . . . . . . . . . . . . . . . . . . . . . . . . . . . . . . . . . . . . . . . . . . . . . . . . . . . . . . . . . . . . . . . . . . . . . . . . . . . . . . . . . . . . . . . 36
Quick View of Recorded Video . . . . . . . . . . . . . . . . . . . . . . . . . . . . . . . . . . . . . . . . . . . . . . . . . . . . . . . . . . . . . . . . . . . . . . . . . . . . . . . . . . . . . . 37
Local Group Configuration Tab . . . . . . . . . . . . . . . . . . . . . . . . . . . . . . . . . . . . . . . . . . . . . . . . . . . . . . . . . . . . . . . . . . . . . . . . . . . . . . . . . . . . . . 38
Cameras Tab for Viewing Live Video . . . . . . . . . . . . . . . . . . . . . . . . . . . . . . . . . . . . . . . . . . . . . . . . . . . . . . . . . . . . . . . . . . . . . . . . . . . . . . . . . 40
Export Video Clip Window . . . . . . . . . . . . . . . . . . . . . . . . . . . . . . . . . . . . . . . . . . . . . . . . . . . . . . . . . . . . . . . . . . . . . . . . . . . . . . . . . . . . . . . . . 41
Event History With Event Time Lines . . . . . . . . . . . . . . . . . . . . . . . . . . . . . . . . . . . . . . . . . . . . . . . . . . . . . . . . . . . . . . . . . . . . . . . . . . . . . . . . . 42
Recorded Video with Time Line of All Captured Video . . . . . . . . . . . . . . . . . . . . . . . . . . . . . . . . . . . . . . . . . . . . . . . . . . . . . . . . . . . . . . . . . . . 44
Video Search Tab . . . . . . . . . . . . . . . . . . . . . . . . . . . . . . . . . . . . . . . . . . . . . . . . . . . . . . . . . . . . . . . . . . . . . . . . . . . . . . . . . . . . . . . . . . . . . . . . 46
Client Manager Window . . . . . . . . . . . . . . . . . . . . . . . . . . . . . . . . . . . . . . . . . . . . . . . . . . . . . . . . . . . . . . . . . . . . . . . . . . . . . . . . . . . . . . . . . . 47
Digital Sentry Message Log History. . . . . . . . . . . . . . . . . . . . . . . . . . . . . . . . . . . . . . . . . . . . . . . . . . . . . . . . . . . . . . . . . . . . . . . . . . . . . . . . . . 48
Digital Sentry Messages Window . . . . . . . . . . . . . . . . . . . . . . . . . . . . . . . . . . . . . . . . . . . . . . . . . . . . . . . . . . . . . . . . . . . . . . . . . . . . . . . . . . . 50
Video Pane Configurations for Alarm Events . . . . . . . . . . . . . . . . . . . . . . . . . . . . . . . . . . . . . . . . . . . . . . . . . . . . . . . . . . . . . . . . . . . . . . . . . . . 51
Example of Window with Record Event and Live Video . . . . . . . . . . . . . . . . . . . . . . . . . . . . . . . . . . . . . . . . . . . . . . . . . . . . . . . . . . . . . . . . . . 52
PTZ Control Tab. . . . . . . . . . . . . . . . . . . . . . . . . . . . . . . . . . . . . . . . . . . . . . . . . . . . . . . . . . . . . . . . . . . . . . . . . . . . . . . . . . . . . . . . . . . . . . . . . . 53
5
6
C3663M-B (11/09)
Introduction
DS NVR and DS NVs are network video recorders that use Integral Digital Sentry® as the video monitoring and management software. DS NVR is
an all-inclusive, stand-alone video recorder. DS NVs is a software-only solution that can be installed on an existing server, as described in the
following sections.
For information on installing DS NVR, refer to the Integral Digital Sentry Installation manual (C3662M).
INSTALLING THE WINDOWS OPERATING SYSTEM
To install Microsoft® Windows® XP Professional or Windows Server® 2003 on the DS NVs server computer, complete the following steps:
1. Insert the Windows installation CD and restart the computer.
2. Press Enter to set up Windows.
3. Press F8 if you agree with the licensing information.
4. Press D to delete any existing partitions, and then L to confirm.
5. Press C to create a partition. Enter 20000MB (20 GB) as the size and press Enter.
6. Press Enter to start the installation.
7. Choose the “Format Partition Using the NTFS File System” option.
8. When prompted, enter “dsserviceuser” as the Administrator password.
9. When finished, open Administrative Tools, Computer Management, and then Disk Management. Rename the Partition 1 volume label to
SYSTEM.
10. Create an extended partition on the remainder of the drive; this is the first DATA partition.
11. Change the CD-ROM drive letter to “R.”
12. On the extended partition, create a logical drive formatted using NTFS.
13. Partition 2 and any other partitions are data drives. Create a logical drive to fill the rest of the drive and name it DATA.
14. Install any required drivers from the motherboard CD.
15. Install the latest Windows Updates, including Service Pack 2 (SP2) for Windows XP Professional or Service Pack 1 (SP1) for Windows
Server 2003.
16. Change the computer name and IP address in Windows.
17. In User Manager, create a new Windows user name “dsserviceuser” with the password “dsserviceuser.” Ensure that the user has
administrative privileges. This can also be done as part of the operating system installation.
18. Windows XP Professional only: Open Control Panel and then User Accounts. Select “Change the Way Users Log On and Off,” and then
clear the “Use the Welcome Screen” check box.
19. In Administrative Tools, open Local Security Policy. Expand “Local Policies and User Rights Assignments,” and then open “Log On as a
Service.” Click Add User or Group.
20. Windows XP Professional only: From the Start menu, select Run. Type “control userpasswords2” and click OK. Select “User Must Enter a
User Name and Password,” and then click Advanced. Select “Require User to Press Ctrl-Alt-Delete.”
21. Create the following directory:
C:\Program Files\Integral\Database
22. Run the SETUP.EXE file on the Server/VAU CD and follow the on-screen instructions.
23. Run the SETUP.EXE file on the Client/Admin CD and follow the on-screen instructions.
C3663M-B (11/09)
7
DS NVS SOFTWARE INSTALLATION
DS NVs software can be installed on a computer that meets the following minimum requirements:
•
Industry-standard, Intel® platform, server-grade motherboard
•
Dual-Core Intel Xeon® Processor (32-input system) or Intel Pentium® 4 3.2 GHz Processor (16-input system or smaller)
NOTE: If you are streaming between 4 and 32 H.264 cameras, Pelco recommends that you meet the following system requirements:
CPU Speed: Intel Core™2 Quad Q9400 at 2.66 GHz (4 CPUs)
VGA Card Spec: NVIDIA® GeForce® 9600 GT (512 MB, minimum)
Computer Memory: 4 GB of RAM
•
2 GB RAM
•
Dual Gigabit network interface cards (NICs)
•
Windows XP Embedded (XPe), Windows XP Professional, or Windows Server 2003 operating system
•
7200 rpm hard drive (minimum of one); can be SCSI or SATA*
•
Drive controller card†
•
CD-RW
•
Stand-alone system: 20 GB available storage for operating system and applications
•
Distributed system: 160 GB available storage for operating system, applications, and video storage
*If all video is stored on the DS NVs server, you must add the appropriate quantity, speed, and size of drives required to meet the storage
requirement. If the video is stored on an external storage subsystem, you must also install a suitable SCSI Card.
†
The transmission I/O rate of the drive controller card is important. For best performance, select a system that has a robust controller card,
especially if you have a high camera count (20 to 32 IP cameras) or when using high-throughput cameras (such as IPIX®).
SERVER/VAU SOFTWARE INSTALLATION
To install Digital Sentry Server/VAU software on the DS NVs server, complete the following steps:
1. Insert the Digital Sentry Server/VAU CD.
2. Run SETUP.EXE from the CD.
3. Select the desired language and click OK.
4. When you are asked if the “dsserviceuser” account has been created, click Yes.
5. The Welcome screen appears. Click Next.
6. If you accept the user agreement, click Yes.
7. Select one of the following component types and click Next:
•
DMS plus Extended Local Storage (VSAN): Installs the server, MSDE, and VSAN components.
•
Extended Local Storage (VSAN): Installs the VSAN component.
•
SAVR or DS XPress plus Extended Local Storage (VSAN): Installs the server, VideoServer, MSDE, and VSAN components.
•
VAU: Installs the VideoServer component.
8. If you have changed the default “dsserviceuser” password, enter and verify the new password, and then click OK to begin the file installation.
9. Enter the license key generated for the component’s product ID.
10. If you selected the VAU or Extended Local Storage (VSAN) installation, enter the name or IP address of the server that the VAU or VSAN is
connected to.
11. When you are prompted to restart the computer, click Finish.
8
C3663M-B (11/09)
DIGITAL SENTRY CLIENT/ADMIN SOFTWARE
To install the Digital Sentry client software on a computer, insert the CD and follow the on-screen instructions. Select either of the following
options, or you can select both for a simultaneous installation.
•
Digital Sentry Admin Program: Allows you to configure the DS NVs server.
•
Digital Sentry Client Program: Allows you to monitor live video and search for recorded video.
TCP/IP ADDRESSES
The DS NVs server must have two NICs: one to communicate with the IP camera network; and the other to communicate with other computers,
such as client computers used to remotely monitor the system. Each NIC has a unique TCP/IP address, and the DSAdmin software must recognize
the address of the NIC used to communicate with other computers.
When you first run DSAdmin (refer to DSAdmin on page 10), check the TCP/IP address assigned to the VAU. If the TCP/IP address is applicable to
the IP camera network, switch the network cables plugged in to each NIC and restart the system. Then run DSAdmin again to verify that the
TCP/IP address assigned to the computer network is displayed.
C3663M-B (11/09)
9
DSAdmin
This section describes DSAdmin, the application that configures Digital Sentry software and the DS hardware. The following topics are
discussed in this section:
•
Overview of DSAdmin and its directory tree
•
Adding and configuring servers, VAUs, and cameras
•
User administration
•
Creating camera groups and zones
•
Enabling e-mail notification
DSADMIN OVERVIEW
DSAdmin is the administration program that configures DS NVR or DS NVs for daily use. DSAdmin is used to select DS servers, VAUs, and
cameras, along with recording frame rates, video settings, motion masks, and recording schedules. DSAdmin also allows you to set up zones,
serial input devices, and other important elements of the DS system.
To run the DSAdmin program, select it from the Start menu and enter your logon information. When DSAdmin first runs, the name of the client
computer appears in the gray title bar and the Folder Items area. The Server List field contains a path to a local .INI file containing a list of servers
to which it can be connected by the client.
NOTE: If the logon information entered during DSAdmin startup does not match the logon information for the available systems, you are also
asked to enter logon information for those systems.
DSADMIN DIRECTORY TREE
A DS system is a collection of servers, VAUs, and cameras, which the DSAdmin program organizes into a directory tree. This tree illustrates the
relationship between all the DS parts and allows you to add, subtract, or modify any of them.
Refer to the sample tree in Figure 1. At the top of the tree is a directory named after the client system (in this case, DSCOMBO). Under DSCOMBO
is the Available Systems directory, which contains a list of all available servers to which the client can connect. In Figure 4, the available system
is DSCLIENT.
Under each server are several directories containing all of the cameras, VAUs, zones, and other hardware and configurations that are available
through the selected server.
Figure 1. DSAdmin Directory Tree
10
C3663M-B (11/09)
ADDING AND CONFIGURING SERVERS
Complete the following steps to make a DS server available to your client computer:
1. Click the client directory at the top of the tree to display the Available Systems directory.
2. Right-click Available Systems and choose Add System. This opens the Add System dialog box (refer to Figure 2).
Figure 2. Add System Dialog Box
3. In the System Name field, enter a name for the DS server you want to make available.
4. Enter the static IP address of the DS server. If the server will not be connected to a network during operation, enter 127.0.0.1.
5. Enter a reconnect interval. If the client becomes disconnected from the server, it will try to reconnect after the indicated amount of time
(in seconds).
6. If you want the client to automatically connect to the server whenever the Digital Sentry client software is started, click Auto Connect.
7. Click Save to add the server to the Available Systems list.
NOTE: Click the server in the directory tree to configure a server that you have made available to the client. This displays the server
configuration information, which allows you to view or change the name, IP address, and reconnect interval for the server. If you do not select
Auto Connect, you can click Connect to connect to the server. You can refresh a connection to a server at any time by right-clicking on the server
name in the directory tree and selecting Refresh.
ADDING AND CONFIGURING A VAU
Perform the following steps to add a VAU to a server:
1. Right-click the VAUs directory under the appropriate server in the directory tree.
2. Select Add VAU. This opens the Add VAU window. Enter the following information for each VAU connected to the DS server:
•
VAU computer name
•
Static IP address
•
Video Server port
3. Click Save. On a server/VAU combination system, this information is the same as the system configuration information, and it might already
be entered in the VAU directory.
4. To configure the VAU, click its name in the directory tree. The following tabs will be displayed:
•
VAU Info: Not used with DS NVR and DS NVs.
•
Serial Ports: Configures PTZ cameras and other devices connected to each COM port.
•
Storage Locations: Configures the local and remote storage locations connected to the DS system.
•
Audio Channels: Not used with DS NVR and DS NVs.
•
IP Cameras: Configures the IP cameras connected to the VAU.
•
Delete VAU: Deletes a VAU from the system.
CAUTION: The Delete VAU function removes all data for that VAU. This includes all recorded video, unless it is the only VAU added to the
server. If only one VAU is added, its data must be deleted manually. If a large amount of data is stored on a VAU, deleting the VAU can require as
much as one hour to complete. Performance might also be reduced during the deletion process. By default, the permission to delete a VAU is not
granted to new users.
C3663M-B (11/09)
11
CONFIGURING SERIAL PORTS
Perform the following steps to configure serial ports on a VAU:
1. Click the VAU in the directory tree and select the Serial Ports tab.
2. Highlight a COM port and click Add to activate it.
3. Highlight the COM port in the assigned ports list.
4. Enter serial input information on the following six tabs:
•
General: Contains required information (refer to Figure 3):
Figure 3. Serial Ports Tab Within General Tab
–
Interface Type: Options include Monitor, Card Reader, or PTZ.
–
PTZ Type: The make and model of the PTZ camera connected to the selected port (if PTZ is selected for the Interface Type).
Select the type from the drop-down arrow; only one PTZ type can be selected per COM port. To update the drop-down arrow, click
Get Types every time you want to configure the PTZ type.
NOTE: For IP PTZ cameras, the PTZ Type is configured on the PTZ tab. Refer to Adding and Configuring Cameras on page 17 for
details.
12
–
Maximum Line Size: The maximum size of a string coming from the alarm panel. A string longer than this many characters
usually indicates an error.
–
End of Line Characters (First, Second, and Third): A character, such as a carriage return, that indicates a line is complete.
–
Description: A description of the COM port.
–
Active: Activates the COM port.
C3663M-B (11/09)
•
Port Settings: Enter the alarm panel settings here, including the COM port to which it is connected, the baud rate, parity, and stop
bits (refer to Figure 4).
Figure 4. Port Settings Tab for Serial Input Devices
•
•
•
•
Reset Text: Enter all text string segments that the alarm panel sends to indicate that an alarm is reset. The instance of one of these
segments in a string is recognized as an alarm reset. After you enter each segment, click Add.
Required Text: Enter text string segments that must be present for Digital Sentry to recognize an alarm. If the panel sends multiple
similar strings for the same alarm, only the string with one of these segments is recognized. After you enter the text, click Add.
Alarm Text: Enter all text string segments that the alarm panel sends to indicate that an alarm is occurring. The instance of one of
these segments in a string is recognized as an alarm. These segments are used to trigger recording in certain zones that you will
configure (refer to Adding and Configuring Zones on page 30). After you enter the text, click Add.
Normal Text: Similar to Alarm Text, but video does not automatically appear for these alarms even if automatic alarm viewing is
configured.
CONFIGURING STORAGE LOCATIONS
The Storage Locations tab (refer to Figure 5) displays local hard drives on the VAU and all activated network storage locations. Local hard drives
available for storage of video files are listed under Local Storage, along with their total size, unused space, and minimum free space maintained
(in MB). Perform the following steps to assign a drive for local storage of video:
1. Select the drive, and then Activate Storage Location.
2. Make sure the drive is detected and available by selecting it. Look for the word Online or Offline displayed below the list. DSAdmin
searches for the drives each time a connection is created or refreshed.
Figure 5. Storage Locations Tab
Activated network storage locations appear on the right side of the Storage Locations tab. To archive video stored on the VAU to the network
storage locations every 15 minutes, select Copy To Network Storage Location. You can also view information about each network storage location
by selecting it in the list. The following section describes how the network storage locations are configured on the Network Storage page.
C3663M-B (11/09)
13
CONFIGURING IP CAMERAS
The IP Cameras tab (refer to Figure 6) allows you to configure IP cameras connected to the VAU through the TCP/IP network port. A limited
number of IP cameras can be connected to a VAU, and a valid manufacturer-specific license must be installed for each. The top of the tab
displays the number of licenses installed for each camera manufacturer.
Figure 6. IP Cameras Tab with List of Connected IP Cameras
To configure an IP camera, click Add IP Camera, and then select the camera model from the drop-down arrow. This opens the IP Camera window
(refer to Figure 7), which contains the following configuration information and options:
Figure 7. IP Camera Window for Configuring IP Cameras
14
C3663M-B (11/09)
•
The top of the window displays the location of the camera input automatically selected for the IP camera. By default, the final input on the
final input device (or “board”) is selected for the IP camera. Because up to 32 cameras can exist on any board, and up to four boards can
exist on any VAU, the input selected for the IP camera might not actually exist. If you want to use the automatically selected camera input
for an analog camera, manually select the IP camera’s input by clicking Change Assigned Input, and then select a new input.
•
The Camera Name field allows you to enter the desired name of the IP camera that will appear in video panes, searches, lists, and so forth.
•
Consult the camera manufacturer's documentation for information on frame rate, resolution, and quality information. This can vary between
camera manufacturers and models.
•
The Compression Type drop-down arrow lists the types of compression supported on Digital Sentry systems: MJPEG, MPEG-4, H.263, and
H.264. Only certain compression types can be used with each supported IP camera model. For more information, refer to the latest release
notes for each supported camera model at www.pelco.com/software/downloads/digitalsentry.
•
If you cannot access MPEG video because it is blocked by a firewall or router, select RTSP Tunneling. This can reduce system and network
performance, so select this option only if you cannot view MPEG video from the camera.
•
The Stream Number field allows you to select the video stream to capture from a camera that provides multiple streams.
•
In the bottom section of the window enter the TCP/IP Address and other information configured for the camera on your network. Some IP
cameras use a TCP or UDP notification for motion events; the event port number is the TCP or UDP port used for that notification and must
be a different number for each camera. To view information about the camera using a Web page generated by the manufacturer, click the
IP Camera Configuration Web Page button. (Internet Explorer® must be the default browser for this to work.) With some cameras, you might
need to install additional software provided by the camera manufacturer.
NOTE: If you select Auto Image Size in the IP Camera Configuration Web page, you cannot modify the camera’s image quality in DS.
When the configuration is complete, make sure Active is selected, and then click OK. To configure an existing IP camera, click Edit IP Camera.
To delete an existing IP camera from the VAU, click Delete IP Camera.
To change the configuration of an existing IP camera, click Edit IP Camera. To delete an existing IP camera from the VAU, click Delete IP Camera;
this does not delete stored video recorded from the camera, but you cannot search and play back the video using Digital Sentry client software.
NETWORK STORAGE
Digital Sentry video files can be saved on storage devices available over a network connection. If you archive video over a network, video files
remain on the local hard drives until they are complete, and then they are copied to the network device. Video files are complete at the end of a
15-minute segment.
The Network Storage page (refer to Figure 8) allows you to configure network storage locations. Complete the following steps to add a network
storage location:
1. Click “Add Storage Location not in list.” This opens the “Add an Archive Storage Location” dialog box.
Figure 8. Network Storage Page
C3663M-B (11/09)
15
2. Enter a uniform naming convention (UNC) share name for the storage location. A valid UNC share name begins with two backward slashes
and contains the network name of the storage unit in which it is installed.
3. Enter a minimum amount of free space (in MB) that you want the storage location to maintain.
4. If you want to enable caching, select Use Caching. Caching is typically used to increase performance on storage devices that employ RAID
arrays.
5. Click Save. The storage location is then included in the list of locations assigned to the selected computer. To begin saving video to the
location, select Activate Storage Location.
After a network storage location is activated, it appears on the Storage Locations tab of each VAU. You can then select all activated network
storage locations for the VAU to copy files to.
To edit the UNC share name for a network storage location, select it and click “Edit UNC Path for Storage Location.” To completely remove a
network storage location, select it and click “Delete a Storage Location.”
VIDEO STORAGE OPTIONS
The Video Storage Options directory (refer to Figure 9) allows you to configure the length of time that video is stored on a DS system before it is
automatically deleted.
Figure 9. Video Storage Options
The Video Storage Options section configures the storage options available for each camera. The value you select for the “First storage option”
and “Second storage option” will appear in the drop-down menus on the camera configuration pages. For example, if you keep the default
storage options (10 and 30 days), the Retain Video drop-down arrow on the Motion Storage tab for all cameras will contain options to store video
as long as possible: 10 days or 30 days.
The Video Storage Options section also allows you to configure how long alarm video is saved before it is automatically deleted. If you select
0 (zero) days, the alarm video will be saved for the same amount of time you select for motion video on the Motion Storage tab. Otherwise, the
alarm video will be saved for the number of days you select in the Video Storage Options section.
Alternatively, you can select the “Force video to be deleted after” option in the Video Storage Options section. To do this, select the check box
and enter the number of days. This option overrides the other video storage options.
You can also enter an “Expected number of day(s).” If video is deleted (because of lack of space) before this number of days, a warning message
is displayed.
NOTES:
16
•
Activating or modifying the “Force video to be deleted after” option affects only the video recorded after you make the change. Any video
recorded before you modify this option follows the setting configured at the time the video was recorded.
•
On some systems, a message might continually appear stating that video is being deleted before the anticipated storage duration is
reached. If this occurs, reconfigure the camera record settings or storage rules, or add more storage capacity to the system.
C3663M-B (11/09)
ADDING AND CONFIGURING CAMERAS
After you add cameras to a system, you can configure them by clicking the respective name under any of the Cameras directories in which they
are shown.
NOTE: If you click a Cameras directory, any configuration changes are applied to all cameras in that directory. After you make the changes, click
“Apply To All Cameras in Folder.” This feature is not available on the Motion tab; it is unlikely that a user would want the identical motion mask
on multiple cameras.
GENERAL
The General tab allows you to configure several camera settings (refer to Figure 10):
Figure 10. General Tab Within Cameras Tab
Features
•
Edit IP Camera Settings: Refer to Configuring IP Cameras on page 14.
•
Frame Rate: The number of images recorded per second and per minute by the selected camera. This field on the General tab does not
actually set the frame rate; it only establishes the Fast, Medium, and Slow settings used on the Time-lapse Storage and Motion Storage
tabs. Select the frame rate per minute for each speed setting; the rate per second is automatically updated.
•
Associated Audio Channel: Not used with DS NVR and DS NVs.
•
Maximum Video Buffer: The maximum amount of time (in seconds) you can save video for pre-alarm or pre-motion recording. If the
camera begins recording an alarm or motion event, you may want to record a certain amount of time before the event. The Maximum Video
Buffer value limits the amount of video that can be inserted at the beginning of any recorded event. This value is limited by the amount of
RAM available in the VAU. Refer to the Motion tab description in this section for information about setting pre-alarm and pre-motion
recording values for individual cameras.
•
IP Camera Configuration Web Page: Refer to Configuring IP Cameras on page 14.
•
Motion Detection: Select Use Integral Motion Detection to enable settings on the Motion tab. Alternatively, you can select “Use
Detection in IP Camera” to enable the motion detection settings that are configured directly on the IP camera (refer to Motion on page 18).
•
Covert Camera: Identifies this camera as covert when assigning camera permissions in the User Administration procedure.
•
CameraPort Name: The default name of the camera input. You cannot change this name.
•
Camera Name: The name of the camera as it appears in the client software. You can change this name as desired.
•
Description: The camera’s location or other identifying information.
•
VAU: The VAU to which the camera’s input device is connected.
•
Input Device Name and Input #: The type of video input device and the input number to which the camera is connected.
Changes on the General tab are implemented at the next time interval: 0 (zero), 15, 30, or 45 minutes after the hour.
C3663M-B (11/09)
17
MOTION
The Motion tab (refer to Figure 11) allows you to configure how much motion is required to trigger motion recording. It is also used to create
motion masks, which ignore motion in certain areas of a camera’s view, and to test your motion setup. Live video from the selected camera is
displayed on this tab.
Figure 11. Motion Tab for Motion Settings and Masks
NOTE: If the “Use Motion Detection in IP Camera” option is selected on the General tab for an IP camera, only the Alarm Settings, Pre-Motion
Recording, and Post-Motion Recording portions of the Motion tab are visible.
Adjust the values for the following parameters to adjust the amount of motion required to trigger motion recording:
•
Sensitivity: The change in a pixel required for that portion of the image to be considered changed. The Sensitivity value is expressed as a
percentage multiplied by 100. For example, a value of 100 indicates a 1 percent change, 5000 indicates 50 percent, and so forth. A brightness
change from black to white would be a change of 10000, or 100 percent. This comparison is performed for all pixels in each image.
•
Unmasked Area % for Motion: The percentage of an image that must change as compared to the reference image for motion recording
to be triggered. For example, a value of 10 percent means that one tenth of the pixels in the image must change enough as compared to the
reference image for motion to be detected.
•
Reference Count: How often the reference image is updated. A setting of 100, for example, means that every 100th image becomes the
new reference. The 99th image would be compared to the first image, whereas the 101st image would be compared to the 100th image.
Motion masks allow even greater control of the motion detection. For example, a camera at a front entrance captures the receptionist’s desk. You
do not want to record all of the receptionist’s normal movements, which would consume valuable disk space storage. You can mask the portion
of the camera’s view that includes the receptionist’s desk to disable detection of activity at the desk. You can create a motion mask as large or as
small as you want and in a virtually unlimited number of patterns.
Complete the following steps to create a motion mask:
1. On the live video pane, click and drag to draw a rectangle that covers all or part of the area you want to mask. Repeat until the entire area
you want to mask is covered.
2. To eliminate a portion of the mask you created, click and drag the mask to draw a rectangle over the area you want to clear. To eliminate the
entire mask, click Clear Mask.
3. To change the color of the mask, click a color square above the live video pane.
NOTE: If there is only one small area where motion events need to be detected, you can mask that area, and then click the Invert Mask button.
This masks all unmasked portions of the video and clears all masked portions.
18
C3663M-B (11/09)
Perform the following steps to test the motion recording performance of the mask you created:
1. Click the “Save and Test Mask” button.
2. Check the following parameters:
•
Max Consecutive: The highest number of consecutive images that exhibited motion during the current test; when motion occurs, a
colored border appears around the video pane.
•
Consecutive Frames: The current number of consecutive images that differed enough from the previous image for motion to be
recognized. This resets to zero when a change is not recognized in an image.
•
Total: The total number of images that exhibited motion during the test, whether consecutive or nonconsecutive.
•
Total Non-Motion Frames: The number of images during the test that did not exhibit motion.
•
Total Frames: The total number of images displayed and compared during the test.
After the test, assess whether too much or too little of the image is masked and whether the sensitivity is too high or too low. Also assess the
consecutive images setting. For example, if a person can walk across the entire camera view while only five images are recorded, the
consecutive images setting should be less than five so that such activity is not ignored.
Any changes made on this page for individual cameras are applied when you click Test Mask, even while recording. You cannot change motion
settings for more than one camera at a time.
The Motion tab also contains settings that control the triggering of alarms based on motion events. You can configure a zone of camera inputs to
begin recording when motion occurs on specific cameras (refer to Adding and Configuring Zones on page 30 for more information). The settings
that control when this recording occurs are found in the Alarm Settings area of the Motion tab. The follow settings are available:
•
Consecutive Motion Frames to Trigger Alarm: The number of consecutive motion images that must occur on the selected camera
input to activate recording on all cameras in the zone.
•
Consecutive Non-Motion Frames for Reset: The number of consecutive non-motion images that must occur to end alarm recording
or to begin post-motion recording, if configured.
You can also configure pre- and post-motion recording on the Motion tab. The following settings are available for the Pre-Motion Recording and
Post-Motion Recording sections of the Motion tab:
•
Consecutive Motion Frames to Trigger Pre-Motion Recording: The minimum number of consecutive motion images that must occur
on the selected camera input for the pre-motion video to be inserted at the beginning of the recorded motion event.
•
Pre-Recording Seconds: The amount of video inserted at the beginning of the recorded motion event when the minimum number of
consecutive motion images occur. The images included in the pre-motion segment is determined by counting backward from the final
consecutive motion image. The maximum possible Pre-Recording Seconds value is equal to the Maximum Video Buffer setting on the
General tab.
•
Consecutive Non-Motion Frames to Start Post Motion Recording: The minimum number of consecutive non-motion images that will
end the motion event and start a post-motion recording period. The first image included in the post-motion recording period is the first
image after the final consecutive non-motion image.
•
Post-Recording Seconds: The amount of video recorded in the post-motion recording period. This video is appended to the end of the
recorded motion event. If the minimum number of consecutive motion images reoccurs during the post-recording period, the post-recording
period restarts beginning with the image following the final consecutive motion image.
C3663M-B (11/09)
19
ON SCREEN DISPLAY
The On Screen Display tab (refer to Figure 12) allows you to set the location for date, time, and camera name text in live and recorded video
panes. You can also set the location for the words Motion and Alarm that appear on video displayed over an analog output when motion or alarm
events occur; these words do not appear in the Digital Sentry client software. Live video from the currently selected camera is displayed on the
tab for easy reference. This is what your setting would look like if you were to activate the OSD for the camera.
Figure 12. On Screen Display Tab for Configuring Video Text
Perform the following steps to display date, time, and camera name information on the test video pane:
1. Select the appropriate boxes in the Display column.
2. Adjust the X and Y values to change the location of the first character of text, for each displayed item on the screen.
Each video pane is divided into a grid, 28 units wide by 11 units high. The X (horizontal) value can be 0 to 27, with 0 (zero) indicating the left
column units and 27 indicating the right column of units. The Y (vertical) value can be 0 to 10, with 0 (zero) indicating the top row of units and 10
indicating the bottom row of units.
Be sure to leave enough room for the rest of the text. For example, do not place the time text in column 27, because the rest of the text would
extend past the right edge of the video pane. The live video pane allows you to immediately test your OSD configuration.
If the Digital Sentry client software is running when you make changes on the On Screen Display tab, you must refresh the system in Client
Manager for the changes to be implemented.
20
C3663M-B (11/09)
TIME-LAPSE STORAGE
The Time-lapse Storage tab (refer to Figure 13) allows you to schedule time-lapse recording for the currently selected camera. The screen
contains a time line, organized by day and time, that visually represents the schedule for each day of the week. The schedule is color-coded to
represent the recording rate scheduled for the camera.
Figure 13. Time-Lapse Storage Tab for Scheduling Continuous Recordings
Complete the following steps to create a schedule for a day of the week:
1. Select the rate (Slow, Medium, or Fast, as defined on the General tab) at which you want video to be recorded on that day of the week.
2. Click the day’s row under the time of day you want to start time-lapse recording, and drag the edge of the box that appears to the right until
you reach the time of day you want to stop time-lapse recording.
3. If you want to record at different rates at different times on that day of the week, select a recording rate and draw another schedule box on
that day’s row.
4. To clear a section of the schedule, select Clear and drag over the schedule boxes that you want to erase. To completely clear the schedule
to start over, click Clear Schedule.
5. Repeat this procedure for each day.
Changes saved on the Time-lapse Storage tab are implemented at the next time interval: 0 (zero), 15, 30, or 45 minutes after the hour.
NOTE: To quickly configure the camera or cameras to record at the preset slow rate, simply click Full Week Slow. This button is available on
both the Time-Lapse Storage and Motion Storage tabs.
C3663M-B (11/09)
21
MOTION STORAGE
The Motion Storage tab (refer to Figure 14) is similar to the Time-lapse Storage tab, except that it allows you to schedule recording only during
motion events that occur in the selected camera’s view. While a motion event is occurring, this schedule and its recording rate override the timelapse recording schedule.
Figure 14. Motion Storage Tab for Scheduling Motion Recording
For example, you have scheduled time-lapse recording at the Slow rate all day on Sunday and motion recording at the Fast rate from 2:00 a.m. to
4:00 a.m. on Sunday. If no motion occurs at 2:00 a.m., video is recorded at the Slow rate. When motion occurs from 2:00 a.m. to 4:00 a.m., video
is recorded at the Fast rate.
When motion is occurring, the motion schedule overrides the time-lapse storage schedule. The exception is at times when motion recording is
not scheduled at all. If motion occurs during a time unscheduled on the Motion Storage page, the time-lapse storage schedule and recording rate
still apply.
The Motion Storage tab also includes a drop-down menu that allows you to configure how long motion video recorded from this camera is saved.
The options in this list are created on the Storage Options page. Refer to the Video Storage Options on page 16 for more information.
Changes saved on the Motion Storage tab are implemented at the next time interval: 0 (zero), 15, 30, or 45 minutes after the hour.
22
C3663M-B (11/09)
PTZ
The PTZ tab (refer to Figure 15) allows you to configure PTZ cameras for use in the Digital Sentry client software. Select “Enable PTZ support for
this camera” and then select the type of camera and the camera’s address from the drop-down menus. The video pane on the tab allows you to
test the PTZ functionality for the camera.
Figure 15. PTZ Tab for Configuring PTZ Cameras, Presets, and Tours
Pan, tilt, and zoom is controlled in Digital Sentry using a heads-up display (HUD). The HUD is a set of boxes that you select to control the various
PTZ functions. The largest box controls the pan and tilt functions; simply click and drag in the direction you want the camera lens to point. The
small box in the center controls the zoom function; left-clicking the box zooms in and right-clicking zooms out. The top box on the right side of the
HUD controls iris functions; left-clicking this box opens the iris and right-clicking closes the iris. The bottom-right box controls focus; left-clicking
focuses far and right-clicking focuses near.
To configure a preset camera position, point the camera as desired and click Set Preset. To select a different preset number, click the right or left
arrows below the button before clicking Set Preset. To view a preset, click Go To Preset. To view a different preset number, click the right or left
arrows below the button before clicking Go To Preset. You can configure up to 99 presets or the maximum number of presets supported on the
camera, whichever number is lower.
Perform the following steps to configure a tour of presets for the camera:
1. Click the Add PTZ Tour button in the PTZ Tour Configuration section.
2. Enter a name for the tour and a Dwell Time (the amount of time the camera will remain at each preset in the tour).
3. Click Save.
4. To select the presets in the tour, click “Add a Tour Stop” and select a preset from the drop-down menu; repeat until all presets are added to
the tour. You can reorder a preset by selecting it and clicking Move Up or Move Down.
5. Select Run PTZ Tour to test the tour.
You can delete a preset from the tour by clicking Delete Tour Stop. You can delete an entire tour by selecting Delete Tour, or you can change the
tour name by clicking Change Tour.
NOTE: When configuring certain brands of IP PTZ cameras, the Port and Address settings are replaced by a PTZ Type drop-down menu.
C3663M-B (11/09)
23
USER ADMINISTRATION
The User Administration directory is used to manage users and assign permissions. Clicking on the directory opens the Camera Assignments tab,
which allows you to select the cameras each user is allowed to view. Other tabs allow you to add and delete users and assign permissions to
perform specific functions.
CREATING USERS
Complete the following steps to add users from the list of those who can access a system:
1. Click Add User. This displays the Add User window.
2. Enter a logon name and password, and then click Create.
NOTE: Logon names can include letters, numbers, and the following symbols: period (.), hyphen (-), and underscore ( _ ).
3. Repeat these steps for each user.
When these users open the DSAdmin or Digital Sentry client software, they must enter this logon name and password to be able to access the
system to which you are connected.
SETTING UP ACCOUNT MANAGEMENT
The Account Management tab (refer to Figure 16) allows you to view or set up common and administrative account properties. This tab is visible
to an account administrator only.
Figure 16. Account Management Tab
NOTE: If the Require Strong Passwords or “User must change password at next logon” is selected, users must change their password the next
time they log on (refer to Figure 17 on page 25).
Adjust the values for the following parameters:
•
24
Common Account Properties
–
Maximum Failed Login Attempts: Sets the maximum number of log on attempts before the user ID is diabled.
–
Password Age (days): Sets the number of days before the user password must be changed.
–
Require Strong Passwords: When selected, requires the user to create a strong password at the next log on.
C3663M-B (11/09)
•
“admin account properties”
– Account is disabled: When selected, disables a user account.
– User must change password at next logon: When selected, requires the user to change a password at the next log on.
– Password never expires: When selected, the user no longer requires a password change at log on.
Figure 17. Change Password Dialog Box
ASSIGNING PERMISSIONS
Complete the following steps to assign permissions to a user:
1. Select the User Rights tab (refer to Figure 18).
Figure 18. User Rights Tab for Assigning User Permissions to Functions
C3663M-B (11/09)
25
2. Select the user’s name in the Users area.
3. Select one or more permissions in the left list, and click the right arrow button to place the permissions in the right list. To assign all
permissions, click the double right arrow button.
4. To remove a permission, highlight it in the right list and click the left arrow button. To remove all permissions, click the double left arrow
button.
5. When you are finished assigning permissions for the user, click Save.
AVAILABLE PERMISSIONS
The following permissions can be assigned to any user in any combination:
•
Alarm Activity: The user is notified of alarm events. (Notifications are displayed on the system only if configured using DSAdmin.)
•
Alarm Clearer: The user can acknowledge and clear alarms by way of check buttons.
•
Analog Output User: The user can control the cameras displayed through the analog outputs.
•
Audio Monitor: Not used with DS NVR and DS NVs.
•
Change Colors: The user can change the default color coding on the Recorded Video and Event History pages.
•
Change Password: The user can change his or her password in Client Manager.
•
Configuration Manager: The user can access DSAdmin and change its data.
•
Configuration Viewer: The user can access DSAdmin but cannot change its data.
NOTE: A user must have either Configuration Viewer or Configuration Manager rights to be able to run DSAdmin. Thus, a user with User
Administrator rights must also have Configuration Viewer rights to view the User Rights tab, or Configuration Manager rights to change
information on the User Rights tab (and perform other User Administrator functions).
26
•
Critical Messages: The user can view messages labeled as “Critical.”
•
Delete Computer: The user can access the Delete VAU tab.
•
Disable Event Monitor: In Client Manager, the user can change the Notify On Event parameter for the system.
•
Disable System Messages: In Client Manager, the user can disable the display of Critical Messages, Warning Messages, and
Informational Messages.
•
Event Viewer: The user can access the Event History page.
•
Export User: The user can export data from Digital Sentry.
•
Informational Messages: The user can view messages labeled as “Informational.”
•
Live Video: The user can view live video.
•
Manual Record: The user can activate manual recording.
•
Print User: The user can print data.
•
PTZ User: The user can control pan/tilt/zoom functions of cameras.
•
Recorded Video Viewer: The user can view the Recorded Video page.
•
Reports in Client: The user can view the on-screen reports available in the Digital Sentry client software.
•
User Administration: The user can access the User Rights tab, add and delete users, and change passwords.
•
Warning Messages: The user can view messages labeled as “Warning.”
•
Zone Administrator: The user can modify information on the tabs located in the Zones directory.
C3663M-B (11/09)
ASSIGNING CAMERA PERMISSIONS
Complete the following steps to assign or change camera permissions for a user:
1. Select the Camera Assignments tab (refer to Figure 19).
Figure 19. Camera Assignments Tab for Assigning Camera Permissions
2. Select the user name in the Users list.
3. Choose the permission from the Groups area. The following permissions are available:
•
All Cameras: Grants access to all cameras available on the selected system (as listed in the Available Cameras list at the bottom of
the tab). If you select this option, click Save and skip step 4.
•
All Non-Covert Cameras: Grants access to all cameras not designated as Covert Camera on the individual camera configuration
pages. If you select this option, click Save and skip step 4.
•
By Assignment: Grants access to cameras individually selected from the bottom of the Camera Assignments tab. If you select this
option, proceed to step 4.
4. If you select By Assignment, select the cameras in the Available Cameras list that the user has permission to monitor, and then click the
right arrow button to move them to the Assigned Cameras list (or click the double right arrow button to assign all cameras). Repeat until all
cameras are properly assigned. To remove a camera from the Assigned Camera list, select it and click the left-arrow button (or click the
double left arrow button to remove all cameras). When all cameras are properly assigned, click Save.
C3663M-B (11/09)
27
MANAGING USERS ACROSS MULTIPLE SYSTEMS
The Multiple Systems tab (refer to Figure 20) allows you to create new user accounts based on existing accounts, add a new user or copy an
existing user to multiple systems, and change a user’s password on multiple systems. All systems added in DSAdmin are available for multiplesystem user administration, and you must have User Administration permissions on each system.
Figure 20. Multiple Systems Tab
To copy an existing user to other systems, select the user in the list box, and click “Copy a user with changes” or “Copy a user with no changes”
button:
1. If you selected “Copy a user with changes”: In the Specify User Details window (refer to Figure 21), modify the user name, camera
access, and user rights as desired.
Figure 21. User Details Window for System Administration
28
C3663M-B (11/09)
If you selected either button: Enter the user’s password. If you want this password to replace the password for this user on systems
where the user is already configured, select this option.
2. Click Continue.
3. Select the systems where you want to copy the user.
4. Click Continue.
5. Click Apply.
6. Watch the Status and Systems dialog boxes for messages. To save a log file containing these information messages, click the disk icon.
Other administration procedures that you can perform on the Multiple Systems tab are as follows:
•
To copy multiple users with the same password to other systems, click the Copy Multiple Users button and begin with step 2 of the
preceding procedure.
•
To create a new user on multiple systems, click the “Create New User on One or More Systems” button and begin with step 1 of the
preceding procedure.
•
To delete an existing user from multiple systems, click the “Delete a User On One Or More Systems” button, enter the user name, select the
systems, and click Continue. Click Apply and watch for messages.
•
To change the password for a user on multiple systems, click the “Change a Password for a User On One Or More Systems” button, enter
the user name, enter the new password, select the systems, and click Continue. Click Apply and watch for messages.
CAMERA GROUPS
The Camera Groups directory (refer to Figure 22) contains groups of cameras with some similar characteristic, such as location. These groups can
be used for quick selection of cameras from which to view live or recorded video. Complete the following steps to create a camera group:
Figure 22. Camera Groups Tab
1. Click New Group and enter a name for the group in the Camera Group drop-down box.
2. In the Available Cameras list, select one or more cameras and click the right arrow button. This adds the camera(s) to the Assigned
Cameras list. Repeat until all desired cameras (up to 16) are placed in the Assigned Cameras list.
3. To remove a camera from the Assigned Cameras list, click the left arrow button. To remove all cameras from the Assigned Cameras list,
click the double left arrow button. To adjust a camera's position in the group, highlight it and click Move Up or Move Down.
4. When you are finished modifying the camera group, click Save.
You can modify a camera group at any time by selecting the group from the Camera Group list and performing steps 2 through 4. To rename a
selected group, type the new name in the New Name field and click Rename Group.
C3663M-B (11/09)
29
ADDING AND CONFIGURING ZONES
A zone is a user-defined group of cameras that are triggered to record when specific events occur. For example, you might create a Door 3 zone
that contains all cameras near Door 3. Then, when the door is opened, all cameras in the Door 3 zone begin recording video. The Event History
page in the Digital Sentry client software allows you to search by zone for alarm events. For example, you could search for all video recorded
when Door 3 was open by choosing the Door 3 zone as part of your search parameters. A zone can contain any number of cameras.
To create a zone, right-click the Zones directory in the directory tree and select Add Zone. When the Add Zone dialog box appears (refer to
Figure 23), enter the following information:
Figure 23. Add Zone Dialog Box
•
Zone Name: A name that describes the zone’s location or other characteristic.
•
Zone Description: Any description identifying the zone.
•
Alarm Information:
–
Active: Activates the zone.
–
Report Alarm: Automatically displays an alarm notification in the Current Alarms window whenever an alarm event occurs within the
zone.
–
Record Until RESET Received: Changes the beginning of the post-alarm recording period. If you select this option, post-alarm
recording does not begin until the alarm is reset to its normal state. Otherwise, the post-alarm recording period begins when the alarm
is triggered.
–
Priority: Determines how alarms from this zone are sorted in the Current Alarms window. Alarms notifications from zones with
Priority 1 are listed at the top of the Current Alarms window.
•
Alarm Time in Seconds:
–
Pre-alarm: Indicates how much of the video captured before the alarm occurs is inserted at the beginning of a video segment of an
alarm event within this zone.
–
Post-alarm: Indicates how much of the video captured after the alarm occurs is appended to the end of a video segment of an alarm
event within this zone.
– Re-alarm: Indicates how long after an alarm occurs that ensuing alarms are ignored. For example, if you enter 5 seconds, alarms that
are active less than 5 seconds after an initial alarm event do not trigger recording.
After you enter this information, click Save to add the zone to the Zones directory in the directory tree.
NOTE: When creating a zone for the recording of video loss events, be sure to include an additional three seconds to account for the maximum
lag between the loss of video and the triggering of the alarm. (The system monitors for video loss every 1.5 seconds.) For example, if you want to
record 5 seconds of pre-alarm video on the zone, set the pre-alarm time to 8 seconds.
30
C3663M-B (11/09)
CONFIGURING ZONES
To configure a zone, click its entry in the Zones directory. This displays the following tabs:
•
General: Contains the configuration information assigned to the zone.
•
Cameras: Assigns cameras to the zone (refer to Figure 24). To assign a camera, select it in the Cameras Available List and click the Add
button. This displays the camera in the Cameras Assigned list. To remove a camera from the zone, select it in the Cameras Assigned list and
click the Remove button.
Figure 24. Cameras Tab for Assigning Cameras to Zones
•
Digital Inputs: Assigns digital (alarm) input points to the zone (refer to Figure 25). Whenever an assigned digital input is triggered,
cameras in the zone begin recording.
Figure 25. Digital Inputs Tab for Assigning Input Points to Zones
NOTE: For Digital Sentry to recognize an alarm from a serial device, you must configure both an Alarm Text (in the VAU configuration) and a
Unique Zone Text, which are different parts of a text string from an alarm panel. The Alarm Text notifies Digital Sentry that some sort of alarm is
occurring, whereas the Unique Zone Text indicates the location or some other distinguishing feature of the alarm and causes the designated
camera inputs to record video. For example, if an alarm panel sends the text string OPEN DOOR3, you would enter “OPEN” for the Alarm Text and
“DOOR3” for the Unique Zone Text. Multiple zones can use the same COM port and Alarm Text segments, but each zone typically uses different
Unique Zone Text segments.
C3663M-B (11/09)
31
•
Video Motion: Selects cameras which, when they detect motion, cause the rest of the zone’s cameras to begin recording (refer to
Figure 26). Refer to Motion on page 18 for information about zone recording based on motion.
Figure 26. Video Motion Tab for Triggering Cameras in Zone
•
Video Loss: Selects cameras whose loss of video cause the rest of the zone’s cameras to begin recording.
•
Serial Input: Looks for certain text in strings sent by alarm panels, as entered during the Computer Configuration (refer to Figure 27).
Select a COM port on the server, enter text that the alarm panel will send during a particular alarm, and click Add. Whenever the alarm
panel sends this text through the designated COM port, the zone’s cameras begin recording.
Figure 27. Serial Input Tab for Sending Text Strings That Trigger Recordings
NOTE: Before you can select a COM port on the Serial Input tab, the port must be added and configured as a Monitor type on the Serial
Ports tab. Refer to Configuring Serial Ports on page 12 for details.
•
32
Schedule: Assigns recording times for the configuration you selected in the other tabs. Draw schedule boxes on the time line to indicate
the days and times this zone’s configuration information should be activated. If you schedule the Alarm Boost, the alarm frame rate
allocation configured on the Camera Frame Rate tab is activated. During alarm activation, the zone’s cameras record when assigned digital
inputs are triggered or assigned cameras lose video or detect motion. To remove a schedule, click Clear Schedule. To activate the alarm
boost for the entire week, click Full Week Boost.
C3663M-B (11/09)
•
Email Configuration: Allows you to select e-mail addresses that receive messages when an alarm event happens in a zone. To identify
and test the mail server, refer to the Email Notification on page 35. To select e-mail addresses, click Add Email Account to open the window
shown in Figure 28 on page 33. Add e-mail addresses as desired, and then select cameras from the zone. For each selected camera, a JPEG
image of the alarm event will be attached to the e-mail messages; you can adjust the image resolution and quality using the slider bars
under JPEG Image Properties.
Figure 28. Add Email Account(s) Window
Changes to a zone configuration are applied when you save them.
CAMERAS DIRECTORY
The Cameras directory under a DS server in the directory tree contains a list of all cameras configured on all VAUs in the tree. Refer to Adding
and Configuring Cameras on page 17 for more information.
CONFIGURATION PARAMETERS
The Configuration Parameters directory contains several miscellaneous parameters for a DS system. Clicking this directory opens the
Configuration Parameters list (refer to Figure 29). To change a parameter, select it in the list and enter a value allowed in the Description field.
The value can be either a quantity, such as number of MB, or a code number.
Figure 29. Configuration Parameters Window for Miscellaneous Settings
The Parameters list contains the following settings (applicable code numbers in parentheses):
•
Interface/EventImageDisplay: Automatically displays event images when the event occurs. Choose 1 to automatically display event
images or choose 0 (zero) not to automatically display event images.
•
Services/DebugFlag: Limits the type of data written to the log file: none (0), basic information (1), or all information (2).
•
Services/LogFileSizeKB: Limits the size, in KB, of the Video Server log file. When the log file reaches this size, it replaces the oldest
data with the newest data.
C3663M-B (11/09)
33
•
Services/MaxAlarmDuration: Limits the amount of time an alarm event is recorded, if not reset by an alarm panel.
•
Services/PacketDelayMS: Sets a delay, in milliseconds, between packets sent.
•
Services/PacketSize: Limits the size, in bytes, of packets sent to the client.
•
Services/PTZUserTimeout: The number of seconds before a PTZ camera resumes a tour, after a user has stopped controlling PTZ
functions.
•
Services/SerialDelimiter: A character or string that separates each field in a message from a card reader. A hexadecimal character
must be preceded by “0x.”
•
Services/SerialFieldCount: Limits the number of fields saved from a message from a card reader.
•
Services/SerialLog: Creates a log of all data read on the COM port. You can choose not to create a log (0), to create a log on ASCII
characters (1), or to create a log on hexadecimal format (2).
•
System/ActiveAlert: Activates the optional ActivEye® Active Alert™ software, if properly licensed and installed. Refer to the Active Alert
User Manual for details.
•
System/DeleteOrphanFilesHour: The hour of the day when a search for orphan files is performed.
•
System/DeleteOrphanFilesMax: The maximum number of orphan files that can be deleted during an orphan search.
•
System/ErrorLogAge: Sets the number of months to retain message log data.
•
System/ErrorLogRowsDelete: Sets the number of expired rows to delete at a time.
•
System/ManualRecord: Limits the amount of time that manual recording can be activated before timing out.
•
System/VideoArchiveTrend: Limits the amount of data (in months) that is stored in the VideoArchiveTrend table, which documents the
number of days video is stored before it is overwritten.
•
Video Server/FastSwitch: Records even and odd fields from an XMUX2 unit. Change this only under the advice of a trained technician.
•
Video Server/FSRetryCount: Limits the number of times Digital Sentry tries to initialize a multiplexer. When initialization fails this many
times, Digital Sentry waits the amount of time set in Video Server/FSRetryDelay before attempting initialization again.
•
Video Server/FSRetryDelay: Sets the time between multiplexer initialization attempts. Digital Sentry tries initializing the multiplexer the
number of times set in Video Server/FSRetryCount before starting this delay.
THROTTLE EXEMPT ADDRESSES
The Throttle Exempt Addresses page (refer to Figure 30) allows you to exempt client computers from the packet restrictions selected on the
Configuration Parameters page. Each computer exempted can download video at the fastest available rate.
Figure 30. Throttle Exempt Addresses Window
To exempt a client computer, type its IP address and click Update List. To delete a computer from the list, select it and click Delete. To delete all
computers from the exempt list, click Delete All.
34
C3663M-B (11/09)
EMAIL NOTIFICATION
The Email Notification page (refer to Figure 31) allows you to select e-mail addresses that receive messages whenever a system message is
generated. Each recipient e-mail address can be configured to receive any combination of critical, warning, or informational messages. Complete
the following steps to enable e-mail notification of these types of messages:
Figure 31. Email Notification Page
1. In the SMTP Server field, enter the e-mail server used to send the e-mail messages. This must be a valid SMTP server accessible from the
DS server.
2. In the “Email sent from domain name” field, enter the domain name as configured on the SMTP server.
3. If required, enter a User Name and Password for sending e-mail using the SMTP server.
4. Click Add Email Account. Enter an Email address and select one or more message types. The e-mail account receives only those messages
that match the selected message types. Click Save.
5. Repeat the previous step for up to 75 e-mail addresses.
6. To change the messages types sent to an e-mail address, select the address and click Edit Email Account. Select the appropriate system
message types and click Save.
7. To delete an entered e-mail address, select the address and click Delete Email Account.
8. To test a configured e-mail address, select the address and click Test Email Account. Check the e-mail account to ensure that an e-mail was
sent.
NOTE: The SMTP server selected for e-mail notification of messages is automatically the same server selected for e-mail notification of alarms,
if applicable. Refer to Configuring Zones on page 31 for more information.
C3663M-B (11/09)
35
Digital Sentry Client Software
This section describes the daily operation of the Digital Sentry client software. The following topics are discussed in this section:
•
Overview of Digital Sentry
•
Video pane configurations
•
The Event History and Recorded Video pages
•
Client Manager
•
Digital Sentry messages
RUNNING DIGITAL SENTRY
To run the Digital Sentry client software, select it from the Start menu. When asked, enter a user ID and password, as configured in DSAdmin.
When Digital Sentry starts, a tool bar is displayed (refer to Figure 32). This tool bar contains buttons for video pane configurations, event history,
recorded video, administration, and exiting Digital Sentry.
Figure 32. Digital Sentry Main Menu
NOTE: Digital Sentry client software can run simultaneously with DSAdmin. However, if you make camera configuration changes in DSAdmin
while the client software is running, you must exit and restart the client software before you can view the new configuration.
36
C3663M-B (11/09)
VIDEO PANE CONFIGURATION
The following video pane configuration buttons control the display of live video:
The 1 × 1 button displays video from a single camera.
The 2 × 2 button displays video from up to four cameras.
The 3 × 3 button displays video from up to nine cameras.
The 4 × 4 button displays video from up to 16 cameras.
The Camera Groups button displays video from predefined groups of cameras.
The Save Local Camera Group button allows you to create camera groups spanning multiple DS systems and to create camera
sequences.
The Close Windows button removes all live video panes (or any other graphics, such as the Event History or Recorded Video time
lines).
To view live video, click a video pane configuration button. If you click the 1 × 1 button, the first camera configured for the first connected system
is displayed; if you click the 2 × 2 button, the first four cameras are displayed; and so forth.
To view a camera group configured in DSAdmin, click the Camera Groups button to display a tree diagram of connected servers. Expand the tree
to view camera groups, and then either double-click the group or click the View Group button. All cameras in the group are then displayed in a
multiple-pane format. For information on creating camera groups, refer to DSAdmin on page 10.
To change which cameras are displayed in which video panes, refer to Cameras Tab on page 40.
RECORDING MODE INDICATORS
Live video panes displaying video that is currently being recorded are surrounded by colored bars that indicate the current recording mode (timelapse, motion, or alarm). The colors are based on settings entered on the Event History and Recorded Video pages. Refer to Event History Page on
page 42 and Recorded Video Page on page 44 for information on configuring recording mode color indicators.
QUICK REVIEW
The Go button above the video panes (refer to Figure 33) allows you to quickly view recently recorded video. Use the drop-down arrow to select
video from the previous 1, 5, 15, 30, or 60 minutes. When you click Go, video from the selected time frame is displayed for each currently
selected camera. You can scroll through the video using the slider on the time line at the top of the screen.
Figure 33. Quick View of Recorded Video
To view video from a time frame before the previous 60 minutes, perform a search on the Event History or Recorded Video page (refer to Event
History Page on page 42 and Recorded Video Page on page 44).
ZOOMING INTO VIDEO
To zoom into a video pane, left-click the pane to highlight it. Each additional click increases the size of the video in the pane by a factor of two
(cropped to fit the video pane) and re-centers the pane in the direction of the click. Right-clicking reverses the zoom.
C3663M-B (11/09)
37
DIGITAL PTZ
If you have a mouse with a scroll wheel, you can digitally zoom into a video pane by scrolling the wheel forward, and digitally zoom out by
scrolling the wheel backward. You can also pan and tilt within a zoomed video pane by clicking and then dragging in the desired direction.
To activate Digital PTZ, select Scroll Wheel Digital Zoom on the Video Controls tab (refer to Video Controls Tab on page 39).
CREATING LOCAL GROUPS
Local groups are similar to camera groups, except that local groups are available only on the remote client computer on which they are created.
Perform the following steps to create a local group of up to 16 cameras:
1. Click the Close Windows button.
2. Click the Save Local Camera Group button, and select the Local Group Configuration tab (refer to Figure 34).
3. Click New Group, type a name for the local group, and select whether the group is viewable by all users of the client computer or only by
the current user.
4. Click Save Group. You can also quickly create a local group by arranging cameras on the live video page and clicking the Save Local Group
button.
Figure 34. Local Group Configuration Tab
The tree on the left side of the Local Group Configuration tab contains a list of all available cameras. To add a camera to the group, drag its name
to the list on the right side of the tab (or select the camera and click the right arrow). To remove a camera from the group, drag its name back to
the tree (or select the camera and click the left arrow). Add cameras until the local group is complete. Cameras will be displayed in the order that
you select on this tab; you can reorder the cameras by selecting a camera and clicking the up and down arrows.
CAMERA SEQUENCING
Digital Sentry can automatically cycle through configurable sequences of camera combinations. To configure a sequence, select the Save Local
Camera Group button and select the Camera Sequence Setup tab. Click New Sequence, type a name for the sequence. Enter a dwell time, which
is the amount of time, in seconds, that each combination of cameras is displayed in the cycle. Then click Save.
A camera sequence can contain camera groups configured on the server and local groups configured on the remote client computer. The tree on
the left side of the tab contains a list of all available camera groups and local groups. To add a group to the sequence, drag its name to the list on
the right side of the tab (or select the group and click the right arrow). To remove a group from the sequence, drag its name back to the tree (or
select the group and click the left arrow). Add groups until the sequence is complete. You can reorder the sequence by selecting a group and
clicking the up and down arrows.
The Rename Sequence and Delete Sequence buttons allow you to modify or remove the sequence selected in the Camera Sequence Name
drop-down menu.
38
C3663M-B (11/09)
COPYING LOCAL CONFIGURATION INFORMATION TO OTHER COMPUTERS
The .INI File Configuration tab allows you to locate the .INI file that contains information about the local configuration so you can copy it to
another client computer. Simply locate the file and copy it to the same location on the other computer over a network, or use a portable data
storage medium.
VIDEO CONTROLS TAB
When you select a video pane configuration button, the Video Controls tab appears on the right side of the screen. This tab allows you to change
characteristics of the selected video pane. The following information can be found on the Video Controls tab:
•
Brightness and contrast settings for the currently selected camera: The Defaults button returns these to preset values.
•
Display options: You can choose to display the current time, date, and camera name on each video pane in various colors. Also, the
Inverse option displays a negative image for the currently selected video pane.
•
Client Local Time, Server Time, and GMT (Greenwich Mean Time, equal to Universal Time): This applies to time displayed on
OSD and the playback counter.
•
Audio On: Not used with DS NVR and DS NVs.
•
De-interlace Mode: This allows you to eliminate pixelated images in high resolution video that contains a large amount of motion. This
feature applies only to live or recorded video with a 704 × 480 (4CIF) resolution.
•
The Delay Live slider bar: When set to the left video displays at its fastest rate. Moving this to the right decreases the displayed image
rate.
NOTE: The “Apply to All” option allows you to apply Video Quality and Delay Live settings to all displayed cameras.
•
An offset video pane configuration button (2 × 2, 3 × 3, and 4 × 4 views only):
This button increases the size of the currently selected video pane and decreases the size of the rest of the displayed video panes. This
allows you to see video in a larger video pane (as with 1 × 1 mode), but still displays the other video panes. To view another camera’s video
in the larger video pane, click the small pane; this switches the size and location of the large and small panes. To return to the pane format,
click the video pane configuration button that appears in the same place on the Video Controls tab, or click one of the buttons on the
toolbar.
•
When you play back video, the Video Controls tab also includes a Play Video section that allows you to control the playback speed.
Available options are As Fast as Possible, In Real Time, and Skipping x.x Seconds. To configure the number of seconds skipped with the
final option, select the up or down arrows to change the number in half second increments. The “As Fast as Possible” option does not skip
any frames.
NOTE: The video settings adjusted on the Video Controls panel are different from the video settings adjusted in DSAdmin. These video settings
merely change the video as it appears in the live and recorded video panes, whereas the video settings in DSAdmin affect the video as it is
digitized and captured.
MANUAL RECORDING
The Video Controls tab also includes the following button for users with Manual Record permission:
This button allows you to start time-lapse recording of video in the currently selected video pane, overriding the recording schedule set in
DSAdmin. When you select the Manual Record button, a menu allows you to select a recording speed. Digital Sentry records video in the
selected video pane at the selected speed, until you click the STOP button that appears in the Manual Record button’s place.
C3663M-B (11/09)
39
CAMERAS TAB
The Cameras tab (refer to Figure 35) contains a tree diagram of all currently connected servers and their cameras. To see a list of cameras
connected to a server, expand the server by clicking its plus button. To view video from a listed camera, drag it to a video pane. You can view
video simultaneously from multiple connected servers.
NOTE: When viewing recorded video from the Event History or Recorded Video page, the Cameras tab is replaced by the Search tab.
For information on the Search tab, refer to Event History Page on page 42 and Recorded Video Page on page 44.
Figure 35. Cameras Tab for Viewing Live Video
PRINT/EXPORT TAB
The Print/Export tab allows you to print and export images displayed in the video panes. The following buttons and fields are found within this
tab:
•
The Authenticate Frames button locates faulty frames in a video clip. All video in the selected video segment and video pane is
authenticated.
•
The Export Image button saves a still image from the currently selected video pane in bitmap or JPEG format. Pause the live or recorded
video and then click Export Image. Enter a filename, format, and location in which to save the image, and then click OK. Then enter any
additional information and click OK.
•
The Export Movie button saves a series of live or recorded images in XPA or EXE format. For instructions on saving a video clip and
descriptions of the file formats, refer to Exporting a Video Clip on page 41.
NOTE: The export options are available only when playing back recorded video from the Event History or Recorded Video page. You must pause
the recorded video to activate these buttons.
•
The Print Screen button prints a still image from all displayed video panes.
•
The Print Image button prints a still image from the currently selected video pane.
•
The Print Comment field prints whatever you type here, along with the selected image or images.
NOTE: Exporting and printing rights are based on user permissions and are available only if the user has permission.
40
C3663M-B (11/09)
EXPORTING A VIDEO CLIP
Digital Sentry allows you to export simultaneous video clips from multiple cameras to any location on the DS system or over a network
connection. Complete the following steps to export a movie:
1. Play back video from the Recorded Video or Event History page.
2. Pause the video and click Export Movie on the Print/Export tab; this opens the Save As dialog box.
3. Select a location, enter a file name, and select a file type: XPA format (playable in Integral Media Player); EXE format (a self-extracting
executable with Integral Media Player built in); MPEG; or AVI.
4. To mark a smaller portion of the video clip for export in EXE or XPV format, move the slider bar to the start of the desired clip, click Mark
Start, and drag the slider bar to the end of the clip (refer to Figure 36). You can also select the cameras to include in the exported file, but
you can export video from only one camera at a time when exporting in MPEG or AVI format. Click OK.
Figure 36. Export Video Clip Window
5. Click the play button to start the video clip.
6. Click STOP on the Video Controls tab when you want to end the video clip. The clip is then saved to the location you chose.
To view the movie you saved, open the file in the location in which you saved it.
•
Copy Destination: This is the drive letter and name of the disc or non-local network drive where the video is exported.
•
Maximum Copy Duration: This is the amount of video that the system attempts to export. If you select Fill Destination Media, the disc or
drive is completely filled by the most recent recorded video (or until all video is exported). Otherwise, video from the most recent days,
hours, and minutes selected from the drop-down menu is exported; if video from the selected time period is too large, only the most recent
video from that time period is exported.
•
Cameras To Include: Video is exported for all cameras selected here. All camera inputs are listed even if they are not enabled. However,
video from the selected inputs is exported only if the camera is enabled and recorded video from that input is stored on the system.
7. Click OK when the configuration is complete.
IMAGE DETAILS TAB
The Image Details tab contains information about the image in the currently selected video pane. This information includes the camera name, the
VAU the camera is connected to, the IP address of the VAU, the size of the image, the video standard (NTSC or PAL), and current recording rate
(if applicable).
The Image Details tab also displays the Connection Status, which is the current status of the connection between the client and the VAU of the
selected camera. Green indicates an active connection, and red indicates an inactive connection.
C3663M-B (11/09)
41
EVENT HISTORY PAGE
The Event History page (refer to Figure 37) allows you to search for and view a log of all events that occurred during a certain time period, and
then play back video of events based on the results of the search. The log is a graphical, color-coded representation of events that is organized by
days and hours. Each row represents a complete calendar day; the columns represent the 24 hours in each day.
Figure 37. Event History With Event Time Lines
NOTE: If the optional Active Alert software is installed and activated, several additional search options are available on the Event History page.
For detailed information about using Active Alert, refer to the Active Alert user manual.
SEARCHING FOR LOGGED EVENTS
To view a log of events, click the Event History button:
The Event History button displays a time line of seven days. Complete the following steps to display all events that occurred during any period:
1. Click the Event History button. The time line appears.
2. From the Systems drop-down menu, choose the system whose event log you want to view. This drop-down lists the connected systems that
you have Event History permissions for.
3. From the Zones drop-down list, choose the zone that includes the cameras whose recorded events you want to view. If you want to include
events from all cameras on the system, select ALL Zones.
4. In the Event Description field, enter search parameters for information received from an access control panel. For example, if you configure
an access control panel to transmit to Digital Sentry the identification of an employee who swipes his ID badge, you can enter the
employee’s name (or other transmitted information) in the Event Description field, and the search result will include only those events
associated with the employee’s badge.
42
C3663M-B (11/09)
5. In the “For (Days)” box, select the length of your search period (the default and maximum are both seven). Also select either Client Local
Time, Server Time, or GMT.
6. In the “From” field, select the first day of the period you want to search. In the “To” field, the last day of the period is automatically
displayed, based on the duration you selected in the “For (Days)” box.
7. Click the Get Event Information button.
NOTES:
•
To view events that occur during the fall-back hour when reverting to standard time from daylight saving time, you must select GMT.
•
When you first view the Event History, the most recent seven days are selected (from midnight of the first day to 11:59:59 p.m. of the
current day, even if a portion of the current day has not yet occurred). If you change this, you can quickly return to the most recent days by
clicking the Today button.
Search results are then listed in two ways:
•
Each event that occurred during the time period you selected is listed on the right side of the screen. The information displayed for each
event includes the date and time it occurred and the zone where it occurred. The total number of events is indicated below the date
selection fields. If the number of events exceeds 2000, events are displayed only in groups. You can select a group from a drop-down list
beside the Get Event Information button.
•
All events that occurred during the time period you selected are also displayed on the time line as boxes, using the color indicated at the
bottom of the screen. They are aligned on the row corresponding to the day they occurred and on the column below the hour they occurred.
(The time line always shows seven days, regardless of the length of the selected period.) Events are organized in quarter-hour segments;
thus, all events that occur between 4:00 and 4:15 are displayed as one box.
NOTE: You can control the colors displayed on the Event History page by right-clicking the colored boxes at the bottom of the screen, and then
selecting a color for each video type and storage location. Colors configured here are also configured for the Recorded Video page and the
recording mode indicators that surround live video panes.
TIP: At any time, you can click the Previous Week or Next Week buttons to view the preceding or following seven days on the time line.
PLAYING BACK A LOGGED EVENT
Perform a log search as described in the previous section, and then complete the following steps to play back a logged event:
1. Click the portion of the colored box aligned with the time and day when the event you want to view occurred. The events corresponding to
your selected segments are highlighted in the list on the right side of the screen.
2. If you want to play back synchronized audio along with the video, select one or more audio channels from the list near the top-right corner
of the screen.
3. Double-click the highlighted event from the list that corresponds to the video you want to view. Recorded video and audio are
simultaneously played back from all cameras in the zone where the event occurred.
4. Use the counter and the playback controls (Play, Pause Video, Play Fast Reverse, Step Back, Step Forward, and Play Fast Forward) at the top
of the screen to view the desired portions of video. To see the function of each button, hover the mouse pointer over the button without
clicking.
5. When you play back an alarm event, the Video Controls tab appears. To return to the list of events, click the down-arrow button on the left.
When you are finished viewing the event, you can click the Event History button to return to your search results, or you can perform other tasks.
NOTE: When you play an event from the Event History, the Video Controls panel includes a Play By Frame/Time feature. Play By Frame plays only
recorded frames, skipping over periods without recorded video. Play By Time plays back video based on time elapsed, including periods when no
video was recorded.
C3663M-B (11/09)
43
RECORDED VIDEO PAGE
The Recorded Video page allows you to view recorded video from up to nine separate cameras or one predefined camera group. This page (refer
to Figure 38) contains a time line similar to the Event History time line, indicating when video was captured and where it is stored. The time line
is organized by days and hours. Each row represents a complete calendar day; the columns represent the 24 hours in each day.
Figure 38. Recorded Video with Time Line of All Captured Video
SEARCHING FOR RECORDED VIDEO
To view a log of recorded video, click the Recorded Video button:
The Recorded Video button displays a time line of seven days. Complete the following steps to display all events that occurred during any period:
1. Double-click or drag camera names from the left list into the middle list (or select the camera name and click the right arrow button).
Alternatively, you can double-click or drag a camera group or local group from the right list to the middle list (or select the group and click
the left-arrow button).
To clear the middle field, click Clear All. To remove one camera at a time, double-click the camera name or drag it to the appropriate list.
2. Enter a search period on the right side by selecting a starting day and a duration (in days). Also select either Local time or GMT.
3. Click the Query Recorded Video button.
NOTE: When you first view the Recorded Video page, the most recent seven days are selected. If you change this, you can quickly return to the
most recent days by clicking the Today button.
All video captured within those parameters is displayed as boxes on the time line, aligned on the row corresponding to the day they occurred and
on the column below the hour they occurred. (The time line always shows seven days, regardless of the length of the selected period.) The video
is organized in quarter-hour segments; thus, all events that occur between 4:00 and 4:15 are displayed as one box.
44
C3663M-B (11/09)
NOTE: To view video that occurs during the fall-back hour when reverting to standard time from daylight saving time, you must select GMT.
The following video-type colors can be displayed on the time line:
•
Event: An alarm event occurred during the 15-minute segment.
•
Motion: Only motion events and time-lapse video were recorded during the 15-minute segment.
•
Time-Lapse: Only a certain frequency of time-lapse frames were recorded per second during the 15-minute segment.
The storage location of an event's segment is indicated by a shorter colored box below the video-type indicator box. The recorded video can be
stored on a VAU, on a VAU requiring copy to permanent storage, or stored on the network.
NOTES:
•
Systems running server software version 2.x or 3.x can also display one or more Continuous recorded video types. These video types
indicate that all images were recorded and stored during the 15-minute segment.
•
At any time, you can click the Previous Week or Next Week buttons to view the preceding, or following seven days, on the time line.
•
You can control the colors displayed on the Recorded Video page by right-clicking on the color boxes at the bottom of the screen and
selecting a color for each video type and storage location. Colors configured here are also configured for the Event History page
(if applicable) and the recording mode indicators that surround live video panes.
PLAYING BACK RECORDED VIDEO
Perform a search as described in the previous section, and then complete the following steps to play back recorded video:
1. Click the portion of the colored box aligned with the time and day when the video you want to view occurred. (You can select any number of
consecutive boxes displayed on the time line by clicking and dragging in any direction.) The Selected Video area then displays the following
information:
•
The date and time of the start and end of the period in which all the video you selected was recorded.
•
The number of images recorded during all alarm events during the period.
•
The number of motion images recorded during motion events during the period.
•
The total number of images recorded during time-lapse recording, alarm events, and motion events during the period.
•
The total size of all video files recorded during the period.
Alternatively, you can enter the time period parameters in the Play Selected Video From area and click Select Video. This can also be used
to narrow the selection you made by clicking on the time line.
2. To select a different portion of video from the time line, click the Clear Selected Video button or simply click the time line.
3. Click Play Selected Video. Recorded video and audio is then played back simultaneously from all cameras you searched.
4. Use the counter and the playback controls (Play, Pause Video, Play Fast Reverse, Step Back, Step Forward, and Play Fast Forward) at the top
of the screen to view the desired portions of video. To see the function of each button, hover the mouse pointer over the button without
clicking.
When you are finished viewing the video, you can click the Recorded Video button to return to your search results, or you can perform other tasks.
NOTE: Watch the counter at the top of the playback screen. Video from a specific camera appears only if it was recording at the time indicated.
If only two cameras were continuously recording video at 4:15, only two video panes would display video. If another camera began recording a
motion event at 4:17, three video panes would show video.
C3663M-B (11/09)
45
SEARCH TAB
When you play back recorded video from the Event History or Recorded Video page, the Search tab appears in place of the Cameras tab (refer to
Figure 39). The Search tab allows you to filter the video so you can view images of specific interest. The following options can be found within
this tab:
Figure 39. Video Search Tab
•
All Frames: Plays back all images in the selected video clip.
•
Motion Frames: Plays back only those images that exhibit motion.
•
Alarm Frames: Plays back only those images that were recorded during an alarm event.
•
Motion and Alarm Frames: Plays back only those images that exhibit motion and were recorded during an alarm event.
•
Manually Recorded Frames: Plays back only those images recorded using the Manual Record button on the Video Controls tab.
•
Smart Search: Plays back images that exhibit motion in a user-defined area of the video pane. Refer to Smart Search for details.
Options to play back motion, alarm, or manually recorded video are available only if the selected video segment contains images recorded in that
manner.
SMART SEARCH
The smart search feature allows you to further filter video recorded based on the occurrence of motion. For example, you can search for video in
which one small portion of a camera view that exhibits motion.
NOTE: Smart Search is not available on all IP cameras.
Complete the following steps to configure a smart search:
1. Perform a search on the Event History or Recorded Video page. Play back a video segment as described earlier in this section.
2. Select the video pane of the camera on which you want to perform a smart search.
3. On the Search tab, select Smart Search. This activates several options and buttons on the Search tab.
4. Select Show Smart Search Mask. Select a color for the mask by clicking the Mask Color box and selecting Change Mask Color.
46
C3663M-B (11/09)
5. Use the mouse to draw a mask in the selected video pane. Motion must occur in the masked area for an image to be displayed during the
smart search. To clear a mask, click the Mask Color box and select Clear Mask; to reverse the mask, select Inverse Mask.
6. Adjust the Blocks Requiring Motion slider bar to select the number of “blocks” in the mask that must exhibit motion for an image to be
displayed during the smart search. Adjust the % Motion Required slider bar to select the pixel value (color) change that must occur in a
block for motion to be identified.
After the smart search is configured, you can perform the search in one of the following ways:
•
Next Frame: This button displays the next image in the video clip that meets the smart search parameters.
•
Play Frames: This button sequentially displays all images that meet the smart search parameters.
•
Build Search List: This button compiles all images that meet the smart search parameters. When the search list is complete, the Play
Smart Search List option is activated, and the number of images in the clip that meet the smart search parameters is displayed.
While Play Smart Search List is selected, click the play button at the top of the screen. This plays back all images in the search list.
Other smart search features include:
•
You can cancel a smart search in progress by clicking Cancel Search.
•
You can zoom into a video pane selected for a smart search by selecting Zoom in the On Mouse Click area.
•
You can select a new video pane for a smart search by selecting an option other than Smart Search, and then clicking the camera icon on
the Search tab.
CLIENT MANAGER
Client Manager allows you to monitor the status of your connection to DS systems and control several operation parameters. Click the following
button to open Client Manager:
The following information is listed within the Client Manager (refer to Figure 40):
Figure 40. Client Manager Window
•
•
•
•
•
•
•
•
System Name: The name of each configured server in the .INI file
Connected As: The user name that connects you to the system
Connected: If selected, you are currently connected to the system
Notify On Event: If selected, you will be notified when an event occurs on the system
Critical Msgs: If selected, you will be notified when critical messages occur on the system
Warning Msgs: If selected, you will be notified when warning messages occur on the system
Informational Msgs: If selected, you will be notified when informational messages occur on the system
Auto Connect: If selected, Auto Connect is currently turned on for the system
Information in the Connected, Notify On Event, and the three “Msgs” columns can be changed with the proper permissions. Refer to User
Administration on page 24 and DSAdmin on page 10 for information on the Disable Error Monitor and Disable Event Monitor user permissions.
C3663M-B (11/09)
47
If you change the information in any column, you can immediately activate the changes by clicking Apply New Settings, or you can click “Undo
Changes in Grid” to return to the settings activated when you opened the manager.
To disconnect and reconnect to all systems labeled as Connected, click Refresh Connected Systems.
CHANGING PASSWORDS
Client Manager allows you to change your password for each system. To do this, click the name of the system on which you want to change your
password; this displays the name of the system after For System, beneath the manager grid. Enter the current password in the Old Password.
Then enter the new password in the New Password and Confirm New Password fields, and click Change.
VIEWING THE MESSAGE LOG
Client Manager allows you to view the Video Server message log on each server. Complete the following steps to view the Video Server
message log:
1. Click the name of the system whose message log you want to view, and then click Message Log History. This displays the Message Log
History screen (refer to Figure 41).
Figure 41. Digital Sentry Message Log History
2. Enter the dates of occurrence for the messages you are interested in.
3. Choose ALL Records or select from the drop-down menu to choose messages based on the source computer or service.
4. Click Load Message Log Records.
All messages that fit the search parameters are then listed by the date they occurred, the originating computer, the originating user (service), the
date they were acknowledged, their type, error code, number of times the message occurred since the last acknowledgment, and the time of the
last occurrence. Use the drop-down arrow above the listed messages to sort the log by any of those information columns.
To view the text of the message, click the message. The message is displayed in the Message field. You can also save the Message log by
entering a file name in the “Save Error log to File” field, browsing to a directory, and clicking Save.
48
C3663M-B (11/09)
VIEWING REPORTS
Several useful reports can be viewed from Client Manager. To view a report, click the Reports button, select a report type, and select the week
for which you want to view the report. The following reports are available:
•
Camera Usage Report: Displays recording activity (per camera and per day) in terms of the amount of disk space used for storage.
•
Client Log: Displays user activity by date/time, user name, and IP address.
•
Administration Log: Displays administrator activity by date/time, user name, and IP address.
•
Configuration Report: Displays all configuration changes for VAUs, cameras, camera groups, zones, users, and other configuration
parameters.
The reports are viewed on the screen in a browser and can also printed.
CLIENT STARTUP OPTIONS
The Client Startup Options section allows you to control the resolution of the Digital Sentry client software. You can display the application at the
standard 1024 × 768 resolution, or at the resolution of the Windows desktop (1024 × 768 minimum).
You can also choose whether to allow multiple simultaneous instances of the client software. A second instance is useful when manually
controlling the analog video outputs.
NOTE: Changes in the Client Startup Options section are not applied until the next time the Digital Sentry client application is started.
ADDING AND DELETING SYSTEMS
Client Manager allows you to add servers to the system list. To do this, click Add System and enter a name, TCP/IP Address, and Reconnect
Interval. Select AutoConnect if you want to automatically connect to the system every time you start the client software or DSAdmin. Click Save
when finished.
You can also delete a server from the system list by clicking the server name and then the “Delete servername” button, where “servername” is
the actual name of the server.
C3663M-B (11/09)
49
VIEWING MESSAGES
The DS system communicates a variety of messages while running. Messages are listed in a pop-up window when they occur, or when you first
start the application after they occur. The following information (refer to Figure 42) can be found within the pop-up window:
Figure 42. Digital Sentry Messages Window
•
(message type): This icon can indicate a critical, warning, or informational message.
•
Last Occurrence: The time and date of the most recent occurrence of the message.
•
System: The DS system on which the message occurred.
•
Source: The VAU on which the message occurred.
•
Code: The code number of the message. This is useful information for technical support.
•
Message Text: The text of the message. If you select the message in the window, the text also appears at the bottom of the window.
•
Message Count: The number of times the message has occurred since the last time that specific message was acknowledged.
•
First Occurrence: The time and date of the first occurrence of the message since the last time it was acknowledged.
The pop-up window allows you to sort messages by any of the columns, as selected from the drop-down menu. You can also view the occurrence
times in either local or GMT time. Local occurrence times are local to the DS system.
To close the message window, click Clear Messages. This acknowledges all messages listed in the window. If any other messages occur while
viewing the message window, they do not appear until after you clear the messages you are currently viewing. Also, they are not added to the
pop-up window you are viewing. After you clear a message, you can view it later in Client Manager (refer to Viewing the Message Log on page 48).
NOTE: On some systems, a message might continually appear stating that video is being deleted before the anticipated storage duration is
reached. If this occurs, reconfigure the camera record settings or storage rules, or add more storage capacity to the system.
50
C3663M-B (11/09)
ALARM ASSESSMENT
If you are assigned Alarm Activity rights in DSAdmin, Digital Sentry immediately notifies you whenever an alarm event occurs. The Current
Alarms pane in the upper-right corner of the Digital Sentry screen automatically displays the time and zone in which the alarm event occurred.
Alarms are sorted by the time they occurred, with the oldest on top. To see all alarms in the panes, click the down-arrow button on the right; this
button is only available when there are too many current alarms to fit in the pane.
NOTE: The Sort by Priority option allows you to sort alarm notifications based on the priority assigned to each zone using the Admin program.
If two or more zones share a priority level, their alarm notifications are sorted by the time they occurred.
The total number of unacknowledged alarms is indicated by the Events entry next to the Current Alarms pane. If there are too many
unacknowledged alarms to fit in the Current Alarms pane, click the down-arrow button to display all the alarm notifications.
PLAYING BACK CURRENT ALARMS
When you click an event notification, its video is played back on the screen. If there are three or fewer cameras in the zone associated with the
alarm event, live video is displayed simultaneously with the recorded alarm event. Figure 43 shows the video pane configurations that can be
displayed while playing back a current alarm event.
ALARM ON 1 CAMERA INPUT
CAMERA X
LIVE VIDEO
CAMERA X
ALARM EVENT
ALARM ON 3 CAMERA INPUTS
CAM X
ALARM
CAM Y
ALARM
CAM Z
ALARM
CAM X
LIVE
CAM Y
LIVE
CAM Z
LIVE
ALARM ON 2 CAMERA INPUTS
CAMERA X
ALARM EVENT
CAMERA Y
ALARM EVENT
CAMERA X
LIVE VIDEO
CAMERA Y
LIVE VIDEO
ALARM ON 4 OR CAMERA INPUTS
CAMERA X
ALARM EVENT
CAMERA X
ALARM EVENT
CAMERA Y
ALARM EVENT
CAMERA Z
ALARM EVENT
Figure 43. Video Pane Configurations for Alarm Events
The counter at the top of the screen becomes red when you play back a current alarm event. The top line of the counter shows the beginning and
ending times of the displayed alarm event. The second line shows the time of the video as it progresses through the playback.
The scroll bar below the counter (refer to Figure 44) shows the progress of the video. The black portion of the scroll bar corresponds to the actual
alarm event. The white portion of the scroll bar to the left of the alarm event corresponds to the amount of pre-alarm video recorded; the white
portion of the scroll bar to the right of the alarm event corresponds to the amount of post-alarm video recorded. Pre-alarm and post-alarm
recording is configured using the DSAdmin program.
C3663M-B (11/09)
51
Figure 44. Example of Window with Record Event and Live Video
ACKNOWLEDGING ALARMS
When one or more alarm notifications appear in the Current Alarms pane, the following two buttons appear in the Digital Sentry tool bar:
This button clears only the alarm selected in the Current Alarms pane.
This button clears all the alarms in the Current Alarms pane. If you click this button, you are asked to confirm the action.
52
C3663M-B (11/09)
PTZ CONTROL
The PTZ tab (refer to Figure 45) allows you to control the pan/tilt/zoom functions of a PTZ-enabled camera. The PTZ tab is available only when the
video pane of a PTZ-enabled camera is selected. PTZ cameras are enabled in DSAdmin.
Figure 45. PTZ Control Tab
PTZ functions are controlled using a heads-up display (HUD). To view the HUD, select PTZ HUD on the PTZ tab. The HUD is a set of boxes that you
select to control the various PTZ functions. The largest box controls the pan and tilt functions; simply click and drag in the direction you want the
camera lens to point. The small box in the center controls the zoom function; left-clicking the box zooms in and right-clicking zooms out. The top
box on the right side of the HUD controls iris functions; left-clicking this box opens the iris and right-clicking closes the iris. The bottom-right box
controls focus; left-clicking this box focuses far and right-clicking this box focuses near. The color bars on the PTZ tab allow you to change the
color of the HUD.
To control PTZ functions, select PTZ Control on the PTZ tab and click the video pane; the HUD does not have to be visible. To tour the presets
configured in DSAdmin, click Start Tour. To view an individual preset, click the Go To Preset X button; to select a different preset number to set,
click the right or left arrows above the button before clicking Go To Preset X.
C3663M-B (11/09)
53
54
C3663M-B (11/09)
PRODUCT WARRANTY AND RETURN INFORMATION
WARRANTY
Pelco will repair or replace, without charge, any merchandise proved defective in
material or workmanship for a period of one year after the date of shipment.
Exceptions to this warranty are as noted below:
• Five years:
– Fiber optic products
– Unshielded Twisted Pair (UTP) transmission products
– CC3701H-2, CC3701H-2X, CC3751H-2, CC3651H-2X, MC3651H-2, and
MC3651H-2X camera models
• Three years:
– Pelco-designed fixed network cameras and network dome cameras with
Sarix™ technology.
– Pelco-branded fixed camera models (CCC1390H Series, C10DN Series,
C10CH Series, and IP3701H Series)
– EH1500 Series enclosures
– Spectra® IV products (including Spectra IV IP)
– Camclosure® Series (IS, ICS, IP) integrated camera systems
– DX Series digital video recorders, DVR5100 Series digital video recorders,
Digital Sentry ® Series hardware products, DVX Series digital video
recorders, and NVR300 Series network video recorders
– Endura® Series distributed network-based video products
– Genex® Series products (multiplexers, server, and keyboard)
– PMCL200/300/400 Series LCD monitors
• Two years:
– Standard varifocal, fixed focal, and motorized zoom lenses
– DF5/DF8 Series fixed dome products
– Legacy® Series integrated positioning systems
– Spectra III™, Spectra Mini, Spectra Mini IP, Esprit®, ExSite®, and PS20
scanners, including when used in continuous motion applications.
– Esprit Ti and TI2500 Series thermal imaging products
– Esprit and WW5700 Series window wiper (excluding wiper blades).
– CM6700/CM6800/CM9700 Series matrix
– Digital Light Processing (DLP®) displays (except lamp and color wheel). The
lamp and color wheel will be covered for a period of 90 days. The air filter is
not covered under warranty.
– Intelli-M® eIDC controllers
– PMCL542F, PMCL547F, and PMCL552F FHD monitors
• One year:
– Video cassette recorders (VCRs), except video heads. Video heads will be
covered for a period of six months.
• Six months:
– All pan and tilts, scanners, or preset lenses used in continuous motion
applications (preset scan, tour, and auto scan modes).
Pelco will warrant all replacement parts and repairs for 90 days from the date of
Pelco shipment. All goods requiring warranty repair shall be sent freight prepaid
to a Pelco designated location. Repairs made necessary by reason of misuse,
alteration, normal wear, or accident are not covered under this warranty.
Pelco assumes no risk and shall be subject to no liability for damages or loss
resulting from the specific use or application made of the Products. Pelco’s liability
for any claim, whether based on breach of contract, negligence, infringement of
any rights of any party or product liability, relating to the Products shall not exceed
the price paid by the Dealer to Pelco for such Products. In no event will Pelco be
liable for any special, incidental, or consequential damages (including loss of use,
loss of profit, and claims of third parties) however caused, whether by the
negligence of Pelco or otherwise.
The above warranty provides the Dealer with specific legal rights. The Dealer may
also have additional rights, which are subject to variation from state to state.
If a warranty repair is required, the Dealer must contact Pelco at (800) 289-9100 or
(559) 292-1981 to obtain a Repair Authorization number (RA), and provide the
following information:
1. Model and serial number
2. Date of shipment, P.O. number, sales order number, or Pelco invoice number
3. Details of the defect or problem
If there is a dispute regarding the warranty of a product that does not fall under
the warranty conditions stated above, please include a written explanation with
the product when returned.
Method of return shipment shall be the same or equal to the method by which the
item was received by Pelco.
RETURNS
To expedite parts returned for repair or credit, please call Pelco at (800) 289-9100
or (559) 292-1981 to obtain an authorization number (CA number if returned for
credit, and RA number if returned for repair) and designated return location.
All merchandise returned for credit may be subject to a 20 percent restocking and
refurbishing charge.
Goods returned for repair or credit should be clearly identified with the assigned
CA or RA number and freight should be prepaid.
10-19-09
The materials used in the manufacture of this document and its components are compliant to the requirements of Directive 2002/95/EC.
This equipment contains electrical or electronic components that must be recycled properly to comply with Directive 2002/96/EC of the European Union
regarding the disposal of waste electrical and electronic equipment (WEEE). Contact your local dealer for procedures for recycling this equipment.
REVISION HISTORY
Manual #
C3663M
C3663M-A
C3663M-B
Date
6/08
3/09
11/09
Comments
Original version.
Updated IP Configuration window information.
Added Account Management information to the User Administration section. Modified DS NVS Software Installation system requirements.
Pelco, the Pelco logo, Camclosure, Digital Sentry, Endura, Esprit, ExSite, Genex, Intelli-M, Legacy, and Spectra are registered trademarks of Pelco, Inc.
Spectra III is a trademark of Pelco, Inc.
DLP is a registered trademark of Texas Instruments Incorporated.
All product names and services identified throughout this document are trademarks or registered trademarks of their respective companies.
The absence of a trademark or registered trademark from this document does not constitute a waiver of intellectual property rights.
©Copyright 2009, Pelco, Inc. All rights reserved.
www.pelco.com
Pelco, Inc. Worldwide Headquarters 3500 Pelco Way Clovis, California 93612 USA
USA & Canada Tel (800) 289-9100 Fax (800) 289-9150
International Tel +1 (559) 292-1981 Fax +1 (559) 348-1120