1
Part for Network Functions and
SD Memory Card Functions
(PT-L735NTE)
Contents
Notes for use ..........................4
Information on SD Memory Card ......4
Instructions on handling ....................4
Instruction on storage ........................4
For protection of important data ........4
Typical applications of network
functions / SD Memory Card ......9
Examples of use of network functions ....9
Insertion and removal of wireless
card and SD Memory Card into /
from the projector ....................11
To create a backup copy of the data
stored on the SD card........................5
Write protection switch ......................5
Information on wireless card ............6
Available channels ............................8
SD Memory Card ................................9
Examples of use of network
functions / SD Memory Card ............10
Wireless card............................................11
SD Memory Card ......................................12
Insertion and removal of wireless card
into/from personal computer ..........13
Installation of software ........14
Wireless LAN Driver..........................15
Wireless Manager 3.0/
Image Creator 1.0A ..........................14
Wireless Simple Connection (live mode) ....21
Operations on the projector ..................21
Operations on the personal computer......22
Network setting ....................25
Use of inter-PC communications ....25
If the communication mode of 802.11
ad hoc (peer-to-peer) is selected:....25
Use of access point (AP) ..................26
Setting example ..............................26
Use of Wireless Manager 3.0 ....38
Start-up ..............................................38
Live mode ..........................................38
Selecting the transfer mode ............38
In live mode ....................................39
Quitting and resuming live mode ....39
Meeting mode (screen capture) ......39
Selection of capture format..............40
Operations after image acquisition ..40
Setting of capture delay time ..........40
"PowerPoint
Presentation"mode ....41
Presentation mode............................41
2
Releasing the connection to the projector ..23
Temporary releasing........................23
Complete releasing..........................23
Setting up the projector....................27
Settings on the personal computer ......30
Settings of TCP/IP ..........................30
Settings for use of optional wireless
card (ET-CDWL2E)..........................34
Setting of capture delay time ..........41
Presentation mode ..........................42
Progress bar ....................................42
Switching display mode ..................42
Other functions ................................44
Searching projector..........................44
Registering projector........................44
Deleting projector ............................44
Confirming connection ....................44
Displaying the sender, sender's name ..45
Setting a shortcut key ......................45
Setting automatic play ....................45
Setting Simple Connection ..............45
Contents
Use of Web browser control ....46
Settings on the projector..................46
Web control......................................46
Web power supply ..........................46
Web password ................................46
Settings on the personal computer 47
Operation of Web browser control ..48
Top screen ......................................48
Projector control ..............................49
Basic control screen ........................49
Option control screen ......................49
Monitor information screen ..............50
Use of Image Creator 1.0A....56
Starting/ending Image Creator 1.0A ......56
Start-up ............................................56
End ..................................................56
Functions on the main screen ........56
Converting and saving captured
images................................................58
Capturing presentation files created with
Microsoft PowerPoint97/2000/2002 ......60
Capturing JPEG, BMP, TIFF or PNG files
created with other applications ............61
Press the "Capture image" button ..61
Images not to be captured ..............61
Capturing files by drag-and-drop
operation..........................................61
Sorting images ................................62
Uninstallation of software ....70
Wireless Manger 3.0..........................70
Explanation of terms ............71
Before placing a repair order ....74
SD control ........................................51
SD file list screen ............................51
SD thumbnail screen ......................51
Presentation screen ........................52
Changing password ........................52
Using a PDA ......................................53
Starting the Web browser control
(PDA) ..............................................53
Top screen ......................................53
Menu screen ....................................54
Projector Control..............................54
SD Control ......................................55
Status ..............................................55
Deleting images ..............................62
Make conversion settings when
writing an image ..............................63
DCF standard ....................................65
Directory (folder) name ....................65
File name ........................................65
File format........................................65
How to use SD card ..............66
Playing images of SD Memory Card......66
SD Viewer (SD guide display) ..........67
Folder selection screen....................67
File selection screen ........................67
Settings of automatic play (auto play) ..68
Image Creator 1.0A ..........................70
Wireless LAN Driver..........................70
Trademark Information................76
3
Notes for use
Information on SD Memory Card
This SD card is a semiconductor memory with the size of 24mm x 32mm x 2.1mm, as
small as a postage stamp, and is expected to be a next-generation recording medium
that replaces minidisks (MDs), compact disks (CDs) and cassette tapes. The card
allows repetition of data reading, writing and deleting.
Instructions on handling
Abstain from the following:
• To disassemble or modify the card
• To give the card a strong impact, twisting, bending, dropping, treading, or water
wetting
• To rub the card with a sheet of cloth or plastics or to bring the card near to
anything that is likely to generate static electricity or electromagnetic field.
• To touch the metallic terminal of card with hand or metallic object, to affix
stickers, or to stain the card.
• To peel off the label that is affixed to the card.
• To affix other labels or stickers.
• To insert the card into a device that does not accept an SD card (e.g., device for
multimedia cards).
• To insert other matters than SD Memory Card in the SD Memory Card slot of
the projector.
• To use cracked or deformed card.
• To use the card in a moist place such as bathroom or in a dusty place such as
warehouse.
Instruction on storage
Be sure to put the card in the case when it is taken out from the main body.
• Do not put the card in a vehicle or in a place exposed to direct sunlight where it
may become hot.
• Do not keep the card in a vehicle that may become hot, a place exposed to
direct sunlight or other places in which the temperature is likely to increase, or a
place in which corrosive gases may arise.
For protection of important data
• Do not turn off the power or remove the SD Memory Card when data is being
read or written (or when the SD Memory Card access lamp is blinking). Doing
this may destroy the data.
• Do not forget to make backup of the data stored in the SD card. Note that user's
important data is subject to potential destruction although it is very rare to occur.
4
Notes for use
To create a backup copy of the data stored on the SD card
Double click and open the icon of SD card
drive in My Computer of your personal
computer (on the desktop if your computer is
Macintosh) and drag and drop the "DCIM"
folder onto desktop (while pressing the
"Option" button, for Macintosh machine). This
operation can create copies of all data within
the "DCIM" folder into your personal
computer.
• Putting the write-protection switch of SD
card to the "LOCK" position will disable
image-editing operation such as deleting or
moving on the projector (attempt of
operation will bring error message).
• If the SD card is inserted into the personal
computer by means of the PC card adaptor
while the write-protection switch of SD card
is set to the "LOCK" position, a blue-screen
warning indication will appear when access
is made. If this occurs, press any button on
the keyboard of your PC to return the
indication to the original one. Before using
an SD card in your personal computer,
ensure that the write-protection switch is
not set to the "LOCK" position.
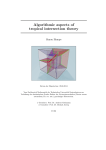
LOCK
Write protection switch
Write-protect switch
Please be advised of the following information in advance:
• The manufacturer shall not be responsible for any damage, whether direct or
indirect, caused by the use of or by the fault of the product.
• The manufacturer shall not be responsible for any damage or destruction of data
caused by the product.
5
Notes for use
Information on wireless card
The optional wireless card (ET-CDWL2E) uses radio wave in the 2.4 GHz band.
Although it is not necessary to have a license for radio station to use the wireless
card, fully understand the following instructions:
Do not use the cards near other sources of radio
emissions.
The following devices may use the same frequencies that are used by the
wireless card. If the wireless card is used near such devices, radio interference
may prevent successful communication, or it may result in slower communication
speeds being achieved.
• Industrial, scientific, medical equipment, etc
• Electric stoves, etc
• Built-in radio devices used for identifying moving equipment in industrial
production lines
• Certain low-power radio devices
Keep the wireless card as far away as possible from
devices such as mobile telephones, TVs and radios
when using such devices
Devices such as mobile telephones, TVs and radios use different frequencies
from the wireless card, so that there will be no effect on either wireless card
communication or on reception or transmission for such devices. However, radio
emissions from the wireless card may cause video or audio interference.
6
Notes for use
Radio emissions from the wireless card will not travel
through steel framework, metal sheets or concrete.
It is not possible to keep communication through walls or floors made of
reinforcing steel bars, metals or concrete although it is possible to keep
communication through walls and floors made of wood or glass (excluding glass
reinforced with metal wires).
7
Notes for use
Available channels
The channels (frequency bandwidth) that are available for the wireless card to
use will vary depending on the country or area where the wireless card is being
used. Refer to the following table as a guide.
Last two digits
Operating
of card
channels
number *
Frequency band
(median frequency)
Country / Area
Certification
Japan
ARIB
STD33 &
T66
22
1~14
2 412 MHz~
2 484 MHz
USA
FCC part 15
23
1~11
2 412 MHz~
2 462 MHz
Canada
IC
Taiwan
DGT
Malaysia
SIRIM
ETSI
300.328
24
1~13
2 412 MHz~
2 472 MHz
Spain
ETSI
300.328
25
10,11
2 457 MHz~
2 462 MHz
Singapore
IDA
26
10~13
2 457 MHz~
2 472 MHz
UK, Germany, France,
Italy, Belgium, Austria,
Sweden, Norway,
Denmark, Switzerland,
Holland, Finland,
Portugal, Greece,
Thailand, Korea,
Australia, New Zealand
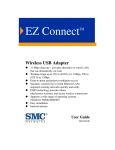
* To check the region of intended use for the wireless card which
you have purchased, check the last two digits of the product
number which appears on the label on the reverse side of the card
in the position shown in the illustration at right.
Note:
The wireless card cannot be used in countries other than the
country of purchase. If you try to use it in other countries, you
may be infringing the radio transmission laws and regulations of
that country.
8
N5HBD0000024
Typical applications of network functions / SD Memory Card
Examples of use of network functions
Projecting images from the personal For Wireless Easy
computer by wireless
Connection,
see page 21
Installation
Wireless Manager3.0
Wireless LAN Driver
For Network settings,
see page 25
Transmission
Optional
wireless card
(ET-CDWL2E)
Loaded with
the included
wireless card
For Installation of
software,
see page14
Images from personal computer can be projected by
wireless all the time
Controlling the projector using Web For Wireless Easy
Connection,
browser control
see page 21
Operation with web
browser control
Optional
wireless card
(ET-CDWL2E)
For Network settings,
see page 25
Loaded with
the included
wireless card
For Web browser
control,
see page 46
Using the Web browser, it is possible to access the
projector and control power ON, OFF and other
functions of the projector.
SD Memory Card
Projecting images from SD card using Web See page 66
browser control
SD Memory Card
This card allows the user to view list of images
(thumbnail images) recorded on the SD Memory Card to
perform automatic play such as slide show.
9
Typical applications of network functions / SD Memory Card
Examples of use of network functions / SD Memory Card
Projecting images from SD card using Web For Wireless Easy
Connection,
browser control
see page 21
For Network settings,
see page 25
Operation with web
browser control
For Web browser
Optional
wireless card
(ET-CDWL2E)
SD Memory control,
Card
see page 46
Loaded with
the included
wireless card
The Web browser allows the user to access the
projector and to project the image data stored on the
SD Memory card inserted in the projector.
Transferring image data from personal For Wireless Easy
computer to the projector and recording Connection,
them onto the SD Memory card inserted in see page 21
the projector
For Network settings,
see page 25
Installation
Wireless Manager3.0
Wireless LAN Driver
For Installation of
software,
see page 14
Transmission
Record
Optional
wireless card
(ET-CDWL2E)
SD
Memory
Card
Loaded with
the included
wireless card
The supplied Wireless Manager 3.0 allows the user to
transfer image data from the personal computer to the
SD card inserted in the projector and to record the data
on the card. Thus the user can project images
changing very quickly to desired ones.
10
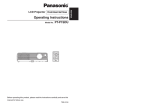
Insertion and removal of wireless card and
SD Memory Card into / from the projector
Wireless card
Insertion
• Turn off the power by putting the [MAIN POWER] switch to the " " position.
• Forced insertion of the card in wrong direction may cause failure.
Hexagon wrench
(supplied)
Card lock
(supplied)
3
the card until
it is locked.
1 Insert
the card
lock.
2 Attach
2
1
the card
lock with the
3 Secure
supplied screw.
Removal
Turn off the power by putting the [MAIN POWER] switch to the "
1
2
3
(Eject switch)
" position.
the screw
of card lock.
1 Remove
the card
lock.
2 Remove
the eject
switch to take out
3 Press
the card.
11
Insertion and removal of wireless card and SD Memory Card into / from the projector
SD Memory Card
Insertion
Forcible insertion of the SD card in a wrong direction may cause a fault.
Insert a card until it is
locked
Removal
Be sure to confirm the access lamp is not blinking before card removal.
Removing the card while the lamp is blinking may destroy the data on the card.
Access lamp
12
Press the centre to
release the lock and take
out the card.
Insertion and removal of wireless card into/from personal computer
Insertion
• Before inserting the wireless card, be sure to install the included Wireless
LAN Driver software (see page 15).
• This illustration is for the case of optional wireless card (ET-CDWL2E).
For other cards, see the instruction manual for the relevant card.
• Also read well the instruction manual for your personal computer.
• Forced insertion of the card in wrong direction may cause failure.
the card to the
1 Fitadaptor.
2
1
the card and the
adaptor into the PC card
2 Insert
slot of the personal
computer.
Removal
Quit Wireless Manager 3.0 if it is in use.
Left-click the [PC card] icon appearing on the task bar at the
1 right
bottom of screen.
If the [PC card] icon is not appearing:
Go to [Start Menu]→[Control Panel] and open [PC card].
Checkmark [Show control on the task bar] and press [OK].
2 Select [Panasonic Wireless LAN PC Card] and click [Stop].
3 Press [OK] and take out the wireless card.
13
Installation of software
Wireless Manager 3.0 / Image Creator 1.0A
Wireless Manager 3.0:
This software can be used to transmit screen images and image files (JPEG and
PNG images) from the personal computer to the projector through wireless LAN.
Image Creator 1.0A:
This software can be used to convert PowerPoint files into image data.
note:
• Quit all software in action on Windows. Otherwise your installation may be
unsuccessful.
• Uninstall Wireless Manager 2.0 or Image Creator 1.0 if it has been installed
before this installation. (See page 70)
• If your PC runs on Windows XP/2000, the authority of Administrator is required
for this installation.
1 Set the supplied CD-ROM in the CD-ROM drive.
This automatically activates the installation program, displaying a window as
shown below.
Note:
If the program is not automatically launched, double-click [Easy Install] → [Easy_
Inst.exe] in the CD-ROM.
2 Click [Wireless Manager 3.0].
Follow the instructions on the screen to carry out installation.
3 Click [Image Creator 1.0A].
Follow the instructions on the screen to carry out installation.
14
Installation of software
Wireless LAN Driver
A Wireless LAN Driver must be installed to use the wireless card on the personal
computer.
• The following section describes installation of the optional wireless card (ETCDWL2E). For other cards, see the instruction manual for the relevant card.
Notes :
• Installation of the Wireless LAN Driver in your personal computer must have
been completed before inserting the wireless card into the computer.
• If the card is accidentally inserted in the personal computer before installation of
the driver, the automatic hardware detection will find the card as an unidentified
device. If this is the case, do not remove the card, but carry out the following
steps with the card kept inserted before installation.
For Windows XP/2000: Go to [Control Panel] → [System] → [Hardware] →
[Device Manager], and if any unidentified device or
Panasonic Wireless LAN PC Card is found in the list,
uninstall the item.
For Windows 98 SE/Me: Go to [Control Panel] → [System] → [Device Manager],
and if any unidentified device or Panasonic Wireless
LAN PC Card is found in the list, uninstall the item.
15
Installation of software
For Windows XP:
[Wireless LAN Driver] on the
1 Click
screen of Procedure 1 on page 14.
This will activate the installer for wireless LAN
2 Click [Next].
A License Agreement message appears.
3 Click [Yes].
the destination for saving
4 Specify
the utility and click [Next].
A logo authentication message appears.
5 Click [Continue].
6 Click [Finish].
16
Installation of software
an optional wireless card
7 Insert
through a CF card adaptor.
(See page 13)
This will activate Found New Hardware Wizard.
that [Automatically install
8 Confirm
the software] is checkmarked and
click [Next].
A logo text message appears.
9 Click [Continue].
A wizard completion message appears.
10 Click [Finish].
A logo authentication message appears.
When installation is complete, confirm as follows:
Go to [Start] → [Programs] → [Connect To] → [Show all connections], and ensure
that a [Panasonic Wireless LAN PC Card] icon has been added to the wireless
network connections.
17
Installation of software
For Windows 2000:
[Wireless LAN Driver] on the
1 Click
screen of Procedure 1 on page 14.
This will activate the installer for wireless LAN
2 Click [Next].
A License Agreement message appears.
3 Click [Yes].
the destination for saving
4 Specify
the utility and click [Next].
The software is downloaded, and [Digital signature
was not found] appears.
5 Click [Yes].
Following the instructions on the screen, go along
the steps.
6 Click [Finish].
Installation is complete.
an optional wireless card
7 Insert
through a CF card adaptor.
(See page 13)
Following the instructions on the screen, go along
the steps.
18
Installation of software
For Windows 98SE/Me:
[Wireless LAN Driver] on the
1 Click
screen of Procedure 1 on page 14.
This will activate the installer for wireless LAN
2 Click [Next].
A License Agreement message appears.
3 Click [Yes].
the destination for saving
4 Specify
the utility and click [Next].
The software is downloaded.
that [Yes, I want to restart
5 Confirm
my computer now.] is checkmarked
and click [Finish].
The personal computer will be rebooted.
an optional wireless card
6 Insert
through a CF card adaptor.
(See page 13)
If the icon cannot be found, select [Start] →
[Program] → [Wireless Network] → [Wireless
Network LAN Adapter].
19
Installation of software
For Windows CE:
Note:
Before starting software installation, enable data communication between the
personal computer and Personal Digital Assistant (PDA) via Active Sync
the supplied CD-ROM, go to
1 In[Wireless
Card], open [Win CE] and
then click [setup.exe].
A screen for selection of folder setting language
appears.
[English], click [OK] and
2 Select
click [Next].
A license window appears.
3 Click [Yes].
Following the instructions on the screen, go along
the steps.
4 Click [Finish].
As [Unable to connect….] appears on the PDA
screen, click [OK].
the optional wireless card
5 Insert
(ET-CDWL2E) into PDA.
20
Wireless Simple Connection (live mode)
When connecting the projector and the personal computer one-to-one by wireless,
selection of the Simple Connection mode using the supplied wireless card and the
optional wireless card (product No. ET-CDWL2E) will automatically execute IP
address, communicate mode, and other necessary settings.
Notes:
• If the abovementioned optional wireless card is not used in your system, Simple
Connection is not available with Windows Me/98SE. In addition, the previous
network settings cannot be restored with Windows 2000. If your personal
computer has already been connected to the network, resetting is required. (See
page 30)
• All operations are not guaranteed on all wireless cards or PC-integrated wireless
LAN adaptors even with Windows XP.
• Other network adaptors cannot be used when the system is in Simple
Connection.
Operations on the projector
the supplied wireless card into the projector.
1 Insert
(See page 11)
Use only the supplied card in the projector; other card cannot be used.
2 Turn ON the power supply of the projector.
3 Select [NETWORK] using the [RGB] button.
the [MENU] button, display
4 Press
the NETWORK SETUP screen using
the [
] buttons, and press the
[ ] button.
[Simple Connection] using
5 Select
the [
] buttons and select [ON]
using the [
] buttons.
Note:
When the network settings are kept in the default conditions, you can skip the
above steps 4 and 5.
21
Wireless Simple Connection (live mode)
Operations on the personal computer
the optional wireless card into the personal
1 Insert
computer. (See page 13)
2 Turn ON the power supply of the personal computer.
to [Start] → [All Programs] → [Wireless Manager],
3 Go
and select [Wireless Manager 3.0].
A window appears as shown below.
Specify different numbers to
different personal computers.
Simple Connection is available to
up to 20 personal computers.
However, simultaneous use is
not possible
[Use Easy Connection] and select
4 Check
[Live mode].
The image on the personal computer screen will be projected on the projector
screen.
Notes:
• If [Restore to original LAN Setup when finished] has been checkmarked, the LAN
settings before Simple Connection setting will be restored when Wireless
Manager 3.0 ends.
• In Windows XP, [Restore to original LAN Setup when finished] cannot be set.
22
Wireless Simple Connection (live mode)
Releasing the connection to the projector.
Temporary releasing
the icon at the right bottom of
1 Right-click
the PC screen.
A screen appears as shown on the right.
2 Click [Live].
This clears the checkmark and changes the colour of the
resident icon into blue, releasing the connection.
Double-click on the resident icon will also release the
connection.
To resume connection:
Click [Live] again or double-click the resident icon again.
This will give a checkmark, changing the colour of the resident icon into green.
Complete releasing
For Windows XP/2000:
the icon at the right bottom of
1 Right-click
the PC screen.
A screen appears as shown on the right.
2 Click [End].
[You want to quit wireless manager?]
3 When
appears, execute by selecting [Yes]
If [Restore to original LAN Setup when finished] is
checkmarked, the personal computer will
automatically restore the previous network settings
when quitting the programme. However, it may take
some time before returning to the previous network
settings.
23
Wireless Simple Connection (live mode)
For Windows 98SE/Me:
the icon at the right bottom of
1 Right-click
the PC screen.
A screen appears as shown on the right.
2 Click [End].
[You want to quit wireless
3 When
manager?] appears, execute by
selecting [Yes]
If [Restore to original LAN Setup when
finished] is checkmarked, the personal
computer will automatically restore the
previous network settings when quitting the
programme. However, it may take some time
before returning to the previous network
settings.
24
Network setting
To wirelessly connect the personal computer to the projector without using Simple
Connection, network settings are required as described below.
Use of inter-PC communications
If the communication mode of 802.11 ad hoc (peer-to-peer) is selected:
Setting item
SSID
Communicate mode
IP address
Subnet mask
Settings on the projector
(on shipping)
Panasonic
Projector
802.11 ad hoc
192.168.10.10 - 12
(LAN1 - LAN3)
255.255.255.0
Channel
11
WEP (encryption)
None
Settings on the personal computer
(for Simple Connection)
Panasonic
Projector
802.11 ad hoc (peer-to-peer)
192.168.10.21 - 40
255.255.255.0
Unnecessary (automatic setting)
None
Since the communication mode of 802.11 ad hoc (peer-to-peer) is selected on
shipping of the projector, make due settings on the personal computer side with
reference to the above data.
To use the WEP functions, make the identical settings both for the projector and the
personal computer.
Some wireless cards may not be applicable to this mode; use a card that is
compatible to 802.11 ad hoc (peer-to-peer).
Note:
• The above channel setting of the projector is a default one and is not one which
has been designated to connect the projector and PC.
25
Network setting
Use of access point (AP)
LAN
AP
Setting example
Setting item
SSID
Settings on the projector
Settings on the personal computer
Make the same settings as the SSID set for the access point
(consult the network administrator).
Communicate mode
IP address
Subnet mask
Channel
WEP
(encryption)
Infrastructure
Infrastructure
Consult your network administrator for setting
Unnecessary
Unnecessary
Make the same settings as the WEP set for the access point
(consult the network administrator).
Notes:
• Select 802.11 ad hoc mode if the system is used in a place outside the radio
wave range to the access point.
• For the SSID of the projector, up to 32 alphanumeric characters and signs can
be used. Therefore, if any SSID that cannot be set for the projector has been set
for the access point, consult the network administrator, and change the SSID to
some other code that can be set for the projector.
• The projector is not compatible to the DHCP. For the LAN that uses a DHCP
server, it is required to assign a fixed IP address to the projector. For more
details, consult the network administrator.
26
Network setting
Setting up the projector
1 Insert the wireless card into the projector. (See page 11)
2 Press the [MENU] button.
A menu screen appears.
the NETWORK SETUP
3 Display
screen using the [
] buttons and
press the[
the [
4 Using
setting item.
] button.
] buttons, select the
Network
The projector can store three types of network settings: LAN 1 to LAN 3.
To view network settings:
Select from LAN 1 to LAN 3 using [
and press [ENTER].
]
Alter the network settings:
Select the setting item using [
].
IP address:
Using [
•
], select numerals and period “.”, press [ENTER], select [Run]
and press [ENTER].
• Set an IP address for the projector with reference to the examples of setting.
Note that the same IP address cannot be used as that of the personal computer
with which the projector is going to communicate.
Subnet mask:
Using [
•
], select numerals and period “.”, press [ENTER], select [Run]
and press [ENTER].
• Set a subnet mask for the projector with reference to the examples of setting.
27
Network setting
Gateway:
Using [
•
], select numerals and period, press [ENTER], select [Run] and
press [ENTER].
• This is a relay point to connect two networks.
• It is necessary to specify this address when you are to connect to network of
different segments or to the Internet in the infrastructure mode or the 802.11 ad
hoc (peer-to-peer) mode. Consult the network administrator.
Mode:
Switching between 802.11 ad hoc and infrastructure using [
]
• To use 802.11 ad hoc (peer-to-peer) mode : Select 802.11 ad hoc for setting.
• To use an access point (AP) : Select infrastructure for setting.
SSID:
Use [
•
] to select characters, press [ENTER], select [Run] and press
[ENTER].
• If infrastructure is selected in communicate mode, use the SSID set for the
access point, or the same string as the ESSID.
• If 802.11 ad hoc is selected in communicate mode, use the SSID set for the
personal computer to which it is going to be connected, or the same string as
the ESSID.
• Use up to 32 alphanumeric characters for the projector SSID. If any SSID that
cannot be set for the projector has been set for the access point, consult the
network administrator, and change the SSID to some other code that can be set
for the projector.
Channel:
This cannot be set. In the 802.11 ad hoc mode and infrastructure mode, the
channel is set automatically.
WEP (encryption key size):
Switching among 64 bits, 128 bits and OFF using [
]
• Select the size of the key necessary for encryption communication.
• The size should be consistent with the settings of the personal computer and
the access point. Incidentally, 64 bits and 128 bits may sometimes be indicated
by 40 bits and 104 bits, respectively.
Key ID (encryption key ID):
Switching among KEY1 to KEY4
• Select an ID for the encryption key used. The ID should be consistent with the
settings of the personal computer and the access point.
• This specifies which one out of KEY1 to KEY4 to use for encryption.
28
Network setting
Format:
Switching between hexadecimals and characters using [
• Use Change the format for WEP key entry.
]
Key 1 to Key 4:
Using [
•
], select characters and press [ENTER].
• A hexadecimal digit: Use 10 digits of 0 to 9 and A to F for entry in 64 bits and
use 26 digits of the same in 128 bits.
Text: Use 5 alphanumeric characters in 64 bits and 13 characters in 128 bits.
• Use Characters should be consistent with the settings of the personal computer
and the access point.
Bringing network settings into effect
Select [Run] and press [ENTER].
Simple connection
Toggling between ON and OFF using [
]
• Use Select ON to use Simple Connection in Wireless Manager.
• If ON is selected, the projector cannot enter the LAN 1 to LAN 3 network setting modes.
Host name
Using [
•
], select characters, press [ENTER], select [Run] and press [ENTER].
• Use This defines the name of the projector on the network. Use up to 16
alphanumeric characters.
Web control
Toggling between ON and OFF using [
]
• Use Select ON to control the projector from the browser.
Web power supply
Toggling between ON and OFF using [
]
• Use Select ON to light the lamp of the projector from the browser when the
lamp is unlit.
• Use When ON is selected, power consumption will become higher than the
normal standby condition.
Web password
Using [
•
], select characters, press [ENTER], select [Run] and press
[ENTER].
• Use This will be the password to be entered on the top page on which the
projector is controlled from the browser.
SD mode
Switching between Viewer and Web using [
]
• Use Viewer: Selection of the SD channel will display thumbnails of image files on the SD
card.This mode can be used when the projector operates on a stand-alone basis.
• Use Web: Selection of the SD channel will not display thumbnails of image files
on the SD card.
• Use Select Web to perform presentation using the image data on the SD card
by controlling the projector from the browser.
29
Network setting
Settings on the personal computer
Settings of TCP/IP
For Windows XP/2000:
An example screen of Windows XP is shown below.
(1) Right-click [My network] and open the Properties.
(2) Right-click [Panasonic Wireless LAN PC Card] and
open the Properties.
(3) Select the Internet protocol (TCP/IP) and click
[Properties].
(4) Enter the IP address of the same segment as the IP
address that was set for the projector.
(5) Enter the same value as the subnet mask that was
set for the projector, set the gateway (infrastructure
mode only), click [OK] and return to the previous
screen.
(6) Click [OK].
The system will continue to be in action without
restarting.
30
Network setting
For Windows Me/98SE:
An example screen of Windows Me is shown below.
(1) Right-click [My network] and open the Properties.
(2) Select [Panasonic Wireless LAN PC Card] and click
[Properties].
(3) Enter the IP address of the same segment as the IP
address that was set for the projector.
(4) Enter the same value as the subnet mask that was
set for the projector.
(5) Set the gateway (infrastructure mode only), click [OK]
and return to the previous screen.
(6) Click [OK].
(7) Click [Yes].
31
Network setting
For Windows CE:
The diagram below shows an example screen of Personal Digital Assistant (PDA).
However, different screens may be found depending on manufacturers and models:
typical settings when the projector is just shipped from the factory or when Simple
Connection is turned ON.
(1) On a PDA, go to [Settings] → [Connect To] → [Network adaptor], then select
[Gemtek Wireless LAN PC Card] and click [Properties].
(2) Check [Use specified IP address] and set the address of the same group as the
projector.
(3) Set IP address to [192.168.10.20] and set subnet mask to [255.255.255.0] and
click [OK].
(4) If the projector uses WEP (encryption ), go to [Start] → [Settings] → [System] →
[Wireless Settings] and select [Encryption].
(5) Change Encryption (WEP) from “Disabled” to 64 bits or 128 bits. Checkmark
“Create Keys Manually”, enter the same WEP key as the projector in
hexadecimal (0-9, A-F) into Key 1 and click [Apply].
To enter WEP settings of the projector with characters, use hexadecimals with
reference to the ASCII code table on the next page.
32
Network setting
30
0
40
@
50
P
60
`
70
p
21
!
31
1
41
A
51
Q
61
a
71
q
22
"
32
2
42
B
52
R
62
b
72
r
23
#
33
3
43
C
53
S
63
c
73
s
34
4
44
D
54
T
64
d
74
t
24
25
%
35
5
45
E
55
U
65
e
75
u
26
&
36
6
46
F
56
V
66
f
76
v
27
'
37
7
47
G
57
W
67
77
w
28
(
38
8
48
H
58
X
68
h
78
x
29
)
39
9
49
I
59
Y
69
i
79
y
3a
:
4a
J
5a
Z
6a
j
7a
z
[
6b
k
7b
6c
l
7c
2a
2b
+
3b
;
4b
K
5b
2c
’
3c
<
4c
L
5c
2d
-
3d
=
4d
M
5d
]
6d
m
7d
2e
.
3e
>
4e
N
5e
ˆ
6e
n
7e
2f
/
3f
?
4f
O
5f
—
6f
o
|
33
Network setting
Settings for use of optional wireless card (ET-CDWL2E)
For Windows XP:
No dedicated utility software is required. For details, see the manual for Windows XP.
(1) Turn ON the power supply of the projector.
(2) Go to [Start] → [Programs] → [Connect To] → [Show all connections] and select
[Wireless network connection].
(3) Right-click the [Panasonic Wireless LAN PC Card]
icon and select [Show available wireless networks].
A wireless network connection screen will appear.
(4) From the [Available wireless network] list, select the
SSID (Panasonic Projector is selected on factory
shipping) of the projector and click [Connect To].
Notes:
• Enter the information of WEP key (entry with characters) in [Network key] before
clicking [Connect To] if encryption (WEP settings) has been set. (“No WEP” is
selected on factory shipping)
• To confirm the detailed settings of the network, click the [Wireless network
settings] icon on the network connection screen.
34
Network setting
For Windows 2000/Me/98SE:
Notes:
Do not use the utility software when the system is in Simple Connection. Using it
may cause some problem in connection with the projector.
(1) Double-click the resident icon at the right bottom of the
PC screen.
This activates the utility software.
(2) Click the item of [Profile Setting] and click [Add].
Note:
To alter any set information, select the set name for alteration with the mouse and
then click [Edit].
(3) Enter the set name of the network, click [Next] and
enter the network name (the SSID of the projector
with which you want to make connection; selection on
factory shipping is Panasonic Projector).
(4) Select the communicate mode, select [Automatic] for
communication speed and click [Next].
35
Network setting
Notes:
• The communicate mode is not compatible with the ad
hoc mode. Select either peer-to-peer (802.11 ad hoc)
or Access Point (infrastructure).
• Some other cards than the optional item (ETCDWL2E) are compatible only with ad hoc mode.
Such cards cannot be used.
• To make setting for encryption (WEP), select 64 (40)
bits or 128 bits from [Off] and click [Next]. If you do
not want to use it, select [Off].
• The user may select characters or hexadecimals for
WEP entry.
Character entry: five characters in 64 (40) bits and
ten characters in 128 bits.
Hexadecimal entry: use 0-9 and A-F in 10 figures and
20 figures, respectively.
• The WEP key should be consistent with the settings
on the projector side; do not change the default key
of “1”.
(5) Select [Disable] for [IP Setting] and click [Complete].
Note:
The state of linking indicates the condition of
connection with the projector. Click [More...].
36
Network setting
For Windows CE:
The diagram below shows an example screen of Personal Digital Assistant (PDA).
However, different screens may be found depending on manufacturers and models:
typical settings when the projector is just shipped from the factory or when Simple
Connection is turned ON.
(1) On a PDA, go to [Start] → [Settings] → [System],
and select [Wireless Settings].
Note:
If [Wireless Settings] does not appear, make PDA hard reset.
(2) Set Mode to [802.11 Ad Hoc] and set SSID to
[Panasonic Projector] and click [OK].
37
Use of Wireless Manager 3.0
Start-up
Go to [Start] → [All Programs] → [Wireless Manager], and
select [Wireless Manager 3.0]
Select the function you want to use in the window when it appears as shown below.
Notes:
• If [Use Simple Connection] has been
checkmarked, setting of the IP address for
the personal computer, the SSID for the
wireless LAN, communicate mode and other
options will be automatically carried out.
When a down list appears on the right,
select different numbers for computers if you
use two or more personal computers.
• If [Restore to original LAN Setup when
finished] has been checkmarked, the LAN
settings before Simple Connection are
restored when Wireless Manager ends if
Simple Connection is used.However, in
Windows XP, this check box does not
appear. If [Use Simple Connection] has not
been checkmarked, [Restore to original LAN
Setup when finished] does not appear.
Live mode
Images on the personal computer screen are directly transferred to the projector.
Since a single personal computer occupies the projector in this mode, the wireless
card does not allow other personal computer(s) to connect to the projector.
Selecting the transfer mode
Right-click the resident icon at the
right bottom of the PC screen, go to
[Option], and select [Live settings].
Four modes are available for
selection: [Normal mode], [Natural
pictures mode], [Fast mode], and
[High quality mode]. [Normal mode] is
selected on factory shipping.
38
Use of Wireless Manager 3.0
In live mode
The colour of icon changes to green from blue, which is normal, and a checkmark is
given to “Live mode” of the task tray.
Quitting and resuming live mode
Click “Live mode” on the task tray. It toggles between Quit and Resume.
Alternatively, double-clicking the resident icon will help you do this.
Note:
The display speed in live mode depends on the CPU performance of the personal
computer. If the display speed is too slow, select another transfer mode, or use a
personal computer with superior CPU performance.
Meeting mode (screen capture)
Images on the personal computer screen are captured and images are transferred to
the projector.
This mode allows the user to send images from two or more personal computers
without switching the connection of wireless card. In addition, checkmarking [Save
image] in optional setting will allow the user to use a once captured image for
projection more than once in presentation mode.
Capture mode
[Full screen]:
The entire screen image of the personal
computer will be captured and displayed in
PictureBox.
[Region]:
Part of personal computer screen (rectangular
region) will be cut and captured.
[
]:
This allows the user to select and capture one of
windows displayed on the PC screen.
To do this, drag and drop the [
] icon onto
the window that you want to capture.
[
]:
This button is for changing full display. Every
press on this button changes the screen size.
[Option]:
Press this icon and a screen will appear for
different settings of screen capture (acquisition).
Note:
If [Capture and send
image] is checkmarked
in option, the image will
be transmitted to the
projector simultaneously
with image capture.
39
Use of Wireless Manager 3.0
Selection of capture format
This function allows selection of format when the image is captured.
[PNG]:
The image quality is not deteriorated, but this format is not suitable for natural
pictures.
[JPEG]:
This compression format is suitable for natural pictures. However, this is not
suited to images that contain many characters because of remarkable quality
deterioration. Further, only JPEG allows the user to adjust the image quality
optionally.
[BMP]:
This format does not use compression, and the size of image data becomes
extremely large.
Operations after image acquisition
If [Capture and send image] is checkmarked:
The PC screen image is transmitted to the projector when it is captured.
If [Capture and send image] is not checkmarked:
No other operations are executed than image acquisition
If [Save image] is checkmarked:
Captured image data will be saved in the specified folder. The [
] button
allows the user to change the destination folder.
Setting of capture delay time
If your personal computer is too low in its ability, sometimes the PC screen image
may not be captured successfully. In such cases, adjust the delay time to the
optimal level. However, no need for this adjustment, normally.
Progress bar:
The bar chart indicates the progress while the image is transferred to the
projector.
40
Use of Wireless Manager 3.0
"PowerPoint
Presentation" mode
This function converts PowerPoint files (*.ppt) into image files so that they may be
transmitted to the projector.
From startup menu, execute [PowerPoint
Presentation mode], and a [Drag
and drop a PowerPoint file (*.ppt) here] message appears. Drag and drop the
desired PowerPoint file to the specified point on the screen.
Specify the destination folder for file saving, and this will automatically start
conversion into an image file. When all conversion is complete, a screen of
presentation mode appears. Here the user may check the list of converted
PowerPoint files.
For further operations, see the instructions on the presentation mode.
Presentation mode
When the user specifies a folder name in the folder selection at the left top, the
images in the folder will be listed in thumbnails if the folder contains image file(s)
(JPEG, PNG). If the system is in “PowerPoint → Presentation” mode, the folder(s) of
converted images will be automatically selected.
Setting of capture delay time
If your personal computer is too low in its ability, sometimes the PC screen image
may not be captured successfully. In such cases, adjust the delay time to the
optimal level. However, no need for this adjustment, normally.
41
Use of Wireless Manager 3.0
Presentation mode
Check [Presentation mode] and press the [Send] button.
When an image is sent, the next image will be automatically selected. In addition,
images can be changed over without delay of time because the next image has been
sent to the projector in advance. Furthermore, the projector cannot be connected by
other personal computers because it is already monopolized.
Progress bar
The bar chart indicates the progress while the image is transferred to the projector.
Switching display mode
Press the [ZOOM] button, and the image being projected on the projector screen
will be displayed by full image in the larger frame (i.e., the thumbnail viewing
frame) on the right and the next image will be displayed on the smaller preview
screen on the left.
Add:
This function allows the user to add images from different folders. Added images
will be placed to the last of the series of images in the thumbnail viewing frame.
Delete:
The user can delete the image(s) selected in the thumbnail viewing frame.
Note:
Deleted image files exist in the recycle bin of the personal computer. Accidentally
deleted files can be retrieved from the recycle bin.
Change of sequence:
Images can be replaced in the sequence by drag and drop operation in the
thumbnail viewing frame.
42
Use of Wireless Manager 3.0
Re-display:
This function updates images to the list of the latest thumbnail images. If any
image in a folder has undergone edit by Explorer etc., for example, the re-display
button will reflect the result in the thumbnail viewing frame.
Automatic play:
This function will project the images in the folder one after another at constant
time intervals in turn from the first one to the last.
Automatic play starts with the currently selected thumbnail image. During
automatic play, the [Automatic play] button changes into a [Pause] button. When
the [Pause] button is pressed, the next image remains selected for transmission.
However, if the [Stop] button is pressed, the display sequence will be refreshed
to the top image in the folder.
During automatic play, too, other personal computers cannot connect to the
projector because the projector is monopolized.
In addition, the user may make settings of image display interval and loop times
(display times) by going to [Option] → [Others].
Timer:
Every press on the [START] button will change the function in turn as: [START]
→ [STOP] → [RESET]. [START] activates the timer, [STOP] suspends the timer,
and [RESET] clears the timer to “0”. The user can use this function to check the
elapsed time in presentation for reference.
Communication with SD
([TRANSMIT], [RECEIVE]):
This function enables the user to
transmit all images in the folder of the
personal computer to the SD Memory
Card set in the projector, or inversely,
to retrieve images in the specified
folder on the SD Memory Card from
the personal computer.
When images are received, image
data will be saved in the selected
folder in the presentation mode
window.
Note:
Do not turn OFF the power to the projector main unit or remove the SD Memory
Card from the main unit when the system is in communication with the SD
Memory Card. Doing this may not only destroy the data, but also damage the SD
Memory Card itself.
43
Use of Wireless Manager 3.0
Other functions
Searching projector
This function is not required when Simple Connection
is used. The function becomes necessary when
Simple Connection is not used or if two or more
projectors are used.
Go to [Option] and specify the projector in
[Selection of projector].
[Search]:
The user can use this function to search the
projectors that are available for connection.
However, projectors subject to search are limited
to those within the same network.
Projectors that are not powered cannot be
searched.
Registering projector
Once a projector is registered, the next time the user can omit the procedure to
connect to the same projector.
If Simple Connection is used, the projector will be automatically registered. If Simple
Connection is not used, connection will be made to currently registered projector.
If two or more projectors have been registered, the one at the top in the registration
(or the projector connected on the previous occasion) will be specified the first for
connection. If any projector is not detected by the search, the user may use the [Add]
button to directly enter the IP address of the projector.
The host name to identify the projector will be automatically sent from the projector
and displayed. The host name should be set on the projector side.
Deleting projector
This function deletes the specified projector from the registration.
Confirming connection
This function checks the condition of connection to registered projectors.
44
Use of Wireless Manager 3.0
Displaying the sender, sender's name
Checkmark [Show the sender] and enter the name in [Sender].
In meeting mode, the entered [Sender’s name] will be shown in combination at the
right bottom of image sent to the projector. The above information is not displayed in
live mode or in presentation mode. If [Presentation mode] is not checkmarked in
presentation mode, the information is displayed on each image transmission.
Setting a shortcut key
Go to [Option] and select [Others].
[Live mode]:
This function turns ON/OFF the live mode.
[Full screen transmission]:
This function transmits the entire image on the
PC screen to the projector.
[Presentation]:
Displays a presentation screen.
[Capture]:
Displays a capture screen.
Note:
The screen of Wireless Manager 3.0 must be activated when using the shortcut
key. Note that, if any other application is running at the same time, and when the
set shortcut key is also used by that application, then this function works in a
totally different way.
Setting automatic play
See the section of automatic play of “presentation mode”. (See page 43)
Setting Simple Connection
When Simple Connection is used, the user may disable the screen saver.
If the system hangs up due to any anomaly during Simple Connection, the user can
press the [Restore] button to bring the network settings into the previous state.
However, this cannot be guaranteed against all abnormal conditions.
45
Use of Web browser control
Browsing software (Internet Explorer etc) can be used to access the projector and
remote-control the projector from the personal computer, or to control the SD
Memory Card inserted in the projector.
Settings on the projector
1 Press the [MENU] button
the [
] buttons, display the
2 Using
network settings screen.
3 Press the [
] button.
It is possible to change the settings using the
[
•
] buttons.
When alteration is complete, press the [ENTER]
button.
Web control
ON: enables Web browser control.
OFF: disables Web browser control.
Web power supply
ON: enables to turn on the lamp of the projector by Web browser control when
the system is on standby.
OFF: disables to turn on the lamp of the projector by Web browser control when
the system is on standby.
Use the POWER button of the projector or remote control to light the lamp.
Web password
Set a password within 16 alphanumeric characters. No password is set on factory
shipping.
When the personal computer accesses the projector, the password will be
queried. Then enter the password that was entered here.
Using [
], select the [Web] password, and press [ENTER], and a software
keyboard will appear.
46
Use of Web browser control
Settings on the personal computer
the [Internet Explorer]
1 Right-click
icon.
This opens Properties.
to [Connect To], open [LAN
2 Go
settings], clear the checkmark on
“All options”, and click [OK].
Then the setting screen will be closed.
Notes:
• If Simple Connection is used, settings will be made automatically.
(Internet Explorer Ver.6.0 or superior is needed, though)
• If a proxy server is already used, set the IP address of the projector to which
connection is made as an exception for not using a proxy server in [Advanced].
set the security level
3 Into "Security",
the "Default level". Or otherwise,
from "Custom level" enable "Active
script"..
Note:
For Netscape, go to [Edit] → [Setting] → [Details] and enable JavaScript.
47
Use of Web browser control
Operation of Web browser control
Starting Web browser control
Start the browser (Microsoft Internet Explorer is used as an example here), and enter
the IP address assigned to the projector.
Web browser control will be started.
Note:
Web browser control can also be started from Wireless Manager 3.0.
While Wireless Manager 3.0 is running, right-click the icon shown on the task bar,
select and left-click Remote Control.The Web browser control can also be started
by pressing the [CTRL] + [H] buttons at the same time.
Top screen
Make setting so that the proxy server will not
be used.
(To use the proxy server, see page 47.)
Specify the IP address that has been assigned
to the projector in the network setting.
Select Japanese or English.
Enter the password if any has been defined.
Note:
• In case you forget the password, assign a new password to the projector (For
security reason, the projector does not show the password that you have been
using).
• The top screen may not be displayed depending on the browser. In that case,
close the window first and start again the Web browser control, or press the
[CTRL] + [R] buttons at the same time.
48
Use of Web browser control
Projector control
Click "Projector control" in the menu.
The user can make various settings of the projector.
Basic control screen
Notes:
• If the power supply has been turned ON, the screen will be closed for a moment.
Confirming the lamp is lighting, then enter into the top screen again.
• It may happen that connection to the projector is unsuccessful immediately after
the power is turned ON. Then, wait for a moment and try connection again.
• If Web control is not set to ON in the network setting of the projector, either basic
control or option control will not operate.
• If Web power is not set to ON in the network setting of the projector, the action of
turning ON the power will not be performed. However, the projector control
screen will provide the same display as that when normal operation is possible.
Option control screen
Note:
Monitor information is updated at regular intervals. If you go to "Display" and press
the "Refresh" button, you can check the current and accurate information.
49
Use of Web browser control
Monitor information screen
When power is turned ON:
When the system is in Web standby state:
Note:
Monitor information is updated at regular intervals. If you go to "Display" and press
the "Refresh" button, you can check the current and accurate information.
50
Use of Web browser control
SD control
Note:
To control SD Memory Card with the Web browser control of the projector, go (on
the projector) to [On-screen menu] → [Network settings], set [WEB control] to ON,
and set [SD mode] to Web (set to Viewer on shipping).
to "SD CARD" by using the input selector (RGB) button
1 Switch
of the projector or the remote control.
It is also possible to switch to it on the basic control screen of the
projector control.
2 Click "SD control" in the menu.
SD file list screen
Select a folder in the SD card.
Select from display of thumbnail, display
of file name list and presentation.
Control auto-play.
Clicking a file name will zoom in on it
within the Web browser.
Clicking Projection will display the file.
SD thumbnail screen
Clicking an image will zoom in on it
within the Web browser.
Clicking "Projection" will display it
on the projector.
Note:
If the thumbnail screen is not renewed,
check the following settings and reset
them when the settings are not correct.
• Internet Explorer
Select [Tool] → [Internet option] →
[Setting] of the temporary Internet file
and check that [Confirm automatically] is
checkmarked.
• Netscape
Select [Edit] → [Setting] → [Detail] →
[Cache] → [Comparison between the
page of Cash and the one on the
network] and check that [When the page
is out of time] is checkmarked.
51
Use of Web browser control
Presentation screen
Click the page, so the image
will be magnified in the Web
browser and projected on
the projector screen.
Changing password
Click "Change password" in the menu.
Note:
Up to16 characters can be used for a password.
Use alphanumeric characters and symbols to create a password.
Both upper and lower case letters can be used.
52
Use of Web browser control
Using a PDA
From a personal digital assistance (PDA) and other portable information terminal, the
user can access this projector to make setting on the projector and to operate data of
the SD card.
For settings of PDA and the network card for PDA, see the instruction manual for that
device.
Starting the Web browser control (PDA)
Start the browsing software and enter the following address:
http://(the IP address set by the projector)/index_p.htm
Then the Web browser control (PDA) will start.
Note:
Explanation made here uses a PDA, pocket Internet explorer 3.0, for example,
with the screen size being 240 wide and 320 long.
Top screen
If a password has been set, enter it and press ENTER.
Enter the password if any has been defined.
Note:
In case you forget the password, assign a new password to the projector (For
security reason, the projector does not show the password that you have been
using).
53
Use of Web browser control
Menu screen
Press [Projector Control], [SD Control] or [Status].
Projector Control
Notes:
• When the power is turned ON, confirm that the indicator lamp is lighting, then go
to the top screen again.
• Immediately after power turning ON, it may happen to be unable to connect with
the projector. If this is the case, wait for a while and then try connection again.
• Either basic control or option control will not function unless Web power is set to
ON in the option setting of the projector.
• Power ON operation will not occur unless Web power is set to ON in the option
setting of the projector. At this moment, however, the projector control screen
has the same indications as those displayed when normal operation is available.
54
Use of Web browser control
SD Control
(1) Switch to “SD CARD” using the input switching (RGB) button on the projector or
the remote control.
This switching can be made also on the screen of the projector control.
(2) Click “SD control” of the menu.
(3) Select from folders in the SD card.
(4) Select form control modes (presentation and list).
Presentation
The NEXT button will project the
next image and the PREV button
the previous image.
List
A list of files that can be replayed
will appear. Press the button
located at the right of the desired
file for replay, and the image will
be projected.
Status
When power is turned ON:
When the system is in Web standby state:
Note:
Although the Status information is updated at constant intervals, pressing the
update button of the Web browser will display the current information.
55
Use of Image Creator 1.0A
Starting/ending Image Creator 1.0A
Start-up
From the [Start] menu at the left bottom of the screen, go
to [All Programs] → [Image Creator], and select [Image
Creator 1.0A].
End
Click [Exit] on the operation screen.
Functions on the main screen
Activate Image Creator 1.0A, and the main screen will open.
Function of each part of main screen is illustrated in the diagram below.
File
Settings
Version information
Close
Capture
slides
Capture
images
SD card/
Other folder
Launch Wireless Manager
Convert and save
56
Thumbnail display
Exit
Use of Image Creator 1.0A
"File" menu
"Capture slides", "Capture an image", "Convert and save" and "Exit" are available
in this menu.
"Settings" menu
This menu allows you to use change of "JPEG conversion format" (saving in DCF
format, making thumbnails) and adjust of "JPEG quality" (low-quality or highquality).
"Version information"
You can check the version of "Image Creator 1.0A software".
"Capture slides" button
Presentation files created with Microsoft PowerPoint are captured into Image
Creator 1.0A.
"Capture images" button
Image files created with other applications (either in JPEG, BMP, TIFF, PNG
format) are captured into "Image Creator 1.0A".
"SD card/Other folder" selection
Here select the destination of captured image files.
"Convert and save" button
The destination folders for saving selected in [SD Memory Card / other folders]
will be subjected to format conversion (automatic, JPEG and PNG conversion)
and size conversion, and then files are saved.
"Launch Wireless Manager" button
Wireless Manager 3.0 will be started.
(Once it is started, it will be minimized on the task bar. To operate the function,
right-clicking the icon with the mouse.)
If images are saved using Image Creator 1.0A in advance, then a series of steps
will be performed, including: startup of Wireless Manager 3.0; display of the
presentation mode window; and up to thumbnail display of images saved by
Image Creator 1.0A. However, the presentation mode window may not be
displayed if Wireless Manager 3.0 has been activated.
Thumbnail display
The images captured into Image Creator 1.0A are displayed in reduced size.
They can be sorted or deleted by right clicking with the mouse.
"Exit" button
Quits Image Creator 1.0A.
"Close" button
Quits Image Creator 1.0A.
57
Use of Image Creator 1.0A
Converting and saving captured images
Click [Convert and save] on the main screen.
A setting screen appears.
Close
Slide
Compress
ion format
Convert
and screen
size
Current
image
All image
Slide display
58
Cancel/Exit
Use of Image Creator 1.0A
"Slide" button
This button switches the display of image files captured into Image Creator.
"Compression format" setting
This button changes the displayed image files captured by Image Creator 1.0A.
Note:
In the AUTO mode, an optimum compression format will be selected automatically
according to the image.
"Convert and screen size" setting
Specify the screen size of the file to be saved.
"Current image" button
Currently selected image file will be saved in the specified compression format
and screen size onto the SD card or into other folders. The name of the saved file
will be generated automatically.
"All image" button
All image files captured into Image Creator are saved in the specified
compression format and screen size onto the SD card or into other folders. The
name of the saved file will be generated automatically.
Slide display
The currently selected image file will be displayed.
"Cancel/Exit" button
This button stops converting and saving process and closes the screen. If you
press this button when converting or saving is in progress, the remaining process
will be stopped and the screen will be closed.
"Close" button
This button stops converting and saving process and closes the screen. If you
press this button when converting or saving is in progress, the remaining process
will be stopped and the screen will be closed.
59
Use of Image Creator 1.0A
Capturing presentation files created with
Microsoft PowerPoint97/2000/2002
(1) Press the [Capture slide] button and select your
desired presentation files, so an [Open] windows
will appear. In the [File location] menu, or using
the folder icon, move to the location in which your
desired presentation files for conversion exist.
Select the presentation files and press the [Open]
button.
Note:
Only presentation files saved in PPT format (with a .ppt extension) can be
captured. A file saved in other format (e.g. a file with a .pps extension) should be
opened with PowerPoint and saved in PPT format.
(2) Press "Convert and save" button to save the
captured image files onto the SD card or other
folders.
To capture all slides in the presentation file:
Press the [Capture all] button.
To capture only desired slides one by one:
Press the [Previous slide] or [Next slide] button
to view the desired slide, and then press the [Capture] button.
Press the [Stop/End] button when all captures are complete.
Notes:
• Press the "Cancel/Exit" button if you want to stop the process of "Capture all".
• All captured slides are converted so that the aspect ratio will be 4:3. Slides with
other aspect ratio than 4:3 will not be reproduced in correct image.
• Some slides created with PowerPoint97 may cause an error during their
converting process. If this occurs, you can solve the problem by converting the
slides with the PC that has PowerPoint2000 installed.
• If image files are pasted in combined PowerPoint 97 and Windows 98, normal
conversion is not available.
60
Use of Image Creator 1.0A
Capturing JPEG, BMP, TIFF or PNG files created
with other applications
Press the "Capture image" button
On the file search window, select your desired image files for conversion and
press the [Open] button.
Press the [Capture all] button, and all image files in
the currently open folder will be captured.
Images not to be captured
The following images cannot be read even if they are in JPEG, BMP, or TIFF format:
• Images with more than 10,000 dots vertically or horizontally.
• BMP images compressed in RLE format
• TIFF images compressed in LZW format
• JPEG or TIFF images in CMYK (Cyan, Magenta, Yellow and Black).
• Images compressed in JPEG2000
Capturing files by drag-and-drop operation
"Image Creator 1.0A" supports drag-and-drop operation. When you choose a file or a
folder to be converted and drag and drop it on the shortcut icon or the window of the
application, Image Creator 1.0A starts automatically and the file(s) are captured.
Drag and drop onto the shortcut icon.
Drag and drop into the window.
61
Use of Image Creator 1.0A
Sorting images
Drag the desired image to the desired spot and drop the
image.
A green bold line is shown vertically between images.
Release the mouse button on the desired location, and the
image will move there.
Note:
Alternatively, the following steps may be taken:
Right-click to select [Sort...] in the submenu and move images on the [Sort
images] setting screen.
Deleting images
(1) Select images for deletion
While pressing the [CTRL] key, repeat clicking:
Two or more image can be selected.
While pressing the [SHIFT] key, click:
All images between two images can be selected.
(2) Right-click to display submenu and select
[Delete from list].
If you choose "Delete all images from the list", all
captured images will be deleted.
(3) Click "Yes" when a confirmation window is displayed.
The images will be deleted from the thumbnail display.
Note:
The original images will not be deleted even captured images are deleted.
62
Use of Image Creator 1.0A
Make conversion settings when writing an
image.
You can specify how to convert images when saving
images onto the SD card or into other folders on the
"Setup screen" displayed by choosing "Setup" from the
"Setup" menu or on the "JPEG quality" adjustment slide
bar on the main screen.
"JPEG conversion format" check box
If you select this check box with " ", the file and directory names will be converted
into DCF format upon saving. If the " " mark is not given, files will be saved in the
name shown under each image on the thumbnail screen.
For details of DCF standard, refer to "DCF standard" on page 65.
Note:
When a file is saved onto the SD card, it is forcefully converted into DCF format.
"Create a thumbnail" check box
If you select this check box with " ", a reduced image (i.e., a thumbnail) will be
created in JPEG format and embedded into the image file upon saving.
Note:
When a file is saved onto the SD card, a thumbnail is forcefully created.
"JPEG quality" adjustment slide bar
You can adjust the quality (compression ratio) of a JPEG image to be saved using
"Save to the SD card" or "Save to the other folder" button.
If you choose higher quality, a file becomes larger; if you choose lower quality, a file
becomes smaller. (The size of the lowest quality file is about one fifth of that of the
highest quality.)
Note:
The JPEG format is suitable for natural pictures such as photographs. For
presentations created with PowerPoint and illustrations made with graphic
software, there may be significant loss of picture quality even if you choose a
higher quality.
63
Use of Image Creator 1.0A
Saving to other folder (directory)
With the "Save to other folder" button, you can save captured
images onto the hard disk of your PC or onto MO disk or
others.
Select [Save in other folders] on the main screen of
Image Creator 1.0A, and select the destination folder for
saving:
On the [Specifying destination folder for saving] screen, in the
[File location] menu, or using the folder icon, move to the
location of the folder from which you want to write, open the
folder, and then press the [Save] button.
Note:
You can create a new folder using the "Create New Folder" button. However, in
Windows 98SE/Me, this button does not appear.
64
Use of Image Creator 1.0A
DCF standard
DCF standard has the following requirements:
Directory (folder) name
Directories must be created under a DCIM directory.
• Data located in directories other than "DCIM" directory is not recognized.
A directory name must be made of "a three-digit number (directory number) + 5
alphabets" (e.g. 100abcde).
• Numbers between 100 and 999 can be used for a three-digit number and 37
different characters can be used for 5 alphabets including 0, 1, 2, 3, 4, 5, 6, 7, 8, 9,
a, b, c, d, e, f, g, h, i, j, k, l, m, n, o, p, q, r, s, t, u, v, w, x, y, z, _(under bar). (The
name is not case sensitive. Double-byte characters cannot be used.)
Multiple directories with the same three-digit number (directory number) cannot be
created.
Layering of directories is not supported.
File name
A file name must be made of "4 alphabets + a four-digit number (file number) + .jpg
(extension)" (e.g. abcd0001.jpg)
Four alphabets:
37 characters, including 0, 1, 2, 3, 4, 5, 6, 7, 8, 9, a, b, c, d, e, f, g, h, i, j, k, l, m, n, o,
p, q, r, s, t, u, v, w, x, y, z and _ (under bar) are available. For four-digit numerals,
numbers ranging from 0001 to 9999 are available. (Upper and lower cases can be
used.)
Multiple files with the same four-digit number (file number) cannot be created in the
same directory.
File format
Only Exif2.1-compliant JPEG image is supported.
65
How to use SD card
Playing images of SD Memory Card
to "SD CARD" using the input switching
1 Change
(RGB) button of the projector or remote controller
A folder selection screen appears.
2 Using [
], select a folder and press [ENTER].
A file selection screen appears.
Notes:
• If three or more folders are found, press the
button and the next three (or
less) folders will be shown in turn.
• If no thumbnail has been incorporated in the image file in advance, it will take a
longer time before image appears.
• A folder that contains no image file cannot be selected.
• To return to the folder selection screen, press the MENU button.
[
3 Using
button
], select a file(s) and press the [ENTER]
The selected image will be displayed in full screen mode.
If "OFF" has been selected for auto play, the
and
buttons can select the
previous or next image for display.
Notes:
• If ten or more files are found, press the
button when the bottom row files are
highlighted, or press the
button when the right bottom file is highlighted.
This will show another nine (or less) files in turn.
• To return to the file selection screen, press the MENU button.
• If "ON" has been selected for auto play, the image will be displayed in full
screen mode and automatic replay will start.
66
How to use SD card
SD Viewer (SD guide display)
Displayed indications are different between those on the folder selection screen and
those on the file selection screen as described below.
Folder selection screen
Top row:
Name and number of the folder selected by cursor /number of all
folders
Middle row: Free space on the SD Memory Card
Bottom row: Settings of automatic play (auto play) including:
Auto play ON/OFF, play interval, repetition times
File selection screen
Top row:
Name of folder, and name and number of the file selected by cursor
/number of all files
Middle row: Free space on the SD Memory Card
Bottom row: Settings of automatic play (auto play) including:
Auto play ON/OFF, play interval, repetition times
67
How to use SD card
Settings of automatic play (auto play)
Since automatic play is set to OFF on shipping, the following settings are necessary.
1 Press the [MENU] button.
The menu screen appears.
PICTURE
PICTURE MODE
COLOR TEMP.
BRIGHT
CONTRAST
SHARPNESS
WHITE BALANCE R
WHITE BALANCE G
WHITE BALANCE B
STANDARD
SELECT:[^][@]
ADJUST:[{][}]
[
], display the SD Memory
2 Using
Card screen.
3
Press the [ENTER] button
[
4 Using
settings.
], select items, and using [
SD CARD
AUTOPLAY
REPEAT
INTERVAL
SELECT:[↑][↓]
ADJUST:[←][→]
STANDARD
STANDARD
32
32
6
32
32
32
ENTER:[ENTER]
ESC:[MENU]
OFF
ON
1
5 sec
ENTER:[ENTER]
ESC :[MENU]
], make
Auto play:
ON: When images are projected, frames will be displayed in turn automatically
OFF: Image frames will not be changed automatically.
Repeat:
1 to 10:
If Auto play is set to "ON", image projection cycle will be repeated
automatically by selected times.
Continuous: If Auto play is set to "ON", image projection cycle will be repeated
endlessly.
Play interval:
This specifies the time period for changing to the next image if Auto play is set to "ON".
The period can be set to 5 to 60 seconds with the steps of 5 seconds.
Notes:
It may take time until the image is projected on the screen depending on images.
In such cases, the play interval may become longer than the set time.
68
How to use SD card
When setting of automatic play is complete, set the channel to [SD CARD] using the
input change (RGB) button of the projector or remote control. Settings of automatic
play will be displayed in the bottom row of SD VIEWER.
Select a desired folder for automatic play, then select image files and display a
magnification screen, and from now on images will be projected in turn following the
settings of automatic play. During automatic play, the user can press the [MENU]
button to stop the play.
69
Uninstallation of software
Wireless Manger 3.0
From desktop, go to [Start] → [All programs] → [Wireless
Manager], and select [Uninstall Wireless Manager ver3.0].
Follow the instructions on the screen to uninstall the software.
Image Creator 1.0A
From desktop, go to [Start] → [All programs] → [Image Creator],
and select [Uninstall Image Creator ver.1.0A].
Follow the instructions on the screen to uninstall the software.
Wireless LAN Driver
For Windows XP
1 Set the supplied CD-ROM in the CD-ROM drive.
the CD-ROM, go to [Wireless Card] and run
2 In[setup.exe].
This activates the uninstalling software.
the checkmark in [Remove] is proper and click
3 Confirm
[Next].
4 When an "Uninstalled" message appears, click [Finish].
For Windows 2000/Me/98SE:
Go to [Start] → [All Programs] → [Wireless Card], and
1 run
[Uninstalled].
the checkmarks in [Remove] is proper and
2 Confirm
Click [Next].
that checkmark in [Yes, I want to restart my
3 Confirm
computer now.] and click [Finish].
70
Explanation of terms
LAN
Abbreviation of Local Area Network, including wired LAN and wireless LAN; a
relatively small-range network developed in a company or in a building.
TCP/IP
Abbreviation for Transmission Control Protocol/Internet Protocol. The standard
protocol for the Internet.
A protocol is a set of specifications and agreements which allow two computers to
communicate with each other.
IP Address
An Internet Protocol (IP) is a protocol used for the transmission of data, and the IP
address is the address of the destination where the data is being sent to. Identical IP
addresses cannot be used for two different devices within the one LAN.
Subnet Mask
Limits the range of IP addresses that can be assigned to a computer when using a
TCP/IP connection, in order to allow a network to be divided into several subsections. The parameters which divide the sub-network in this way are called the
subnet mask.
Gateway
A junction point where different types of networks are connected to each other.
It is used to refer to the hardware and software which is used when connecting a
particular network to another network which has been set up under different network
specifications. It makes adjustments for differences in the protocols used by the two
networks and makes it possible to connect to other networks.
DHCP
Abbreviation for Dynamic Host Configuration Protocol.
A function to automatically assign an IP address to connected devices. If a device
having functions of DHCP server is detected within the LAN, an IP address is
automatically assigned to each of connected devices. This function is not supported
by the projector side.
Ad Hoc Mode
This mode allows direct communication between the projector and a personal
computer having a wireless LAN inside or a personal computer to which a wireless
LAN card is fitted. It is necessary to establish a common channel both to the projector
and the personal computer. Some cards are not compatible to this mode.
Infrastructure Mode
This mode allows communication via an access point connected to a wired LAN.
Even a personal computer to which any wireless LAN card is not fitted can transfer
images to the projector via an access point.
71
Explanation of terms
802.11 Ad Hoc (peer-to-peer) Mode
This mode allows direct communication between the projector and a personal
computer having a wireless LAN inside or a personal computer to which a wireless
LAN card is fitted. It is necessary to make settings of SSID.
Access Point
A point of connection between a wired LAN and a wireless LAN.
Channel
If several access points which use the same frequency band are located near each
other, radio transmission interference between these access point can occur when
they are being used, and this can in turn result in drops in transmission speeds. In
order to reduce this problem when using wireless LANs, the frequency band can be
divided into 11 channels for communication purposes. (The number of channels
varies depending on the country.) However, because interference between adjacent
channels can occur, the channels available for use are normally spaced 2 or 3
channels apart from each other.
SSID
Abbreviation for Service Set ID. Wireless LANs that utilise access points require the
setting of SSID identification codes in order to distinguish between devices which are
a part of the LAN and devices which are not.
Wireless LAN cards of some manufacturers use the name of “ESSID” or “Network
name” instead of SSID.
WEP
Abbreviation for Wired Equivalent Privacy. A method of encrypting transmitted data.
An encryption key is generated and is given only to the person who will be using the
transmitted data, in order to prevent third parties from decoding the transmitted data.
Not available with this product.
JPEG
Abbreviation for Joint Photographic Experts Group. JPEG is the name of an
international organisation which was jointly established by the ISO and the ITU-TS
(formerly the CCIT), but the term is normally used to refer to the specifications for the
still picture compression algorithm which was formulated by the JPEG. This algorithm
allows still images such as photographs, single frames of moving images and
scanned images to be compressed to up to 1/100th of their original sizes. However,
images which are compressed in this way cannot be fully restored to their original
quality (some deterioration in quality occurs), so that compression rates of 1/5 to 1/30
are normally used. Because of differences in color separation, two format sub-types
are used: RGB (red, green and blue) and CMYK (cyan, magenta, yellow, black).
The projector and the Image Creator 1.0 software do not support the CMYK sub-type
of JPEG file.
BMP
Abbreviation for BitMaP. This is the standard image format for the bitmapped files
(image files consisting of a collection of dots) which are handled by Windows.
Color levels of monochrome, 16 colors, 256 colors and 16.7 million colors are
supported.
72
Explanation of terms
PNG
Abbreviation for Portable Network Graphics.
A high compression rate file format that provides restorable compression for line
raster images.
Because it uses restorable compression, it does not result in any loss of image
resolution unlike JPEG.
RLE
Abbreviation for Run Length Encoding. It can be used to achieve high rates of
compression for image files which contain large areas of a single colour. RLE can be
used with monochrome, 16-colour and 256-colour BMP image files. (Image Creator
1.0 does not support files compressed using RLE.)
TIFF
Abbreviation for Tagged-Image File Format. This type of file is used to exchange
documents between computers. Colour levels of monochrome, 256 colours and 16.7
million colours are supported. TIFF files in 16.7 million colour format can include
transparent colour.
LZW
Abbreviation for Lempel-Ziv-Welch. LZW is a compression method used for TIFF
files, and is named thus because it was developed by three people named Lempel,
Ziv and Welch. It compresses the files by converting patterns within the images into
short codes. There is no deterioration in image quality resulting from compression,
but high rates of compression which are comparable to JPEG files cannot be
expected to be obtained. (Image Creator 1.0 does not support files compressed using
LZW.)
DCF
Abbreviation for Design rule for Camera File system. DCF is a standard which was
established by the Japan Electronic Industry Development Association (JEIDA) with
the aim of realising a common image file format, directory name format and file name
format for the images used with digital still cameras. It is based on recommendations
such as Exif Version 2.1.
Exif 2.1
Abbreviation for Exchangeable Image File Format. This is an image file format which
was established by the Japan Electronic Industry Development Association (JEIDA).
It defines the common information format and range of application for images used
with digital still cameras, centering around TIFF and JPEG-format images. Version
2.1 is the latest version of the Exif standard.
PowerPoint
Application software for creating presentations which is included as part of Microsoft
Office. 95, 97, 2000 and 2002 versions are available, but the Image Creator 1.0
software which is bundled with the projector is only compatible with the 97, 2000 and
2002 versions.
73
Before placing a repair order
Please make sure of the following:
Symptom
Please check:
The computer
does not
recognize the SD
card.
• Is the PC card adapter inserted into the PC card slot of the
PC until it reaches the end?
• Is the SD card inserted into the SD card slot of the PC card
adapter until it reaches the end?
• Is the driver installed?
• Are there sufficient IRQ (interrupting signal) numbers?
(Refer to the online help of Windows.)
Writing cannot be
• Is the write-protect switch of the SD card set to "LOCK"?
performed.
The image from
the PC is not
displayed.
• Is the external video output of the notebook computer
properly selected? (In some cases, the setting of the output
is changed if Fn and F3 buttons are pressed simultaneously.
Since this depends on the model, refer to the instruction
manual supplied with your PC.)
The PC does not
recognize the
wireless card.
• Is the wireless card inserted into the PC card slot of the PC until it
reaches the end?
• Is the driver installed?
• Had the driver been installed before the wireless card was inserted?
• Are there sufficient IRQ (interrupting signal) numbers? (Refer to the
online help of Windows.)
• If WEP is enabled, transfer operation takes a longer time
because the image data needs to be converted.
Transfer rate has
• If another wireless device uses the same channel, the
become lower.
transfer rate may become lower. Select other channel for
setting.
• Does the personal computer CPU operate fast enough?
Images displayed
Operation in live mode depends on the performance of
too slow in live
personal computer CPU.
mode
• With Windows XP/2000, the operation speed may decrease
remarkably but for the Administrator authority.
74
Before placing a repair order
Symptom
Please check:
"Projector search"
of the Wireless
Manager 3.0 does
not detect the
projector.
• Immediately after the projector is turned on, it is on the way
to establish the network communication. Perform the search
again after a while.
• Check whether the distance is too far between the PC and
the projector, or if any obstacle between is making the radio
waves unstable.
• Make sure that the IP address and the subnet mask are
correctly assigned.
• Is TCP/IP installed in your personal computer?
• Does the WEP setting correspond with that of the projector?
Communication with the projector cannot be established if
the WEP function was enabled when a third-party wireless
card was used or the access point was used. Disable the
WEP function.
• In the Infrastructure mode, use the same setting for the
projector and the PC as the access point "SSID".
Alphanumeric characters (case sensitive) can be used for
an SSID. Make sure that the user is not using the function
for controlling PCs that can communicate with the access
point.
• In [802.11 ad hoc (peer-to-peer)] mode, the SSID must be of
the same settings both for the projector and the personal
computer. In addition, SSID is case sensitive.
• Is any network device other than the wireless card enabled?
Check with the device manager of Windows.
• Check if the proxy-client software is in operation. Disable
the software when communicating with the projector.
An error message
appears saying that
this image cannot
be displayed
although the image
can be displayed on
the “presentation
mode” screen of
Wireless Manager
3.0
• There are several different formats in JPEG and PNG
images and some of them cannot be displayed.
Colours are not
displayed properly
with Wireless
Manager 3.0 and
it is hard to read
characters.
• Right-click the space on the desktop and choose
"Properties". On the "Display Properties", open the
"Settings" tab and set "Colors" to "High Color [16 bit]" or
higher.
75
Trademark Information
• The SD logo is a trademark.
• Windows and Powerpoint are trademarks or registered trademarks of
Microsoft Corporation in the United States of America and other countries.
• Macintosh and Mac are registered trademarks of Apple Computer Inc.
• All other model names, company names or product names are trademarks
or registered trademarks of their respective owners. TM and (R) symbols
identifying trademarks and registered trademarks are not otherwise used
throughout this manual.
ATTENTION
• Unauthorized use or reproduction of this software or this manual in full
or in part is strictly forbidden.
• Panasonic assumes no responsibility for any results or effects arising
from the use of this software and this manual.
• The specification for this software and the contents of this manual are
subject to change without prior notice.
Matsushita Electric Industrial Co., Ltd.
Web Site: http://www.panasonic.co.jp/global/
C 2003 Matsushita Electric Industrial Co., Ltd.
M0503-0