1
2nd Paper Tray
Installation Instructions
Oki PN-40834406 - 500 Sheet Second Paper Tray
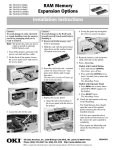
Install the Tray
1. Unpack the tray and remove the
shipping materials.
2. Turn off the printer and unplug the
power cord.
3. Remove the interface cable.
4. Note the location of the pins (1),
connector (2) and tray opening (3).
7. Attach the connection cable.
8. Reattach the interface cable.
9. Plug in the power cord and turn on
the printer.
10.Verify installation
• TRAY2 PAPERSIZE
• TRAY2 MEDIATYPE
• TRAY2 MEDIAWEIGHT
to match the print media you will
normally use in Tray 2. (If you need
help with this, see “Operator
Panels” in your on-line User’s
Guide.
Load Paper
1. Pull out the tray.
Models with Operator Panel:
5. Pull down the printer’s manual feed
tray.
a. Press the Menu button one or
more times until INFO. MENU
appears on the display.
b. Press SELECT twice.
The MenuMap prints.
Models with Control Button:
6. Lower the printer onto the auxiliary
tray, aligning the holes/plug on the
bottom of the printer on the pins/
connector on the tray. You should
feel the printer seating and locking
in place.
© 2004 Oki Data Americas, Inc.
a. Press the Control Button to take
the printer off-line.
b. Press and hold down the control
button for at least 2 seconds, but
less than 5 seconds. The
MenuMap prints.
11. Look for TRAY2 on the first page
of the MenuMap under the
MEDIA MENU listing. If it isn’t
there, check to be sure that the
connection between the printer
and Tray 2 is secure, then reprint
and recheck the MenuMap.
12. Check the MEDIA MENU
settings shown on the MenuMap
and make any needed changes for
2. Position the paper guides in the
tray.
(continued on back)
58366302
3. Fan the paper.
4. Lift the paper bar (1) and load
paper (up to 500 sheets 20-lb. US
Bond). Keep the stack below the
full line (2).
AUTOFEED
To set the printer to switch to Tray 2 when
Tray 1 is empty:
Printers with Operator Panel:
Set AUTOTRAY on in the Print Menu.
Printer with online Status Monitor:
Go to the Paper tab in the Status Monitor.
Select Auto Tray Switch.
Activate the Tray in
the Printer Driver
Windows®
PCL Driver
1. Click Start → Settings → Printers
[Printers and Faxes for XP].
The Printers (Printers and Faxes)
dialog box opens.
2. Right click the Oki printer icon,
then click Properties.
3. Click the Device Option(s) tab.
4. For Available Tray, select Lower
Cassette.
5. Click OK, then close the Printers
(Printers and Faxes) dialog box.
PostScript Emulation Driver,
(Printers with Postscript option
installed).
5. Lower the paper bar and push the
tray back into the printer.
Note: To install paper in Tray 1:
a. Open the Tray 2 front panel.
b. Slide Tray 1 out.
1. Click Start → Settings → Printers
[Printers and Faxes for XP].
The Printers (Printers and Faxes)
dialog box opens.
2. Right click the Postscript
emulation printer icon, then click
Properties.
3. Next:
– Windows XP, 2000 and NT 4.0:
click the Device Settings tab.
– Windows Me and 98: click the
Device Options tab.
4. Then:
– Windows XP, 2000, NT 4.0 and
Me: under Installable Options,
click Available Tray and select 2.
– Windows 98: under Change
setting for Available Tray, select
2 (1 Optional Tray).
5. Click OK, then close the Printers
(Printers and Faxes) dialog box.
Macintosh®
PostScript Emulation Driver,
(Printers with PostScript option
installed)
OS 8.x and 9.x
1. Activate Chooser from the Apple
menu.
2. Select LaserWriter 8.
3. Click Printer → Setup.
4. Click Configure.
5. Change the Available Tray setting
to 2 (1 Optional Tray).
6. Click OK twice.
7. Close Chooser.
OS X.1
No activation is required for
Macintosh OS X.1.
OS X.2
1. Activate Print Center from Local
Hard Drive → Applications →
Utilities → Print Center.
2. Highlight the printer name and
select from the menu Printers →
Show Info.
3. Click the Available Tray
drop-down menu and select 2 (1
Optional Tray).
4. Click Apply Changes and exit to
the desktop.