1
Océ TDS600
Multifunctional Digital System
User Manual
Océ-Technologies B.V.
This manual contains a description of the Océ TDS600 and the copying,
printing and scanning that can be done with it.
Tademarks
Products in this manual are referred to by their trade names. In most, if not all
cases, these designations are claimed as trademarks or registered trademarks of
their respective companies.
Safety information
This manual contains the following safety information:
■ Appendix B lists ‘Instructions for safe use’. You are advised to read this
information before you start to actually use the copier. Technical safety
information such as safety data sheets can also be found in appendix B.
■ Where applicable, cautions and warnings are used throughout this manual to
draw your attention to safety precautions to be taken.
Internet
Check Océ on the internet at www.oce.com for:
■ the latest drivers
■ the latest user manuals
Copyright
Océ-Technologies B.V. Venlo, The Netherlands © 2001
All rights reserved. No part of this work may be reproduced, copied, adapted,
or transmitted in any form or by any means without written permission from
Océ.
Océ-Technologies B.V. makes no representation or warranties with respect to
the contents hereof and specifically disclaims any implied warranties of
merchantability or fitness for any particular purpose.
Further, Océ-Technologies B.V. reserves the right to revise this publication and
to make changes from time to time in the content hereof without obligation to
notify any person of such revision or changes.
Edition 1.0
GB
Contents
Chapter 1
Introduction
About this manual 12
The Océ TDS600 14
Océ TDS600 key concepts 15
Océ TDS600 users 18
Océ TDS600 components 19
Océ TDS600 printer 19
Océ TDS600 scanner 20
Océ Power Logic controller 20
Chapter 2
Use the Océ TDS600 to print
Before you begin 24
Switch the Océ TDS600 printer on 24
Switch the Océ TDS600 printer off 25
Printer operator panel 26
Display 26
Counter 27
Buttons 28
Printer operator panel actions 29
Media type and size on the printer 29
Special media indication 31
Interrupt a print job 32
Select a language 32
Off-line folding settings 34
Positioning the reinforcement knives (optional) 34
Chapter 3
Use the Océ TDS600 to copy
Before you begin 38
Switch the Océ TDS600 printer and scanner on 38
Switch the Océ TDS600 printer and scanner off 40
Scanner operator panel 41
Buttons 42
Section, Function and Arrow buttons 42
Contents
3
Sections on the operator panel 43
Change the operator panel language 45
Settings on the Océ TDS600 Copier operator panel 45
Perform basic copy jobs 47
Make copies 47
Select the required media 48
Select the input mode 49
Specify the zoom factor 50
Select the exposure 51
Background compensation 52
Deliver originals after scanning 52
Define settings for the next original 53
Account logging 53
Using the manual feed for copying 54
Define delivery of copies 55
Stop a copy job 56
Chapter 4
Use the Océ TDS600 to scan
Before you begin 58
Switch the Océ TDS600 scanner on 58
Switch the Océ TDS600 scanner off 59
Scanner operator panel 60
Buttons 61
Section, Function and Arrow buttons 61
Sections on the operator panel 62
Change the operator panel language 64
Settings on the Océ TDS600 Copier operator panel 64
Océ Scan Logic 66
Scan clicks 66
Make a scan to file 68
Settings for scan to file 70
File mode 71
Destination 71
File type 71
Tiff subformat 72
PDF compression 73
Resolution 73
Zoom 73
Optimization 74
Mirror 74
Océ Scan Manager 75
Tree view 76
Table view 76
4
Océ TDS600 Multifunctional Digital System User Manual
Actions from the Océ Scan Manager 78
Destinations 78
Scanned files 81
Manage the temporary store 83
How to retrieve scanned files? 84
Océ View Station LT 86
Menu options 87
Function buttons 88
View error 89
Chapter 5
Special copy and scan jobs
Non-standard size originals 92
The scan width 92
The copy size 93
Scanning originals with filing strip 94
Improving the image quality 98
Brightness 98
Automatic background compensation 98
Editing functions 101
Auto align 101
Shift the image 103
Mirror-image copies 104
Chapter 6
Océ Print Exec LT Web
Introduction to Océ Print Exec LT Web 106
Basic concepts 106
Requirements for the user browser software 106
Requirements for the network infrastructure 106
How to connect to the Océ Print Exec LT Web 106
Chapter 7
Océ Power Logic: Remote Logic
Introduction 110
Installation procedure for MS Windows systems 111
Installation procedure for Unix systems 113
IBM AIX 114
HP-UX 114
Linux 114
Contents
5
Installation procedure for Other systems 115
Use Océ Remote Logic 116
User modes 117
Log in 118
Log out 118
To change the password 118
Automatic login 119
Language 119
Help 119
Command line parameters 120
How to use the remote system 122
Chapter 8
Océ Power Logic: Queue Manager
Introduction 124
Structure 124
Modes 127
Icons 128
Managing print jobs 130
Print queue 130
Inbox queue 131
History queue 132
Chapter 9
Océ Power Logic: System Control Panel
Introduction 134
Structure 134
Icons 136
User operations 138
Chapter 10
Océ Power Logic: Settings Editor (for the key operator)
Introduction 140
Starting up and shutting down the controller 141
Settings Editor 142
General structure 143
Menu bar 144
Top toolbar 144
Left toolbar 146
Settings area 146
6
Océ TDS600 Multifunctional Digital System User Manual
Status bar 147
How to access the Settings Editor 148
Start Océ Settings Editor 148
How to perform actions from the Settings Editor 149
Key operator settings 151
Job-related settings for copying 152
Job-related settings for copying 153
Original card 155
Print card 159
File card 164
Zoom calibration 166
Scan to file 167
Job-related settings for printing 168
Sheet 170
Finishing 174
Image 176
Layout 179
Off line folding 180
Printer related settings 182
Scanner related settings 184
Single options 185
Sheet 186
Zoom steps 187
Timers 187
System related settings 189
Telephone number 190
Enabling passwords 190
Localization 192
Job priorities 194
Media 195
Timers 197
Disk clean up 198
Job management 199
Logging 201
Chapter 11
Océ Power Logic: Settings Editor (for the system administrator)
Introduction 204
System Administrator settings 205
Printer related settings 207
Printer Descriptive Language settings 209
Pen settings 217
System related settings 219
Contents
7
Controller identification settings 220
Set memory reservation settings 221
Connectivity settings 221
Chapter 12
Océ Power Logic: Account logging
The account logging mechanism 226
1 Enable the Account logging option 226
2 The account log file 226
3 Make copy/print/scan jobs 227
4 How to retrieve the account files 228
5 Use the generated accounting file 230
Account information in the log file 231
Account information for the media format 231
Account information for the media weights 232
Structure of the account file 233
Description of all the parameters in the account log file 233
Chapter 13
Media and supplies
Media 240
Load rolls of copy material 241
Cut sheet material 246
Add the toner 248
Chapter 14
Maintenance
Maintenance of the glass platen and the reference roller 252
Maintenance of the reinforcement unit 254
A new tape roll 254
The waste box 262
Maintenance of the reinforcement knives 263
Chapter 15
Problem solving
Introduction 266
How to clear original jams 267
How to clear paper jams 269
Paper jam in the cut sheet section 270
8
Océ TDS600 Multifunctional Digital System User Manual
Paper jam in the roll feed section 271
Paper jam in the manual feed 271
Paper jam in the fuser section 272
Paper jam at the integrated receiving tray 273
Paper jam in the folder 274
Problems with the Reinforcement Unit 282
Clear paper jams in the Reinforcement Unit 282
Clear tape jams in the reinforcement unit 284
No reinforcement strips on the output without an error message 286
Other problems (call service) 288
Chapter 16
The folder
Introduction 290
Océ TDS600 folder 290
Off line folding 295
Reinforcement unit 296
Belt unit 297
Appendix A
Overview and tables
Overview of the Océ TDS600 system 300
Printer operating panel 301
Scanner operating panel 302
Product specifications Océ TDS600 303
List of available material types and sizes 309
Reinforcement strips 310
Appendix B
Safety information
Recommended weight limits 312
Instructions for safe use 314
Safety data sheets 316
Safety data sheet Océ TDS600 printer 317
Safety data sheet Océ TDS600 scanner 318
Safety data sheet Océ TDS600 folder 319
Safety data sheet B5 toner 320
Safety data sheet D5 developer 322
Safety data sheet OPC drum 324
EPA Energy Star® 326
Contents
9
Appendix C
Miscellaneous
Notation conventions 330
Reader’s comment sheet 331
Addresses of local Océ organisations 333
Index 335
10
Océ TDS600 Multifunctional Digital System User Manual
Océ TDS600
Multifunctional Digital System
User Manual
Chapter 1
Introduction
This chapter contains a general introduction to the
Océ TDS600, including a general description of the main
features, delivery options and software applications
provided with the system.
11
About this manual
This manual contains the following chapters
Chapter 1: Introduction contains a general introduction to the Océ TDS600
system, including a general description of the main features, delivery
options and software applications provided with the system.
Chapter 2: Use the Océ TDS600 to print contains a brief description of the
actions that can be performed on the printer operating panel of the Océ
TDS600.
Chapter 3 Use the Océ TDS600 to copy contains a brief description of the
actions that can be performed on the scanner operating panel of the Océ
TDS600 plus the basic copy functions that are available from the system.
Chapter 4: Use the Océ TDS600 to scan describes how to scan orginals to a
file.
Chapter 5: Special copy and scan jobs .provides a detailed description of
special copy functions to be performed on the Océ TDS600.
Chapter 6: Océ Print Exec LT Web a jobsubmission application which allows
you to send print jobs to a printer from your web browser.
Chapter 7: Océ Power Logic: Remote Logic describes the installation and the
functionality of the Océ TDS600 applications.
Chapter 8: Océ Power Logic: Queue manager describes how to view the Océ
TDS600 print queue and how to abort the active print, how to delete and pause
print jobs in the queue and how to restart jobs that are put on hold.
Chapter 9: Océ Power Logic: System Control Panel describes how to view the
system status of the Océ TDS600.
Chapter 10: Océ Power Logic: Settings Editor (for the Key operator)
describes how to make key operator settings with the Océ Settings Editor.
Chapter 11: Océ Power Logic: Settings Editor for the (System administrator)
describes how to make system administrator settings with the Océ Settings
Editor.
12
Océ TDS600 Multifunctional Digital System User Manual
Chapter 12: Océ Power Logic: Account logging You can keep track of all jobs
you make for accounting purposes. This chapter describes how you use the
accounting functionality.
Chapter 13: Media and supplies describes regular maintenance tasks, such as
refilling paper and toner, and refilling the reinforcement unit.
Chapter 14: Maintenance describes how to clean the glass platen, the
reference roller and how to maintain the reinforcement unit
Chapter 15: Problem solving describes the problems that may occur while
using the Océ TDS600
Chapter 16: The folder contains a description of the folder delivered as an
optional with the Océ TDS600.
Appendix A: Overview and tables contains an overview of the system, the
operator panels, the product specifications for the Océ TDS600,and a list of
available material types and sizes.
Appendix B: Safety information contains the recommended weight limits,
instructions for safe use, the available safety data sheets and the applicable
ENERGY STAR® specifications.
Appendix C: Miscellaneous contains the notation conventions, a reader’s
comment sheet and the addresses of local Océ organisations.
Index indicates where you can find the most commonly used terms in the
manual.
Introduction
13
The Océ TDS600
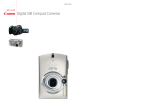
The Océ TDS600 is a wide format, black-and-white, electrophotographic, mid
to high volume copier/printer/scanner. The machine is available in a number of
printer configurations, ranging from two rolls in a single drawer (the minimum
configuration) to a maximum of six rolls (with one sheet feeder) and three
sheet feeders (with four rolls).
The Océ TDS600 is a versatile, highly productive system which offers you a
broad range of functions. See ‘Product specifications Océ TDS600’ on
page 303 for more information.
[1] Océ TDS600
14
Océ TDS600 Multifunctional Digital System User Manual
Océ TDS600 key concepts
Printer configuration The Océ TDS600 is available in a number of printer
configurations, ranging from two rolls in a single drawer (the minimum
configuration) to a maximum of six rolls with one sheet feeder and four rolls
with three sheet feeders. Also a number of optionals are available, including an
integrated folder, a copy delivery tray, paper roll loaders and a paper switch for
supporting customer finishing units.
Copy functionality With the Océ TDS600 scanner a large number of copy
activities can be performed. A wide variety of original and copy related
settings are supported. You can specify particular layout, media, finishing,
feeding and quality enhancement options from the scanner operating panel.
See ‘Product specifications Océ TDS600’ on page 303 for more information.
Océ Scan Logic The Océ TDS600 offers optional scan to file functionality.
Documents are scanned then stored digitally. Ten customised destinations are
supported.
Network connectivity The Océ TDS600 supports a number of popular network
protocols. This means that it can be used in multiple networking environments
such as TCP/IP, NetBEUI, and Novell Pserver (IPX/SPX).
Set processing The Océ TDS600 supports set processing. This means that a
job can consist of several files/originals. You can print/scan these
files/originals in multiple times and sorted. The Océ TDS600 is equipped with
a set memory for storing up to 250 A0s which allows for the creation of
identical sets that are sorted either by page or by set.
Print/copy job A print/copy job is a job sent to the Océ TDS600 Printer from
a user application (print job) or from the scanner (copy job). A print/copy job
may consist of several sets, which in turn may consist of several pages. Sorting
of a print/copy job may take place based on sets or on pages.
Spool memory The Océ TDS600 contains a spool memory which provides a
queuing system for files you want to print. The spool memory allows multiple
users to send print jobs to the Océ TDS600 simultaneously. The print jobs are
then placed in the print queue where they wait to be printed. The job that is put
first into the queue is printed first.
Introduction
15
Job recovery The Océ TDS600 is equipped with a job recovery function that
safeguards users against data loss in case of a printer failure. After a restart, the
data submitted to the printer before the crash will be automatically processed
and printed. This means that jobs do not have to be resubmitted after a printer
malfunction, thus saving valuable time for the users.
Green button principle The Océ TDS600 is a very user-friendly system. The
scanner, in particular, is very easy to operate. Basic copy jobs can be performed
by simply pressing the green start button on the scanner operating panel. Only
if you want to perform more complex copy jobs, you have to change the default
copy settings with the help of the other settings on the scanner operating panel.
User interaction The user can communicate with the Océ TDS600 from
different locations, both locally (printer and scanner operating panels,
controller applications) and remotely (drivers on user workstations, Remote
Control Format (RCF) files or Océ Job Tickets (OJT) and remote applications):
■ Operating panels
The Océ TDS600 consists of two operating panels for making a wide variety
of settings for printing and copying. See ‘Printer operator panel’ on page 26
and ‘Before you begin’ on page 38 for more information.
■ Controller applications
The Océ TDS600 controller applications are used for making default key
operator and system administrator settings (Océ Settings Editor). For
viewing the status of the jobs in the print queue you use the Queue Manager.
The ‘Océ System Control Panel’ shows the status of the entire system.
■ Océ Scan Logic
With ‘Océ Scan logic’ you can define all relevant settings for scan to file. See
‘Use the Océ TDS600 to scan’ on page 57 for more information.
■ Printer drivers
With the Océ TDS600 a number of printer drivers can be used, including
Windows driver, AutoCAD ADI/HDI and PostScript 3/PDF. With these
drivers you can access the Océ TDS600 remotely, from your applications, to
print your files. More information about installing, configuring and using
drivers can be found in the documentation provided with the drivers. All Océ
drivers (except Postscript) can be freely downloaded from the Web at
www.oce.com.
■ Océ Remote Logic
Océ Remote Logic enables you to:
View system status (Océ System Control Panel).
Manage print jobs (Océ Queue Manager).
Change settings (Océ Settings Editor).
16
Océ TDS600 Multifunctional Digital System User Manual
Print submisssion and Print Management Applications
A number of print submission and print management applications are available
for the Océ TDS600 within the Océ Print Exec family, including the web based
Océ Print Exec LT Web, Windows Océ Print Exec LT and more advanced Océ
Print Exec and Océ Print Exec Pro.
■ A Remote Control Format (RCF) file or Océ Job Ticket (OJT) can be used to
instruct the Océ TDS600 how to handle a remote print job. The specific
settings can be made by a user on a control panel, or by means of the user
interface (UI) on a workstation or PC. The RCF file/job ticket specifies the
sets of inputs, the sets of outputs and the processing that is needed to form
the outputs. See the ‘Remote Control Format Reference Manual’ and the
‘Océ Job Ticket Reference Manual’ for more information about Remote
Control Format (RCF) files or Océ Job Tickets (OJT).
■
Introduction
17
Océ TDS600 users
On the Océ TDS600 the following user types can be identified:
System administrator The Océ TDS600 system administrator is responsible
for installing and configuring the Océ TDS600 in his environment. He defines
the printer language settings, pen settings and Automatic Language Sensing
(ALS) settings. The system administrator can also provide assistance to normal
users who need to install the printer drivers on their workstations. See ‘Océ
Power Logic: Settings Editor (for the system administrator)’ on page 203 for
more information. Configuration information can be found in the Océ TDS600
Connectivity Manual provided with the Océ TDS600.
Key operator The Océ TDS600 key operator is responsible for the daily
maintenance of the Océ TDS600. The key operator replenishes toner when
necessary, loads media as needed and defines the default printer settings for
recurring print jobs. Also, the key operator defines all time settings, such as
panel time out and sleep mode time out. See ‘Océ Power Logic: Settings Editor
(for the key operator)’ on page 139 for more information.
Repro operator The Océ TDS600 repro operator is responsible for the daily
operations on the Océ TDS600. The repro operator performs all job related
activities on the system and is allowed to change the default settings for
job-related activities in the Océ Settings Editor.
Anonymous user Typically, an anonymous user on the Océ TDS600 can be
either a PC user who has remote access to the system through one or more
drivers (Windows driver, AutoCAD ADI/HDI or PostScript) or the remote
applications (Océ Queue Manager, Océ System Control Panel and Océ
Settings Editor), or the print submission/print management applications, or a
user performing a copy job at the scanner.
Service operator The Océ TDS600 service operator is responsible for
installation and maintenance of the Océ TDS600.
18
Océ TDS600 Multifunctional Digital System User Manual
Océ TDS600 components
The Océ TDS600 is available as a digital network printer, a scanner or as a full
hybrid machine with which you can print, copy or scan to file. It consists of the
following components (see figure 1 on page 14):
■
■
■
Printer
Scanner
Océ Power Logic Controller
These components, in combination with your network, Océ Print Exec LT Web
and one or more drivers (Windows driver, AutoCAD HDI or PostScript), allow
you to use the Océ TDS600 as your default enterprise printing and copying
solution.
See the Océ TDS600 Connectivity Manual for more details about making
networking settings on the Océ TDS600 printer. You find more information
about installing, configuring and using drivers in the documentation provided
with the drivers.
Note: All Océ drivers (except PostScript 3) can be freely downloaded from the
World Wide Web at www.oce.com.
Océ TDS600 printer
The Océ TDS600 printer has the ability to contain two rolls in a single drawer
(the minimum configuration) to a maximum of six rolls with one sheet feeder
and four rolls with three sheet feeders.The printer delivers your jobs on the
integrated receiving tray, on top of the printer.
You can optionally buy:
■ a copy delivery tray
■ a folder to fold the output
■ a reinforcement unit to add a reinforcement strip to folded output
Introduction
19
Océ TDS600 scanner
You use the Océ TDS600 scanner to make copies or with the optional Océ Scan
Logic, to scan to file.
The optional original delivery tray enables you to stack your originals behind
the scanner.
Océ Power Logic controller
The Océ TDS600 is equipped with an Océ Power Logic controller which helps
you to make optimum use of your system. On this Océ Power Logic controller
a number of applications run which allow you to control your print jobs, make
your default printer settings and monitor the printer status. These applications
include:
■ Océ Queue Manager (QM)
■ Océ System Control Panel (SCP)
■ Océ Settings Editor (SE)
■ Océ Remote Logic (includes QM, SCP and SE on a remote workstation
which connects to the Océ Power Logic controller)
Océ Queue Manager The Océ TDS600 Queue Manager (QM) application
provides you with a graphical representation of the print queue. It allows you
to view the print queue and the status of the print jobs as well as to manage the
jobs in the queue. With the Océ TDS600 Queue Manager you can:
■ View the print queue
■ Abort the job currently being printed
■ Delete job(s) in the queue
■ Pause job(s) in the queue
■ Restart previously paused job(s) in the queue
■ Print jobs from the Inbox queue
■ Print jobs from the History queue
■ Give jobs a priority.
■ See ‘Managing print jobs’ on page 130 for more information about the Océ
TDS600 Queue Manager.
Océ System Control Panel The Océ TDS600 System Control Panel (SCP)
application provides you with status information about the printer. This
includes:
20
Océ TDS600 Multifunctional Digital System User Manual
■
■
■
Machine status of the Océ TDS600 printer, scanner and the Océ Power Logic
Controller
Set memory monitor to view the available storage space on the controller.
Overview of the loaded media types and sizes.
See ‘Océ Power Logic: System Control Panel’ on page 133 for more
information about the Océ TDS600 System Control Panel.
Key Operator settings / System Administrator settings The Océ TDS600
Settings Editor allows an operator to configure and set up job, printer, system
and scanner specific settings. These settings include:
■ Format options
■ Editing options
■ Media related options
■ Finishing options
The system administrator settings in the Océ TDS600 Settings Editor
application allow the system administrator to configure and set up all aspects
related to the infrastructure of the system. These settings include:
■ Host information
■ Network settings
■ Pen settings
■ Printer language settings
■ General administrator settings
See ‘Océ Power Logic: Settings Editor (for the system administrator)’ on
page 203 for more information about the Océ TDS600 Settings Editor
application.
Optionals: you can order the following optionals for the Océ Power Logic
controller:
Océ Scan Logic consists of Océ Scan Manager and Océ View Station LT.
With Océ Scan Logic you can perform scan to file.
■ Océ Print Exec LT Web is a job submission application, which allows you to
send print jobs to a destination device (Océ printer) from your web browser.
For detailed information (see ‘Océ Print Exec LT Web’ on page 105).
■ Account Logging. Account Logging is for accounting purposes, the Océ
Power Logic Controller is able to keep track of all your jobs. For each
copy/print/scan job the job info and the paper usage is stored.
■
Introduction
21
22
Océ TDS600 Multifunctional Digital System User Manual
Océ TDS600
Multifunctional Digital System
User Manual
Chapter 2
Use the Océ TDS600 to print
This chapter contains a short description of the operator
panel of the Océ TDS600 printer and the actions that can
be done with it.
23
Before you begin
You must switch on both the Océ TDS600 printer and the Océ Power Logic
controller before you can print. You do not have to use a specific order in which
you switch on or off the Océ TDS600 printer and the Océ Power Logic
controller.
Switch the Océ TDS600 printer on
You switch the Océ TDS600 printer on with the on/off switch, which is at the
rear of the printer.
[2] On/off switch on the printer
[3] On/off button on the Océ Power Logic controller
24
Océ TDS600 Multifunctional Digital System User Manual
▼
Switch the Océ TDS600 printer on
1 Set the on/off switch at the rear of the printer to position ‘1’, (see figure 2). The
green LED will be on.
2 The message ’Ready to print’ appears.
▼
Switch the Océ Power Logic controller on
1 Press the on/off button on the controller, (see figure 3).
2 Press the on/off button on the monitor
The controller starts up.
Switch the Océ TDS600 printer off
▼
Switch the Océ TDS600 printer off
Note: Ensure that the engine does not run.
1 Set the on/off switch at the rear of the printer to position ‘0’.
▼
Switch the Océ Power Logic controller off
1 Select the ‘Shut down’ option from the Océ System Control Panel.
2 Switch off the controller and the monitor (see figure 3).
Note: Wait at least 5 seconds before you restart the Océ TDS600.
Use the Océ TDS600 to print
25
Printer operator panel
The printer operator panel consists of a number of buttons and a graphical
display (see figure 4). At the top of the panel is an indicator (a light) which
starts flashing when operator intervention is required.
Up/Down
buttons
Selection
buttons
On line
button
Stop button
[4] Printer operator panel
Display
The graphical (LCD) display offers feedback about the current printer status.
It provides you with the following information:
■
26
Status information (e.g. ‘Preparing for run’ or ‘Ready to print’).
During normal operation the following message types may appear:
Status/action message: indicates the actual status of the printer plus the
action to be taken, e.g. ‘Roll empty. Feed A2, plain paper’.
Warning message: during a warning message the printer will continue to
Océ TDS600 Multifunctional Digital System User Manual
■
■
■
operate, but it is possible that the print quality is not optimal, e.g. ‘Fill B5
toner’.
A graphical overview of available rolls and sheet feeders, including the
material type and size used by each roll or sheet feeder.
A symbol indicating the paper orientation (for sheet feeders only).
An indication that a particular roll or sheet feeder is empty (if applicable).
An empty roll is represented by a dotted roll symbol.
An empty sheet feeder is displayed as an empty paper tray.
In the event of an error, a graphical representation of any error location
(cover or panel), together with instructions on how to solve the problem is
displayed.
Counter
On the operating panel of the Océ TDS600 Printer a counter will be displayed
that gives the user feedback about the progress of the job that is currently being
printed. The counter, which is located at the bottom of the upper window on
the operating panel, displays the number of sets and/or pages printed. Counting
starts at 1. The following options are available:
■
■
■
When no sets are made, only the current page and the total number of pages
are displayed (e.g. ‘Page 3 of 5’). At the beginning of a job, when the system
does not know the total number of pages yet, only the current page may be
displayed (e.g. ‘Page 5’).
With set input: set counter. In this case the counter shows the current, the
total number of sets and the current page (e.g. ‘Set 3 of 5, Page 10’). At the
beginning of a job, when the system does not know the total number of sets
yet, only the current set and page may be displayed (e.g. ‘Set 2, Page 5’).
With set input: multiple sheet counter. In this case the counter shows the
current page, the total number of pages and the current copy, e.g. ‘Page 2 of
12, Copy 5’). At the beginning of a job, when the system does not know the
total number of pages yet, only the current page and copy may be displayed
(e.g. ‘Page 2, Copy 5’).
Use the Océ TDS600 to print
27
Buttons
With the buttons on the operator panel you can make a number of settings for
the Océ TDS600 Printer, such as the media type and size or the preferred
language.
The following buttons are available:
Button types
Selection
buttons
Function
The selection buttons are located immediately below the
graphical display. The left button can be used to activate one of
the main menu choices (Language, Folding or
Media) on the left part of the display.
Note: A shadow highlighting effect is used to indicate the active menu option.
The right selection button can be used to activate the options
on the right part of the graphical display.
Up/Down
buttons
On line button
Stop button
Key button
28
Note: To identify the active selection, the dotted line around
this selection is changed into an uninterrupted line and the
small selection triangles next to the specified option are no
longer dimmed.
These selection triangles indicate that you can select an option
from a predefined list with the help of the Up/Down buttons.
These two triangular buttons to the right of the graphical display are used to display the next or previous option from the selected menu choice and to select the desired option.
By pressing the on line button you can put the printer on line
or off line. If the green light above the on line button is on, the
printer is on line; if this light is off, the printer is off line.
The red stop button is used to stop the present print job. After
this button is pressed, a dialogue will be displayed asking for
confirmation.
Note: The printing process does not stop instantaneously since
a number of prints may already have been submitted to the
printer after processing. The prints cannot be stopped.
The green key button has no function.
Océ TDS600 Multifunctional Digital System User Manual
Printer operator panel actions
On the Océ TDS600 printer operator panel you can perform a limited number
of actions:
■ Set the media type
■ Set the media type for manual feeder
■ Set the media size
■ Set a special media indication
■ Stop a print job
■ Select the preferred language
■ Make off-line folding settings
■ Clean the reinforcement knives
Media type and size on the printer
One of the features of the Océ TDS600 printer is the automatic media change
function. This function allows the printer to switch to another roll of the same
format and copy material when the roll or sheet feeder becomes empty during
printing.
Note: Since the Océ TDS600 Printer cannot detect the loaded copy material
type and format itself, you have to specify type and size after you (re)load
media, as described in ‘Media’ on page 240.
See ‘List of available material types and sizes’ on page 309 for an overview of
all materials that can be used on the Océ TDS600 Printer.
▼
Set media type
1 Press the on line button on the printer operating panel to put the printer off line.
The message ‘Off line’ is displayed in the status window.
Use the Océ TDS600 to print
29
[5] Operator panel in off line mode
The focus is shifted to the Media option (indicated by the shadow effect).
2 Use the Up/Down buttons to select the roll or sheet feeder for which you have
just loaded new media.
3 Press the right selection button to activate the Mat. (Material) option.
The dotted line around the current selection is changed into an uninterrupted
line and the small selection triangles next to the specified material are no
longer dimmed.
4 Use the Up/Down buttons to select the material you just loaded.
5 Press the on line button to put the printer on line again. The printer now knows
which material is used for the specified roll or sheet feeder.
▼
Set media type for manual feed
1 Press the on line button on the printer operating panel to put the printer off line.
The message ‘Off line’ is displayed in the status window.
2 Press the left selection button to shift the focus to the Media option.
A shadow effect is used to indicate that the focus is set to this option.
3 Use the Up/Down buttons to select the Manual option.
4 Press the right selection button to activate the Mat. (Material) option.
The dotted line around the current selection is changed into an uninterrupted
line and the small selection triangles next to the specified material are no
longer dimmed.
30
Océ TDS600 Multifunctional Digital System User Manual
5 Use the up/down buttons to select the material you just loaded.
6 Press the on line button to put the printer on line again. The printer now knows
which material is used by the manual feeder.
▼
Set media size
1 Press the on line button on the printer operating panel to put the printer off line.
2
3
4
5
6
The message ‘Off line’ is displayed in the status window (see figure 5 on
page 30).
Press the left selection button to shift the focus to the Media option.
A shadow effect is used to indicate that the focus is set to this option.
Use the up/down buttons to select the roll or sheet feeder for which you have
just loaded new media.
Press the right selection button to activate the Size option.
The dotted line around the current selection is changed into an uninterrupted
line and the small selection triangles next to the specified size are no longer
dimmed.
Use the up/down buttons to select the size for the media you just loaded.
Press the on line button to put the printer on line again. The printer now knows
which media size is used for the specified roll or sheet feeder.
Special media indication
On the Océ TDS600 Printer, you can attach a Special indication (exclamation
mark: !) to a roll or sheet feeder which uses special media (for instance
coloured paper). This indication is used to identify the roll or sheet feeder to
the printer. For this roll or sheet feeder the automatic media change option is
disabled.
▼
Set a special media indication
1 Press the on line button on the printer operating panel to put the printer off line.
The message ‘Off line’ is displayed in the status window (see figure 5 on
page 30).
2 Press the left selection button to shift the focus to the Media option.
A shadow effect is used to indicate that the focus is set to this option.
3 Use the up/down buttons to select the roll or sheet feeder for which you have
just loaded special media.
4 Press the right selection button to activate the ‘Type’ option.
The dotted line around the current selection is changed into an uninterrupted
line and the small selection triangles next to the specified type are no longer
dimmed.
Use the Océ TDS600 to print
31
5 Use the up/down buttons to select the Special option for the specified roll or
sheet feeder.
6 Press the on line button to put the printer on line again. The printer now knows
that the specified roll or sheet feeder contains special material.
Interrupt a print job
The red ‘Stop’ button on the Océ TDS600 Printer operating panel interrupts the
active print process. You can cancel or continue the current print job.
▼
Cancel a print job
1 Press the ‘Stop’ button.
A dialogue is displayed informing you that you can press on line to continue
or stop to cancel the job.
2 Press the ‘Stop’ button again to cancel the current job.
Note: In general, the printer cannot be stopped immediately because the
started prints have to be finished. Printing will be stopped at the end of the
page.
▼
Continue a print job
1 Press the ‘Stop’ button.
A dialogue is displayed informing you that you can press on line to continue
or stop to cancel the job.
2 Press the ‘On line’ button to continue the current print job.
Select a language
On the operating panel of the Océ TDS600 Printer you can specify which
language you want to use for displaying printer information, such as status and
error messages.
By default, you can choose between two languages, which have been defined
for your system by the key operator (see ‘First language’ on page 192).
Note: If the key operator has specified only one language, it will not be possible
for you to choose. In that case the language option will not appear on the
operating panel.
32
Océ TDS600 Multifunctional Digital System User Manual
▼
Select a language
1 Press the ‘On line’ button on the printer operating panel to put the printer off
line. The message ‘Off line’ is displayed in the status window.
2 Press the left selection button to shift the focus to the Language option.
A shadow effect is used to indicate that the focus is set to this option.
3 Activate the Language option by pressing the right selection button.
The dotted line around the current selection is changed into an uninterrupted
line and the small selection triangles next to the specified language are no
longer dimmed.
4 Use the up/down buttons to switch between the predefined languages.
5 The language specific elements on the display are immediately customized to
reflect your language choice. Only the indicator for the language itself, is in
the alternative language. This way you always know what your alternative
language is.
6 Put the printer on line again by pressing the on line button. The printer now
uses the selected language.
Use the Océ TDS600 to print
33
Off-line folding settings
On the operating panel of the Océ TDS600 Printer you can specify the settings
you want to use for off-line folding. These settings include defining the length
and width of the folded package, enabling and defining the binding edge,
selecting the input method and legend position and cleaning the reinforcement
knive.
▼
Make off-line folding settings
1 Press the on line button on the printer operating panel to put the printer off line.
The message ‘Off line’ is displayed in the status window.
2 Activate the Folding option by pressing the left selection button.
3
4
5
6
7
8
9
10
The dotted line around the current selection is changed into an uninterrupted
line and the small selection triangles next to the specified option are no longer
dimmed.
Use the up/down buttons to switch between the available options.
Activate the Input option and press the right selection button to activate the
Legend option.
If necessary, change the value in the Legend field with the up/down buttons.
Press the right selection button again to activate the Method option.
If necessary, change the value in the Width field with the up/down buttons.
Press the left selection button again and use the up/down buttons to select
another option. This can be Package (with suboptions Length and Width),
Binding (with suboptions Size and Binding), or Special (with suboption
Knife).
Make any desired settings.
Put the printer on line again by pressing the on line button. The printer now
uses the specified off-line folding settings.
Positioning the reinforcement knives (optional)
Because the knives of the optional reinforcement unit of the folder get sticky
from the glue on the reinforcement tape, they have to be cleaned regularly. You
are recommended to clean the knives each time you have inserted a new tape
roll (see ‘A new tape roll’ on page 254) or when an error in the reinforcement
unit has occurred.
Before you can clean the reinforcement knives, you have to place them in such
a position that all the parts that need to be cleaned are accessible. You can do
this from the printer operating panel.
34
Océ TDS600 Multifunctional Digital System User Manual
▼
Prepare the reinforcement knives for cleaning
1 Press the on line button on the printer operating panel to put the printer off line.
The message ‘Off line’ is displayed in the status window.
2 Press the left selection button to shift the focus to the Folding menu.
A shadow effect is used to indicate that the focus is set to this menu.
3 Select the Special option from the Folding menu.
4 Press the right selection button start activate the Knife option.
The following information is now displayed in the panel display:
[6] Cleaning the reinforcement knife
Note: When a job is running, the message ‘Job interrupted’ appears. The
machine stops running after it has correctly finished the prints that were
already in the engine. Then the reinforcement knives are placed in the
correct position.
5 You can now continue to clean the reinforcement knives (see ‘Maintenance of
the reinforcement unit’ on page 254).
Use the Océ TDS600 to print
35
36
Océ TDS600 Multifunctional Digital System User Manual
Océ TDS600
Multifunctional Digital System
User Manual
Chapter 3
Use the Océ TDS600 to copy
This chapter contains a short description of the interface of
the Océ TDS600 Copier and the actions that can be done
on its operator panel.
37
Before you begin
You must switch on the Océ TDS600 printer, scanner and the Océ Power Logic
controller before you can print. You do not have to use a specific order in which
you switch on or off the Océ TDS600 printer, scanner and the Océ Power Logic
controller.
Note: Chapter 1 (see ‘Printer operator panel’ on page 26) explains the printer
operator panel.
Switch the Océ TDS600 printer and scanner on
You switch on the Océ TDS600 printer and scanner with the on/off switch. The
switch of the is at the rear of the printer. The switch of the scanner is
underneath the original feed table.
[7] On/off switch on the printer
38
Océ TDS600 Multifunctional Digital System User Manual
[8] On/off switch on the scanner
[9] On/off button on the Océ Power Logic controller
▼
Switch the Océ TDS600 printer on
1 Set the on/off switch at the rear of the printer to position ‘1’, (see figure 7). The
green LED will be on.
2 The message ’Ready to print’ appears.
▼
Switch the Océ TDS600 scanner on
1 Set the on/off switch at the front of the scanner to position ‘1’., (see figure 8).
The green LED will be on.
2 The message ’Ready to copy’ appears.
▼
Switch the Océ Power Logic controller on
1 Press the on/off button on the controller, (see figure 9).
2 Press the on/off button on the monitor.
Use the Océ TDS600 to copy
39
The controller starts up.
Switch the Océ TDS600 printer and scanner off
▼
Switch the Océ TDS600 printer off
Note: Ensure that the engine does not run.
1 Set the on/off switch at the rear of the printer to position ‘0’.
▼
Switch the Océ TDS600 scanner off
1 Set the on/off switch at the front of the scanner to position ‘0’.
▼
Switch the Océ Power Logic controller off
1 Select the ‘Shut down’ option from the System Control Panel.
2 Switch off the controller and the monitor (see figure 9).
Note: Wait at least 5 seconds before you restart the Océ TDS600.
40
Océ TDS600 Multifunctional Digital System User Manual
Scanner operator panel
The Océ TDS600 is a very user-friendly system. The scanner, in particular, is
very easy to operate. Basic copy jobs can be performed by simply pressing the
green (start) button on the scanner operator panel. Only if you want to perform
more complex copy jobs, you have to change the default copy settings with the
help of the other settings on the scanner operator panel.
The operator panel is located above the original feed. As you can see in this
diagram (see figure 10), the panel consists of a display in the centre surrounded
by a number of function, section and arrow buttons. To the left of the display,
you can find the ‘Stop’ button and below the display you can find the ‘Start’,
‘Numeric’ and ‘Correction’ buttons as well as the ‘Counter’ window.
This section consists of two parts. The first part explains the basic use of the
buttons. The second part deals with special use of the display. It describes how
to use the soft buttons above and along the sides of the display to define your
copy settings.
.
Section buttons
Arrow buttons
Stop
button
Function
buttons
Start button
Numeric buttons
Correction button
[10] Scanner operator panel
Use the Océ TDS600 to copy
41
Buttons
With the buttons on the operator panel you can make a number of settings for
the Océ TDS600.
The following buttons are available:
Button type
Start buttons
Numeric buttons
Correction button
Stop button
Interrupt button
Function
The green button marked with
is used to start the
feeding of the original, or to re-start the copy process.
The buttons with numbers on the lower part of the operator panel are used to enter numbers.
The orange button marked with C, located at the bottom
right of the operator panel. If you press the correction
button once, the copy counter is set to the default (probably ‘1’). If you press this button twice, all settings are
reset to their default values.
Pressing the red button to the left of the display stops the
copy process for the current original. You can stop the
original transport immediately when an original jam occurs.
Currently not in use.
Section, Function and Arrow buttons
Apart from the above mentioned buttons, the operator panel of the Océ
TDS600 Copier contains a number of other buttons. These include:
■ Section buttons
■ Function buttons
■ Arrow buttons.
The section buttons are the four buttons located above the display. These
buttons provide access to the ‘Custom’, ‘Original’, ‘Print’ and “File’ sections
on the display.
Each section contains several functions (cards). These can be accessed with the
help of the left most function button, which is also called the card selection
button.
42
Océ TDS600 Multifunctional Digital System User Manual
The five function buttons (below the display) allow you to select functions or
subfunctions within a card.
Finally, the arrow buttons can be used, like the numeric buttons, to define
numeric settings. The arrow buttons are also used for selecting subfunctions.
Sections on the operator panel
The operator panel of the Océ TDS600 Copier consists of the following
sections:
■ Custom
■ Original
■ Print
■ File
Custom section Upon start-up of the Océ TDS600 Copier, a number of default
settings are available from the ‘Custom’ section. These settings, which can
also be found in one of the other two sections, are the most commonly used
options on the Océ TDS600 Copier. The key operator can change the contents
of the ‘Custom’ section from the Océ Settings Editor on the controller (see
‘Custom card’ on page 153).
By default, the ‘Custom’ section includes the ‘Media’, ‘Input mode’ and
‘Zoom’ settings plus one or two others. This could be, depending on your
configuration and language settings, the ‘Folding’ (if you have a folder),
‘Language’ (if you work with more than one language) or ‘Exposure’ settings.
See figure 10 on page 41 for an example of the ‘Custom’ section.
Original section The ‘Original’ section contains all original-related settings,
divided over a number of cards. The following cards are available (top to
bottom):
■ Scanner
■ Image
■ Sheet
■ Feeding
Each card contains a number of specific options, as is shown below.
Use the Océ TDS600 to copy
43
[11] Original section of the Océ TDS600 Copier
Print section The ‘Print’ section contains all copy-related settings, divided
over a number of cards. The following cards are available (top to bottom):
Image
■ Layout
■ Finishing
■ Sheet
■
Each card contains a number of specific options, as is shown in figure 12 on
page 44.
[12] Copy section of the Océ TDS600 Copier
File section The ‘File’ section contains all scan to file related settings, divided
over a number of cards. The following cards are available (top to bottom):
■ Image
■ Destination
Note: The ‘File’ section is only available if you have the scan to file option
installed.
44
Océ TDS600 Multifunctional Digital System User Manual
[13] ‘File’ section of the Océ TDS600 Copier
Change the operator panel language
It is possible to change the operator panel language. You can choose between
two preferred languages.
▼
To select a language
1 Open the ‘Scanner’ card in the ‘Original’ section.
Press the ‘Language’ function button to set the needed language.
Settings on the Océ TDS600 Copier operator panel
On start-up of the Océ TDS600 Copier, the ‘Custom’ card is displayed (see
figure 14).
The custom card gives access to the settings you defined in the Océ Settings
Editor. This contains a number of settings which are direct accessible. The key
operator defines the custom card in the Océ Settings Editor.
[14] The ‘Custom ‘ card on the scanner operator panel
Use the Océ TDS600 to copy
45
▼
Make settings
1 Press one of the Section buttons to activate the desired menu.
Note: The active menu is slightly moved downwards to visually separate it
from the other menus. Apart from that, a shadow highlighting effect is used
for extra highlighting.
2 Press the Card selection button to select the appropriate card. You can switch
cards (from bottom to top) by pressing the button again.
Note: Here, too, the active card is visually separated from the other cards
and given a shadow highlighting effect for extra highlighting.
3 Select the desired function values in one of the following ways:
■ Simple (non-numeric) selection: press the Function button to activate the
desired (non-numeric) value. The selected value is preceded by a ‘●’ symbol.
The ‘Background compensation’ setting demonstrated in figure 11 on
page 44 is an example of this.
■ Long list selection: if you want to select a value from a list of options that can
not be fully displayed on the panel, you first activate the selection triangles
next to the specified option (the dotted line around this selection is changed
into an uninterrupted line and the selection triangles are no longer dimmed),
which indicate that there are additional options available and then select one
of the non-displayed values with the Arrow buttons. The ‘Original type’
setting demonstrated in figure 11 on page 44 is an example of this.
■ Numeric selection: activate the selection triangles and select the desired
value with the Arrow buttons or with the numeric buttons. The ‘Brightness’
setting demonstrated in figure 11 on page 44 is an example of this.
Also a combination of simple selection and numeric selection is possible, as is
shown in the ‘Cut length’ setting demonstrated in figure 12 on page 44.
Note: The Up arrow and Down arrow buttons can be used to increase or
decrease the active value by 1; the Left arrow and Right arrow buttons
increase or decrease the active value by 10. Exception to this rule is the
selection of zoom values. Here, the Left arrow button can be used to browse
through the predefined reduction steps and the Right arrow button to
browse through the predefined enlargement steps.
46
Océ TDS600 Multifunctional Digital System User Manual
Perform basic copy jobs
On the Océ TDS600 scanner you perform a number of basic tasks. These
include:
■ Make copies
■ Select the required media
■ Select the input mode
■ Specify the zoom factor
■ Select the brightness
■ Deliver originals after scanning
■ Define settings for the next original
■ Define delivery of copies
■ Stop a copy job
Make copies
1 Place your original face-down, right aligned along the original guide. Keep the
legend at your right hand side.
Note: When feeding the original, keep it in place until it is transported
(about 1 cm) into the machine.
[15] Inserting the original
2 Specify the number of copies using the numeric buttons.
3 Specify the desired copy material on the operator panel.
If you select ‘Automatic’ the Océ TDS600 Copier will try to use a roll format
that matches the specified size.
Use the Océ TDS600 to copy
47
Note: After inserting the original, the roll or sheet feeder that is used is
4
5
6
7
8
9
indicated by the ‘❍ ’ symbol.
Use the ‘Media’ function to select copy material and format.
Specify how a job will be sorted: ‘Single sheet’, ‘Multiple sheets’ (output: 1-1,
2-2, 3-3) or ‘Set’(output: 1-2-3, 1-2-3).
The currently selected input mode is indicated by the ‘●’ symbol.
Specify a reduction or enlargement factor on the operator panel by using the
‘Zoom’ function.
If you select ‘Automatic’, the Océ TDS600 Copier will use a zoom factor that
is needed to obtain a copy without loss of information. After inserting the
original, the zoom factor that is used is indicated by the ‘❍’ symbol.
Specify the desired brightness on the operator panel.
You can use the ‘Brightness’ setting to correct for a lighter or darker original.
Specify folding options on the operator panel.
If the optional folder is installed, you can use the ‘Folding’ settings to get a
neatly folded copy.
Press the green start button
to start the copy job.
Your original will be fed into the scanner. The printer starts.
Collect your output.
Your copy will be delivered on the selected output unit of the print engine.
Select the required media
The ‘Media’ setting can be used to select copy material and format. The
display will show you what rolls or sheet feeders are currently loaded. The
currently selected roll or sheet feeder is indicated by the ‘●’ symbol.
If you select ‘Automatic’, the Océ TDS600 Copier will try to use a roll or
sheetfeeder format that matches the original size. After inserting the original,
the roll or sheetfeeder that is used is indicated by the ‘❍’ symbol.
Note: The ‘❍’ symbol remains in place until a new original is inserted. Then it
may move to indicate another roll or sheetfeeder, depending on the original
format.
▼
Selecting the required media
1 Select the ‘Sheet’ card in the ‘Print’ section.
2 Select the desired media with the ‘Media’ function button.
48
Océ TDS600 Multifunctional Digital System User Manual
Interrupt
Access
to
job
Page
Access to
ial
[16] Selecting the required media
Note: You can also select the desired media from the ‘Custom’ section, if this
setting has been defined for this (see figure 14 on page 45).
Select the input mode
You can use the ‘Input mode’ setting to specify how a job will be sorted: the
‘Single sheet’ option treats each sheet as a separate job. ‘Multiple sheets’
produces the specified number of copies for each sheet in a job and then
continues with the next sheet. Graphically that would look something like this:
1 1 1
2 2 2
3 3 3
4 4 4
5 5 5
Note: An important characteristic of ‘Multiple sheets’ is that, if this setting is
selected, the active job is kept together and treated as a whole. In this case the
job cannot be interrupted by a high-priority copy job, and there will be no risk
of getting mixed output.
‘Set’ produces one copy for each sheet in a set and then continues with the next
copy of the entire set, as follows:
1 2 3
1 2 3
1 2 3
1 2 3
1 2 3
The current input mode can be closed by pressing the Stop button.
The currently selected input mode is indicated by the ‘●’ symbol.
▼
Select the input mode
1 Select the ‘Feeding’ card in the ‘Original’ section.
2 Select the desired media with the ‘Input mode’ function button.
Use the Océ TDS600 to copy
49
Interrupt
Access
to
job
Page
Access to
ial
[17] Selecting the input mode
Note: You can also select the input mode from the ‘Custom’ section (if this
setting has been defined for this).
Specify the zoom factor
You can use the ‘Zoom’ setting to select a zoom factor. If you select
‘Automatic’ with the ‘●’ symbol, the Océ TDS600 Copier will use a zoom
factor that is needed to obtain a copy without loss of information. This will be
done according to the selected media roll or sheet feeder. After inserting the
original, the zoom factor that is used is indicated by the ‘❍’ symbol.
If you select the numeric zoom factor with the ‘●’ symbol, you can define a
zoom factor yourself between 25% and 400%. After selecting the numeric
zoom factor, the four little triangles will appear to the right. Now you can
define a new zoom factor in two different ways:
■ By using the Arrow buttons on the right of the display (see figure 10 on
page 41). If you press one of the vertical buttons, the zoom factor will
increase or decrease with steps of 0.1%. If you press one of the horizontal
buttons, the zoom factor will increase or decrease with the steps predefined
in the Océ Settings Editor by the key operator.
■ By using the numeric buttons at the bottom of the operator panel. You can
specify the exact zoom factor with 0.1% increments.
For example, if you want to specify a zoom factor of 25.4%, you type 254. If
you want to specify a zoom factor of 254%, you type 2540.
▼
Selecting the zoom factor
1 Select the ‘Image’ card in the ‘Copy’ section.
2 Select the desired media with the ‘Zoom’ function button.
50
Océ TDS600 Multifunctional Digital System User Manual
Interrupt
Access
to
job
Page
Access to
ial
[18] Selecting the zoom factor
Note: You can also select the zoom factor from the ‘Custom’ section (if this
setting has been defined for this).
Select the exposure
You can use the ‘Exposure’ setting to correct for a lighter or darker original.
▼
Selecting the exposure setting
1 Select the ‘Image’ card in the ‘Original’ section.
2 Select the desired exposure level by using the Arrow buttons to the right of the
display (see figure 10 on page 41).
Interrupt
Access
to
job
Page
Access to
ial
[19] Selecting the exposure level
Note: You can also select the exposure level from the ‘Custom’ section (if this
setting has been defined for this).
Use the Océ TDS600 to copy
51
Background compensation
You can use the ‘Background compensation’ function with dark originals.
Select ‘Background compensation’ on, to get all information correct on the
copy. A grey background is visible.
If you select ‘Background compensation’ off, there is no grey background, but
weak lines will be affected.
Deliver originals after scanning
You can choose for delivery of the original at the front (rewind) or the rear side
of the scanner.
Attention: The ‘Rewind’ function is disabled if the optional copy delivery
tray is installed.
Note: If you are copying thick or very thin originals, originals that are
damaged or originals in a carrier sheet, it is recommended to use the output at
the rear side of the scanner to ensure correct delivery (‘Rewind’ function off).
▼
Select original delivery
1 Open the ‘Scanner’ card in the ‘Original’ section.
2 Press the ‘Rewind original’ function button to make your selection:
■
■
‘On’: Originals are delivered at the front side of the scanner. You have to
collect each original by hand.
‘Off’: Originals are delivered at the rear side of the scanner.
Interrupt
Access
to
job
Page
Access to
ial
[20] Using the Rewind original function to select original delivery at the front or the rear
52
Océ TDS600 Multifunctional Digital System User Manual
Define settings for the next original
You can define the settings for each original you want to copy. When
‘Automatic feed’ is enabled, you should bear in mind that the original is
automatically pulled into the scanner. If you want to be absolutely sure about
the settings that belong to an original, insert an original when the settings are
correct.
Note: To increase your versatility at the scanner input side, you can ask your
key operator to switch off Automatic feed. When using the scanner with
automatic feed off, you must press the start button for each new original to be
scanned. This offers you the possibility to change the settings for the next
original, even if you already put the original in place on the scanner feed table.
▼
Define settings for the next copy job
1 Select all settings required for the next original.
2 Insert the next original.
If ‘Automatic feed’ is off, press the start button.
If ‘Automatic feed’ is on, the original is fed automatically.
Note: You can enable or disable this function from the ‘Scanner’ card in the
‘Original’ section. See figure 15 on page 47.
Account logging
For accounting purposes, the system is able to log job information for each job.
The job identification attributes and the number of print jobs are logged in the
account file. For more information on account logging (see ‘Océ Power Logic:
Account logging’ on page 225)
Note: The account settings are only available if the accounting option is
enabled in the system configuration.
Use the Océ TDS600 to copy
53
[21] Accounting function option
▼
To select accounting
1 Open the ‘Scanner’ card in the ‘Original’ section.
2 Press the ‘Accounting’ function button to set ‘Accounting’.
3 Select the needed ‘Account id’ or ‘User id’ with the Arrow buttons to the right
of the display.
4 Enter the ‘Account ID’ or the ‘User ID’ with the numeric buttons.
Using the manual feed for copying
If you want to copy a job on a media type and/or size that is not available on
one of the paper rolls or sheet feeders, it can be convenient to manually feed
sheets instead of switching paper rolls or sheet feeders. The sheet feed is a
special slot just above the roll drawers on the engine. You can insert pre-cut
copy material in this slot, one sheet at a time.
Note: Only use media as specified in ‘List of available material types and sizes’
on page 309.
▼
Copying on pre-cut sheets
1 Open the ‘Sheet’ card in the ‘Print’ section.
2 Press the ‘Manual feed’ button. The display will look as follows:
54
Océ TDS600 Multifunctional Digital System User Manual
[22] Using the manual feed option
3 Select any required other settings.
4 Enter the number of copies using the numeric buttons.
5 Feed the original.
6 Press the start button.
7 Take your sheet of copy material to the side of the printer engine that contains
8
9
10
11
12
the sheet feed.
Use both hands to align the copy material in accordance with the format
indication and the sticker on the manual feed table.
Move the copy material forward in the nip of the roller. This must cause an
ample paper bulge over the full width of the page.
Hold the paper with both hands until the engine pulls in the first part of the
sheet.
The bulge will be reduced or it will disappear. A few seconds later the complete
sheet will be pulled in the printer.
Note: If the copy job requires more sheets, the display will ask you to feed
the next sheet.
Repeat steps 7 to 11 to complete the job.
Collect your output.
Note: The image will be printed on the side of the sheet which is facing up.
Define delivery of copies
Normally, your copies are delivered on the integrated receiving tray on top of
the Océ TDS600 Printer. However, you can specify to deliver your copies on
the optional copy delivery tray or on a folder. If you want to use your copy
delivery tray, you take the following steps.
▼
Deliver copies on the copy delivery tray
1 Open the ‘Finishing’ card in the ‘Print’ section.
2 Use the ‘Copy delivery’ function button to select the ‘Copy deliv. tray’ option.
Use the Océ TDS600 to copy
55
Interrupt
Access
to
job
Page
Access to
ial
[23] Delivering copies on the copy delivery tray
Stop a copy job
Pressing the Stop button interrupts the original transport.
▼
Stop a job
1 Press the Stop button.
The original transport is now stopped and you are prompted the open the
scanner cover in order to remove the original.
2 Open the cover, remove the original and close the cover again
You are now ready to start the next copy job.
56
Océ TDS600 Multifunctional Digital System User Manual
Océ TDS600
Multifunctional Digital System
User Manual
Chapter 4
Use the Océ TDS600 to scan
This chapter contains a description of the interface of the
Océ TDS600 Scanner and the actions that can be done on
its operator panel.
57
Before you begin
You must switch on both the Océ TDS600 scanner and the Océ Power Logic
controller before you can scan. You do not have to use a specific order in which
you switch on or off the Océ TDS600 scanner and the Océ Power Logic
controller.
Switch the Océ TDS600 scanner on
You switch on the Océ TDS600 scanner with the on/off switch. The switch of
the scanner is underneath the original feed table.
[24] On/off switch of the scanner
[25] On/off button on the Océ Power Logic controller
58
Océ TDS600 Multifunctional Digital System User Manual
▼
Switch the Océ TDS600 scanner on
1 Set the on/off switch at the front of the scanner to position ‘1’., (see figure 24).
The green LED will be on.
2 The message ’Ready to copy’ appears.
▼
Switch the Océ Power Logic controller on
1 Press the on/off button on the controller, (see figure 25).
2 Press the on/off button on the monitor.
The controller starts up.
Switch the Océ TDS600 scanner off
▼
Switch the Océ TDS600 scanner off
1 Set the on/off switch at the front of the scanner to position ‘0’.
▼
Switch the Océ Power Logic controller off
1 Select the ‘Shut down’ option from the Océ System Control Panel.
2 Switch off the controller and the monitor (see figure 25).
Wait at least 5 seconds before you restart the Océ TDS600.
Use the Océ TDS600 to scan
59
Scanner operator panel
The Océ TDS600 is a very user-friendly system. The scanner, in particular, is
very easy to operate. Basic scan jobs can be performed by simply pressing the
green (start) button on the scanner operator panel. Only if you want to perform
more complex scan jobs, you have to change the default scan settings with the
help of the other settings on the scanner operator panel.
The operator panel is located above the original feed. As you can see in this
diagram (see figure 26), the panel consists of a display in the centre surrounded
by a number of function, section and arrow buttons. To the left of the display,
you can find the ‘Stop’ button and below the display you can find the ‘Start’,
‘Numeric’ and ‘Correction’ buttons as well as the ‘Counter’ window.
This section consists of two parts. The first part explains the basic use of the
buttons. The second part deals with special use of the display. It describes how
to use the soft buttons above and along the sides of the display to define your
scan settings.
Section buttons
Arrow buttons
Stop
button
Function
buttons
Start button
Numeric buttons
[26] Scanner operator panel
60
Océ TDS600 Multifunctional Digital System User Manual
Correction button
Buttons
With the buttons on the operator panel you can make a number of settings for
the Océ TDS600.
The following buttons are available:
Button type
Start buttons
Numeric buttons
Correction button
Stop button
Interrupt button
Function
The green button marked with
is used to start the
feeding of the original, or to re-start the copy process.
The buttons with numbers on the lower part of the operator panel are used to enter numbers.
The orange button marked with C, located at the bottom
right of the operator panel. If you press the correction
button once, the copy counter is set to the default (probably ‘1’). If you press this button twice, all settings are
reset to their default values.
Pressing the red button to the left of the display stops the
copy process for the current original. You can stop the
original transport immediately when an original jam occurs.
Currently not in use.
Section, Function and Arrow buttons
Apart from the above mentioned buttons, the operator panel of the Océ
TDS600 Copier contains a number of other buttons. These include:
■ Section buttons
■ Function buttons
■ Arrow buttons.
The section buttons are the four buttons located above the display. These
buttons provide access to the ‘Custom’, ‘Original’, ‘Print’ and ‘File’ sections
on the display.
Each section contains several functions (cards). These can be accessed with the
help of the left most function button, which is also called the card selection
button.
Use the Océ TDS600 to scan
61
The five function buttons (below the display) allow you to select functions or
subfunctions within a card.
Finally, the arrow buttons can be used, like the numeric buttons, to define
numeric settings. The arrow buttons are also used for selecting subfunctions.
Sections on the operator panel
The operator panel of the Océ TDS600 Copier consists of the following
sections:
■ Custom
■ Original
■ Print
■ File
Custom section Upon start-up of the Océ TDS600 Copier, a number of default
settings are available from the ‘Custom’ section. These settings, which can
also be found in one of the other two sections, are the most commonly used
options on the Océ TDS600 Copier. The key operator can change the contents
of the ‘Custom’ section from the Océ Settings Editor on the controller (see
‘Custom card’ on page 153).
By default, the ‘Custom’ section includes the ‘Media’, ‘Input mode’ and
‘Zoom’ settings plus one or two others. This could be, depending on your
configuration and language settings, the ‘Folding’ (if you have a folder),
‘Language’ (if you work with more than one language) or ‘Exposure’ settings.
See figure 26 on page 60 for an example of the ‘Custom’ section.
Original section The ‘Original’ section contains all original-related settings,
divided over a number of cards. The following cards are available (top to
bottom):
■ Scanner
■ Image
■ Sheet
■ Feeding
Each card contains a number of specific options, as is shown below.
62
Océ TDS600 Multifunctional Digital System User Manual
[27] Original section of the Océ TDS600 Copier
Print section The ‘Print’ section contains all copy-related settings, divided
over a number of cards. The following cards are available (top to bottom):
■ Image
■ Layout
■ Finishing
■ Sheet
Each card contains a number of specific options, as is shown in figure (see
figure 28).
[28] Print section of the Océ TDS600 Copier
File section The ‘File’ section contains all scan to file related settings, divided
over a number of cards. The following cards are available (top to bottom):
Image
■ Destination
■
Note: The ’File’ section is only available if you have the scan to file option
installed.
Use the Océ TDS600 to scan
63
[29] ‘File’ section of the Océ TDS600 Copier
Change the operator panel language
It is possible to change the operator panel language. You can choose between
two preferred languages.
▼
To select a language
1 Open the ‘Scanner’ card in the ‘Original’ section.
Press the ‘Language’ function button to set the needed language.
Settings on the Océ TDS600 Copier operator panel
On start-up of the Océ TDS600 Copier, the ‘Custom’ card is displayed (see
figure 30).
The custom card gives access to the settings you defined in the Océ Settings
Editor. This contains a number of settings which are direct accessible. The key
operator defines the custom card in the Océ Settings Editor.
[30] The ‘Custom ‘ card on the scanner operator panel
64
Océ TDS600 Multifunctional Digital System User Manual
▼
Make settings
1 Press one of the Section buttons to activate the desired menu.
Note: The active menu is slightly moved downwards to visually separate it
from the other menus. Apart from that, a shadow highlighting effect is used
for extra highlighting.
2 Press the Card selection button to select the appropriate card. You can switch
cards (from bottom to top) by pressing the button again.
Note: Here, too, the active card is visually separated from the other cards
and given a shadow highlighting effect for extra highlighting.
3 Select the desired function values in one of the following ways:
■ Simple (non-numeric) selection: press the Function button to activate the
desired (non-numeric) value. The selected value is preceded by a ‘●’ symbol.
The ‘Background compensation’ setting demonstrated in figure 27 on
page 63 is an example of this.
■ Long list selection: if you want to select a value from a list of options that can
not be fully displayed on the panel, you first activate the selection triangles
next to the specified option (the dotted line around this selection is changed
into an uninterrupted line and the selection triangles are no longer dimmed),
which indicate that there are additional options available and then select one
of the non-displayed values with the Arrow buttons. The ‘Original type’
setting demonstrated in figure 27 on page 63 is an example of this.
■ Numeric selection: activate the selection triangles and select the desired
value with the Arrow buttons or with the numeric buttons. The ‘Brightness’
setting demonstrated in figure 27 on page 63 is an example of this.
Also a combination of simple selection and numeric selection is possible, as is
shown in the ‘Cut length’ setting (see figure 28 on page 63).
Note: The Up arrow and Down arrow buttons can be used to increase or
decrease the active value by 1; the Left arrow and Right arrow buttons
increase or decrease the active value by 10. Exception to this rule is the
selection of zoom values. Here, the Left arrow button can be used to browse
through the predefined reduction steps and the Right arrow button to
browse through the predefined enlargement steps.
Use the Océ TDS600 to scan
65
Océ Scan Logic
Océ Scan logic is an option which enables you to scan a document to a file for
later (re)use. You enable scan to file via a password (see ‘Scan Logic
password’ on page 190).
You use scan to file in order to:
■ print documents at a later time
■ archive documents
■ email documents
■ reuse the information documents contain in another application
A scan to file is made at the Océ TDS600 scanner. On the scanner operating
panel you can, among other things, choose at which resolution you want to
scan and where you want to store your file.
The result of the scan to file can be stored on the controller (temporary store)
or directed forward towards a network destination via Window’s Network
Neighbourhood.
Océ View Station LT, linked to the Océ Scan Manager application, enables you
to automatically or manually view the scanned documents afterwards.
Scan clicks
The Océ TDS600 counts the area of media that you scanned during scan to file
operations. You view the scan click count in the bottom right corner of the Océ
Scan Manager (see figure 31 on page 67).
The scan click count is measured in square feet or square meters. You set the
measurement unit in the Océ Settings Editor (see chapter , ‘Measurement’ on
page 88).
66
Océ TDS600 Multifunctional Digital System User Manual
[31] Scan click count in the Océ Scan Manager
Use the Océ TDS600 to scan
67
Make a scan to file
To scan an original to file is an easy operation. If the settings (see ‘Settings for
scan to file’ on page 70) are correct, and the destinations have been set in the
Océ Scan Manager (see ‘Océ Scan Manager’ on page 75), the only thing you
have to do is press the start button
on the scanner.
▼
Scan to file
1 Place your original face-down, right aligned along the original guide.
2 Select the appropriate original type.
3 Select the ‘Destination’ card in the ‘File’ section.
[32] ‘Destination’ card in the file section
4 Press the section button ‘File’, to select ‘File mode’ On.
The status message displays: Ready to scan to file.
5 Select a Destination (see ‘Destinations’ on page 78).
6 Press the start button
.
The original is scanned.
A status message displays (see figure 33 on page 69):
“Scanning job “Scan job number X””
“File scan22.tif”
68
Océ TDS600 Multifunctional Digital System User Manual
[33] Feedback during scan to file
7 On the controller Océ View Station LT starts automatically, showing the result
of the scan (see figure 34).
[34] Océ View Station LT
Use the Océ TDS600 to scan
69
Settings for scan to file
The settings regarding scan to file on the scanner operating panel are divided
into two cards: Destination and Image.
Destination card:
■ Destination
■ File type
■ TIFF subformat or PDF compression
[35] Scanner operating panel: Destination card
Image card:
■ Resolution
■ Zoom
■ Optimization
■ Mirror
[36] Scanner operating panel: Image card
70
Océ TDS600 Multifunctional Digital System User Manual
File mode
File mode can be on ‘File’, ‘Print’ or ‘File with check print’. ‘Print’ means
normal copy mode. ‘File’ results in scan to file. Choose ‘File with check print’
to scan to file with a check print. A check print is a print of the scanned
original, ensuring consistency with a later re-print.
Note: The Océ TDS600 system does not allow you to change the ‘File mode’
setting during a set from ‘On’ to ‘Off ’ and the other way round. However
changing from ‘On’ to ‘On with check print’ and vice versa is allowed.
Note: In scan to file mode the automatic behaviour is optimised for scanning.
Turning check plot on or off does not influence this automatic behaviour
Destination
You can store your scan either in the temporary store on the controller or on a
network destination. You can define up to ten destinations in the Océ Scan
Manager application. On the scanner operating panel you can choose one of
these destinations.
▼
Select a destination
1 Press the function button to select destination 1 until 4.
2 To select destination four till ten, initially you have the select destination four.
Press the arrow buttons to select destination 4 until 10.
Note: The names of the destinations can be any. However, for your
convenience, you are able to define understandable names in the Océ Scan
Manager application (see ‘Create a destination’ on page 78).
File type
To define the internal organisation of the scanned files, choose between TIFF
(Tagged Image File Format) and CALS-I (Continuous Acquisition and
Life-Cycle support).
TIFF describes image data that typically comes from scanners, frame grabbers,
and paint- and photo-retouching programs. The purpose of TIFF is to describe
and store raster image data. A primary goal of TIFF is to provide a rich
Use the Océ TDS600 to scan
71
environment within which applications can exchange image data. This
richness is required to take advantage of the varying capabilities of scanners
and other imaging devices. For example TIFF supports lossless image
compression. Though TIFF is a rich format, it can easily be used for simple
scanners and applications as well because the number of required fields is
small.
CALS is an industry strategy for transition of paper-intensive processes to
highly automated, integrated processes for defence system acquisition, design,
manufacturing, and life cycle support.
PDF Portable Document Format (Adobe® Postscript® 3™ /PDF) is a file
format that has captured all the elements of a printed document as an electronic
image that you can view, navigate, print or forward.
Tiff subformat
Within the ‘Tiff subformat’ option, you can define the ‘Organization’ and
‘Compression’ of the file.
Organization can be (select with the arrow buttons):
■
■
■
Striped
Tiled
Raw
Note: Only choose ‘Striped’ or ‘Tiled’ when you are sure you can use these
organizations afterwards. Choose ‘Raw’ in any other case.
Compression can be (select with the arrow buttons):
■
■
■
Group 4
Group 3
None
Note: Only choose ‘Group 4’ or ‘Group 3’ when you are sure you can use these
compressions afterwards. Choose ‘None’ in any other case.
Note: If you scan grayscales or dark originals then use Group 3 compression.
In these cases group 4 can increase the file size.
72
Océ TDS600 Multifunctional Digital System User Manual
Note: ‘Group 4’ or ‘Group 3’ are compression methods which are optimised
for text and vector drawings. If you choose these compressions when scanning
a photo with many grayscales these compressions can result in a negative
compression: the file size increases instead of decreases. So use these
compressions with care.
PDF compression
Within the ‘PDF compression’ option, you can define the ‘Compression’ of the
file.
Compression can be (select with the arrow buttons):
■
■
Group 4
None
Note: Only choose ‘Group 4’ when you are sure you can use this compression
afterwards. Choose ‘None’ in any other case.
Resolution
The Océ TDS600 scan to file option allows you to scan at the following three
resolutions:
■
■
■
200 dots per inch (dpi)
300 dpi
400 dpi
The higher the resolution the better the image quality. Higher resolution also
leads to larger file sizes. The default value is 200 dpi.
Zoom
The ‘Zoom’ option allows you to scale while scanning to a file. When you set
‘File mode’ to ‘On’ then the automatic ‘Zoom’ setting will result in ‘1:1’. You
can change this default setting into one of the following three settings:
Custom This option let’s you specify a custom zoom value. You can enter a
range from 25% through 400%. This value also shows the zoom value when
the option ‘Automatic’ is chosen.
Use the Océ TDS600 to scan
73
1:1 With this option selected, scan to file will result in an image that is exactly
the same size as the original. ‘Zoom’ displays 100%.
Automatic Selecting ‘Automatic’ always results in a 1:1 scan to file.
Optimization
There are two ways to epitomise a scan to file.
Scan quality epitomises for the best image quality. The scan resembles the
original as close as possible.
File size optimizes for better compression. Generally resulting in a smaller file
size.
Mirror
You can use the ‘Mirror’ option to scan a horizontally mirrored image of an
original. Mirroring is performed in the vertical axis.
74
Océ TDS600 Multifunctional Digital System User Manual
Océ Scan Manager
The Océ Scan Manager is an application available only locally on the
controller. With the Océ Scan Manager you can configure the destinations for
scan to file. To increase your productivity you can define automatic file
naming. This way you can do batch scans without operating the controller.
During scan to file, Océ Scan Manager displays the filename and the status of
the file generation process. When the scan is completed a view of the scanned
image is automatically displayed on the controller.
Figure 37 on page 75 shows the Océ Scan Manager application. It has a
Microsoft Windows ‘Explorer’ look and feel. The left part displays a tree view
containing folders containing destinations. The right part displays a table view
containing the content of the folder currently selected. In 37 on page 75 folder
‘Next Dest(8)’ is selected.
[37] Overview of the Océ TDS600 Scan Manager application
Use the Océ TDS600 to scan
75
Note: Not all options are available to all users. You must log into a particular
user mode to perform specific tasks with Océ TDS600 Scan Manager (see
‘User modes’ on page 117).
Tree view
The tree view displays:
■ the system name
■ the collapsible destination tree
■ the collapsible temporary store tree.
If you scan to a particular destination, that destination is displayed bold and
the corresponding icon changes. The destination you scanned last to, is
displayed bold.
If you select a destination, to view it’s content in the right table view, this
destination will show selected. Figure 37 on page 75 shows that the destination
‘Temp10’ is selected.
If for any reason a scan to file cannot be sent to the appropriate remote
destination, the file will be stored in the ‘Unsent’ folder.
Table view
The table view (on the right side of figure 37 on page 75) displays the
filenames of the files in the opened destination or temporary folder.
Each file has the following information:
■ Name
■ Size
■ Type
■ Modified
■ Resolution
■ Image size.
If the currently viewed destination is the one you are scanning to, then the
scanned file will appear at the end of the table. If you currently view another
destination than the one you are scanning to, then the scanned to destination is
displayed bold.
76
Océ TDS600 Multifunctional Digital System User Manual
It is possible that there are more files in the table than fit on screen. The most
recent scanned file appear at the end of the table. Under these circumstances it
is possible that your most recent scanned file is not visible in the table on
screen. In this case you can update the table view.
▼
Update the table view
1 From the ‘View’ menu select ‘Refresh’ or click the ‘Refresh’ button on the
toolbar (see figure 38). If the opened destination is also the one which is
currently scanned to, then the view is automatically updated.
[38] ‘Refresh’ button on the toolbar
Use the Océ TDS600 to scan
77
Actions from the Océ Scan Manager
The Océ TDS600 Océ Scan Manager enables you to make settings regarding
scan to file. You can edit and view the destination properties. You can also view
the properties of scanned files.
Destinations
A destination is a place where you scan your file to. You can create, delete and
lock destinations. You can also define automatic filenaming to ensure your
files get the desired names.
A destination can also be a file server or a PC of an end user. It is better to select
remote destinations instead of the local ones. The local destinations are
temporary and cannot contain a lot of scan files.
▼
Create a destination
1 Select ‘Destinations’ in the tree view.
2 Open the ‘File’ menu and select ‘New’ or click on the ‘New’ button on the
toolbar (see figure 39).
[39] ‘New’ button on the toolbar
78
Océ TDS600 Multifunctional Digital System User Manual
The following dialogue box appears (see figure 40):
[40] ‘Destination properties’ window
3 Enter a logical name for the destination in the ‘Name’ text box.
This logical name also appears on the scanner panel (see figure 32 on page 68).
4 Choose a destination type from the ‘Type’ drop-down list box.
5
6
7
8
9
You can choose between File Transfer Protocol (FTP), Server Messages Block
(SMB) or local storing in the temporary store on the controller.
Enter the name of the system you want to scan your files to in the ‘System’ text
box.
Enter a path of the target folder in the ‘Path’ text box. You can also click the
‘Browse’ button to select the path.
Note: This is only possible if you choose ‘On the controller’ as ‘Type’ (see
step 4).
Enter, if required, a user name for the network destination in the ‘User name’
textbox.
Enter, if required, the appropriate password for the network destination in the
‘Password’ textbox.
Click Ok to accept the destination properties.
Note: You can create a maximum number of 10 destinations.
Use the Océ TDS600 to scan
79
A key operator can determine whether a destination can be modified by an
anonymous user. This is done by locking and unlocking a destination.
▼
Lock a destination
1 Select a destination.
2 Open the ‘File’ menu and select ‘Properties’.
3 Check the ‘Locked’ check box.
4 Click Ok to accept the destination settings.
The destination properties are now locked.
Note: This option is only available if you are logged on as a Key operator (see
‘User modes’ on page 117).
▼
Unlock a destination
1 Select a destination.
2 Open the ‘File’ menu and select ‘Properties’.
3 Uncheck the ‘Locked’ check box.
4 Click Ok to accept the destination settings.
The destination properties are now unlocked.
Note: This option is only available if you are logged on as a Key operator (see
‘User modes’ on page 117).
▼
Delete a destination
1 Select a destination.
2 Open the ‘File’ menu and select ‘Delete’ or click the ‘Delete’ button on the
toolbar (see figure 41).
[41] ‘Delete’ button on the toolbar
The selected destination is deleted.
Note: This option is only available if you are logged on as a Key operator or
as a Repro operator.
Note: You are not able to delete the last destination.
▼
Define file name
1 Select a destination.
2 Open the ‘File’ menu and select ‘Properties’.
The ‘Destination properties’ screen appears as in figure 40 on page 79.
3 Enter a name in the ‘Base name’ textbox.
80
Océ TDS600 Multifunctional Digital System User Manual
Note: The ‘Base name’ may contain ‘###’ for automatic file naming. The
‘###’ will be replaced by an ascending number. You may place as many
dots in the ‘Base name’.
4 Check or uncheck the ‘Add appropriate file extension’ check box to add or
respectively leave out an appropriate file extension. The file extension can be
set in the Océ Settings Editor see page 225.
5 Click Ok to accept the settings.
▼
Set / Change destination properties
1 Select a destination.
2 Open the ‘File’ menu and select ‘Properties’ or click the ‘Properties’ button on
the toolbar (see figure 42).
[42] ‘Properties’ button on the toolbar
The ‘Destination properties’ screen appears as in figure 40 on page 79.
3 Change the destination properties as described in ‘Create a destination’ on
page 78.
Scanned files
The right pane of the Océ TDS600 Scan Manager contains the scanned files
and additional information about the files. You can view, print and delete these
files. You can also view the file properties.
▼
View a scanned file
1 Select a file in the right pane.
2 Open the ‘File’ menu and select ‘View’ or click the ‘View’ button on the
toolbar (see figure 43).
[43] ‘View’ button on the toolbar
Océ View Station LT (see ‘Océ View Station LT’ on page 86) starts up and
displays the file.
Note: When you scan to file the controller Océ View Station LT starts
automatically, showing the result of the scan.
▼
Print a scanned file
1 Select a file in the right pane.
Use the Océ TDS600 to scan
81
2 Open the ‘File’ menu and select ‘Print’ or click the ‘Print’ button on the toolbar
(see figure 44).
[44] ‘Print’ button on the toolbar
The selected file will be printed with the default settings as defined in the Océ
Settings Editor (see ‘Job-related settings for printing’ on page 168).
▼
Delete a scanned file
1 Select a file in the right pane.
2 Open the ‘File’ menu and select ‘Delete’ or click the ‘Delete’ button on the
toolbar (see figure 45).
[45] ‘Delete’ button on the toolbar.
The selected file will be deleted.
Note: This option is only available if you are logged on as a Key operator
or as a Repro operator.
▼
View properties of a scanned file
1 Select a file in the right pane.
2 Open the ‘File’ menu and select ‘Properties’ or click the ‘Properties’ button on
the toolbar (see figure 46).
[46] ‘Properties’ button on the toolbar.
The following window appears (see ‘‘Scanfile properties’ window’ on
page 83):
82
Océ TDS600 Multifunctional Digital System User Manual
[47] ‘Scanfile properties’ window
3 Click Ok to close the ‘Scanfile properties’ window.
▼
Automatically view a file after scanning
You can choose to view a file automatically after scanning:
1 Open the ‘System’ menu and select ‘Auto view’.
Whenever you scan to file, Océ View Station LT will start automatically and
show the scanned file.
Manage the temporary store
When you regularly scan originals to a file, many files are created in the
temporary store. You can clean up the temporary store manually or
automatically.
To manually delete the files in the temporary store select the ‘Purge’
command from the ‘System’ menu.
To automatically delete the scanned files from the temporary store, you must
make some settings in the Océ TDS600 Settings Editor (see ‘Océ Power Logic:
Account logging’ on page 225).
Use the Océ TDS600 to scan
83
How to retrieve scanned files?
The scanned files are stored in the logging directory of the controller. You can
retrieve your files from the local host via File Transfer Protocol (FTP). FTP can
be done:
1 via an internet browser or
2 via a dos box.
When you scan to file your files will be stored in the destination you set. This
can be on the local controller or on a remote system. You can retrieve your files
from the local host via File Transfer Protocol (FTP) (see figure 48). Also if
during scanning to a remote destination, something goes wrong, you can
retrieve your files from the local host.
FTP
Get files via
Remote client
Windows 95 / 98
Get files via
FTP
Local host (Controller)
Windows NT 4.0
Remote client
Windows NT 4.0
[48] How to retrieve scan files?
84
Océ TDS600 Multifunctional Digital System User Manual
[49] The tempstore directory with the scanned files on the Océ TDS600 system
▼
Get files via FTP
1 Launch an FTP client.
2 Enter the ‘ftp’ command.
A DOS box now appears with the FTP prompt.
3 Enter the ‘Open’ command followed by either the registered name of the Océ
4
5
6
7
8
9
Power Logic Controller or the IP address (for example: 194.2.66.146) to
connect to the Controller and press Enter: ‘open 194.2.66.146’.
Note: Instead of performing steps 2 and 3 you could also enter “ftp
host_name” in the FTP client.
The connection with the Controller is now established and a window appears
asking you for a user name.
Enter your user name ‘anonymous’, and enter as your password also
‘anonymous’.
A connection is now set up for the default user ‘anonymous’.
Note: As there is no registered user, you can simply press Enter to initiate
the connection.
Set the transmission mode to binary by entering ‘binary’.
Go to the ‘tempstore’ directory using the following command: ‘cd tempstore\’.
Go to the ‘scan’ directory if you want to retrieve a file from a destination on
the local host,
or
go to the ‘unsent’ directory if you want to retrieve a file from ‘unsent’ folder
on the local host.
Get the data file (for example: bugatti.tif) via the ‘get’ command:
‘get bugatti.tif’.
Quit FTP by entering the ‘bye’ command.
Use the Océ TDS600 to scan
85
Océ View Station LT
With Océ View Station LT you can view your scanned files. This can be
automatically (see ‘Automatically view a file after scanning’ on page 83) after
scanning or via Océ Scan Manager (see ‘Print a scanned file’ on page 81).
Océ View Station LT has the following menu’s (see figure 50):
■ File
■ View
■ Preference
■ Help
[50] Océ View Station LT
Note: You can view earlier scanned files, if they are scanned to the Océ Power
Logic Controller. You can not view scans that are sent to remote destinations,
when the next scan is made.
86
Océ TDS600 Multifunctional Digital System User Manual
Menu options
File menu
Command
Close
Properties
What does it do?
Closes the active document.
Provides technical information about, and allows you to change
certain properties of, the document.
View menu
Command
Fit
1:1
Magnify
Reduce
Refresh
Invert
Mirror
Rotate 90 CCW
Rotate 90 CW
Rotate 180
Sample
Negate
Scale to gray
Monochrome
What does it do?
Scales the image to fill the window.
Displays the image at a 1:1 scale factor.
Zooms into the page.
Zooms out of the page.
Redraws all windows displaying the active document.
Reverses the black and white parts of the image.
Mirrors the image.
Rotates the image 90 degrees counter-clockwise.
Rotates the image 90 degrees clockwise.
Rotates the image 180 degrees.
When active, displays only a sample of bilevel raster pixels.
Reverses the raster image pixels on display and changes which
are dominant for scaling.
When active, displays the active bilevel raster image as though
it were a greyscale image.
An image or screen having only background and foreground
colours. Same as black-and-white or bilevel.
Preference menu
Command
View ribbon
Status bar
What does it do?
View Ribbon displays and removes the ribbon that contains buttons. The View Ribbon appears, by default, below the menu bar.
It serves as a fast means of selecting some File, View, and Preference menu commands.
Status Bar displays and removes the Status Bar at the bottom of
the Océ View Station LT window. The Status Bar displays the
pointer co-ordinates and a status line.
Use the Océ TDS600 to scan
87
Preference menu
Reference
Reference displays or removes a small, usually floating window. This window displays the entire current page in miniature.
The crossed box inside the Reference window indicates which
part of the page is displayed in the document window.
By moving or resizing the crossed box, you change which area
of the page is displayed.
Displays or removes the Detail window.
When active, allows you to measure lines and areas on the image.
Detail
Measurement
Help menu
Command
About
What does it do?
Shows information about Océ View Station LT.
Note: You can retrieve help about Océ View Station LT via Océ Scan Manager.
Function buttons
Below the menu’s there are function buttons in a ribbon. This ribbon can be
turned on and off (see ‘View ribbon’ on page 87).
1
2
3
4
5
6
7
8
9
10
11
12
[51] Function buttons in Océ View Station LT
Figure 51 displays the buttons:
1 Invert: Reverses the black and white parts of the image.
2 Fit: Scales the image to fill the window.
3 1:1: Displays the image at a 1:1 scale factor.
4 Magnify: Zooms into the page.
5 Reduce: Zooms out of the page.
6 Mirror: Mirrors the image.
7 Rotate 90 CCW: Rotates the image 90 degrees counter-clockwise.
8 Rotate 90 CW: Rotates the image 90 degrees clockwise.
9 Rotate 180: Rotates the image 180 degrees.
10 Measurement When active, allows you to measure lines and areas on the
image.
88
Océ TDS600 Multifunctional Digital System User Manual
11 Reference. This small floating window displays the entire current page in
miniature for reference.
12 Displays or removes the Detail window.
View error
When the memory is almost full it can occur that the viewer does not show the
scanned file. Instead it shows a red border with a red cross (see figure 52).
[52] Error view in Océ View Station LT
Use the Océ TDS600 to scan
89
90
Océ TDS600 Multifunctional Digital System User Manual
Océ TDS600
Multifunctional Digital System
User Manual
Chapter 5
Special copy and scan jobs
This chapter describes the special jobs such as non
standard sizes and how to improve the print quality.
91
Non-standard size originals
The scanner of the Océ TDS600 system automatically detects the width of the
inserted original. For European sizes, for example, it detects whether the width
is A0, A1, A2, A3, A4, 500 mm, or 700 mm. The Océ TDS600 system uses a
memory table that contains all standard width - standard length combinations
to predict the length of the original. The scanner also measures the real length
of each original while it is transferred through the scanner.
Note: If you are copying thick, thin or damaged originals or originals in a
carrier sheet, it is recommended to use the output at the rear side of the
scanner to ensure correct delivery (see ‘Deliver originals after scanning’ on
page 52).
The scan width
To prevent information loss when copying a non-standard original, you can
select the ‘non-standard’ scan width. The scanned width will then be larger
than the original width. It is also possible to define the scanned width and
length yourself.
▼
Define the scan width
1 Open the ‘Sheet’ card in the ‘Original’ section.
2 Press ‘Scan width’ to select the required setting:
■
■
■
92
Standard. This option must be used to copy a standard-size original.
Non-standard. This option can be used to copy a non-standard original. The
scanned width will be larger than the original width (to the next larger,
standard size), to prevent information loss.
Numeric. You can define the scan width yourself, using the higher/lower
buttons or the numeric buttons.
Océ TDS600 Multifunctional Digital System User Manual
[53] Selecting ‘Non-standard’ scan size
The copy size
The copy width depends on the selected roll or sheet feeder or the custom
defined scan width, whereas the copy length depends on the selected cut
option.
▼
Copy non-standard size originals
1 Press the ‘Media’ button in the ‘Sheet’ card of the ‘Print’ section to select
‘Automatic’, or to select the roll or sheet feeder with the correct width.
................
[54] Selecting roll or sheet feeder in the ‘Custom’ section
Note: The media can also be selected directly from the ‘Custom’ section.
Note: When ‘Automatic’ is selected, the roll or sheet feeder that is used is
indicated by the ‘ ❍ ’ symbol.
2 Press the ‘Cut length’ function button to select the required cut option:
■ Standard, which cuts copies at a standard length.
■ Synchro, which cuts copies at the end of the image. The system cuts at the
measured length of the original times the zoom factor.
■ Custom (numeric), which cuts copies on a specified length. You can define
the copy length yourself, using the arrow buttons or the numeric buttons.
3 Make other settings as required.
Special copy and scan jobs
93
4 Feed the original.
Refer to table ‘Standard folding settings’ on page 290 for more information
about folding copies of non-standard sized originals.
Scanning originals with filing strip
Left hand side You can adjust the original guide of the scanner to remove a
filing strip along the left hand side (right hand side in the feed direction,
face-down). This side can be reduced by up to 60 mm (see figure 55).
Face up:
Left hand side
- 40 mm
Face down:
right hand side
in feed direction
[55] Example of adjusting the left hand side of an original
▼
Copying with removed filing strip along the left hand side
1 Press the handle underneath the original guide, and move it to the right.
[56] Adjusting the original guide to add or remove a filing strip along the left hand side
94
Océ TDS600 Multifunctional Digital System User Manual
2 Make all required settings.
3 Insert the original face down, right aligned with the original guide on the
original feed table.
Right hand side You can also remove the filing strip along the right hand side
(left hand side in the feed direction, face-down) by selecting a specific roll or
sheet feeder. If the paper width of the original is larger than the paper width of
the selected roll or sheet feeder, the remaining paper part on the right hand side
will not be scanned (see figure 57).
Face up:
Right hand side
- 40 mm
Face down:
left hand side in feed
direction
[57] Example of removing the right hand side of an original
▼
Copying with removed filing strip along the right hand side
1 Select the required media in the ‘Custom’ section on the operating panel.
2 Select the 100% value for the ‘Zoom’ function.
3 Make other settings as required.
4 Feed the original.
Leading and trailing edge It is also possible to adjust the length of both the
leading and trailing edge to eliminate or add a filing strip. Leading and trailing
edges can be extended up to 400 millimetres (mm) or shortened up to 100 mm
(see figure 58).
Special copy and scan jobs
95
Leading edge:
- 40 mm
Trailing edge:
- 40 mm
Leading edge:
+40 mm
Trailing edge:
+ 40 mm
[58] Example of adjusting the leading/trailing edge of an original
▼
Copy with removed filing strips along the leading and trailing edge
1 Open the ‘Sheet’ card in the ‘Original’ section.
2 Press the ‘Remove strip’ function button.
[59] Removing strip
3 Adjust the values in mm for the trailing edge using the numeric or arrow
buttons.
4 Press the ‘Remove strip’ function button again.
5 Adjust the values in mm for the leading edge using the numeric or arrow
buttons.
6 Make other settings as required.
7 Feed the original.
96
Océ TDS600 Multifunctional Digital System User Manual
▼
Copy with added filing strips along the leading and trailing edge
1 Open the ‘Layout’ card in the ‘Copy’ section.
2 Press the function button ‘Add strip’ function button.
[60] Adding strip
3 Adjust the values in mm for the trailing edge using the numeric or arrow
buttons.
4 Press the function button ‘Add strip’ again.
5 Adjust the values in mm for the leading edge using the numeric or arrow
buttons.
6 Make other settings as required.
7 Feed the original.
Special copy and scan jobs
97
Improving the image quality
You can improve the image quality by modifying the exposure setting, or
making use of special functions. You will learn how to switch on and off
automatic background compensation, how to use the lighter and darker buttons
to achieve the best possible copy quality, or how to adjust the brightness based
on the type of image you want to copy.
Brightness
You can change the brightness of a print or copy by modifying the exposure of
the scanner. The exposure can be set to lighter and darker.
▼
Set the exposure
1 Press the ‘Exposure’ function button and use the arrow buttons to set the
exposure as desired.
Note: The Up and Down arrow buttons can be used to gradually increase
or decrease the exposure setting; the Left or Right arrow buttons can be
used to go to the highest or lowest available exposure level at once. If you
want to go from any negative value to the highest possible positive value,
or vice versa, you have to press the appropriate Left or Right button twice.
Automatic background compensation
The automatic background compensation will provide a good quality copy
from a large variety of originals. The automatic background compensation
setting, which is switched on (by default), ensures the production of
background-free copies of most line drawings.
98
Océ TDS600 Multifunctional Digital System User Manual
[61] Brightness settings
▼
Set the automatic background compensation
1 Open the ‘Image’ card in the ‘Original’ section.
2 Press the ‘Background compensation’ function button if this function is
disabled.
When copying extremely light or dark originals, or originals with unequal
background density, the result may not meet your requirements (e.g. too much
background). In such cases you can manually adjust the brightness (see
figure 61).
Original type The Océ TDS600 Copier allows you to adjust the exposure
setting according to the type of image on the original. There are six original
types available. Select a suitable mode according to the original (see figure 61
on page 99).
▼
Set the original type of your image
1 Press the ‘Original type’ function button to select the appropriate image type:
By default ‘Lines/text’ is selected with ‘Background compensation’ enabled.
This is the most suitable setting for originals that contain characters and line
art.
■ Press the ‘Original type’ function button to select ‘Photo’ when the original
consists of a combination of characters, line art and picture images.
Note: If you select ‘Photo’ or ‘Grays&lines’ , the ‘Background
compensation’ will be switched off automatically, by default.
■ Press the ‘Original type’ function button to select ‘Grays&lines’ when the
original contains many gray scales and lines.
■ Press the ‘Original type’ function button to select ‘Blue print’ when you want
to copy an original with an image in ‘negative’ (image in white on dark
background). The copy will be ‘positive’ (image in black on white
background).
■
Special copy and scan jobs
99
■
■
Press the ‘Original type’ function button to select ‘Printed matter’ when you
want to copy an original that is already a print itself, containing raster
information.
Press the ‘Original type’ function button to select ‘Dark orig’ when the
original has an extremely dark background (i.e. low contrast).
2 Make other settings as required.
3 Feed the original.
100
Océ TDS600 Multifunctional Digital System User Manual
Editing functions
The Océ TDS600 Copier has editing functions. You set the functions before
you scan the original.
Note: You can select only one edit function at a time.
Auto align
To align the image automatically to a side of the print you can use the
alignment functions of the Océ TDS600 scanner. Alignment is possible in the
following ways (see figure 62):
Top Left
Top Middle
Top Right
Middle Left
Middle
Middle Right
Bottom Left
Bottom Middle
Bottom Right
[62] Auto align options with standard cut option active
▼
Select default settings for auto shifting with standard cut option
Note: You must switch on standard cut length to get copies like the one in
the example of illustration 62 above.
1 Open the ‘Layout’ card in the ‘Print’ section.
Special copy and scan jobs
101
[63] Automatic shift with the ‘Align’ function
2 Press the ‘Align’ function button and select a horizontal alignment value (Left,
Middle or Right) with the arrow buttons.
3 Press the ‘Align’ function button again and select a vertical alignment value
(Top, Middle, or Bottom) with the arrow buttons.
Note: If you select ‘Center’, make sure the original width is specified as
follows (see ‘The scan width’ on page 92):
■ ‘Standard’ if a standard sized original is used
■ The exact original width (numeric) if a non standard sized original is used.
4 Feed your original.
Note: You must switch on standard cut length to get copies like the one in the
example of illustration 62 above. If synchro cut length has been switched on,
the result will be as follows:
Top Left
Top Middle
Top Right
Middle Left
Middle
Middle Right
Bottom Left
Bottom Middle
Bottom Right
[64] Auto shift options with synchro cut option active
In ‘Shift the image’ on page 103 you can read how to define the exact place of
your image on the page.
102
Océ TDS600 Multifunctional Digital System User Manual
Shift the image
In some cases the margin may be too narrow to accommodate filing strips
without loss of information. To avoid this, you can shift the image in horizontal
and/or vertical direction, as shown below.
[65] Example of shifting the image
▼
Shift the image
1 Open the ‘Layout’ card in the ‘Print’ section.
[66] Image shift
2 Press the ‘Shift’ function button and select a horizontal shift value by pressing
the numeric or arrow buttons until the required distance is set to shift the image
to the left or to the right.
Special copy and scan jobs
103
Note: When you shift the image horizontally, you can only shift to the left
or to the right.
3 Press the ‘Shift’ function button again and select a vertical shift value by
pressing the numeric or arrow buttons until the required distance is set to shift
the image upwards or downwards.
Note: When you shift the image vertically you can only shift up or down.
4 Make other settings as required.
5 Feed the original.
Note: You can use horizontal and vertical shift simultaneously.
Mirror-image copies
With the Océ TDS600 Copier you can make a mirror-image copy of an
original, as shown in the next figure:
[67] Example of a mirror-image copy
▼
Make mirror-image copy
1 Open the ‘Image’ card in the ‘Print’ section.
Roll 2
Process
type
[68] Mirror-image
2 Press the ‘Mirror’ function button to enable the ‘Mirror’ function.
3 Make other settings as required and feed the original.
104
Océ TDS600 Multifunctional Digital System User Manual
Océ TDS600
Multifunctional Digital System
User Manual
Chapter 6
Océ Print Exec LT Web
The Océ Print Exec LT Web is a job submission application
which allows you to send print jobs to a printer from your
web browser.
105
Introduction to Océ Print Exec LT Web
Océ Print Exec LT Web is optional software which allows you to create and
send a set of plots or drawing files to an Océ TDS printer. You can send the
settings for these jobs from your workstation, using your web browser. It also
provides basic feedback on the system, media and the print queue.
Basic concepts
The role of Océ Print Exec LT Web is to allow you to:
■ Get information on the printer configuration
■ Get information on the available media
■ Get information on pending jobs in the printer queue
■ Assemble up to 10 documents in a job
■ Prepare the basic settings which will be used for the printer
■ Submit the job to the printer.
Requirements for the user browser software
■
■
Microsoft Internet Explorer 4.01 (Service Pack 2) or higher
Netscape Navigator 4.08 or higher
Requirements for the network infrastructure
■
■
TCP/IP network, which connects the printer and the end user workstation
Port 8001 must not be filtered.
How to connect to the Océ Print Exec LT Web
▼
Connect to the Océ Print Exec LT Web
1 Enable Océ Print Exec LT Web in the Océ Settings Editor (see ‘Océ Print Exec
LT Web’ on page 191).
2 Type the following URL in your browser: http://Printername
106
Océ TDS600 Multifunctional Digital System User Manual
where ‘Printername’ is the domain network server (DNS) name or IP address
of the printer (see figure 69).
[69] Océ Print Exec LT Web
▼
Add new jobs
1 Click ‘New job’
A form appears (see figure 70 on page 108).
2 Click ‘Browse’ to add documents
3 Click ‘Submit’ when you are ready.
Océ Print Exec LT Web
107
[70] Job composition
For more information please consult the on-line help.
108
Océ TDS600 Multifunctional Digital System User Manual
Océ TDS600
Multifunctional Digital System
User Manual
Chapter 7
Océ Power Logic: Remote Logic
This chapter describes how to install and use Océ Remote
Logic.
109
Introduction
Océ Remote Logic enables you to:
■ View system status (Océ System Control Panel).
■ Manage print jobs (Océ Queue Manager).
■ Change settings (Océ Settings Editor).
Océ Remote Logic has five different user modes (see ‘User modes’ on
page 117). These user modes are meant to limit access to the special functions
to authorised users. Log in to get access to one of the user modes.
Change the display language, to operate the Océ Remote Logic in your
language. Use the help system if you do not know how to work with the
applications.
Océ Remote Logic is available on the local host and as a remote version except
for Scan Manager which is only available on the local host.
Océ Remote Logic operates separately. You have to log in and select a
language in each application.
110
Océ TDS600 Multifunctional Digital System User Manual
Installation procedure for MS Windows
systems
Before you install Océ Remote Logic, you must take note of the following
minimum system requirements for the remote system. The system must be a
Pentium 233 with 32 Mb RAM running Windows 95, 98, NT (service pack 3)
or Windows 2000. Contact your local Océ organisation for more possible
systems.
Océ Remote Logic (Queue Manager, System Control Panel and Settings
Editor) are on the Océ TDS600 CD-ROM and on the Océ Power Logic
Controller CD-ROM provided with the system. The installation procedure for
Remote Logic is quite simple and self-explanatory. When you select the
‘Install remote applications’ option on the CD-ROM, a Wizard starts to guide
you through the installation process. When the installation process is complete
you do not have to restart your system.
Note: Remote Logic only works when TCP/IP is enabled on your system. Refer
to your system administrator for assistance with the installation procedure for
TCP/IP.
▼
Install Remote Logic
1 Insert the Océ remote Logic CD-ROM or the Océ Power Logic Controller
CD-ROM into the CD-ROM drive of your PC.
2 Select the ‘Install remote applications’ option.
The installation Wizard starts, and asks to select a setup language.
[71] Choosing a setup language
Océ Power Logic: Remote Logic
111
3 Indicate the required language and click ‘OK’.
4 Follow the instructions on screen to complete the installation of ‘Océ Remote
Logic’.
When the installation is complete, you can start the applications by selecting
them from the specified folder in the ‘Start’ menu.
To work with the applications you first have to connect to an available Océ
TDS600 machine. How to connect is described in ‘How to use the remote
system’ on page 122.
If you plan to work with more than one of the available remote applications,
you are advised to use the ‘Applications’ version, because this uses less system
resources than the individual applications.
112
Océ TDS600 Multifunctional Digital System User Manual
Installation procedure for Unix systems
Océ Remote Logic is set up to be platform independent. It runs on a variety of
operating systems providing that a java runtime environment is available for
that platform. The java runtime environment must be installed by a user with
system administrator privileges, depending on Java Virtual Machine (VM). It
is also assumed that Océ Remote Logic is installed by an experienced user.
UNIX versions and the required JRE
UNIX version
IBM AIX
IBM AIX
IBM AIX
IBM AIX
SUN Solaris
HP-UX
LINUX
LINUX
OS version
4.1.5
4.2.1
4.3.3 + fix
4.3.3.10 + fix
2.6
10.20
1.0
1.2
JRE
1.1.6
1.1.8
1.2.2
1.3.0
1.1.6
1.1.3
1.1.3
1.1.8
Default installation directory
/usr/jdk_base
/usr/jdk_base
/usr/jdk_dev2
/usr/jdk_java130
Note: OS = Operating System, JRE = Java Runtime Environment
▼
Install Océ Remote Logic’
1 Check if a java runtime environment (JRE) is installed on the system. The
2
3
4
5
preferred version is JRE 1.1.8. Below you can find some links to JRE's for
various UNIX platforms.
Unpack the contents of the file ‘RemoteLogic_vX.tar’, from the directory
Products/remotelogic/UNIX, to a subdirectory on the system.
Use ‘tar xvf RemoteLogic_vX.tar’ to unpack.
Set the environment variable ‘RL_VM_HOME’ to point to the installation of
the JVM.
Run the file ‘remotelogic’ with the applications as parameters. (e.g.
remotelogic QM SCP SE to start the three applications), or use ‘remotelogic
AL’, for the application launcher.
Note: If you do not supply any options, a short help text is displayed.
Océ Power Logic: Remote Logic
113
IBM AIX
For the various versions of IBM AIX, java runtime engines can be downloaded
from:
http://www.ibm.com/java
The preferred version of the java runtime engine for use with Océ Remote
Logic is the 1.1.8 version.
HP-UX
For HP-UX 10.20 and 11.00 the runtime engine can be downloaded from:
http://www.unix.hp.com/java
The preferred version of the java runtime environment for HP-UX 10.20 and
HP-UX 11.00 is version C.01.18.xx.
Linux
IBM has a runtime engine available for Linux which can be downloaded from:
http://www.ibm.com/java
114
Océ TDS600 Multifunctional Digital System User Manual
Installation procedure for Other systems
In general, Océ Remote Logic can run on any system with a Java VM.
▼
Steps to install Océ Remote Logic in general
1 Install Java Virtual machine (preferred 1.1.8 (or higher)).
2 Extract ‘RemoteLogic_vX.tar’ or ‘RemoteLogic_vX.zip’, from the Océ
Remote logic CD-ROM.
3 Set the environment variable RL_VM_HOME to point to the Java VM
installation directory.
4 If needed, edit the remote logic script (tar file) or batch file (zip file).
5 Use remotelogic script or batch file to start the applications.
Océ Power Logic: Remote Logic
115
Use Océ Remote Logic
Océ Remote Logic enables you to:
■ View the system status (Océ System Control Panel).
■ Manage print jobs (Océ Queue Manager).
■ Change settings (Océ Settings Editor).
Océ Remote Logic has five different user modes. These user modes are meant
to limit access to the special functions to authorised users only. Log in to get
access to one of the user modes.
Change the display language, to operate Océ Remote Logic in the language of
your selection. Use the on-line help system if you do not know how to go on
with the applications.
The Océ Remote Logic applications operate separately. You have to log in and
select a language in each application, if you start the applications separately. If
you start the applications via the ‘Launcher’, the language is selected
automatically.
Start the Océ TDS applications via the ‘Start’ menu or via the ‘Launcher’
application.
▼
Start Océ Remote Logic on a remote workstation
1 Select 'Océ Remote Logic' via the 'Start' menu.
2 Select ' Application Launcher'.
3 Select the required application from the ‘Launcher’.
116
Océ TDS600 Multifunctional Digital System User Manual
User modes
The following user modes are available:
■ Anonymous user mode
■ Repro operator mode
■ Key operator mode
■ System administrator mode
■ Service operator mode
The anonymous user mode only offers monitoring capabilities. You are not
allowed to change anything.
The repro operator, the key operator and the system administrator modes allow
you to perform a number of user actions.
In the Queue Manager and the System Control Panel the repro operator, the key
operator and the system administrator have the same user rights. In the Settings
Editor, however, the user modes offer different rights.
In repro operator mode, the operator is allowed to only view settings in the key
operator and system administrator views.
In key operator mode, the operator is allowed to view and change settings in
the key operator view. The key operator is also allowed to view system
administration settings, but is not able to change them.
In system administrator mode, the operator is allowed to view and change
settings in the system administrator view. The system administrator is also
allowed to view key operator settings, but is not able to change them.
The service operator mode is meant for the Océ technician.
When you are not authorised to perform a certain action, the action is greyed.
Note: The status bar at the bottom displays the active user mode.
Océ Power Logic: Remote Logic
117
Log in
The access to the key operator, repro operator, system administrator and
service operator modes is password protected to allow only authorised
personnel to use particular functions.
The default password for the System Administrator is: SysAdm.
The default password for the Key Operator is: KeyOp.
The default password for the Repro Operator is: ReproOp.
Note: The default passwords are case sensitive. Change the passwords after
your first log in.
▼
How to log in
1 From the ‘File’ menu, select ‘Log in’.
2 Select the correct user name.
3 Enter the Password.
4 Click ‘OK’.
Note: You must log in into each application separately.
Log out
You have to log out to leave the key operator, repro operator and system
administrator modes.
▼
How to log out
1 From the ‘File’ menu, select ‘Log out’.
You return to anonymous user mode.
Note: You must log out into each application separately.
To change the password
You can change your password on a standard base. You can change the
password for each user mode (except anonymous user mode, for which no
password is required and service operator) by taking the following steps:
▼
Change the password:
1 From the ‘File’ menu, select ‘Log in’.
2 Click the ‘Password’ button.
118
Océ TDS600 Multifunctional Digital System User Manual
3 Select the correct username in the ‘Username’ drop-down list box.
4 Enter the old password in the ‘Password’ text box.
5 Enter the new password in the ‘New password’ text box.
6 Enter he new password in the ‘Confirm new password’ text box and click ‘OK’
to confirm the new password.
Automatic login
If you do not want to log in each time you start an application, you can select
the automatic login function. This option allows you to start an application
automatically in the indicated user mode.
▼
Enable automatic log in
1 From the ‘Edit’ menu, select ‘Options’.
The Options window appears.
2 Select the ‘Enable automatic login’ check box.
3 Select the correct user mode and enter your password for that user mode.
4 Click ‘OK’. Automatic login is now enabled.
Language
From the ‘View’ menu, select ‘Language’, to select one of the supported
languages.
Note: The check mark in front of the language indicates that this is the active
display language.
▼
Set the languages
1 From the ‘View’ menu, select ‘Language’.
You have to change the display language setting in the Settings Editor, to
change the languages in the scanner and printer operator panels, and in the
local applications.
Help
▼
Display help information
1 Open the ‘Help’ menu and select ‘Contents’.
Océ Power Logic: Remote Logic
119
Now you can find help for all functions of the Océ Remote Logic applications.
Command line parameters
In order to start the remote applications faster, there are 6 command line
parameters available.
configfile=<config_file> Specifies a configuration file you want to use. The
configuration file can have any name and may include a path.
server=server Specifies the server you want to connect to.
language1=lang Specifies the first language in combination with the
parameter ‘country1=country’.
country1=country Specifies the first language in combination with the
parameter ‘language1=language’.
language2=lang Specifies the second language in combination with the
parameter ‘country2=country’.
country2=country Specifies the second language in combination with the
parameter ‘language2=language’.
Note: You must always use a matching combination of ‘lang’ and ‘country’
(see table on page 121).
120
Océ TDS600 Multifunctional Digital System User Manual
Language
Danish
Czech
Spanish
Finish
Hungarian
Italian
US Englisch
UK Englisch
Dutch
German
French
Portugese
Norwegian
Swedish
Polish
Japanese
Lang
da
cs
es
fi
hu
it
en
en
nl
de
fr
pt
no
sv
pl
ja
Country
DK
CZ
ES
FI
HU
IT
US
GB
NL
DE
FR
PT
NO
SE
PL
JP
The parameters can be applied to the following applications:
■ QM.exe (Queue Manager)
■ SCP.exe (System Control Panel)
■ SE.exe (Settings Editor)
■ AL.exe (Application launcher)
Note: These executables are usually located in ‘C:\Program Files\OceRemote
Logic\Bin’.
The easiest way to do this is by creating a short-cut of an application and then
add the command line properties.
Example command line parameter Below is an example of how to start the
Océ remote Logic applications with the configuration file ‘Myconfig.cfg’,
connected to the ‘My9600’ server. The first language is set to US English and
the second to French:
‘C\Program Files\Remote Logic\Bin\Clients.exe -configFile=Myconfig.cfg
server=My9600 language1=en country1=US language2=fr country2=FR’.
Océ Power Logic: Remote Logic
121
How to use the remote system
Start up the Océ Remote Logic applications (Océ Settings editor, Océ Queue
manager, Océ System control panel), on a remote client after you installed the
software (see ‘Installation procedure for MS Windows systems’ on page 111).
In order to use the functionality you first have to add an Océ Power Logic
controller and then connect to an available Océ Remote Logic controller.
▼
Add an Océ Power Logic controller
1 Open the ‘File’ menu and select ‘Connect to’.
2
3
4
5
A dialogue box will appear with a drop-down list box containing the already
added Océ Remote Logic systems.
Click ‘Edit...’. The ‘Edit systems’ dialogue box appears.
Enter the IP address or the name of the Océ Remote Logic system you want to
connect to, in the ‘Systems’ text box.
Click ‘Add’. The system is added to the list. You can add as many systems.
Note: You can also remove an Océ Remote Logic system. Select one in the
list and click ‘Remove’.
Click OK twice to return to the application.
Note: Before you can add an Océ Remote Logic system, the system has to be
installed and configured by a system consultant or a technician.
▼
Connect to an Océ Power Logic controller
1 Open the ‘File’ menu and select ‘Connect to’.
A dialogue box will appear containing a drop-down list box with the available
systems.
2 Select one of the available systems and click on ‘OK’. When you connect to
another system, all settings have to be retrieved. This may take some time.
122
Océ TDS600 Multifunctional Digital System User Manual
Océ TDS600
Multifunctional Digital System
User Manual
Chapter 8
Océ Power Logic: Queue Manager
This chapter describes how to view the Océ TDS600 System
print/copy queue and how to abort the active print, how to
delete and put on hold print and copy jobs in the queue and
how to restart jobs that are put on hold.
123
Introduction
The Océ TDS600 Queue Manager application provides you with a graphical
representation of the print queue. It allows you to view the print queue and the
status of the print jobs as well as to manage the jobs in the queue. With the Océ
TDS600 Queue Manager you can:
■ Abort the job currently being printed
■ Delete job(s) in the queue
■ Put job(s) in the queue on hold
■ Print jobs from the history queue
■ Print jobs form the inbox queue
■ Move job(s) to the top of the queue
■ Restart job(s) that were previously put on hold in the queue
▼
Start Océ Queue Manager on a remote workstation
Note: You must first install Remote Logic in ‘Installation procedure for MS
Windows systems’ on page 111.
1 Select 'Océ Remote Logic' via the 'Start' menu, or
2 Select the 'Launcher' application.
3 Select Queue Manager. Océ Queue Manager starts.
Note: To start more than one Queue Manager, System Control Panel or
Settings editor you can better use the Launcher.
Structure
The Océ TDS600 Queue Manager window is divided into the following parts
(see figure 72 on page 126):
■
■
■
■
■
■
■
124
The standard menu bar.
The menu bar for the Queue Manager contains the following menus:
File: Login, Logout, Connect to, Close
Edit: set the default printer and 'Auto login'.
View: selecting the language, switching between queues, and configuring the
view of the queues.
Help: About Queue Manager, Contents of the help.
The tool bar
The tool bar for the Queue Manager contains the following icons:
Hold, resume, move to top, delete and print job(s).
Océ TDS600 Multifunctional Digital System User Manual
The active print job window.
This window displays the job currently being printed on the Océ TDS600.
■ The print queue window.
This window has a tabular format and shows the jobs waiting to be printed.
The jobs are displayed in the order in which they are expected to be printed.
Note: Copy jobs can move in the queue, to take preference over print jobs
but that depends on a setting in the Settings Editor.
■ Inbox queue
The inbox queue contains print jobs which have been sent to the 'Inbox' on
the controller. You can print these jobs, view the properties and delete these
jobs.
■ History queue
The history queue contains print and copy jobs which have been printed. You
can print these jobs, view, edit some the properties and delete these jobs. You
can set how long and how many jobs are kept in the history queue, in the
Settings Editor.
Note: You can select the ‘History’ or ‘Inbox’ queue from the drop-down list
box on top of the right window.
■ Status bar
The Queue Manager has a status bar displaying the following information:
■ System status (connected, not connected)
■ The connected system
■ The job status e.g. ‘printing job.A0.hp’
■ User mode
■
For each job the following information is displayed:
The current status and schedule of the job in the form of an icon. See ‘Icons’
on page 128.
■ The name of the print job.
■ The type of job (print job / copy job)
■ The name of the user who has submitted the print job.
■ The number of sets and pages.
■ Any remarks (e.g. 'Manual Feed').
■
You can resize the columns in the main queue window by dragging the table
header separators. It is also possible to change the order of the columns by
dragging a specific column to a new position.
Note: You can sort the inbox and history. You can not sort the printer queue.
Océ Power Logic: Queue Manager
125
[72] Queue Manager window with the History queue
[73] Queue manager with the Inbox queue
126
Océ TDS600 Multifunctional Digital System User Manual
Modes
The Queue Manager has the following modes:
■ Anonymous user mode
■ Repro operator mode
■ Key operator mode
■ System administrator mode
■ Service operator
These different modes are designed to limit access to the specific functions to
authorized users only.
The anonymous user mode only offers view access to the queue. In this mode
the available buttons are disabled.
The repro operator, the key operator and the system administrator modes allow
you to perform a number of activities on the jobs in the queue, with the help of
the Abort, Delete, Resume and Hold buttons. The service operator mode is
meant for Océ technicians.
Note: In the Queue Manager and the System Control Panel, the repro operator,
the key operator and the system administrator have the same user rights. In the
Settings Editor, however, the user modes offer different rights.
Access The access to the key operator, repro operator, system administrator
modes and service operator is password protected to allow only authorized
personnel to use particular functions. You can enter these modes by selecting
the Login option from the File menu and by specifying the correct password
when prompted for it (see ‘Log in’ on page 118).
From the ‘File’ menu, select ‘Close’ to exit the Queue Manager.
Job priority The priority of print and copy jobs in the Queue Manager is
determined by the order in which they are submitted to the Océ TDS600.
However, there is a setting in the Settings Editor which allows you to give copy
jobs priority over print jobs.
Océ Power Logic: Queue Manager
127
Icons
The Océ TDS600 Queue Manager uses a number of icons to display
information about a job in the queue. The following icons are used:
[74] Receiving job
[75] Received job
[76] Processing job
[77] Processed job
[78] Job in progress
[79] Printing job
[80] Delivering job
[81] Delivered job
[82] Deleted job
[83] A job that requires manual feed
[84] The job is placed on hold by the user or the system.
128
Océ TDS600 Multifunctional Digital System User Manual
[85] Attention, needs operator attention (e.g. a media request).
Océ Power Logic: Queue Manager
129
Managing print jobs
Print queue
▼
View the print queue
The Queue Manager displays all jobs sent to the print queue in a list sorted
according to the order in which they will be printed.
This ordering can be changed by:
■ deleting jobs
■ putting jobs on hold
■ restarting jobs currently on hold
■ moving jobs to top (if advanced Queue management is enabled)
■ This list will be automatically updated.
Note: Queue operations can only be performed when you are properly
authorized. Before you can use the Queue Manager in a different mode, you
first have to enter a password to get the required access
▼
Delete print jobs
1 Select the desired job(s) by clicking on it/them.
Note: You can select a consecutive list of jobs to be deleted by clicking on
the first job, holding down the Shift key and clicking on the last job. You can
select a non-consecutive list of jobs to be deleted by clicking on each
desired job while holding down the Ctrl key.
Note: To delete a job from a remote client, you need repro operator, key
operator or system administrator rights.
2 Click on the Delete button.
A cross icon is displayed in front of the job and a confirmation window will
now be displayed.
Note: Consider carefully before you use the Delete button. A delete
operation cannot be undone.
▼
Put print jobs on hold
1 Select the desired job(s) by clicking on it/them.
130
Océ TDS600 Multifunctional Digital System User Manual
Note: You can select a consecutive list of jobs to be put on hold by clicking
on the first job, holding down the Shift key and clicking on the last job. You
can select a non-consecutive list of jobs to be put on hold by clicking on
each desired job while holding down the Ctrl key.
2 Click on the Hold button.
An icon for a job that is put on hold (see ‘Icons’ on page 128) is displayed in
front of the job when the job is put on hold.
Note: A job that is put on hold will retain its position in the print queue.
Once it reaches the top of the queue, the job that is put on hold will stay
there until it is restarted or deleted. While a job is on hold, other jobs will
be printed, even when they were behind the job on hold in the queue. The
active job and the jobs in printing state can not be put on hold by the Queue
Manager.
▼
Restart jobs that are put on hold
1 Select the desired job(s) by clicking on it/them.
Note: You can select a consecutive list of jobs to be restarted by clicking on
the first job, holding down the Shift key and clicking on the last job. You can
select a non-consecutive list of jobs to be restarted by clicking on each
desired job while holding down the Ctrl key.
2 Click on the Resume button.
The selected job(s) will now be restarted.
▼
Move jobs to top
1 Select the desired job(s) by clicking on it/them.
2 Click on the ‘Move to top’ button on the toolbar.
If more than one job is selected then the first selected job will be on top, the
second will be on top, the second below that one and so on.
Inbox queue
All print job are sent to the ‘Inbox’ queue, if the setting ‘Jobs in inbox’ is set
in the settings Editor. if you want to print your jobs, select the jobs in the
‘Inbox’ from the queue manager, and press the ‘Print’ button (see figure 73 on
page 126).
The Key Operator determines if jobs go to the inbox, are send to the print
queue or if the jobs are printed as described in the job ticket. The setting in the
in the settings editor: ‘System - Job management - Print jobs’
Océ Power Logic: Queue Manager
131
History queue
The purpose of the history queue is:
■ to view the printed jobs
■ to reprint a job
The key operator enables the history queue in the Setting Editor. When the
history queue is enabled the printed jobs can be seen.
The key operator selects the time the jobs are stored in the history queue after
printing, and how many jobs are stored in the history queue.
The setting ‘Rights for printing’ has two values:
■ 'Everyone', everybody can print or reprint jobs from the ‘Inbox’ queue.
■ 'Special user', only the key operator or the repro operator can print from the
‘Inbox’ or the ‘history queue’.
Note: If you use the print job setting 'As in ticket' you need Océ Print Exec LT
to print the job.
132
Océ TDS600 Multifunctional Digital System User Manual
Océ TDS600
Multifunctional Digital System
User Manual
Chapter 9
Océ Power Logic: System Control
Panel
This chapter describes how to view the status of the Océ
TDS600.
133
Introduction
The Océ System Control Panel (SCP) application provides you with status
information about the system. This includes:
■ Status of the printer
■ Overview of the loaded media types and sizes
■ Status of the scanner
■ Status of the controller
■ Memory usage.
Note: If you do not have a scanner, the scanner status is not available. If you
have a scanner only, the machine status of the printer and the overview of the
loaded media is not available.
Structure
The System Control Panel window is divided into the following parts (see
figure 86 on page 136):
The menu bar which contains the following menu’s:
■
■
■
■
■
■
134
File - Login, Logout, Connect to and Exit.
Edit
If you select this option a window is displayed in which you can view your
default system for the System Control Panel application. The ‘Auto login’
option allows you to start the application automatically in the indicated user
mode.
View
The View menu allows you to switch between the display languages as
defined in the Edit options window and to enable or disable System Control
Panel sub windows.
System
The System menu allows you to dump your configuration settings, make a
demo plot, clear the system and shut down the system.
Help options: Contents of System Control Panel, About System Control
Panel.
Toolbar
The tool bar of the System Control Panel contains the following buttons:
Printer: to hide or to show the status of the printer.
Media: to hide or to show media information.
Océ TDS600 Multifunctional Digital System User Manual
Scanner: to hide or to show the status of the scanner.
Controller: to hide or to show the status of the controller.
Memory: to hide or to show the amount of set memory that is used.
Note: If operator invention is required for a device, the respective button
flashes.
The Printer status window Displays the current status of the Printer. Any error
messages displayed on the printer control panel also appear in the printer status
window of the System Control Panel.
The Media display Provides graphical information about the status of the rolls
and sheetfeeders (available, empty or disabled) of the printer and about the
available media (size and type).
Note: If the Media type equals polyester, the thickness is expressed in mil
(0.001"), otherwise the weight is expressed in g/m2.
When a roll or tray is disabled the roll icon is dimmed and the media
information is replaced by the text “-disabled-” (see ‘Icons’ on page 136).
Note: Special media are excluded from the automatic behaviour of the Océ
Power Logic Controller.
The Scanner status display Displays the current status of the scanner. Any
error messages displayed on the scanner control panel will also appear in the
scanner status window of the System Control Panel.
The set memory meter Indicates how much of the set memory is filled. The
information is displayed in the form of a meter which is divided into three
zones:
■ Green: safe, you have enough space left to print large jobs/many small jobs
■ Orange: pay attention, you might reach the set memory limit soon
■ Red: the set memory is (nearly) full; you should remove files or wait until
files are printed and automatically removed or flushed from memory. No
more print jobs are accepted. Copy jobs can still be made.
Note: At the right of the set memory meter a percentage is displayed,
indicating the amount of set memory currently being used.
Below the System Control Panel main window is displayed:
Océ Power Logic: System Control Panel
135
Interrupt
Access
to
job
Page
Access to
ial
[86] System Control Panel window
Note: You can hide the media by de-selecting it in the View menu option.
Icons
The Océ TDS600 System Control Panel uses a number of icons to display
information about the media available on the printer. The following icons are
used:
The material is available and the roll is ready for printing.
The roll is disabled.
The roll is enabled but empty.
The material is available in portrait orientation and the sheetfeeder
is ready for printing.
The material is available in landscape orientation and the
sheetfeeder is ready for printing.
The sheetfeeder is empty and material should be loaded in portrait
orientation.
136
Océ TDS600 Multifunctional Digital System User Manual
The sheetfeeder is empty and material should be loaded in
landscape orientation.
The sheetfeeder is disabled.
Océ Power Logic: System Control Panel
137
User operations
The System Control Panel allows you to perform the following operations:
■ Make a demo plot
■ Print your system configuration
■ Clear the system
■ Shut down the system
▼
Make a demo plot
1 Select the Demo plot option in the System menu.
A demo plot is made on the printer.
▼
Print your system configuration
1 Select the Print settings option in the System menu.
A list is printed of the current settings on the Océ Power Logic Controller.
▼
Clear the system
1 Select the Clear system option in the System menu to delete all jobs.
You can use this option in case of a corrupt job which can not be deleted with
the help of the Queue Manager.
Note: This option is only available in repro operator, key operator and
system administrator mode. In anonymous user mode it is not possible to
clear the system.
▼
Shut down the system
1 Select the Shut down option in the System menu to shut down the system.
This option is only available in repro operator, key operator
and system administrator mode. In anonymous user mode it is not
possible to shut down the system.
138
Océ TDS600 Multifunctional Digital System User Manual
Océ TDS600
Multifunctional Digital System
User Manual
Chapter 10
Océ Power Logic: Settings Editor
(for the key operator)
This chapter describes how to make key operator settings
in the Settings Editor of the Océ TDS600.
139
Introduction
This chapter learns you how to set the Océ TDS600 according to your
companies requirements. The information in this chapter is for the key
operators.
The key operator is responsible for correct default settings of the system. These
settings include the default settings, and groups of default printer settings for
the print and the copy jobs that again occur.
The key operator can define all timer settings, like the panel time out and the
sleep mode time out.
Note: One key operator or system administrator can log into the Settings
Editor at the same time.
140
Océ TDS600 Multifunctional Digital System User Manual
Starting up and shutting down the
controller
Take the following actions to start up the controller:
▼
Start up the Océ controller
1 Turn on the controller and the screen.
After the initial system test of the controller the applications, Queue Manager,
System Control Panel, Settings Editor and Scan Manager are automatically
started and the Océ TDS600 is ready for operation.
Note: The Queue Manager and the System Control Panel applications are
visible on the screen; however the Settings Editor is minimized, to save screen
estate.
Take the following actions to shut down the controller:
▼
Shut down the Océ controller
1 Go to the System Control Panel application.
2 Select the ‘Shutdown’ option from the ‘System’ menu.
3 Confirm shutdown by clicking on the ‘Yes’ button in the ‘Shut down’ window.
The system automatically performs the shutdown procedure for the controller.
Finally, the Windows NT ‘Shutdown Computer’ window appears, which
informs you that you can turn off your computer.
Note: You can now restart the controller by pressing the ‘Restart’ button.
4 Turn off your computer and display.
Note: The Océ TDS600 has a sleep mode (see page 197). The sleep mode
powers off almost all the power supplies after a certain time of inactivity.
Océ Power Logic: Settings Editor (for the key operator)
141
Settings Editor
The Settings Editor is one of the controller applications for the Océ TDS600,
which allows users and operators to view and, if authorised, to modify settings
of the system.
With the Settings Editor two groups of settings can be configured:
■ Key operator settings (KO settings)
The key operator group allows authorised users to configure default settings
for copy and print jobs, default off-line fold settings and scan to file options.
With the key operator settings also the printer, system and scanner defaults
can be set or modified.
■ System Administrator settings (SA settings)
The system administrator group allows authorised users to configure default
printer language (PDL) settings and printer pen settings. It also allows the
system administrator to configure system and connectivity settings.
These groups of settings can be selected from the ‘View’ menu of the Settings
Editor.
Setting dependencies The Settings Editor is used to display and edit a
specified group of settings. Some settings are related to other settings,
however. If you want to change settings which have dependencies with other
settings you will be prompted with a message. When a setting is changed, the
system automatically updates the related settings.
Also, when you change certain settings, such as measurement unit or paper
series, all related settings are instantaneously converted to the new setting
(with a bullet for the settings that are changed).
142
Océ TDS600 Multifunctional Digital System User Manual
[87] Settings Editor
General structure
The Settings Editor is structured as follows:
■ Menu bar
■ Top toolbar
■ Left toolbar
■ Settings area
■ Status bar
Océ Power Logic: Settings Editor (for the key operator)
143
Menu bar
The menu bar of the Settings Editor contains the following menus:
File If you select the ‘File’ menu you can log in as a particular type of user,
log out of the previously selected user mode, open an existing setting file, save
the current settings to a file, connect to a different controller (only for remote
users) or exit the Settings Editor.
Edit If you select ‘Options’ from the ‘Edit’ menu, a window is displayed in
which you can view your default system and the display languages (first and
second) for the Settings Editor application. The ‘Auto login’ option allows you
to start the Settings Editor application automatically in the specified user
mode.
The ‘View’ menu allows you to switch between the display languages
as defined in the Edit options window and to switch between KO settings and
SA settings.
View
Help The ‘Help’ menu contains the following options: ‘Contents of Settings
Editor’ and ‘About Settings Editor’.
[88] Menu bar
Top toolbar
The top toolbar of the Settings Editor contains four control buttons: ‘Open’,
‘Save as’, ‘Apply’ and ‘Undo’.
[89] Top toolbar
Open When you click on the ‘Open’ button, you open a saved file.
Save as All key operator and system administrator settings can be saved in a
file. This way you can have different settings for different customers,
departments or other situations.
144
Océ TDS600 Multifunctional Digital System User Manual
Note: These settings can only be saved in Key operator or System
administrator mode.
Apply When you click on the ‘Apply’ button, the changes you have made
become effective. Initially, this button is disabled. It is enabled after the first
setting is changed and disabled again after the apply action is performed or
after an undo action.
Undo This button restores the settings to the state it was in the last time the
settings were applied (and not back to the factory default). Initially, the ‘Undo’
button is disabled. This button is enabled the moment the first setting is
changed. It is disabled after an Apply action is performed or after an undo
action
▼
Save settings to file
1 Open the ‘File’ menu and select ‘Save as’, or press the ‘Save as’ button on the
toolbar.
You now have two possibilities:
■ If the client is a local client, a dialogue is displayed and the user can supply
a file name. The file is saved in a predefined directory on the system.
■ If the client is a remote client, a dialogue box is displayed and the user can
supply a directory and a file name.
Note: All settings in the current view mode are saved; not only the ones that
are currently visible.
A few special files are available here:
■ Default.kos/Default.sas
These files contain the factory default settings for the key operator and
system administrator, respectively, and can not be changed.
■ Backup.kos/Backup.sas
These files contain a previous version of the settings for the key operator and
system administrator, respectively (before the last Apply).
■ Current.kos/Current.sas
These files contain the version of the settings for the key operator and system
administrator after the last Apply.
When an Apply is performed, first the contents of the current settings is copied
to the backup file. There are two versions of this file, one for KO settings and
one for SA settings. These files are always stored on the system.
Océ Power Logic: Settings Editor (for the key operator)
145
▼
Open a saved file
1 Open the ‘File’ menu and select ‘Open’, or press the ‘Open’ button on the
toolbar.
A dialogue box is displayed from where you can choose the correct file.
2 Click the ‘Apply’ button.
The loaded settings are transferred to the system.
Note: This is only possible if the user is logged in as a key operator or system
administrator.
Left toolbar
There are four different buttons available at the left toolbar of the Settings
Editor. These are ‘Jobs’, ‘Printer’, ‘Scanner’ and ‘System’. Each button
provides access to a specific group of settings. By clicking on each of these
buttons, you can get access to the settings related to the selected group.
A shadow highlight is used to indicate which button is activated.
[90] Left toolbar
Settings area
The settings area consists of two parts: a setting tree and an update area.
Tree structure Most settings are displayed using a tree structure. By clicking
on the settings, folders can be opened to show all the entries or closed to hide
all the entries below these folders.
146
Océ TDS600 Multifunctional Digital System User Manual
The settings for system components that are not available are not displayed.
So, if you do not have a folder, no folder settings are available. This means that
different configurations result in different tree structures.
Note: When a tree item has been changed, this item will be marked with a
bullet.
Update area The user can move through the tree and select a setting. If he
selects a setting for which he is authorised, he can edit the setting in the update
area.
If the user is not authorised for a particular setting, the update area is greyed
and no changes can be made.
Note that a few settings, such as basic card and pen settings, are not edited from
the tree structured, but are accessed directly from the settings area.
The update area contains some additional information about the selected
setting. This includes a brief definition of the setting, as well as the minimum,
maximum and default values (if appropriate).
[91] Settings area
Status bar
The Settings Editor has a status bar displaying the following information (left
to right):
Océ Power Logic: Settings Editor (for the key operator)
147
■
System status (icon for connected or disconnected)
The following icons are used:
The Settings Editor is connected to a system.
The Settings Editor is disconnected from a system.
■
■
■
System name (‘localhost’ if you are working at the controller)
User mode (Repro operator, Key operator, System administrator or
anonymous)
View mode (KO settings or SA settings).
How to access the Settings Editor
In order to perform special key operator functions, you must log into the
Settings Editor as a key operator.
As these functions are restricted to a dedicated key operator, a password is
required to access them. The service engineer will provide this password to
you upon installation.
Note: Only one key operator or system administrator at a time is authorised to
make modifications. However, there may be multiple users viewing the settings.
When a second user tries to log in as Key Operator or as System Administrator,
an error message is displayed.
Start Océ Settings Editor
You can start the Océ TDS applications on the controller as well as on a remote
workstation.
▼
Start Océ Settings Editor on the Power Logic Controller
1 Select the 'Launcher' application.
2 Select Settings Editor. Océ Settings Editor starts.
▼
Start Océ Settings Editor on a remote workstation
Note: You must first install Remote Logic as described (see ‘Installation
procedure for MS Windows systems’ on page 111).
1 Select 'Océ Remote Logic' via the 'Start' menu.
148
Océ TDS600 Multifunctional Digital System User Manual
2 Select the 'Launcher' application.
3 Select Settings Editor. Océ Settings Editor starts.
How to perform actions from the Settings Editor
You can perform a number of activities from the Settings editor. These
activities include:
■
■
■
Save settings to file
Load settings from a file
Specify the custom card.
Save and load settings All key operator and system administrator settings can
be saved in a file or loaded from a file. This way you can have different settings
for different customers, departments or other situations.
Note: These settings can only be saved in Key operator or System
administrator mode.
▼
Save settings to file
1 Open the ‘File’ menu and select ‘Save as’.
You now have two possibilities:
■ If the client is a local client, a dialogue is displayed and the user can supply
a file name. The file is saved in a predefined directory on the system.
■ If the client is a remote client, a dialogue box is displayed and the user can
supply a directory and a file name.
Note: All settings in the current view mode are saved; not only the ones that
are currently visible.
A few special files are available here:
■ Default.kos/Default.sas
These files contain the factory default settings for the key operator and
system administrator, respectively, and can not be changed.
■ Backup.kos/Backup.sas
These files contain a previous version of the settings for the key operator and
system administrator, respectively (before the last Apply).
■ Current.kos/Current.sas
These files contain the version of the settings for the key operator and system
administrator after the last Apply.
Océ Power Logic: Settings Editor (for the key operator)
149
When an Apply is performed, first the contents of the current settings is copied
to the backup file. There are two versions of this file, one for KO settings and
one for SA settings. These files are always stored on the system.
▼
Load a settings file
1 Open the ‘File’ menu and select ‘Open’.
A dialogue box is displayed from where you can choose the right file.
2 Click the ‘Apply’ button.
The loaded settings are transferred to the system.
Note: This is only possible if the user is logged in as a key operator or system
administrator.
▼
Specify the custom card
The custom card on the scanner panel contains high priority settings. Because
there is only room for five default settings on the basic card and there are more
functions that might qualify, the custom card is programmable.
This option allows you to add or delete current settings on the custom card. In
the left window all the available setting groups are displayed. In the right
window all the current settings are displayed. You can use the two arrow
buttons between the two windows to add settings to or remove settings from
the custom card.
1 Click the ‘Scanner’ button.
2 Select the ‘Custom card’ tab.
3 Press the upper arrow button to add settings to the custom card. The maximum
number of settings that can be added to the custom card is five.
4 To change the order of the settings on the card click on one of the buttons on
the right of the ‘Custom card’ window.
5 Click the ‘Apply’ button to save any changes you have made.
150
Océ TDS600 Multifunctional Digital System User Manual
Key operator settings
In order to perform special key operator functions, you must log into the
Settings Editor as a key operator.
As these functions are restricted to a dedicated key operator, a password is
required to access them. The service engineer will provide this password to
you upon installation.
Note: When you are finished, make certain you log out of the Key operator
mode of the Settings Editor to prevent unauthorized use of the Océ TDS600.
▼
Make key operator settings in the Settings Editor
1 Maximize the Settings Editor on the screen.
2 Log in as key operator.
3 Click on one of the top buttons to display the desired group of settings.
4 Select the setting you want to update in the tree structure.
5 Update the setting in the update area, as required.
Note: A few settings, such as the defaults for the Custom card, are made
directly from the tree structure area.
6 Click on the ‘Apply’ button.
The new value is now applied for the setting
7 Log out of the Key operator mode when you have finished updating the
settings.
Océ Power Logic: Settings Editor (for the key operator)
151
Job-related settings for copying
The ‘Copy & File’ tab of the job-related settings contains a folder with default
settings, which can be overruled by settings that are sent along with the copy
job (via a job ticket or from the scanner panel), plus a folder with settings for
horizontal and vertical zoom calibration.
The ‘Defaults’ folder contains the following options (see figure 92):
■ Defaults
■ Custom card
■ Checkprint
■ Number of prints/sets
■ Output mode
■ Mirror
■ User id
■ Account id
■ Zoom
■ Original card
■ Print card
■ File card
■ Zoom calibration
■ Scan to file
[92] ’Defaults’ Folder for ‘Copy & File’
152
Océ TDS600 Multifunctional Digital System User Manual
Job-related settings for copying
Custom card
Description
Min/max values
Menu path
The option ‘Custom card’ allows you to define the custom
card on the scanner operator panel.
N/A
Jobs - Copy & File - Defaults
Checkprint
Description
Min/max values
Menu path
Use ‘Checkprint’, to define that a paper copy will be made of
each scanned original.
N/A
Jobs - Copy & File - Defaults - Checkprint
Number of prints/sets
Description
Min/max values
Menu path
Use ‘Number of prints/sets’, to define the default number of
copies for each job in the printer memory.
The default value is 1. The maximum number of copies is 999.
1 - 999
Jobs - Copy & File - Defaults - Number of prints/sets
Output mode
Description
Min/max values
Menu path
The option ‘Output mode’ allows you to define the
destination of the output: Copy: the output will be printed on
paper. File: the output is saved as a print file and can be printed on paper at a later time.
N/A
Jobs - Copy & File - Defaults - Output mode
Mirror
Description
Min/max values
Menu path
You can use the ‘Mirror’ option to print a horizontally mirrored image of an original.
Mirroring is performed in the vertical axis.
N/A
Jobs - Copy & File - Defaults - Mirror
Océ Power Logic: Settings Editor (for the key operator)
153
User id
Description
Min/max values
Menu path
You can use the ‘User id’ option to determine how many jobs
are processed by that user.
N/A
Jobs - Copy & File - Defaults - User id
Account id
Description
Min/max values
Menu path
You can use the ‘Account id’ option to determine how many
jobs are processed for that account.
N/A
Jobs - Copy & File - Defaults - Account id
Zoom method
Description
Menu path
The Océ TDS600 has a custom, automatic and 1-to-1 scaling
option.
Custom let’s you define the zoom ratio.
If you select ‘Automatic’, a zoom ratio will be calculated,
based on the original size and the copy media size.
1-to-1 means there is no zoom ratio.
Jobs - Copy & File - Defaults - Zoom method
Custom zoom
Description
Menu path
154
The custom zoom value defines the zoom ratio when you
select ‘Custom’ for Zoom method
Jobs - Copy & File - Defaults - Custom zoom
Océ TDS600 Multifunctional Digital System User Manual
Original card
[93] ’Original folder’ Folder for Copy & File
Input mode
Description
Min/max values
Menu path
The ‘Input mode’ allows you to define the type of input:
Single sheet: No sorting will be used. Each page is put in a
separate job.
Multiple sheets: Sort by page job where until the set is closed
all original will belong to the same job (e.g. 11111 - 22222 33333).
Set: Sort by set job (e.g. 123 - 123 - 123 - 123 - 123)
N/A
Jobs - Copy & File - Defaults - Original card - Feeding -Input
mode
Legend location
Description
Min/max values
Menu path
You can use the ‘Legend location’ option to determine if users
will default feed the original with the legend on the leading
edge or on the trailing edge of the original.
This information is used to fold the copy in such a way that the
legend is always on top of the folded package.
N/A
Jobs - Copy & File - Defaults - Original card - Feeding - Legend location
Océ Power Logic: Settings Editor (for the key operator)
155
Drawing method
Description
Min/max values
Menu path
You can use the ‘Drawing method’ option to determine how
your output must be folded.
Choose between Standard, Afnor and Ericsson
N/A
Jobs - Copy & File - Defaults - Original card - Feeding - Drawing method
Remove leading / trailing strip
Description
Min/max values
Menu path
Use the remove leading or trailing strip settings to remove, by
default, a blank strip at the top or bottom of the image. The
print length will decrease accordingly.
‘Remove leading strip’ will remove a blank strip at the top of
the image.
‘Remove trailing strip’ will remove a blank strip at the bottom
of the image.
You can remove up to of 400 mm or 16 inch in steps of 1 mm.
By default, no leading or trailing strip is defined.
Remove leading or trailing strips will always work, unless you
try to remove the entire plot.
N/A
Jobs - Copy & File - Defaults - Original card - Sheet - Remove
leading / trailing strip
Scan width method
Description
Min/max values
Menu path
156
The ‘Scan width method’ option allows you to select the width
that will be scanned:
Standard: The width scanned is according to the automatic
sensed original width.
Non-standard: The scan width is extended to the first not activated original width sensor or maximum original size.
Custom: Custom selected width. Useful if the original is a
non-standard format. This setting will overrule the automatically detected original size.
N/A
Jobs - Copy & File - Defaults - Original card - Sheet - Scan
width method
Océ TDS600 Multifunctional Digital System User Manual
Custom scan width
Description
Min/max values
Menu path
The ‘Custom scan width’ option allows you to select the
width that will be scanned:
Useful if the original has an arbitrary width. This setting will
overrule the automatically detected original format.
The setting is used in combination with ‘Scan width method’.
25 - 914 mm
Jobs - Copy & File - Defaults - Original card - Sheet - Custom
scan width
Scan length method
Description
Min/max values
Menu path
Use ‘Scan length method’, to select the length that will be
scanned.
Standard: The scan length is according to the automatically
sensed original length.
Non-standard: The scan length extends to the first original
length sensor that is not activated or to the maximum original
size.
Custom-selected length: Useful if the original is of a
non-standard format. This setting will overrule the automatically detected original size.
N/A
Jobs - Copy & File - Defaults - Original card - Sheet - Scan
length method
Custom scan length
Description
Min/max values
Menu path
The ‘Custom scan length’ option allows you to select the
length that will be scanned.
Useful if the original has an arbitrary length. This setting will
overrule the automatically detected original format.
The setting is used in combination with ‘Scan length method’.
1000 - 15000 mm
Jobs - Copy & File - Defaults - Original card - Sheet - Custom
scan length
Océ Power Logic: Settings Editor (for the key operator)
157
Original type
Description
Min/max values
Menu path
Select the type of original that you want to scan from the following range:
- Lines / text
- Greys & lines
- Dark original
- Blueprint
- Printed matter
- Photo
N/A
Jobs - Copy & File - Defaults - Original card - Image - Original type
Background compensation
Description
Min/max values
Menu path
Use this function to automatically compensate the original
background.
The compensation depends on the original type. For ‘photo’
or ‘Greys & lines’ originals, the background compensation
will be fixed. For other original types, the compensation will
be adaptive.
N/A
Jobs - Copy & File - Defaults - Original card - Image - Background compensation
Exposure
158
Description
The exposure can be set for every original.
A negative value indicates a lower brightness, resulting in a
darker scan; a positive value indicates a higher brightness,
thus resulting in a lighter scan.
Min/max values
Menu path
N/A
Jobs - Copy & File - Defaults - Original card - Image - Exposure
Océ TDS600 Multifunctional Digital System User Manual
Print card
[94] ’Print card’ Folder for Copy & File
Align
Description
Min/max values
Menu path
The align function enables you to automatically align the image to one corner, to one side, or to the centre of the page. The
default is ‘Upper left’. The following options are available:
Left up
Up
Right up
Left
Centre
Right
Left down
Down
Right down.
N/A
Jobs - Copy & File - Defaults - Print card - Layout - Align
Océ Power Logic: Settings Editor (for the key operator)
159
Horizontal shift
Description
Min/max values
Menu path
The print margin may be too small to accommodate, for instance, filing strips without loss of information. To avoid this,
shift the image in horizontal and/or vertical direction. Image
shift can be used in combination with the align function.
-914 - 914 mm
Jobs - Copy & File - Defaults - Print card - Layout Horizontal shift
Vertical shift
Description
Min/max values
Menu path
The print margin may be too small to accommodate, for instance, filing strips without loss of information. To avoid this,
shift the image in horizontal and/or vertical direction. Image
shift can be used in combination with the align function.
-1219 - 1219 mm
Jobs - Copy & File - Defaults - Print card - Layout - Vertical
shift
Unfolded copy delivery
Description
Min/max values
Menu path
To determine where the unfolded output must be delivered
into the Integrated Receiving tray or the Copy Delivery tray
N/A
Jobs - Copy & File - Defaults - Print card - Finishing
Folding
Description
Min/max values
Menu path
To determine if the job will be folded by default.
N/A
Jobs - Copy & File - Defaults - Print card - Finishing
Folded copy delivery
Description
Min/max values
Menu path
160
To determine where the folded output must be delivered:
Stacker or Belt.
N/A
Jobs - Copy & File - Defaults - Print card - Finishing
Océ TDS600 Multifunctional Digital System User Manual
Folding length
Description
Min/max values
Menu path
Determines the folding length of the package
276 - 310
Jobs - Copy & File - Defaults - Print card - Finishing
Folding width
Description
Min/max values
Menu path
Determines the folding width of the package
186 - 230 mm
Jobs - Copy & File - Defaults - Print card - Finishing
Folding reinforcement
Description
Min/max values
Menu path
To specify if the folded prints should be reinforced
186 - 230 mm
Jobs - Copy & File - Defaults - Print card - Finishing
Binding strips
Description
Min/max values
Menu path
To add a binding strip to folded prints
15 - 30 mm
Jobs - Copy & File - Defaults - Print card - Finishing
Automatic media
Description
Min/max values
Menu path
The ‘Auto format’ option allows you to specify that the
selected media size should be based on the size of your
original.
Note:
Only sizes present in the specified paper series will be considered for use with the auto format function, unless nothing appropriate can be selected. In the latter case the best fitting
format in the specified paper series will be proposed.
N/A
Jobs - Copy & File - Defaults - Print card - Sheet - Automatic
media
Océ Power Logic: Settings Editor (for the key operator)
161
Default paper source
Description
Min/max values
Menu path
Use ‘Default paper source’, to define the default paper source.
The default is Roll 1. Whether a roll or a sheet feeder is selected as default media source, is determined by the specified
feed preference. The default selected paper source can be:
Roll
Sheet feeder
Manual feed
Auto.
N/A
Jobs - Copy & File - Defaults - Print card - Sheet - Default paper source
Default paper source number
Description
Min/max values
Menu path
Use ‘Default paper source number’, to define the default paper source.
1-2
Jobs - Copy & File - Defaults - Print card - Sheet - Default paper source number
Manual feed
Description
Min/max values
Menu path
162
Use ‘Manual feed’, to allow manual feed only upon request
by the printer. Only portrait orientation is allowed.
N/A
Jobs - Copy & File - Defaults - Print card - Sheet - Manual
feed
Océ TDS600 Multifunctional Digital System User Manual
Cut length method
Description
Min/max values
Menu path
The Océ TDS600 determines the length and width of each
digital image. Use ‘Print cut method’, to select one of the following default cut methods:
Standard The print length corresponds to a standard format,
depending on the media width.
Synchro The print length is related to the length of the image.
This is the default value. The minimum print length is 279
mm or 11 inch.
Custom The print length is defined by the user. The minimum
length is 279 mm or 11 inch. The default value is specified
with the Cut length option.
N/A
Jobs - Copy & File - Defaults - Print card - Sheet - Cut length
method
Custom cut length
Description
Min/max values
Menu path
You can define a specific cut length.
The specified cut length is used when the Custom cut method
is selected. If custom cut is enabled, the copy media length
will only depend on this setting, any other influence is excluded.
279 - 15000 mm
Jobs - Copy & File - Defaults - Print card - Sheet - Custom cut
length
Add leading / trailing strip
Description
Min/max values
Menu path
Use the add leading / trailing strip settings to add, by default,
a blank strip at the top or bottom of the image. The print
length will increase accordingly.
‘Add leading strip’ will add a blank strip at the top of the image.
‘Add trailing strip’ will add a blank strip at the bottom of the
image.
By default, no leading or trailing strip is defined.
Note: Adding a trailing strip will only work if the cut method
is set to synchro cut.
0 - 400 mm
Jobs - Copy & File - Defaults - Print card - Sheet - Strips - Add
leading / trailing strip
Océ Power Logic: Settings Editor (for the key operator)
163
File card
[95] ’File card’ Folder for ‘Copy & File’
File format
Description
Min/max values
Menu path
To define the internal organisation of the scanned files.
Choose between TIFF, CALS and PDF.
N/A
Jobs - Copy & File - Defaults - File card - Destination - File
format
Destination
Description
Min/max values
Menu path
To define the default destination when you scan to file.
N/A
Jobs - Copy & File - Defaults - File card - Destination
TIFF compression
Description
Min/max values
Menu path
164
Before scanning you can set the compression method for
TIFF files. Choose between Group 4, Group 3, or None.
N/A
Jobs - Copy & File - Defaults - File card - Destination - TIFF
compression
Océ TDS600 Multifunctional Digital System User Manual
TIFF organization
Description
Min/max values
Menu path
Before scanning you can set the compression method for
TIFF files. Choose between RAW, stripped or tiled.
N/A
Jobs - Copy & File - Defaults - File card - Destination - TIFF
organisation
PDF compression
Description
Min/max values
Menu path
Before scanning you can set the compression method for PDF
files. Choose between Group 4 or None.
N/A
Jobs - Copy & File - Defaults - File card - Destination - PDF
compression
File resolution
Description
Min/max values
Menu path
The Océ TDS600 scan to file option allows you to scan at the
following three resolutions:
200 dots per inch (dpi)
300 dpi
400 dpi
The higher the resolution the better the image quality. Higher
resolution also leads to bigger filesize.
200 - 400 dpi
Jobs - Copy & File - Defaults - File card - Image - File resolution
Optimization
Description
Min/max values
Menu path
There are two ways to optimize a scan to file.
Scan quality: optimizes for the best image quality resulting in
a better image quality. The scan resembles the original as
close as possible.
File size: optimizes for better compression. Generally resulting in a smaller file size.
N/A
Jobs - Copy & File - Defaults - File card - Image - File optimization
Océ Power Logic: Settings Editor (for the key operator)
165
Zoom calibration
On the Océ TDS600 there are two options available for zoom calibration:
‘Horizontal zoom calibration’ and ‘Vertical zoom calibration’ (see figure 96).
[96] ’Zoom calibration’ Folder for ‘Copy & File’
Horizontal / vertical zoom calibration
Description
Min/max values
Menu path
166
In order to optimise the 1 to 1 copy and print quality, the key
operator can adjust the zoom calibration factor to an accuracy
of 0.1%.
The zoom factor can be adjusted by means of two correction
factors, one for the vertical zoom direction and the second for
the horizontal zoom direction.
97 - 103%
Jobs - Copy & File - Zoom calibration - Horizontal / Vertical
zoom calibration
Océ TDS600 Multifunctional Digital System User Manual
Scan to file
With the options available for scan to file, you can define another extension for
PDF, TIFF or Cals files.
[97] ‘Scan to file’ Folder for ‘Copy & File’
Océ Power Logic: Settings Editor (for the key operator)
167
Job-related settings for printing
The ‘Print’ tab of the job-related settings contains a folder with default
settings, which can be overruled by settings that are sent along with the print
job, plus a setting for printing error pages (see figure 98).
The ‘Print’ tab contains the following options:
■ Print error page
■ Defaults
Number of prints/sets
Collate
Default print mode
User id
Account id
■ Sheet
■ Finishing
■ Image
■ Layout
[98] Tab for ‘Print’
Print error page
Description
Min/max values
Menu path
168
Use this setting, to have error pages printed in case a printing
error occurs.
Error pages are printed in the following environments: PDL,
RCF ticket or OJT ticket.
N/A
Jobs - Print - Print error pages
Océ TDS600 Multifunctional Digital System User Manual
Number of prints/sets
Description
Min/max values
Menu path
The ‘Number of prints/sets’ option allows you to define the
default number of prints for each job in the printer memory.
1 - 999
Jobs - Print - Defaults - Number of prints/sets
Collate
Description
Min/max values
Menu path
Specifies whether or not a number of originals should be processed together as a set. If set processing is off, sorting is always done by page and every original will be presented as a
job. If set processing is on, sorting is done by page and all
originals will belong to the same job until the set is closed, or
sorting is done by set.
N/A
Jobs - Print - Defaults - Collate
Default print mode
Description
Min/max values
Menu path
With the print mode the printer Image Logic can be set in a
mode that matches the contents of the image. Setting the default print mode according to the main stream contents of the
print jobs, will improve the quality of printed images. The default print mode setting is used when the Image Logic is not
able to automatically detect the appropriate print mode.
Select ‘Poster’ for images with domination of grey areas.
Select ‘Lines/Text’ for scanned images.
Select ‘Standard’ otherwise.
N/A
Jobs - Print - Defaults - Default print mode
User id
Description
Min/max values
Menu path
You can use the ‘User id’ option to determine how many jobs
are processed by that user.
N/A
Jobs - Copy & File - Defaults - User id
Océ Power Logic: Settings Editor (for the key operator)
169
Account id
Description
Min/max values
Menu path
You can use the ‘Account id’ option to determine how many
jobs are processed for that account.
N/A
Jobs - Copy & File - Defaults - Account id
Sheet
[99] ‘Sheet folder of the ‘Print’ tab
Auto format
Description
Min/max values
Menu path
170
The ‘Auto format’ option allows you to specify that the selected media size should be based on the size of your original.
Note:
Only sizes present in the specified paper series will be considered for use with the auto format function, unless nothing appropriate can be selected. In the latter case the best fitting
format in the specified paper series will be proposed.
N/A
Jobs - Print - Defaults - Sheet - Auto format
Océ TDS600 Multifunctional Digital System User Manual
Fit method
Description
Min/max values
Menu path
The ‘Fit method’ option allows you to define on which media
size an original will be printed if the specified media size is
not available.
The following options are available:
- Exact fit: The original will only be printed if the specified
media size is available.
- Next smaller: If the specified media size is not available, the
original will be printed on the next smaller size.
- Best fit: The system will choose the best possible fit method.
N/A
Jobs - Print - Defaults - Sheet - Fit method
Feed preference
Description
Min/max values
Menu path
The ‘Feed preference’ option allows you to define which media type is to take preference when the Automatic media selection option is active:
- Sheet then roll
- Roll then sheet
N/A
Jobs - Print - Defaults - Sheet - Feed preference
Default paper source
Description
Min/max values
Menu path
The ‘Default paper source’ option allows you to define the default paper source. Whether a roll or a sheet feeder is selected
as default media source is determined by the specified feed
preference.
Available default paper sources:
- Roll
- Sheet feeder
- Manual feed
- Auto
N/A
Jobs - Print - Defaults - Sheet - Default paper source
Default paper source number
Description
Min/max values
Menu path
Use ‘Default paper source number’, to define the default paper source.
1-2
Jobs - Print - Defaults - Sheet - Default paper source number
Océ Power Logic: Settings Editor (for the key operator)
171
Print cut method
Description
Min/max values
Menu path
The Océ TDS600 determines the length and width of each
digital image. The ‘Print cut method’ option allows you to select one of the following default cut methods:
Standard: The print length corresponds to a standard format,
depending on the media width.
Synchro: The print length is related to the length of the image. This is the factory default value. The minimum print
length is 279 mm.
Custom: The print length is defined by the user. The minimum length is 279 mm. The default value is specified with the
‘Cut length’ option.
N/A
Jobs - Print - Defaults - Sheet - Print cut method
Custom print length
Description
Min/max values
Menu path
The ‘Default paper source number’ option allows you to define the On the Océ TDS600 you can define a specific cut
length.
The specified cut length is used when the ‘Custom’ cut method is selected. If custom cut is enabled the copy media length
will only depend on this setting, thus any other influence is excluded.
The minimum cut length is 279 mm.
279 - 15,000 mm
Jobs - Print - Defaults - Sheet - Custom print length
Default roll format
Description
Min/max values
Menu path
172
Use ‘Default roll format’, to define the default media size for
your print jobs.
The default is A0.
The following sizes are available:
A0 to A4 (DIN range)
36 inch (E+)
ISO B1
ISO B2
Note: ‘Default roll format’ works only, when ‘Auto format’
Off is selected in the Media section.
279 - 15,000 mm
Jobs - Print - Defaults - Sheet - Default roll format
Océ TDS600 Multifunctional Digital System User Manual
Default material
Description
Min/max values
Menu path
Default material to use for incoming print jobs.
N/A
Jobs - Print - Defaults - Sheet - Default paper material
Add leading / trailing strip
Description
Min/max values
Menu path
Use the add leading or trailing strip settings to add, by default,
a blank strip at the top or bottom of the image. The print length
will increase accordingly.
‘Add leading strip’ will add a blank strip at the top of the image.
‘Add trailing strip’ will remove a blank strip at the bottom of
the image.
You can remove up to of 400 mm or 16 inch in steps of 1 mm.
Note: Add leading or trailing strips will always work, unless
you try to remove the entire plot.
0 - 400 mm
Jobs - Print - Defaults - Sheet - Strip - Add leading / trailing
strip
Remove leading / trailing strip
Description
Min/max values
Menu path
Use the remove leading or trailing strip settings to remove, by
default, a blank strip at the top or bottom of the image. The
print length will decrease accordingly.
‘Remove leading strip’ will remove a blank strip at the top of
the image.
‘Remove trailing strip’ will remove a blank strip at the bottom
of the image.
You can remove up to of 400 mm or 16 inch in steps of 1 mm.
Note: Remove leading or trailing strips will always work, unless you try to remove the entire plot.
0 - 400 mm
Jobs - Print - Defaults - Sheet - Strip - Remove leading / trailing strip
Océ Power Logic: Settings Editor (for the key operator)
173
Finishing
[100] ‘Finishing’ of the “Print’ tab
Unfolded print delivery
Description
Min/max values
Menu path
To determine where the unfolded output must be delivered
into the Integrated Receiving tray or the Copy Delivery tray
N/A
Jobs - Print - Defaults - Finishing- Unfolded print delivery
Folding
Description
Min/max values
Menu path
To determine if the job will be folded by default.
N/A
Jobs - Print - Defaults - Finishing - Folding
Folded print delivery
Description
Min/max values
Menu path
174
To determine where the folded output must be delivered:
Stacker or Belt.
N/A
Jobs - Print - Defaults - Finishing- Folded print delivery
Océ TDS600 Multifunctional Digital System User Manual
Drawing method
Description
Min/max values
Menu path
To define the standard folding method.
N/A
Jobs - Print - Defaults - Finishing - Drawing method
Image orientation
Description
Min/max values
Menu path
To specify the image orientation for folding. Choos between
Portrait, Landscape or Auto detect.
N/A
Jobs - Print - Defaults - Finishing - Image orientation
Folding length
Description
Min/max values
Menu path
Determines the folding length of the package
276 - 310
Jobs - Print - Defaults - Finishing - Folding length
Folding width
Description
Min/max values
Menu path
Determines the folding width of the package
186 - 230 mm
Jobs - Print - Defaults - Finishing - Folding width
Folding reinforcement
Description
Min/max values
Menu path
To specify if the folded prints should be reinforced
186 - 230 mm
Jobs - Print - Defaults - Finishing - Folding reinforcement
Binding strip
Description
Min/max values
Menu path
To add a binding strip to folded prints
15 - 30 mm
Jobs - Print - Defaults - Finishing - Binding striping
Océ Power Logic: Settings Editor (for the key operator)
175
Image
[101] ‘Image’ folder for ‘Print’
Zoom method
Description
Min/max values
Menu path
You can choose between the zoom methods:
Custom: to specify the zoom ratio you need
Shrink to fit: the large image zooms to fit on the chosen and
smaller media
Exact fit: enlarge or reduce the image to fit to the selected media
N/A
Jobs - Print - Defaults - Image - Zoom method
Custom zoom
Description
Min/max values
Menu path
176
Specifies the zoom value when zoom method is set to custom.
25 - 400 %
Jobs - Print - Defaults - Image - Custom zoom
Océ TDS600 Multifunctional Digital System User Manual
Mirror
Description
Min/max values
Menu path
You can use the ‘Mirror’ option to print a horizontally mirrored image of an original.
Mirroring is performed in the vertical axis.
N/A
Jobs - Print - Defaults - Image - Mirro
Invert
Description
Min/max values
Menu path
Use ‘Invert’, to print digital originals in reverse image.
This means that black text on a white background will be
printed as white text on a black background.
N/A
Jobs - Print - Defaults - Image - Invert
Rotate
Description
Min/max values
Menu path
The ‘Rotate value’ option allows you to set the default rotation
applied to the print.
The following values are available:
0 - 90 - 180 - 270 degrees
Auto rotate
Note: Use ‘Auto rotate’, to make the Océ 9600 choose a rotation automatically. When this setting is activated, the image
will rotate to the best fitting media format.
The following values are available:
Auto rotate productive If possible, the orientation is changed
to landscape to allow for faster printing (paper movement
through the machine will be reduced.
Auto rotate folding If possible, the orientation is changed to
portrait to facilitate folding.
Auto rotate portrait The orientation is changed to portrait.
Auto rotate landscape The orientation is changed to landscape.
Note:
Rotation is possible for both vector and raster files (1-bit).
N/A
Jobs - Print - Defaults - Image - Rotate - Rotate value
Océ Power Logic: Settings Editor (for the key operator)
177
Legend correction
Description
Min/max values
Menu path
178
The ‘Rotate value’ option allows you to set the default rotation
applied to the print.
The following values are available:
0 - 90 - 180 - 270 degrees
Auto rotate
Note: Use ‘Auto rotate’, to make the Océ 9600 choose a rotation automatically. When this setting is activated, the image
will rotate to the best fitting media format.
The following values are available:
Auto rotate productive If possible, the orientation is changed
to landscape to allow for faster printing (paper movement
through the machine will be reduced.
Auto rotate folding If possible, the orientation is changed to
portrait to facilitate folding.
Auto rotate portrait The orientation is changed to portrait.
Auto rotate landscape The orientation is changed to landscape.
Note:
Rotation is possible for both vector and raster files (1-bit).
N/A
Jobs - Print - Defaults - Image - Rotate - Legend correction
Océ TDS600 Multifunctional Digital System User Manual
Layout
[102] ‘Layout’ folder for ‘Print’
Auto shift
Description
Min/max values
Menu path
The Auto shift function enables you to automatically align the
image to one corner, to one side, or to the centre of the page.
The following options are available:
- Left up
- Up
- Right up
- Left
- Centre
- Right
- Left down
- Down
- Right down
N/A
Jobs - Print - Defaults - Layout - Auto shift
Horizontal / Vertical shift
Description
Min/max values
Menu path
The print margin may be too small to accommodate, for instance, filing strips without loss of information. To avoid this,
shift the image in horizontal and/or vertical direction. Image
shift can be used in combination with the align function.
N/A
Jobs - Print - Defaults - Layout - Horizontal / Vertical shift
Océ Power Logic: Settings Editor (for the key operator)
179
Off line folding
[103] Off-line folding settings for jobs
Folding delivery
Description
Min/max values
Menu path
To determine where the folded output must be delivered:
Stacker or Belt.
N/A
Jobs - Off-line folding- Folding delivery
Legend location
Description
Min/max values
Menu path
180
You can use the ‘Legend location’ option to determine if users
will default feed the original with the legend on the leading
edge or on the trailing edge of the original.
This information is used to fold the copy in such a way that the
legend is always on top of the folded package.
N/A
Jobs - Off-line folding - Legend location
Océ TDS600 Multifunctional Digital System User Manual
Drawing method
Description
Min/max values
Menu path
You can use the ‘Drawing method’ option to determine how
your output must be folded.
Choose between Standard, Afnor and Ericsson
N/A
Jobs -Off-line folding - Drawing method
Folding length
Description
Min/max values
Menu path
Determines the folding length of the package
276 - 310
Jobs - Off-line folding - Folding length
Folding width
Description
Min/max values
Menu path
Determines the folding width of the package
186 - 230 mm
Jobs - Off-line folding - Folding width
Folding reinforcement
Description
Min/max values
Menu path
To specify if the folded prints should be reinforced
186 - 230 mm
Jobs - Off-line folding - Folding reinforcement
Binding strip
Description
Min/max values
Menu path
To add a binding strip to folded prints
15 - 30 mm
Jobs - Off-line folding - Binding strip
Océ Power Logic: Settings Editor (for the key operator)
181
Printer related settings
There are two printer related settings for a key operator (see figure 104):
■ Automatic roll switch
■ Folder
Reinforce A4
Sheets on belt
■ Adjust
Block number with correct light intensity
[104] Printer related settings
Automatic roll switch
Description
Min/max values
Menu path
182
When you enable ‘Automatic roll switch’, the system switches
to another roll or sheet feeder (depending on the specified feed
preference) with the same material type and size, as soon as a
roll or sheet feeder is empty.
If ‘Set next larger fit’ is active, a larger size of material will be
used for printing. Only when all corresponding rolls or sheet
feeders are empty, you will have to refill media.
Note:
The system will not switch to a roll or sheet feeder which is
configured as a special.
N/A
Printer - Automatic roll switch
Océ TDS600 Multifunctional Digital System User Manual
Reinforce A4
Description
Min/max values
Menu path
To determine whether or not a reinforcement strip is added to
an A4
N/A
Printer - Folder - Reinforce A4
Sheets on belt
Description
Min/max values
Menu path
To determine the number of sheets that can be delivered after
the belt full indicator is activated
N/A
Printer - Folder - Sheets on belt
Block number with correct light intensity
Description
Min/max values
Menu path
As the printer drum gets older, the print quality might slightly
deteriote (printouts get lighter).
To avoid this and to guarantee the best possible print quality,
you may use the ‘Block number with correct light intensity’
option to adjust the light intensity of the printhead.
1 - 20
Printer - Adjust - Block number with correct light intensity
Océ Power Logic: Settings Editor (for the key operator)
183
Scanner related settings
There are single Scanner related settings and groups of settings for a key
operator (see figure 105):
■ Printer family
■ Rewind originals
■ Automatic feed
■ Sheet
■ Zoom steps)
■ Timers
[105] Scanner related settings for a key operator
184
Océ TDS600 Multifunctional Digital System User Manual
Single options
Printer family
Description
Min/max values
Menu path
During scan to file the image can be optimised for a specified
range of printers. When reprinting a scanned file, the output
quality will be best on a printer from the specified family. A
‘Universal’ printer does not optimise for one range of printers,
but gives an image that will print about equally well on all
types of printers.
N/A
Scanner - Settings - Printer family
Rewind originals
Description
Min/max values
Menu path
Use ‘Rewind originals’, to have the Océ 9600 rewind the originals after they have been scanned.
You can then take the scanned original from the front of the
scanner.
N/A
Scanner - Settings - Rewind originals
Automatic feed
Description
Min/max values
Menu path
If you enable the option ‘Automatic feed time out’, you only
have to use the start key once at the beginning of the scan job.
If this option is disabled, you will have to press the start key
for every original in order to start scanning or copying.
Note: If the start button has to be used to start the scanning, a
message will appear.
N/A
Scanner - Settings - Automatic feed
Océ Power Logic: Settings Editor (for the key operator)
185
Sheet
[106] ‘Sheet’ folder for the key operator
Fit method
Description
Min/max values
Menu path
186
Use ‘Fit method’, to indicate on which media size an original
will be printed if the specified media size is not available.
The following options are available:
Exact fit: he document will only be printed, if the specified
media size is available.
Next larger: if the specified media size is not available, the
document will be printed on the next larger size.
Next smaller: if the specified media size is not available, the
document will be printed on the next smaller size.
Best fit: the system will choose the best possible fit method. If
the specified media size is not available, than larger sizes have
preference above smaller sizes.
N/A
Scanner - Settings - Sheet - Fit method
Océ TDS600 Multifunctional Digital System User Manual
Zoom steps
The Key-Operator can change the 8 zoom steps in the range from 25.0% 400.0% in steps of 0.1%. There are 4 zoom steps to reduce and 4 zoom steps
to enlarge (see figure 107). The zoom step 100.0% can not be changed.
[107] Zoom steps for key operators
The defaults for the 8 zoom steps are:
■ Reduction step 1: 70.7%
■ Reduction step 2: 50%
■ Reduction step 3: 35.5%
■ Reduction step 4: 25%
■ Enlargement step 1: 141.4%
■ Enlargement step 2: 200%
■ Enlargement step 3: 282.8%
■ Enlargement step 4: 400%
Timers
There are three, scanner related, timer settings a key operator can change (see
figure 108):
■ Panel time out
■ Set time out
■ Automatic feed time out
Océ Power Logic: Settings Editor (for the key operator)
187
[108] Scanner related Timer settings for key operators
Panel time out
Description
Min/max values
Menu path
The ‘Panel time out’ option allows you to set the panel
time-out of the scanner panel. When no settings are being
made and no original is being scanned the panel will switch to
default settings after this time-out.
30 - 600 seconds
Scanner - Settings - Timers - Panel time-out
Set time out
Description
Min/max values
Menu path
The ‘Set time-out’ option allows you specify after how much
time the set on the scanner is automatically closed if no new
original is fed and the set is not closed with the start key.
10 - 600 seconds
Scanner - Settings - Timers - Set time-out
Automatic feed time out
Description
Min/max values
Menu path
188
If you enable the option ‘Automatic feed time out’, you only
have to use the start key once at the beginning of the scan job.
If this option is disabled, you will have to press the start key
for every original in order to start scanning or copying.
15 - 600 seconds
Scanner - Settings - Timers - Automatic feed time out
Océ TDS600 Multifunctional Digital System User Manual
System related settings
There are single System related settings and groups of settings for a key
operator (see figure 109):
■ Telephone number
■ Enabling passwords
■ Localization
■ Job priorities
■ Media
■ Timers
■ Disk cleanup
■ Job management
■ Logging
[109] System related settings for a key operator
Océ Power Logic: Settings Editor (for the key operator)
189
Telephone number
Telephone number
Description
Min/max values
Menu path
Use ‘Telephone number’, to display a telephone number,
when a permanent error occurs.
This can be the number of the key operator but also that of the
local service organisation.
N/A
System - Telephone number
Enabling passwords
[110] Enable passwords setting
Scan Logic password
Description
Min/max values
Menu path
Scan Logic is an option. To activate this option, you require a
password. Call your local dealer for this password.
N/A
System - Enabling passwords - Scan Logic password
Postscript 3/PDF password
Description
Min/max values
Menu path
190
To activate or disable the use of Adobe ® Postscript ® 3™ /
PDF.
N/A
System - Enabling passwords - Postscript password
Océ TDS600 Multifunctional Digital System User Manual
Océ Print Exec LT Web
Description
Min/max values
Menu path
To activate this option, you require a password. Call your local
dealer for this password.
N/A
System - Enabling passwords - Océ Print Exec LT Web
Account logging
Description
Min/max values
Menu path
To enable the logging of job attributes for account purposes.
To activate this option, you require a password. Call your local
dealer for this password.
N/A
System - Enabling passwords - Job logging
Advanced Queue management
Description
Min/max values
Menu path
To activate or disable the use Advanced Queue Manager.
N/A
System - Enabling passwords - Advanced Queue management
Océ Power Logic: Settings Editor (for the key operator)
191
Localization
Under localization you can change the display languages and the measurement
unit (see figure 111).
[111] Localization settings for key operators
First language
Description
Min/max values
Menu path
Use the ‘First language’ option, to specify the first (default)
language to be used at the operating panels (printer and scanner) of your system for providing information to the users. All
settings (also on the system) will be presented in the specified
language.
N/A
System - Localization - Display languages - First language
Second language
Description
Min/max values
Menu path
192
Use the ‘Second language’ option, to specify the second (alternative) language to be used at the operating panels (printer
and scanner) of your system for providing information to the
users. Users can switch between the first and second languages by changing the language at the printer operating panel. For
this option the same languages are available as for the first
language.
N/A
System - Localization - Display languages - Second language
Océ TDS600 Multifunctional Digital System User Manual
Measurements unit
Description
Min/max values
Menu path
Use the ‘Measurement unit’ option, to specify the preferred
measurement unit for your system: meters or inches.
The selected measurement unit will be used throughout the
system.
Note: After the measurement unit has changed, all the settings
will be recalculated.
N/A
System - Localization - Measurement unit
Océ Power Logic: Settings Editor (for the key operator)
193
Job priorities
There is one setting: Copy priorities (see figure 112).
[112] Job priorities settings for key operators.
Copy priorities
Description
Min/max values
Menu path
194
When you enable ‘Copy priorities’, the copy job will be
placed right behind the active job.
When you disable the option, the job will be placed at the end
of the print queue.
N/A
System - Job priorities - Copy priorities
Océ TDS600 Multifunctional Digital System User Manual
Media
The Media group contains the following settings (see figure 113).
[113] Media settings for key operators
Paper series
Description
Min/max values
Menu path
Use ‘Paper series’, to specify which paper range is to be used
as the default on your Océ TDS600.
When the user sets a new media size on the printer operating
panel, only the sizes in the selected paper series are available.
If ‘Auto format’ is enabled, the ‘Paper Series’ setting determines which sizes will be used (only those present in the paper series).
Choose from the following paper series:
DIN
DIN carto
Only 8.5 inch range
Mixed 8.5 inch and 9 inch range
N/A
System - Media - Paper series
Media request time-out
Description
Min/max values
Menu path
Time out for jobs when media format is not available. After
this time-out other jobs will be processed
N/A
System - Media - Media request timeout
Océ Power Logic: Settings Editor (for the key operator)
195
Media request action
Description
Min/max values
Menu path
Action for the job, after the media request time-out expired.
N/A
System - Media - Media request action
Manual feed time out
Description
Min/max values
Menu path
Use ‘Manual feed time-out’, to define the manual feed
time-out in seconds. This time-out is the delay before jobs will
get the status not ready to print (e.g. when the sheet is not being fed).
N/A
System - Media - Manual feed time out
Manual feed action
Description
Min/max values
Menu path
196
Action for the job, after the manual feed Action for the job, after the media request time-out expired.
time-out expired.
N/A
System - Media - Manual feed action
Océ TDS600 Multifunctional Digital System User Manual
Timers
The Timers group allows you to adjust the following settings (see figure 114):
■ Sleep mode timer
■ Controller panel time out
[114] Timers settings for key operators.
Sleep mode time
Description
Min/max values
Menu path
Use ‘Sleep mode timer’, to specify after how many minutes of
inactivity the system should switch to Sleep mode. In Sleep
mode, almost all the power supplies are switched off. Note:
The sleep mode time-out also applies to the scanner and the
folder, but NOT to the controller.
N/A
System - Timers - Sleep mode timer
Controller panel time out
Description
Min/max values
Menu path
Use ‘Panel time-out’, to set the panel time-out of the scanner
panel. When no settings are being selected and no original is
being scanned, the panel will switch to the default settings after this time out. By default this setting is ‘ON’. The default
panel time-out is 90 sec.
N/A
System - Timers - Controller panel time out - <value> - Apply
Océ Power Logic: Settings Editor (for the key operator)
197
Disk clean up
Use disk cleanup to clean the disk with regular intervals. Cleanup can be done
automatically or manually. Three directories can be cleaned (see figure 115):
■ Local storages folder
■ Unsent folder
■ Scan spool folder
[115] Disk clear up settings for key operators
Frequency
Description
Min/max values
Menu path
Frequency: the folder will be cleaned at the preset time.
0 - 850 h
System - Disk cleanup - Local storages / Unsent folder / Scan
spool cleanup - Frequency
File age
Description
Min/max values
Menu path
198
File age: files older than the specified time and date will be deleted.
0 - 850 h
System - Disk cleanup - Local storages / Unsent folder / Scan
spool cleanup - File age
Océ TDS600 Multifunctional Digital System User Manual
Next time
Description
Min/max values
Menu path
Next time: the next cleanup action will be at the preset time.
After completion of the cleanup action, this setting is updated
according to the frequency setting.
N/A
System - Disk cleanup - Local storages / Unsent folder / Scan
spool cleanup - Next time
Job management
Use job management to manage jobs in the print queue and the history queue.
f
[116] ‘Job management’ settings for the key operator
Print jobs
Description
Min/max values
Menu path
To determine if jobs go to the inbox, are send to the print
queue or if the jobs are printed as described in the job ticket.
N/A
System - Job management - Print jobs
Rights for printing
Description
Min/max values
Menu path
To define if everyone is allowed to print from the inbox or the
history queue or only a special user.
N/A
System - Job management - Rights for printing
Océ Power Logic: Settings Editor (for the key operator)
199
Enable history queue
Description
Min/max values
Menu path
To enable or disable the saving of already printed jobs in the
history queue.
N/A
System - Job management - History queue - Enable history
queue
Print job lifetime
Description
Min/max values
Menu path
Time the jobs are stored in the history queue.
N/A
System - Job management - History queue - Print job lifetime
Max nr of jobs
Description
Min/max values
Menu path
200
To define how many print jobs can be stored in the history
queue.
N/A
System - Job management - History queue - Max nr of jobs
Océ TDS600 Multifunctional Digital System User Manual
Logging
Use logging to specify the format of the logging file.
[117] ‘Logging’ settings for the key operator
File format
Description
Min/max values
Menu path
To define the file format for the logging files. Choose between
7-bit ASCII or Unicode.
N/A
System - Logging - File format
File field separator
Description
Min/max values
Menu path
To define if the field separator should be a semicolon, a comma or a tab.
N/A
System - Logging - File field separator
File age
Description
Min/max values
Menu path
To define if jobs must be removed after the predefined number
of days.
N/A
System - Logging - File age
Océ Power Logic: Settings Editor (for the key operator)
201
202
Océ TDS600 Multifunctional Digital System User Manual
Océ TDS600
Multifunctional Digital System
User Manual
Chapter 11
Océ Power Logic: Settings Editor
(for the system administrator)
This chapter describes how to make System Administrator
settings in the Settings Editor of the Océ TDS600.
203
Introduction
The Océ TDS600 system administrator is responsible for:
■
■
■
■
■
■
■
Dithering matrix and Poker settings
Printer language controller settings
Pen settings
Automatic Language Selection (ALS) settings
Controller identification settings
Set memory reservation settings
Connectivity settings.
To modify the system administrator settings you have to access the SA settings
in the Settings Editor.
This chapter will inform you how to access the Settings Editor and how to
define system administrator settings.
204
Océ TDS600 Multifunctional Digital System User Manual
System Administrator settings
In order to perform special system administrator functions, you must log into
the Settings Editor as a system administrator (see ‘User modes’ on page 117).
Note: When you are finished, make certain you log out of the System
administrator mode of the Settings Editor to prevent unauthorized use of the
Océ TDS600.
▼
Make system administrator settings in the Settings Editor
1 Maximize the Settings Editor on the screen.
2 Log in as system administrator.
3
4
5
6
7
See ‘User modes’ on page 117 for more information about logging into the
Settings Editor.
Click on one of the top buttons to display the desired group of settings.
Select the setting you want to update in the tree structure.
Update the setting in the update area, as required.
Note: A few settings, such as the default pen settings, are made directly
from the tree structure area.
Click on the ‘Apply’ button.
The new value is now applied for the setting
Log out of the System administrator mode when you are finished updating
settings.
See ‘Océ Power Logic: Settings Editor (for the key operator)’ on page 139 for
more information about the Settings Editor for the key operator.
Océ Power Logic: Settings Editor (for the system administrator)
205
There are two types of system administrator settings (see figure 118):
■ Printer
■ System
.
[118] System administrator settings in the Settings editor
206
Océ TDS600 Multifunctional Digital System User Manual
Printer related settings
The PDLs tab contains the following settings:
■ Dithering matrix
■ Poker PDL heap size
■ Poker min number of vertices in polygons
■ Poker max number of vertices in polygons
■ Scale down algorithm
■ HPGL
■ HPGL-2
■ Calcomp
■ Postcript
■ NIRS
■ C4
■ TIFF
■ CALS
■ ASCII
Dithering matrix
Description
Min/max values
Menu path
The ‘Dithering matrix’ option allows you to select the dithering matrix for improving the print quality. You can choose between:
- Clustered
In general this option can be used for vector files with sharp
lines
- Stochastic
Use this option in case of raster files.
N/A
Printer - PDLs - Dithering matrix
Océ Power Logic: Settings Editor (for the system administrator)
207
Poker PDL heap size
Description
Min/max values
Menu path
This setting allows you to increase the PDL heap size if the
system is unable to perform transformations (in case of very
big polygons). A higher heap size may result in performance
degradation, however.
16 - 256 Mb
Printer - PDLs - Poker PDL heap size
Poker min number of vertices in polygons
Description
Min/max values
Menu path
This setting specifies the minimum number of vertical polygons that can be correctly handled by the printer.
1024 - 35000
Printer - PDLs - Poker min number of vertices in polygons
Note: The minimum and maximum number should be the same.
Poker max number of vertices in polygons
Description
Min/max values
Menu path
This setting specifies the maximum number of vertical polygons that can be correctly handled by the printer. If you select
a very high value, a great deal of memory will be used and
performance degradation may occur.
1024 - 35000
Printer - PDLs - Poker max number of vertices in polygons
Note: The minimum and maximum number should be the same
.
Scale down algorithm
Description
Min/max values
Menu path
208
Use 'Scale down algorithm', to scale down a bitmap. If you
use 'Sampling', all information will be sized down. This
means that you may lose thin lines. If you use 'Black pixel
conservation', to scale down the bitmap all information will
be kept.
N/A
Printer - PDLs - Scale down algorithm
Océ TDS600 Multifunctional Digital System User Manual
Printer Descriptive Language settings
The Printer menu in the SA settings of the Settings Editor allows you to define
specific settings for the available printer languages and to change pen settings
for the supported vector languages.
The Océ TDS600 accepts print files in various data formats (languages). These
include HP-GL, HP-GL/2, Calcomp, Postscript level 3, NIRS, C4, TIFF,
CALS and ASCII. You can change the settings for HP-GL, HP-GL/2, Calcomp
and ASCII. The other available languages can only be enabled or disabled.
On the Océ TDS600, a number of settings are available which allow the system
administrator to specify, per connection type, which printer languages are
accepted for automatic data format recognition and which language is forced.
These settings are called ALS (Automatic Language Sensing) settings.
If ALS is enabled, the Océ TDS600 automatically recognizes the host data
language and adapts the printer to support all the parameters required for
printing data from the host.
Automatic data format recognition enables the Océ TDS600 to switch between
files with different formats when working in a multi-format environment,
where different printer drivers are being used.
The following language formats are supported on the Océ TDS600:
■ HPGL
■ HPGL2
■ CALCOMP
■ PostScript
■ NIRS
■ C4
■ TIFF
■ CALS
■ ASCII
The ASCII language is not automatically recognizable, but must be forced
when plots are to be printed in ASCII format (e.g. for printing listings). VDF
and BGL are not available on the Océ TDS600.
C4, or CALS type 4, was previously called EDMICS. NIRS is also called
CALS type 3. CALS type 2 is recognized, but not interpreted (only CALS1 is
supported).
Océ Power Logic: Settings Editor (for the system administrator)
209
Note: When using automatic data format recognition, it is important that every
print file begins with a start of plot instruction and terminates with an end of
plot instruction.
Automatic language sensing When you are using automatic data format
recognition it is advisable to:
Implement the same defaults for all connection types
■ Select the ‘Automatic’ option as your ‘PDL selection’ setting for the
appropriate connection type
■ Set all languages supported on the Océ TDS600 to ‘Enabled’.
■
Any other approach is only appropriate for system administrators who need to
tune or organize the use of their system to specific organizational
requirements.
Note: If your print is not recognized correctly, define the data format in a
remote control file or an Océ Job Ticket and then send the print again. In that
case the selected option only applies to this job.
Alternatively, you can select the appropriate data format manually on the
Settings Editor panel and then resend the print. However, this setting will
remain active for all incoming prints on that connection. This means that you
will need to reset machine default settings to Automatic to return to your
“normal” working mode.
For further information on remote control, refer to the Remote Control File
Reference Manual or the Océ Job Ticket Reference Manual.
▼
Enable Automatic Language Sensing (ALS)
1 Click on the ‘System’ button.
The System settings are displayed
2 Click on the ‘Connectivity’ folder.
A list of available connection types is displayed.
3 Click on the folder for the appropriate connection type.
4 Select the ‘PDL selection’ option.
5 Select ‘Automatic’ (the default value) to activate Automatic Language Sensing
6 Click on the ‘Apply’ button to save the changes you made.
Note: The following default settings can be overruled by settings that are sent
along with the print or copy job:
210
Océ TDS600 Multifunctional Digital System User Manual
.
HPGL
Setting
Enable
HPGL
Origin
Select pen 0
Colour
merge control
Pen width
scaling
Kanji font
set
Description
The 'Enable' option allows you to enable or disable HPGL. In case
of problems with HPGL, the HPGL PDL can be disabled by selecting the 'Disabled' option.
Use the 'Origin' option to define the HPGL origin settings of the
plot.
If you enable the 'Select pen 0' option, the selection of pen 0 will
be interpreted as end of file (EOF). If the option is disabled, pen 0
will behave like a default HPGL pen.
Use the 'Colour merge control' option to determine what should
happen when two or more colours intersect at the same point on a
plot, especially at the intersection of vectors or 'filled' polygons. If
the colour merge control is set to off, the colour of the last vector
or area fill overwrites the colours specified at the same crossing area. White areas are considered opaque. If set to on, all colours are
blended together (merged) at the intersection of vectors and polygons.
To enable or disable the pen width scaling.
If enabled: scaling an image will scale the pen width correspondingly.
To specify the correct font set for the files which contain Kanji
font.
HPGL-2
Setting
Enable
HPGL-2
Origin
Select pen 0
Colour
merge control
Description
The 'Enable' option allows you to enable or disable HPGL-2. In
case of problems with HPGL-2, the HPGL-2 PDL can be disabled
by selecting the 'Disabled' option
Use the 'Origin' option to define the HPGL-2 origin settings of the
plot.
If you enable the 'Select pen 0' option, the selection of pen 0 will
be interpreted as end of file (EOF). If the option is disabled, pen 0
will behave like a default HPGL-2 pen.
Use the 'Colour merge control' option to determine what should
happen when two or more colours intersect at the same point on a
plot, especially at the intersection of vectors or 'filled' polygons. If
the Colour merge control is set to off, the Colour of the last vector
or area fill overwrites the colours specified at the same crossing area. White areas are considered opaque. If set to on, all colours are
blended together (merged) at the intersection of vectors and polygons.
Océ Power Logic: Settings Editor (for the system administrator)
211
HPGL-2
Pen priority
PS no clip
Emulation
type
Line attributes
Pen width
scaling
Kanji font
set
212
Pen parameters can be defined in two ways:
- In the plot data file
- In the Remote Configuration File (RCF) or Océ Job Ticket (OJT)
If pen priority is set to 'Language', the pen parameters defined in
the plot data file will be used. If pen priority is set to 'Setup', the
pen parameters defined in the configuration file or the job ticket received with the plot will be used.
If 'PS no clip' is set to 'On' and the plot defines a Page Size (PS)
value of WxH (Width and Height), the PS is not taken into account.
In that case the plot may be bigger or smaller than the PS.
You can use the 'Emulation type' option to determine the type of
printer you want to emulate: HP650C or HP750C. The default emulation type is HP650C, which is backward compatible with old
machines. Differences occur in the default pen palette and the default number of pens. If HP750C is selected, the default palette is
a grey level palette and compatible with HP750C.
If the 'HP default' value is set, the Line Attributes instruction is fully emulated. All types of lines ends/joins allowed by the Line attributes specifications will be therefore printed according to these
specifications. For backward compatibility reason, the interpretation of this instruction can be disabled ('Océ Round value). In that
case, the lines of the plot will be processed as rounded and without
join.
To enable or disable the pen width scaling.
If enabled: scaling an image will scale the pen width correspondingly.
To specify the correct font set for the files which contain Kanji
font.
Océ TDS600 Multifunctional Digital System User Manual
Calcomp
Setting
Enable Calcomp
Step size
Origin
Synchro
code
Double synchro
Checksum
End of message
Pen priority
Colour
merge control
Pen width
scaling
Description
The 'Enable' option allows you to enable or disable Calcomp. In
case of problems with Calcomp, the Calcomp PDL can be disabled
by selecting the 'Disabled' option.
The 'Step size' option allows you to define the number of steps per
inch. Note: This setting should correspond with the resolution of
the plot.
With the 'Origin' option you can define the Calcomp origin settings
of the plot.
You can use the 'Synchro code' option to define the character code
for the synchronization byte. This setting indicates the beginning
of the plot data.
You can use the 'Double synchro' option to enable / disable the
double sync mechanism.
You can use the 'Checksum' option to enable / disable the checksum.
You can use the 'End of message' option to define the character
code for the end-of-message byte. This will indicate the end of a
data sequence.
Pen parameters can be defined in two ways:
- In the plot data file
- In the Remote Configuration File (RCF) or Océ Job Ticket (OJT)
If pen priority is set to 'Language', the pen parameters defined in
the plot data file will be used. If pen priority is set to 'Setup', the
pen parameters defined in the configuration file or the job ticket received with the plot will be used.
You can use the 'Colour merge control' option to determine what
happens when two or more colours intersect at the same point on a
plot, especially at the intersection of vectors or 'filled' polygons.
If the Colour merge control is set to 'Off', the Colour of the last vector or area fill overwrites the colours specified at the same crossing
area. White areas are considered opaque. If set to 'On', all colours
are blended together (merged) at the intersection of vectors and
polygons.
To enable or disable the pen width scaling.
If enabled: scaling an image will scale the pen width correspondents.
Océ Power Logic: Settings Editor (for the system administrator)
213
Calcomp
Kanji font
set
Font 3
To specify the correct font set for the files which contain Kanji
font.
To specy if you use font 3 with 8 bit 'German' or 16 bit 'Japanese'
symbols.
PostScript
Setting
PS level 3
password
Enable PostScript
Default page
size
PS heap size
Enable PDF
Description
To activate or disable the use of Adobe® PostScript® 3/PDF.
The ‘Enable’ option allows you to enable or disable PostScript. In
case of problems with PostScript, the PostScript PDL can be disabled by selecting the 'Disabled' option
To indicate the dimensions of the paper on which your document
will be printed.
To increase the PostScript Level 3 heap size if the system is unable to print the file. However a higher heap size may result in performance degradation
To define if PDF is enabled or disabled as PDL for printing.
NIRS
Setting
Enable NIRS
Description
The 'Enable' option allows you to enable or disable NIRS. In case
of problems with NIRS, the NIRS PDL can be disabled by selecting the 'Disabled' option.
C4
Setting
Enable C4
214
Description
The 'Enable' option allows you to enable or disable C4. In case of
problems with C4, the C4 PDL can be disabled by selecting the
'Disabled' option.
Océ TDS600 Multifunctional Digital System User Manual
TIFF
Setting
Enable TIFF
Photometry
Description
The 'Enable' option allows you to enable or disable TIFF.
The 'Photometry' option allows you to define the photometry value
for TIFF.
You can choose from:
- File control
The photometry info in the TIFF header will be used.
- White is zero
The photometry info in the TIFF header will be overruled.
For example:
When the plot is inverted in terms of background and you wish to
correct that, this option can fix the problem and re-invert the plot
(although it depends on the content of the plot)
CALS
Setting
Enable
CALS
Description
The 'Enable' option allows you to enable or disable CALS. In case
of problems with CALS, the CALS PDL can be disabled by selecting the 'Disabled' option.
ASCII
Setting
Enable
ASCII
End of line
Line overflow
Font size
Tab size
Description
The 'Enable' option allows you to enable or disable ASCII. In case
of problems with ASCII, the ASCII PDL can be disabled by selecting the 'Disabled' option.
The 'End of line' option allows you to define the type of line break
used in the ASCII file:
- carriage return (CR) only
- line feed (LF) only
- carriage return and line feed (CR-LF).
The 'Line overflow' option allows you to define whether a line that
extends beyond the right margin is wrapped onto the next line, or
is truncated.
The 'Font size' option allows you to define the font size to use, in
points (1 point=1/72 inch)
The 'Tab size' option allows you to define the tab size to use.
Océ Power Logic: Settings Editor (for the system administrator)
215
ASCII
Top margin
Bottom margin
Left margin
Right margin
Pen width
Page type
Custom page
width
Custom page
height
Standard
page format
Standard
page orientation
Pen width
scaling
▼
The 'Top margin' option allows you to define the top margin to
keep above the text.
The 'Bottom margin' option allows you to define the top margin to
keep underneath the text. Top is related to input, not orientation of
paper.
The 'Left margin' option allows you to define the margin to keep to
the left of the text.
The 'Right margin' option allows you to define the margin to keep
to the right of the text.
The 'Pen width' option allows you to define the default line width
of the text.
The 'Page type' option allows you to define the default page type
for the logical image that contains the ASCII text.
Possible values are:
- Standard
- Custom
The 'Custom page width' option allows you to define the selected
page width when 'Custom' has been selected as default page type.
The 'Custom page height' option allows you to define the selected
page height when 'Custom' has been selected as default page type.
The 'Standard page format' option allows you to define the default
size of the formatted text when 'Standard' as file type is selected.
The 'Standard page orientation' option allows you to define the direction of the ASCII text when 'Standard' is selected as file type.
The following settings are available:
- Portrait
- Landscape
To enable or disable the pen width scaling.
If enabled: scaling an image will scale the pen width correspondents.
Specifying printer language settings
1 Click on the ‘Printer’ button.
The Printer settings are displayed.
2 Click on the ‘PDLs’ tab.
A list of available printer languages is displayed.
3 Click on the folder for the appropriate language and make the desired settings.
4 Click on the ‘Apply’ button to activate the changes.
216
Océ TDS600 Multifunctional Digital System User Manual
Pen settings
When printing files, the pen settings can be changed on the ‘Pens’ tab of the
‘Printer’ menu. You can change the default width and pattern for each pen
number. These settings apply to all vector languages: HP-GL, HP-GL/2 and
CalComp.
[119] Making pen settings
Pen width Pen width can be defined from 0.12 up to 16.25 mm. By default all
pen widths are set to 0.12 mm. Adjustment can be made in steps of 0.01 mm.
Pen pattern A pen can be selected by the plot file to draw a line or to fill a
polygon. All lines or polygons on the plot can be drawn with a predefined
pattern or shade of grey. Default is pen pattern 16 (black).
Océ Power Logic: Settings Editor (for the system administrator)
217
The following pen patterns are available:
white
black
[120] Available pen patterns
▼
Define pen settings
1 Click on the ‘Printer’ button.
The Printer settings are displayed
2 Click on the ‘Pens’ tab.
The Pen settings are displayed (see figure 119).
3 Type a pen number in the ‘Pen number’ box or select a number with the
selection arrows to the right of the box.
The ‘Pen width’ and ‘Pattern’ boxes now become active.
4 Specify a pen width by typing a value or selecting one with the selection
arrows.
5 Specify a pen pattern by typing a number, selecting one with the selection
arrows or clicking on one of the available patterns in the ‘Pattern overview’
box.
6 Click on the ‘Apply’ button to save the changes you made.
218
Océ TDS600 Multifunctional Digital System User Manual
System related settings
The system related settings contains the following options (see figure 121):
■ Scan memory reservation
■ Controller identification
■ Set memory reservation
■ Connectivity
[121] System related settings in the Settings Editor
Scan memory reservation
Description
Min/max values
Menu path
To specify the maximum amount of the file system disk usage
allowed for all folders to store scanned files, the (temporary
store folder, the unsent folder and the scan spool folder
1024 - 3072 Mb
System - Scan memory reservation
Océ Power Logic: Settings Editor (for the system administrator)
219
Controller identification settings
Controller identification contains the following options:
■ Host name
■ Description
■ Location
■ Administrator
Host name
Description
Min/max values
Menu path
To specify the name with which the Océ TDS600 will present
itself on the TCP/IP network. To identify the controller, you
have to enter the host name. Keep the following:
- use no more than 15 characters.
- choose characters from the following series: a-z; A-Z; 0-9.
- if you use a hyphen, put it somewhere in the middle of the
name, not at the beginning nor at the end.
N/A
System - Controller identification - Hostname
Description
Description
Min/max values
Menu path
To enter additional information about the system. It is not
mandatory to fill in this field.
N/A
System - Controller identification - Description
Location
Description
Min/max values
Menu path
To enter additional information about the system. It is not
mandatory to fill in this field.
N/A
System - Controller identification - Location
Administrator
Description
Min/max values
Menu path
To enter the name of the system administrator.
N/A
System - Controller identification - Administrator
[122] Making system settings
220
Océ TDS600 Multifunctional Digital System User Manual
Set memory reservation settings
The System Control Panel contains a set memory bar, which indicates how
much set memory is still available. In the Settings Editor you can define the
threshold values for the orange and red zones (see figure 121 on page 219).
Orange zone limit
Description
Min/max values
Menu path
To specify the orange limit in Megabytes. The orange zone is
entered when the free space in the set memory becomes less
than this limit.
100 - 2048 Mb
System - Set memory reservation - Orange zone limit
Red zone limit
Description
Min/max values
Menu path
To specify the red limit in Megabytes. The red zone is entered
when the free space in the set memory becomes less than this
limit. If the red zone is reached, write access to set memory
is refused, until the starting point of the orange zone is
reached.
50 - 1024 Mb
System - Set memory reservation - Red zone limit
Connectivity settings
The Océ TDS600 supports a large number of different connection types,
including:
■ FTP
■ LPD
■ SMB
■ Novell
■ TCP/IP
■ IPX/SPX
■ NetBeui
The system administrator can configure the Océ TDS600 for these different
connection types with the help of the Settings Editor.
▼
Making connectivity settings
1 Click on the ‘System’ button.
Océ Power Logic: Settings Editor (for the system administrator)
221
2 Open the ‘Connectivity’ folder.
3 Open the folder with the appropriate connection type.
4 Select any of the available options for the selected connection type.
5 Change the setting in the update area, as appropriate.
6 Click on the ‘Apply’ button to save any changes you have made.
See the TDS Connectivity Manual on the ‘User Documentation and Remote
Applications CD-ROM’, which is delivered with the system, for detailed
information about making the Océ TDS600 available in your particular
network configuration.
FTP
Setting
Enable FTP
Time-out
Communication
mode
PDL selection
Description
To define if FTP communication is enabled or disabled.
To define the plot time-out on a FTP connection.
60 - 900 s
To define the communication mode for a FTP connection.
With Print while spool the data will be spooled in chunks.
With Spool then print the complete job will be spooled before
printing starts.
To define the PDL enabled for a FTP connection. The Automatic option enables Automatic Language Sensing.
LPD
Setting
Enable LPD
Communication
mode
PDL selection
222
Description
To define if LPD communication is enabled or disabled.
To define the communication mode for a LPD connection.
With Print while spool the data will be spooled in chunks.
With Spool then print the complete job will be spooled before
printing starts.
To define the PDL enabled for a LPD connection. The Automatic option enables Automatic Language Sensing.
Océ TDS600 Multifunctional Digital System User Manual
SMB
Setting
Enable SMB
Workgroup name
Communication
mode
PDL selection
Description
To define if SMB communication is enabled or disabled.
To specify the SMB workgroup name. A workgroup is a
group of users sharing computer files and services for communication.
To define the communication mode for a SMB connection.
With Print while spool the data will be spooled in chunks.
With Spool then print the complete job will be spooled before
printing starts.
To define the PDL enabled for a SMB connection. The Automatic option enables Automatic Language Sensing.
Novell
Setting
Enable Novell
Pserver name
Pserver password
Access mode
File server names
NDS context
Queue poll interval
Connection retry
interval
Communication
mode
PDL selection
Description
To define if Novell communication is enabled or disabled.
To specify the Novell PSERVER name. The specified string
should not be preceded by a period.
To specify the Novell PSERVER password.
To define the Novell access mode.
To specify the names of the available Novell file servers. You
can define multiple names, divided by a semi-colon.
To specify the Novell Directory Services context of the Pserver that has been defined for the system.
To specify the Novell queue poll interval in seconds. The system will check regularly on the Pserver, if there are new jobs
to be printed.
To define the interval for trying to re-establish a Novell connection.
To define the communication mode for a Novell connection.
With Print while spool the data will be spooled in chunks.
With Spool then print the complete job will be spooled before
printing starts.
To define the PDL enabled for a Novell connection. The Automatic option enables Automatic Language Sensing.
Océ Power Logic: Settings Editor (for the system administrator)
223
TCP/IP
Setting
Domain
DNS
Enable
Enable DHCP
IP address
IP mask
Default gateway
Primary WINS
server
Secondary WINS
server
Description
To specify the network domain name. The network domain
name is the TCP/IP address of the domain server where the
Océ TDS600 controller is connected to.
To specify the DNS server. Use semicolons ( ; ) to separate
entries.
To define if the TCP/IP adapter is enabled or disabled, in order to allow TCP/IP communication.
To enable or disable the DHCP protocol, that lets network administrators manage centrally and automate the assignment
of Internet Protocol. In order to make DHCP recognise your
system, a fixed IP address has to be configured.
To specify the IP address for the server. A single adapter card
can have more than one adapter on it, so it is possible to specify several IP addresses.
To specify the IP subnet mask for the server. The subnet mask
is a number that when compared by the computer with a network address number, will block out all but the necessary information.
To specify the IP address of the default gateway. A gateway
connects networks using different protocols so that information can be passed from one to the other. A gateway both
transfers information and converts it to a form compatible
with the protocols used by the receiving network.
Type the IP address for the primary WINS server. This uses
Windows Internet Name Service (WINS) protocol in combination with name query broadcasts to resolve computer
names to IP addresses.
Type the IP address for the secondary WINS server. This uses
Windows Internet Name Service (WINS) protocol in combination with name query broadcasts to resolve computer
names to IP addresses.
IPX/SPX
Setting
Enable
Description
To define if the SPX adapter is enabled or disabled.
NetBeui
Setting
Enable
224
Description
To define if the NetBeui adapter is enabled or disabled.
Océ TDS600 Multifunctional Digital System User Manual
Océ TDS600
Multifunctional Digital System
User Manual
Chapter 12
Océ Power Logic: Account logging
This chapter describes what Account logging is and how
you use it.
225
The account logging mechanism
For accounting purposes, the Océ Power Logic Controller is able to keep track
of all your jobs. For each copy/print/scan job the job info and the paper usage is
stored. For scan to file with check print 2 records are generated, one for the
scan to file and one for the check print.
All this data is stored in a file: the account log file. The account file contains a
record for each copy/print/scan job.
Account logging consists of the following steps:
1 Enable the Account logging option
2 Set the file format properties
3 Make copy/print/scan jobs on the right account
4 Retrieve the generated Account logging file
5 Use the generated Account logging file
1 Enable the Account logging option
Account logging is an option. You enable this option in the Settings Editor via
a password (see ‘Account logging’ on page 191).
2 The account log file
File format The account logging information is stored in a file. The format of
the file is either ASCII (using the ISO Latin-1 encoding) or UTF-16. The
format depends on the Logging file format setting (see ‘File format’ on
page 201). The file format is either YYYYMMDD.csv (for ASCII files), or
YYYYMMDD.txt (for UTF-16 files). You set the file name in the settings
editor (see ‘File format’ on page 201).
File content The account log file content is based on a text file consisting of a
sequence of lines of text. A line of text is an ordered sequence of characters.
Records consist of a sequence of fields separated by a field separator character
(see ‘File field separator’ on page 201). Each line of text forms a record. The
records can be of different types, as indicated by a record type identifier which
is the first field in a record.
226
Océ TDS600 Multifunctional Digital System User Manual
Storage The account log file is stored on the controller. The controller
generates a account log file each day. You can determine for how long the
accounting log file is kept on the controller. You set the file age in the Settings
Editor (see ‘File age’ on page 201).
File field separator The items of a record in the account log file are separated
by the file field separator. The file field separator depends on the regional
settings of your operating system. By default the file field separator is set to
‘semicolon’. Make sure you specify the same file field separator in the Settings
Editor (see ‘File field separator’ on page 201) as in your regional system
settings. For Windows operating system you can find this under: Start Settings - Control Panel - Regional Setting - Number - List separator.
Escaping method If the text in the field separator contains the field separator
character, end of line or double quote then the text in the field changes as
follows:
1 An occurrence of a double quote is replaced by two double quotes.
2 The resulting text is surrounded by double quotes.
Note: The escaping method is compatible with MS Access and MS Excel.
Storage The print/copy/scan jobs you make in one day are stored in one
separate account log file. The Océ TDS600 system makes each day a new
account log file. You can set how long the account log files are stored on the
controller (see ‘File age’ on page 201).
3 Make copy/print/scan jobs
▼
To set the accounting for a copy or scan job
1 Open the ‘Scanner’ card in the ‘Original’ section.
2 Press the ‘Account’ function button to toggle between ‘User ID’ and ‘Account
ID’.
3 Enter the correct ‘Account id’ or ‘User id’ with the numeric button, or use the
arrow buttons on the scanner operator panel.
▼
To set accounting for a print job
1 For a print job, you must specify the ‘Account ID’ and the ‘User ID’ in the
printer driver, in Océ Print Exec LT web or in Océ Print Exec LT.
You are now ready to make copy/print/scan jobs.
Océ Power Logic: Account logging
227
4 How to retrieve the account files
The account log files are stored in the logging directory of the controller. You
can retrieve your files from the local host via File Transfer Protocol (FTP). FTP
can be done:
1 via an internet browser or
2 via a dos box.
▼
Get the account log file via FTP in a internet browser
1 Start an internet browser
2 Enter the ftp address of the Océ TDS600 system (see ‘Host name’ on
page 220).
Note: You set the name of the system in the Settings Editor.
The browser shows the ftp directories on the Océ TDS600 system (see
figure 123).
3 Browse to the ‘Accounting’ directory.
The accounting log files are shown (see figure 124).
4 Save the accounting log files to any destination on your system. This is usually
done by a right click on the file and then the ‘save’ option.
[123] The ftp directories on the Océ TDS600 system
228
Océ TDS600 Multifunctional Digital System User Manual
[124] The accounting directory with the account log file on the Océ TDS600 system
▼
Get the account log file via FTP in a dos box
1 Launch an FTP client.
2 Enter the ‘ftp’ command.
A DOS box now appears with the FTP prompt.
3 Enter the ‘Open’ command followed by either the registered name of the
4
5
6
7
8
Power Logic Controller or the IP address (for example: 194.2.66.146) to
connect to the Controller and press Enter: ‘open 194.2.66.146’.
Note: Instead of performing steps 2 and 3 you could also enter “ftp
host_name” in the FTP client.
The connection with the Controller is now established and a window appears
asking you for a user name.
Enter your user name ‘anonymous’, and enter as your password also
‘anonymous’.
A connection is now set up for the default user ‘anonymous’.
Note: As there is no registered user, you can simply press Enter to initiate
the connection.
Set the transmission mode to binary by entering ‘binary’.
Go to the ‘logging’ directory using the following command: ‘cd logging\’.
Get ‘20001011.csv’ or ‘20001110.txt’ depending on the file format setting,
(see ‘File format’ on page 201).
Quit FTP by entering the ‘bye’ command.
Océ Power Logic: Account logging
229
5 Use the generated accounting file
After you retrieved the accounting file you can view and use the data that are
stored in the records. You can import the account log file into for example
Microsoft Excel or Microsoft Access.
▼
Import the account log file into Microsoft Excel
1 Start Microsoft Excel.
2 Open the account log file that is on your system.
Microsoft Excel shows the content of the account log file: the records (see
figure 125).
Now you can process the data in the account log file.
[125] The account log file in Microsoft Excel
230
Océ TDS600 Multifunctional Digital System User Manual
Account information in the log file
For each output page an account log record (1 line) is generated. A job that
consists of several output pages, will have several account log records. Also for
each scan (scan to file jobs) an account log record is generated.
All records that are part of a single job, will have the same value for the ‘Job
Unique ID’ field. This field is part of each record and is unique for each job in
the file. This field is for collecting records that are part of a single job and to
calculate the totals for the whole job.
Account information for the media format
If a standard output media format is chosen in a print, scan or copy job, the
media width and height for the output media reported in the account log file,
will be exactly as specified in the following table. Any deviation from these
values (even by 1 unit) implies that a non-standard media format was chosen
in the job.
Note: Note that for output in landscape orientation, the width and height
values are swapped.
Océ Power Logic: Account logging
231
Format name
A0
A1
A2
A3
A4
E
D
C
B
A
E+
D+
C+
B+
A+
B1
B2
B3
B4
30x42
jis B1
jis B2
jis B3
jis B4
jis B5
Width
(units of 1/72 inch)
2384
1684
1191
842
595
2448
1584
1224
792
612
2592
1728
1296
864
648
2004
1417
1001
709
2160
2064
1460
1032
729
516
Height
(units of 1/72 inch)
3370
2384
1684
1191
842
3168
2448
1584
1224
792
3456
2592
1728
1296
864
2835
2004
1417
1001
3024
2920
2064
1460
1032
729
Account information for the media weights
In the account log file, media weight is represented by the values ‘LIGHT’,
‘NORMAL’ and ‘HEAVY’. The following table specifies the mapping for
actual media to the values in the account log.
232
Océ TDS600 Multifunctional Digital System User Manual
Actual material
Plain paper 75g, 80g
Plain paper 110g, 24lb
Transparent 80g
Transparent 110g
Vellum
Polyester 3P5 Mil
Polyester 4P5 Mil
Translucent
Plain paper 64g
Japanese transparent (90g)
Value in log file
NORMAL
HEAVY
NORMAL
HEAVY
NORMAL
NORMAL
NORMAL
NORMAL
LIGHT
NORMAL
Structure of the account file
The Océ TDS600 supports two different record types: 6210 and 6211. The first
record in each account log file is of type 6210 and contains a list of abbreviated
field names that occur in records of type 6211. this record is always the same
in each account log file and is used as a comment. For example to clarify the
meaning of the fields if the file is imported in an application like MS Excel.
The actual account log information is in records of type 6211 (the second up
to the last record in the account log file). The fields of that record are described
in the table ‘All Parameter descriptions’ on page 234.
For the TDS800 these numbers are 6110 and 6111.
For the TDS400 these numbers are 6310 and 6311.
Description of all the parameters in the account log file
Note: The table below lists the fields in their order of appearance in the
account log file.
Océ Power Logic: Account logging
233
All Parameter descriptions
Parameter
Type
Record type
num
Length
(max)
4
Account ID
text
255
User ID
text
255
Job ID
text
255
Machine ID
text
255
Record version
num
2
Job Unique ID
num
8
Record number
num
6
Job submission
source
Channeltype
text
255
Receive date
year
Receive date
month
Receive date day
234
Description
num
4
Record type identifier = 6211.
Note: each account log file starts with a record of
type 6210. This is a constant record which only
contains the abbreviated field names used in
records of type 6211.
Account ID, escaped according to escaping rules.
Empty field if not available. Note: numeric account ID from RCF or scanner panel is converted
to its textual representation (without any prefix).
For OJT, the Account ID is copied from the OJT
“Account” field (string).
User ID of submitter of job, escaped according to
escaping rules.
Empty field if not available. Note: numeric user
ID from RCF or scanner panel is converted to its
textual representation (without any prefix).
ID of job (e.g. job name) as specified in a job ticket, escaped according to escaping rules. Empty
field if not available.
Unique ID of the printer. If there is only a scanner,
then the unique ID of the scanner. For the Océ
TDS600 this is implemented as the serial number
of the printer/scanner.
Version number of this record type. 0 for this version.
Controller-generated unique job ID. Is unique for
each job in the log file.
Sequence number of this record in the account log
for this job. Starts at 0.
Host name or IP address of the source of the job.
Empty field if not available.
Protocol used for the job submission: LP, SMB,
PSERVER, FTP, CENTRONICS
Year when source page was received. E.g. 2001
num
2
Month when source page was received. 1-12
num
2
Day of the month when source page was received.
1-31
text
Océ TDS600 Multifunctional Digital System User Manual
Receive time
hours
Receive time
minutes
Receive time
seconds
Source location
num
2
Hour when source page was received. 0-23
num
2
Minute when source page was received. 0-59
num
2
Second when source page was received. 0-59
text
255
num
6
Location of the input file or set:
For files in the input stream: F1 to F999 (for the
first until the 999th file in the input stream of this
job).
For referenced files: the URL of the file.
For scans, the input set number to which the page
belongs: S1 to S999 (for the first until the 999th input set). Note: The Océ TDS600 only supports 1
input set.
Page number of the input page in the source
set/file. First = 1
Type of the source page:
For PDL’s: TIFF, CALS, PDF, PS, NIRS, HPGL,
HPGL2, C4, CALCOMP, ASCII
For scans: SCANF (scan of front of page),
SCANB (scan of back of page)
Native width of source page in points (1/72 inch)
Native height of source page in points (1/72 inch)
Actual width of output page in points (1/72 inch)
Actual width of output page in points (1/72 inch)
The scaling factor applied to the original in the
width direction. In %.
The scaling factor applied to the original in the
height direction. In %.
Mirroring applied to the original.
LR (left and right swapped) or TB (top and bottom
swapped). Empty if no mirroring applied.
Counter-clockwise rotation angle of the scaled
(and possibly mirrored) original. Possible values:
0, 90, 180, 270. An angle of 0 implies that the orientation of the source and output image is the
same.
Source page
number
Source type
text
Source width
Source height
Output width
Output height
Width scale
num
num
num
num
num
6
6
6
6
4
Height scale
num
4
Mirroring
text
2
Rotation angle
num
3
Océ Power Logic: Account logging
235
Process type
text
Process completion
text
Delivery date
year
Delivery date
month
Delivery date
day
Delivery time
hours
Delivery time
minutes
Delivery time
seconds
Output page
number
num
4
Type of processing that was done for this page:
PLOT, COPY, STF (scan to file), CHK (check
plot), ICOPY (interrupt copy), INTRNL (internal
job), HEADER (header page), TRAILER (trailer
page), ERRPAGE(error page), REPLOT (from
history queue)
How the process completed for this page: DONE
(normal termination), ABRT (job aborted by user), ERR (error occurred).
In case an error occurred or the job was aborted,
the last page that was correctly delivered has value
DONE and an extra record with value ABRT or
ERR is generated for the first page after that (the
page that did not come out due to the error).
Year when source page was delivered. E.g. 2000
num
2
Month when source page was delivered. 1-12
num
2
num
2
Day of the month when source page was delivered. 1-31
Hour when source page was delivered. 0-23
num
2
Minute when source page was delivered. 0-59
num
2
Second when source page was delivered. 0-59
num
6
Output media
type
text
Output media
special
text
Output media
weight
text
Page number of the output page in this job. First =
1. Physical output pages are numbered separately
from digital output pages.
Digital output pages are numbered separately for
each separate output file.
Type of the output medium in case of physical output: PPAPER (plain paper), TRANSPARENT,
FILM, POLYESTER, VELLUM, TRANSLUCENT. Empty if no physical output.
Indicates whether special output media is selected. Y or N.
Empty if no physical output
Output media weight in case of physical output:
LIGHT, NORMAL, HEAVY. Empty if not known
or if only digital output.
236
1
Océ TDS600 Multifunctional Digital System User Manual
Output media
source
text
Output fold
method
text
Output binding
method
text
Output media
destination
text
Output file type
text
Output file compression
text
Output file size
num
9
Output file destination
text
255
Output resolution (width direction)
Output resolution (height direction)
num
4
Source from which the output media was taken in
case of physical output: ROLL1, ROLL2, ROLL3,
ROLL4, ROLL5, ROLL6, TRAY1, TRAY2,
TRAY3. MANUAL (manual feed slot). Empty if
no physical output.
Folding method applied to the output media in
case of physical output:
For folding in 2 directions: AFNOR, ERICSSON,
DIN.
For folding in 1 direction: AFNOR1,
ERICSSON1, DIN1.
Empty if no physical output or not folded.
Specifies the binding method for the output media. EDGEONLY (only binding edge), REINFORCE. Empty if no physical output or no
binding method.
Output media destination in case of physical output: BELT1, BELT2, BELTS, CDT, IRT, FIRSTFOLD, STACKER.
Empty if no physical output.
Type of output file in case of digital output: TIFF,
CALS, PDF. Empty if no digital output.
Compression method of output file in case of digital output: GROUP3, GROUP4, PACKBITS,
LZW. Empty if no digital output or no compression.
Size of output file in bytes (including all pages in
case of multi-page output files) in case of digital
output. Empty if no digital output.
Nickname of the destination for the output file as
used in the scan manager, in case of digital output.
If multiple pages in one job have the same destination file, a multi-page file is generated. Empty if
no digital output.
Resolution of output in width direction in dpi
num
4
Resolution of output in height direction in dpi
Océ Power Logic: Account logging
237
238
Océ TDS600 Multifunctional Digital System User Manual
Océ TDS600
Multifunctional Digital System
User Manual
Chapter 13
Media and supplies
This chapter describes how to refill paper, refill toner and
refill the reinforcement unit of the folder.
239
Media
The Océ TDS600 is available in many configurations, ranging from two rolls
in a single drawer, four rolls in two drawers plus three sheet feeders and a
maximum of six rolls with one sheet feeder.
Note: Contact your Océ representative if you want to know more about the
available configurations.
Each of the rolls and sheet feeders on the Océ TDS600 may be loaded with
print material of a different size or type. The size and type of the available
media are indicated on the operating panel.
Note: In case you have three sheet feeders, no A4 size material and no A3
landscape material can be used in the bottom sheet feeder. The minimum size
of media in the third sheet feeder is A2.
Attention: After loading new print material, you need to inform the system
of the size of the material and of the type of print material that was loaded
(paper, transparent, or polyester).
The definition of the size and type of the new print material is required to:
■
■
■
Enable the automatic media switch function to work correctly (see
‘Automatic roll switch’ on page 182)
Prevent folding errors (when a folder is installed)
Support autozoom and auto format functions.
Caution: It is highly advisable to place heavy rolls (A0, A1, and 175 meter
rolls of plain paper) in position 1 of the top drawer, position 3 of the middle
drawer or position 5 of the bottom drawer, to minimize user strain. The
diameter of rolls should not exceed 185 mm.
240
Océ TDS600 Multifunctional Digital System User Manual
Load rolls of copy material
When a roll is empty during a print job, a ‘Roll empty’ message is displayed
at the printer operating panel and on the System Control Panel application. You
then have to load a new roll of print material.
Note: Currently the following media are supported on the Océ TDS600:
■
■
■
■
■
■
Plain paper (Red label plus) 75g/m2
Plain paper (Red label) 110g/m2
Transparent paper 90-95g/m2
Polyester film (CPRF) 3.5mil
Polyester film 4.5mil
vellum (9020/9022) 20lbs.
Caution: See Appendix B for more information about safely handling/
placing rolls of print material in the printer.
▼
Load paper
1 Open the appropriate roll compartment (see figure 126).
[126] Opening the appropriate roll compartment
2 If necessary remove any scrap material from the paper roll compartment.
3 Remove the roll holder from the paper roll compartment.
Media and supplies
241
4 Press the green knob inside the roll holder (on the right side) to release the
locking mechanism (see figure 127) and remove the core from the holder.
34"
A0
36"
[127] Pressing the green knob
Note: You can place the new roll in the groove on top of the printer.
5 Slide the roll holder in the new roll of material while pressing the green knob.
6 Align the roll with the appropriate size indicator on the roll holder and release
the locking mechanism. This line has to be completely visible.
7 Use both hands to place the holder in the roll compartment (see figure 128).
left view
[128] Positioning the roll
242
Océ TDS600 Multifunctional Digital System User Manual
8 Use both hands to slide the material under the metal paper guide until it makes
contact, as shown in figure 129.
[129] Using both hands to load the material
Note: When the print material is particularly curled it may be somewhat
difficult to slide the material under the paper guide. In that case you can
slightly fold back the top few centimetres (no more than 10) of the print
material to facilitate the load process.
9 Press the appropriate green button inside the paper roll compartment (see
figure 130). The material will automatically be fed into the machine.
Also refer to the sticker inside the drawer.
Feed/cut
buttons
[130] Button for feeding and cutting the paper
10 Press the green button a second time to cut off the material protruding from the
paper path.
11 Remove the scrap material.
12 Close the roll compartment.
13 Press the on line button to put the system off line.
Media and supplies
243
14 Specify the size and type of material on the operating panel.
15 Press the on line button again.
Note: You only have to adjust the settings on the operating panel when you
alter the size and/or media type.
Roll loader In order to help customers to comply with the international safety
regulations as far as maximum roll weights are concerned, Océ has developed
a roll loader for use with the Océ TDS600. See ‘Recommended weight limits’
on page 312 for more information about the maximum recommended roll
weights with and without a roll loader.
▼
Use the optional roll loader to load a roll
1 Fully open the roll compartment.
Inside the drawer, the roll loaders are installed. The roll loaders consist of a
metal frame with a lever and a green knob in the middle of the lever.
2 Put the appropriate horizontal lever in an upright position by pulling it to the
right.
3 Pull the lever completely forward. The roll holder is lifted up (see figure 131).
d
[131] Lifting up the holder with the roll loader
4 Remove the roll holder from the paper roll compartment using both hands.
5 Press the green knob inside the roll holder to release the locking mechanism
and remove the core from the holder.
Note: You can place the new roll in the groove on top of the printer.
6 Slide the roll holder in the new roll of material while pressing the green knob.
7 Align the roll with the appropriate size indicator on the roll holder and release
the locking mechanism. This line has to be completely visible.
244
Océ TDS600 Multifunctional Digital System User Manual
8 Use both hands to place the holder in the roll loader (see figure 132).
d
[132] Placing the new roll in the roll loader
9 Place the holder back in the roll compartment by returning the roll loader lever
to its upright position. The roll will now be loaded.
Caution: Be careful when lifting the lever to avoid any possible damage to
the roll compartment.
10 Use both hands to slide the material under the metal paper guide until it makes
contact, as described in the procedure for loading rolls of print material.
11 Press the appropriate green button inside the roll compartment. The material
12
13
14
15
16
17
18
will automatically be fed into the machine.
Note: Also refer to the sticker inside the drawer.
Press the green button a second time to cut off the material protruding from the
paper path.
Remove the scrap material.
Return the roll loader lever to its starting position by pushing it to the left.
Close the paper roll compartment.
Press the on line button to put the system off line.
Specify the size and type of material on the operating panel.
Press the on line button again.
Note: When you alter the size and/or media type, you have to adjust the settings
on the operating panel.
Media and supplies
245
Cut sheet material
When a sheet feeder is empty during a print job, a ‘Sheet feeder x empty’
message is displayed at the printer operating panel and in the System Control
Panel (SCP) application. You then have to load new cut sheet print material.
Note: You must fan polyester cut sheet before use to prevent sticking together.
Also avoid the use of sheets that have already been printed on one side.
▼
Load cut sheet material
1 Open the appropriate drawer (see figure 133).
[133] Opening the appropriate drawer
2 Release the right hand guide by squeezing the light green release handle on the
guide (see figure 134) and move the guide to the required media size indicator.
Note: Make certain that the handle is properly aligned with the appropriate
indicator.
246
Océ TDS600 Multifunctional Digital System User Manual
guide
release
handles
view holes
[134] Adjusting the position of the right hand guide
3 Remove the packaging of the print material. In case of wrapped paper, also
4
5
6
7
remove the top and bottom sheets.
Note: If you use polyester as print material you have to fan the sheets before
you load them to avoid that they stick together.
Position the print material in the drawer against the front plate. The side to be
printed should be facing downwards.
Note: You can check if the material is properly loaded by looking through
the view holes in the drawer (see figure 134).
Adjust the right hand guide.
Note: Carefully place the print material in the drawer to avoid damage to
the media.
Slide the two other guides into position.
Also refer to the sticker inside the drawer.
Close the drawer.
Note: When you alter the size and/or media type, you have to adjust the settings
on the operating panel.
Attention: If you decide to reload print material when the drawer is not
entirely empty, it is recommended to remove all remaining print material
from the drawer before you insert the new print material. This way you can
avoid the risk of inadvertently shifting any remaining print material out of
place and blocking the path. This could result in a jam.
Media and supplies
247
Add the toner
When a ‘Toner low’ message appears on the printer panel, you should refill
toner. From this moment on, you can print a maximum of 260 m2.
Refilling toner can be done at any time, even while a job is printing. You will
be able to finish your current job.
If you do not refill toner in time, the system will stop and an ‘Out of toner’
message will appear. In that case, printing will only be resumed after you have
refilled toner and pressed the on line button.
Note: Before you refill toner, always make certain that you first replace the
waste toner bag.
▼
How to add toner
1 Open the left cover of the printer (see figure 135).
[135] Opening the left printer cover
2 Pull the waste toner bag from the holder and place the supplied cap on the bag.
248
Océ TDS600 Multifunctional Digital System User Manual
3 Slide a new waste toner bag as far as possible over the holder (see figure 136).
[136] Replacing the waste toner bag
Attention: Use only Océ B5 toner.
4 Shake the toner bottle thoroughly and open the bottle.
5 Screw in the bottle clockwise in a slanted position (see figure 137).
[137] Screwing in the bottle
Media and supplies
249
6 Move the toner bottle to a vertical position (see figure 138).
[138] Adding toner
7 Tap the bottle to remove the toner from the bottle.
8 Return the bottle to its original position when the toner bottle is empty.
9 Unscrew the toner bottle anti-clockwise and close it.
10 Close the cover.
Printing will be resumed after you press the ‘on line’ button.
Note: When you have refilled toner after a ‘toner low’ message, it may take a
while (up to thirty seconds), depending on the number of prints that you make,
before the ‘Out of toner’ message disappears. When you have refilled toner
after the system had stopped because the toner supply was really exhausted,
you have to confirm the refill operation by pressing the On line button. The
‘Out of toner’ message will then disappear.
250
Océ TDS600 Multifunctional Digital System User Manual
Océ TDS600
Multifunctional Digital System
User Manual
Chapter 14
Maintenance
This chapter describes the maintenance of the glass platen
the reference roller and the reinforcement unit.
251
Maintenance of the glass platen and the
reference roller
If the glass platen is dirty or static, it should be cleaned to ensure top quality
copies are produced. At the same time you can clean the white reference roller.
▼
Clean the glass platen and reference roller
1 Switch off the scanner.
2 Open the top cover of the scanner (see figure 139).
[139] Opening the top cover of the scanner
3 Clean the glass platen with a soft cloth moistened with water (see figure 140).
[140] Glass platen and reference roller
252
Océ TDS600 Multifunctional Digital System User Manual
4 Clean the white reference roller with soft cloth moistened with a small quantity
of Cleaner A (see figure 140).
5 Lift the top cover of the scanner to release the lock of the hinge, and close the
cover (see figure 141).
[141] Closing the top cover of the scanner
6 Switch on the scanner.
Maintenance
253
Maintenance of the reinforcement unit
This section covers maintenance activities for the optional reinforcement unit
of the folder, such as:
■ Inserting a new tape roll
■ Emptying the waste box
■ Cleaning the reinforcement knives
Attention: Only use the original reinforcement strips from Océ, to avoid
damage to the reinforcement unit.
A new tape roll
When the tape roll is empty while the engine is in stand-by, one of these
messages will appear on the display:
■
■
‘Load reinforcement tape’
‘Reinforcement unit empty’ (if the engine was running when the roll ran out
of tape).
When a tape roll is empty while the engine is running, this message will be
accompanied by a picture of the engine with the side door of the reinforcement
unit blinking (see figure 142).
[142] No tape in reinforcement unit
254
Océ TDS600 Multifunctional Digital System User Manual
▼
Insert a new tape roll
1 Open the side door of the reinforcement unit (see figure 143).
[143] Opening the side door of the reinforcement unit
2 Turn the two guide plates away from the pin roller and lock them into their
open position (see figure 144).
[144] Opening the guide plates
Maintenance
255
3 Remove the trailing edge of the old tape (see figure 145).
[145] Removing the trailing edge of the old tape
4 Open the front side plate of the roll holder by unscrewing the green knurled nut
and remove the old kernel.
Note: It is recommended that you clean the reinforcement knives before you
place a new roll. See ‘Maintenance of the reinforcement knives’ on
page 263 for more information.
5 Place the new roll and close the side plate. Make certain that the roll is placed
with the holes to the back and the protection sheet to the front (see figure 146).
[146] Placing the new roll
256
Océ TDS600 Multifunctional Digital System User Manual
6 Detach the end of the roll and lead the tape over the large guide roller (see
figure 147).
[147] Guiding the tape around the guide roller
7 Lead the tape between the upper and lower knife and over the pin roller (see
figure 148).
[148] Leading the tape between upper and lower knife
Maintenance
257
8 Make certain that at least 200 mm (2 strip lengths) of tape protrude from the
knife section (see figure 149).
[149] Protruding tape
9 The holes in the tape must be aligned with the hole pattern on the sticker you
can find on the frame plate of the reinforcement unit (see figure 150). If this is
not the case, you lift the tape from the pin roller and push the tape further
between the two knives until the holes are aligned.
[150] Adjusting the holes on the tape
258
Océ TDS600 Multifunctional Digital System User Manual
10 Close the guide plates of the pin roller (see figure 151).
[151] Closing the guide plates
11 Peel the protection sheet off the tape (see figure 152).
[152] Peeling off the protection sheet
Maintenance
259
12 Lead the protection sheet back between the upper and lower knife.
[153] Leading the protection sheet between upper and lower knife
13 Lift the guide and lead the protection sheet between the protection sheet
rollers, pulling the protection sheet tight (see figure 154).
[154] Leading the protection sheet between the rollers
260
Océ TDS600 Multifunctional Digital System User Manual
14 Insert the leading edge of the tape into the closed section of the slide (see
figure 155).
[155] Inserting the tape into the closed section of the slide
15 Hold the upper guide plate down and cut the tape at the knife section by quickly
pulling the edge up so that the tape is cut by the upper knife (see figure 156).
[156] Cutting the tape at the knife section
16 Close the side door of the reinforcement unit.
Maintenance
261
The waste box
If a reinforcement unit is installed, the protective sheet from the reinforcement
tape is stored in a waste box. For each roll of tape the box should be emptied
twice.
Note: You can empty the waste box while the engine is running.
▼
Empty the waste box
1 Open the waste box by first pulling it to the left hand side and next pulling it
towards you.
[157] Opening the waste box
2 Empty the box.
3 Close the waste box by first pushing it forwards and next pushing it to the right
hand side.
[158] Closing the waste box
262
Océ TDS600 Multifunctional Digital System User Manual
Maintenance of the reinforcement knives
Because the knives of the reinforcement unit get sticky from the glue on the
reinforcement tape, they have to be cleaned regularly. You are recommended
to clean the knives each time you have inserted a new tape roll (see ‘A new tape
roll’ on page 254) or when an error in the reinforcement unit has occurred.
If you want to clean the reinforcement knives, you have to place them in such
a position that all the parts that need to be cleaned are accessible.
Attention: Only use the original Cleaner K and Fixing Unit Cleaning Oil
(silicon oil) from Océ, to avoid damage to the reinforcement unit.
▼
Clean the reinforcement knives
1 Press the on line button on the printer operating panel to put the printer off line.
The message ‘Off line’ is displayed in the status window.
2 Press the left selection button to shift the focus to the ‘Folding’ menu.
A shadow effect is used to indicate that the focus is set to this menu.
3 Select the ‘Clean knives’ option from the ‘Folding’ menu.
Then the reinforcement knives are placed in the correct position.
Note: When a job is running, the message ‘Job interrupted’ appears. The
machine stops running after it has correctly finished the prints that were
already in the engine and the focus can be set to the Folding menu.
A picture of the engine appears on the display with the side door of the
reinforcement unit blinking.
4 Open the side door of the reinforcement unit.
Maintenance
263
5 Clean the upper and lower knife using Cleaner K (see figure 159).
[159] Cleaning the upper and lower knife
6 Oil the felt using Fixing Unit Cleaning Oil (silicon oil).
[160] Oiling the felt
Close the side door of the reinforcement unit. The knives are automatically
placed back in their home positions. The picture on the display disappears, and
the message ‘Press start to resume job’ or ‘Ready to print’ appears, depending
on whether or not a job was interrupted to clean the knives.
264
Océ TDS600 Multifunctional Digital System User Manual
Océ TDS600
Multifunctional Digital System
User Manual
Chapter 15
Problem solving
This chapter describes the problems that can occur when
you use the Océ TDS600.
265
Introduction
Problems can be:
■ Original jams.
■ Paper jams.
■ Problems with the reinforcement unit.
■ Problems that you can correct if you follow the instructions on the display.
■ Other problems like Call Service.
When an error occurs, the display informs you about
■ what the problem is
■ where it has occurred
■ how to solve it
Normally the paper moves through the system without problems. On the
graphic display a cover or door indicates in which part of the system the paper
has stopped.
Stickers on some parts of the system indicate which green handles, green
knobs, green bars and covers, etc. you have to lift, press or open to remove any
jammed paper.
The display guides you through a sequence of steps to correct the problem. If
a jam occurs in more than one location, the display will continue to instruct you
until all jammed paper has been removed.
If you corrected the error, the display gives instruction you how to continue the
job.
266
Océ TDS600 Multifunctional Digital System User Manual
How to clear original jams
When you scan and an original jams, the message ‘Original jam’ appears on
the scanner display. You must remove the original from the scanner.
▼
Remove a stopped original
1 Open the top cover of the scanner (see figure 161).
[161] Opening the top cover of the scanner
2 Remove the original.
3 Lift the top cover of the scanner to release the lock of the hinge, and close the
cover (see figure 162).
[162] Closing the top cover of the scanner
4 Make the original smooth and feed the original.
Problem solving
267
If an original jam occurs often:
■ Check if you use the correct type of original.
■ Check if you insert the original along the guide.
■ Check if the original is damaged before you insert it.
Note: When you are working with poor-quality or valuable originals, you are
advised to disable the rewind function to avoid the risk of jams during rewind.
268
Océ TDS600 Multifunctional Digital System User Manual
How to clear paper jams
When paper jams, the copying stops and the message ‘paper jam’ appears in
the display. The error location is shown by flashing covers or doors.
When paper jams:
■ Follow the instructions on the display
■ Leave the main power switch on to prevent the data loss, and correct the
paper jam as described in the equivalent chapter.
■ Remove all the pieces of paper from the machine.
If a paper jam occurs often, check if:
The paper is refilled correctly, (see ‘Load rolls of copy material’ on page 241
or ‘Cut sheet material’ on page 246)
■ The correct paper is used, (‘List of available material types and sizes’ on
page 309)
■ All the pieces of paper are removed from the paper path.
■
Paper jams can occur in:
The manual feed
■ The fuser section
■ The roll feed section
■ The folder
■ The reinforcement unit
■
Problem solving
269
E: Folding section
D: Fusing section
C: Manual feed
A: Cut sheet feed section
B: Roll feed section
[163] Sections for jams
Paper jam in the cut sheet section
▼
How to clear a paper jam in the sheet feeder
1 Open the appropriate sheet feeder.
Note: Only one sheet feeder can be open at a time.
2 Remove any jammed printing material from the paper path (see figure 164).
[164] Removing jammed material from the paper path
3 Close the sheet feeder again.
270
Océ TDS600 Multifunctional Digital System User Manual
Note: If the cut sheet feed covers are still flashing on the display, re-check the
sheet feeder section.
Paper jam in the roll feed section
▼
How to clear a jam in the roll compartments
1 Open the appropriate roll compartment.
Note: Only one compartment can be open at a time.
2 Remove any jammed printing material from the paper path (see figure 164)
and, if necessary, pull back the paper and rewind it.
Note: Occasionally, a jam may occur before the printing material has been
cut. In that case, you can cut the material manually by pressing the
appropriate green load button in the roll compartment.
3 Reload the roll if the system asks you to do so (see ‘Load rolls of copy
material’ on page 241).
4 Close the roll compartment again.
Note: If the roll feed covers are still flashing on the display, re-check the roll
feed section.
Paper jam in the manual feed
▼
How to clear a jam in the manual feed
1 Open the manual feed by tilting it towards you (see figure 165).
[165] Opening the manual feeder
2 Remove any jammed printing material.
Problem solving
271
Note: If the material cannot be removed easily, you must open the cover of
the fusing section to get access to the jammed material. Otherwise, the
OPC drum may become damaged.
3 Close the manual feeder again.
Paper jam in the fuser section
The fusing section is indicated as section D (see figure 163 on page 270).
Caution: During normal use the fuser must be closed. Only open it to
remove paper after a media jam. Because of hot surfaces the operator
always has to be cautious and wear heat-protective gloves, when removing
printing material in the fuser section.
▼
How to clear a jam in the fuser section
1 Switch off the printer.
2 Wait a few moments to let the fuser cool down.
3 Open the manual feeder to release the printing material.
Attention: If you fail to do so, the OPC drum might get damaged when you
remove jammed material.
4 Open the cover on the left side (see figure 166).
Note: During normal use the left cover has to be closed. This is necessary to
ensure proper operation.
[166] Opening the left side cover
272
Océ TDS600 Multifunctional Digital System User Manual
5 Open the fuser section cover by lifting the cover by the green handle (see
figure 167).
[167] Opening the fuser section cover
6 Remove any jammed printing material from the fuser section.
Note: If the printing material is visible for the manual feed section, remove
it from the front side of the Océ TDS600 Printer.
7 Pull the green knob to release the fuser section cover and close the cover with
the help of the green handle.
8 Close the cover.
9 Switch the printer on again.
Paper jam at the integrated receiving tray
▼
How to clear a jam at the integrated receiving tray
1 Open the manual feeder to release the printing material.
Attention: If you fail to do so, the OPC drum might get damaged when you
remove jammed material.
2 Open the cover on the left side (see figure 166 on page 272).
3 Open the fuser section cover by lifting the cover by the green handle (see
figure 167).
4 Remove any jammed printing material from the Integrated Receiving Tray.
5 Pull the green knob to release the fuser section cover and close the cover with
the help of the green handle.
Problem solving
273
Paper jam in the folder
When printing material misfeeds in section E in figure 163 on page 270 a jam
has occurred in the folding section.
Any jams in the folder can occur in either the first fold section, the second fold
section, the folder transport section or the belt unit.
▼
How to clear a jam in the first fold section
1 Open the top cover of the folder (see figure 168).
The green light on the right of the folder is blinking quickly.
[168] Top cover of the folder
2 Remove any jammed printing material.
274
Océ TDS600 Multifunctional Digital System User Manual
3 Open the cover of the first fold section (see figure 169).
[169] Opening first fold section
4 Open the guide plate (see figure 170).
[170] Opening guide plate
5 Remove any jammed printing material.
6 Close the guide plate.
7 Close the cover of the first fold section.
8 Close the top cover of the folder.
Problem solving
275
▼
Clear a jam in the folder transport section
1 Open the cover of the transport to the first fold delivery (see figure 171).
.
[171] Opening the cover of the folder transport section
2 Remove any jammed printing material.
3 Close the cover of the folder transport section from the left side by lifting it up
and pushing the hinge away from you.
▼
Clear a jam in the second fold section
1 Open the front door of the second fold section (see figure 172).
[172] Opening the front door of the second fold section
2 Remove any jammed printing material at the bottom of the second fold section.
3 Close the front door of the second fold section.
276
Océ TDS600 Multifunctional Digital System User Manual
4 If you have a belt unit, put the belt in an upright position (see figure 173).
[173] Putting the belt in an upright position
5 Open the delivery unit (see figure 174).
[174] Opening the delivery unit
6 Open the guide plate with the green lever (see figure 175).
Problem solving
277
[175] Opening the guide plate with the green lever
7 Remove any jammed printing material.
8 Open the vertical transport with the green lever (see figure 176).
[176] Opening the vertical transport
9 Remove any jammed printing material.
278
Océ TDS600 Multifunctional Digital System User Manual
10 Close the vertical transport (see figure 177).
[177] Closing the vertical transport
11 Close the guide plate.
12 Close the delivery unit (see figure 178).
[178] Closing the delivery unit
Problem solving
279
▼
Clear a jam in the belt unit
1 Open the door of the belt unit (see figure 179).
[179] Opening the belt unit door
2 Squeeze the two green knobs in the upper section of the belt unit and open the
plate (see figure 180).
[180] Opening the plate
3 Remove any jammed printing material.
4 Squeeze the two knobs again and put the plate in its original position.
280
Océ TDS600 Multifunctional Digital System User Manual
5 Release the green lever in the lower section of the belt unit (by slightly lifting
it and pulling it forward) to open the lower plate (see figure 181).
[181] Opening the lower plate
6 Remove any jammed printing material.
7 Pull up the green lever again (until it locks into position) to close the plate.
8 Close the belt unit door.
9 Put the belt in its operating position by pushing it down gently.
Problem solving
281
Problems with the Reinforcement Unit
If a reinforcement unit is installed, the following errors can occur:
■ Paper jams
■ Tape jams
■ No reinforcement strips on the output
This section explains how these errors can be solved.
Clear paper jams in the Reinforcement Unit
When a paper error occurs, the following message is displayed: ‘Paper jam’. A
picture of the engine appears on the display with one or two doors blinking,
depending on where the jam occurs (see figure 182).
[182] Paper jam
▼
How to clear a paper jam
1 Open the cover of the transport to the First Fold delivery and remove all paper
inside (see figure 183).
282
Océ TDS600 Multifunctional Digital System User Manual
[183] Opening the cover of the folder transport section
2 Close the cover of the folder transport section.
3 Open the front door of the reinforcement unit (see figure 184).
[184] Opening the front door of the reinforcement unit
4 Open the top cover of the reinforcement unit and remove all paper inside (see
figure 185).
Problem solving
283
[185] Opening the top cover of the reinforcement unit
5 Close top cover and side door of the reinforcement unit.
Clear tape jams in the reinforcement unit
When a tape jam occurs the following message appears on the display:
‘Reload tape in reinforcement unit’.
When a tape jam occurs while the engine is running, the message will be
accompanied by a picture of the engine with the side door of the reinforcement
unit blinking (see figure 186).
[186] Tape jammed in reinforcement unit
▼
Hoe to clear a tape jam
1 Open the front door of the reinforcement unit (see figure 187).
284
Océ TDS600 Multifunctional Digital System User Manual
[187] Opening the front door of the reinforcement unit
2 Turn the two guide plates away from the pin roller and lock them into their
open position (see figure 188).
[188] Opening the guide plates
3 Remove all tape between the rollers and knives (see figure 189).
Problem solving
285
[189] Removing the tape
4 Lead a new trailing edge of tape between the rollers and knives.
No reinforcement strips on the output without an error message
This error occurs when there are no reinforcement strips on the output although
reinforcement is selected. This can happen when the file header (Remote
Control Format or Océ Job Ticket) contains instructions to have no
reinforcement.
If you want to process A4 formats, reinforcement can be disabled for this
format. For more information refer to ‘Reinforce A4’ on page 183.
▼
Solve this error
1 Put the printer off line by pressing the on line button on the operating panel.
2 Open the side door of the reinforcement unit.
3 Check if there are loose reinforcement strips in the unit with the protection
sheet still on (see situation B in figure 190).
286
Océ TDS600 Multifunctional Digital System User Manual
[190] Situation A: No mechanical errorSituation B: Mechanical error
4 If there are, remove the tape strips in the reinforcement unit.
Note: If the protection sheet is not on the reinforcement strip (see situation
A in figure 190), there is no mechanical error and you should insert a new
tape roll as described in ‘A new tape roll’ on page 254. If this error
frequently occurs you should call the Océ service organisation (see ‘Other
problems (call service)’ on page 288).
5 Remove all tape between the rollers and knives (see figure 191).
[191] Removing the tape
6 Lead a new trailing edge of tape between the rollers and knives. For more
information see ‘A new tape roll’ on page 254.
Problem solving
287
Other problems (call service)
If you have a problem that you can not correct, call the Océ service
organisation. In that case switch off the system with the main switch and leave
the system as it is.
288
Océ TDS600 Multifunctional Digital System User Manual
Océ TDS600
Multifunctional Digital System
User Manual
Chapter 16
The folder
This chapter contains a description of the folder delivered
as an optional with the Océ TDS600.
289
Introduction
If you have a folder installed on your Océ TDS600 system, the following two
other optional features are available:
■ Reinforcement unit
■ Belt unit
Océ TDS600 folder
The Océ TDS600 can have a folder to fold your copies. The copies are folded
according to the selected folding width and length with a drawing method. You
can only fold paper. Polyester, transparent or vellum media cannot be folded,
a media jam can occur.
Belt
Stacker
First Fold Delivery
tray
Folder
Reinforcement
Unit
[192] Océ TDS600 folder
Standard folding settings By default, you use the standard folding settings
defined for your Océ TDS600 system by the key operator. The following
settings are available:
▼
Set the folded copy delivery
1 Press the ‘Finishing’ card in the ‘Print’ section.
2 Press the function button ‘Folded copy delivery’.
3 Select ‘Stacker’ or ‘Belt’.
290
Océ TDS600 Multifunctional Digital System User Manual
▼
Set folding legend
1 Press the ‘Feeding’ card in the ‘Original’ section.
2 Press the function button ‘Legend location’.
3 Select ‘Leading’ or ‘Trailing’.
In the drivers, this setting is called the ‘Folding orientation’, with the
options ‘Portrait’, ‘Landscape’ and ‘Automatic’.
▼
Set the drawing method
1 Press the ‘Feeding’ card in the ‘Original’ section.
2 Press the function button ‘Drawing method’.
3 Select ‘Standard’, ‘Ericsson’ or ‘Afnor’.
▼
Set the folded package width
1 Press the ‘Finishing’ card in the ‘Print’ section.
2 Press the function button ‘Folded package’.
3 Select ‘Width’.
Enter a range between 186 - 230 mm in steps of 1 mm; default 210 mm.
▼
Set the folded package length)
1 Press the ‘Finishing’ card in the ‘Print’ section.
2 Press the function button ‘Folded package’.
3 Select ‘Length’.
4 Enter a range between 276 - 310 mm in steps of 1 mm; default 210 mm
▼
Set the binding edge
1 Press the ‘Finishing’ card in the ‘Print’ section.
2 Press the function button ‘Binding’.
3 Select binding enabled or disabled.
4 If you selected enabled enter a range between 15 - 30 mm in steps of 1 mm;
default 20 mm.
▼
Set the reinforcement
1 Press the ‘Finishing’ card in the ‘Print’ section.
2 Press the function button ‘Binding’.
3 Select ‘Reinforce’ enabled or disabled.
You can overrule the standard folding program with settings from the printer
driver or the scanner operating panel.
See ‘Standard folding settings’ on page 290 for complete information about
defining default folding settings.
The folder
291
▼
Fold settings from the Océ TDS600 scanner operating panel
1 Open the ‘Feeding’ card in the ‘Original’ section and press the ‘Legend
location’ function button to select the required legend location (‘Leading’ or
‘Trailing’).
Note: Make certain that your legend is always located on your left-hand
side to ensure correct positioning of the legend during folding.
Press the ‘Drawing method’ function button to select ‘Standard’, ‘Ericsson’ or
‘Afnor’ fold.
[193] Fold options from the scanner operator panel
2 Open the ‘Finishing’ card in the ‘Print’ section.
3 Press the ‘Folding’ function button to select ‘Full’ or ‘First fold only’ (see
figure 194).
4 Press the ‘Folded package’ function button and change the length and/or width
of the folded package, as required, by using the arrow buttons or the numeric
buttons.
5 If required, press the ‘Binding’ function button.
Set the required binding edge using the arrow buttons or the numeric buttons.
6 Make other settings as required.
Feed the original.
[194] Fold options from the scanner operator panel
292
Océ TDS600 Multifunctional Digital System User Manual
Note: You can also select a drawing method and, if needed, a folding length,
folding width and binding edge. When you change the folding length and/or
folding width, and the folder has a belt, you must also adjust the side guides of
this unit.
Maximum folding length There are maximum values for different kind of
paper. Table 195 shows the maximum values for three types of paper and the
possible folding methods.
The folder
293
Maximum folding settings for long plots
Paper density
[g/m2]
60
75
110
First fold output
1st fold
[mm / inch]
1220 / 48
6000 / 236
2500 / 98
Stacker 2nd fold
2 folds
[mm / inch]
1220 / 48
2500 / 98
1220 / 48
Stacker 2nd fold
3 folds
[mm / inch]
1220 / 48
2000 / 79
not possible
Belt 2nd fold
2folds
[mm / inch]
1220 / 48
1220 / 48
1220 / 48
[195] Folding settings for long plots
Folding settings 75 grams
‘Stacker’ or ‘Belt’
selected
Output length
< 2.5 m
Delivery
Delivered on stacker or belt
2.5 m - 6 m
First fold only, delivered in
first fold delivery
Unfolded, delivered in first fold
delivery
Possible paper jam
>6m
length known at start
>6m
length not known at start
‘First fold only’ selected
<6m
>6m
length known at start
>6m
length not known at start
Delivered in first fold delivery
Unfolded, delivered in IRT
Possible paper jam
[196] Folding settings 75 grams
Folding settings 110 grams
‘Stacker’ or ‘Belt’
selected
Output length
< 1.22 m
(3 folds)
Delivery
Delivered in first fold delivery
[197] Folding settings 110 grams
‘First fold only’ selected
294
< 1.22 m
(2 folds)
> 1.22 m
< 2.5 m
> 2.5 m
Delivered on stacker or belt
< 2.5 m
> 2.5 m
Delivered in first fold delivery
Unfolded, delivered in IRT
Delivered in first fold delivery
Unfolded, delivered in IRT
Océ TDS600 Multifunctional Digital System User Manual
Off line folding
An important productivity feature provided by the Océ TDS600 folder is the
possibility to make off line folds. For off line folding the same settings can be
made as for normal folding. By default, the predefined settings in the Settings
Editor for off line folding are used. Polyester or transparent media cannot be
folded. This may result in a media jam.
Off line folding settings
‘Stacker’ or ‘Belt’
selected
Output length
=< 2 m
Delivery
Delivered on stacker or belt
2 m - 2.5 m (2 folds)
2 m - 2.5 m (3 folds)
Delivered on stacker or belt
Stopped in second fold (possible
paper jam)
Unfolded, delivered in IRT
> 2.5 m
‘First fold only’ selected
<6m
First fold only, delivered in first
fold delivery
[198] Off line folding settings
Note: Use off line folding only for sheets which do not exceed a maximum
length of 6 m. If you try to fold a sheet longer than 6 m anyway, an error occurs.
▼
Make off line folds
1 Switch the printer off line on the printer operating panel and wait for the printer
to finish the jobs that are already in the printer.
Note: Watch the light on the top cover of the folder.
■ If this is off, the printer is on line and off line folding is not possible.
■ If this is blinking slowly, the printer is off line, but the folder still processing
the last prints.
■ If this is blinking rapidly, an error has occurred.
■ If this is on, the printer is off line and you can feed a sheet.
Note: Also refer to the sticker on the top cover of the folder.
2 Make any settings for (off-line) folding on the printer operating panel.
Note: If required, the key operator can change the default settings for
folding programs from the Settings Editor. See ‘Océ Power Logic: Account
logging’ on page 225 for more information.
3 Feed the sheet of paper face down and with the legend on your right-hand side.
Also make certain that you feed the paper with the legend on the right-hand
side (see ‘Océ TDS600 folder’ on page 290 for more information).
The folder
295
Note: Wait until the light on the folder no longer blinks before you feed a
new sheet. Otherwise a media jam may occur.
4 Collect your output.
Reinforcement unit
If you install a reinforcement unit, copies can be delivered with a pre-punched,
self-adhesive strip (see figure 199).
Protection sheet
[199] Example a of reinforcement strip
With this strip the copy can be stored in a binder, without running the risk that
the punching holes tear out. You can unfold a folded map in a binder without
opening the binder mechanism (see figure 200).
[200] Example of a folded map with a reinforcement strip
296
Océ TDS600 Multifunctional Digital System User Manual
The optional reinforcement unit supports all media sizes larger than A4.
However, A4 size media can also be reinforced if you enable A4 reinforcement
in the Settings Editor.
Note: Reinforcement is only possible with the Standard folding method.
See ‘Reinforcement unit’ on page 296 for more information about inserting a
new tape roll and other maintenance issues.
▼
Enable reinforcement
1 Click on the ‘Jobs’ button in the Settings editor.
2 Select the ‘Copy’ tab if you want to enable folding reinforcement for copy jobs
3
4
5
6
7
or select the ‘Print’ tab if you want to enable folding reinforcement for print
jobs.
Open the ‘Defaults’ folder.
Open the ‘Finishing’ folder.
Select the ‘Folding reinforcement’ option.
Enable folding reinforcement in the right part of the window.
Click on the ‘Apply’ button to save any changes you have made.
Belt unit
A belt unit offers a large capacity and more flexibility. On the belt unit up to
100 A0 prints can be delivered offset stacked. You can adjust the side guides
of the belt, depending on the width of the folded package.
See ‘Océ Power Logic: Account logging’ on page 225 for more information
about selecting the belt for default print/copy/off line delivery.
Note: The belt unit can also be selected from the drivers (including Plot
Director) or the copier operating panel. The remote command overrules the
key operator setting.
▼
Selecting belt as folded copy delivery on copier operating panel
1 Open the ‘Finishing’ card in the ‘Copy’ section of the copier operating panel.
2 Press the ‘Folding’ function button to select full folding.
3 Press the ‘Folded copy delivery’ function button to select the belt.
▼
Adjusting the side guides of the belt
1 Loosen the nuts (see figure 201).
The folder
297
[201] Adjusting the side guides of the belt
2 Adjust the plate in accordance with the width of the fold package.
3 Tighten the nuts.
298
Océ TDS600 Multifunctional Digital System User Manual
Océ TDS600
Multifunctional Digital System
User Manual
Appendix A
Overview and tables
299
Overview of the Océ TDS600 system
1
2
3
10
4
5
9
6
8
7
[202] The Océ TDS600 system
1 Off line folding input
2 Integrated receiving tray
3 Printer operating panel
4 Manual feed
5 Printer
6 Rolls or sheet feeders
7 Scanner
8 Scanner operating panel
9 Scanner feed table
10 Folder
300
Océ TDS600 Multifunctional Digital System User Manual
Printer operating panel
Display
Up/Down
buttons
Selection
buttons
On line
button
Stop button
Overview and tables
301
Scanner operating panel
Section buttons
Arrow buttons
Stop
button
Function
buttons
Start button
302
Numeric buttons
Océ TDS600 Multifunctional Digital System User Manual
Correction button
Product specifications Océ TDS600
The Océ TDS600 is a wide format mid to high volume printing and copying
system.
Overview and tables
303
Printer
Technology
Resolution
Speed
Media sources
Output sizes
Media types
Output reception
Warm up time
Electrical requirements
Dimensions
Weight
Safety approvals
Functionality
Electrophotography (LED head) with organic photoconductor (OPC) drum and closed toner system
400 dpi
5 linear meters p/min. or approx. 4 A0s p/min.
Several possible configurations from 2 to 6 rolls, up to
3 sheet feeders, and manual sheet feed
From A4 to A0, up to 15 meters long
Plain, transparent, recycled, fluorescent and coloured
papers; films and vellums
Standard Integrated Receiving Tray (IRT) for 100
prints
None, instant behaviour
120/230 V, 50/60 Hz
1,400 mm (W) x 1,470 mm (H) x 753 mm (D) including integrated receiving tray
From 250 kg (model with 2 rolls) to 360 kg (model
with 6 rolls and 1 sheet feeder)
TüV GS, CETECOM, CE, UL, (c)UL, CB, FCC Class
B
Multiple prints: up to 999
Automatic Language Sensing (ALS)
Auto roll/cassette tray selection and switching
Plot manipulation: autopositioning, rotation, autoscaling
File spooling on the controller
Set memory: send once, process once, print many; capacity to store up to 250 A0s and create identical sets
sorted by page or by set
Concurrent receiving/processing/ printing/finishing
of digital jobs
Sophisticated local and remote user communication
system with:
Queue Manager application: view status for each job
and cancel, hold/restart the entire job
System Control Panel application: view status and settings of system components
Setting Editor application: customise system settings
Power Logic Controller
Platform
Océ Controller with embedded Windows NT
Memory
128 MByte RAM standard, 256 MByte RAM for scan
to file
304
Océ TDS600 Multifunctional Digital System User Manual
Power Logic Controller
Disk space
High-speed hard disk dedicated to file spooling, and a
high-speed hard disk dedicated to set memory offering 250 A0 storage capacity
File formats
HPGL, HPGL2, HPRTL, TIFF 6.0, CALS type 1,
NIRS, EDMICS (C4), CalComp 906/907/951, PostScript Level 3 (optional)
Interfaces
Standard: Ethernet 10/100 Mbits/s with RJ45
Optional: Ethernet 10 Mbits/s with BNC and SubD;
TokenRing 4/16 Mbits/s; Centronics
Network protocols
TCP/IP, NetBEUI (smb), Novell (IPX, SPX)
Scanner
Model
Technology
Speed
Original feed
Originals
Maximum thickness
Exposure control
Media selection
Reproduction scale
Input mode
Overview and tables
Free-standing console
Optional: Original delivery tray
CCD, Océ Image Logic real-time image processing
hardware
5 linear metres per minute or approximately 4A0s per
minute
Face down, right aligned
Automatic feed off/on
Rewind original to front off/on
Automatic original size detection
210 - 914 mm
Original width: 210 - 1020 mm
Original length:150 mm - 15 m
1 mm
Automatic, manual fine adjustment
Special modes: Lines & Text (default), Photo, Greys &
lines, Dark Original, Blueprint, Printed matter
Manual or automatic, based on original size (autodetect)
and zoom factor
Zoom: 25 % - 400 % (adjustable in 1 % and 0.1 % steps)
Programmed fixed steps
Auto zoom to paper size
Single sheet
Set (sets processing/set collation)
Multiple sheets
305
Other operating
Functions
Image editing
Dimensions
Weight
306
Concurrent scanning and printing
Multi-copy mode: 1-999 copies (scan once print many)
Pre-programming of next job
Programmable default settings
Programmable custom card
Automatic roll selection
Automatic reduction/enlargement
Standard cut, synchro cut and custom cut modes
Leading and trailing edge adjustment (up to +/- 400 mm)
Two languages available
Image align: Horizontal left, middle, right
Image align: Vertical top, middle, bottom
Image shift: horizontal/vertical up to +400 mm
Image mirroring
1,314 mm (W) x 583 mm (H) x 1,353 mm (D)
90 Kg
Océ TDS600 Multifunctional Digital System User Manual
Scan to file
Applications
Scan destinations
Resolution
Data formats
Scan modes
File naming
Check print
Viewing
Océ Image Logic
Ease of use
Options
Océ Scan Manager, integrated scanning solution
10 programmable destinations
Scan to controller
Scan to network directory
File Transfer Protocol (FTP)
200, 300, 400 dpi
PDF
Tiff (G3, G4, uncompressed) with optimisation to filesize or quality
CALS type 1
Single scan, stream feed productive batch scanning
Automatically generate unique file names for each scan
Single/multiple check prints
View scans at point of scanning
Optimum scan quality with six special original modes
STF from scanner panel, scan directly to destination
Océ View Station: Edit and enhancement software
Océ Batch Processor: Automated editing software
Drivers and application software
Océ ADI driver
For AutoCAD 12, 13, 14,
Windows 3.x, 95/98 and NT 3.51/4.0
Océ HDI driver
For AutoCAD 2000
Windows 95/98 and NT 4.0
Océ Windows driver
Windows 95/98 and NT 4.0
PostScript Level 3
For Windows 95/98 and NT 4.0
drivers
Others
Certified drivers for e.g. Microstation, Intergraph and
Pro Engineer, provided by the CAD/EDM software supplier
Finishing: integrated Folder
Folding modes
On-line fanfold and crossfold
Folding method
Standard (=DIN-like), Ericsson, Afnor-like;
Length: 276 - 310 mm
Width: 186 - 230 mm
Filing strip: 15 - 30 mm
Paper size
(75 g/m2),
Width: 279 - 914 mm
Length: 210 - 6,000 mm fanfold only;
210 - 2,500 mm for fanfold and crossfold
First fold exit
Extra bin for fanfold
Overview and tables
307
Dimensions
Weight
Optionals
2,200 mm (W) x 997 mm (H) x 1,260 mm (D)
220 kg
Reinforcement unit
Belt delivery tray for 100 A0
Finishing: copy delivery tray for the printer
Model
Wheeled delivery tray with blower unit
Capacity
Up to 150 sheets (media type dependent) from A4 to A0
Types of media
Plain paper, transparent paper, film, vellum and polyester
Power consumption
< 40 W
Electrical require120/230 V, 50/60 Hz
ments
Dimensions
1,170 mm (W) x 1,090 mm (H) x 1,440 mm (D) with
tray fully extended
Weight
35,5 kg
Finishing: original delivery tray for the scanner
Model
Wheeled delivery tray with blower unit
Capacity
Up to 150 sheets (media type dependent) from A4 to A0
Types of media
Plain paper, transparent paper, vellum and polyester
Power consumption
< 40 W operating
Electrical require120/230 V, 50/60 Hz
ments
Dimensions
1,170 mm (W) x 1,090 mm (H) x 1,440 mm (D)
Tray fully extended
Weight
35.5 Kg
308
Océ TDS600 Multifunctional Digital System User Manual
List of available material types and sizes
Océ machines and materials are matched for optimal quality and performance.
It is therefore recommended to use only approved Océ materials in the Océ
TDS600.
A full list of Océ materials suited for use in the Océ TDS600, including plain
paper, transparent paper, coloured papers and various polyester films is
available from your Océ representative.
Material types The following material types are available for the Océ TDS600:
Plain paper
Transparent paper
Vellum
Polyester film
Special
Width
Length
75 to 110 g/m2
80 to 110 g/m2
16 - 20 lbs
3.5 or 4.5 mil
Coloured paper, etc.
Minimum
210 mm
279 mm
Maximum
914 mm
15 m
Material sizes The following material sizes are available for the Océ TDS600:
Format
ISO range
A4 portrait
A3
A2
A1
A0
Width
Length
210 mm
297 mm
420 mm
594 mm
841 mm
297 mm
420 mm
594 mm
841 mm
1189 mm
Format
ANSI PLUS
range
A+ portrait
B+
Width
Length
9”
12”
C+
D+
E+
Width
Length
8.5”
11”
17”
22”
34”
11”
17”
22”
34”
44”
Format
Others
Width
Length
12”
18”
30”
B1
30”
700 mm
18”
24”
B1+
707 mm
24”
36”
36”
48”
B2
B2+
500 mm
507 mm
42”
1000
mm
1000
mm
700 mm
700 mm
Overview and tables
Format
ANSI range
A portrait
B
C
D
E
309
Attention: Avoid storing paper in rooms where temperature and humidity
are high. Also, avoid dust and direct sunlight. Wrap unused paper in plastic
to prevent it absorbing moisture.
Reinforcement strips
Information about the different reinforcement strips is available from your Océ
representative.
Attention: Only use the original reinforcement strips from Océ, to avoid
damage to the reinforcement unit.
310
Océ TDS600 Multifunctional Digital System User Manual
Océ TDS600
Multifunctional Digital System
User Manual
Appendix B
Safety information
311
Recommended weight limits
The Océ TDS600 can be equipped with 6 rolls. Using the NIOSH method
(National Institute for Occupational Safety and Health) the following
recommended weight limits (RWLs) for the roll positions can be calculated:
Weight limits (in kg)
Roll 1
Roll 2
Roll 3
Roll 4
Roll 5
Roll 6
13.5
8.9
13.2
8.3
13.3
8.0
Note: A roll will always be placed in the machine including a 1.3 kg roll holder.
In order to be able to put all available materials on all roll positions without
exceeding the RWLs a roll loader has been designed. With the roll loader you
can safely use the following weights per roll:
Weight limits (in kg) with roll loader
Roll 1
21.7
Roll 2
20.5
Roll 3
22.9
Roll 4
22.4
Roll 5
20.1
Roll 6
21.5
312
Océ TDS600 Multifunctional Digital System User Manual
The following overview shows the weights of some commonly used materials:
Roll weights per material
Plain paper (75g/m2, A0, 175m)
Plain paper (110g/m2, A0, 100m)
Transparent paper (90g/m2, A0, 100m)
Océ polyesters (3.5mil, A0, 50m)
Vellum 7500 (20lb, 36", 500’)
Engineering bond 45-111 (20lb, 36", 500’)
11.5
9.7
8.2
11.8
11.4
11.4
Note: Weights are without the 1.3 kg roll holder.
The weight of a stack of sheets never exceeds the RWL.
Caution: If the Océ TDS600 printer is not equipped with the optional roll
loader, the NIOSH limit value for handling loads will be exceeded when
rolls of imaging materials having a net weight of more than 7 kg (i.e. a
width of more than approx. 50 cm or 20 inches) are placed in the roll
positions numbers 2, 4 and 6 by only one person.
Safety information
313
Instructions for safe use
Océ machines and materials have been developed and tested in accordance
with the strictest international safety standards. To ensure safe working with
these products it is important that you observe the following safety rules:
■
■
■
■
■
■
■
■
■
■
■
■
■
■
■
■
314
Do not remove any screws from fixed panels.
The machine is not user-serviceable except for the components and
maintenance materials mentioned in this manual.
Do not place any liquids in or on the machine.
Use maintenance materials or other materials for their original purpose only.
Keep maintenance materials away from children.
Do not mix cleaning fluids or other materials.
To avoid risks, all modifications to Océ equipment are strictly reserved for
Océ service personnel. It is recommended to use attachment cables specified
by Océ.
Do not bridge any mechanical or electrical circuit breakers.
Do not use an extension lead to connect the machine.
Locate the machine close to a dedicated 16 A wall socket that is easily
accessible.
The switch in the fixed connection (if any) should be easily accessible.
This machine has not been designed for connection to an IT power system.
(An IT power system is a voltage network in which the neutral wire is not
connected to earth).
Do not block the ventilation openings of the machine.
Ensure that the machine is placed on a level, horizontal surface of sufficient
strength. See the Océ TDS600 safety data sheet in this appendix for
information about the weight of the machine.
Ensure there is sufficient space around the machine. This facilitates
reloading materials as well as maintenance.
Do not place the machine in rooms which are subject to excessive vibration.
Do not place the machine in rooms which are too small and insufficiently
ventilated. See the Océ TDS600 safety data sheet in this appendix for
information about space and ventilation requirements.
Océ TDS600 Multifunctional Digital System User Manual
■
■
■
■
Always use materials recommended by Océ and developed for this Océ
machine. Materials not approved by Océ may result in faults in your
machine.
Do not use the machine when it is emitting unusual sounds. Remove the plug
from the power socket and contact your key operator.
Do not open more than one drawer at the same time.
Do not remove the printer supports underneath the Océ TDS600.
Safety information
315
Safety data sheets
Disclaimer The disclaimer below is valid for all safety data sheets in this
manual.
These safety data sheets have been compiled to the best of our knowledge as a
compact guide to safe handling of this product. We reserve the right to revise
safety data sheets as new information becomes available. It is the user’s
responsibility to determine the suitability of this information for the adoption
of safety precautions as may be necessary and to contact the company to make
sure that the sheet is the latest one issued. If and in so far as limitation of
liability is permitted under the applicable laws we do not accept liability for
any inaccuracy that may occur in this information.
316
Océ TDS600 Multifunctional Digital System User Manual
Safety data sheet Océ TDS600 printer
PRODUCT SAFETY DATA SHEET
Océ-(UK), Ltd
Number
Date
E-691-a-UK
May 1999
Model
Océ 9600 Printer-engine
Description
Electrostatic printer, instant printing, console model, plain paper, organic photoconductive
drum, powder toner.
5m/min.
Max. process speed
Dimensions
Width
Depth
Height
Weight
Voltage
Frequency
Current-rated
Current-max
Power consumption, operation
Power consumption, standby
EPA ENERGY STAR ¨
* Power consumption, low power
Mains connection
Safety class
Protection class
1400
753
1470
250
mm
mm
mm
kg
230
50-60
7,5
10
1470
50
V
Hz
A
A
W
W
50 kg (extra rolldrawer) 25 kg (extra sheet feeder)
180 W Recovery time < 3 seconds
Cable with plug
I
(IEC 536) Protective earth connection
IP 20
(IEC 529)
Standby:
30 dB(A)
In operation:
mainbody 50 dB(A);
incl. optionals 57 dB(A);
mpulse ∆ Li = 3 dB(A)
mainbody 63 dB(A);
incl. optionals 75 dB(A)
Sound pressure level
(at operator/bystander
position)
Sound power level
51 dB(A)
Radio interference
Radiation
Heat emission
Ozone emission
Complies with Directive 89/336/EEC
Below the Threshold Limit Value for UV radiation (TLV list of ACGIH)
Standby 50 W; in operation 1470 W
0,004 mg/min at continuous operation
Room volume
Room ventilation
Recommendation: min. 50 m3
Recommendation: min. 25 m3/h (natural ventilation)
(For heat evacuation extra ventilation may be necessary)
With a room volume and ventilation as recommended and a daily volume of 210 m (much
more than average) the use simulation at random operation gives the following ozone
concentrations:
(0,00o5 ppm)
- Time weighted average
0,001 mg/m3
- Peak
0,002 mg/m3
(0,0005 ppm)
Use simulation at random
operation
Threshold Limit Value/Occupational Exposure Limit
(Time Weighted Average) for ozone
Odour Perception Limit for ozone
Consumables
(0,1 ppm)
(0,02 ppm)
Océ OPC Drum,(Océ Material Safety Data Sheet E-218)
Océ B5 Toner (Océ Material Safety Data Sheet E-199)
Océ D5 Developer (Océ Material Safety Data Sheet E-200)
Océ Copying Materials. This apparatus is suitable for processing recycling paper which
complies with the requirements of ENV 12281.
Additional safety information
CE-Compliance
0,2 mg/m3
0,04 mg/m3
The ozone Þlter does not have to be replaced for keeping the ozone concentration in the
workplace below 0,04 mg/m3 (the life of the Þlter equals that of the apparatus)
Approved according to
Low Voltage Directive
73/23/EEC
Approved according to
EMC Directive
89/336/EEC
Copyright © 1999 Océ-Technologies B.V., Venlo, NL
Note: The contents of this safety data sheet is subject to the disclaimer on
page 316 of this manual.
Safety information
317
Safety data sheet Océ TDS600 scanner
PRODUCT SAFETY DATA SHEET
Océ-(UK), Ltd
Number
E-692-a-UK
Date
December 1999
Model
Océ 9600 Scanner
Description
Max. process speed
Free standing wide format scanner
5 m/min
Dimensions
Width
Depth
Height
1314
583
1353
90
Weight
Voltage
Frequency
Current-rated
Current-max
Power consumption, operation
Power consumption, stand by
Mains connection
Safety class
Protection class
mm
mm
mm
kg
230 V
50-60 Hz
1 A
1 A
110 W at continuous operation
97 W
Cable with plug
I
(IEC 536) Protective earth connection
IP 20
(IEC 529)
Stand by
26 dB(A)
In operation
main body 52 dB(A)
impulse ∆ Li = 4 dB(A)
43 dB(A)
main body 62 dB(A)
Complies with Directive 89/336/EEC
Below the Threshold Limit Values for UV, Visible and IR radiation (TLV list of ACGIH)
Standby 97 W; at continuous operation 110 W
Not applicable
Sound pressure level
(at operator position)
Sound power level
Radio interference
Radiation
Heat emission
Ozone emission
Room volume
Room ventilation
No special requirements
Consumables
Not applicable
Additional safety information
CE-Compliance
None
Approved according to
Low Voltage Directive
73/23/EEC
Approved according to
EMC Directive
89/336/EEC
Copyright © 1999 Océ-Technologies B.V., Venlo, NL
Note: The contents of this safety data sheet is subject to the disclaimer on
page 316 of this manua
318
Océ TDS600 Multifunctional Digital System User Manual
Safety data sheet Océ TDS600 folder
Note: The contents of this safety data sheet is subject to the disclaimer on
page 316 of this manual.
Safety information
319
Safety data sheet B5 toner
MATERIAL SAFETY DATA SHEET
Number
Date
Page
(93/112/EEC and ISO 11014-1)
E-199-a-UK
October 1997
1 of 2
Océ B5 Toner
1. Product and company identification
Product name
Packing
Company
Address
Telephone
Telefax
Océ B5 Toner
Polyethylene bottle, contents 0,45 kg/1.1 lb
Océ (UK) Ltd.
Langston Road, Loughton, Essex IG10 3SL
0181-508 5544 (contact product safety coordinator)
0181-508 6689
2. Composition / information on ingredients
Ingredients
CAS No.
Polyester resin
Phenoxy resin
Iron oxide
Carbon black
Amorphous Silica
Pigment
170831-75-1
PMN P-95-461
1317-61-9
1333-86-4
68611-44-9
Classi?cation
Weight %
25-50
25-50
10-25
1-5
<1
<1
3. Hazards identification
In a toner dust cloud the formation of an explosive dust-air mixture is possible.
Toner dust may cause discomfort for the eyes and respiratory tract, in the same manner as inert nuisance dust.
To our knowledge, with due observance of the recommended exposure limit and of normal hygiene this product presents no health hazard
in normal use.
4. First aid measures
Eyes contact
Skin contact
Inhalation
Ingestion
Rinse with plenty of water.
Wash with cold water and soap.
Clean nose, mouth, throat. Cough up. Fresh air.
Rinse mouth with water. If large quantity swallowed seek medical advice.
For any medical advice take along this material safety data sheet.
5. Fire fighting measures
Extinguishing media
Special fire fighting precautions
Hazardous products of decomposition
Dry chemical, carbon dioxide, water spray (fog), foam
N.A.
N.A.
6. Accidental release measures
Spills can be cleaned with a vacuum cleaner or a damp rag. Do not use warm water, because this makes the powder soft and sticky.
7. Handling and storage
Keep bottle tightly closed to prevent dust formation. Handle carefully. Avoid breathing dust.
No special technical measures for storage.
8. Exposure controls / personal protection
No special technical measures. No personal protective equipment needed.
Industrial hygiene: after skin contact wash with cold water and soap.
Threshold Limit Value for:
* nuisance dust
10 mg/m3
* carbon black
3,5 mg/m3
* amorphous silica
10 mg/m3
continued on next page
320
Océ TDS600 Multifunctional Digital System User Manual
MATERIAL SAFETY DATA SHEET
Number
Date
Page
(93/112/EEC and ISO 11014-1)
E-199-a-UK
October 1997
2 of 2
Océ B5 Toner
9. Physical and chemical properties
Explosion limits (dust explosion)
Appearance and odour
Boiling point (oC)
Vapour density (air = 1)
Solubility in water
Vapour pressure
Other characteristics
LEL 60 g/m3. UEL U (= unknown)
Black powder, faint odour
N.A
N.A.
Insoluble
N.A.
N.A.
Flash point (oC)
Ignition temperature (oC)
Bulk density (kg/m3)
Softening point (oC)
Evaporation rate (butyl acetate = 1)
% Volatile
pH (solution)
N.A. (=Not Applicable)
U.
Approx. 1400
Approx. 50
N.A.
0
N.A.
10. Stability and reactivity
Thermal decomposition
Hazardous decomposition products
Hazardous reaction
Above approx. 450 oC
None at intended use
None at intended use
11. Toxicological information
Inhalation
Skin
Eyes
Ingestion
Mutagenicity
* At high concentration in air the powder may cause discomfort of upper respiratory system.
* No adverse health effects are expected.
* Dust may cause discomfort in the same manner as nuisance dust.
* Considered relatively harmless.
No mutagenicity detected in Ames test of similar toners.
* These statements are based on toxicological literature on the ingredients of this product and test results of similar
products.
12. Ecological information
This product is not biodegradable.
The ingredients are not classified as ecologically hazardous. No adverse environmental effects are expected.
13. Disposal considerations
Pack waste dustproof to prevent dusting. With due observance of local laws and regulations, dispose of by burial in a sanitary landfill or
incineration. Do not throw in open fire, in order to prevent the risk of a dust explosion.
14. Transport information
This product is not classified as a dangerous substance according to the international transport regulations.
15. Regulatory information
This product is not classified as a dangerous preparation according to the European Directives 67/548/EEC and 88/379/EEC for the
classification, packaging and labelling of dangerous substances and preparations.
Therefore, indications of special risks or safety advice on the packing are not prescribed for this product.
16. Other information
Use: ink powder for printers.
Room ventilation: see operator manual or safety data sheet for the machine.
Copyright © 1997 Océ-Technologies B.V. Venlo, NL
Note: The contents of this safety data sheet is subject to the disclaimer on
page 316 of this manual.
Safety information
321
Safety data sheet D5 developer
MATERIAL SAFETY DATA SHEET
Number
Date
Page
(93/112/EEC and ISO 11014-1)
E-200-a-UK
October 1997
1 of 2
Océ D5 Developer
1. Product and company identification
Product name
Packing
Company
Address
Telephone
Telefax
Océ D5 Developer
Polyethylene bottle, contents 1,75 kg/3.86 lb
Océ (UK) Ltd.
Langston Road, Loughton, Essex IG10 3SL
0181-508 5544 (contact product safety coordinator)
0181-508 6689
2. Composition / information on ingredients
Ingredients
CAS No.
Iron oxide
Polyester resin
Phenoxy resin
Carbon black
Amorphous Silica
Pigments
1317-61-9
170831-75-1
PMN P-95-461
1333-86-4
68611-44-9
Classi?cation
Weight %
50-100
1-5
1-5
<1
<1
<1
3. Hazards identification
In a developer dust cloud the formation of an explosive dust-air mixture is possible.
Developer dust may cause discomfort for the eyes and respiratory tract, in the same manner as inert nuisance dust.
To our knowledge, with due observance of the recommended exposure limit and of normal hygiene this product presents no health hazard
in normal use.
4. First aid measures
Eyes contact
Skin contact
Inhalation
Ingestion
Rinse with plenty of water.
Wash with cold water and soap.
Clean nose, mouth, throat. Cough up. Fresh air.
Rinse mouth with water. If large quantity swallowed seek medical advice.
For any medical advice take along this material safety data sheet.
5. Fire fighting measures
Extinguishing media
Special fire fighting precautions
Hazardous products of decomposition
Dry chemical, carbon dioxide, water spray (fog), foam
N.A.
N.A.
6. Accidental release measures
Spills can be cleaned with a vacuum cleaner or a damp rag. Do not use warm water, because this makes the powder soft and sticky.
7. Handling and storage
Keep bottle tightly closed to prevent dust formation. Handle carefully. Avoid breathing dust.
No special technical measures for storage.
8. Exposure controls / personal protection
No special technical measures. No personal protective equipment needed.
Industrial hygiene: after skin contact wash with cold water and soap.
Threshold Limit Value for:
* nuisance dust
10 mg/m3
* carbon black
3,5 mg/m3
* amorphous silica
10 mg/m3
continued on next page
322
Océ TDS600 Multifunctional Digital System User Manual
MATERIAL SAFETY DATA SHEET
Number
Date
Page
(93/112/EEC and ISO 11014-1)
E-200-a-UK
October 1997
2 of 2
Océ D5 Developer
9. Physical and chemical properties
Explosion limits (dust explosion)
Appearance and odour
Boiling point (oC)
Vapour density (air = 1)
Solubility in water
Vapour pressure
Other characteristics
LEL(= unknown)UEL U
Black powder, faint odour
N.A
N.A.
Insoluble
N.A.
N.A.
Flash point (oC)
Ignition temperature (oC)
Bulk density (kg/m3)
Softening point (oC)
Evaporation rate (butyl acetate = 1)
% Volatile
pH (solution)
N.A. (=Not Applicable)
U
Approx. 2500
Approx. 50
N.A.
0
N.A.
10. Stability and reactivity
Thermal decomposition
Hazardous decomposition products
Hazardous reaction
Above approx. 450 oC
None at intended use
None at intended use
11. Toxicological information
Inhalation
Skin
Eyes
Ingestion
Mutagenicity
* At high concentration in air the powder may cause discomfort of upper respiratory system.
* No adverse health effectsare expected.
* Dust may cause discomfort in the same manner as nuisance dust.
* Considered relatively harmless.
No mutagenicity dectected in Ames-test of similar products.
* These statements are based on toxicological literature on the ingredients of this product and test results of similar
products.
12. Ecological information
This product is not biodegradable.
The ingredients are not classified as ecologically hazardous. No adverse environmental effects are expected.
13. Disposal considerations
Pack waste dustproof to prevent dusting. With due observance of local laws and regulations, dispose of by burial in a sanitary landfill or
incineration. Do not throw in open fire, in order to prevent the risk of a dust explosion.
14. Transport information
This product is not classified as a dangerous substance according to the international transport regulations.
15. Regulatory information
This product is not classified as a dangerous preparation according to the European Directives 67/548/EEC and 88/379/EEC for the
classification, packaging and labelling of dangerous substances and preparations.
Therefore, indications of special risks or safety advice on the packing are not prescribed for this product.
16. Other information
Use: ink powder for printers.
Room ventilation: see operator manual or safety data sheet for the machine.
Copyright © 1997 Océ-Technologies B.V. Venlo, NL
Note: The contents of this safety data sheet is subject to the disclaimer on
page 316 of this manual.
Safety information
323
Safety data sheet OPC drum
MATERIAL SAFETY DATA SHEET
Number
Date
Page
(93/112/EEC and ISO 11014-1)
E-218-a-UK
April 1998
1 of 2
Océ OPC Drum Part No. 2912571, Océ ES102 OPC Part No. 7069008
1. Product and company identification
Product name
Packing
Company
Address
Telephone
Telefax
Océ OPC Drum Part No. 2912571, Océ ES102 OPC Part No. 7069008
OPC for Océ 705x, 707x, 9400 and 9600
Cardboard box
Océ (UK) Ltd.
Langston Road, Loughton, Essex IG10 3SL
0181-508 5544 (contact product safety coordinator)
0181-508 6689
2. Composition / information on ingredients
Ingredients
CAS No.
Aluminium
Resins
Pigments
7429-90-5
Classi?cation
Weight %
>99
<1
<1
3. Hazards identification
To our knowledge this product presents no health hazard in normal use.
4. First aid measures
Eyes contact
Skin contact
Inhalation
Ingestion
Not Applicable(=N.A.)
N.A.
N.A.
N.A.
For any medical advice take along this material safety data sheet.
5. Fire fighting measures
Extinguishing media
Special fire fighting precautions
Hazardous combustion products
Dry chemical, carbon dioxide, water spray (fog), foam
N.A.
Carbon monoxide, carbon dioxide.
6. Accidental release measures
N.A.
7. Handling and storage
No special technical measures for storage.
8. Exposure controls / personal protection
No special technical measures. No personal protective equipment needed.
No special work hygiene practices needed.
continued on next page
324
Océ TDS600 Multifunctional Digital System User Manual
MATERIAL SAFETY DATA SHEET
Number
Date
Page
(93/112/EEC and ISO 11014-1)
E-218-a-UK
April 1998
2 of 2
Océ OPC Drum Part No. 2912571, Océ ES102 OPC Part No. 7069008
9. Physical and chemical properties
Explosion limits (dust explosion)
Appearance and odour
Boiling point (oC)
Vapour density (air = 1)
Solubility in water
Vapour pressure
Other characteristics
LEL N.A.
UEL N.A.
brown coloured aluminium cylinder
N.A
N.A.
Insoluble
N.A.
N.A.
Flash point (oC)
Ignition temperature (oC)
Density (g/cm3)
Melting point (oC)
Evaporation rate (butyl acetate =1)
% Volatile
pH (solution)
N.A.
N.A
2,7
N.A.
N.A.
0
N.A.
10. Stability and reactivity
Thermal decomposition
Hazardous decomposition products
Hazardous reaction
None at intended use
None at intended use
None at intended use
11. Toxicological information
Inhalation
Skin
Eyes
Ingestion
Mutagenicity
N.A.
No adverse health effects are expected. (Based on toxicological literature on the ingredients of this product)
N.A.
N.A.
No mutagenicity detected in Ames test. None of the ingredients is listed as mutagenic or carcinogenic.
12. Ecological information
This product is not biodegradable.
The ingredients are not classi?ed as ecologically hazardous. No adverse environmental effects are expected.
13. Disposal considerations
The drum will be returned to Océ for re-use.
14. Transport information
This product is not classified as a dangerous substance according to the international transport regulations.
15. Regulatory information
This product is an article and contains no dangerous substances. Therefore, indications of special risks or safety advice on the packing are
not prescribed for this product.
16. Other information
Use: photoconductor for printers and copiers.
Copyright © 1998 Océ-Technologies B.V. Venlo, NL
Note: The contents of this safety data sheet is subject to the disclaimer on
page 316 of this manual.
Safety information
325
EPA ENERGY STAR®
Océ-Technologies B.V. has joined the ENERGY STAR® program of the United
States Environmental Protection Agency (EPA). The purpose of the ENERGY
STAR® program is to promote the manufacturing and marketing of
energy-efficient equipment, thereby potentially reducing combustion-related
pollution.
Using the energy management features outlined below prevents unnecessary
power consumption, which helps to prevent air pollution from electricity
generating plants and saves money on your utility bills.
The Océ TDS600 is supplied as a printer and as a copier/printer and includes
the following separate units:
1 Océ TDS600 printer
2 Océ TDS600 controller
3 Océ TDS600 monitor
4 Océ TDS600 scanner (only the copier/printer)
5 Océ TDS600 folder (optional)
As an ENERGY STAR® partner, Océ-Technologies B.V. has determined that
both the printer and the copier/printer meet the ENERGY STAR® guidelines for
energy efficiency.
The EPA ENERGY STAR® criteria involve the following features:
Low power mode The Océ TDS600 Printer is shipped with the low power
mode default time set at 30 minutes, which means that the device automatically
enters the low power mode 30 minutes after the last print is made.(*) The low
power mode default time can be adjusted by the key operator to between 5 and
60 minutes. The low power mode recovery time is less than 1 second, after
which printing can be resumed (“instant printing”, i.e. time to first print less
than 40 seconds).
The Océ TDS600 has a stand-by mode which complies with the ENERGY
STAR® low power mode criteria for Multifunction Devices.(*) The default
time is zero and the recovery time is less than 1 second.
326
Océ TDS600 Multifunctional Digital System User Manual
Sleep mode The Océ TDS600 is shipped with the sleep mode default time set
at 30 minutes, which means that the device automatically enters the sleep mode
30 minutes after the last copy or print is made.(*) The sleep mode default time
can be adjusted by the key-operator to between 20 and 60 minutes. The sleep
mode recovery time is less than 1 second. Only if a sleep mode default time of
60 minutes still causes you sizable inconvenience, due to your particular usage
pattern, the key-operator may disable the sleep mode feature.
Recycled paper The use of recycled paper also benefits the environment. The
Océ TDS600 is designed to use recycled paper. Product literature on
recommended types of recycled copier/printer paper can be obtained from
your local Océ company or Océ Headquarters (Océ-Technologies B.V.) in
Venlo, the Netherlands.
(*) For power consumption data: see the Product Safety Data Sheet in this
appendix.
ENERGY STAR® is a U.S. registered mark.
Safety information
327
328
Océ TDS600 Multifunctional Digital System User Manual
Océ TDS600
Multifunctional Digital System
User Manual
Appendix C
Miscellaneous
329
Notation conventions
There are a number of notation conventions used in this manual. This
consistent style enables you to quickly become conversant with the use of this
manual and consequently the Océ TDS600.
Description Each section or subsection contains a description of the feature or
operation identified in the title. It might also include possible applications, as
well as any guidelines that you should bear in mind.
Procedures A description is followed by a procedure. A procedure always
begins with a phrase which briefly describes the procedure, followed by a
series of numbered steps that take you, step by step, through all phases of
performing the operation.
Figures and tables Figures and tables are titled and numbered sequentially
throughout this manual. Figures include pictures of product components,
screendumps, examples, and diagrams of concepts discussed in the
description.
Attention getters There are several types of information to which we draw
your attention. This information is classified as follows:
Note: In a ‘Note’, information is given about matters which ensure the proper
functioning of the machine or application, but useful advice concerning its
operation may also be given.
Attention: The information that follows ‘Attention’ is given to prevent
something (your copy or original, the copier or printer, data files etc.)
being damaged.
Caution: The information that follows ‘Caution’ is given to prevent you
suffering personal injury.
330
Océ TDS600 Multifunctional Digital System User Manual
Reader’s comment sheet
Have you found this manual to be accurate?
❏ Yes
❏ No
Could you operate the product after reading this manual?
❏ Yes
❏ No
Does this manual provide enough background information?
❏ Yes
❏ No
Is the format of this manual convenient in size, readability and arrangement
(page layout, chapter order, etc.)?
❏ Yes
❏ No
Could you find the information you were looking for?
❏ Always
❏ Most of the times
❏ Sometimes
❏ Not at all
What did you use to find the required information?
❏ Table of contents
❏ Index
Are you satisfied with this manual?
❏ Yes
❏ No
Thank you for evaluating this manual.
If you have other comments or concerns, please explain or suggest
improvements overleaf or on a separate sheet.
Miscellaneous
331
Comments:
------------------------------------------------------------------------------------------------------------------------------------------------------------------------------------------------------------------------------------------------------------------------------------------------------------------------------------------------------------------------------------------------------------------------------------------------------------------------------------------------------------------------------------------------------------------Date:
This reader’s comment sheet is completed by:
(If you prefer to remain unknown, please do fill in your occupation)
Name:
Occupation:
Company:
Phone:
Address:
City:
Country:
Please return this sheet to:
Océ-Technologies B.V.
For the attention of ITC User Documentation.
P.O. Box 101,
5900 MA Venlo
The Netherlands
Send you comments by E-mail to : [email protected]
For the addresses of local Océ organizations see : www.oce.com
332
Océ TDS600 Multifunctional Digital System User Manual
Addresses of local Océ organisations
Océ-Australia Ltd.
P.O.Box 363
Ferntree Gully MDC VIC 3165
Australia
Océ-Danmark A.S.
Kornmarksvej 6
DK 2605 Brøndby
Denmark
Océ-Österreich GmbH
Postfach 95
1233 Vienna
Austria
Océ-France S.A.
32, Avenue du Pavé Neuf,
93161 Noisy-le-grand, Cedex
France
Océ-Belgium N.V./S.A.
Avenue J.Bordetlaan 32
1140 Brussels
Belgium
Océ-Deutschland GmbH
Postfach 101454
4330 Mülheim an der Ruhr (13)
Deutschland
Océ-Brasil Comércio e Industria Ltda.
Caixa Postal 3187
01060-970 Sao Paulo, SP
Brazil
Océ (Hong Kong China) Ltd.
12/F 1202 The Lee Gardens
33 Hysan Avenue, Causeway Bay
Hong Kong
Océ-Canada Inc.
4711 Yonge Street, Suite 1100
Toronto, Ontario M2N 6K8
Canada
Océ-Hungária Kft.
P.O.B. 237
1241 Budapest
Hungary
Océ Office Equipment (Beijing) Co Ltd.
Xu Mu Cheng
Chaoyang District
Beijing 100028
China
Océ-Italia S.p.A.
Strada Padana Superiore 2/B
20063 Cernusco sul Naviglio (MI)
Italia
Océ-Česká republika s.r.o.
Hanusova 18
14021 Praha 4
Pankrác,
Czech Republic
Miscellaneous
Océ Systems (Malaysia Sdn. Bhd.)
#3.01, Level 3, Wisma Academy
Lot 4A, Jalan 19/1
46300 Petalig Jaya
Malaysia
333
Océ-Nederland B.V.
P.O.Box 800
5201 AV ‘s-Hertogenbosch
The Netherlands
Océ Norge A/S
Postboks 53, Grefsen
0409 Oslo 4
Norway
Océ-Poland Ltd.
ul. Łopuszańska 53
02-232 Warszawa
Poland
Océ-Lima Mayer S.A.
Av. José Gomes Ferreira, 11
Ed. Atlas II Miraflores
1495 Algés
Portugal
Océ (Singapore) Pte. Ltd.,
#03-00 Wisma Gulab
190 MacPherson Road
Singapore 348548
Océ España SA
Business Park MAS BLAU
C/Osona 2, 2-3a Planta
08820 El Prat del Llobregat (Barcelona)
Spain
Océ-Svenska AB
P.O.box 1231
S-164 28 Kista
Sweden
Océ-Schweiz AG
Sägereistrasse 29
CH8152 Glattbrugg
Switzerland
Océ (Taiwan) Ltd.
No. 99-24 Nan Kang Road Sec.2
Taipeh, Taiwan
Taiwan, RO
334
Océ TDS600 User Manual
Océ (Thailand) Ltd.
16th Floor, B.B. Building
54 Asoke Road, Sukhumvit 21
Bangkok 10110
Thailand
Océ-U.K.Ltd.
Langston Road
Loughton, Essex IG10 3SL
United Kingdom
Océ-USA Inc.
5450 North Cumberland Av.
Chicago, Ill. 60656
U.S.A.
Océ Japan Corporation
3-25-1, Nishishinnbashi
Minato-Ku
105-0003 Tokyo
Japan
Océ Suomi
P.O. Box 163
Tallberginkatu 2A
SF 00181 Helsinki
Finland
Océ-Ireland Ltd.
3006 Lake Drive Citywest Business
Campus
Saggart/Co.Dublin
Ireland
Index
D
access 148
account logging mechanism 226
add a controller 122
adding toner 248
replacing waste toner bag 248
applications 110
apply 145
auto align 101
automatic language sensing 210
automatic login 119
automatic login 119
automatically view a scanned file 83
available material types and sizes 309
default settings 42, 61
define settings 53
defining
original settings 158
pen settings 217
set time-out 188
zoom calibration 166
delete a scanned file 82
deleting print jobs 130
destination 71
delete 80
lock 80
unlock 80
destination properties 81
destination type 79
display language 119
dithering matrix 207
drawing method 291
B
E
A
background compensation 98
belt unit 290, 297
binding edge 291
buttons 28
selection buttons 28, 42, 61
stop 28, 42, 61
editing image 101
enlargement 47
epa energy star 326
exposure
modifying 48
F
C
call service 288
clearing jams
folder 274
fuser section 272
clicks 66
command line parameters 120
compression 72, 73
connect to a controller 122
connecting 122
connecting workstations 85, 229
copying 47
long/short originals 92
custom card 150
Index
file extension 81
file mode 71
file type 71
cals 72
tiff 71
folded copies 290
folded package length 291
folded package width 291
folder 290
belt unit 296
standard folding program 290
folder options
belt unit 290
reinforcement unit 290
335
folding length 293
folding settings 294, 295
ftp 84, 228
ftp in a internet browser 228
function buttons 43, 62
functions
océ tds600 14
G
general control buttons 147
get files 85, 229
glass platen 252
L
language 45, 64, 119
leading and trailing edge 95
loading media 240, 252
cut sheet material 246
rolls 241, 252
using roll loader 244
log file 226
log in 118
log in 118
log out 118
log out 118
log record 231
long/short originals 92
H
help 119
history queue 125
history queue 132
horizontal zoom calibration 166
how to use the remote system 122
I
import the account log file 230
inbox queue 125, 131
install remote logic 111
instructions for safe use 314
M
manual feed see sheet feed
media jam
belt unit 280
folder 274
folder transport section 276
fuser section 272
roll feed section 271
second fold section 276
sheet feeder 270
menu bar 144
mirror 74
moving a job to top 131
multiple sheet 155
J
N
jams 269
non-standard sized originals 92
number of copies, defining - 47
K
key operator settings 142
key operator settings (kos) 12
kos system
introduction 140
336
O
océ tds600
functions 14
océ tds600 applications
key operator settings/system administrator
settings 21
Océ TDS600 Multifunctional Digital System User Manual
queue manager 20
queue manager 124
system control panel 20
océ tds600 folder 289
océ tds600 key operator settings (kos) 139
océ tds600 printer 14
océ tds600 system administrator settings (sas)
203
off line folding 294, 295
operating panel 41, 60
operator panel printer 26
optimization 74
file size 74
scan quality 74
organization 72
original delivery
selecting front or rear output 52
original type 99
originals
copying thick - 52, 92
other problems 288
Q
queue manager
active print job window 124
deleting print jobs 130
functions 20, 124
introduction 20, 124
menu bar 124
modes 127
moving a job to top 131
pausing print jobs 130
print queue window 125
restarting paused print job 131
restarting paused print jobs 131
structure 124
viewing the print queue 130
window 126
queue manager window 135
R
P
panel time-out 188
paper jams 269
password 118
pen pattern 217
pen settings 217
pen settings
pen pattern 217
pen width 217
pen width 217
postscript 214
print a scanned file 81
print exec lt web 105
print exec lt web
add new jobs 107
print settings 217
printer buttons 28
printer settings
selecting language 32
setting a special media indication 29, 31
setting media type and size 29
stopping print job 32
product specifications 303
properties of a scanned file 82
Index
recommended weight limits 312
record 231
reduction 47
reduction/enlargement 47
reference roller 252
reinforcement unit 290
remote logic
languages 119
resolution 73
restarting a paused print job 131
retrieve scanned files 84
retrieve the account files 228
roll holder 241, 244
S
safety data sheet
océ tds600 developer 322
océ tds600 folder 319
océ tds600 opc drum 324
océ tds600 toner 320
safety data sheets 316
safety information 311, 314
sas system
337
pen settings 217
scan manager 75, 78
create destination 78
scan to file
destination 68
file mode 68
how to 68
password 66
settings 70
selecting language 32
selection buttons 28, 42, 61
set time-out 188
setting dependencies 142
setting media type and size 29
setting special media indication 31
settings area 146
shutting down 141
single sheet 155
solving problems 288
sort 155
standard folding program 290
start button 48
starting up 141
status bar 147
stop a copy job 56
stop button 28, 42, 56, 61
stopping a print job
stop button 32
stopping print job 32
supported media 241
switch the océ power logic controller off 40, 59
switch the océ tds600 printer off 40
switch the océ tds600 scanner off 40, 59
switching on
printer 25, 39
switching on and off 24
system administrator 203
system administrator settings 142
system control panel (scp)
icons 136
introduction 134
structure 134
temporary store 83
tiff subformat 72, 73
tree structure 146
tree view 76
destinations 76
U
undo 145
unix 113
update area 147
user modes 117, 148
V
vertical zoom calibration 166
view a scanned file 81
view error 89
view station 66, 86
view a scanned file 69
viewing printer status 133
viewing the print queue 130
W
waste box 262
waste toner bag 248
work on a remote system 122
Z
zoom 47, 73
zoom calibration 166
T
table view 76
file properties 76
338
Océ TDS600 Multifunctional Digital System User Manual