1
Océ Account
Center
User manual
Océ-Technologies B.V.
Copyright
© 2005, Océ-Technologies B.V. Venlo, The Netherlands
All rights reserved. No part of this work may be reproduced, copied, adapted,
or transmitted in any form or by any means without written permission from
Océ.
Océ-Technologies B.V. makes no representation or warranties with respect to
the contents hereof and specifically disclaims any implied warranties of
merchantability or fitness for any particular purpose.
Further, Océ-Technologies B.V. reserves the right to revise this publication and
to make changes from time to time in the content hereof without obligation to
notify any person of such revision or changes.
Edition 08-2005
US
Table of Contents
Chapter 1
Introduction
Notes for the reader 8
The documentation set 9
Chapter 2
Get to know Océ Account Center
The users of Océ Account Center 12
An overview of Océ Account Center 13
Chapter 3
Prepare Océ Account Center for use
Océ Power Logic® controller setup 18
Install Océ Account Console 20
Licensing Océ Account Console 22
Remote access to Océ Account Console 23
Make the Océ Account Logic application available for use 24
Remote access to Océ Account Logic 25
Chapter 4
Océ Account Center for Special users: Administrators
Before you begin 28
Log on to Océ Account Console 28
Overview of the main components of Océ Account Console 31
Log out from Océ Account Console 34
Manage the Océ Account Console license 35
Determine the host ID of Océ Account Console 35
Activate a new license 37
Back up the current license file 38
Create the Account information dialog for Océ Account Logic 39
Introduction 39
Create a field 40
Create new values for the account fields 44
Add a value 48
Manage the account fields 52
Edit a field 52
Delete the account fields 53
Move 54
Manage the values for the account fields 55
Edit a value 55
Table of Contents
3
Delete values 57
Change the order of the values 58
Use Account information fields from third party applications 60
Publish fields from third party applications 60
Make the Account information dialog available in Océ Account Logic 61
Introduction 61
Preview 62
Make the Account information dialog available for Océ Account Logic 64
Create and manage the Océ devices 65
Create a new device 65
Edit a device 67
Delete devices from the list 68
Upgrade a device 69
Retrieve the account data 71
Retrieve the account data from a device 71
Administer Océ Account Logic 75
The Administration window 75
The logon window 76
Retrieve a new account information dialog 77
Define the account information requirements for the jobs 78
Define the remote access settings 80
Print jobs with only the user ID and the account ID defined as account information
81
Allow local clients to retrieve the accounting dialog 82
Chapter 5
Océ Account Center for users
Introduction 84
Enter account information for the print jobs 86
Print jobs 86
The print tab in Océ Account Logic 87
Manage the print jobs that do not have valid account information 90
Enter account information for the copy jobs and the scan-to-file jobs 91
Account information dialog 91
Copy jobs or scan-to-file jobs 93
Chapter 6
Océ Account Center for Special users: bookkeepers
Before you begin 96
Log on to Océ Account Console 96
Log out from Océ Account Console 99
Export the account log data 100
Create and manage the export filters in Océ Account Console 100
Introduction export filters 100
Create a new export filter 101
Delete an export filter 102
Edit an export filter 103
4
User manual
Copy an export filter 104
Run an export filter 105
Manage the log files 106
Delete log data 106
Appendix A
Appendix 109
Description of the fields in the account log file 110
Table of Contents
5
6
User manual
Océ Account Center
User manual
Chapter 1
Introduction
7
Notes for the reader
Definition
This manual helps you to use Océ Account Center. The manual contains a
description of the features of Océ Account Center and guidelines to use those
features. There are also tips to increase your knowledge and help you to
manage the workflow even better.
Note, Attention and Caution
Some parts of this manual require your special attention. These parts provide
important, additional information or are about the prevention of damage to
your properties. The words 'Note' and 'Attention' indicate these important
parts.
■
■
8
The word 'Note' comes before additional information about the correct use
of Océ Account Center or a tip.
A part marked with 'Attention' contains information to prevent damage to
items, for example an original or file.
User manual
The documentation set
Introduction
Océ Account Center consists of the following 2 applications.
■ Océ Account Console
■ Océ Account Logic.
Océ Account Center supports the following Océ systems.
■
■
Océ TDS range (TDS400, 600, 800, 860)
Océ TCS400 release 2.2 and higher releases.
The section below describes the items in the documentation set that describe
Océ Account Center.
The documentation set
This Account Center user manual
This user manual introduces you to Océ Account
Center. The manual provides the instructions for the
installation and the setup of the system.
Chapters 4, 5 and 6 include the descriptions of how
to use the applications.
The on-line help on Océ Account
Console
The on-line help provides complete information
about all functions of Océ Account Console.
The on-line help on Océ Account
Logic
The on-line help provides complete information
about all functions of Océ Account Logic.
The on-line help on the Océ Settings Editor
The on-line help provides complete information
about all settings on the Océ Settings Editor.
The user manuals of the Océ range
of print systems
The manuals provide general information about Océ
Account Center.
Interfacing with Océ Account
Center
Please contact your local Océ representative for information about how to integrate Océ Account Center with other applications.
Introduction
9
10
User manual
Océ Account Center
User manual
Chapter 2
Get to know Océ Account Center
11
The users of Océ Account Center
Introduction
Océ Account Center has the following types of users.
■ Special users: Administrators
■ Users
■ Special users: Bookkeepers.
The actions of the users
Users
Functions
Special users: Administrators
■
■
■
■
■
Users
Enter the correct account information for the jobs in
the Account information dialog.
Special users: Bookkeepers
■
■
■
■
■
12
Create the Account information dialog for Océ
Account Logic
Make the Account information dialog available in
Océ Account Logic
Define the accounting requirements in the
application.
Define the correct password
Create and manage the devices.
User manual
Determine the required accounting information
Retrieve account data from a device
Manage the log data
Export the log data
Use the log data from Océ Account Center for
accounting purposes.
An overview of Océ Account Center
Introduction
Use Océ Account Center to manage the account information of the print, copy
and scan-to-file jobs for your Océ TDS and Océ TCS devices.
Get to know Océ Account Center
13
Definition
Océ Account Center consists of two software modules.
■ Océ Account Logic
Océ Account Logic runs on the Océ Power Logic® controller. You can
connect to Océ Account Logic locally on the Océ Power Logic® controller
or from a remote PC through a web browser. Océ Account Logic is
managed by an administrator and mainly used by people that want to add
account information to their print, copy or scan-to-file jobs.
■ Océ Account Console
Océ Account Console runs on a PC that functions as a server. You can
connect to Océ Account Console from a local PC or remotely through a
web browser. Access to Océ Account Console application is password
protected and limited to authorised personnel such as an administrator and
a bookkeeper.
Illustration
14
User manual
User roles and tasks in Océ Account Center
[1] User roles and tasks in Océ Account Center
Users
Tasks
1) Administrator
A) Create, manage and delete the account dialog.
B) Publish the account dialog to the Océ Power Logic® controller.
2) Users
C) Use the dialog of Océ Account Logic or the dialog
in the Océ Windows Printer Driver (WPD) or Océ
Print Exec Workgroup to specify the account information for each copy, print and scan-to-file job.
3) Bookkeeper
D) Retrieve and use the account information of the
copy, print and scan-to-file jobs that is stored on the
Océ Power Logic® controller. The log data serves as
input for the accounting reports.
[1] User roles and tasks in Océ Account Center
Get to know Océ Account Center
15
16
User manual
Océ Account Center
User manual
Chapter 3
Prepare Océ Account Center for use
17
Océ Power Logic® controller setup
Introduction
Before you begin to use Océ Account Logic, you must do the following.
■ Activate Océ Account Logic by uploading the license in Océ License Logic.
■ Define the correct settings in the Océ Settings Editor on the Océ Power
Logic® Controller.
Before you begin
Before you can define the correct settings in the Océ Settings Editor on the Océ
Power Logic Controller, log on as a Key Operator (KO).
Note: Refer to the on-line help on the Océ Settings Editor for information
about the settings and the location of the settings.
18
User manual
The correct settings
The path to the setting in
the Océ Settings Editor
Definition
Explanation
KO - System - Job management - Print jobs
Select 'Jobs in inbox'.
Océ Account Logic requires
that all jobs are sent to the
Inbox.
Note: The print jobs that
have valid account
information are
automatically moved from
the Inbox to the Print queue.
Enter the account
information for the print
jobs that do not have valid
account information on the
'Print' tab of Océ Account
Logic.
KO - System - Job management - Rights for
printing
Select 'Special user'.
Only special users are allowed to print. This setting
disables printing by normal
users with the Océ Queue
Manager. The print button
is disabled in the Océ
Queue Manager. Océ Account Logic is a special user
on the Océ Power Logic®
controller.
KO - Scanner - Settings Timers - Panel timeout
Océ advises you to set the
panel timeout to the minimum value (30 seconds).
The scanner locks when the
scanner panel timeout expires. The scanner locks to
prevent users to use the
scanner without entering
account information. When
you set the time-out to a
minimum value, the scanner
locks after a minimum of
time has passed.
Prepare Océ Account Center for use
19
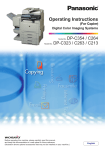
Install Océ Account Console
Introduction
Install Océ Account Console on a PC that functions as a server. Do not turn off
the PC that runs Océ Account Console.
You can run scheduled tasks like the overnight retrieval of log files on a server.
Access Océ Account Console locally on the PC or use the Microsoft Internet
Explorer to connect to Océ Account Console from a workstation on the
network.
Before you begin
Requirements.
®
®
■ Microsoft Windows NT 4.0 SP3 or,
®
®
■ Microsoft Windows 2000 SP1 or higher or,
®
®
■ Microsoft Windows XP or,
®
®
■ Microsoft Windows 2003 Server
■ Free disk space of 250 MB
■ Internal memory of 512 MB RAM
■ A port accessible from the network
The default port is port 8001.
■ Microsoft Internet Explorer 5.5 SP2 or higher.
The installation procedure
1. Insert the Océ Account Center installation CD in the CD-ROM drive of the
server PC. If the CD-ROM drive does not start, browse to your CD-ROM drive
icon and double-click the ocemenu.exe.
Setup starts with the welcome screen. Select the preferred language, for
example US English.
Note: The language you choose at the beginning of the set-up procedure
determines the default language selection for the user manual and the on-line
help in the installation procedure.
20
User manual
2. Click 'Next'.
The license agreement appears.
3. Read the license agreement and click 'Yes' to accept the agreement.
4. Follow the instructions on the screen.
■
■
■
The default destination folder is C:\oce\webapps.
The default user manual to be installed is the US English version. You can
change this and include other language versions.
The default language of the on-line help file to be installed is US English.
You can change the language or select more than one language file.
5. When the 'Installshield Wizard complete' screen appears, click 'Finish'.
Result
The Océ Account Console application, the selected user documentation and a
readme file are available in the list of programs. The program icon is available
on the desktop. The on-line help file(s) are integrated in the application.
Prepare Océ Account Center for use
21
Licensing Océ Account Console
Océ Account Console is protected by a license. After installing Océ Account
Console, you can use Océ Account Console for a maximum of 30 days. Within
a period of 30 days you need to acquire a license file from your Océ
representative.
You must provide your Océ representative with a host ID. The host ID is
displayed in the License window of Océ Account Console. To access the
License window (see ‘Determine the host ID of Océ Account Console’ on
page 35).
After you have received the license file from your Océ representative, you
must activate this license file in the License window (see ‘Activate a new
license’ on page 37).
22
User manual
Remote access to Océ Account Console
Introduction
Océ Account Console is a web application with a web server included. Océ
Account Console does not require Internet Information Services (IIS).
Access Océ Account Console local on the PC or use the Internet browser to
connect to Océ Account Console from a workstation on the network.
Note: Access Océ Account Console from a remote location with Microsoft
Internet Explorer 5.5 SP2 or higher.
Connect to Océ Account Console from a workstation on the network
1. Enter the following URL in Microsoft® Internet Explorer.
http://host name:8001/
The host name is the host name of the server where Océ Account Console is
installed.
2. The Océ Account Console logon screen appears. (see ‘Log on to Océ Account
Console’ on page 28)
Note: Access to Océ Account Console is password protected.
Prepare Océ Account Center for use
23
Make the Océ Account Logic application available for use
When to do
Océ Account Logic is installed on the Océ Power Logic® controller.
Before the users can use Océ Account Logic to enter the account information
for their jobs, make the application and the 'Account information' dialog
available.
Before you begin
Before you begin to use Océ Account Logic, you must define the correct
settings in the Océ Settings Editor. (see ‘Océ Power Logic® controller setup’
on page 18)
How to enable Océ Account Logic
1. Activate the proper license for Océ Account Logic in Océ License Logic.
2. Create an 'Account information' dialog in Océ Account Console.
3. Create the devices in Océ Account Console.
4. Publish the Account information dialog from Océ Account Console for Océ
Account Logic. (see ‘Make the Account information dialog available for Océ
Account Logic’ on page 64)
5. Define the correct account information requirements for the jobs in Océ
Account Logic.(see ‘Define the account information requirements for the jobs’
on page 78)
6. Check the check box: 'The scanner locks when the scanner panel timeout
expires'. This check box enables that the scanner locks automatically after the
scanner panel time-out expires.(see ‘Océ Power Logic® controller setup’ on
page 18)
7. Check the check box: "Lock scanner on start up". This option locks the scanner
as soon as the scanner is switched on.
Result
The users can enter the account information for their jobs in Océ Account
Logic.
Océ Account Logic is available locally on the Océ Power Logic® controller.
Use the Internet browser to connect to Océ Account Logic from a remote
workstation on the network.
24
User manual
Remote access to Océ Account Logic
Introduction
Use the Internet browser to connect to Océ Account Logic from a workstation
on the network.
Note: Access Océ Account Logic from a remote location with Microsoft
Internet Explorer 5.5 SP2 or higher.
Connect to Océ Account Logic from a workstation on the network
1. Enter the following URL in your Internet browser
http://host name of the print system/accountlogic.html
Note: The host name of the print system is defined in the SA - System - Settings
- Océ Power Logic identification - Host name setting on the Océ Settings
Editor.
Result
You can enter the account information for your jobs from your workstation.
The administrator defines which tabs are available for the remote users of Océ
Account Logic. (see ‘Define the remote access settings’ on page 80)
Prepare Océ Account Center for use
25
26
User manual
Océ Account Center
User manual
Chapter 4
Océ Account Center for Special
users: Administrators
27
Before you begin
Log on to Océ Account Console
Introduction
Access to Océ Account Console is password protected.
Take the following steps to logon to Océ Account Console.
®
■ Start the Microsoft Internet Explorer application on you local workstation
or on the server where Océ Account Console is installed.
■ Enter the correct address in the address bar.
■ Enter the correct password in the field.
■ Click 'Log on' to access Océ Account Console.
[1] logon window
[1] logon window
Note: The default password is empty.
28
User manual
Illustration
[2] The administration window
[2] The administration window
How to change the password
Take the following steps to change the password.
■ Click the 'Administration' link in the upper right-hand corner of the main
window to access the 'Administration' window.
■ Click the check box to enable the option.
■ Change the password in the 'Change the password' section.
■ Retype the new password to confirm the password.
■ Click 'OK' to confirm or 'Cancel' to reject the changes.
Note: The administrator and the bookkeeper have to use the same password.
How to activate publishing
Instead of manually defining the accounting dialog, you can also upload the
dialog from an external application. The uploaded accounting dialog is
automatically published when this setting is enabled.
Océ Account Center for Special users: Administrators
29
How to change the settings for Océ Account Center
Take the following steps to define the settings.
■ Click the arrow of the drop down list to select the language of your choice.
■ Click the arrow of the drop down list to select the unit in which sizes the
print width and length are expressed in the log file.
■ Click the arrow of the drop down list to select the unit in which the used
media area in the exported log data is expressed.
■ Click 'OK' to confirm or 'Cancel' to reject the changes.
Note: The values you select for the Length setting and the Area setting are used
in the exported log data.
30
User manual
Overview of the main components of Océ Account Console
Introduction
An administrator uses Océ Account Console to perform a number of
maintenance and configuration tasks.
The main functional areas of Océ Account Console are described in the table
below.
Océ Account Center for Special users: Administrators
31
[2] Main parts of Océ Account Console
Part
Description
The 'Dialog' tab
'Fields' section.
Create an accounting dialog. The accounting dialog consists of
a number of accounting fields.
■ Delete an accounting dialog. Please note that this action cannot
be reversed.
■ Edit an accounting dialog. You can change the type of
accounting field.
■ Change the order of the accounting field in the list.
■ Make a preview of the accounting dialog to test the validity.
■ Publish the accounting dialog. Make the accounting dialog
available to external applications.
■
'Values' section.
Create values for each accounting field.
■ Add values for each accounting field. You add existing values
to an accounting field.
■ Delete values for each accounting field. Please note that this
action cannot be reversed.
■ Edit values for the selected accounting field
■ Move the selected value up or down in the list.
■ 'Sort A..Z '. Use this option to organise the list alphabetically.
■ 'Sort Z..A'. Use this option to organise the list alphabetically.
■
The 'Devices' tab
'Devices' section.
■ 'Create...'. Use this option to create a new device.
■ 'Delete'. Use this option to remove the device. The log data for
the device is removed as well. Please note that this action
cannot be reversed.
■ 'Edit...'. Use this option to change the values for a device.
■ 'Delete log data'. Use this option to remove log data of a device.
■ 'Upgrade'. Use this option to upgrade Océ Account Logic.
'Tasks' section.
'Start'. Use this option to run an update dialog or to retrieve log
data.
■ 'Edit...'. Use this option to change the conditions for the update
dialog and the log data retrieval.
■
32
User manual
Part
Description
The 'Export filters'
tab
'Overview' section.
■ 'Create...'. Use this option to define the conditions to export
data
■ 'Delete'. Remove the export filter.
■ 'Edit...'. Change the conditions to export log data.
■ 'Copy...'. Make a duplicate of the filter settings to create
another export filter.
■ 'Run...'. Select the required filter and start the export of the log
data.
The 'Licenses'
screen
The 'Administration' screen.
The license screen enables you to perform the following actions.
Determine the host ID necessary to receive a valid license file.
■ Activate the license file.
■ Create a back-up of the license file.
■
The administrator screen enables you to perform the following
actions.
■ Change the password.
■ Publish the data that are retrieved from other applications.
■ Define the remaining settings for Océ Account Console.
[2] Main parts of Océ Account Console
Océ Account Center for Special users: Administrators
33
Log out from Océ Account Console
1. Click on the 'Logout' link in the upper right corner of the main window.
2. Click 'OK'.
34
User manual
Manage the Océ Account Console license
Determine the host ID of Océ Account Console
Introduction
Océ Account Console is protected by a license. After installing Océ Account
Console, you can use Océ Account Console for a maximum of 30 days. Within
a period of 30 days you need to acquire a license file from your Océ
representative. In order to receive a license you need to provide the host ID of
Océ Account Console to your Océ representative.
Before you begin
Logon to Océ Account Console remotely or locally on the PC where Océ
Account Console is installed.
Océ Account Center for Special users: Administrators
35
Illustration
[3] The licenses window
[3] The licenses window
How to display the host ID
1. Click the 'Licenses' link in the upper right-hand corner of the screen. The
licenses window appears.
2. The host ID is displayed in the host ID section of the window. Use this host ID
to obtain a license file.
36
User manual
Activate a new license
Introduction
After you have sent the host ID to your Océ representative, you receive a
license file.
Before you begin
Logon to Océ Account Console remotely or locally on the PC where Océ
Account Console is installed.
Illustration
[4] Activate a new license
[4] Activate a new license
How to activate the license
1. Click the 'Licenses' link in the upper right-hand corner of the screen. The
licenses window appears.
2. Click 'Browse' to navigate to the license file.
3. Select the license file.
4. Click 'Activate' to start the upload process of the license file.
Result
A message is displayed when the process is completed and the license is
activate.
Océ Account Center for Special users: Administrators
37
Back up the current license file
Introduction
It is possible to create a backup of the current license file. With this option you
can prevent the loss of the current license information.
Before you begin
Logon to Océ Account Console remotely or locally on the PC where Océ
Account Console is installed.
How to back up the license file
1. Click the 'Licenses' link in the upper right-hand corner of the screen. The
licenses window appears.
2. Click 'Backup' button to open a navigation window.
3. Navigate to a location of your choice to store the license file.
4. Click 'OK' to save the license file to this location.
38
User manual
Create the Account information dialog for
Océ Account Logic
Introduction
Introduction
The 'Account information' dialog allows users to specify accounting
information for each print, copy or scan-to-file job in Océ Account Logic. A
bookkeeper collects this information periodically in Océ Account Console.
The bookkeeper exports the data to create accounting reports.
The administrator is responsible for the creation, management and distribution
of the 'Account information' dialog.
Do the following to create the 'Account information' dialog for the Océ
Account Logic users.
Create the Account information dialog
1. Create the account fields.
2. Define the order of the account fields.
3. Create valid values for the account fields.
Note: Do not use Océ Account Console to create or edit the fields, values or
devices in parallel by multiple administrators. Multiple changes at the same
time can cause an inconsistent system.
4. Preview and test the 'Account information' dialog.
5. Create the devices in Océ Account Console. This action is necessary to enable
Océ Account Console to automatically update the accounting dialog in Océ
Account Logic on these devices.(see ‘Create a new device’ on page 65)
6. Publish the 'Account information' dialog to make it available for Océ Account
Logic.
Océ Account Center for Special users: Administrators
39
Create a field
When to do
Create the account fields as a first step to create the 'Account information'
dialog for the Océ Account Logic and other applications.
How to create an account field
1. Access Océ Account Console.
2. Select the 'Dialog' tab.
3. Click the 'Fields' section.
4. Click the 'Create...' button in the toolbar section.
The 'Create field' window opens.
[5] The Create field window
[5] The Create field window
40
User manual
5. Define the 'Name' of the field.
6. Define the unique identification string ('ID') of the field.
The software uses this 'ID' to identify the field. The IDs are presented as table
headers in the exported log files.
The following types of IDs are available.
■ Defined IDs for User name, User ID, Account ID, and Password.
■ Custom IDs.
Custom IDs cannot begin with a '_'. The IDs can not contain: Single or
double quotes (', "), forward or backward slashes (/, \), plus sign (+),
hyphen-minus sign (-), spaces.
7. Define the valid 'Entry type'.
Select one of the following.
■ 'Text field'
When you select 'Text field', the users must enter free text or select a value
in the 'List of values' list. Use a 'Text field' for example for a user name
field.
■ 'Multiline text' field
When you select 'Multiline text field', the users must enter free text with no
character maximum.
Use a 'Multiline text' field for example for a remarks field.
■ 'Dropdown list'
When you select 'Dropdown list', the users must select a value from a
dropdown list. Use a 'Dropdown list' field for example for a list of project
names in a projects field.
■ 'Password'
When you select 'Password', the users must enter free text. The entered
characters are not visible and shown as asterisks.
Note: When you define 'List of values' as the 'Content type', define the values
for the list in 'Values' window.
8. Define the 'Content type' that makes up a correct value for the field.
This value depends on the value selected in 'Entry type' field.
When you define a 'List of values' or list of encrypted values for the entry type
'Text field', the users must enter the value 'ID'.
Only the value IDs you define are valid.
Note: When you define 'List of values' as the 'Content type', define the values
for the list in 'Values' window.
Océ Account Center for Special users: Administrators
41
9. Define the child field of the parent field. A child field is a field that is a sub
level of the parent field. This relation is defined by the field 'Field depends on'.
For example, the Project field is a child of the parent field User ID.
10. Define the requirements for the field.
Select one of the following.
■ 'No'
The users are not required to enter a valid value in this field.
■ 'Always'
The users are always required to enter a valid value in this field.
■ 'Only when you enter account information with Océ Account Logic'
The users are not required to enter a valid value in this field when the user
sends a job with a print job submission tool or a printer driver.
When the users enter account information in the Account information
dialog on Océ Account Logic, the user is required to enter a valid value.
11. Click the check box if you want to clear this field after submission.
When this setting is enabled you specify that the submission application, for
example Océ Print Exec Workgroup or the Océ Windows Printer driver has to
clear this field after a job is submitted.
12. After you define all elements, click 'OK' to save the field.
42
User manual
Result
The new field is saved in the list of account fields.
[6] The new field is saved in the list of account fields
[6] The new field is saved in the list of account fields
Océ Account Center for Special users: Administrators
43
Create new values for the account fields
When to do
Create the values for the account fields with one or more of the following
properties.
■ The 'Entry type' of the account field is a 'Dropdown list'
■ The 'Entry type' of the account field is a 'Text field' and the 'Content type' is
a 'List of values'
■ The 'Entry type' of the account field is a 'Password'.
44
User manual
Illustration
[7] Click the correct parent field. For example, User ID
[7] Click the correct parent field. For example, User ID
[8] Click the correct child field lower in the tree. For example, Project.
[8] Click the correct child field lower in the tree. For example, Project.
Océ Account Center for Special users: Administrators
45
How to create new values for an account field
1. Click 'Values' on the 'Dialog' tab.
2.
3.
4.
5.
A tree structure with all fields that have the properties described above is
displayed in the 'Fields' section
Click the correct parent field. For example, User ID.
Click the value to link a value to in the 'Values' section. For example, Jeff.
Click the correct child field lower in the tree. For example, Project.
The child fields are fields that depend on the parent field. Define where the
field depends on in the create or edit a field dialog.
The full path of the field selected in the tree displays in the 'Values' section.
Click the 'Create...' button in the 'Values' section.
The 'Create value' window opens.
[9] The Create value window
[9] The Create value window
6. Define the 'Name' of the value. For example, Office.
7. Define the unique 'ID' of the value.
Note: It is not possible to create a value with an existing ID.
8. Click 'OK' to confirm the value.
The 'Create value' window closes.
9. Do the same operation for additional values. For example, Villa.
10. The 'Values' section shows the list of defined values for the field.
46
User manual
Result
According to the example, the User ID Jeff can select the projects Office and
Villa in the 'Account information' dialog.
[10] The User ID Jeff can select the projects Office and Villa
[10] The User ID Jeff can select the projects Office and Villa
How to create new values for an account field with the entry type Password
1. Click 'Values' on the 'Dialog' tab
2.
3.
4.
5.
6.
7.
8.
9.
A tree structure with all fields that have the described properties is displayed
in the 'Fields' section
Click the correct parent field. For example, User name.
Click the value to link a value to in the 'Values' section. For example, John
Smith.
Click the child field for the password.
The full path of the field selected in the tree is displayed in the 'Values' section.
Click the 'Create...' button in the 'Values' section.
The 'Create a new Password' window opens.
Enter the correct 'User name'
Enter the required password.
Enter the password again to confirm.
Click 'OK' to confirm the value.
The 'Create a new Password' window closes.
Océ Account Center for Special users: Administrators
47
Add a value
Purpose
Add the existing values for the account fields with the following properties.
■ The 'Entry type' is 'Dropdown list' and
■ The 'Content type' is 'List of values'.
Note: You cannot add existing values to a field with the entry type 'Password'
When to do
If the fields depend on the same parent field, you can add the values of the
fields to the other child fields.
The 'Add...' function enables the administrator to use the values of a field again
in another field. When you use this function, the administrator is not required
to create the same values for more than one field.
For example another User ID, Arthur, has project Bridge as a valid project. You
can add the values you created for User ID Jeff to the list of projects for User
ID Arthur.
48
User manual
How to add existing values to an account field
1. Click 'Values' on the 'Dialog' tab.
2.
3.
4.
5.
A tree structure with all fields that have the described properties is displayed
in the 'Fields' section.
Click the correct parent field. For example, User ID.
Click the value in the 'Values' section. For example, Arthur.
Click the correct child field lower in the tree. For example, Project.
The full path of the field selected in the tree displays in the 'Values' section.
Click the 'Add...' button in the 'Values' section.
The 'Add value' window opens.
[11] The Add value window
[11] The Add value window
Océ Account Center for Special users: Administrators
49
6. Select one or more values from the list of existing values for the account field.
For example, Office.
7. Click 'OK' to confirm.
The 'Add value' window closes.
8. The 'Values' section shows the list of defined values for the field.
[12] The Values section shows the list of defined values for the field
[12] The Values section shows the list of defined values for the field
50
User manual
Result
According to the example, you have added the project Office to the User ID
Arthur. The User ID Arthur can now select the projects Bridge and Office in
the 'Account information' dialog.
[13] The User ID Arthur can select the projects Bridge and Office
[13] The User ID Arthur can select the projects Bridge and Office
Océ Account Center for Special users: Administrators
51
Manage the account fields
Edit a field
When to do
You can edit the existing account fields to include any changes.
How to edit an account field
1. Click 'Fields' on the 'Dialog' tab.
2. Select an accounting field from the list.
3. Click the 'Edit...' button in the 'Fields' toolbar.
The 'Edit field' window opens.
[14] The Edit field window
[14] The Edit field window
You can edit the same fields as in the 'Create field' window.
4. When ready, click 'OK' to save the changes.
52
User manual
Delete the account fields
When to do
When existing account fields are no longer in use, you can delete the existing
account fields.
How to delete the account fields
Attention: This action also deletes all dependent fields and values.
1. Click 'Fields' on the 'Dialog' tab.
2. Select the fields to delete.
3. Click the 'Delete' button in the 'Fields' toolbar.
A confirmation dialog appears.
4. Make sure you selected the correct fields, and click 'OK'.
Océ Account Center for Special users: Administrators
53
Move
Introduction
You can change the order of the account fields the way they appear in the
'Account information' dialog in Océ Account Logic.
How to move the account fields
1. Click 'Fields' on the 'Dialog' tab.
2. Click the 'Move...' button on the 'Fields' toolbar.
A window opens where you can change the order of the fields.
[15] The Change order window
[15] The Change order window
3. Select the account field to move.
4. Use the 'Move up' button to move the field up or,
use the 'Move down' button to move the field down in the list.
5. Click 'OK' to confirm.
The window closes.
Note: You cannot move a depending field above the parent field. In the
illustration above the Project field cannot be moved above the User ID field.
The User ID field is the parent of the Project field.
54
User manual
Manage the values for the account fields
Edit a value
When to do
You can edit the existing values to include any changes.
How to edit a value
1. Click 'Values' on the 'Dialog' tab
2.
3.
4.
5.
6.
7.
8.
9.
10.
A tree structure with all fields that have the entry type 'Dropdown list' or the
content type 'List of values' is displayed in the 'Fields' section.
Click the correct parent field in the tree.
Click a value of the parent field in the 'Values' section.
Click the required child field lower in the tree.
The full path of the field selected in the tree is displayed in the 'Values' section.
The 'Values' section shows the list of defined values for the field.
Select the field to edit in the 'Values' section.
Click the 'Edit...' button in the 'Values' section.
The 'Edit value' window opens.
Edit the 'Name' of the value.
Edit the unique 'ID' of the value.
Click 'OK' to confirm the value.
The 'Edit value' window closes.
Océ Account Center for Special users: Administrators
55
How to edit values for an account field with the Entry type Password
1. Click 'Values' on the 'Dialog' tab
2.
3.
4.
5.
6.
7.
8.
9.
10.
56
A tree structure with all fields that have the described properties is displayed
in the 'Fields' section
Click the correct parent field in the tree.
Click the child fields lower in the tree until you reach the required field.
The full path of the field selected in the tree displays in the 'Values' section.
The 'Values' section shows the list of defined values for the field.
Select the field with the entry type 'Password' to edit in the 'Values' section.
Click the 'Edit...' button in the 'Values' section.
The 'Edit a password' window opens.
Enter the correct 'User name'.
Enter the required password.
Enter the password again to confirm
Click 'OK' to confirm the value.
The 'Edit a password' window closes.
User manual
Delete values
When to do
When a value is no longer in use, you can delete the existing values.
How to delete the values of an account field
1. Click 'Values' on the 'Dialog' tab.
2.
3.
4.
5.
6.
A tree structure with all fields that have the entry type 'Dropdown list' or the
content type 'List of values' is displayed in the 'Fields' section.
Click the correct parent field in the tree.
If relevant, click the child fields lower in the tree until you reach the required
field.
The full path of the field selected in the tree displays in the 'Values' section.
The 'Values' section shows the list of defined values for the field.
Select the fields to delete in the 'Values' section.
Click the 'Delete' button in the 'Values' section.
A confirmation dialog appears.
Make sure you selected the correct fields, and click 'OK'.
Note: The 'Delete' action is irreversible.
Océ Account Center for Special users: Administrators
57
Change the order of the values
Introduction
You can change the order of the values in the list for an account field like they
appear in the 'Account information' dialog on Océ Account Logic.
How to move a value
1. Click 'Values' on the 'Dialog' tab.
2.
3.
4.
5.
A tree structure with all fields that have the described properties is displayed
in the 'Fields' section.
Click the correct parent field in the tree.
If relevant, click the child field lower in the tree until you reach the required
field.
The full path of the field selected in the tree is displayed in the 'Values' section.
Click the 'Move...' button in the 'Values' section.
The 'Move values' window opens.
[16] The Move values window
[16] The Move values window
58
User manual
6. Select the value to move.
7. Use the 'Move up' button to move the value up or,
use the 'Move down' button to move the value down.
8. Click 'OK' to confirm.
The 'Move values' window closes
How to sort the values
1. Click 'Values' on the 'Dialog' tab.
A tree structure with all fields that have the described properties is displayed
in the 'Fields' section.
2. Click the correct parent field highest in the tree.
3. If relevant, click the child field lower in the tree until you reach the required
field.
The full path of the field selected in the tree displays in the 'Values' section.
4. Click the 'Sort A..Z ' button to sort the values in an ascending alphabetical
order.
Click the 'Sort Z..A' button to sort the values in a descending alphabetical
order.
Océ Account Center for Special users: Administrators
59
Use Account information fields from third
party applications
Publish fields from third party applications
Definition
You can use fields and values from third party applications. You can set Océ
Account Console to publish these fields and values automatically for Océ
Account Logic.
Please contact your local Océ representative for more information about fields
and values from third party applications.
How to use fields and values from third party applications
From defined third party accounting applications you can publish fields for the
account dialog to Océ Account Console.
Select 'Publish fields and values automatically when other applications have
populated Océ Account Console' to publish the fields for Océ Account Logic
without administrator action.
When you do not select this check box, use the 'Publish' button in the main
window to publish the fields for Océ Account Console.
After you publish the fields, retrieve the new account information structure in
Océ Account Logic to make the dialog available for the users.
60
User manual
Make the Account information dialog
available in Océ Account Logic
Introduction
Introduction
The 'Account information' dialog allows users to specify accounting
information for each print, copy or scan-to-file job in Océ Account Logic. A
bookkeeper collects this information periodically in Océ Account Console.
The bookkeeper exports the data to create accounting reports.
The administrator is responsible for the creation, management and distribution
of the 'Account information' dialog.
Do the following to create the 'Account information' dialog for the Océ
Account Logic users.
Create the Account information dialog
1. Create the account fields.
2. Define the order of the account fields.
3. Create valid values for the account fields.
Note: Do not use Océ Account Console to create or edit the fields, values or
devices in parallel by multiple administrators. Multiple changes at the same
time can cause an inconsistent system.
4. Preview and test the 'Account information' dialog.
5. Create the devices in Océ Account Console. This action is necessary to enable
Océ Account Console to automatically update the accounting dialog in Océ
Account Logic on these devices.(see ‘Create a new device’ on page 65)
6. Publish the 'Account information' dialog to make it available for Océ Account
Logic.
Océ Account Center for Special users: Administrators
61
Preview
When to do
You can preview and test the 'Account information' dialog.
Before you make the 'Account information' dialog available for Océ Account
Logic, test the dialog to see if all fields have valid values.
Illustration
[17] An example of the Preview window
[17] An example of the Preview window
62
User manual
How to preview the Account information dialog
1. Click 'Values' on the 'Dialog' tab.
2. Select an account field from the list.
3. Use the 'Preview...' button in the toolbar to open the 'Preview' window.
The 'Preview' window shows the 'Account information' dialog like it will
display on Océ Account Logic.
4. Enter the required information in the fields.
Note: The users must enter a value 'ID' in the following condition.
■ The 'Entry type' is a 'Text field', and
■ The 'Content type' is a 'List of values'.
Only the value IDs the administrator defines are valid.
5. Click 'Test'.
The following can occur.
■ When you have filled all fields with correct values, a dialog displays with
'OK!'
■ When the 'Account information' dialog has fields with values that are not
correct, a dialog displays with the first field that has a wrong value.
Note: The field 'User name' requires the user to enter the field ID defined by
the administrator in the following condition.
When the 'Entry type' is a 'Text field', and
when the 'Content type' is a 'List of values'.
Océ Account Center for Special users: Administrators
63
Make the Account information dialog available for Océ Account
Logic
When to do
After you use the preview to make sure that the fields have valid values, you
can make the 'Account information' dialog available in Océ Account Logic.
The following two actions are required to make the 'Account information'
dialog available in Océ Account Logic.
■
■
Publish the 'Account information' dialog from Océ Account Console.
Retrieve the 'Account information' dialog in the 'Administration' window of
Océ Account Logic.
Note: You can make the account information dialog automatically available
with the 'Update dialog' task.
How to make the Account information dialog available for Océ Account Logic
1. Use the 'Publish' button to publish the 'Account information' dialog.
The 'Publish' button is available in the following locations on the 'Dialog' tab.
■ The toolbar in the 'Fields' screen.
■ The toolbar on the 'Values' screen.
2. A confirmation dialog appears.
Click 'OK' to publish the 'Account information' dialog.
3. If the automatic update setting for the device is enabled, the new dialog is
automatically made available to Océ Account Logic on the device.
If the automatic update setting is disabled, you can manually retrieve the
account information dialog in Océ Account Logic.
64
User manual
Create and manage the Océ devices
Create a new device
Purpose
When the users enter account information for the jobs done on the printers (and
or scanners), you can use Océ Account Console to retrieve the account data.
Before you can retrieve the log data, create a device. You can only retrieve the
log data for a device when the device is present in the list.
When you set the 'Auto update' option, Océ Account Console updates the
account dialog remotely when you click 'Publish'.
How to add a device to the list
1. Click 'Devices' on the 'Devices' tab.
2. Click the 'Create...' button in the 'Devices' section.
3. The 'Create a new device' window opens.
[18] The Create a new device window
[18] The Create a new device window
Océ Account Center for Special users: Administrators
65
Enter the following information.
■ The 'Name' of the device.
■ The 'Host name' of the device on the TCP/IP network as defined in the Océ
Settings Editor.
■ The 'Auto update' option of the device. This option allows Océ Account
Console to automatically update the accounting dialog in Océ Account
Logic on the device.
4. After you define all elements, click 'OK'.
66
User manual
Edit a device
Purpose
You can edit an existing device when,
■ the 'Name' of the device changes,
■ the 'Host name' of the device changes, or
■ the 'Auto update' option changes.
How to edit an existing device
1. Click 'Devices' on the 'Devices' tab.
2. Select the device of which you want to edit the settings.
3. Click the 'Edit...' button in the 'Devices' section.
4. The 'Edit devices' window opens
You can edit the following
■ The 'Name' of the device
■ The 'Host name' of the device on the TCP/IP network.
■ The 'Auto update' option of the device.
5. After you define all elements, click 'OK'.
Océ Account Center for Special users: Administrators
67
Delete devices from the list
When to do
When account data are not required from some devices, you can delete the
devices from the list.
Before you begin
When you delete a device, the system also deletes all the retrieved log files of
that device. Before you delete a device, make sure you export the log files.
How to delete devices
1. Click 'Devices' on the 'Devices' tab.
2. Select the devices to delete.
3. Click the 'Delete' button in the 'Devices' section.
A confirmation dialog appears.
4. Make sure you selected the correct devices, and click 'OK'.
Note: The delete action is irreversible.
68
User manual
Upgrade a device
Purpose
Use the upgrade option to install the newest version of Océ Account Logic on
a device.
Note: The Océ Power Logic® controller is not accessible during the
installation. If an error occurs, Océ Account Console displays a message.
Read the message carefully and follow the instructions. Océ Account Console
asks you to restart the Océ Power Logic® controller, at the end of the
installation .
Illustration
[19] Upgrade option in the Deices toolbar
[19] Upgrade option in the Deices toolbar
Océ Account Center for Special users: Administrators
69
How to upgrade a device
1. Click the 'Devices' tab.
2. Select a device from the list.
3. Click the 'Upgrade' button in the toolbar.
The 'Upgrade Océ Account Logic' window opens.
[20] Upgrade Océ Account Logic window
[20] Upgrade Océ Account Logic window
4. Click 'Yes, continue'.
5. Click 'Next' to continue.
6. The upgrade is started. You can check the progress in the following screens.
[21] Upgrade progress
[21] Upgrade progress
7. When the upgrade process is finished you can reboot the Océ Power Logic®
Controller.
Result
The newest version of Océ Account Logic is available on the device.
70
User manual
Retrieve the account data
Retrieve the account data from a device
Introduction
After you add a device, a 'Retrieve log data' and an 'Update dialog' task appears
in the task tab.
Use one of the two following methods to retrieve the account data from a
device.
■ 'Manual'
■ 'Scheduled'.
Before you begin
Make sure that the devices are turned on and that you created a list of devices.
Use the 'Create a device' window or the 'Edit device' window to define one of
the following.
■ Retrieve the account data manually
Use the procedure described below to retrieve the account data.
■ Retrieve the account data automatically according to a schedule.
Océ Account Center for Special users: Administrators
71
How to retrieve the account data from a device manually
1. Click 'Tasks' on the 'Devices' tab.
2. Select the 'Retrieve log data' task of the device of which you require the
account data.
[22] Select the devices of which you require the account data.
[22] Select the devices of which you require the account data.
3. Click the 'Start' button in the 'Tasks' section.
The log files are retrieved from the device.
4. Click the 'Refresh' link and check the 'Status' of the task. If the 'Status' is still
unchanged, click the 'Refresh' link again to update the status.
72
User manual
How to automatically retrieve the account data at the defined interval and time
1. Click 'Tasks' on 'Devices' tab.
2. Select the device of which you need to retrieve the account data automatically.
3. Click the 'Edit...' button in the toolbar.
The 'Edit device' window appears.
4. Use the radio buttons to define the workflow for account data retrieval.
[23] Manual or scheduled retrieval
[23] Manual or scheduled retrieval
-When you select 'Manual', use the 'Start' button in the 'Tasks' section to
retrieve the logs.
-When you select 'Scheduled', the system automatically retrieves the account
data at the defined interval and time.
Use the drop down lists to define the time interval of the log data retrieval.
-When you select 'Every week', you must select the correct 'Day'.
-When you select the correct day, define the time of the day when the account
log data is retrieved.
Note: The Océ Power Logic® controller deletes the log files after a maximum
of 7 days. Make sure you retrieve the log files from the controller before the
controller deletes the log files. Define the number of days after which the Océ
Power Logic® controller deletes the log files in the setting Path: KO - System
- Logging - File age in the Océ Settings Editor.
It is strongly advised to use a daily retrieval of account data to avoid loss of
data.
Océ Account Center for Special users: Administrators
73
Result
When you select 'Scheduled', the system automatically retrieves the log data at
the defined interval and time.
74
User manual
Administer Océ Account Logic
The Administration window
Definition
Introduction
The 'Administration' window in Océ Account Logic enables the administrator
to do the following.
■ Retrieve a new account information structure from Océ Account Console
■ Define the account information requirements for the jobs
■ Define the remote access settings
■ Define the workflow for the print jobs with only the user ID and the account
ID defined as account information
■ Define if local clients are allowed to retrieve the account dialog.
Océ Account Center for Special users: Administrators
75
The logon window
Introduction
Access to the 'Administration' window is limited to the administrator. When
you click on the 'Administration' link in the upper right corner of the main
window, a logon window appears.
After you enter the correct password, click the 'OK' button to open the
'Administration' window. Click the 'Cancel' button to return to the main
window.
[24] The logon window
[24] The logon window
The Change the password section
76
Field
Function
'Password'
Enter the correct password.
Note: The default password is empty.
'Change the administrator password'
Check this box to change the password then you enter the
correct password in the 'Password' field.
You are required to enter the password two times.
User manual
Retrieve a new account information dialog
Introduction
The administrator defines the 'Account information' dialog in Océ Account
Console. Use the following procedure to retrieve the 'Account information'
dialog published in Océ Account Console.
Note: This procedure is not necessary if the automatic update feature of the
device is activated in Océ Account Console (see ‘Create a new device’ on
page 65).
How to retrieve a new account information structure
1. Click on the administration link in the upper right corner of the main window
2.
3.
4.
5.
6.
of Océ Account Logic.
A logon screen appears.
Note: Access to the administration window is limited to the administrator.
Log on as administrator.
Enter the host name of the system where 'Océ Account Console' is installed in
the 'Océ Account Console' field.
Enter the port number for the communication with the system where 'Océ
Account Console' is installed in the 'Océ Account Console' field.
Note: The default port number is 8001.
Click the 'Retrieve' button, to retrieve the new account dialog from Océ
Account Console.
When ready, click 'OK'.
Result
A dialog box tells you if the retrieval was successful. The 'Account
information' dialog now contains the fields defined in Océ Account Console
If the retrieval was not successful, make sure that the server that runs Océ
Account Console is available.
If the retrieval was successful, click 'OK' to close the administration window.
Océ Account Center for Special users: Administrators
77
Define the account information requirements for the jobs
Purpose
Note: Make sure that the job management setting in the Océ Settings Editor is
set to Jobs to Inbox.
Define the following.
■ 'Entering account information is required'
The jobs are only valid when the required account information is entered.
The user can unlock the scanner after the required account information is
entered for the copy jobs and scan-to-file jobs.
The print jobs that do not have valid account information remain in the
inbox until the user enters the valid account information.
■ 'Entering account information is optional'
The user is not required to enter account information.
Check the check box to enable the 'Account information' dialog.
■ 'Entering account information is not allowed'.
The 'Account information' dialog is not available for the users.
■ 'The scanner locks when the scanner panel timeout expires'
The scanner locks automatically after scanner panel timeout expires. The
user is required to unlock the scanner for the copy jobs and scan-to-file jobs.
Define the scanner panel timeout in the Océ Settings Editor (Path: KO Scanner - Settings - Timers - Panel timeout).
■ 'The scanner always locks when switched on'
The scanner locks automatically after the scanner is switched on. The user
is required to unlock the scanner for the copy jobs and scan-to-file jobs.
Note: If many users use the system, you can choose to set the panel timeout to
the minimum value (30 seconds). If you have a dedicated operator, it is not
necessary to set the operator panel time-out to a minimum value. You can also
choose to deselect the setting in this situation.
Define the account information requirements for the jobs
1. Click on the administration link in the upper right corner of the main window.
A logon window appears.
Note: Access to the administration window is limited to the administrator.
78
User manual
2. Log on as administrator.
3. Use the radio buttons in the 'Copy jobs and scan-to-file jobs' field to define the
account information requirements for the jobs done on the scanner.
'The scanner locks when the scanner panel timeout expires' and the 'The
scanner always locks when switched on' settings are check boxes. You can
enable this settings with any requirement for the jobs done on the scanner.
4. Use the radio buttons in the 'Print jobs from the inbox' field to define the
account information requirements for the print jobs in the inbox.
5. Use the radio buttons in the 'Print jobs from the history queue' field to define
the account information requirements for the print jobs in the history queue.
6. When ready, click 'OK'.
Océ Account Center for Special users: Administrators
79
Define the remote access settings
Purpose
Define which tabs are available for remote users of Océ Account Logic.
Note: Use Microsoft Internet Explorer 5.5 SP2 or higher to access Océ
Account Logic from a remote workstation.
How to define the tabs which are available on remote browsers
1. Click on the administration link in the upper right corner of the main window.
A logon window appears.
Note: Access to the administration window is limited to the administrator.
2. Log on as administrator.
3. Use the check boxes in the 'Remote access' field to define which tabs are
available on remote browsers.
Select one of the following.
■ The tab 'Copy & File' is available on remote browsers.
■ The tab 'Print' is available on remote browsers.
Note: Remote use is only useful for print jobs (to complete the missing
accounting information or to reprint from the history queue with accounting
information). For copy and scan jobs you need to be at the device and therefore
remote use is less relevant.
4. When ready, click 'OK'.
80
User manual
Print jobs with only the user ID and the account ID defined as
account information
Introduction
A number of applications can send the account information in a separate job or
inside the print job. The device needs to know where to look for the accounting
data to validate the job.
When to do
When you use basic account logging, only the account ID and the user ID are
defined as account information fields.
When you use basic account logging, some applications, like printer drivers,
can send the account information within the print job.
When you use basic account logging, this field allows you to define where the
device validates the account information.
Define the workflow
1. Click on the administration link in the upper right corner of the main window.
A logon window appears.
Note: Access to the administration window is limited to the administrator.
2. Log on as administrator.
3. Use the check boxes in the 'Print jobs with only the user ID and the account ID
defined as account information' field to define the workflow.
Select the following.
■ Validate the account information inside the print job
■ Validate the account information inside a separate account job.
Only disable the 'Validate the account information inside a separate account
job' check box when your network does not contain applications that send
the account information in a separate job.
4. When ready, click 'OK'.
Océ Account Center for Special users: Administrators
81
Allow local clients to retrieve the accounting dialog
Large accounting dialogs can cause a decreased performance of the Océ Power
Logic® Controller. Océ Print Exec Workgroup is responsible for this situation.
It uses most of the memory capacity to load this accounting dialog.
To prevent this situation, this interface setting has to be deselected.
Océ Account Logic will not pass the dialog to Océ Print Exec Workgroup. Océ
Print Exec Workgroup will then show the default dialog. As a consequence,
Océ Print Exec Workgroup jobs will remain in the inbox. Users must supply
the account information with Océ Account Logic.
82
User manual
Océ Account Center
User manual
Chapter 5
Océ Account Center for users
83
Introduction
The administrator has configured in Océ Account Logic if and how users have
to provide accounting information. There is a difference between copy and
scan jobs, print jobs and already printed jobs ('History queue').
For each type of job there are three possibilities.
-'Entering account information is required'
-'Entering account information is optional'
-'Entering account information is not allowed'. Not allowed means that you
cannot enter account information. Printing, scanning or copying is done
without accounting information.
Print jobs can be submitted with the correct accounting information right away.
Print jobs that do not have the correct accounting information stay in the Inbox.
The user has to define the correct accounting information with Océ Account
Logic.
The table below describes how the user has to use Océ Account Logic for both
print jobs and copy/scan jobs.
Appearance of the accounting dialog
Option defined by the administrator
Copy/scan jobs
The accounting information fields are visible and
must always be entered. The 'Lock scanner' and
the 'Unlock scanner' buttons are also available.
'Entering account information is required'
Print jobs (from Inbox and History Queue)
The accounting information fields are visible and
must always be entered. When valid accounting
information is entered, the 'Print' button is enabled.
If you want to delete the entered accounting information, press the clear button.
84
User manual
Appearance of the accounting dialog
Option defined by the administrator
Copy/scan jobs
The following situations can occur.
■ A check box is displayed. When left
unchecked the accounting information fields
are greyed out. Only the 'Lock scanner' and the
'Unlock scanner' buttons are available.
■ The check box is checked. The accounting
information fields are displayed. Entering
information is required. The 'Lock scanner'
and the 'Unlock scanner' option are also
visible.
'Entering account information is optional'
Print jobs
The following situations can occur.
■ A check box is displayed. When left
unchecked the accounting information fields
are greyed out. Select the job and press 'Print'.
■ The check box is checked. The accounting
information fields are displayed. Entering
information is required. Select the job, enter
the accounting information and press 'Print'.
If you want to delete the entered accounting
information, press the clear button.
Copy/scan jobs
Only the 'Lock scanner' and the 'Unlock scanner'
buttons are available. The accounting informaton
fields are not displayed.
'Entering account information is not
allowed'
Print jobs
No buttons are available. Printing has to be done
through the Océ Queue Manager.
Note: A red dot indicates a required field.
Océ Account Center for users
85
Enter account information for the print
jobs
Print jobs
Enter accounting information for the print jobs
Enter the accounting information in one of the following locations.
Where
The print job submission software.
for example Océ Print Exec Workgroup (LT).
The Océ Windows Printer Driver.
A third party accounting information dialog.
The Print tab in Océ Account Logic
■ The 'Inbox' section.
■ The 'History' queue section.
86
User manual
The print tab in Océ Account Logic
Definition
The print tab has the following two screens.
■ 'Inbox'
This section displays the jobs in the inbox on the Océ Queue Manager
which do not have valid account information.
■ 'History queue'.
This section displays the jobs in the history queue on the Océ Queue
Manager that have been printed.
The 'History queue' on the print tab contains a list with all the printed jobs. To
print a job again, you need to enter new account information. Enter the valid
account information for the print jobs in the 'Account information' dialog.
Illustration
[25] The print tab
[25] The print tab
Océ Account Center for users
87
The jobs missing account information section
The 'Jobs missing account information' section displays the jobs in the inbox
or history queue that do not have valid account information.
The 'Jobs missing account information' section displays the following
information.
■ The name of the user who sent the job.
■ The name of the job.
■ The type of job (a copy job or a print job).
■ The date when the job was received (in the 'Inbox') or printed ('History
queue').
The application refreshes the list of jobs that do not have account information
automatically.
Overview of the Account information dialog
Enter the account information for your print jobs in the 'Account information'
dialog.
A red dot indicates a required field.
The content of the 'Account information' dialog depends on the account
information requirements defined by the administrator.
When the administrator has defined that it is optional to enter account
information, a check box is displayed.
When the check box is not checked, only the 'Print' button is available.
When the check box is checked, the 'Account information' dialog is available.
When the administrator has defined that it is always required to enter account
information, the check box is not visible.
88
User manual
The types of fields in the Account information dialog
The 'Account information' dialog can have the following types of fields.
■ 'Text' field
Enter free text.
The administrator can have defined the required values.
■ 'Multiline text' field.
Enter free text.
Use 'Multiline text' field, for example, for a remarks field.
■ 'Dropdown list'.
Select a value from a dropdown list.
■ 'Password'.
Enter free text. The entered characters are not visible and shown as
asterisks.
Note: A red dot indicates a required field. The field User name requires the
user to enter the field ID defined by the administrator.
Océ Account Center for users
89
Manage the print jobs that do not have valid account information
Introduction
Print jobs that are sent without valid account information are stored in the
'Inbox'. You can check the print jobs and if required, send the print jobs again.
Please make sure that the accounting information is filled out.
Jobs that are in the 'History queue' were successfully printed. You can access
a printed job and reprint the job, this time with different account information.
How to print the print jobs that do not have valid accounting information
1. On the 'Print' tab, click the 'Inbox' queue.
2. Select a job in the list with the jobs that are missing valid account information.
3. Enter the correct account information in the 'Account information' dialog.
4. Click 'Print' to send the job to the print queue.
How to reprint jobs from the History queue
1. On the 'Print' tab, click the 'History queue'.
2. Select a job in the list.
3. Enter the correct account information in the 'Account information' dialog.
4. Click 'Print' to send the job to the print queue.
90
User manual
Enter account information for the copy
jobs and the scan-to-file jobs
Account information dialog
Introduction
The account information dialog enables you to add accounting information to
each copy, print or scan-to-file job. You can use this account information to
generate accounting reports to calculate costs.
Depending on the administrator settings in Océ Account Logic® , different
information can be displayed in the account information dialog.
Definition
Enter the account information for your copy jobs or scan-to-file jobs in the
'Account information' dialog.
Océ Account Center for users
91
Content
Appearance of the accounting dialog
Option defined by the administrator
The accounting information fields are vis- 'Entering account information
is required'
ible and must always be entered. The
'Lock scanner' and the 'Unlock scanner'
buttons are also available.
92
The following situations can occur.
■ A check box is displayed. When left
unchecked the accounting information
fields are greyed out. Only the 'Lock
scanner' and the 'Unlock scanner'
buttons are available.
■ The check box is checked. The
accounting information fields are
displayed. Entering information is
required. The 'Lock scanner' and the
'Unlock scanner' option are also
visible.
'Entering account information
is optional'
Only the 'Lock scanner' and the 'Unlock
scanner' buttons are available. The accounting informaton fields are not displayed.
'Entering account information
is not allowed'
User manual
Copy jobs or scan-to-file jobs
Introduction
Enter the account information for your copy jobs or scan-to-file jobs in the
'Account information' dialog on the 'Copy & File' tab of Océ Account Logic.
Enter account information for the copy jobs or scan-to-file jobs jobs
1. Enter the account information in the fields of the 'Account information' dialog.
(see ‘Account information dialog’ on page 91)
2. Click the 'Unlock scanner' button.
3. The scanner is ready for use.
Océ Account Center for users
93
94
User manual
Océ Account Center
User manual
Chapter 6
Océ Account Center for Special
users: bookkeepers
95
Before you begin
Log on to Océ Account Console
Introduction
Access to Océ Account Console is password protected.
Take the following steps to logon to Océ Account Console.
®
■ Start the Microsoft Internet Explorer application on you local workstation
or on the server where Océ Account Console is installed.
■ Enter the correct address in the address bar.
■ Enter the correct password in the field.
■ Click 'Log on' to access Océ Account Console.
[26] logon window
[26] logon window
Note: The default password is empty.
96
User manual
Illustration
[27] The administration window
[27] The administration window
How to change the password
Take the following steps to change the password.
■ Click the 'Administration' link in the upper right-hand corner of the main
window to access the 'Administration' window.
■ Click the check box to enable the option.
■ Change the password in the 'Change the password' section.
■ Retype the new password to confirm the password.
■ Click 'OK' to confirm or 'Cancel' to reject the changes.
Note: The administrator and the bookkeeper have to use the same password.
How to activate publishing
Instead of manually defining the accounting dialog, you can also upload the
dialog from an external application. The uploaded accounting dialog is
automatically published when this setting is enabled.
Océ Account Center for Special users: bookkeepers
97
How to change the settings for Océ Account Center
Take the following steps to define the settings.
■ Click the arrow of the drop down list to select the language of your choice.
■ Click the arrow of the drop down list to select the unit in which sizes the
print width and length are expressed in the log file.
■ Click the arrow of the drop down list to select the unit in which the used
media area in the exported log data is expressed.
■ Click 'OK' to confirm or 'Cancel' to reject the changes.
Note: The values you select for the Length setting and the Area setting are used
in the exported log data.
98
User manual
Log out from Océ Account Console
1. Click on the 'Logout' link in the upper right corner of the main window.
2. Click 'OK'.
Océ Account Center for Special users: bookkeepers
99
Export the account log data
Create and manage the export filters in Océ Account Console
Introduction export filters
Introduction
You have to export data from Océ Account Console to make the data available
for bookkeeping purposes. With an export filter you can export the data per
device for a specified time period.
You can for example export all the data retrieved from the Océ TDS800 in the
month of May 2005.
Océ Account Console has three standard export filters. These filters are
described in the table below.
Note: The standard filters cannot be modified or deleted.
Additional filters can be created by the customer. These custom export filters
always deliver the data in CSV format.
List of standard filters
100
Filter
Description
XML
This filter exports the standard fields and all the additional fields defined in Océ Account Console in
XML (Extensible Markup Language) format.
Standard CSV
This filter exports only the standard fields of the Océ
Power Logic® controller account logging.
The User ID (_UID ) and Account ID (_AID ) validated in Océ Account Logic replace the User ID and
Account ID in the standard log file.
Extended CSV
This filter exports the standard fields of the Océ
Power Logic® controller account logging and all the
additional fields defined in Océ Account Console.
User manual
Create a new export filter
Purpose
The bookkeeper defines the export filters. An export filter specifies the
account information fields that are included and stored in the account log data.
Illustration
[28] Export filters tab
[28] Export filters tab
How to create a new export filter
1. Click the 'Export filters' tab.
2. Click the 'Create...' button to open the Create filter window.
3. Enter a name to identify the filter.
4. Enter a description with the details of the filter. This information is visible in
the description column in the list of export filters.
5. Select the fields to export.
6. Define the general filter settings.
■
■
■
Indicate which encoding you prefer. Choose the encoding to correctly
display special characters that occur in certain languages.
Indicate how the information must be separated into columns.
Click 'OK' to confirm or 'Cancel' to reject your entries.
Océ Account Center for Special users: bookkeepers
101
Delete an export filter
Purpose
If an export filter is no longer used, you can delete the export filter. Please note
that you can only delete custom export filters. the standard export filters annot
be changed or deleted.
Note: You cannot restore a deleted export filter. There is no undo function
available.
Illustration
How to delete an export filter
1. Click the 'Export filters' tab.
2. Select an export filter from the list of custom export filters.
3. Click the 'Delete' button.
A dialog appears.
4. Click 'OK' to confirm your choice or 'Cancel' to reject the action.
102
User manual
Edit an export filter
Purpose
You can change the name, description and fields that are exported in the export
filter. You can also change the general settings of the export filter to make the
data acceptable for other applications.
Illustration
How to edit the export filter
1. Click the 'Export filters' tab.
2. Select an export filter from the list.
3. Click 'Edit...' in the toolbar to open the Edit filter dialog.
4. Change the name and/or description of the export filter.
5. Add or delete a field.
6. Change the 'General settings'.
7. Click 'OK' to confirm or 'Cancel' to reject the changes.
Océ Account Center for Special users: bookkeepers
103
Copy an export filter
Purpose
If you want to create an export filter that is almost identical to an existing filter
you can use the 'Copy...' function.
Next, you can edit the name and the required fields to adapt the export filter
instead of having to create an export filter from scratch (see ‘Edit an export
filter’ on page 103).
How to copy an export filter
1. Click the 'Export filters' tab.
2. Select an export filter from the list.
3. Click the 'Copy...' button in the toolbar.
A dialog appears.
4. Click 'OK' to confirm and 'Cancel' to reject this action.
Note: Make sure that the export filter has a unique name and an informative
description.
Result
A copy of the selected export filter is added to the list. The export filter has a
unique name. You can use the 'Edit...' function to customise the filter settings.
104
User manual
Run an export filter
When to do
After you define the settings for the export filter, you can run the export filter.
Illustration
How to run the export filter
1. Click the 'Export filters' tab.
2. Select an export filter from the list.
3. Click the 'Run...' button in the toolbar to open the Run filter dialog.
4. You can select a time interval to run the filter. With the 'Time period' field you
can indicate the time interval for the account data to export.
5. In the 'Device selection' list, you can select the device that you want to export
the log data for.
6. Click 'Run' to confirm or 'Close' to reject the changes.
Océ Account Center for Special users: bookkeepers
105
Manage the log files
Delete log data
When to do
After you process the data from the log files and you do not require the log files
any more, delete the log files.
Illustration
[29] Delete log data
[29] Delete log data
106
User manual
How to delete log data from Océ Account Console
1. Click the 'Devices' tab.
A list with all the devices defined in Océ Account Console is displayed in the
'Devices' section.
2. Select a device from the list.
3. Click the 'Delete log data' button in the toolbar.
The delete log data window appears.
[30] Delete the log data
[30] Delete the log data
4. Select the time period or define a time period manually.
5. Select a device again.
6. Click 'OK' to confirm or 'Cancel' to reject the changes.
Note: The action is irreversible.
Océ Account Center for Special users: bookkeepers
107
108
User manual
Océ Account Center
User manual
Appendix A
Appendix
109
Description of the fields in the account log file
Introduction
This section describes all the fields that can be exported from Océ Account
Console, excluding the accounting fields defined with Océ Account Console.
Structure of the output of the Standard CSV export filter
If you use the Standard CSV export filter you will get the standard fields for
the Océ Power Logic® Controller account logging in a CSV file.
The User ID (_UID ) and Account ID (_AID ) validated in Océ Account Logic
replaces the User ID and Account ID in the standard log file on the Océ Power
Logic controller.
You can use the data in the CSV file in any spreadsheet application. The first
line contains the titles of columns that match with the names of the fields.
Each line of text is a record. An account log record (1 line) is generated for
each output page. A job that has several pages of output will have a similar
number of account log records.
All records that are part of a single job will have the same value for the 'Job
Unique ID' field. The 'Job Unique ID' field is part of each record and is unique
for each job in the file. Use the 'Job Unique ID' field to collect records that are
part of a single job and to calculate the totals for the whole job.
The first field in each record is a 4-digit number in ASCII, which identifies the
record type. The fields in a record have a fixed order determined by the record
type. The first two digits of the record type identify the product.
The records include a sequence of fields separated by a field separator
character.
The fields contain alphanumeric text, semicolons and end-of-lines. When a
device does not support a function, or a function was not used for the job, the
field remains empty.
110
User manual
Description of the exported fields
Parameter
Type
Length
(max)
Description
Record type
num
4
Each account log file starts with a record of type
6310. This is a fixed record which only contains
the abbreviated field names used in records of the
type.
Record type identifiers for the folowing Océ
systems.
■ 6111 for the Océ TDS800
■ 6211 for the Océ TDS600
■ 6311 for the Océ TDS400
■ 6411 for the Océ TCS400
■ 6511 for the Océ TDS860.
Account ID
(AccID)
text
255
Account ID.
Note: The 9-digit numeric 'AccountID' from the
scanner panel isconverted to a textual
representation without any prefix. For an Océ
Job Ticket (OJT) the textual representation is set
to the 'AccountID' field in the ticket.
Note: Empty field if not available.
User ID
(UserID)
text
255
ID of the user who sent the job.
Empty field if not available.
Note: The 9-digit numeric 'UserID' is converted to
a textual representation without any prefix. For
OJT tickets the textual representation is set to the
'UserID' field in the ticket.
Job ID (JobID)
text
255
ID of job (for example, the job name) as indicated
in a job ticket.
When the job ID is not available, this field is empty.
Note: For OJT tickets the textual representation is
set to the 'JobName' field in the ticket.
Machine ID
(MachID)
text
255
Unique ID for the system.
Note: When you have a configuration with a
printer, the Machine ID is the serial number of the
printer. When you have a scanner only
configuration, the Machine ID is the serial
number of the scanner.
Appendix
111
Parameter
Type
Length
(max)
Description
Record version (Version)
num
2
Version number of the record. Starts at 0.
Records are numbered from the first layer of the
first input page to the last layer of the last input
page of the job
Job Unique num
ID (JobUID)
8
Unique job ID, generated by the controller. The
Job Unique ID is unique for each job in the log
file.
Record
number
(RecNr)
num
6
Sequence number of this record in the account log
for this job. Starts at 0.
Job submission source
(JobSrc)
text
255
Host name or IP address of the source of the job.
When the source of the job submission is not
available, the field is empty.
Channel
type
(ChnType)
text
N/A
The Protocol used for the job submission. Includes LPD, SMB, PSERVER, FTP, CENTRONICS.
Receive date num
year (RcvY)
4
The year when the source page was received.
Receive date num
month (M)
2
The month when the source page was received.
Receive date num
day (D)
2
The day of the month when the source page was
received.
Receive
time hours
(H)
num
2
The hour when the source page was received.
Receive
time minutes (m)
num
2
The minute when the source page was received.
Receive
time seconds (s)
num
2
The second when the source page was received.
255
The location of the input file.
Source loca- text
tion (SrcLoc)
112
User manual
Parameter
Type
Length
(max)
Description
Source page
number
(SrcPg)
num
6
The page number of the input page in the source
file. Starts at 1.
Source type
(SrcType)
text
N/A
The type of source page. The different types of
PDLs are TIFF, CALS, PDF, PS, NIRS, HPGL,
HPGL2, C4, CALCOMP, and ASCII.
Source
width
(SrcWth)
num
6
Native width of source page in points (1/72 inch).
Source
height
(SrcHgt)
num
6
Native height of source page in points (1/72 inch).
Output
width (OutWth)
num
6
Actual width of output page in points (1/72 inch).
Output
height (OutHgt)
num
6
Actual height of output page in points (1/72 inch).
Width scale
(WthScl)
num
4
The scaling factor, in %, applied to the original in
the width direction.
Height scale
(HgtScl)
num
4
The scaling factor, in %, applied to the original in
the height direction.
Mirroring
(Mirror)
text
2
Mirroring applied to the original. LR (vertical
mirror) or TB (horizontal mirror). When mirroring is not applied, this field remains empty.
Rotation angle (Rot)
num
3
The angle of the scaled original when you rotate
to the left. The possible values are 0, 90, 180, 270.
An angle of 0 indicates that the orientation of the
source and the output image are identical.
Appendix
113
Parameter
Type
Length
(max)
Description
Process type
(PrcType)
text
N/A
The type of processing that was done for this
page.
■ PLOT
■ COPY
■ STF (scan to file)
■ CHK (check plot)
■ ICOPY (interrupt copy)
■ INTRNL (internal job)
■ REPLOT (from history queue).
Process
completion
(PrcCmplt)
text
N/A
How the process was completed for this page.
DONE (normal termination)
■ ABRT (job cancelled by user)
■ ERR (error occurred)
■
When an error occurred or the job was cancelled,
the last page that was correctly delivered has the
value DONE and an additional record with value
ABRT or ERR is generated for the first page after
that (the page that failed to deliver due to the error).
Delivery
date year
(DlvY)
num
4
The year when the page was delivered.
Delivery
date month
(M)
num
2
The month when the page was delivered.
Delivery
num
date day (D)
2
The day of the month when the page was delivered.
Delivery
time hours
(h)
num
2
The hour when the page was delivered.
Delivery
time minutes (m)
num
2
The minute when the page was delivered.
Delivery
time seconds (s)
num
2
The second when the page was delivered.
114
User manual
Parameter
Type
Length
(max)
Description
Output page
number
(OutPg)
num
6
The page number of the output page in this job.
Starts at 1.
Physical output pages are numbered separately
from digital output pages.
Digital output pages are numbered separately for
each separate output file.
Output media type
(MedType)
text
N/A
The type of output medium.
PPAPER (plain paper)
■ TRANSPARENT
■ FILM
■ POLYESTER
■ VELLUM
■ TRANSLUCENT
■ PAPERDRAFT
■ PAPERSTANDARD
■ BOND
■ BONDDELUX
■ PAPERSTANCOATED
■ PAPERPREMCOATED
■ BONDCOATED
■ BONDCOATEDHIGHRES
■ PHOTOPAPERMATT
■ PHOTOPAPERGLOSS
■ TRACINGPAPER
■ BONDTRANSLUCENT
■ MONOVELLUM
■ COLORVELLUM
■ FILMMATT.
■ PAPERRECYCLED
■ TRACINGJAPAN
■ PAPERCOATED
■ FILMMATTTHIN
■ CUSTOM1
■ CUSTOM2
■ CUSTOM3
■
The field is empty for scan-to-file jobs.
Appendix
115
Parameter
Type
Length
(max)
Description
Output media special
(MedSpc)
text
1
Indicates whether special output media was selected. Y or N.
The field is empty for scan-to-file jobs.
Output media weight
(MedWgt)
text
N/A
The weight of the output media.
LIGHT
■ NORMAL
■ HEAVY.
■
When the weight of the output media is not
known, this field remains empty. The field is empty for scan-to-file jobs.
Output media source
(MedSrc)
text
N/A
Source of the output media.
■ ROLL1
■ ROLL2
■ ROLL3
■ ROLL4
■ ROLL5
■ ROLL6
■ TRAY1
■ TRAY2
■ TRAY3
■ MANUAL
The field is empty for scan-to-file jobs.
Output fold
method
(Fold)
text
N/A
Folding in 2 directions
AFNOR
■ ERICSSON
■ DIN.
■
Folding in 1 direction
AFNOR1
■ ERICSSON1
■ DIN1.
■
Off-line folding is not logged.
The field is empty for scan-to-file jobs.
116
User manual
Parameter
Type
Output bind- text
ing method
(Bind)
Length
(max)
Description
N/A
Specifies the binding method for the output
media.
■ EDGEONLY (only binding edge)
■ REINFORCE
■ PUNCH.
The field is empty for scan-to-file jobs.
Output media destination
(MedDst)
text
N/A
Output media destination in case of physical
output
■ BELT1
■ BELT2
■ BELTS
■ CDT
■ IRT
■ FIRSTFOLD
■ STACKER.
■ DOUBLE_DECKER_PRO
The field is empty for scan-to-file jobs.
Output file
type (FileType)
text
N/A
Type of output file in case of digital output.
TIFF
■ CALS
■ PDF.
■
The field is empty for print jobs and copy jobs.
Output file
compression (FileCmpr)
text
N/A
Compression method of output file in case of
digitaloutput.
■ GROUP3
■ GROUP4
■ PACKBITS
■ LZW
■ FLATE.
The field is empty for print jobs and copy jobs.
The field is empty for scan-to-file jobs without
compression.
Output file
text
size (FileSz)
Appendix
9
Size of output file in bytes (including all pages incase of multi-page output files) in case of digital
output.
The field is empty for print jobs and copy jobs.
117
Parameter
Type
Length
(max)
Description
Output file
destination
(FileDst)
text
255
Name of the destination for the output file as used
inthe Océ Scan Manager, in case of digital output.
If multiplepages in one job have the same destination file, amulti-page file is generated.
The field is empty for print jobs and copy jobs.
Output reso- num
lution
(width direction)
4
The resolution of output in width direction, in dpi.
Output reso- num
lution
(height direction)
4
The resolution of output in height direction, in
dpi.
Completion
ID (CmpId)
8
The completion ID indicates the instance number
of the job. Starts at 1. More than 1 job instance occurs when the jobs are restarted from the history
queue.
num
Additional fields of
record type 6410 (Océ
TCS400)
Output color text
mode(ColM
od)
255
Output qual- text
ity
mode(Qual
Mod)
255
118
User manual
The colour mode of the job.
COLOR
■ MONOCHROME
■
The quality mode of the job.
CHECK
■ RELEASE
■ PRESENTATION.
■
Parameter
Type
Length
(max)
Output content
type(ContMod)
text
255
Image type
(ImageType)
text
Description
The content type of the print jobs
LINESTEXT
■ AREALINES
■
255
The image type of the copy and scan-to-file jobs.
PHOTO
■ LINEART
■ MAP
■ ARTWORK
■ DARKORIGINAL
■ BLUEPRINT.
■
Note: This table is a complete list of all standard fields for all systems. When a
system does not support a function, the field remains empty.
Structure of the output of the Extended CSV export filter
If you use the Extended CSV export filter you will also get the additional
fields defined by Océ Account Console.
These additional fields are added behind the standard fields.
When the additional fields are not available for a job, the field remains empty.
Additional fields that can be exported with custom export filters
Océ Account Console enables you to configure the unit to be used for the
dimensions (Widh and Length, Area). The custom export filters that include
such fields, export the information in the defined unit. (for example, Output
width in mm.)
The date and time fields logged by the Océ Power Logic® Controller do not
have unique field names. With custom export filters you can choose additional
date and time fields with unique names.
Parameter
Type
Receive date
(Rcv)
text
Receive date
year (Y)
num
Appendix
Length
(max)
Description
The textual representation of the received data.
4
The year when the source page was received.
119
Parameter
Length
(max)
Description
Receive date
num
month (RcvM)
2
The month when the source page was received.
Receive date
day (RcvD)
num
2
The day of the month when the source page was
received.
Receive time
hours (Rcvh)
num
2
The hour when the source page was received.
Receive time
minutes
(Rcvm)
num
2
The minute when the source page was received.
Receive time
num
seconds (Rcvs)
2
The second when the source page was received.
Source width
(SrcWth)
num
6
Native width of source page in units (as configured in Océ Account Console).
Source height
(SrcHgt)
num
6
Native height of source page in units (as configured in Océ Account Console).
Source area
(SrcArea)
num
50
Native area of the source page in units (as configured in Océ Account Console).
Output width
(OutWth)
num
6
Actual width of output page in units (as configured in Océ Account Console).
Output height
(OutHgt)
num
6
Actual height of output page in units (as configured in Océ Account Console).
Output area
(OutArea)
num
50
Actual area of the output page in units (as configured in Océ Account Console).
Delivery date
(Dlv)
text
Delivery date
year (Y)
num
4
The year when the page was delivered.
Delivery date
month (DlvM)
num
2
The month when the page was delivered.
Delivery date
day (DlvD)
num
2
The day of the month when the page was delivered.
Delivery time
hours (Dlvh)
num
2
The hour when the page was delivered.
120
Type
User manual
Textual representation of the delivery date.
Parameter
Type
Length
(max)
Description
Delivery time
minutes
(Dlvm)
num
2
The minute when the page was delivered.
Delivery time num
seconds (Dlvs)
2
The second when the page was delivered.
Appendix
121
Account information for the media format
If a standard output media format is selected for a job, the values in the log file
match the values in the following table. Any different values indicate that a
non-standard media format was selected in the job.
[3] Media format for output media
Format name
Width (units of 1/72 inch)
Height (units of 1/72 inch)
A0
2384
3370
A1
1684
2384
A2
1191
1684
A3
842
1191
A4
595
842
E
2448
3168
D
1584
2448
C
1224
1584
B
792
1224
A
612
792
E+
2592
3456
D+
1728
2592
C+
1296
1728
B+
864
1296
A+
648
864
B1
2004
2835
B2
1417
2004
B3
1001
1417
B4
709
1001
30x42
2160
3024
jis B1
2064
2920
jis B2
1460
2064
jis B3
1032
1460
jis B4
729
1032
jis B5
516
729
[3] Media format for output media
122
User manual
The width and the height values change position for output with landscape
orientation.
Note: The above list is not a list of supported media types and sizes. Not all
systems support all the described media types and sizes.
Appendix
123
124
User manual
License file 38
Index
C
A
Account data
Retrieve 71
Account field
Edit 52
Account information dialog 91
Create 39, 61
Preview 62
Print 87
Publish 64
Account information requirements 78
Account logging
Log file structure 110
Media format information 122
Standard log file information 110
Activate a new license 37
Add existing values 48
Additional fields that can be exported with custom
export filters 119
Administration
Remote access 80
Copy jobs 78
Océ Account Console 77
Print jobs 78
Print jobs with only the user ID and the
account ID defined as account information
81
scan-to-file jobs 78
Administration window 75
Allow local clients to retrieve the accounting
dialog 82
An overview of Océ Account Center 13
B
Back up the current license file 38
Backup
Index
Change password 76
Change the order
Values 58
Change the order of the account fields 54
Connect to Océ Account Console from a
workstation on the network 23
Controller setup 18
Copy
Export filter 104
Copy jobs
Enter account information 93
Create
Device 65
Create a new export filter 101
Create account fields 40
Create new values 44
Create the Account informarion dialog 39, 61
CSV 111
D
Define the remote access settings 80
Delete 102
Log data 106
Delete account fields 53
Delete devices 68
Delete values 57
Description
Exported fields 111
Description of the exported fields 111
Determine the host ID 35
Device
Upgrade 69
Add 65
Create 65
Edit 67
Devices
Delete 68
Devices tab 31
Dialog tab 31
125
Documentation set 9
E
Edit
Export filter 103
Edit account fields 52
Edit an existing device 67
Edit values 55
Enable Océ Account Logic 24
Enter accounting information
Print jobs 86
Export filter
Copy 104
Create 101
Delete 102
Edit 103
Run 105
Export filters 100
Export filters tab 31
Exported fields 111
F
Field
Create 40
Delete 53
Move 54
Fields
Change order 54
H
History 88
Host ID 35
How to activate publishing 29, 97
How to activate the license 37
How to add a device to the list 65
How to add existing values to an account field 49
How to automatically retrieve the account data at
the defined interval and time 73
How to back up the license file 38
How to change the password 29, 97
How to change the settings for Océ Account Center
126
User manual
30, 98
How to copy an export filter 104
How to create a new export filter 101
How to create an account field 40
How to create new values for an account field 46
How to create new values for an account field with
the entry type Password 47
How to define the tabs which are available on
remote browsers 80
How to delete an export filter 102
How to delete devices 68
How to delete log data from Océ Account Console
107
How to delete the account fields 53
How to delete the values of an account field 57
How to display the host ID 36
How to edit a value 55
How to edit an account field 52
How to edit an existing device 67
How to edit the export filter 103
How to edit values for an account field with the
Entry type Password 56
How to enable Océ Account Logic 24
How to make the Account information dialog
available for Océ Account Logic 64
How to move a value 58
How to preview the Account information dialog
63
How to print the print jobs that do not have valid
accounting information 90
How to reprint jobs from the History queue 90
How to retrieve a new account information
structure 77
How to retrieve the account data from a device
manually 72
How to run the export filter 105
How to sort the values 59
How to upgrade a device 70
How to use fields and values from third party
applications 60
I
Inbox 88
Install Océ Account Console 20
Installation
Océ Account Console 20
J
P
Jobs missing account information 87
Manage 90
Password
change 76
Preview
Account information dialog 62
Print area 28, 96
Print jobs with only the user ID and the account ID
defined as account information
define workflow 81
Print length 28, 96
Publish
Account information dialog 64
Publish fields
Third party applications 60
Publishing 29, 97
L
Language 28, 96
License 22
Activate 37
License file
Backup 38
Licensing Océ Account Console 22
List of standard filters 100
Log data
Delete 106
Log file structure 110
Log files
Retrieve 71
Logon 76
M
Main components of Océ Account Console 31
Make the Account information dialog available
64
Move
Field 54
Value 58
O
Océ Account Console
Log on 28, 96
log out 34, 99
remote access 23
Océ Account Logic
Make available 24
Remote access 80
remote access 25
Océ Account logic
Enable 24
Overview of the workflow 13
R
Retrieve
Account data 71
Log files 71
Retrieve a new account information dialog 77
Run
Export filter 105
S
Scan-to-file jobs
Enter account information 93
Sort
Value 59
Sort the order
Sort alphabetical 58
Standard CSV export filter 110
Structure of the output of the Extended CSV export
filter 119
Structure of the output of the Standard CSV export
filter 110
System requirements 20
T
Task
Index
127
Retrieve log data 71
Third party applications
Publish fields 60
U
Upgrade
Device 69
Upgrade a device 69
Upgrade Océ Account Logic 69
User roles
Administrator 15
Bookkeeper 15
Users 15
User roles and tasks in Océ Account Center 15
User tasks 15
Users 12
V
Value
Add existing 48
Create 44
Delete 57
Edit 55
Move 58
Sort alphabetical 59
128
User manual
Index
129