1
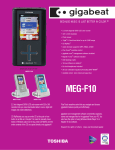
O2 DSL Router Classic
Quick start guide
Ple
a
ins se fo
t
se
qu ruct llow
en ion th
tia
e
l o s in
rde
r!
Overview of the package contents and the necessary installation information
You will require the following components to set up and configure your O2 DSL Router Classic. Please note that the O2 DSL Router Classic
will only work once your telephone line has been activated. Please see your welcome letter for the activation date.
Power outlet
A O2 DSL Router
Classic1
B Power supply unit
with power cable
C DSL cable
D 2 adaptors for
phone/fax
B
C
ON/OFF switch
Telephone outlet
TAE outlet (F)
RESET
A
E
E Ethernet/LAN
cable
F
O2 DSL Starter CD
G O2 DSL manual
D
H Welcome letter
(received in advance)
Computer
Tip: You will find English and Turkish versions of the quick start guide as PDF documents
on the O2 DSL Starter CD in the »Handbücher« folder.
Phone/fax (analogue)
Setting up and connecting the O2 DSL Router Classic
Please only use your O2 DSL Router Classic in conjunction with your O2 DSL connection.
1
2
Connecting the DSL router to the power supply
Connect the power cable B to the DSL router A . Then plug the
Connect the small connector on the DSL cable C to the grey DSL connector
A
power supply unit into a power outlet.
Connecting the DSL router to the telephone socket
on the DSL router. Now insert the other end of the DSL cable into the
telephone outlet, which is labelled with an (F) or a telephone symbol.
Turn the DSL router on using the ON/OFF switch.
B
The DSL router will now establish a DSL connection. During this time, the
C
LEDs marked »DSL« and »INTERNET« will flash in succession.
Once the blue LED lamp marked »POWER« is continuously illuminated,
the DSL router is ready for use.
Once the »DSL« LED is permanently illuminated and the »INTERNET« LED
flashes, the DSL router has successfully established the internet connection.
Note: This process may take up to 1 minute.
Tip: When setting up the DSL router, please follow the safety notes
in the manual.
3
Note: This process may take up to 3 minutes.
4
Connecting the phone/fax to the DSL router
Connecting the DSL router to the computer
The DSL router and computer are connected via LAN (with Ethernet cable).
Please wait until the blue »PHONE 1« and »PHONE 2« LEDs are
permanently illuminated. You can now connect your phone/fax.
Connect the Ethernet/LAN cable E to one of the yellow Ethernet
E
connections marked 1– 4 on the DSL router. Connect the second yellow
Note: This process may take between 3 and 5 minutes.
plug on the cable to the network connection port on your computer.
Your phone/fax is connected directly to the DSL router and not to the
telephone socket.
If your telephone connector cable has a Type 1 plug (see top picture),
Typ 1
connect this plug directly to one of the two DSL router connectors marked
»PHONE 1« or »PHONE 2«.
Typ 2
If your telephone connection cable has a Type 2 plug, please use one of the
adapters supplied D as shown in the adjacent picture.
Tip: Connect the phone to the adapter via socket (F); fax via socket (N).
D
Your phone/fax is now ready to use.
1 The O2 DSL Router Classic only works with an O2 DSL tariff from O2 Germany. If you want to use it with a
different DSL provider, the integrated calling function will not be available.
Please turn over
Software installation and configuration – only Microsoft Windows operating systems
Users of other operating systems such as Mac OS or Linux can configure their network settings directly using the graphical user interface of the DSL router. This can be accessed via a browser at the
following URL: http://192.168.1.1 (password: 1234). The DSL router works with the following browsers: Internet Explorer ® (5.5 or above), Firefox ® (1.4 or above), Netscape ® (7 or above), Opera ® (9.0
or above), Safari ® (1.3.2 or above) or Konqueror ® (3.4.0 or above). Further tips can be found in the O2 DSL Router user instructions on the O2 DSL Starter CD.
5
6
Insert O2 DSL Starter CD
Software installation
The O2 DSL Connection Manager is located on the O2 DSL Starter CD and
assists you in configuring your network and DSL router.
Preparing for the installation
Switch your computer on and then insert the O2 DSL Starter CD F
into the CD-ROM drive. Please close all open applications before
commencing the installation.
F
Note: If installation does not start automatically, you can start it manually
by double-clicking on the cdrun.exe program on the CD-ROM.
Select the item »DSL Connection Manager installieren« on the welcome screen. Now follow the
instructions given by the installation wizard and confirm each step with »Weiter« or »Fertig stellen«.
Tip: Your network can also be configured without the O2 DSL Connection
Manager. To do this, all the necessary settings must be configured manually
Your computer must be restarted after successfully installing the software. When your computer
via the user interface of the DSL router (see above – users of other
restarts, it will automatically load the O2 DSL Connection Manager configuration wizard, which will
operating systems).
guide you step-by-step through setting up your network and DSL router.
7
Completion of quick configuration
After successfully configuring your network and DSL router, the O2 DSL
8
Verifying the installation
If the DSL router LEDs are illuminated as shown below, your O2 DSL is ready for use.
Connection Manager will start automatically.
This program makes it easier for you to manage your DSL router and your
DSL connection. You can directly view and amend the settings of the DSL
router using the O2 DSL Connection Manager, as well as implementing error
If there is more than one Ethernet/LAN connection, the corresponding LEDs also illuminate.
diagnoses.
You can now surf the internet and make phone calls with the O2 DSL.
You can find further information about this in the »DSL Connection
Note: If the LEDs are not illuminated as shown, please verify each installation step or call
Manager« manual on the O2 DSL Starter CD F .
our customer support hotline.
Customer support
Our customer support hotline is available to assist you with the setting up
of your O2 DSL Router Classic and for any other questions you may have
regarding the full functionality of the DSL router.
Contact our hotline:
• From a landline: dial +49 (0) 18 05. 62 43 57 (o2HELP) – for 14 cents per minute
• If you have an O2 Germany mobile phone contract, call from the O2 Germany
mobile phone network on +49 (0) 179. 55 222 – free of charge.
O2 wishes you hours of happy surfing and DSL telephoning with O2 DSL!
Errors excepted. We reserve the right to make changes at any time. Revised: April 2008.
If our hotline is unable to assist you, we will gladly send a service technician to
your home at your request.