1
Preferred Advantage DSL
®
Quick Start
Installation Guide
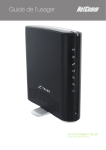
Netopia® 3347NWG-VGX Wireless ADSL Gateway
Microsoft® Windows® 95/98/2000/ME/XP/NT 4.0
NADSL_704_6.9
Welcome to McLeodUSA!
We look forward to helping you communicate more effectively with data and
Internet services from McLeodUSA. Your DSL service has already been processed
and is scheduled for installation within the next few days.
So you can prepare for your DSL installation, we have enclosed the McLeodUSA
Preferred Advantage® DSL Quick Start Installation Guide that provides
step-by-step instructions for installing your new DSL router.
DSL is a revolutionary service that allows McLeodUSA to provide high-speed,
cost-effective data solutions. And while DSL is a cutting-edge technology, it can
be limited by two primary factors:
• The condition of the telephone lines to your location
• The distance between the Central Office and your location
Before processing your order, we thoroughly researched the lines to your location
in order to prevent unnecessary surprises. In a small percentage of cases, the
exact DSL performance and availability cannot be determined until the time of
installation. If you have any questions about the performance of your DSL service
at any time, our DSL Help Desk is at your service 24 hours a day, 7 days a week at
888-849-0640, or email [email protected].
Thank you for choosing McLeodUSA.
IMPORTANT NOTE: This guide portrays the typical flow of the installation
process. Please read the instructions before installing the gateway. Some
computer or network configurations may cause software windows to appear
that are not depicted in this guide. Please read and follow the instructions on
those screens to continue the installation process. Verify that you are installing
your DSL equipment after the “Service Completion Date” given to you when
you ordered your DSL Internet service.
MCLEODUSA INCORPORATED AND AFFILIATES HAVE NO RESPONSIBILITY
FOR ANY PERSONAL INJURY OR PROPERTY DAMAGE THAT MAY RESULT
FROM YOUR INSTALLATION OF DSL EQUIPMENT AS DISCUSSED IN THIS
GUIDE. MCLEODUSA AND ITS AFFILIATES SPECIFICALLY DISCLAIM ANY
LIABILITY FOR SUCH INJURY OR DAMAGE. BY PROCEEDING WITH THIS
INSTALLATION, YOU ASSUME ALL RISK OF PERSONAL INJURY OR
PROPERTY DAMAGE.
© 2004 McLeodUSA Incorporated. All rights reserved. McLeodUSA, the
McLeodUSA logo and Preferred Advantage are trademarks of McLeodUSA. All
other trademarks are the property of their respective owners.
Quick Start Installation Guide
Contents
Section 1:
Contents of Your DSL Installation Kit . . . . . . . . . . . . . . . . . . . . . . . . . . . 1
Section 2:
System Requirements . . . . . . . . . . . . . . . . . . . . . . . . . . . . . . . . . . . . . . . . 2
Section 3:
Installation of Inside Wiring (If Self-installing) . . . . . . . . . . . . . . . . . . 4
Section 4:
Installation of Microfilters and Voice/DSL Line Splitter. . . . . . . . . . . 5
Section 5:
Connecting the DSL Gateway . . . . . . . . . . . . . . . . . . . . . . . . . . . . . . . . . 7
Did I Connect Everything Correctly? . . . . . . . . . . . . . . . . . . . . . . . . . . 10
Additional Resources for Users with Advanced Needs. . . . . . . . . . . 11
Section 6:
Configuring Microsoft® Windows® Operating System . . . . . . . . . . . 13
Section 7:
McLeodUSA® Customer Website . . . . . . . . . . . . . . . . . . . . . . . . . . . . . 22
E-mail and Internet Browser Setup . . . . . . . . . . . . . . . . . . . . . . . . . . . 22
Section 8:
Troubleshooting Tips . . . . . . . . . . . . . . . . . . . . . . . . . . . . . . . . . . . . . . . 23
Section 9:
Frequently Asked Questions (FAQs). . . . . . . . . . . . . . . . . . . . . . . . . . 26
Section 10: Contact Information . . . . . . . . . . . . . . . . . . . . . . . . . . . . . . . . . . . . . . . . 28
Section 1:
Contents of Your DSL Installation Kit
Quantity
Item Description
1
Netopia Gateway 3347W
1
Netopia Gateway 3347W CD-ROM
1
Power Supply
1
RJ-11 Telephone Cable (lavender)
1
RJ-45 Ethernet Cable (yellow)
1
DSL 2-Line Microfilter
3
DSL Microfilters
1
Voice/DSL Line Splitter
1
Section 2:
System Requirements
Before you begin the installation process, please ensure that your system
meets the following requirements:
• Personal computer/workstation — Pentium®-class processor, 166 MHz,
25 MB free disk space, 32 MB RAM.
• Operating system — Windows 95/98/2000/ME/XP or NT 4.0 is
supported. The wireless component and installation wizard can only be
used with Windows 98SE/2000/ME/XP.
• Browser & E-mail client — Each PC should have both an Internet
browser (e.g., Microsoft Internet Explorer, Netscape® Communicator)
and an e-mail client (e.g., Outlook®, Outlook Express, Netscape Mail,
Eudora®) installed prior to performing DSL self-installation.
• Available Ethernet port or wireless Ethernet adapter — Many PCs
come equipped with an Ethernet port. If you do not have an Ethernet
port available, you will need to purchase and install an Ethernet
Network Interface Card (NIC) in each PC. Ethernet NICs can be
purchased at most retail electronic stores where computer accessories
are sold. If you are not sure whether your PC has an available Ethernet
port, please refer to your PC owner’s manual or contact your
PC vendor.
• Ethernet cabling from each PC to the location where the DSL gateway
will be installed — one Ethernet cable is included in this kit and can be
used for connecting one PC if the gateway is placed nearby.
• PC owner’s manual — For reference if necessary.
Additional requirements for Local Area Network (LAN) Systems:
• Available Ethernet port (10/100 Base-T capable) on your Ethernet hub
or switch for expansion.
• Dynamic IP LAN configuration — The DSL gateway has a built-in DHCP
server that will allocate IP addresses to your LAN workstations. The
DHCP server functionality is turned on by default. It is recommended
that you disable any other DHCP servers on your LAN to prevent
conflicts. Section 6: Configuring Microsoft Windows, assumes that you
will use the DHCP server built into the DSL gateway and that you will
enable DHCP on each workstation.
2
McLeodUSA DSL Help Desk: 888-849-0640 | [email protected]
If you prefer to continue using an existing DHCP server, or would prefer
that your LAN workstations operate under a private static IP scheme,
please refer to the Netopia User Guide (located on the Netopia
Gateway CD) for configuration assistance instead of the instructions
in Section 6 of this guide.
• Available wireless adapters — The following adapters can be used to
connect to the DSL gateway: PCMCIA for laptops, PCI for desktop
PCs, or USB adapter for either.
3
Section 3:
Installation of Inside Wiring (If Self-installing)
Installation of the inside wiring:
If you have chosen to self-install the DSL service and have not requested
McLeodUSA to perform on-site installation for an additional charge, you will need
to install inside wiring yourself or contact a local vendor to complete the inside
wiring. “Inside wiring” refers to the portion of wire between where McLeodUSA
connects to the building and the DSL gateway.
Inside wiring basics for DSL:
• Standard telephone wiring can be used to carry the DSL line into the
DSL gateway. Special cabling, such as CAT-5 wiring used for Ethernet
LANs, is only required between the gateway and the PC(s).
• Only two wires are used for the DSL line.
• The gateway expects the DSL signal to terminate on the two center
pins of an RJ-45 jack. Your jack must be wired accordingly.
• McLeodUSA terminates the DSL line to a Network Interface Device
(NID) that is located either on the outside of the building or in a
closet/basement. The NID is the same device that connects your
building to all incoming telephone lines. The new DSL line should be
tagged. If you have trouble locating the new DSL line at the NID,
please call 888-847-5316. McLeodUSA can assist you or your vendor
in locating the DSL line.
• If you will be sharing the DSL service over an existing LAN, you will
want to install the wiring and jack near an Ethernet switch or hub with
an available 10/100 Base-T Ethernet port.
4
McLeodUSA DSL Help Desk: 888-849-0640 | [email protected]
Section 4:
Installation of Microfilters and Voice/DSL Line Splitter
The included DSL microfilters are used to prevent possible interference between
the DSL service and standard telephone service.
Install microfilters on all telephone equipment that is connected to the DSL
line including (but not limited to): telephones, Caller ID devices, answering
machines, fax machines, credit card machines and computer modems.
The included voice/DSL line splitter is required when you are connecting a
telephone and the DSL gateway to the same wall jack.
Installing the Microfilters:
Telephone Wall Jack
Microfilter
1
2
3
Disconnect the telephone line cord from the wall jack.
Plug the microfilter into the jack.
Plug the telephone line cord into the female end of the microfilter.
NOTE: Repeat these steps for all additional telephones or other devices that
share the DSL phone line. Make sure a microfilter is NOT installed between the wall
jack and the DSL gateway. The Installation Kit contains three microfilters. Should
you require additional microfilters, you can obtain them at most electronics or
computer retail stores.
If you have a 2-line telephone, connect the 2-line microfilter on the jack with the
DSL gateway.
5
Section 4:
Installation of Microfilters and Voice/DSL Line Splitter continued
Installing the Voice/DSL Line Splitter:
Use the following steps to install the voice/DSL line splitter if you will be
connecting a telephone and the DSL gateway to the same wall jack:
Telephone Wall Jack
Voice/DSL
Line Splitter
Microfilter
1
2
3
4
5
Remove the telephone line cord from the wall jack.
Plug the male end of the voice/DSL line splitter into the wall jack.
Install a microfilter in one of the female ports of the line splitter.
Plug the line cord from the telephone into the microfilter.
Plug the line cord from the gateway into the remaining open port of
the line splitter.
NOTE: When using a voice/DSL line splitter, ensure that the DSL gateway and
telephone will work properly by verifying the following:
• The microfilter is installed between the line splitter and the telephone.
• The microfilter is NOT installed between the line splitter and the DSL
gateway. (Refer to the image above.)
NOTE: If you have a two-line telephone that will be connected to the same line
as the DSL gateway, you’ll need to use the included two-line microfilter. If you
need additional two-line microfilters, contact your local electronics or computer
retail store.
6
McLeodUSA DSL Help Desk: 888-849-0640 | [email protected]
Section 5:
Connecting the DSL Gateway
Ethernet LAN connection method (wired LAN)
The following instructions are for connecting PCs to the DSL gateway. Up to
four individual PCs can share the DSL service by connecting directly to the
DSL gateway. Please verify that the PCs meet the System Requirements in
Section 2. For connecting to an existing LAN you need to connect the
Ethernet port to your hub.
1
Place the DSL gateway near your PC or another location that permits
easy access and visibility. Make sure any Ethernet cables are kept away
from power cords, fluorescent lighting fixtures, and other sources of
electrical interference. Put the DSL gateway in a location where air can
circulate freely around it.
2
Plug the power supply to the power jack on the back of the DSL
gateway and into a surge-protected AC outlet (1).
3
Turn on the power using the power switch. The Power light should
come on solid green.
4
Plug one end of the lavender telephone cable (2) into the DSL wall
jack, and the other end into the port labeled DSL on the back of the
DSL gateway. The DSL Sync indicator light should blink for up to two
minutes then light solid green. Note that the light will flash green as
data flows through the device.
Ethernet LAN Connection Example
7
Section 5:
Connecting the DSL Gateway
5
continued
For PCs using Microsoft Windows 98SE/2000/ME/XP only: Insert the
Netopia Gateway CD into your PC’s CD-ROM drive. The installation
wizard will launch automatically and help you configure your PC to
work with the DSL gateway.
a) The installation wizard will first ask you to decide whether you
want to Add/Remove, View Documentation or Exit. Select
Add/Remove and accept the Netopia agreement.
b) The installation wizard will next ask you to decide whether you
want to use Ethernet, USB or Wireless. Select Use Ethernet.
c) When prompted, connect the yellow Ethernet cable between the
Ethernet port on your PC and one of the Ethernet Ports (labeled
1 through 4) on the back of the DSL gateway. If you are
connecting additional PCs or other networked devices such as a
printer, repeat this step for each device. You will need to supply
the additional Ethernet cables or have Ethernet wiring installed for
additional devices.
6
The LAN light corresponding to the port you selected will come on
solid green. If the Netopia Installation Wizard detects the required
network settings in your PC, it will automatically launch your web
browser and you can proceed directly to Section 6: Configuring
Microsoft Windows.
Wireless LAN Connection Method
The following instructions are for connecting wireless devices to the DSL
gateway. Note the serial number on the label on the bottom of the
gateway (SN). You will need this number when installing your wireless
cards/adapters and if you need to call Netopia technical support.
8
1
Follow steps 1 through 4 in the Ethernet LAN connection method
instructions above.
2
Install your wireless card using instructions provided by the
manufacturer, then remove your wireless card.
McLeodUSA DSL Help Desk: 888-849-0640 | [email protected]
3
For PCs using Microsoft Windows 98SE/2000/ME/XP only:
Insert the Netopia Gateway CD into your PC’s CD-ROM drive. The
installation wizard will launch automatically and help you configure
your PC to work with the DSL gateway.
a) The installation wizard will first ask you to decide whether you
want to Add/Remove, View Documentation or Exit. Select
Add/Remove and accept the Netopia agreement.
b) The installation wizard will next ask you to decide whether you
want to use Ethernet, USB or Wireless. Select Use Wireless.
c) The wizard will now ask for the serial number of the Netopia DSL
Gateway 3347NWG-VGX. This can be found on the sticker below the
Netopia logo. If you are using a non-Netopia wireless card, please check
the indicated box. Select Enter.
4
The installation wizard will start to install the wireless client and drivers
for your wireless adapters.
5
You will be prompted to install your wireless card. At this time, insert
your wireless card or USB adapter into your PC.
6
If the Netopia installation wizard detects the required network settings
in your PC, it will automatically launch your web browser and you can
proceed directly to Section 6: Configuring Microsoft Windows.
Wireless LAN Connection Example
9
Section 5:
Connecting the DSL gateway
continued
Did I connect everything correctly?
Your gateway has status indicator lights (LEDs) on the front to verify that the
connections you just made are working as expected.
• Wireless Link: Blinks green when there is activity on wireless
LAN.
• LAN 1, 2, 3, 4: Solid green when connected to each port.
Blinks green when active on each port.
• DSL Sync: Blinks green with no line attached. Solid green
when a network connection is established (trained).
• Power: Solid green when the power is on.
10
McLeodUSA DSL Help Desk: 888-849-0640 | [email protected]
STOP!
The next section of this installation guide, “Configuring Microsoft Windows,”
is intended for users with single, stand-alone PCs that are being connected
together in order to share the new DSL service.
If you are using a LAN and understand the impacts of changing Windows
TCP/IP settings, please proceed with the instructions in Section 6.
McLeodUSA and Netopia are available to answer questions you may have.
Please see Section 10: Contact Information.
Additional resources for users with advanced needs:
You are considered a customer with advanced needs if any of the
following apply to you/your network configuration:
• You require certain workstations on your network to have public
Internet static IP addresses.
• You require servers on your network to have public Internet
static IP addresses.
• Your network workstations are currently configured with private
static IP addresses, and you cannot change them to dynamic
(DHCP) without interrupting existing applications or connectivity
to LAN servers.
• You need to customize firewall filter sets.
• You need to customize gateway defaults. The default settings for
the DSL gateway have the following features enabled:
• DHCP IP Address-Serving to your LAN.
• DHCP Client to the McLeodUSA network is enabled. This will
change if you need to use public static IP addresses within
your LAN.
• Network Address Translation is enabled.
11
Please refer to the following additional resources if you are a
customer with advanced needs:
• If you have ordered the Static IP Address Option with your
McLeodUSA DSL service, please use the “Account Information”
sheet (sent separately) and the “Netopia User’s Reference Guide”
(contained in Adobe Acrobat format on the Netopia Gateway
CD) to configure the gateway. If you need help configuring the
gateway, please have your “Account Information” sheet ready
and contact Netopia using the information in Section 10.
• To use the DSL gateway with a private static IP LAN scheme,
refer to the instructions in the “Netopia User’s Reference Guide”
located on the Netopia Gateway CD.
• To disable DHCP serving to your LAN, customize the firewall,
enable the firewall or turn off Network Address Translation, refer
to the instructions in the “Netopia User’s Reference Guide”
located on the Netopia Gateway CD. This will change if you need
to use public static IP addresses within your LAN.
12
McLeodUSA DSL Help Desk: 888-849-0640 | [email protected]
Section 6:
Configuring Microsoft Windows
Now you will need to configure your computer’s TCP/IP settings so it can
communicate with the DSL gateway. You may need to perform this configuration
on each PC connected to the DSL service.
Configuration Steps for Windows 95/98/ME
1
Double-click on the “My
Computer” icon on your
desktop or click on “Start,”
go to “Settings” and select
“Control Panel.”
NOTE to Windows ME users:
After selecting “Control Panel,”
click on “Show all Control
Panels.”
2
Double-click on the
“Network” icon.
3
You must determine if you have
a TCP/IP “binding” associated
with your Network Ethernet
Adapter. It will be indicated by
a “wire” with “TCP/IP -> Brand
Name NIC” similar to what is
highlighted in the image to the
right. 3Com® is the “Brand
Name” for this Network
Ethernet Adapter. If this
binding is already associated
with your Network Ethernet
Adapter, skip to step 8.
4
If there is no binding, you must
add one. Click on “Add.”
13
Section 6:
Configuring Microsoft Windows
continued
Configuration Steps for Windows 95/98/ME continued
14
5
Select Microsoft and Bindings.
Click on “Next.”
6
Select “TCP/IP Protocol.” For
this step you may need your
OEM System CD.
7
Click on “Properties” and you
should see the TCP/IP
Properties dialog box.
8
Select the “IP Address” tab and
choose “Obtain an IP address
automatically.”
9
Select the “Gateway” tab to
make sure there is nothing
selected under “Installed
gateways.”
10
Select the “DNS Configuration”
tab. Select “Disable DNS.”
11
Click “OK” until you are
prompted to restart Windows
and select “Yes.” When your
PC has restarted, you should
be able to surf the Internet.
McLeodUSA DSL Help Desk: 888-849-0640 | [email protected]
Configuration Steps for Windows XP
1
Double-click on the “My
Computer” icon on your
desktop or click on “Start,”
go to “Settings” and select
“Control Panel.”
2
Double-click on the
“Network” icon.
3
Double-click on the “Local
Area Connection” icon.
4
5
Click on “Properties” tab.
Select “TCP/IP” and then
select “Properties.”
15
Section 6:
Configuring Microsoft Windows
continued
Configuration Steps for Windows XP continued
16
6
Select “Obtain an IP address
automatically.”
7
Select “Obtain DNS server
address automatically.”
8
Click “OK” to accept changes.
McLeodUSA DSL Help Desk: 888-849-0640 | [email protected]
DHCP Configuration for Windows 2000
1
Click on the “Start” button
on your taskbar on your
desktop.
2
Go to “Settings” and click
on “Control Panel.”
3
Click on the “Network and
Dial-Up Connections” icon
within the Control Panel.
4
Double-click on the “Local
Area Connection” icon.
5
Click on “Properties” tab.
17
Section 6:
Configuring Microsoft Windows
continued
DHCP Configuration for Windows 2000 continued
18
6
Check to see that your
NIC card is displayed in
the “Connect Using” box.
Highlight the “Internet
Protocol (TCP/IP)”
component and make
sure the box to the left is
checked, then click on the
“Properties” button.
7
Select “Obtain an IP
address automatically.”
This allows the computer
to automatically be “given”
an IP address from the
DSL gateway.
8
Select “Obtain DNS
server address automatically.”
This allows the computer
to automatically be “given”
the DNS IP addresses from
the DSL gateway.
9
Press “OK” to accept changes.
McLeodUSA DSL Help Desk: 888-849-0640 | [email protected]
DHCP Configuration for Windows NT 4.0
1
Double click on the “My
Computer” icon on the
desktop.
2
Double click on the “Control
Panel” icon.
3
Double click on the
“Network” icon.
4
Now you see the Network
dialog box.
5
6
Select the “Protocols” tab.
Highlight “TCP/IP Protocol”
and select “Properties.” This
opens the Microsoft TCP/IP
Properties dialog box.
19
Section 6:
Configuring Microsoft Windows
continued
DHCP Configuration for Windows NT 4.0 continued
7
Displayed within the “Adapter”
field are all of the network
adapters that have been
installed on the computer.
Select your installed NIC from
the pull down box by clicking
on the drop down arrow.
8
Select “Obtain an IP address
from a DHCP server” if
dynamic addressing is desired.
This will allow the computer to
receive an IP address directly
from the DSL gateway.
OR
Select “Specify an IP address”
if static addressing is desired.
(If you chose static addressing,
enter the public or private IP
address, subnet mask, and
default gateway, which you can
obtain from QIP® or AS400®.)
9
20
Click on the DNS tab.
McLeodUSA DSL Help Desk: 888-849-0640 | [email protected]
10
Under “Host Name,” type in
the computer name.
11
Under “DNS Service Search
Order” click “Add” and enter
the correct primary DNS IP
address, then click “OK.” The
McLeodUSA DNS will be
provided on your Account
Information sheet.
12
Repeat process for secondary
DNS IP address. You will now
see both DNS IP addresses
installed under “DNS Service
Search Order.”
13
Click “OK” until you are
prompted to restart Windows
and select “Yes.”
21
Section 7:
McLeodUSA Customer Website
The McLeodUSA customer Website allows you to view, add and edit specific areas
of your e-mail account or find the support information you need.
Go to www.mcleodusa.com/YourAccount and click on “New customers register
here.” You will be asked to provide your account number and PIN. Your account
number is listed on your Account Information sheet. For businesses, the PIN is the
last 4 digits of the employer identification number; for residential, it is the last 4
digits of the social security number.
To add or edit e-mail addresses, click on “Manage Your Services” on the left and
select “Data/Internet.” To set up a new e-mail address, click on one of the e-mail
accounts listed and select add.
Additional e-mail addresses must include the full e-mail address, i.e.
[email protected] and the password must include at least one
capital letter and one numeral.
To configure your e-mail or browser accounts, click on the FAQ tab in the center
of the screen and choose “Data/Internet.”
You will need to set up the e-mail client and Internet browser for each PC
connecting to the DSL service.
You will find instructions for Netscape and Outlook Express under E-mail
Information—plus the Internet Explorer and Netscape browsers. If you are
using an e-mail client or browser other than those, please consult that program’s
support manual if you need assistance.
22
McLeodUSA DSL Help Desk: 888-849-0640 | [email protected]
Section 8:
Troubleshooting Tips
Please refer to this list if you are having problems using the McLeodUSA DSL
service, or if you receive an error message. If you need additional assistance,
please refer to Section 10: Contact Information.
I can’t connect to the Internet. What should I do?
• Check your Ethernet cable connection between the computer
network Ethernet adapter and the DSL gateway. Is it secure?
• Verify that you are installing your DSL equipment after the “Service
Completion Date” provided to you when you ordered your DSL
Internet service.
• Verify that the Ethernet active link light is solid green.
• Verify that all devices attached to the DSL line have microfilters
installed.
• Make sure that there is no microfilter on the phone jack/cord
connected to your DSL gateway.
Still can’t connect? Ping!
The Ping Test is an effective way of determining if you have installed your
network Ethernet adapter correctly and if you have connectivity to the Internet.
• To initiate a ping test, open an MS DOS® prompt and at the “>”
prompt type “ping 127.0.0.1”.
• If you receive a reply, you have ensured that the adapter is
installed and functioning correctly.
• If you receive the message “response timed out,” then you must
troubleshoot the adapter (Network Interface Card) installation
because it is not functioning correctly. If your Ethernet adapter
(NIC or Network Interface Card) is functioning correctly, you will
next want to determine if you can “ping” your DSL gateway.
• At the “>” prompt type in “ping (IP address of your DSL gateway)”
(computer default gateway).
23
Section 8:
Troubleshooting Tips
continued
• If you get a “reply” then you know that your adapter, TCP/IP and
DSL gateway are all configured correctly.
• If you receive no response, there is no connection between your
computer and the DSL gateway. Please see Section 10 for contact
information.
My wireless connection doesn’t work. What should I do?
• Verify all cables are properly connected and that the DSL gateway is
turned on.
• Make sure your wireless card/adapter is plugged in and is functioning
correctly. Verify that the card manufacturer’s install instructions have
been followed correctly.
• Verify that the Wireless Link light is solid green.
• Make sure the gateway works when connected with the Ethernet cable
(RJ45 yellow cable provided.)
• Try moving the gateway into the same room as your computer.
• Clear the area around the gateway of any items that may be causing
interference, e.g. power cables, electrical devices, steel shelving
or cabinets.
• If you still have problems, see Section 10 for contact information.
24
McLeodUSA DSL Help Desk: 888-849-0640 | [email protected]
BASIC CONFIGURATION FOR THE
NETOPIA 3347NWG-VGX WIRELESS ADSL GATEWAY
• Firmware: . . . . . . . . . . . . . . . . . . . . . . . . . .“7.5” (McLeodUSA bit sets)
• ATM Circuit Encapsulation: . . . . . . . . . .“RFC-1483 Bridged Ethernet”
• ATM Circuit VPI: . . . . . . . . . . . . . . . . . . . .“0”
• ATM Circuit VCI: . . . . . . . . . . . . . . . . . . . .“35”
• ATM Circuit Multiplexing: . . . . . . . . . . . .“LLC/SNAP”
• WAN IP Interfaces: . . . . . . . . . . . . . . . . . .“RFC-1483 Bridged Ethernet vccl”
• Enable Interface: . . . . . . . . . . . . . . . . . . .“ON”
• Obtain IP Address Automatically: . . . . .“ON”
• Address Translation Enabled: . . . . . . . . .If using private IPs “YES”
If using public IPs “NO”
• IP Addressing: . . . . . . . . . . . . . . . . . . . . . .“Numbered”
• Local WAN IP Address: . . . . . . . . . . . . . .“0.0.0.0” (obtained automatically
from DHCP server)
• Local WAN IP Mask: . . . . . . . . . . . . . . . . .“0.0.0.0” (obtained automatically
from DHCP server)
• Ethernet IP: . . . . . . . . . . . . . . . . . . . . . . . . .“192.168.1.1” (default for most
customers/Static IP customers:
see Account Information sheet)
• Ethernet Subnet Mask: . . . . . . . . . . . . . . .“255.255.255.0“ (default for most
customers/Static IP customers:
see Account Information sheet)
• Domain Name: . . . . . . . . . . . . . . . . . . . . . .“mcleodusa.com” (obtained automatically
from DHCP server)
• Primary Domain Name Server: . . . . . . .“0.0.0.0” (obtained automatically from
DHCP server)
• Secondary Domain Name Server: . . . . .“0.0.0.0” (obtained automatically from
DHCP server)
• Default IP Gateway . . . . . . . . . . . . . . . . . .“0.0.0.0” (obtained automatically from
DHCP server)
• IP Address Serving: . . . . . . . . . . . . . . . . . .“ON” (default)
• Number of Client IP Addresses: . . . . . .“100” (default)
• First Client Address: . . . . . . . . . . . . . . . . .“192.168.1.100” (default)
• IP Address Serving: . . . . . . . . . . . . . . . . . .“OFF” (default)
• Write Access Name: . . . . . . . . . . . . . . . . .“admin”
• Write Access Password: . . . . . . . . . . . . . .Mcdsl1 (case-sensitive)
• WEP: . . . . . . . . . . . . . . . . . . . . . . . . . . . . . . .“ON”
• Wireless: . . . . . . . . . . . . . . . . . . . . . . . . . . .“ON”
25
Section 9:
Frequently Asked Questions (FAQs)
26
QUESTION
ANSWER
Can I talk on the
telephone while I am
using my DSL Internet
connection?
Yes. Your voice conversation uses the lower
frequencies of the signal, while your DSL service
uses the higher frequencies. The filters ensure that
the DSL service does not interfere with your voice
conversation.
Can I use my fax gateway
while I am using my DSL
Internet connection?
Yes. As with a voice conversation, a fax transmission
uses the lower frequencies of the signal allowing
DSL service to utilize the higher frequencies.
However, if your telephone and fax machine are both
connected to the same telephone line as your DSL
service, you will not be able to use both the
telephone and fax at the same time
Can I use my two-line
telephone while I am
using my DSL Internet
connection?
Yes. However, you must install a filter on the line that
is shared with your DSL service. Check which line is
used for your DSL service, and plug a telephone into
the jack and call the telephone number associated
with your DSL service provided in the Account
Information sheet. If the telephone rings, this is the
line where you must install a filter.
Do I need to turn off my
Call Waiting while I am
using my DSL Internet
connection?
No. DSL frequency is not affected by the calling
features on your telephone line.
Why should I leave my
DSL gateway turned ON
all the time?
Your DSL service is an “always-on” connection, even
when your computer is OFF. Save wear and tear on
the gateway by leaving it ON all of the time. This
gives you access to the Internet anytime you wish.
McLeodUSA DSL Help Desk: 888-849-0640 | [email protected]
QUESTION
ANSWER
Can I disconnect my
second telephone line?
If your secondary telephone line is used only for
dial-up access to the Internet, you may disconnect
it if you wish. As long as your DSL service is
connected to your primary telephone number, your
DSL service is now “sharing” the voice telephone
line and a second telephone line is not required.
Can I increase the speed
of my DSL service?
In some cases, you may increase the speed of your
DSL connection by upgrading your service. Please
call McLeodUSA Customer Care at 800-593-1177 to
discuss the various DSL service offerings available
to you.
What if I want to move
my computer to another
office or room?
In order to utilize DSL service in a different office or
room, a phone jack needs to exist that is connected
to the DSL service you are using. Test the phone jack
by plugging a phone into the jack and dialing the
phone number associated with the DSL service
provided on your Account Information sheet. Call
from a cell phone (or by having another party dial
you). If a phone jack does not exist, call your local
telephone company to request that one be installed.
Will my DSL service be
affected if I move to
another location?
If you change your location, contact McLeodUSA
Customer Care at 800-593-1177 to find out what DSL
service options are available in your new location.
27
Section 10:
Contact Information
Need Help Installing Your DSL Service and gateway?
For support during the installation process, please call us at:
888-847-5316
(Select option “1”)
Additional Questions?
If you have installed the gateway and have accessed the Internet successfully,
please use the following contact information when you require additional
support or have questions.
888-849-0640
or
[email protected]
Gateway or Configuration Questions?
If you have questions about special configurations for the DSL gateway,
please contact Netopia Technical Support.
In addition to the User’s Guide and application notes included on the
CD-ROM, Netopia provides an extensive collection of support documentation
and application notes at www.netopia.com/support. You can also contact
Netopia at:
800-576-9506
or
[email protected]
28
McLeodUSA DSL Help Desk: 888-849-0640 | [email protected]