1
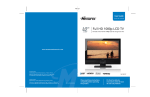
6 Unit c Table Stand Packaging material d Unit Table Warranty Card Screw Screwx x66 Stand Packaging material MLT3221 Connecting an Audio Receiver and TV Cable HDMI 1 IN HDMI 2 IN PC/VGA VGA IN HDMI 1 IN AUDIO OUT YPbPr1 IN AUDIO AUDIO Y Pb Pr STEREO AUDIO HDMI 2 IN AUDIO OUT YPbPr1 IN HDTV/TV Air/Cable L R L R L Y Pb Pr R PC/VGA VG IN DIGITAL OPTICAL AUDIO L AUDIO Y Pb Pr STEREO AUDIO DIGITAL OPTICAL COAXIAL AUDIO VHF/UHF IN VIDEO L AUDIO VIDEO2 IN R L R S-VIDEO AUDIO S-VIDEO IN YPbPr2 IN L R HDTV/TV Air/Cable L R R L R L Y Pb Pr R L COAXIAL AUDIO VHF/UHF IN VIDEO AUDIO Cable Connecting to Audio Receiver: Use an audio cable to connect the audio receiver’s audio LINE IN jacks to LCD TV’s AUDIO OUT jacks. Connecting to Digital 5.1 Sound System: METHOD A: Use a optical cable to connect the audio amplifier’s OPTICAL IN jacks to LCD TV’s OPTICAL OUT jacks. METHOD B: B Use a coaxial cable to connect the audio amplifier’s COAXIAL IN jacks to LCD TV’s COAXIAL OUT jacks. A Audio Receiver Audio Amplifier ATSC/NTSC Connect all AC power sources, before turning on the power switch of the LCD TV or other connected equipment. Press the button on the remote to turn on the LCD TV. L AUDIO VIDEO2 IN R L R S-VIDEO AUDIO S-VIDEO IN YPbPr2 IN L R R While in TV (CABLE/AIR) mode, press the MENU button to display the Main menu, and use the buttons to select the TV menu. Use the buttons to select Tuner Mode (AIR/CABLE) and press OK button. buttons to select Channel Scan and press 3. Use the OK button. It will automatically cycle through all the channels and store active channels into memory. TV(CABLE/AIR) VIDEO 1(SIDE) VIDEO 2(REAR) VIDEO 3(S-VIDEO) VIDEO 4(YPbPr1) VIDEO 5(YPbPr2) VIDEO 6(HDMI1) VIDEO 7(HDMI2) COMPUTER(VGA) 16 feet INPUT TV(CABLE/AIR), VIDEO 1(SIDE), VIDEO 2(REAR), VIDEO 3(S-VIDEO), VIDEO 4(YPbPr1), VIDEO 5(YPbPr2), VIDEO 6(HDMI1), VIDEO 7(HDMI2), COMPUTER(VGA) and press OK button. Step1 Slide to open the battery compartment cover of the remote control. Step2 Install two "AAA" batteries (not included), paying attention to the polarity diagram in the battery compartment. Replace the battery compartment cover. FO LD User Guide Widescreen LCD HDTV with full function remote control www.memorexelectronics.com Model MLT3221 Printed in China Distributed by Imation Enterprises Corp. Weston, Florida Memorex, the Memorex logo, and "Is it live or is it Memorex?" are trademarks of the affiliates of Memorex Products, Inc. Please read these instructions completely, before operating this product. WEEE This product contains electrical or electronic materials. The presence of these materials may, if not disposed of properly, have potential adverse effects on the environment and human health. Presence of this label on the product means it should not be disposed of as unsorted waste and must be collected separately. As a consumer, you are responsible for ensuring that this product is disposed of properly. This TV incorporates High-Definition Multimedia Interface (HDMITM) technology. HDMI, the HDMI logo and High-Definition Multimedia Interface are trademarks or registered trademarks of HDMI Licensing LLC. Manufactured under license from Dolby Laboratories. Dolby and the double -D symbol are trademarks of Dolby Laboratories. CONTENTS Important Safety Instructions........................................................................................ 2 Chapter 1 Introducing the LCD TV Key Features................................................................................................................ 5 Package Contents........................................................................................................ 6 Setting Your LCD TV..................................................................................................... 7 Your LCD TV................................................................................................................. 9 Your Remote Control...................................................................................................11 Chapter 2 Installing the LCD TV Connecting a TV Cable or an Antenna....................................................................... 13 Connecting a VCR...................................................................................................... 18 Connecting a Video Camera or Game Console......................................................... 19 Connecting a DVD Player........................................................................................... 20 Connecting a Digital TV Cable Box or Digital Satellite Receiver................................ 22 Connecting an AV Equipment with HDMI Connector.................................................. 23 Connecting an AV Equipment with DVI Connector..................................................... 24 Connecting a PC........................................................................................................ 25 Connecting an Audio Receiver or a Dolby Digital 5.1 Sound System........................ 26 Chapter 3 Using the Features Wide Screen Viewing.......................................................................................27 Operating the Menu.........................................................................................28 Customizing the VIDEO Settings.......................................................................30 Customizing the AUDIO Settings.......................................................................32 Customizing the TV Settings.............................................................................34 Customizing the SETUP Settings......................................................................36 Using the Program Block Settings......................................................................40 Using the Program Guide.................................................................................45 Troubleshooting.................................................................................................... 46 Specification............................................................................................................ 47 ENGLISH Warnings and Precautions Warnings and Precautions Warnings and Precautions ENGLISH Warnings and Precautions Chapter 1 Introducing the LCD TV Chapter 1 Introducing the LCD TV ENGLISH Key Features Various Audio/Video terminals for external equipment connection ▪ ▪ ▪ ▪ ▪ ▪ ▪ ▪ 2 sets of composite A/V input terminals 1 set of S-VIDEO terminals 2 sets of component Video input terminals 1 VGA/ Audio input terminals 2 HDMI/Audio input terminals 1 set of Audio(L/R) output terminals 2 SPDIF output terminals (Optical x 1 /Coaxial x 1) 1 Headphone terminal The built-in TV tuner to receive HD ATSC ▪ This function allows the reception of HD broadcasting without the addition of a set top box. High Definition Multimedia Interface (HDMI) ▪ High Definition Multimedia Interface (HDMI) is a small, user-friendly interconnect that can carry up to 5 Gbps of combined video and audio in a single cable. This system eliminates the cost, complexity and confusion of multiple cables used to connect current A/V systems. HDTV Component Video Inputs ▪ Offers the best video quality for DVD(720p,HD1080i) and digital set-top-box (720p,HD1080i) connections. 3D Digital Noise Reduction ▪ This function can digitally reduce image noise to provide better picture quality. Film-Mode Detection (3:2 Reverse Pull Down) ▪ This function can automatically detect content derived from film and adjust the interlacer’s frame matching to provide a more natural-looking, clearer image of the moving picture. Chapter 1 Introducing the LCD TV Package Contents Make sure all of the following contents are included. LCD TV Bottom Stand(151-700-BF327WV3H) /Screw Driver and 4 Screws Remote Control (845-042-GF1XABH) Power Cord (601-181-3200-LIH) VIDEO Cable AUDIO Cable Warranty Card Warranty Card User’s Manual Quick Start Guide Quick Start Guide USER MANUAL These items are all you need to set up and operate the LCD TV in its basic configuration. Make sure all of the above contents are included in the package. If you are missing any items, please contact the customer service department. Chapter 1 Introducing the LCD TV Setting Up Your LCD TV ENGLISH How to install the TV Stand If you prefer to mount your new TV on a wall instead of attaching it to the stand, please reference the instructions included in the wall mounting kit(not included). Attach the Stand the TV with the bottom foam packaging material still attached. Read all instructions before continuing with the stand installation. a. Lift foam packaging material from the top of the LCD out of the box. b. Lift LCD out of the box, with the bottom foam packaging material still attached, and place onto a stable surface. a b Stand Protective bag Shipping box Table c. Remove protective bag from LCD unit, but DO NOT remove the bottom foam packaging material from the TV. d. Locate the place on the back of the TV to attach the stand. Secure the stand to the LCD with all four screws. Unit c Table Stand Packaging material d Unit Table Screw x 4 Stand Packaging material Chapter 1 Introducing the LCD TV How to setup the TV Use a supplied antenna cable to connect the VHF/UHF signal to the LCD TV’s ANT. terminal (refer to page15-18). Connect the AC power cord at the back of the TV and connect the power cord to wall outlet. Insert two AAA batteries in remote control(battery not included). Step1 Slide the back cover up to open the battery compartment of the remote control. Step2 Insert two AAA size batteries. Make sure to match the (+) and ( - ) ends of the batteries with the (+) and ( - ) ends indicated in the battery compartment. Slide the cover back into place. Do not use caustic cleaners (porcelain, stainless steel, toilet, or oven cleaner etc.) on the remote, as it may suffer damage. Connect other an external AV device (refer to page18-26). Chapter 1 Introducing the LCD TV Your LCD TV ENGLISH Front/Right Side View and Controls IR Infrared Receiver. LED The LED light is blue when the LCD TV is in standby and the LED light indicates no colour when powered up. VOLUME+/Adjusts the volume up and down. Selects the main-menu item and change values for items when in the OSD mode. VIDEO L CHANNEL▲▼ Scans up and down through channels. Selects sub-menu item when in the OSD mode. MENU Press once to display the OSD (on screen display), press again to turn the OSD off. INPUT Chooses from different input signal sources. Turns the LCD TV on and into standby mode. AV1 IN Connects to the composite Video and Audio output jacks on external video equipment. R VIDEO IN HEADPHONE Connects to the external headhone for private listening. Chapter 1 Introducing the LCD TV Rear View and Jacks VIDEO2 IN Connects to the composite VIDEO and AUDIO(L/R) output jacks on external video equipment. HDMI IN Connects the all digital AV equipment with HDMI connector.HDMI supports enhanced, high-definition video and two-channel digital audio. The AUDIO(L/R) of HDMI IN is for DVI connection. S-VIDEO IN Connects to the S-VIDEO and AUDIO(L/R) output jacks on external video equipment. VGA IN Connects the PC, or other AV equipment with VGA and AUDIO(L/R) output jacks. HDMI 1 IN HDMI 2 IN VGA IN AUDIO OUT YPbPr1 IN AUDIO AUDIO Y Pb Pr STEREO AUDIO DIGITAL OPTICAL HDTV/TV Air/Cable L L R R L Y Pb Pr R L COAXIAL AUDIO VHF/UHF IN VIDEO L AUDIO VIDEO2 IN R L R S-VIDEO AUDIO S-VIDEO IN YPbPr2 IN L R R YPbPr1 IN/YPbPr2 IN Connects to the DVD player, Digital Set-Top-Box, or other AV equipment with component(YPbPr) video and audio output jacks. AUDIO OUT-STEREO Connects to the AUDIO(L/R) input jacks on AV equipment. AUDIO OUT-DIGITAL-OPTICAL/COAXIAL Connects to the DIGITAL AUDIO jack on the digital/standard 5.1 audio system. AIR/CABLE IN Connects RF input from VHF/UHF antenna or cable to receive high/standard definition television. AC IN Connects to the AC power cord. 10 Chapter 1 Introducing the LCD TV Your Remote Control 1 22 MTS Cycles through the multi-channels TV sound(MTS) options: SAP/MONO/ STEREO 3 S.MODE Selects sound effect options: Surround/ Live/Dance/Techno/Classic/Soft/Rock/ Pop/Off. 4 P.MODE Selects picture mode: Vivid/Hi-Bright/ Cinema/Sport/User 5 P.SIZE Cycles through Wide mode settings : NORMAL /FULL/WIDE 6 CAPTION Cycles through the Closed Caption: 2 3 4 6 5 7 8 Turns the LCD TV on and off. Anlalog Closed Caption:CC1/CC2/ CC3/CC4/T1/T2/T3/T4/Off Digital Closed Caption:Service1/ Service2/Service3/Service4/Service5/ Service6/Off 9 10 12 11 13 7 SLEEP Cycles through the LCD TV sleep timer: OFF/10/20/30/40/50/60/90/120 mins 8 0-9 Select and switch to a channel by using 0-9 buttons. In HDTV mode, use with 0-9 and buttons to select a digital channels. Returns to previously selected channel. 9 JUMP 10 MUTE Mutes and restores the audio 11 VOL.+- Increases and decreases volume. 12 CH.+- Scans up and down the channels 13 INPUT 845-042-GF1XABH Pressing INPUT display the source list, use ▲▼ to select the video equipment connected to the video inputs of your LCD TV : TV/VIDEO1/VIDEO2/VIDEO3/ VIDEO4/VIDEO5/VIDEO6/VIDEO7/ COMPUTER Input Source TV(CABLE/AIR) VIDEO1 (SIDE) VIDEO2 (REAR) VIDEO3 (S-VIDEO) VIDEO4 (YPbPr1) VIDEO5 (YPbPr2) VIDEO6 (HDMI1) VIDEO7 (HDMI2) COMPUTER(VGA) 11 ENGLISH 1 Chapter 1 Introducing the LCD TV 14 GUIDE Displays the Program Guide on the screen. Pressing again to turn GUIDE off. 15 EXIT Exits the OSD menu. 16 ▲▼►◄ Cycles through OSD options and selects individual menu items. OK confirms option settings. OK 17 INFO Pressing repeatedly displays a variety of information such as the current channel and the input source. 18 MENU Displays the OSD menu on the screen. 19 GREEN In Program Guide, press to select first program of next day. 20 RED 14 15 16 17 21 YELLOWIn Program Guide, press to view previous page of detailed program description. 22 BLUE In Program Guide, press to view next page of detailed program description. 23 LIST 21 20 22 25 23 24 Displays the received channel list 18 19 In Program Guide, press to select first program of previous day. Channel List 7-1 KABC-DT 9-1 KQED-HD 9-2 KOED-SD 8 C CT 12 13 15 24 FAV.CH Pressing FAV.CH display favorite channels. 25 FREEZE In TV mode, pressing FREEZE to freeze 26 TIMER Displays the current time on the screen. 26 the current picture, press again to restore the picture. Effective range: Effective range: The remote can control the LCD TV from up to 5m away, if pointed directly at the receiver. The remote can control the LCD TV from up to 5m away, if pointed directly at the receiver. 12 Chapter 2 Installing the LCD TV Chapter 2 Installing the LCD TV Connecting a TV Cable or an Antenna Antenna Connection The antenna requirements for good color TV reception are more important than those for a black & white TV reception. For this reason, a good quality outdoor antenna is strongly recommended. The following is a brief explanation of the type of connection that is provided with the various antenna systems. ■ A 75-ohm system is generally a round cable (not included) with Ftype connector that can easily be attached to a terminal without tools. F-type connector 75-ohm coaxial cable (round) ■ A 300-ohm system is a flat twin-lead cable (not included) that can be attached to a 75-ohm terminal through a 300-75-ohm adapter (not included). 300-ohm twin-lead cable (flat) 13 ENGLISH Refer to the owner’s manual of any external equipment to be connected. When connecting any external equipment, do not connect any AC power cords to wall outlets until all other connections are completed. Chapter 2 Installing the LCD TV Use one of the following two diagrams when connecting an outdoor antenna. A: Shows how to use a VHF/UHF combination outdoor antenna. B: Shows how to use a separate VHF and/or UHF outdoor antenna. A. Combination VHF/UHF antenna VHF/UHF Antenna 300/75-ohm adapter (not included) 300-ohm twinlead cable VHF/UHF Antenna 75-ohm coaxial cable B. Separate VHF and/or UHF antennas UHF Antenna Combiner 300-ohm twin(not included) lead cable OUT IN 75-ohm coaxial cable 300-ohm twinlead cable 14 VHF Antenna Chapter 2 Installing the LCD TV Cable TV (CATV) Connection ■ A 75-ohm coaxial cable connector is built into the set for easy hookup. When connecting the 75-ohm coaxial cable to the set, connect the 75ohm cable into the ANT. terminal. ■ Some cable TV companies offer premium pay channels. Since the signals of these premium pay channels are scrambled, a cable TV converter/descrambler is generally provided to the subscriber by the cable TV company. This converter/descrambler is necessary for normal viewing of scrambled channels. (Set your TV to channel 3 or 4, typically one of these channels is used. If this is unknown, consult your cable TV company.) For more specific instructions on installing cable TV, consult your cable TV company. One possible method of connecting the coverter/descrambler provided by your cable TV company is shown in the diagram below. RF switch (not included) OUT VHF/UHF IN 2 set signal splitter (not included) A IN B Cable TV Line Cable TV converter/ descrambler (not included) ■ The RF switch (not included) is required to provide two inputs (A and B). Setting the RF switch to position A allows viewing of all unscrambled channels by using the TV channel keys. ■ Setting the RF switch to position B allows viewing of all scrambled channels via the converter/descrambler by using the converter channel keys. 15 ENGLISH This reminder is provided to call the CATV system installer’s attention to Article 820-40 of the National Electrical Code (NEC) that provides guidelines for proper grounding and, in particular, specifies that the cable ground shall be connected to the grounding system of the building accurately, or as close to the point of cable entry as possible. Use of this TV for other than private viewing of programs broadcasted on UHF, VHF or transmitted by cable companies for the use of the general public may require authorization from the broadcast/cable company, and/ or program owner. Chapter 2 Installing the LCD TV Use a supplied antenna cable to connect the TV signal to the LCD TV’s TV CABLE terminal. HDTV/TV Air/Cable VHF/UHF IN Connect the AC power cord at the back of the TV and connect the power cord to wall outlet. HDTV/TV Air/Cable VHF/UHF IN Press the button on the remote to turn on the LCD TV. Always disconnect the LCD TV from the main voltage when the LCD TV will not be used for a long period of time. The POWER button on the front panel is only used for switching the LCD TV into standby, it does not disconnect the device from the main voltage. To completely disconnect the main voltage, please remove the power plug from the socket. 16 Chapter 2 Installing the LCD TV Press the INPUT button on the remote to display the Input Source List. Use the ▲▼ buttons to select TV and press the OK button. Input Source TV(CABLE/AIR) VIDEO1 (SIDE) VIDEO2 (REAR) VIDEO3 (S-VIDEO) VIDEO4 (YPbPr1) VIDEO5 (YPbPr2) VIDEO6 (HDMI 1) VIDEO7 (HDMI 2) COMPUTER(VGA) Press the MENU button on the remote control to display the Main menu, and use the ◄► buttons to select the TV. Channel Scan Tuner Mode Channel Skip Favorite List Time Zone TV ENGLISH Cable Eastern Time Select Exit Press the ▼ button to select Channel Scan, and press the OK button. The Channel Scan automatically creates a list of receivable channels. Press the MENU button at any time to interrupt the memorization process.(the list cannot be created if interrupted) Status: Scanning..... Cable Analog Channels: 25 Digital Channels: 0 47% The Channel Scanning will create a list of receivable channels for the current input (antenna or cable). You will be required to run Channel Scanning for each RF input to create a list of available channels from both inputs. Press the OK button to display the received channel list. Then press ▲▼ to select a channel and press again the OK button to display the channel detail. Channel List 5-2 RF5-2 9-1 KQED-HD 9-2 KOED-SD 8 C CT 12 13 15 Channel Detail Calfornia’s Gold Or, use the ▪ (Input button) with 0-9 buttons to select digital channel( for example 9.1) The digital main channel might include many subchannels (for example 9-1, 92..) that are showing program at the same time. 17 Chapter 2 Installing the LCD TV Connecting a VCR Rear of TV HDMI 1 IN HDMI 2 IN VGA IN AUDIO OUT YPbPr1 IN AUDIO AUDIO Y Pb Pr STEREO AUDIO DIGITAL OPTICAL HDTV/TV Air/Cable L R L R L Y Pb Pr R L COAXIAL AUDIO VHF/UHF IN VIDEO L AUDIO VIDEO2 IN R L R S-VIDEO AUDIO S-VIDEO IN YPbPr2 IN L R R AUDIO Cable S-VIDEO Cable AV Cable A B METHOD A: Use a composite cable to connect the VCR’s composite video/audio jacks to the LCD TV’s VIDEO2 IN jacks. METHOD B: Use an audio cable to connect the VCR’s audio output jacks to the LCD TV’s audio inputs. Use a S-Video cable to connect the VCR’s s-video output jack to the LCD TV’s S-VIDEO IN input jack. Connect all AC power sources, before turning on the power switch of the LCD TV or other connected equipment. Press the button on the remote to turn on the LCD TV. To watch a videotape, press the INPUT button on the remote to select VIDEO2( METHOD A), or VIDEO3 (METHOD B). 18 Chapter 2 Installing the LCD TV Connecting a Video Camera or Game console Rear of TV ENGLISH Right Side HDMI 1 IN HDMI 2 IN VGA IN AUDIO OUT VIDEO YPbPr1 IN AUDIO AUDIO Y Pb Pr STEREO AUDIO DIGITAL OPTICAL L HDTV/TV Air/Cable L R L R L R L Y R Pb Pr R L COAXIAL AUDIO VHF/UHF IN VIDEO IN VIDEO AUDIO VIDEO2 IN L R S-VIDEO AUDIO S-VIDEO IN YPbPr2 IN L R R AUDIO Cable or S-VIDEO Cable B GAME CONSOLE AV Cable A METHOD A: Use a composite cable to connect the video camera’s or game console’s composite video/audio jacks to the LCD TV’s VIDEO2 IN jacks or VIDEO1 IN jacks. METHOD B: Use an audio cable to connect the video camera’s or game console’s audio output jacks to the LCD TV’s audio inputs. Use an S-Video cable to connect the video camera’s or game console’s s-video output jack to the LCD TV’s S-VIDEO IN input jack. Connect all AC power sources, before turning on the power switch of the LCD TV or other connected equipment. Press the button on the remote to turn on the LCD TV. To watch a video vis camera or game console, press the Input button on the remote to select VIDEO2/VIDEO1( METHOD A), or VIDEO3 (METHOD B). Not all cameras have the ability to connect to a TV. Please check your video camera user guide for compatibility. 19 Chapter 2 Installing the LCD TV Connecting a DVD Player Rear of TV HDMI 1 IN HDMI 2 IN VGA IN AUDIO OUT YPbPr1 IN AUDIO AUDIO Y Pb Pr STEREO AUDIO DIGITAL OPTICAL HDTV/TV Air/Cable L L R R L Y Pb Pr R L COAXIAL AUDIO VHF/UHF IN VIDEO L AUDIO VIDEO2 IN R L R S-VIDEO AUDIO S-VIDEO IN L YPbPr2 IN R R or Pb Pr COMPONENT/AUDIO Cable AUDIO Cable S-VIDEO Cable AV Cable HDMI Cable A B C Pb Pr D DVDPLAYER METHOD A: Use a composite cable to connect the DVD player’s composite video/audio jacks to the LCD TV’s VIDEO2 IN jacks. METHOD B: Use an audio cable to connect the DVD player’s audio output jacks to the LCD TV’s audio inputs. Use an S-Video cable to connect the DVD player’s s-video output jack to the LCD TV’s S-VIDEO IN input jack. METHOD C: Use a component cable to connect the DVD player’s component output jacks to the LCD TV’s YPbPr1 IN or YPbPr2 IN input jacks. Use an audio cable to connect the DVD player’s component audio jacks to the LCD TV’s audio input jacks. METHOD D: Use a HDMI cable to connect the DVD player’s HDMI output jacks to the LCD TV’s HDMI 1 IN or HDMI 2 IN input jacks. The component video jacks on your DVD player are sometimes labeled YPbPr, or YCbCr. For an explanation of component video, see your DVD player’s user guide. 20 Chapter 2 Installing the LCD TV Press the button on the remote to turn on the LCD TV. To watch a DVD, press the Input button on the remote to select VIDEO2( METHOD A), or VIDEO3 ( METHOD B), or VIDEO4/VIDEO5 (METHOD C). For best picture quality, if your equipment has component video output, use a component cable instead of a composite video or S-video cable. 21 ENGLISH Connect all AC power sources, before turning on the power switch of the LCD TV or other connected equipment. Chapter 2 Installing the LCD TV Connecting a Digital TV Cable Box or Digital Satellite Receiver Rear of TV HDMI 1 IN HDMI 2 IN VGA IN AUDIO OUT YPbPr1 IN AUDIO AUDIO Y Pb Pr STEREO AUDIO DIGITAL OPTICAL HDTV/TV Air/Cable L R L R L Y Pb Pr R L COAXIAL AUDIO VHF/UHF IN VIDEO L AUDIO VIDEO2 IN R L R S-VIDEO AUDIO S-VIDEO IN YPbPr2 IN Pb L R R Pr COMPONENT/AUDIO Cable A Pb Pr B HDMI Cable METHOD A: Use a component cable to connect the satellite receiver’s/TV Cable Box’s component (YPbPr1) output jacks to the LCD TV’s component input jacks. Use an audio cable to connect the satellite receiver’s/TV Cable Box’s component audio jacks to the LCD TV’s audio input jacks. METHOD B: Use a HDMI cable to connect the satellite receiver’s/TV Cable Box’s HDMI output jacks to the LCD TV’s HDMI 1 IN or HDMI 2 IN input jacks. Connect all AC power sources, before turning on the power switch of the LCD TV or other connected equipment. Press the button on the remote to turn on the LCD TV. To watch programs via satellite receiver or TV Cable Box, press the Input button on the remote to select VIDEO4/VIDEO5. 22 Chapter 2 Installing the LCD TV Connecting an AV Equipment with HDMI Connector HDMI 1 IN HDMI 2 IN ENGLISH Rear of TV VGA IN AUDIO OUT YPbPr1 IN AUDIO AUDIO Y Pb Pr STEREO AUDIO DIGITAL OPTICAL HDTV/TV Air/Cable L R L R L Y Pb Pr R L COAXIAL AUDIO VHF/UHF IN VIDEO L AUDIO VIDEO2 IN R L R S-VIDEO AUDIO S-VIDEO IN YPbPr2 IN L R R HDMI Cable AV EQUIPMENT Use a HDMI cable to connect the AV equipment’s HDMI output jack to the LCD TV’s HDMI IN jacks. Connect all AC power sources, before turning on the power switch of the LCD TV or other connected equipment. Press the button on the remote to turn on the LCD TV. Press the Input button on the remote to select VIDEO6. The HDMI connector provides both video and audio signals, it’s not necessary to connect the audio cable. 23 Chapter 2 Installing the LCD TV Connecting an AV Equipment with DVI Connector Rear of TV HDMI 1 IN HDMI 2 IN VGA IN AUDIO OUT YPbPr1 IN AUDIO AUDIO Y Pb Pr STEREO AUDIO DIGITAL OPTICAL HDTV/TV Air/Cable L R L R L Y Pb Pr R L COAXIAL AUDIO VHF/UHF IN VIDEO L AUDIO VIDEO2 IN R L R S-VIDEO AUDIO S-VIDEO IN YPbPr2 IN L R R AUDIO Cable AUDIO L HDMI-to-DVI Cable R DVI IN AV EQUIPMENT Use a HDMI-to-DVI cable to connect the AV equipment’s DVI output jack to the LCD TV’s HDMI IN jacks. Use an audio cable to connect the AV equipment’s audio output jacks to LCD TV’s HDMI AUDIO jacks. Connect all AC power sources, before turning on the power switch of the LCD TV or other connected equipment. Press the button on the remote to turn on the LCD TV. Press the Input button on the remote to select VIDEO6. If the LCD TV is connected to AV equipment’s DVI connector, you will need an HDMI-to-DVI cable or an HDMI adapter(not suplied) and an audio cable. 24 Chapter 2 Installing the LCD TV Connecting a PC HDMI 1 IN HDMI 2 IN ENGLISH Rear of TV VGA IN AUDIO OUT YPbPr1 IN AUDIO AUDIO Y Pb Pr STEREO AUDIO DIGITAL OPTICAL HDTV/TV Air/Cable L R L R L Y Pb Pr R L COAXIAL AUDIO VHF/UHF IN VIDEO L AUDIO VIDEO2 IN R L R S-VIDEO AUDIO S-VIDEO IN YPbPr2 IN L R R AUDIO Cable VGA Cable PC Use a D-SUB cable to connect the PC’s D-SUB output jack to the LCD TV’s VGA input jack. Use an audio cable to connect the PC’s audio output jacks to LCD TV’s. Connect all AC power sources, before turning on the power switch of the LCD TV or other connected equipment. Press the button on the remote to turn on the LCD TV. Press the Input button on the remote to select COMPUTER. 25 Chapter 2 Installing the LCD TV Connecting an Audio Receiver or a Dolby Digital 5.1 Sound System For better sound quality, you may want to play the LCD TV audio through your stereo system. HDMI 1 IN HDMI 2 IN VGA IN AUDIO OUT YPbPr1 IN AUDIO AUDIO Y Pb Pr STEREO AUDIO DIGITAL OPTICAL HDTV/TV Air/Cable L R L R L Y Pb Pr R L COAXIAL AUDIO VHF/UHF IN VIDEO L AUDIO VIDEO2 IN R L R S-VIDEO AUDIO S-VIDEO IN YPbPr2 IN L R R AUDIO Cable B Audio Receiver A Audio Amplifier Connecting to Audio Receiver: Use an audio cable to connect the audio receiver’s audio LINE IN jacks to LCD TV’s AUDIO OUT jacks. Connecting to Digital 5.1 Sound System: METHOD A: Use a optical cable to connect the audio amplifier’s OPTICAL IN jacks to LCD TV’s OPTICAL OUT jacks. METHOD B: Use a coaxial cable to connect the audio amplifier’s COAXIAL IN jacks to LCD TV’s COAXIAL OUT jacks. Connect all AC power sources, before turning on the power switch of the LCD TV or other connected equipment. Press the button on the remote to turn on the LCD TV. 26 Chapter 3 Using the LCD TV Chapter 3 USING THE FEATURES Wide Screen function allows viewing of 4:3/16:9 images in wide screen mode, cycling through the following wide screen settings. Press the P.SIZE button repeatedly to select the screen format you want. FULL Stretches the image vertically and horizontally to keeps the image size consistent in the center of the screen and stretches the sides WIDE Stretches the image vertically and horizontally to fill the screen at 1:1.85 aspect ratio NORMAL Displays at 4:3 aspect ratio NORMAL is not available when you are watching 720p, 1080i, source. 27 ENGLISH Wide Screen Viewing Chapter 3 Using the LCD TV Operating the Menu Press the button to turn the LCD TV on. Press the MENU button on the remote control, the on-screen menu will appear on the screen. Use the ◄► buttons to select your main menu option. VIDEO MENU: Allows you to make adjustments to your picture settings. ▪ If the signal source is TV/VIDEO/SVIDEO/YPbPr/ HDMI, the VIDEO MENU appears as: Picture Mode User Contrast50 Brightness54 Saturation54 Hue 0 Sharpness5 Color Temperature Noise Reduction Medium Video Select ▪ If the signal source is VGA, the VIDEO MENU appears as: Picture Mode User Contrast50 Brightness54 Color Temperature Noise Reduction Medium VGA Exit Video Video Select Select Exit Exit AUDIO MENU: Allows you to customize the audio options and effects. ▪ If the signal source is VIDEO/SVIDEO/YPbPr/ HDMI/VGA, the AUDIO MENU appears as: ▪ If the signal source is TV, the AUDIO MENU appears as: Bass50 Treble50 Balance 0 Sound Effect Surround MTS Stereo SPDIF Type Dolby Digital Audio Language English Speaker On Audio Out Variable Bass50 Treble50 Balance 0 Sound Effect Surround Speaker On Audio Out Variable Audio Select Audio Exit 28 Select Exit Chapter 3 Using the LCD TV TV MENU: Allows you to edit and label channels. TV ENGLISH Channel Scan Tuner Mode Channel Skip Favorite List Time Zone Cable Eastern Time Select Exit SETUP MENU: Allows you to set up a variety of features: Language, Closed Caption, reset, Parental Control, time Setup. ▪ If the signal source is TV/VIDEO/S-VIDEO/Ypbpr, the SETUP MENU appears as: OSD Language Time Setup Closed Caption Parental Gamma Reset Default Setup English OSD Language Time Setup Parental Gamma Reset Default Middle Select ▪ if the signal source is HDMI/VGA, the SETUP MENU appears as: Exit Setup English Middle Select Exit Use the ▲▼ buttons to highlight the option of the sub-menu, and press the OK button. While in adjustment mode, and use the ◄► buttons to change the value of the item. Press the EXIT button to exit the menu. 29 Chapter 3 Using the LCD TV Customizing the VIDEO Settings Press the button to turn the LCD TV on. Press the MENU button on the remote control to display the Main menu, and use the ◄► buttons to select the VIDEO. Use the ▲▼buttons to highlight an individual VIDEO option, use the ◄► buttons to change the setting, and press the MENU to exit the menu ▪ If the signal source is TV/VIDEO/S-VIDEO/Ypbpr/ HDMI, the VIDEO MENU appears as: Picture Mode User Contrast50 Brightness54 Saturation54 Hue 0 Sharpness5 Color Temperature Noise Reduction Medium Video Select ▪ if the signal source is VGA, the VIDEO MENU appears as: or Exit Picture Mode User Contrast50 Brightness54 Color Temperature Noise Reduction Medium VGA Video Video Select Select Exit Exit The VIDEO menu includes the following options: Picture Mode Contrast Controls the difference between the brightest and darkest regions of the picture Brightness Controls the overall brightness of the picture Saturation Controls the color intensity Hue Controls the difference between the green and red regions of the picture Sharpness Increase this setting to see crisp edges in the picture; decrease it for soft edges Cycles among display types: Vivid/Hi-Bright/Cinema/Sport/User 30 Chapter 3 Using the LCD TV Color temperature Color Temperature R Gain G Gain B Gain Color Temperature User 120 120 120 Select Back Noise Reduction Select to reduce the noise level of connected equipment: Off/Low/ Strong /Medium. VGA Press the OK button to enter the VGA Setting: Auto Adjust H.Position72 V. Position 31 Clock 127 Phase 31 VGA ▪ Auto Adjust Select Exit Press the OK button to automatically adjust the display setting to optimize performance based on the VGA mode ▪ H. Position Adjusts the position of the picture left and right in the window ▪ V. Position Adjusts the position of the picture up and down in the window ▪ Clock ▪ Phase Controls the width of the picture based on the VGA mode Controls the signal phase, which can improve focus clarity and image stability based on the VGA mode 31 ENGLISH Adjusts color components independently to achieve a warm or cool effect: Cool/Middle/Warm/User ▪ Warm: Increases red tint ▪ Nature : Increases natural tint ▪ Cool : Increases blue tint ▪ User : Allows the user to adjust red, green and blue color component levels independently. Chapter 3 Using the LCD TV Customizing the AUDIO Settings Press the button to turn the LCD TV on. Press the MENU button on the remote control to display the Main menu, and use the ◄► buttons to select the AUDIO. Use the ▲▼buttons to highlight an individual AUDIO option, use the ◄► buttons to change the setting, and press the MENU to exit the menu ▪ if the signal source is TV, the AUDIO MENU appears as: ▪ If the signal source is VIDEO/S-VIDEO/Ypbpr/ HDMI/VGA, the AUDIO MENU appears as: Bass50 Treble50 Balance 0 Sound Effect Surround Speaker On Audio Out Variable Audio Select or Exit Bass50 Treble50 Balance 0 Sound Effect Surround MTS Stereo SPDIF Type Dolby Digital Audio Language English Speaker On Audio Out Variable Audio Select Exit The AUDIO menu includes the following options: Bass Controls the relative intensity of lower-pitched sounds Treble Controls the relative intensity of higher pitched sounds Balance Adjusts the relative volume of the speakers in a multiple speaker system Sound Effect Allows selection of an audio-enhancement technique from among the following options: Surround/Live/Dance/Techno/Classic/Soft/Rock/POP/ Off MTS Allows you to listen to high-fidelity stereo sound while watching TV ▪ Stereo: Use separate audio tracks for left and right speakers, if available ▪SAP: You can enjoy a second audio program from the speakers while watching a scene in the original program ▪ Mono: Allows mono output (useful when stereo is noisy or inconsistent) 32 Chapter 3 Using the LCD TV Allows to selection of the digital sound format: PCM/OFF/Dolby Digital ▪ PCM: The external audio system is connected to the AUDIO OUT (L/R) of the LCD TV ▪ Dolby Digital: The external audio system is connected to the AUDIO OUT DIGITAL (OPTICAL or COAXIAL) ot the LCD TV ▪ OFF: Select OFF to turn off the external audio system SPDIF Type Speaker Allows to select to turn on or off the TV speakers. 33 ENGLISH Audio LanguageAllows to select the audio language:English/Spanish/French. Chapter 3 Using the LCD TV Customizing the TV Settings Press the button to turn the LCD TV on. Press the MENU button on the remote control to display the Main menu, and use the ◄► buttons to select the TV. Use the ▲▼buttons to highlight an individual TV option, use the ◄► buttons changes the setting, and press the MENU exits the menu. Channel Scan Tuner Mode Channel Skip Favorite List Time Zone Cable Eastern Time TV Select Exit The TV menu includes the following options: Channel Scan Press the OK button, the Channel Scanning automatically creates a list of receivable channels. Tuner Mode Allows selection between TV cable and antenna signal sources: ▪ AIR Choose this setting if you are receiving TV channels with an antenna (over the air) Channel Skip ▪ Cable Choose this setting if you are receiving TV channels with a CATV (cable TV) Allows addition/removal of channels on the channel list. Press the OK button to display the Channel Skip menu: 2 ABC Analog 3 DISC Analog 4 Analog 5 Analog 6 Analog 7 Analog 8 Analog 9 Analog 10 Analog Channel Skip Select 34 Back Chapter 3 Using the LCD TV Favorite List OK button repeatedly to select show () or hide() Select Favorite List from the TV option and press the OK button. The Favorite List menu appears: 2 Analog 3 Analog 4 Analog 5 Analog 6 Analog 7 Analog 8 Analog 9 Analog 10 Analog Favorite List Select Back Press the ▼ button to select the desired channel, and press the OK button repeatedly to select show () or hide() Allows selection of regional TV systems of USA: Eastern Time/ Indiana/Central time/Mountain Time/Arizona/Pacific Time/ Alaska/Hawaii Time Zone 35 ENGLISH Press the ▼ button to select the desired channel, and press the Chapter 3 Using the LCD TV Customizing the SETUP Settings Press the button to turn the LCD TV on. Press the MENU button on the remote control to display the Main menu, and use the ◄► buttons to select the SETUP. Use the ▲▼buttons to highlight an individual SETUP option, use the ◄► buttons to change the setting, and press the MENU to exit the menu. ▪ If the signal source is TV/VIDEO/S-VIDEO/Ypbpr, the SETUP MENU appears as: OSD Language Time Setup Closed Caption Parental Gamma Reset Default ▪ if the signal source is HDMI/VGA, the SETUP MENU appears as: English OSD Language Time Setup Parental Gamma Reset Default Middle Setup Select Exit English Middle Setup Select Exit The SETUP menu includes the following options: OSD Language Selects to display all on-screen menus in your language of choice: English/French/Spanish Allows to set the current time. Time Setup ▪ ON :Selects to display the system current time. ▪ OFF :Selects to set the current time. Press the ▲▼ buttons to select the Date or Time. Press the ◄► buttons to move each setting, and use 0-9 keys to set the current time. Analog Cloaed Caption Digital Cloaed Caption Digital Caption Style Off Off Timer Select 36 Back Chapter 3 Using the LCD TV Closed Caption Allows to select from analog or digital closed caption modes and press the OK button. The Closed Caption list appears: Digital Closed Caption: Press the◄►buttons to select the digital closed caption options: Service1/Service2/Service3/Service4/Service5/Service6/OFF Note: The setting here will be applied to each DTV channel Caption Style: Press OK button to customize the settings for digital closed caption option: Caption Style Font Size Font Color Font Opacity Background Color Background Opacity Window Color Window Opacity Custom Large White Solid Black Solid Black Translucent Cloaed Caption Style 37 Select Back ENGLISH Analog Closed Caption: Press the ◄► buttons to select the basic analog closed caption options: ▪ CC1 /CC2 /CC3 /CC4: Display a printed version of the dialog and sound effects of the program being viewed ▪ T1/T2: Display station information presented using either half or the whole screen ▪ T3/T4: Extended Data Services. For example: Network name, program name, program length, etc. Chapter 3 Using the LCD TV Parental The Parental Control can be set up to the TV to block Channel, Video Source and to change password. Use the ▼ button to select the Parental, and press the OK to display the Parental menu Use the Program Block function, must enter a four-digit password. The factory password is 0000 The Parental list appears: Program Block Channel Block Input Block Change Password Parental Enter Select Back Program Block Allows to setup the TV and MPAA Rating Lock options (refer to “Using the Program Block Setting”). U.S.TV Ratings U.S. Movie Ratings Canadian English Ratings Canadian French Ratings Block MPAA Unrated Block TV Unrated Parental Block Select Back Allows to block digital channels. Channel Block NO NO Press the ▲▼ buttons to select the channel. Press the OK button repeatedly to select BLOCK UNBLOCK 2 ABC . Analog 3 DISC Analog 4 Analog 5 Analog 6 Analog 7 Analog 8 Analog 9 Analog 10 Analog Channel Block Select 38 Back or Chapter 3 Using the LCD TV Selects to block a Input source signal Input Block TV(CABLE/AIR) 2 VIDEO1 (SIDE) 3 VIDEO2 (REAR) 4 VIDEO3 (S-VIDEO) 5 VIDEO4 (YPbPr1) 6 VIDEO5 (YPbPr2) 7 VIDEO6 (HDMI1) 8 VIDEO7(HDMI2) 9 COMPUTER(VGA) Input Block Select Press the ▲▼ buttons to select the input source. Press the OK button repeatedly to select BLOCK UNBLOCK Open V-Chip ENGLISH 1 . Back or Selects to block program based on downloadable ratings are blocked from viewing.(this function is only available in U.S.A . where the Open V-Chip ratings exist) Press the OK button to display the Open V-Chip options. Tumbolia region, alternate US Parental Enter Select Back Press the ▲▼buttons to select the downloadable rating system, Press the OK button repeatedly to select Change Password Gamma Reset Default and press OK button. BLOCK or UNBLOCK. The Open V-Chip function is automatically downloaded while watching DTV channels. It may take several seconds. The rating name( for example: humor level, intelligence level..etc) and rating level(for example:DH, MH, H..etc) may differ depending on the information from broadcasting station. Selects to change your password Allows adjustment of the display’s gamma correction, which fine tunes both brightness and red/green/blue ratios: Bright/Middle/Dark. Press the OK button to restore factory settings 39 Chapter 3 Using the LCD TV Using the Program Block Settings Press the MENU button on the remote control to display the Main menu, and use the ◄► buttons to select the SETUP. Use the ▼buttons to highlight Parental, and press the OK button. OSD Language Closed Caption Parental Gamma Reset Default Setup Parental Middle Select Exit Use the Parental function, must enter a four-digit password. The factory password is 0000. Password English **** Select Program Block Channel Block Input Block Open V-Chip Change Password Back Parental Select Back Use the ▼ button to select the Program Block, and press the OK to display the Program Block menu. U.S.TV Ratings U.S. Movie Ratings Canadian English Ratings Canadian French Ratings Block MPAA Unrated Block TV Unrated Parental Block NO NO Select Back 40 Chapter 3 Using the LCD TV The Parental block menu includes the following options: U.S. TV Ratings Selects to activate the TV Rating programs. U.S. Movie Ratings Selects to activate the MPAA Rating programs. Canadian English Ratings Selects to activate the English Rating programs of Canada. Canadian French Ratings Selects to activate the French Rating programs of Canada Block MPAA Unrated ▪ YES: Block all movies that are broadcast without a MPAA rating. ▪ NO: Allows all movies that are broadcast without a MPAA rating Block TV Unrated ▪ YES: Block all movies that are broadcast without a TV rating. ▪ NO: Allows all movies that are broadcast without a TV rating. 41 ENGLISH Chapter 3 Using the LCD TV U.S. TV Ratings The U.S.TV Rating has 2 rating methods: Content-Based Rating and Age-Based Rating. The U.S.TV Rating includes the following options: A D L S V FV TV-Y TV-Y7 TV-G TV-PG TV-14 TV-MA Allowed Rating Blocked Rating U.S. TV Ratings Select Back AGE-BASED RATING DESCRIPTION TV-Y All children TV-Y7 Directed to children age 7 and older TV-G General Audience TV-PG Parental Guidance suggested TV-14 Parents strongly cautioned TV-MA Mature Audience only CONTENT-BASED RATING DESCRIPTION FV Fantasy violence D Suggestive dialogue L Strong language S Sexual situations V Violence ALL All contents are blocked CONTENT-BASED FV D L S V TV-PG TV-14 AGE-BASED TV-Y TV-Y7 TV-G TV-MA : To block programs by both content and age. Use the ◄►▲▼ buttons to select the rating you want and press the OK button repeatedly to select BLOCK or UNBLOCK . 42 Chapter 3 Using the LCD TV U.S. Movie Ratings G PG PG-13 R NC-17 X Allowed Rating U.S. Movie Ratings Blocked Rating Select Back RATINGDESCRIPTION GGeneral Audiences. Movie is appropriate for all ages PGParental Guidance Suggested. May contain material not suited for younger viewers PG-13 Contains content that may not be appropriate for viewers under the age of 13 R Restricted. Contains adult content, no one under 17 admitted without parent NC-17 No one 17 and under admitted X No one 17 and under admitted Use the ◄►▲▼ buttons to select the rating you want and press the OK button repeatedly to select BLOCK or UNBLOCK . Open V-Chip Allows to setup the TV and MPAA Rating Lock options (referto "Using the V-CHIP Setting") 43 ENGLISH The U.S. Movie Ratings is used for original movies rated by the Motion Picture Association of America(MPAA) as broadcasted on cable TV and not edited for television. The U.S. Movie Ratings includes the following options: Chapter 3 Using the LCD TV Canadian English Ratings The Canadian English Ratings includes the following options: C C8+ G PG 14+ 18+ Allowed Rating Canadian English Ratings Blocked Rating Select Back RATINGDESCRIPTION CAll children C8+Children 8 years and older G General programming PG Parental guidance 14+ Viewers 14 and older 18+ Adult programming Use the ◄►▲▼ buttons to select the rating you want and press the OK button repeatedly to select BLOCK or UNBLOCK . Canadian French Ratings The Canadian French Ratings includes the following options: G 8 ans+ 13 ans+ 16 ans+ 18 ans+ Allowed Rating Canadian French Ratings Blocked Rating Select Back RATINGDESCRIPTION GGeneral programming 8 ans+Not recommended for ages under 8 13 ans+Not recommended for ages under 13 16 ans+Not recommended for ages under 16 18 ans+Programming restricted to adults. Use the ◄►▲▼ buttons to select the rating you want and press the OK button repeatedly to select BLOCK or UNBLOCK . 44 Using the Program Guide Using the Program Guide With the LCD TV connected to a television programming source, press the TV button on the remote control. Press the GUIDE button on the remote control, the Program Guide will appear on the screen: Monday 6 November 2006 2:36:26 PM 9-1 9-2 KQED-SD 9-1 Calfornia’s Gold CC Antiques Roadshow TThe NewHour with Jim LehrerCC TodZoboomafoo CC Arthur 5:00 PM - 5:30 PM Mon, 29 Apr Clubs: Dongwa doesn’t communicate with his parents. Eplisode: Explorer’s club/Time for everything Not Rated Press the ◄► button to select the channel. Press the ▲▼ button to select the program from a list, the Program Guide provides introduction about the current program being shown on each channel. The Program information in the guide is provided by the broadcasters. It may sometimes include only the channel number, without a program title or description. Monday 6 November 2006 2:36:26 PM 9-1 9-2 KQED-SD 9-1 Calfornia’s Gold CC Antiques Roadshow TThe NewHour with Jim LehrerCC TodZoboomafoo CC Arthur 5:00 PM - 5:30 PM Mon, 29 Apr Clubs: Dongwa doesn’t communicate with his parents. Eplisode: Explorer’s club/Time for everything Not Rated Press the GUIDE button again on the remote control to exit the Program Guide 45 ENGLISH The Program Guide feature brings all sorts of information to your screen, such as program title, program duration, time remaining, rating information, closed caption, availability, etc. Troubleshooting TROUBLESHOOTING Before consulting service personnel, check the following chart for a possible cause of the trouble and for a possible solution. TV will not turn on Make sure the power cord is plugged in, then press the The batteries in the remote control may be exhausted. Replace the batteries. button on the remote. No picture, no sound Check the interface cable between TV and antenna/cable TV. Press the button on the remote. Press the INPUT button on the remote repeatedly to select the connected video sources. Poor picture, sound OK Check the interface cable between TV and antenna/cable TV. Try another channel, the station may have broadcast difficulties. Adjust the Brightness/Contrast options in the PICTURE Menu. Picture OK, poor sound Sound may be muted. Press the MUTE button on the remote. Press the TV button on the remote, then press the VOL+ button to increase the volume. Audio noise Move any infrared equipment away from the TV. 46 Specifications SPECIFICATIONS LCD Panel Panel Size Max. Resolution Input Connector MLT3221 32 TFT LCD 1366x768 VIDEO/AUDIO(L/R) 2 S-Video/AUDIO(L/R) 1 YPbPr/AUDIO(L/R) 2 VGA/AUDIO(L/R) 1 HDMI/AUDIO(L/R) 2 AUDIO OUT(L/R) 1 OPTICAL/COAXIAL 1 HEADPHONE 1 Power Source 100-240V~, 50/60HZ, 2.2A Power Consumption 150 W, standby < 3 W Dimension 805 x 246 x 634.9 mm WEIGHT 33.2 lbs 47 ENGLISH MODEL Specifications CARE AND MAINTENANCE To prevent fire or shock hazard, disconnect your unit from the AC power source when cleaning. The finish on the unit may be cleaned with a dust cloth and cared for as other furniture. Use caution when cleaning and wiping the plastic parts. Mild soap and a soft, damp cloth may be used. FOR ADDITIONAL SET-UP OR OPERATING ASSISTANCE, PLEASE VISIT OUR WEBSITE AT WWW.MEMOREXELECTRONICS.COM OR CONTACT CUSTOMER SERVICE AT 1-800-919-3647 PLEASE KEEP ALL PACKAGING MATERIAL FOR AT LEAST 90 DAYS IN CASE YOU NEED TO RETURN THIS PRODUCT TO YOUR PLACE OF PURCHASE OR TO IMATION ELECTRONICS PRODUCTS. FOR CONSUMER REPLACEABLE PART(S),SEE PART NUMBER(S)ON PAGE 6 AND THEN CONTACT FOX INTERNATIONAL AT 1-800-321-6993. 48 Printed in China Imation Electronics Products, A Division of Imation Enterprises Corp., Weston, Florida Memorex, the Memorex logo, and “Is it live or is it Memorex?” are trademarks of the affiliates of Memorex Products, Inc.