1
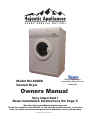
Model MJ-9200D
Vented Dryer
After sales service
provided by Sears Service
nationwide
Owners Manual
Very Important !
Read Installation Instructions On Page 5
Website: http://www.MajesticAppliances.com
Check this website under Models for the most up-to-date manual. In all situations, the most current manual goverens in questions of use and warranty
Majestic LLC © 01/01/2006
Important Safety
Instructions
WARNING- To reduce the risk of fire, electric shocks, or injury to
persons when using your appliance, follow the basic precautions,
including the following:
1. Read all instructions before using the appliance.
2. Do not wash articles that have been previously cleaned in, washed
in, or spotted with gasoline, dry-cleaning solvents, or other
flammable and explosive substances such as solvents.
3. Do NOT leave machine unattended when in use.
4. Do not add gasoline, dry-cleaning solvents or other flammable or
explosive substances to the wash water. These substances give off
vapors that could ignite or explode.
5. Under certain conditions, hydrogen gas may be produced in a hot water system that has
not been used for 2 weeks or more. If this is the case, before using your washing machine,
turn on all hot water faucets and let the water flow from each faucet for several minutes. This
will release any accumulated hydrogen has. Do not smoke or use an open flame during this
process.
6. Do not allow children to play on or in the appliance. Close supervision of children is
necessary when the appliance is in use.
7. Before the appliance is removed from service or discarded, remove the door.
8. Do not reach into the appliance if the tub or agitator is moving.
9. Do not install or store this appliance where it will be exposed to the weather.
10. Do not tamper with controls.
11.Do not repair or replace any part of the appliance or attempt any servicing unless
specifically recommended in the user-maintenance instructions or in published user-repair
manual. Also make sure that you understand the instructions completely and have the
skills to carry them out.
12. Do not use fabric softeners or products to eliminate static unless recommended by the
manufacturer of the fabric softener or product.
13.Do not use heat to dry articles containing foam, rubber or similarly textured rubber-like
materials.
14.Keep area around the exhaust opening and adjacent surrounding areas free from the
accumulation of lint, dust and dirt.
15. The interior of the appliance and exhaust duct should be cleaned periodically by qualified
service personnel.
16.Do not place items exposed to cooking oils in your dryer. Items contaminated with cooking
oils may contribute to a chemical reaction that could cause a load to catch fire.
17. This appliance must be grounded. Refer to the INSTALLATION INSTRUCTIONS for
grounding details.
SAVE THESE INSTRUCTIONS
Majestic LLC © 01/01/2006
Welcome...
Congratulations.WelcometothegrowingfamilyofMajestic™Applianceowners.By
choosingaMajesticAppliancesmodelasyourlaundryapplianceyounotonlyfound
thebestinreliabletechnology,butaboveallyouhavefoundafaithfulanduntiring
convenienceappliance.
Yourmachineisstrong,reliableandlonglasting.Allthosequalitieswhichhavemade
theMajestic™trademarkfamoustheworldover.
Aboveall,Majesticproductsareeasytouse.Readthisowner’smanualcarefullysince
itcontainsalltheinstructionforsafeinstallation,useandmaintenance.Rememberto
keepyourowner’smanualinasafeplacesothatyoucanrefertoitwheneveryouneed
to.
Foradditionalinformationandcontactwiththeourstaff,weinviteyoutovisitourweb
site.
http://www.MajesticAppliances.com
(MajesticApplianceshasmadeiteasytoregisteryourappliance
online.Justgotoourwebsiteandclickon“OnlineRegistration”.
Registeringyourproductisessentialtoreceivewarrantyservice.)
Weofferawiderangeofapplianceproducts,someofwhichmightsuityourneeds.We
alsoofferourrevolutionaryMajesticAppliances.TVweboption,whereyoucanview
orientationmoviesonthewebaswellascommentsfromotherusersandfrequently
askedquestions.WelcometoourFamily!
For Your Records
Thank you for purchasing our Majestic Appliances Product.
This manual will guide you in getting the most productive
use of your appliance purchase.
Remember to record you Model and Serial Number. They
are on a label on the back of the machine or inside the
door.
Model Number
Serial Number
Date of Purchase
Staple your receipt to your manual. YOU WILL NEED IT TO OBTAIN WARRANTY SERVICE!
Majestic LLC © 01/01/2006
Table of Contents
Instant help
Page 5
Getting things ready to install
your appliance
Unpacking, Inspecting, Electricity, Closets/
Alcoves, Plumbing, Venting
Page 8
Selecting dry cycles
Page 10
Troubleshooting
Page 11
Maintenance tips
Page 13
Warranty Information
Drying Controls, Cottons, Synthetics/Delicates,
Wool
Washing, Drying, Vibration, Optimizing dry time,
wrinkles, draining
Water,exterior, interior, winterizing, detergent,
pump, technical specifica≠tions, Obtaining
Service
Registering your appliance via the in≠ternet,
Extended Warranty options, ordering
maintenance manuals
Majestic LLC © 01/01/2006
Installing/Removing
Getting things ready to install
your appliance
Unpacking, Inspecting, Electricity, Closets/Alcoves,
Plumbing, Venting
Unpacking
•Check the packing box for external damage. It is your responsibility to
register any damage with the freight company delivering the product.
•Remove the strapping, then slide the cardboard surround off the
machine. Re≠move the foam protecting material and the plastic bag.
•Write down the serial number from the box or the back of the machine.
•Destroy the carton, plastic bags and foam parts after appliance has
been unpacked.
•Children should never be left alone or unattended in the area where
appliances being unpacked.
• If you have any doubts, do not use the appliance and call on a qualified
technician.
OWNER RESPONSIBLE
FOR DAMAGE RESULTING
FROM TIPPING MACHINE
AFTER REMOVING
SHIPPING BOLTS. AVOID
TIPPING MACHINE
FORWARD AFTER
SHIPPING BOLTS ARE
REMOVED
REMOVING THE FOAM DRUM SUPPORT
REPLACING THE METAL BOTTOM PAN.
EXTRA CARE HAS BEEN TAKEN TO PREVENT SHIPPING
DAMAGE. MAJESTIC IS THE ONLY COMPANY WHO SHIPS THIER
APPLIANCES WITH A DRUM SUPPORT TO REDUCE TRANSIT
DAMAGE. THE FOAM DRUM SUPPORT MUST BE REMOVED. HERE
WE DEMONSTRATE HOW TO ACCOMPLISH THIS.
SHIPPING
BOLTS MUST
REMAIN IN
MACHINE
DURING THIS
PROCESS!
Carefully tip the unit
from front to back making sure it can’t tip all the
way over.
Tip the unit the other
direction from the back
and remove the leveling
legs totally
Remove the foam drum
support.
Slide the bottom pan so
that the front slots in the
pan fit over the feet of
the leveling legs.
With the unit tipped
back, loosen the leveling
legs a few turns.
Replace the rear leveling
legs and tighten them
down securely.
Page 5
Majestic LLC © 01/01/2006
Go to the front of the
machine and retighten
the leveling legs and you
are done.
Installing/Removing
Getting things ready to install
your appliance
Unpacking, Inspecting, Electricity, Closets/Alcoves,
Plumbing, Venting
Unpacking
•Check the packing box for external damage. It is your responsibility to
register any damage with the freight company delivering the product.
•Remove the strapping, then slide the cardboard surround off the
machine. Re≠move the foam protecting material and the plastic bag.
•Write down the serial number from the box or the back of the machine.
•Destroy the carton, plastic bags and foam parts after appliance has
been unpacked.
•Children should never be left alone or unattended in the area where
appliances being unpacked.
• If you have any doubts, do not use the appliance and call on a qualified
tech- nician.
OWNER RESPONSIBLE
FOR DAMAGE RESULTING
FROM TIPPING MACHINE
AFTER REMOVING
SHIPPING BOLTS. AVOID
TIPPING MACHINE
FORWARD AFTER
SHIPPING BOLTS ARE
REMOVED
Inspecting WHEN TO REMOVE SHIPPING BOLTS!
WARNING!!! TIPPING THE MACHINE TO POSITION IT FOR USE
MUST BE DONE WITH THE SHIPPING BOLTS STILL IN THE
MACHINE!
TIPPING THE MACHINE WITHOUT SHIPPING BOLTS, CAN
CAUSE THE INNER DRUM TO IMPACT OTHER INTERNAL PARTS,
THUS DAMAGING THEM. POSITION THE MACHINE AS CLOSE
AS POSSIBLE TO IT’S FINAL POSITION AND THEN REMOVE
SHIPPING BOLTS.
√ INSPECT CONTENTS
[ ] Owners Manual
[ ] (Must be installed on hot and
[ ] Warranty Registration Card
[ ] Majestic Literature
SHIPPING
BOLT
Page 6
Majestic LLC © 01/01/2006
Installing/Removing
Getting things ready to install
your appliance (continued)
Electricity
Make sure that the voltage and frequency available correspond with the values stated on the data plate located at
the back of the machine and that the electric system is dimensioned to withstand the maximum current shown on
the data plate. If the socket the machine is connected to does not correspond with the plug, replace the plug with
a suitable one and avoid using adapters or shunts since they could cause over heating and burn out.
Grounding
This appliance must be grounded. In the event of malfunction or breakdown, grounding will reduce the risk of
electric shock by providing a path of least resistance for electric current. This appliance is equipped with a cord
having and equipment-grounding conductor and a grounding plug. The plug must be plugged into an appropriate
outlet that is properly installed and grounded in accordance with all local codes and ordinances.
WARNING- Improper connection of the equipment-grounding conductor can result in a risk of electric shock.
Check with a qualified or service representative or personnel if you are in doubt as to whether the appliance is
properly grounded.
Do not modify the plug provided with the appliance: if it will not fit the outlet, have a proper outlet installed by a
qualified electrician.
Electrical Specifications:
Voltage/Amperage - 115V, 12 Amp, 60 Hz 3 Prong plug attached to the appliance in the factory
Circuit/Protection - 3 wires single phase, 120V, 60 Hz, AC separate 15 amp circuit or greater.
Recessed, Closet and Alcove Installations
This appliance may be installed in a recessed area, closet or alcove. All measurements are in inches.
• If the appliance is to be installed in a closet with zero clearance on the side of the appliance, a total of 12
square inches of free air space movement to the back of the unit must be allowed into the closet.
• If a door is to be installed that potentially encloses the unit while running, the door must allow for a minimum
of 20 square inches of free air movement. There must also be a 1” space from the front of the unit to the closed
door and 1” from the back of the unit to the wall. Additional spacing should be considered for easy installation,
servicing, removal and compliance with applicable local, state and federal codes.
• The floor must be able to support at least 280 lbs and a surface that is solid and level. If machine is to be
placed in cabinet, up off the floor, it may be necessry to secure the drun with a tether to prevent excessive drum
movement. Plese call Majestic Appliances for more information.
• Installations in RV’s or Marine pleasure craft suggest that the machine might best be installed midships in the
boat, or over the axles of the RV where movement is at a minimum.
Adequate blocking should prevent extreme movement when installed in an RV or Marine pleasure craft.
If the appliance is to
be installed in a closet,
the installation must be
completed by a quali≠fied
person or service
representative.
Additional clearances for
floor, wall or door moldings
may be required.
Page 7
Majestic LLC © 01/01/2006
Installing/Removing
Getting things ready to install your
appliance (continued)
CORRECT LEVELING OF UNIT IS ESSENTIAL
It is important for the machine to be perfectly level.
The angle of inclination on the work surface must not
be more than 2 degrees. For this reason the machine
is fitted with adjustable feet used for leveling the
machine before use. In the case of carpeted flooring,
remember to check that the ventilation in the support
area is not plugged.
Exhaust Duct Installation
• Check that all ducting is lint free. Secure ducting with clamps or metal
tape.
• The exhaust duct must end with an approved exhaust vent hood with
swing out dampers or appropriate louvers.
• Flex or rigid metalic ducting is recommended.
• Exhaust duct should be short and straight and slope downwards and
away from the appliance. Long exhaust duct runs can increase drying
time and collect lint.
IMPORTANT! THE EXHAUST DUCT SHOULD NOT BE INSERTED INTO A
CHIMNEY WALL, CEILING OR CONCEALED SPACE OF STRUCTURE.
Page 8
Majestic LLC © 01/01/2006
Drying
Selecting Dry Cycles
Drying Controls, Cottons, Synthetics/Delicates, Wool
Drying Controls
Washing and Drying AutomaticallyIf
you are washing cottons (blue) or
synthetics (Green), the machine will
automatically begin drying at the end
of the wash cycle. Remember that the
temperature for cottons (blue) is higher
than the temperature for synthetics
(green). It takes 15 minutes for the
machine to reach full temperature.
Blue is for Cotton
fabrics. Up to 120
minutes
Green is for
Synthetics, is a
lower temperature
than cotton, up to
90 minutes.
You are in control of the drying cycle
Generally, cottons require more drying time than synthetics. You will notice that the cotton dry cycle
offers up to 120 minutes of drying. Normally cotton shirts take less time than denim jeans. You will
have to experiment a little to determine what dry times work for you.
Size of drying load
With the correct load size, the Majestic™ washes and drys very efficiently. If the wash load is made
up of heavy and dense fabrics, you may need to split the load into two loads. After the first load is
complete, turn off the power, turn the wash timer to the appropriate time, load the machine and turn
the power button on again.
Caution:
For your safety, the door lock stays engaged for the duration of the dry cycle. If you want to open the
door, you may, but you must turn off the power. We suggest waiting 1 minute before opening the door.
Page 9
Majestic LLC © 01/01/2006
Stains
Tips on Stain Removal
BALLPOINT INK
Hold stain against towel, spray closely from behind with aerosol hair spray. Ink should transfer to towel
BEVERAGES
Soak in cool water. Re-wash with stain remover. Launder using chlorine bleach (if safe for fabric) or oxygen bleach.
BLOOD
Immediately rinse with cool water. For dried stains, soak in warm water with a product containing enzymes. Launder.
CANDLE WAX
Scrape off as much as possible with dull side of knife, then iron between absorbent paper, changing paper until wax is absorbed.
CHOCOLATE
Pre-wash with product containing enzymes in warm water or treat with pre-wash stain remover. Launder.
COLLAR, CUFF SOIL
Pre-wash with stain remover, liquid laundry detergent or paste of granular detergent and water. Launder.
COSMETICS
Pre-wash with stain remover, liquid laundry detergent or paste of granular detergent and water or rub with bar of soap. Launder.
DAIRY PRODUCTS
Soak in a product containing enzymes for at least 30 minutes (hours for aged stains). Launder.
DEODORANTS & ANTI-PERSPIRANTS
Pre-treat with liquid laundry detergent. Launder. For heavy stains pre-treat with pre-wash stain remover. Allow to stand 5 to 10 minutes.
Launder using an oxygen bleach.
EGG
Soak in product containing enzymes. Launder.
FRUIT JUICE
Rinse with cool water.
GRASS
Soak in product containing enzymes. If stains persist, launder using a chlorine bleach (if safe for fabric) or oxygen bleach.
GREASE SPOTS, OIL
Pre-treat with pre-wash stain remover or liquid laundry detergent. For heavy stains, place stain face down on clean paper towels. Apply
cleaning agent to back of stain. Replace towels under stain frequently. Let dry, rinse and launder using hottest water safe for fabric.
INK
Use ink eradicator on undyed, untreated linen.
LEMON, LIME JUICE, VINEGAR
Rinse immediately with cool water.
LIPSTICK
On pure linen, rub with a little salad oil to dissolve lipstick, then launder to remove oil.
MEAT JUICE
Rinse with cool, never hot, water.
MILDEW
Badly mildewed fabrics may be beyond repair. Launder stained item using chlorine bleach, (if safe for fabric). Or soak in oxygen bleach
and hot water. Then launder.
PERSPIRATION
Use pre-wash stain remover or rub with bar of soap. If color of fabric has changed, apply ammonia to fresh stains, white vinegar to old
stains and rinse. Launder using hottest water safe for fabric.
RED WINE
Cover with salt if stain is fresh, then rinse with cool water. If stain has dried, try club soda.
SCORCH
Treat same as for mildew (listed above).
TAR
Scrape residue from fabric. Place stain face down on paper towels. Sponge with cleaning fluid. Replace towels frequently. Launder in
hottest water safe for fabric.
TOMATO
Rinse with cool water.
WHITE WINE
Use club soda.
Page 10
Majestic LLC © 01/01/2006
Troubleshooting tips
Read here, then call us
Even though your washer dryer has been carefully designed and constructed, something
may still go amiss with your machine. Before rushing to technician, please check that the
operations listed below have been carried out. In many cases you will save time, money
and a bother. Our statistics show that many calls made to our service representatives
could have been solved with a little more attentions to these basic operations.
The washer dryer won’t start
Check that:
• the plug is pushed right into the main socket
• the door is closed tight
• the ON/OFF button has been pressed
The washer dryer won’t fill with water
Check that:
• the tap is open and properly connected to the inlet pipe
• the inlet pipe is not bent
• the inlet pipe is placed at least 80cm/32in. above ground level
The washer dryer drains continuously
Check that:
• the drain hose is not blocked
• the drain hose is placed at least 80 cm/20 inches above ground level but not more than
1 meter/40 inches above ground level.
• the drain pump doesn’t work, the filter net of the drain pump is blocked
There is too much foam in the tub
Check that:
• the detergent being used is meant for automatic machines and not for washing by hand
that the amount used is correct as stated in this manual and not more
The washer dryer vibrates too much when spinning
Check that:
• the shipping bolts have been removed (see installation manual)
• the machine is level
• the washing load is according to the instructions given in this booklet
The washer dryer fills up with water and won’t drain.
Check that:
• The drain hose is only 6” into the stand pipe.
• The drain hose is not clogged
• Standpipe is correct specification
The washer dryer is not drying
Check that:
• the plug is fitted firmly into the main socket
• the door is properly closed
• the wash program knob is in position *
• the drying time knob is not in position 0.
• Use the cotton (blue) hotter cycle with cotton fabrics, and use synthetic (red) cooler cycle for synthetic fabrics.
• the recommendations for the maximum loads and drying times have been followed
Wrinkling
Check that:
• avoid mixing heavy fabrics with light fabrics
• Load your dryer to allow for enough room for clothes to tumble
• Make sure you are not using the cotton drying cycle with synthetic clothes
• the recommendations for the maximum loads and drying times have been followed
Page 11
Majestic LLC © 01/01/2006
Owner Care
Maintenance Tips
Owner Care
Exterior, interior, technical specifications
Exterior
Keeping the exterior of the unit clean will preserve the value of your investment. Use a soft cloth and liquid cleanser to
clean and maintain the exterior.
Interior
Do not use solvents either to clean the machine or to do the wash.Clean the detergent dispenser ever so often. This is
very simple and should be done with water. Detergent dispenser - Your machine has an extractable dispenser to make it
even easier. From time to time, using water and a damp clothes remove excess detergent, softener and any build up of
bleach that may have accumulated in the detergent drawer.
Page 12
Majestic LLC © 01/01/2006
/Preparing your appliance for service
MAJESTIC™ has hundreds of service agents all over the country including
a partnership with the Sears Network of Appliance Service, with over 15,000
service agents. Call us on our toll free hotline (1-800-678-8002) and we
will serve your needs. Remember that if your service call is the result of
component failure we will be happy to cover it under your warranty. If it
is not, you will be charged for the time and travel. Our call center is
available Monday through Friday from 8:00 am to 5:00 PM. You will find our
technicians helpful, knowledgeable and friendly and available from 7 am to
3:30 Pacific time.
PREPARING YOUR APPLIANCE - Your Majestic Appliance may have
been installed in a home, condominium or apartment. Clothes, detergent
and other items must be cleared away and units must be accessible. RV
or Marine installations require that the owner remove trim, doors and other
items as well as repositioning the machine to make the back accessible.
Remote Locations
In certain cases, even the largest appliance manufacturers do not have service in remote
locations. Having product in a home is one thing. Having appliances in a home that moves all
the time is another. Majestic has taken serveral important steps to accommodate this difficult
situation. Service knowledge on demand™ is one such step that only Majestic offers. Often
applaince dealers who service traditional home appliances can view our training movies online
and make a repair where no other option would be available. But after all of these steps are
exhasuted Majestic Appliances may have to request that an RV Owner drive to the nearest
authorized service dealer in order for us to provide service.
Improper installations, by owners or dealers are the responsibility of the installer. Majestic is
happy to provide technical support in such cases. Service costs and travel expense will be paid
by the owner and negotiated between the owner and the installer. Please run your machine
after it is initially installed through all cycles to verify that the machine works and has
been installed according to installation guidelines.
Majestic LLC © 01/01/2006
Page 14
Owner Care
Warranty Information
Your Majestic™ appliance is covered by this warranty
under normal personal, family, household or RV use in
the US and Canada
Your Majestic™ Appliance is covered under the limited warranty for 1 full year from the
original purchase, on the mechanical parts. Only when installed in accordance with the
instructions in the manual does our warranty apply. It is the option of the factory to replace
or repair any part or material which becomes defective as a result of poor workmanship or
material under normal personal, family or household use.
During this one year, Majestic™ Appliance will provide all labor and parts necessary to repair
any defect as long as the appliance has been installed and operated in accordance with the
instructions provided. In the case of a tight installation, including RV’s or Marine pleasure
craft, providing ready access to the appliance is the responsibility of the owner including
wood or metal trim, doors or hardware. In all cases our flat rate schedule for labor applies.
In no event, shall Majestic™ Appliances or its parent company, be liable for incidental or
consequential damages or for damages resulting from external causes such as abuse,
misuse, incorrect voltage or acts of God. This warranty does not cover service calls which
do not involve defective workmanship. Trip fees are also not covered under this warranty.
Incorrect installation procedures or materials not provided by Majestic™ appliances are not
covered. Therefore, service calls, diagnosis, and repair costs for a service call which does
not involve defective workmanship or materials will be the responsibility of the consumer/
owner. This might include but is not restricted to, improper hookup or leveling, cleaning of air
and/or water filters, replacing broken door handles, or excessive movement caused by travel
or recreation or installation.
Being fair, most work is covered. If the machine has malfunctioned Majestic™ covers it. If
the installer/consumer has omitted or done something to cause the machine to malfunction,
they cover it. Warranty registration and proof of purchase are required for any warranty
service.
You can call us toll free at 1-800-678-8002 for service. Our address is
Majestic Appliances, LLC
3201 NW Lower River Rd. #9
Vancouver, WA 98660
Extended Warranty Information
Contact us at our office for up-to-date information on extended warranty costs. You
can obtain an additional warranty through our exclusive warranty agreement. To be
eligible for this warranty you must use the machine for personal use, not in a commercial
application, purchase the coverage, register the contract and received your contract
number or certificate. The unit must be registered with our warranty agency and have a
contract number issued within the 30 days of ownership,
to the original owner, or this offer is void. You can apply for extended warranties
online at http://www.thehotdeal.com our online partner.
Page 15
Majestic LLC © 01/01/2006
Owner Care
Accessories
You have a broad selection of installation and owner
accessories available. Just ask your local deale or
give us a call.
PN 17-1051 Dryer Vent Kit includes:
Louvered Vent Hood
Pipe and Collar
UL Lised Transition Duct
(2) Clamps
PN 17-1052 Econo Outside Vent
Calcium filled Polypropylene
Melting Point 325 Degrees Approx.
UV Inhibitor added
Opens with ease for maxiumu exhaust flow
Curved Louvers for quieter operation
Durable Weather Resistant
Dimensions - 6” wide x 6” tall x 5/8” flange depth
Free - 4” diamteter - 19.5 square inches.
PN 17-1054 Deluxe Chrome Outside Vent
Die cast ZAMAK with chrome finish
Black polypropylene flange
4” hose adapter
Pre-drilled for #8 screws
dimensions - 54.25” tall x 5.8 “ wide
PN 17-1053 Econo Outside Vent
x 2.25” deep
Paintable ABS
UV Inhibitor
Melting Point 325 degrees approx.
UV Inhibitor added
Easy installation
Rubber Flap quiet when traveling
Durable Weather Resistant
Dimensions - 5. 25” wide 6” tall x 2 25” deep
Free Air - 4” diameter = 19.5 Square Inches
PN 17-1056 drip Pan
High Density ABS
PN 17-1050 Stackable
Attaching Kit
Part for stacking the washer
and dryer separates
Page 16
PN 17-1054 Majestic Laundryu Detergent
Low Sudsing Action
Approved in all 50 states
Majestic LLC © 01/01/2006