1
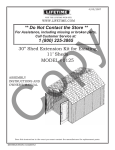
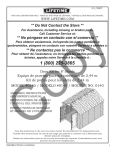
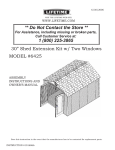
04/21/2008
®
VISIT THE LIFETIME WEB SITE:
WWW.LIFETIME.COM
** Do Not Contact the Store **
For Assistance, including missing or broken parts,
Call Customer Service at:
y
1 (800) 225-3865
30” Shed Extension Kit 11’ Sheds
op
MODEL #0125
C
ASSEMBLY
INSTRUCTIONS AND
OWNER’S MANUAL
Save this instruction in the event you must contact the manufacturer for replacement parts.
INSTRUCTION #1036820
**A MINIMUM OF TWO ADULTS ARE REQUIRED FOR ASSEMBLY**
BEFORE BEGINNING ASSEMBLY
Identify and inventory all parts using the checklist boxes on the Parts List. Keep the
hardware bags and their contents separate. If any parts are missing, call our Customer
Service Department.
SAFETY INSTRUCTIONS
Failure to follow these safety instructions may result in serious injury or property damage. Proper and complete
assembly, use and supervision is essential for proper operation and to reduce the risk of accident or injury. A high probability
of serious injury exists if this display is not installed, maintained, or operated properly. • If using a ladder during assembly,
use extreme caution. Follow all warnings and cautions on the ladder carefully. • 2 people are required for assembly. •
Misuse could result in system failure. • If technical assistance is required, contact the manufacturer.
Most injuries are caused by misuse and/or failure to follow instructions.
PARTS LIST
AA
1028035
Center Roof Cap (1021070)* 1
AB
1019503
Gutter Channel
2
AC
1007977
Wall Support Channel
2
AD 1007988
Truss Channel
1
AE
1007996
Inner Roof Panel (1000496)* 2
AF
1007997
Wall Panel (1000272)*
2
AJ
1008000 Inner Floor Panel (1000463)* 2
AK
1008001
Roof Support Strip
4
AM 1020423
Truss Support Strip
2
Shed Parts Box [1019238]
GA 1010271
1/2” Foam Cube
4
Skylight Hardware Bag [1011616]
1
LA
BW01200 #10-1” Fender Washer
7
LB
1010132
#10 x 5/8” Pan Head Screw 7
Truss Extension Hardware Bag [1016014] 1
FA
1009117
Floor Bracket
2
FB
300072
1/4” x 1 1/2” Hex Bolt
11
FC
BN00300 1/4” Cap Nut
11
FD 1012933
Center Gutter Connector
1
Shed Screw Hardware Bag [1011615]
1
SS
BS07500
1/4” x 5/8” Screw
60
LB
LA
FA
FB
SS
FC
FD
* The number in Parentheses
indicates the number molded into the
plastic part.
GA
Tools and Materials Required for
Assembly
(Not Included)
1.
2.
3.
7/16” Wrenches (2)
3/8” Wrenches (2)
#2 Phillips screwdriver or
Electric drill with phillips head
HARDWARE IS NOT ACTUAL SIZE
(unless otherwise indicated)
AE
AA
AJ
AF
AK
AM
AB
AC
AD
Site Selection
a. This extension kit adds another 30” to the length of your shed. Before beginning expansion of your shed be
sure that your site can accommodate the new size.
If you are Extending an Existing Shed
1. See “Option 2” instructions on page 11. If you have not yet assembled your shed, use the
“Option 1” instructions on the next page.
3
Option 1: Add Extension Kit During Shed Assembly
1. Check contents of boxes and compare to parts listed on the Parts List.
2. Follow instructions that came with your shed, but when you come to the following sections of
your Owner’s Manual assemble the additional floor, wall, window and truss parts that are included
in this kit.
Site Selection
Opt. 1.1: Add 30” to the length of your site’s wooden platform (shown) or cement platform; the width will remain
the same. This may require the use of additional lumber or other materials.
Note: Floor studs are all 16” on center with one at 14” on center. Refer to Site Selection & Platform Instructions
in Owner’s Manual.
16”
4
14”
Assemble Floor
Note: Refer to the corresponding section in your Owner’s Manual for more specific instructions.
Opt. 1.2: Fit together the two Inner Floor Panel extensions (AJ).
AJ
AJ
Opt. 1.3: Connect the Inner Floor Panel extensions (AJ) to the other Inner Floor Panels and finish off by
connecting the last two Outer Floor Panels that came with your shed.
5
Assemble Wall (Right or Left)
Note: Refer to the corresponding section in your Owner’s Manual for more specific instructions.
Opt. 1.4: Add the two Wall Panel (AF) extensions as you attach the other Wall Panels around the shed.
Assemble Truss Frames
Note: Refer to the corresponding section in your Owner’s Manual for more specific instructions.
Opt. 1.5: Fit two Truss Support Strips (AM) together. Bolt Truss Support Strips, Center Gutter Connector
(FD) and two Gutter Channels (AB). Refer to the Owner’s Manual that came with your shed when assembling
other truss frames.
FD
AM
AM
FB
AB
Finger Tighten Hardware
FC
WARNING
AB
Do not overtighten the Cap Nut. If the end of
the Bolt breaks through the plastic cap, call our
Customer Service Department.
AM
6
Opt. 1.6: Attach a Gutter Channel (AB) (Truss Support Strips fit inside Gutter Channel). Attach Truss
Channel (AD) to Gutter Channel at each end.
AM (x2)
FC
AD
FB
AB
AD
FC
FB
Tighten All Hardware
Opt. 1.7: Attach Truss Assembly to two Wall Support Channels (AC). Do not completely tighten the Cap Nut
(FC) until after truss is secured to the wall.
FC
AB
Use Second
Holes from
the end.
AC
AC
FB
WARNING
Do not overtighten the Cap Nut. If the end of
the Bolt breaks through the plastic cap, call our
Customer Service Department.
Opt. 1.8: Continue attaching other Truss Assemblies to Wall Support Channels (AC) according to your original
Shed Instructions.
7
Install Truss Assemblies
Opt. 1.9: Follow Owner’s Manual instructions to assemble the connect Truss Frames included in this kit to your
shed, along with those that came with your shed.
Opt. 1.10: Attach one Floor Bracket (FA) to each Wall Support Channel (AC) and fasten the Floor Bracket
to the floor. You only need to do this step if you plan to anchor your shed. See the “Anchoring the Shed” step
at the end of your Owner’s Manual.
WARNING
Do not overtighten the Cap Nut. If the end of
the Bolt breaks through the plastic cap, call our
Customer Service Department.
Tighten all Hardware.
FC
AC
FA
FB
8
Install Roof Sections
Opt. 1.11: Attach Inner Roof Panels (AE) using Screws (SS) Always start inserting screws at the top of the
Inner Roof Panel. Refer to the Owner’s Manual that came with your original shed.
9
Opt. 1.12: Install a Center Roof Cap (AA) with 1/4” x 5/8” Screws (SS) to the Roof Panels.
Only use a hand
screwdriver for the
Skylights
Attach Roof Cap (AA) to Truss on
both sides with 1/4” x 5/8” Screws
(SS).
Repeat Step 23 for all four
center roof sections.
Opt. 1.13: Fold End Roof Cap along its hinge. Install it at the front of the shed.
Only use a hand
screwdriver on this step
Note: This is an
exterior view.
Note: This is an interior upward
view.
10
Option 2: Add Extension Kit to an Existing Shed
**Save all hardware for re-assembly!**
ATTENTION: If your existing shed is anchored to the ground, remove all
anchoring hardware before following these steps.
Opt. 2.1: Remove the four Lower Roof Panels and two Center Roof Caps that are highlighted below
(if the existing Shed has Skylights, leave them attached to the Roof Caps).
Note: Your shed may be shorter than shown above. Skip the very back Roof Panels (slightly more narrow than the middle Roof Panels) and then remove the next two Roof Panels from each side of the shed
(along with the connected Roof Caps).
Repeat Steps 2.2 through 2.4 for both sides of the shed.
Opt. 2.2: Remove all screws from the highlighted Wall Panel that connect it to adjoing Wall Panels
and to the Wall Support.
Remove
this panel.
Remove
this panel.
11
Opt. 2.3: Tip the Wall Panel inward.
Note: To remove a Wall Panel, slide it to the left (when looking at it from inside the shed) until it lifts
out.
Opt. 2.4: Use a long flat screwdriver to gently pry the bottom corner of the Wall Panel so that it has room to slide
on the inside of other Wall Panels. Slide the Wall Panel to the left, and then remove the panel.
Note: As you remove the Wall Panels, have one person support the Truss assembly so that it does not
fall over.
12
Opt. 2.5: Remove the Truss assembly and set it aside for later.
Opt. 2.6: With at least on person on each side of the shed, tip the back section of the shed forward to about a 45
degree angle and slide the back section away from the shed..
13
Opt. 2.7: Fit together the two Inner Floor Panel extensions (AJ).
AJ
AJ
Opt. 2.8: Connect the Inner Floor Panel extensions (AJ) to the other Inner Floor Panels on the main section
of the shed.
Opt. 2.9: With at least on person on each side of the shed, tip the back section of the shed forward to about a 45
degree angle and slide it forward to re-connect it to the rest of the shed.
14
Opt. 2.10: Fit two Truss Support Strips (AM) together. Bolt Truss Support Strips, Center Gutter Connector
(FD) and two Gutter Channels (AB). Refer to the Owner’s Manual that came with your shed when assembling
other truss frames.
AM
AM
FB
AB
Finger Tighten Hardware
FC
WARNING
AB
Do not overtighten the Cap Nut. If the end of
the Bolt breaks through the plastic cap, call our
Customer Service Department.
AM
Opt. 2.11: Attach a Gutter Channel (Truss Support Strips fit inside Gutter Channel). Attach Truss Channel
(AD) to Gutter Channel at each end.
AM (x2)
FC
AB
FB
AB
AB
FD
FC
FB
Tighten All Hardware
Opt. 2.12: Attach Truss Assembly to two Wall Support Channels (AC). Do not completely tighten the Cap Nut
(FC) until after truss is secured to the wall.
FC
AB
Use Second
Holes from
the end.
AC
AC
FB
15
Opt. 2.13: Replace the two Wall Panels that were previously removed. Add the two new Wall Panels that came
with this kit.
Note: As new panel slides into place be sure that screw bosses along the sides interlock properly with
the adjoining Wall Panels.
1
3
2
1. Set Wall Panel Tabs into Floor Panel Slots.
2. Slide Wall Panel to the left until the Wall Panel locks into place.
3. Use a Rubber Mallet to nudge the panel into position. Be careful
not to damage the edge of the wall panel.
Opt. 2.14: Replace the Truss assembly that was previously removed. Add the new Truss assembly from steps
2.10 to 2.12.
Opt. 2.15: Replace the four Lower Roof Panels that were previously removed. Add the two new Lower Roof
Panels that came with this kit.
16
Opt. 2.16: Install the Center Roof Cap (AA) that came with this Kit.
Only use a hand
screwdriver for the
Skylights
Attach Roof Cap (AA) to Truss on both
sides with 1/4” x 5/8” Screws (SS).
Opt. 2.17: Along the outside edges of the shed, Fasten the new Trusses to the underside of the new Roof
Panels (Fig. 1). Insert two Foam Cubes (GA) at each truss location (Fig. 2).
SS
SS
GA
SS
GA
Fig. 1
GA
Fig. 2
17
Enhance your Lifetime® Outdoor Shed by purchasing the following Shed
Accessories:
Model #
0111
Window Shutters
Two decorative window shutters.
0112
Shed Lights (2 pack)
Two battery powered Touch Lights.
0113
16” Pegboard Strips w/ hardware
Two sixteen inch Pegboard Strips with hooks. Great for hanging large items such as:
rakes, shovels, or other tools.
0114
10” Shelf Kit w/ hardware (5 pack)
Five 30” x 10” Shelves with hardware.
0115
14” Shelf Kit w/ hardware (5 pack)
Five 30” x 14” Shelves with hardware.
6426
60” Shed Extension Kit w/ 2 windows
Extend your shed five feet for the ultimate storage building.
To purchase shed accessories, visit us at:
www.buylifetime.com
Or call:
1 (800) 424-3865
Congratulations on your Lifetime® Outdoor Shed purchase. By following the
instructions below, your new Lifetime shed should provide you with years of service
and enjoyment.
Cleaning and Care
The polyethylene walls and shelves are stain- and solvent resistant. To clean, use a mild soap and a soft-bristled
brush. Abrasive cleaning materials may scratch the plastic and are not recommended. Repair scratches or
rust spots on the metal by Sanding the affected area lightly; using a rust preventative spray primer; and finally,
spraying with a high-gloss spray enamel paint. Avoid placing a direct heat source on or near surfaces unless
using a heat barrier.
For warranty details or to register your product, visit
www.lifetime.com or call 801-776-1532
18