1
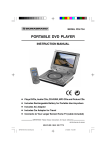
MODEL PDV-705
PORTABLE DVD PLAYER
INSTRUCTION MANUAL
•
•
•
•
•
•
PLAYS DVDs
•
CONNECTS TO YOUR LARGER SCREEN HOME TV
(cable included)
PLAYS ALL AUDIO CDs
PLAYS MP3 RECORDED DISCS
PLAYS CD-R & CD-RW DISCS
PLAYS JPEG PHOTO DISCS
INCLUDES RECHARGEABLE BATTERY FOR
PORTABLE USE ANYWHERE
PLEASE READ CAREFULLY BEFORE USE
IB-PDV705-WM-E-010506
IB-PDV705-WM-E-010506.pmd
1
4/3/2006, 9:24 AM
SAFETY INSTRUCTIONS
WARNING
TO PREVENT FIRE OR SHOCK HAZARD, DO NOT USE THE PLUG WITH AN EXTENSION
CORD, RECEPTACLE OR OTHER OUTLET UNLESS THE BLADES CAN BE FULLY INSERTED
TO PREVENT BLADE EXPOSURE. TO REDUCE THE RISK OF FIRE OR ELECTRIC SHOCK,
DO NOT EXPOSE THIS APPLIANCE TO RAIN OR MOISTURE. TO PREVENT ELECTRICAL
SHOCK, MATCH WIDE BLADE PLUG TO WIDE SLOT, FULLY INSERT.
CAUTION
RISK OF ELECTRIC SHOCK
DO NOT OPEN
T h e l i g h t n i n g flash w i t h
arrowhead symbol, within an
equilateral triangle, is intended
to alert the user to the presence
of uninsulated “dangerous
voltage” within the product’s
enclosure that may be of
sufficient
m agnitude
to
constitute a risk of electric
shock to persons.
WARNING: TO REDUCE THE
RISK OF ELECTRIC SHOCK,
DO NOT REMOVE COVER (OR
BACK).
NO
USER
SERVICEABLE PARTS INSIDE.
REFER
SERVICING
TO
QUALIFIED
SERVICE
PERSONNEL.
The exclamation point within
an equilateral triangle i s
intended to alert the user to
the presence of important
operating and maintenance
(servicing) instructions in the
literature accompanying the
appliance.
See bottom of the set
IMPORTANT SAFETY INSTRUCTIONS
1.
2.
3.
4.
5.
6.
7.
8.
Read these instructions.
Keep these instructions.
Heed all warnings.
Follow all instructions.
Do not use this apparatus near water.
Clean only with dry cloth.
Do not block any ventilation openings, install in accordance with the manufacturer’s instructions.
Do not install near any heat sources such as radiators, heat registers, stoves, or other
apparatus (including amplifiers) that produce heat.
9. Do not defeat the safety purpose of the polarized or grounding-type plug. A polarized plug
has two blades with one wider than the other. A grounding type plug has two blades and a
third grounding prong. The wide blade or the third prong are provided for your safety. If the
provided plug does not fit into your outlet, consult an electrician for replacement of the
obsolete outlet.
10.Protect the power cord from being walked on or pinched particularly at plugs, convenience
receptacles, and the point where they exit from the apparatus.
11. Only use attachments/accessories specified by the manufacturer.
1 2 . Use only with the cart, stand, tripod, bracket, or table specified by the manufacturer, or
sold with the apparatus. When a cart is used, use caution when moving the cart/apparatus
combination to avoid injury from tip-over.
S3152A
13.Unplug this apparatus during lightning storms or when unused for long periods of time.
1
IB-PDV705-WM-E-010506.pmd
2
IB-PDV705-WM-E-010506
4/3/2006, 9:24 AM
SAFETY INSTRUCTIONS
14.Refer all servicing to qualified service personnel. Servicing is required when the apparatus
has been damaged in any way, such as power-supply cord or plug is damaged, liquid has
been spilled or objects have fallen into the apparatus, the apparatus has been exposed to
rain or moisture, does not operate normally or has been dropped.
15.This appliance shall not be exposed to dripping or splashing water and that no object filled
with liquid such as vases shall be placed on the apparatus.
Do not apply oil or petroleum products or solvents to any part of this set.
FCC NOTE
This equipment has been tested and found to comply with the limits for a Class B digital
device, pursuant to Part 15 of the FCC rules. These limits are designed to provide reasonable
protection against harmful interference in a residential installation. This equipment generates,
uses and can radiate radio frequency energy and, if not installed and used in accordance
with the instructions, may cause harmful interference to radio communications. However,
there is no guarantee that interference will not occur in a particular installation. If this
equipment does cause harmful interference to radio or television reception, which can be
determined by turning the equipment off and on, the user is encouraged to try to correct
the interference by one or more of the following measures.
- Reorient or relocate the receiving antenna.
- Increase the separation between the equipment and receiver.
- Connect this equipment into an outlet on a circuit different from that to which the receiver
is connected.
- Consult the dealer or an experienced radio/TV technician for help.
WARNING:
Changes or modifications to this unit not expressly approved by the party responsible for
compliance could void the user’s authority to operate the equipment.
NOTE
This product incorporates copyright protection technology that is protected by method
claims of U.S. patent numbers 4,631,603; 4,819,098; 4,907,093; 5,315,448; and 6,516,132
and other intellectual property rights owned by Macrovision Corporation and other rights
owners. Use of this copyright protection technology must be authorized by Macrovision
Corporation, and is intended for home and other limited viewing uses only, unless otherwise
authorized by Macrovision Corporation. Reverse engineering or disassembly is prohibited.
CAUTION
Included Accessories
Use of controls or adjustments or
performance of procedures other than
those specified herein may result in
hazardous radiation exposure. Do not
open covers and do not repair yourself.
Refer servicing to qualified personnel.
This DVD VIDEO player is classified as
CLASS 1 LASER PRODUCT as stated on
the bottom of the set.
The following items are included with your
DVD player:
- Remote Control
- AAA Batteries (2)
- Rechargeable battery
- AC adaptor
- Audio/Video Cables
- User’s Guide
- Product Registration Card
2
IB-PDV705-WM-E-010506.pmd
3
IB-PDV705-WM-E-010506
4/3/2006, 9:24 AM
TABLE OF CONTENTS
• Getting Started:
Safety Instructions------------------------------------------------------------------------------------------1
Location of Controls --------------------------------------------------------------------------------------4
Power Supply ----------------------------------------------------------------------------------------------7
Remote Control Operation -----------------------------------------------------------------------------8
Notes on Discs ---------------------------------------------------------------------------------------------9
• Basic Operation:
1. Basic Play----------------------------------------------------------------------------------------------10
2. Using the Search Functions---------------------------------------------------------------------11
3. Selecting Audio Mode---------------------------------------------------------------------------11
4. Change Subtitle Language---------------------------------------------------------------------11
5. Displaying Disc Information--------------------------------------------------------------------12
6. Repeat Play-------------------------------------------------------------------------------------------13
7. Slow-Motion Play----------------------------------------------------------------------------------13
8. Zoom Play-------------------------------------------------------------------------------------------14
9. Search for Preferred Play-----------------------------------------------------------------------14
10. Viewing from a Desired Angle----------------------------------------------------------------15
11. Programmed Play---------------------------------------------------------------------------------15
12. MP3 Disc Operation------------------------------------------------------------------------------16
13. JPEG or Picture Disc Operation---------------------------------------------------------------16
• Connection
System Connections -------------------------------------------------------------------------------------17
Watching a DVD on Your TV --------------------------------------------------------------------------19
• Initial Setting:
System Setup (TV System, LCD Mode, TV Type & Default)
Setting the TV System -----------------------------------------------------------------------------20
Setting the LCD Mode ----------------------------------------------------------------------------20
Selecting the TV Type -----------------------------------------------------------------------------21
Default - Resetting the Functions to Factory Defaults-------------------------------------21
Language Setup (OSD, Audio, Subtitle & Menu) ------------------------------------------------22
Audio Setup ------------------------------------------------------------------------------------------------22
Video Setup ------------------------------------------------------------------------------------------------22
Speaker Setup ---------------------------------------------------------------------------------------------22
•
•
•
•
Precautions ------------------------------------------------------------------------------------------------23
Trouble Shooting -----------------------------------------------------------------------------------------24
Glossary -----------------------------------------------------------------------------------------------------27
Specifications ---------------------------------------------------------------------------------------------28
3
IB-PDV705-WM-E-010506.pmd
4
IB-PDV705-WM-E-010506
4/3/2006, 9:24 AM
LOCATION OF CONTROLS
Front View
1
2
3
4
4
11
12
13
14
15
5
6
7
8
9
16
17
18
10
19
1.
2.
3.
4.
5.
6.
7.
8.
9.
10.
11.
12.
13.
14.
15.
16.
17.
18.
19.
20.
21.
22.
23.
20
21 22
23
TFT LCD SCREEN – Provides a high resolution picture.
SCREEN BRIGHTNESS BUTTONS – Adjust the brightness of the LCD screen.
SCREEN COLOR BUTTONS – Adjust the color of the LCD screen to your taste.
SPEAKERS – Provide high quality stereo sound.
AUDIO BUTTON – Press to select the audio channel (or director’s cut channel).
DISPLAY BUTTON – Press to view the disc information and times.
SUBTITLE BUTTON – Press to select or change the subtitles (if available on your disc).
– Press to play fast forwards.
FORWARD BUTTON
BACKWARD BUTTON
– Press to play fast backwards.
VOLUME BUTTONS – Press to adjust the volume (up + or down –).
SCREEN OFF BUTTON – When you fold down the LCD screen, the LCD panel will push
this button and turn off the LCD screen but keeps the set working for viewing DVDs on
your TV. This is useful when the AUDIO/VIDEO cable is connected.
NEXT BUTTON
– Press to skip to the next title, chapter or track.
PREVIOUS BUTTON
– Press to skip to the previous title, chapter or track.
– Stops playback, press twice for full stop.
STOP BUTTON
PLAY/PAUSE BUTTON
– Press to start or pause play..
SETUP BUTTON – Press to display the DVD player’s setup menu.
DIRECTION BUTTONS – Used to select options and DVD menus and MP3 tracks.
OK BUTTON – Press to confirm a selection.
DISC DOOR – Open the door and set the disc inside it.
SET OPEN BUTTON – Opens the set.
ON/STANDBY INDICATOR – The indicator lights up in red when the set is in standby
mode and in green when the set is on.
OPEN BUTTON – Press to open the disc door.
REMOTE SENSOR – Receives signals from the remote control.
4
IB-PDV705-WM-E-010506.pmd
5
IB-PDV705-WM-E-010506
4/3/2006, 9:24 AM
LOCATION OF CONTROLS
Right Side View
1
2
3
4
5
6
1. PHONES JACK – Insert your headphones (not included) to enjoy the sound without disturbing
others.
2. VIDEO/AUDIO OUT JACK – Connects the DVD player to your TV using the A/V cable (included).
3. S-VIDEO JACK – Connects the DVD player to your TV using an S-Video cable (S-Video
cable is not included).
4. COAXIAL JACK – Connects the DVD player to your home theater system using a coaxial
cable (coaxial cable is not included).
5. POWER ON/OFF SWITCH – Slide to switch the DVD player ON or OFF.
6. DC IN JACK – For connecting to the supplied AC Adaptor.
Rechargeable Battery
1
2
3
1. RECHARGEABLE BATTERY – For DC power supply (included).
2. BATTERY LED INDICATOR – Will flash when charging the battery and be steadily on
when the battery is fully charged.
3. BATTERY TAB – Push to detach or remove the battery.
5
IB-PDV705-WM-E-010506.pmd
6
IB-PDV705-WM-E-010506
4/3/2006, 9:24 AM
LOCATION OF CONTROLS
1. SCREEN ON/OFF button – Press to turn the
LCD screen ON or OFF (for external TV use).
2. MENU button – Press to display the disc’s menu
(if your disc has a menu).
3. TITLE button – Displays the title menu if
present in the disc.
REMOTE CONTROL
20
ON/STANDBY
SCREEN ON/OFF
1
2
3
TITLE
11
MENU
/
button – Press to skip to previous
title, chapter or track / press and hold more than
1 second to fast backward playback.
5.
/
button – Press to skip to next title,
chapter or track / press and hold more than 1
second to fast forward playback.
DIRECTION buttons – Used in DVD menus &
audio MP3 track selection.
OK button – Press to start/pause play or enter a
command or confirm a selection.
NUMERIC buttons – Used in DVD menus
& audio CD/MP3 track selection.
ANGLE / PROGRAM button – In DVD mode,
press to display angle menu (if present on the
DVD disc); Press to program your favorite track
in CD/MP3 mode.
VOLUME buttons – Press to adjust the volume
level (remember to also adjust your TV’s volume).
12
STOP
4
DISPLAY
5
13
14
6
7
6.
SUBTITLE
AUDIO
8
SEARCH
9
4.
SETUP
PROGRAM
ZOOM
ANGLE
SLOW
REPEAT
10
15
16
7.
8.
17
18
19
9.
VOLUME
10.
11. ON/STANDBY button – Press to turn the set ON or STANDBY.
12. SETUP button – Press to display the DVD player’s setup menu.
13. DISPLAY button – Press this button to view the elapsed time, title or chapter
information and the track numbers during play.
14. STOP button – Stops play, press twice to full stop.
15. SUBTITLE button – Press to setup the subtitle (if available on your disc).
16. AUDIO button – Press to select the desired audio channel.
17. SEARCH button – Allows you to select the desired disc starting time, track or title or
select the point in time to start playback.
18. REPEAT button – Press this button to repeat the current track, chapter, title, a chosen
section (A to B), or all of the disc.
19. SLOW/ZOOM button – Press to zoom the playing picture in DVD mode or hold more than 1
second to view slow motion playback.
20. REMOTE CONTROL’S lens – Sends the signal to the set. Do not block or cover this,
keep this clean for best operation.
6
IB-PDV705-WM-E-010506.pmd
7
IB-PDV705-WM-E-010506
4/3/2006, 9:24 AM
POWER SUPPLY
You can power this portable DVD player by connecting the AC adaptor or by the rechargeable
battery (both included).
A. Using the AC adaptor
This player is supplied with an AC adapter for
powering the unit and charging the battery.
Insert the AC adaptor plug to the DC IN jack on
the portable DVD player and connect the
adaptor to a wall outlet.
B. Using the rechargeable battery
The rechargeable battery pack is suitable for portable use and when it is convenient for you to
enjoy the unique functions of the unit outdoors.
Remember to charge the battery fully before initial use.
Attaching the Battery
Refer to the following steps for attaching the battery:
1. Make sure the player is off and the AC adapter is
disconnected.
2. Place the DVD player on a soft and smooth surface with
the bottom of the unit facing up.
3. With one hand on the DVD player to prevent it from
moving, take the battery and align the plastic tabs on the
battery with slots on the player, and slide it forward to lock,
The battery will click into place.
slot
slot
Detaching the Battery
1. Make sure the player is off and the AC adapter is
disconnected.
2. Push the tab on the battery down.
3. Slide and lift the battery out.
2
SLID
E
3
tab
To charge the battery
1. Insert the adaptor’s plug into the DC IN jack on the DVD player and connect the
adaptor to a wall outlet. After 5 seconds, the battery LED indicator will turn on.
2. The battery LED indicator will flash when charging the battery and be steadily on when the
battery is fully charged.
3. Charging time is about 5 hours. A fully charged battery delivers about 2.5 hours of use.
NOTE: When inserting the battery while the set is AC powered, the LED turn on is delayed by
several seconds. This is because the battery charging circuit needs to reset and
detect the battery status.
7
IB-PDV705-WM-E-010506.pmd
8
IB-PDV705-WM-E-010506
4/3/2006, 9:24 AM
Working conditions and precautions for the rechargeable battery
•
•
•
•
•
•
•
•
New batteries should be fully charged before initial use.
Battery should be changed by an adult for safety.
Battery should only be used and charged when temperatures are between 32 -100 OF.
Never put the battery in fire or water.
Do not expose the battery to high temperatures or store in hot, sunny places.
Do not short the battery terminals.
Do not open the battery.
When the battery is weak, the ON/STANDBY indicator will flash and the Low Power icon
“
” will appear on the LCD screen and then the power automatically turns off. If this
occurs, please use the AC adaptor to recharge the battery or play the set on AC power.
REMOTE CONTROL OPERATION
1. Push the door tab to open the battery door.
2. Insert 2 size “AAA” alkaline batteries
(included) into the battery compartment
according to the + and – markings
inside the battery compartment, then
replace to close the battery door.
NOTE:
• Point theoremote control unit from less than 20 feet (6 m) from the remote sensor and within
about 60 of the front of the unit.
• Batteries should be changed by an adult for safety.
• Reversing polarities will damage the batteries and possibly your REMOTE. Be sure to follow
polarity ( + and –) as indicated.
• Do not mix different types batteries together (Alkaline, Carbon-Zinc, Nickel-Cadmium etc.),
or old batteries with new ones.
• When the batteries have become discharged, they must be disposed of in a safe manner that
complies with all applicable laws.
• When the batteries becomes weak, the operating distance of the remote control will be
greatly reduced and you will need to replace the batteries.
• When the remote control is not to be used for a long time (2 months or more), remove the
batteries to avoid possible damage that may be caused by batteries leakage.
• Avoid keeping the remote control in extremely hot or humid locations.
• Do not point bright lights at the remote control sensor (like laser pointers).
• Do not place objects between the remote control unit and the remote control sensor.
• Do not use this remote control while using the remote control unit of any other equipment at
the same time, the signals may mix.
8
IB-PDV705-WM-E-010506.pmd
9
IB-PDV705-WM-E-010506
4/3/2006, 9:24 AM
NOTES ON DISCS
Discs that can be played
RECORDED CONTENT
DISC TYPE & LOGO MARK
DVD Video
(Region 1)
Video + Audio
DVD-R
Video + Audio
“.JPG” or “JPEG”
JPEG disc
Video only (Photos)
or Audio / Video
Audio only
Music CD
CD-R disc
Audio only
or Audio / Video
CD-RW disc
Audio only
or Audio / Video
MP-3
MP3 disc
Audio only
” may appear on the screen when pressing some buttons. A “
”
NOTE: A hand symbol “
means that the operation is not permitted by the DVD player of the disc in that mode or
at that time, sometimes the set needs to be in stop mode or other mode for that button
to work.
Discs that cannot be played
CD-Is, CD-ROMs (including computer software discs and game discs), Data part of CD-Extras,
DVD-ROMs, DVD Audio discs, DIVX, MPEG 4 DVD discs, HD layer on SACDs or discs recorded
in another format such as SECAM, and regions other than your region. This set will also not play
damaged, scratched or dirty discs.
9
IB-PDV705-WM-E-010506.pmd
10
IB-PDV705-WM-E-010506
4/3/2006, 9:24 AM
1. BASIC PLAY
1 Press the set OPEN button and lift the LCD screen.
2 Slide the DVD player’s POWER switch to the ON position, the DVD logo (start-up picture) will
appear on the screen.
3 Press
the OPEN button on the DVD player to open the disc
door. Place a disc gently on the tray with the label side up and
close the door by pushing it down. The DVD player starts to read
the disc’s table of contents (this may take a few seconds).
NOTE 1: Load the disc with the label side facing up, when
playing a double-sided disc, load it with the desired
playing side face down.
NOTE 2: “NO DISC” will show in the display if the disc is upside
down or the disc is badly scratched or dirty, it will not
play. Please clean it or change the disc before use.
Also you can buy a disc polisher to try to repair the
scratched disc.
4 Some discs will start playing automatically, and others will display the Disc Contents Menu on
the screen. If the menu is shown, use the
and press the OK button to confirm.
,
,
&
buttons to highlight your selection
5 Press the VOLUME + or VOLUME – button to adjust the volume level.
6 Press the BRIGHTNESS and COLOR buttons to adjust the brightness
and the color of
the LCD screen.
7 To stop playback, press the STOP button.
8 To pause the playback, press the OK button
on the remote or the PLAY/PAUSE button
on the player. To resume playback, press the OK button
on the remote or the PLAY/
PAUSE button on the player again.
NOTE 1: During play, pressing the STOP button once will show “PRE STOP
” in the
display, If you press the STOP button the second time, the display will show
“STOP ”, and now your system is in the full STOP mode.
NOTE 2: Leaving the set in the stop mode for a longer time will drain the battery the same
as during normal play.
9 To skip to another track/chapter, press the NEXT
or PREVIOUS
button repeatedly
during playback.
10
To access the disc menu or title menu during DVD play, press the MENU or TITLE button
on the remote control.
11
Remember to shut off the player by sliding the POWER switch to the OFF position when
the movie finishes playing.
NOTE: This player has a screen saver which will display a bouncing DVD logo if no video is
played for a while.
10
IB-PDV705-WM-E-010506.pmd
11
IB-PDV705-WM-E-010506
4/3/2006, 9:24 AM
2. USING THE SEARCH FUNCTIONS
During play, you can search quickly through a chapter or track.
Search through a chapter or a track
1
button on the player or press and hold the FORWARD
During play, press the FORWARD
button on the remote to search forward at a faster speed, the fast search speed changes as follows:
FORWARD X2
PLAY
2
FORWARD X4
FORWARD X8
FORWARD X20
During play, press the BACKWARD
button on the player or press and hold the BACKWARD
button on the remote to search backwards at a faster speed, the search speed changes
as follows:
BACKWARD X2
X20
PLAY
Y
BACKWARD X4
BACKWARD X8
BACKWARD
NOTE: In any fast forward or fast backward mode, press the OK button on the remote or
press the PLAY/PAUSE button on the player to return to normal play mode immediately.
3. SELECTING AUDIO MODE
If a DVD disc contains a Multi-Audio soundtrack feature, you can select the desired audio
language by pressing the AUDIO button on the set or on the remote repeatedly during play,
playback status will be displayed on the screen. The AUDIO button can also select director’s
cuts dialogue and other disc dialogue.
Note 1: If you press the AUDIO button for several times, but the desired language is not selected,
it means a second language is not available on the disc.
Note 2: This DVD player does not support DTS decoding. For discs with DTS decoding,
please press the AUDIO button to select another audio output mode, such as
AC-3 until you hear the sound.
4. CHANGE SUBTITLE LANGUAGE
(DVD ONLY)
You can select a desired subtitle quickly and easily with the SUBTITLE button on the set or on the remote.
NOTE: This operation works only with DVD discs on which multiple subtitle languages are
recorded. Some DVDs have no subtitles, some may have 5 or more. If no subtitles are
recorded on your DVD, pressing this button will not change the subtitles.
To remove the subtitles display, press the SUBTITLE button again till “
11
IB-PDV705-WM-E-010506.pmd
12
: [OFF] ” shows.
IB-PDV705-WM-E-010506
4/3/2006, 9:24 AM
5. DISPLAYING DISC INFORMATION
If you want to know the information of the disc during play, press the DISPLAY button on the
remote or on the set, the disc information will appear on the screen’s top as shown below:
For DVD Play
DVD TT 1/2 CH 6/12
5.1CH
o)) 1/3ENG
DVD TT 1/2 CH 6/12
The information about the title/chapter number
and chapter elapsed time is shown.
00:02:35
2/3ENG
The information about the AUDIO, SUBTITLE
and ANGLE is shown.
OFF
The information about the chapter remaining
time is shown.
C-00:06:41
DVD TT 1/2 CH 6/12
T 00:18:05
The information about the title elapsed time is
shown.
DVD TT 1/2 CH 6/12
T-01:05:40
The information about the title remaining time
is shown.
OFF
The information display goes off.
For CD Play
CD TRK
2/12
The information about the current track
elapsed time is shown.
00:01:03
CD TRK 2/12
C-00:02:42
The information about the current track
remaining time is shown.
CD TRK 2/12
T 00:10:49
The information about the total track elapsed
time is shown.
CD TRK 2/12
The information about the total track remaining
time is shown.
T-00:40:35
The information display goes off.
OFF
For MP3 Play
MP3 TRK 2/124
00:03:03
The information about the current track
elapsed time is shown.
MP3 TRK 2/124
C-00:01:36
The information about the current track
remaining time is shown.
OFF
The information display goes off.
NOTE 1: “TT” stands for title, “CH” stands for chapter.
NOTE 2: Depending on the disc, the above information may not appear on your screen or you
may not be able to change the display.
12
IB-PDV705-WM-E-010506.pmd
13
IB-PDV705-WM-E-010506
4/3/2006, 9:24 AM
6. REPEAT PLAY
Allows you to repeat the current track, chapter, title, a chosen section (A-B), or all of the disc.
Each time you press the REPEAT button on the remote control repeatedly, the repeat mode
changes as follows:
For DVD
REP:
[CHAPTER]
REP:
REP: [TITLE]
WILL REPEAT THIS
CHAPTER OVER AND OVER
WILL REPEAT THIS
TITLE OVER AND OVER
[REP ALL]
REP: [OFF]
WILL REPEAT THIS
DISC OVER AND OVER
A-B CANCEL
NORMAL PLAY
REPEAT A-B
“A-B CANCEL” SHOWS AND
NORMAL PLAY RESUMES
REPEAT A-
REPEAT A TO B SEGMENT OVER AND OVER.
NOTE: When you select “A TO B” repeat play:
1. Press the REPEAT button until “REPEAT A- ” appears at the beginning of the segment
(point A) you want to play repeatedly.
2. Press REPEAT button again at the end of the segment (point B), “REPEAT A-B” will
appear on the display.
3. The DVD player will automatically play the selected segments A to B over and over till
you press REPEAT button again.
For CD
REP: [REP 1]
A-B CANCEL
REP: [REP ALL]
REP: [OFF]
REPEAT A -
REPEAT A-B
For MP3
REP: [REP 1]
REP: [REP DIR]
REPEAT A-B
A-B CANCEL
REP: [REP ALL]
REP: [OFF]
REPEAT A -
(JUST FOR DVD)
7. SLOW-MOTION PLAY
A disc can also be played in slow-motion.
1 Each time you press and hold the ZOOM/SLOW button on the remote during play, the playback
speed will change as follows:
SF 1/2
SF 1/3
SF 1/4
SF 1/5
SF 1/6
SF 1/7
2 Press the OK button to resume normal play from any slow-motion mode.
PLAY
Y
NOTE 1: Sound will be silent during slow motion play.
NOTE 2: SF stands for SLOW FORWARD.
13
IB-PDV705-WM-E-010506.pmd
14
IB-PDV705-WM-E-010506
4/3/2006, 9:24 AM
(FOR DVD)
8. ZOOM PLAY
This function allows you to do a minimal zoom into a picture as well as shift the zoom point.
1
Press the ZOOM/SLOW button on the remote repeatedly to enlarge or reduce a picture. The
display will show as follows:
ZOOM 2
ZOOM 3
ZOOM 4
ZOOM 1/2
ZOOM1/3
ZOOM1/4
ZOOM: OFF
2
Press the DIRECTION buttons ( ,
down, left or right.
3
To return to normal play from the ZOOM mode, press ZOOM/SLOW button repeatedly till
the icon shows “ZOOM: OFF”.
,
&
) to move the enlarged picture a little to up or
NOTE 1: Some discs may not respond to the zoom feature and during some zoom functions
the picture edges may seem fuzzy, this is normal.
NOTE 2: When reducing to smaller sizes, the black area around the picture will enlarge, this
is normal.
9. SEARCH FOR PREFERRED PLAY
To select a scene with the title, the chapter,
the track number and the time during play.
1
Press the SEARCH button on the remote
during play, the screen will show as on
the right:
2
Move the LEFT & RIGHT DIRECTION
& ) and press the number
buttons (
buttons on the remote to select the
title, the track, or the time, then press
the OK button to confirm.
3
The player will jump to play the section
you selected and the menu display
disappears from the screen.
Press SEARCH for DVD
for searching by title, chapter & time
DVD TT 01/02 CH 002/013
00:02:03
title you want chapter you want time you want
to jump to
to jump to
to jump to
Press SEARCH for CD
CD TRK 02/12
00:03:11
1
input the minute
you want to jump to
track you want
to jump to
input the second
you want to jump to
NOTE: The search function may not work
during the opening screens of many DVDs,
such as the FBI warnings etc.
Press SEARCH for MP3
MP3 TRK 0016/154
track you want
to jump to
00:01:21
input the minute
you want to jump to
input the second
you want to jump to
14
IB-PDV705-WM-E-010506.pmd
15
IB-PDV705-WM-E-010506
4/3/2006, 9:24 AM
10. VIEWING FROM A DESIRED ANGLE
(DVD ONLY)
Some DVD video discs may contain scenes which have been shot simultaneously from a
number of different camera angles. The jacket or case of discs that are recorded with angles
will be marked with this icon: 3 , for these discs, the same scene can be viewed from any of
these different angles by pressing the PROGRAM/ANGLE button on the remote.
ANGLE 1
ANGLE 2
ANGLE 3
NOTE: 1. The recorded angles differ depending on the disc used.
2. Only some DVD discs have this feature (very few).
3. If this feature is not available on your DVD, a hand “
” will show in the top left corner..
11. PROGRAMMED PLAY
You can make a program of up to 16 tracks in the order you want them to be played. This feature
can be used on CD and MP3.
1
Press PROGRAM/ANGLE button on the remote control, the screen will display the program
menu:
PROG
1 _ _ _ _ 5 _ _ _ _ 9 _ _ _ _ 13_ _ _ _
2 _ _ _ _ 6_ _ _ _ 10 _ _ _ _ 14_ _ _ _
3 _ _ _ _ 7 _ _ _ _ 11 _ _ _ _ 15_ _ _ _
4 _ _ _ _ 8 _ _ _ _ 12 _ _ _ _ 16_ _ _ _
PLAY
2
3
4
5
CLEAR
Press the numeric button and the direction buttons to input the track number corresponding to
the order of the tracks on the disc you wish to play them.
After programming, press the direction buttons to select PLAY, then press OK button on the
remote, the player will start to play the disc in the programmed order you selected.
To skip to the next (programmed) track, press the NEXT
button.
To stop programmed playback, press STOP button twice, or open the disc door.
15
IB-PDV705-WM-E-010506.pmd
16
IB-PDV705-WM-E-010506
4/3/2006, 9:24 AM
12. MP3 DISC OPERATION
This allows you to play your MP3 audio recorded disc you made on this set.
1
Load your recorded MP3 disc into the player, a menu will show on the screen.
[MP3]01-------MP3
01.MP3
01.01
02.02
03.03
04.04
05.05
06.06
07.07
08.08
09.09
10.10
2
3
4
5
6
7
Select the desired file by pressing the UP or DOWN button.
8
Press STOP button to stop playing.
Press the OK button to open the file.
Select the desired track by pressing the UP or DOWN button.
Press the OK button to start playback.
You may use the PREVIOUS
Press the BACKWARD
forward play.
or NEXT
button to skip to the previous or next track.
or FORWARD
button on the player for fast backward or fast
13. JPEG OR PICTURE DISC OPERATION
This allows you to play your JPEG or picture disc on this set.
1
2
Load a JPEG disc or picture CD disc into the player, a menu will show on the screen.
3
During the picture show, use the
or left.
4
5
6
7
Go to the menu of directory which you want to view by using the DIRECTION buttons, press
the OK button to start the JPEG play.
/
/
/
buttons to rotate it in invert, or mirror, or right
Press the PROGRAM/ANGLE button on the remote to change the picture display directions, the
picture display will start from the top, or the bottom or the left or the right or any of the corners.
Press the ZOOM/SLOW button on the remote repeatedly to enlarge or reduce a picture. The
display will show as follows:
ZOOM 2
ZOOM 3
ZOOM 4
ZOOM 1/2
ZOOM1/3
ZOOM1/4
ZOOM: OFF
To move the enlarged picture in any direction, press any of the
/
/
/
buttons.
To return to normal view, press ZOOM button till “ZOOM: OFF” shows on the screen.
Press the NEXT
button to see the next image in your folder..
Each picture in the current directory will be displayed consecutively in a slide show
presentation.
16
IB-PDV705-WM-E-010506.pmd
17
IB-PDV705-WM-E-010506
4/3/2006, 9:24 AM
SYSTEM CONNECTIONS
For TV Connection
This DVD player can also be used to play movies on your larger screen TV. When playing on
your TV, you may fold the screen down to shut off the TFT LCD display.
Always ensure when connecting cables, the DVD player, TV and any other electrical equipment
are turned off and not plugged into the mains (AC).
Ensure that you observe the color coding when connecting audio and video cables.
1. Connecting the DVD player to your TV
Using the attached A/V cable
Insert the 3.5mm plug into the VIDEO/AUDIO OUT jack on your DVD player and the audio and
video plugs into the TV’s AUDIO and VIDEO jacks.
NOTE: The 3.5 mm plug used on the cable supplied has 3 sections, be sure to only use this A/V
cable, otherwise, there may be no picture in your TV’s screen.
YOUR TV
WHITE
RED
L
R
AUDIO IN
Pl ea se f ol lo w th e
cable plug colors.
YELLOW
VIDEO IN
S-Video connection (S-VIDEO cable is not included)
Insert the 3.5mm plug into the VIDEO/AUDIO OUT jack on your DVD player and the audio plugs
(white and red) into the TV’s AUDIO jacks.
Connect the DVD player’s S-VIDEO jack and your TV’s S-VIDEO jack by using an S-VIDEO
cable with a 3.5 mm plug on one end (not included).
YOUR TV
AUDIO IN
17
IB-PDV705-WM-E-010506.pmd
18
S-VIDEO
IB-PDV705-WM-E-010506
4/3/2006, 9:24 AM
For TV Connection
SYSTEM CONNECTIONS
Connecting to a digital home theater system using a coaxial cable
Refer to your home theater system’s manual before connection.
For Video, insert the 3.5mm plug into the VIDEO/AUDIO OUT jack on your DVD player and the
video plug into the TV’s VIDEO jack.
For Audio, connect the DVD player’s COAXIAL jack and your home theater system’s COAXIAL
jack by a coaxial cable with a 3.5 mm plug on one end.
YOUR TV
VIDEO IN
COAXIAL
YOUR HOME
THEATER SYSTEM
OR AMPLIFIER
2. Connecting to your headphones
Turn down the volume of the DVD player and connect the headphones (optional, not included)
to the DVD player’s PHONES jack, when headphones are connected, the speakers of your
DVD player will automatically turn off. Adjust the volume to your taste.
18
IB-PDV705-WM-E-010506.pmd
19
IB-PDV705-WM-E-010506
4/3/2006, 9:24 AM
WATCHING A DVD ON YOUR TV
After all the connections have been done, please follow steps below to watch a DVD on your TV.
1
2
3
4
5
6
7
8
9
10
11
12
13
14
Make sure all the products are plugged back into the AC (mains) power.
Press the set OPEN button and lift the LCD screen.
Slide the DVD player’s POWER switch to the ON position, the DVD logo (start-up picture) will
appear on the screen.
Turn on your TV and set it to DVD mode (please see box below), the DVD logo will appear on
your TV’s screen.
Press the OPEN button on the DVD player to open the disc door. Place a disc gently on the
tray with the label side up and close the door by pushing it down. The DVD player starts to
read the disc’s table of contents (this may take a few seconds).
Some discs will start playing automatically, and others will display the Disc Contents Menu on
&
buttons to highlight your selection
the screen. If the menu is presented, use the , ,
and press OK button to confirm.
Press the VOLUME + or VOLUME – button on DVD’s remote and on your TV’s remote to
adjust the volume level.
Fold down the LCD screen cover, the DVD player will continue to work, but the screen will
be dark.
To stop playback, press the STOP button.
To pause the playback, press the OK button
on the remote. To resume playback,
again.
press the OK button
NOTE 1: During play, press the STOP button once, the display will show “ PRE STOP
”.
”,
If you press the STOP button the second time, the display will show “ STOP
and now your system is in the full STOP mode.
NOTE 2: Leaving the set in the stop mode for a longer time will drain the battery the same
as during normal play.
To skip to another track/chapter, press the NEXT
during playback.
or PREVIOUS
button repeatedly
To access the disc menu or title menu during DVD play, press the MENU or TITLE button
on the remote control.
If you want to use other DVD play functions, please see pages 11-16.
Remember to shut off the player by sliding the POWER switch to the OFF position when
the movie finishes playing.
How to Find your TV’s Video Input Channel
Make sure you have made all the connections (see page 17), you may need to change
your TV’s video input mode to see the DVD player’s menu and movies, also double check
that both TV and player are powered from the mains (AC power).
1. Set your TV to the correct video input. For example, if you connect this player to the
VIDEO 1 input on your TV, switch your TV to video 1.
2. Switch your TV to the correct video input channel. The video input channel varies with
different TV brands and models, many TV remote controls have a TV/VIDEO button
which can be used to change to different video inputs and back to TV for normal
broadcast viewing, on some older TVs, you may need to press channel 3 on your
TV’s remote. Once you selected the correct channel, your TV will show the opening
DVD screen. For more details, please see your TV’s manual.
19
IB-PDV705-WM-E-010506.pmd
20
IB-PDV705-WM-E-010506
4/3/2006, 9:24 AM
INITIAL SETTING
For TV or Portable Use
When using the set for the first time, you may need to set some of the settings and adjustments
according to your TV and favorite preferences.
You can get to the SETUP menu by following the below steps.
1
Press the SETUP button, a SETUP menu like right
will appear on the TV screen.
2
/
/
/
buttons on the DVD player
Use the
or on the remote control to highlight your selection.
3
4
Press the OK button to confirm your selection.
When the setting has been done, press the
SETUP button to exit the SETUP mode.
SYSTEM SETUP
TV SYSTEM
LCD MODE
TV TYPE
DEFAULT
EXIT SETUP
SYSTEM SETUP (TV SYSTEM, LCD MODE, TV TYPE & DEFAULT)
Setting the TV SYSTEM (only when you are using your TV to watch the picture).
- NTSC
A USA video standard. If your TV is NTSC system,
select this mode.
- AUTO
If the connected TV is multi-system, select this
mode. The output format will be in accordance
with the video signal of the disc.
SYSTEM SETUP
TV SYSTEM
LCD MODE
TV TYPE
DEFAULT
NTSC
AUTO
EXIT SETUP
Setting the LCD MODE
This allows you to set the aspect ratio of the LCD
screen.
SYSTEM SETUP
TV SYSTEM
LCD MODE
TV TYPE
DEFAULT
4:3
4:3
16:9
EXIT SETUP
16:9
20
IB-PDV705-WM-E-010506.pmd
21
IB-PDV705-WM-E-010506
4/3/2006, 9:24 AM
INITIAL SETTING
Selecting the TV TYPE
Select the aspect ratio of the movie to match the
LCD screen and your TV set. There are three types
of screen sizes you may select.
NOTE: If your DISC is not encoded to allow you to
change the aspect ratio, the TV display
cannot be changed.
SYSTEM SETUP
TV SYSTEM
LCD MODE
TV TYPE
DEFAULT
4:3 PS
4:3 LB
16:9
EXIT SETUP
4 X 3 Standard (4:3 PS PAN and SCAN) - Choose this setting if
you want to see movies to fill the entire screen of your TV. This
might mean that parts of the picture (the left and right edges)
won’t be seen.
Most discs produced in a WIDESCREEN format can’t be cropped
in this fashion.
4X3 Standard
4X3 Letterbox
16X9 Widescreen
4 X 3 Letterbox (4:3 LB LETTER BOX) - Choose this setting if
you want to see movies in their original aspect ratio (width-toheight ratio). You’ll see the entire frame of the movie, but it will
take up a smaller portion of the screen vertically. The movie will
appear with black bars at the top and bottom of the screen, but you
will see everything to the right & left of the center as in a movie
theater.
16 X 9 Widescreen (16:9) - Choose this setting if your DVD
Player is connected to a WIDESCREEN TV. If you choose this
setting and you don’t have a widescreen TV, the images on the
screen may appear distorted due to vertical compression (faces
may seem long and thin).
If you play a disc recorded in 4 X 3 format on a widescreen TV, the
left and right side of the screen will appear black. Press SETUP
button to change to 4:3 ratio or match the type of TV you have.
NOTE: For 16:9 Widescreen TV TYPE, you need to adjust both
the LCD mode and the TV TYPE to 16:9 (see page 20 for Setting
the LCD MODE).
Default - Resetting the functions to factory defaults
In case you fiddled around with your set’s controls
and you cannot return the set to its normal operation;
we have made re-setting the major options on
this set very easy for you.
NOTE: If you set “DEFAULT”, all items in the setup
menu will be reset to default setting.
SYSTEM SETUP
TV SYSTEM
LCD MODE
TV TYPE
DEFAULT
RESTORE
EXIT SETUP
21
IB-PDV705-WM-E-010506.pmd
22
IB-PDV705-WM-E-010506
4/3/2006, 9:24 AM
INITIAL SETTING
LANGUAGE SETUP (On Screen Display, AUDIO, SUBTITLE & MENU)
These items allow you to preset the OSD language (OSD
= On Screen Display), audio language, subtitle language,
and menu language that will always be used for every
disc on this player (if the language selected is available).
NOTE 1: If the language selected is not available on
the disc, the original language designated
by each disc will be selected.
NOTE 2: You can change the AUDIO or SUBTITLE
language easily by pressing the AUDIO or
SUBTITLE button (refer to pages 11).
LANGUAGE SETUP
OSD LANGUAGE
AUDIO LANG
SUBTITLE LANG
MENU LANG
ENGLISH
SPANISH
FRENCH
EXIT SETUP
AUDIO SETUP (DIGITAL OUT) - Only for use in COAXIAL connection mode
Your DVD player can be connected to a home theater system with coaxial digital audio jack to
realize high quality sound effects, digital audio output allows you to select SPDIF/RAW or SPDIF/
PCM digital signal.
A. SPDIF/RAW
The coaxial output is connected with a receiver that
accepts Dolby Digital or other signals. It works for
most of the coaxial connections.
B. SPDIF/PCM
The coaxial output is connected with a receiver that
accepts PCM SIGNALS.
AUDIO SETUP
AUDIO OUTPUT
SPDIF/RAW
SPDIF/PCM
EXIT SETUP
VIDEO SETUP
These settings allow you to set the Video signals’
Brightness, Contrast, Hue, and Saturation.
BRIGHTNESS - The brightness of the Video signals.
CONTRAST - The contrast of the Video signals.
HUE - The hue of the Video signals.
SATURATION - The saturation of the Video signals.
VIDEO SETUP
12
10
8
6
4
2
0
BRIGHTNESS
CONTRAST
HUE
SATURATION
EXIT SETUP
SPEAKER SETUP (DOWNMIX)
SPEAKER SETUP
When you use the DVD player itself or if you connect
the DVD player to your TV or other amplifier with the
supplied A/V cable, you can enter the SPEAKER SETUP
to set the DOWNMIX, Downmix audio output setup allows
you to select LT/RT or STEREO audio output mode.
DOWNMIX
LT/RT
STEREO
EXIT SETUP
- LT/RT
Select this item when the disc supporting Pro Logic Dolby Stereo is played. You have the
opportunity to hear a program’s soundtrack in the most accurate and realistic presentation
possible.
- STEREO
For 5-channel output, the left and right track signals are output simultaneously; For 2-channel
output, the ordinary stereo signal is output.
22
IB-PDV705-WM-E-010506.pmd
23
IB-PDV705-WM-E-010506
4/3/2006, 9:24 AM
PRECAUTIONS
Safety
•
•
Operation
•
As the laser beam used in the DVD player
may be harmful to the eyes, do not attempt
to disassemble the cabinet. Refer servicing
to qualified personnel only (it is perfectly
safe if you don’t unscrew and open the
cabinet).
Should any solid object or liquid fall into
the player, unplug the player, and have it
checked by qualified personnel before
operating it any further.
Handling Discs
Placement of Your DVD Player
•
•
•
•
•
•
Do not leave the player in a location near a
heat source, or in a place subject to direct
sunlight, excessive dust or mechanical
shock.
•
Do not place the player on an inclined or
unstable place, it may fall and break.
•
Do not touch the playback side of the disc.
Every fingerprint can cause playback
problems. Do not scratch the disk.
Do not store the Discs in a place subject
to direct sunlight or near heat sources.
Cleaning Discs
Do not place anything within 2 inches of
the sides or back of the cabinet. The
ventilation holes must not be covered for
the player to operate properly and prolong
the life of its components.
•
Before playing, make sure the disc is
clean. If not, clean the DISC with a cleaning
cloth. Wipe the DISC in a straight motion
from the center out.
Don’t place this DVD player on lacquered
finished furniture without a cloth, wood or
glass protector in between.
If the player or discs will be left in a car
parked in the sun, put the player in the trunk
or where the player will not be subjected
to the direct rays and heat of the sun.
•
Cleaning the Cabinet
•
If the player is brought directly from a cold
to a warm location, or is placed in a very
damp room, moisture may condense on the
lens inside. Should this occur, the player
may not operate properly. In this case,
remove the disc and wait about an hour for
the moisture to evaporate. If the player has
not been used for a long time, turn the set
to ON to warm it up for a few minutes before
inserting a disc.
Clean the cabinet, panel and controls with
a soft cloth slightly moistened with a very
mild detergent solution or a plain damp
cloth. Do not use any type of abrasive pad,
scouring powder, or solvent, such as
alcohol or benzine.
•
Do not use solvents such as benzine,
thinner, commercially available cleaners or
anti-static spray intended for vinyl LPs.
If the disc is scratched, it will not play.
So me ti me s a scra tche d di sc can b e
repaired with a disc polishing machine
available in many stores.
Never touch the lens with your fingers, if
the lens gets dirty, it will not play. Clean the
disc before use.
23
IB-PDV705-WM-E-010506.pmd
24
IB-PDV705-WM-E-010506
4/3/2006, 9:24 AM
TROUBLE SHOOTING
Remedy
Symptom
No power.
1. The battery is exhausted, please recharge the battery or use
the AC adaptor, make sure the AC outlet has power.
2. The POWER switch is at the OFF position, please slide it to ON.
Battery is fully charged
but does not work.
The battery protective circuit may have shut down the battery
for safely. To reactivate the battery, charge it for a while.
Battery drains too fast
in stop mode.
The set continues to be on even in stop mode. If you plan on
leaving the disc stopped for a longer time, turn the set’s power
off to conserve battery power or use the AC adaptor.
• Play fails to start even
when PLAY is pressed.
• Play starts but then
General
stops immediately.
1. The disc may be damaged or scratched.
2. This player cannot play a DVD disc other than region 1 standard.
3. The disc may be dirty and may require cleaning.
4. Ensure that the disc is installed with the label side up (facing you).
5. If your disc is rented, it may be scratched or damaged from a
previous renter. Return it or polish it.
6. Condensation may have formed on your disc. Wait about 1
hour to allow the player to dry out.
No image on the LCD
screen.
The player may be in LCD off mode (as when you are using the
external TV).
1. Press the little button marked SCREEN OFF #11 on page 4.
2. Press the SCREEN ON/OFF button on the remote.
No picture on the TV’s
screen.
1. Ensure that the equipment is connected properly. Double
check all cables and AC power.
2. Ensure that the A/V cable you used is attached in the package,
other cables may not be suitable for this DVD player.
3. Select the proper video channel on your TV set VIDEO 1, 2, 3, etc.
4. Check if the proper AV input is selected on your TV set video
inputs (some TV sets have 3 or 4 different inputs).
5. Make sure both the TV and DVD player are on.
6. Make sure you use a 3 section 3.5 mm plug cable as supplied.
The picture is distorted.
1. Picture is distorted during rapid advance or rapid reverse. The
picture may be somewhat distorted occasionally, this is normal.
2. Did you connect your DVD player to your VCR? Please
connect the player directly to your TV and disconnect the VCR.
This player has Macrovision copy protection this will distort
pictures when used with VCRs.
24
IB-PDV705-WM-E-010506.pmd
25
IB-PDV705-WM-E-010506
4/3/2006, 9:24 AM
TROUBLE SHOOTING
Symptom
Remedy
The picture seems
squeezed or stretched.
The LCD mode and TV type you are in may be wrong for this
movie, try changing the LCD and TV type setting for standard
or widescreen. See pages 20 & 21.
General
No sound from your
TV or speakers.
1. Press AUDIO button several times. The disc may have been
set to DTS output or a blank audio channel on multiple language,
please select AC-3 output or reset to the main language (refer to
page 11).
2. Adjust the DVD player’s volume.
3. Make sure the AUDIO output connection and setting are
correct. See details on page 22.
4. Ensure that the equipment is connected properly.
5. Ensure that the input setting for the TV and stereo system
are correct.
6. Adjust volume setting on your TV’s remote.
7. Make sure the headphones are detached from the DVD player.
8. The movie is paused, press play.
9. The movie is in search or fast play or other speed related play.
There is no sound in these cases. Only normal play has sound.
The color buttons have
no function or have
less function.
The disc you used is a copied one, please replace it with a fresh
original disc.
The REMOTE CONTROL unit does not
work.
1. Check that the remote’s batteries are installed correctly.
2. The remote’s batteries are weak or depleted, replace them with
new ones (refer to page 8).
3. Point the remote control unit at a distance of less than 20 feet
(6m) from the DVD player.
4. Remove any obstacles between the remote control unit and remote
control sensor, also make sure the lens on the remote is not dirty.
No rapid advance or
rapid reverse play.
Some discs may have sections which prohibit rapid advance (or rapid
reverse), especially on opening screens or during FBI warnings.
Cabinet vibrates or hums. This is normal for high speed reading of DVD discs.
A specific disc does not
play.
1. The disc may be dirty, try cleaning the disc.
2. Make sure the disc is not upside down.
3. The region code is not 1, in this case, the disc can not be used.
4. Disc may not be industry standard or it may be an illegal copy.
Only use legally sold movies not pirate copies.
The player’s controls
don’t work or the player
can not work properly.
Set needs to be reset.
Reset the DVD player by removing the battery pack and disconnect AC adaptor for 1 minute, then replace to reset. (The player
may not be operating properly due to lightning, static electricity,
damaged or wrong discs, or some other external factors).
25
IB-PDV705-WM-E-010506.pmd
26
IB-PDV705-WM-E-010506
4/3/2006, 9:24 AM
TROUBLE SHOOTING
DVD
General
Symptom
Remedy
No sound during fast
forward or other speed
functions.
This is normal. Normal sound only happens during normal play.
Cannot change a menu
item.
Try changing this item with the DVD door open (not during play).
The LCD picture is not
16:9 widescreen even
you have set the TV
TYPE to 16:9.
You need to adjust both the LCD mode and the TV type mode to
16:9 (see pages 20 and 21).
Audio soundtrack and/
or subtitle language is
not at the initial settings.
If the audio soundtrack and / or subtitle language does not exist
on the disc, the language selected at the initial setting will not be
heard/seen. Try setting it up again, see Page 22.
No subtitles.
Subtitles appear only on discs which contain them. If subtitles
don’t show, press the SUBTITLE button to display the subtitles.
Alternative
audio
soundtrack (or subtitle)
language does not show.
An alternative language is not possible with discs which do not
have more than one language. In the case of some discs, the
alternative language cannot be selected by operating the AUDIO
or SUBTITLE buttons. Try selecting it from the DVD menu if one
is available or your disc may not have this feature.
An gl e ca nn ot
changed.
This function is dependent on the DVD disc. Even if a disc has a
number of angles recorded, these angles may be seen only on
specific scenes.
be
Picture is frozen.
If a button is pressed too fast over and over, the signals may jam
the circuits inside. To restore to normal, press the STOP button
and unplug the set from the mains (AC). Also remove the batteries.
Screen saver appears
on TV screen.
Turn off screen saver by pressing any button on the REMOTE
control or on the set.
Can not copy discs to
VHS video tapes.
You can’t copy most commercial movie discs due to copy
protection built into the disc and player.
Display shows numbers
on top of screen.
Press the DISPLAY button several times until the numbers
display disappears.
Foreign language is
heard on the disc.
Press the AUDIO button until your preferred language is heard.
Foreign language is
seen in menus.
Reset the default language to your preferred language by pressing
the SUBTITLE button.
26
IB-PDV705-WM-E-010506.pmd
27
IB-PDV705-WM-E-010506
4/3/2006, 9:24 AM
GLOSSARY
VIDEO CABLE
This is a wire with plugs on each end which is
used to connect the picture information into
your TV set.
TITLE
The longest sections of a picture or a music
piece on a DVD, or a movie, etc.. Each title is
assigned a title number enabling you to locate
the title you want.
NOTE:
The video cable supplied with this set uses a
special 3 sections 3.5 mm jack which has 3
outputs, 2 for audio and 1 for video. Use of
stereo (2sections) 3.5 mm cables will not allow
pictures to be seen on your TV set.
CHAPTER
Sections of a picture or a music piece on a
DVD that are smaller than titles. A title is
composed of several chapters. Each chapter
is assigned a chapter number enabling you to
locate the chapter you want.
NTSC
National TV Systems Committee for TV
broadcasts: a video standard used in the USA
and Canada.
JPEG
JPEG is short for the “Joint Photographic Experts Group”, a group of experts nominated
to produce standards for continuous tone image coding. In other words, your DVD player
can view digital picture CDs or CDs you made
on your computer with file names that end in
the “.JPG” format. This set will not play pictures encoded in formats other than JPG.
JACK
This is another term for socket.
ABOUT DVD REGION
MANAGEMENT
VIDEO INPUT
This is a jack which accepts the picture portion
of a signal. In order to use this DVD player,
your TV set must have an S-Video (better) or
Video input (standard) jack.
The DVD inventors and motion
picture makers have decided to
break up the world’s DVDs into
regions so that one country’s
DVDs should not be able to play in another
country.
This is a legal issue and that is why your
DVD player is restricted to play only region 1
DVDs.
S-VIDEO CABLE
This cable can connect to your S-Video input
of your TV. It allows for sharper pictures for
TV sets with this jack.
27
IB-PDV705-WM-E-010506.pmd
28
IB-PDV705-WM-E-010506
4/3/2006, 9:24 AM
SPECIFICATIONS
General Description
TFT LCD screen size:
7"
Power source:
AC 100 – 240V, 50/60Hz
Power consumption:
20 Watts [normal household current] (approx. 3W when the set is in
the standby mode).
Signal system:
NTSC TV system
Video output level:
1.0 Vp-p
Audio output level:
1 Vrms (1 kHz, 0dB)
Dimensions (Approx.):
Length: 210 mm
Width: 178 mm
Height: 45 mm
Weight: 1,4 kg
8 1/4 "
7"
1 3/4"
3.1 lbs
Audio Signal Output Characteristics:
DVD (linear audio):
(1) Frequency response:
4Hz-22kHz (48 kHz sampling)
4Hz-44kHz (96 kHz sampling)
(2) S/N ratio: 100dB
(3) Dynamic range: 90 dB
(4) Wow and flutter: below measurable level
CD audio:
(1) Frequency response: 20 Hz - 20 kHz
(2) S/N ratio: 65dB
(3) Dynamic range: 90 dB
(4) Wow and flutter: below measurable level
Pickup: Wave length: 650nm~660nm
Laser power: Class 1
We reserve the right to make design and specification changes for product improvement.
The descriptions and characteristics given in this document are given as a general indication
and not as a guarantee. In order to provide the highest quality product possible, we reserve
the right to make any improvement or modification without prior notice. The English version
serves as the final reference on all product and operation details should any discrepancies
arise in other languages.
PROTECT YOUR FINE FURNITURE!
WE RECOMMEND A PROTECTIVE MATERIAL BE PLACED UNDER THE SET WHEN PLACING
IT ON SURFACE WITH A NATURAL OR LACQUER FINISH.
28
IB-PDV705-WM-E-010506.pmd
29
IB-PDV705-WM-E-010506
4/3/2006, 9:24 AM
LIMITED WARRANTY
We warrant this product to be free from defects in material and workmanship under normal
use for a period of 1 year after purchase, and we will repair it free of charge or replace it at no
charge, should it become defective under this warranty, providing you submit proof of purchase
(sales slip) with the set.
During the initial 1 year period after original purchase, we will service the set that is returned
to LENOXX ELECTRONICS CORP., prepaid, at no charge. After the initial 1 year period expires,
we will exchange, at no charge, any part that is defective, but will charge for the cost of labor,
return postage paid by Lenoxx.
This warranty does not apply to any product which has been subject to misuse, neglect or
accident. This warranty does not cover a broken cord or cabinet. UNDER NO CIRCUMSTANCES
WILL LENOXX ELECTRONICS CORP. BE LIABLE FOR ANY INCIDENTAL OR CONSEQUENTIAL DAMAGES. Some states do not allow the exclusion or limitation of incidental or
consequential damages, so the above limitations or exclusions may not apply to you.
This warranty gives you specific legal rights, and you may also have other rights which vary
from state to state. The following charges apply to repairs beyond the warranty period: $ 30.00.
Be sure to pack carefully and return postage paid insured together with your money
order (personal checks will not be accepted) and sales receipt to:
LENOXX ELECTRONICS CORP., 2 GERMAK DRIVE, CARTERET N.J. 07008
For Customer Service Dial: 1-800-315-5885
(MONDAY - THURSDAY 8:00 AM - 5:00 PM, FRIDAY 8:00 AM - 1:30 PM EST)
or Visit Our Website: http://www.lenoxx.com
or Email: [email protected]
© 2006 LENOXX ELECTRONICS CORP.
2 GERMAK DRIVE
CARTERET, N.J. 07008
MADE & PRINTED IN CHINA
29
IB-PDV705-WM-E-010506.pmd
30
IB-PDV705-WM-E-010506
4/3/2006, 9:24 AM