1
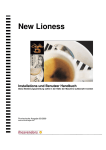
Cod. 2850012 - Rev. 00 ENG - Ottobre 2008
P300
INDEX
Technical characteristics ----------------------- 3
Installation ---------------------------------------- 4
Operating ----------------------------------------- 7
Programmation----------------------------------- 8
frequent menu --------------------------- 8
set drinks --------------------------------- 9
set prices---------------------------------- 10
counters & amounts--------------------- 11
events ------------------------------------ 12
main menu ------------------------------- 14
set time-------------------------------- 15
payment system---------------------- 16
set temperature----------------------- 17
options -------------------------------- 18
1st level -------------------------- 19
2nd level ------------------------- 20
set drinks ----------------------------- 23
quick functions -------------------------- 27
Troubleshooting guide -------------------------- 28
Hydraulic circuit --------------------------------- 29
Electrical diagram ------------------------------- 30
Pag. 2
ELECTRIC CIRCUIT LEGEND
F
TR
I.P.
CX
R.C.
R.G.
V
CV
anti-interference filter
transformer 230Vac / 24 – 20 Vac 170VA
door safety switch
safety thermostat 145°C
boiler heating element 230V 1200W
espresso group heating element
ventilator
flowmeter
PS
PC
MG
EV-A
MS5
MS4
MS3
MS2
MS1
MZ
EM-G
M-CB
M-SB
EM-C
EM-P
E-S4/5
F-S4/5
E-S1/2
F-S1/2
E-S3
F-S3
EV-C
M-M
soluble pump
espresso pump
espresso group motor
hot water Electro valve
doser motor soluble 5
doser motor soluble 4
doser motor soluble 3
doser motor soluble 2
doser motor soluble 1
“sugar in cup” doser motor
to the obliterator coil (24Vdc)
cup turret motor
cup releaser motor
coffee releaser coil
spoon releaser coil
soluble 4 & 5 electro valve
soluble 4 & 5 whipper
soluble 1 & 2 electro valve
soluble 1& 2 whipper
soluble 3 electro valve
soluble 3 whipper
espresso coffee electro valve
grinder motor
S
S-PB
G.R.
GET
S-B
MB
S-PE
S-PZ
M.B.
D.C.
V.A.
G.E.
boiler temperature probe
“cup” position sensor
espresso group “normal” position sensor
“token” microswitch
“cup” sensor
cup-releaser motor
“supply” position sensor
“sugar” position sensor
cup-releaser switch
coffee-doser switch
lack water switch (float)
espresso group “supply” position micro switch
Pag. 31
ELECTRIC DIAGRAM
TECHNICAL CHARACTERISTICS
Dimensions: Height 162 cm
Width 48.5 cm
Depth 55 cm
Weight:
90 Kg
Voltage supply: 230 Vac. 50 Hz or 120 Vac. 60Hz on request
Absorbed power: 1,6 KW
Selections: n°14 for F300 model
n°28 for F306 model
Possibility to program up to 40 selections.
Payment system: predisposed for
•
•
•
Obliterator / token system 24Vdc
Parallel selector 12Vac or 24Vac
Executive / MDB system
Water connection: inside tank 15lit.
From water system with male fitting of ¾" (optional)
Cups capacity: up to 300
Stirrers capacity: up to 300
Optional:
•
•
•
•
Pag. 30
connection kit to the water net
double pump
beniamino filter (anti-limestone filter)
whipper for powder container position 3 (mod. Plus)
Pag. 3
HYDRAULIC CIRCUIT
INSTALLATION
Before proceeding to the operations of installation, maintenance and reparation of
the machine, read the manual carefully, where there is contained the necessary
information for the correct use of the machine.
Install the machine in a dry and not dusty place.
Put to level the machine through the regulation of the feet.
ELECTRIC CONNECTION
Before connecting the machine to the power, follow the following instructions:
o
o
o
o
check that the electric line has a suitable course for the absorbed power
(1600W)
check that the voltage corresponds to the data indicated in the plate on the left
side of the machine.
The power has to have the efficient earth connection..
In case of substitution of the cable of feeding, use only original cables (ask to
the manufacturer the special cable with type M connection)
The manufacturer will not take on any responsibility if these instructions are not respected.
All the electric devices in the machine work with a 24Vdc produced by the transformer except the boiler heating element and the same transformer, that use a tension of 230Vac or 120Vac on request.
The main light switch is a bipolar type and it supplies all the machine.
There are two fuses, 2A and 12A, which respectively protect the transformer and
the circuit in low voltage 24Vdc.
In case you have to extract the breakdown fuses, unscrew the hood container.
The 20Vac low-power circuit is interrupted by a safety button, situated on the
chassis, that cuts the current to the electronic board when the door is open.
Extracting the button, it is possible to reestablish the feeding with the door open
(by only technical staff).
Pag. 4
Legend:
EV
D
VA
CV
PS
PC
V
C
EV1
EV2
EV3
EvE
M1
M2
M3
GE
S
Inlet electrovalve
anti-limestone filtrer (optional)
water reservoir (optional)
flowmeter
soluble pump
espresso pump
one-way valve
boiler
soluble 1 & 2 electrovalve
soluble 3 and hot water electrovalve
soluble 4 & 5 electrovalve
espresso electrovalve
soluble 1 & 2 mixing group
soluble 3 mixing group
soluble 4 & 5 mixing group
espresso group
espresso waste electrovalve
UC
U1
U2
U3
espresso group outlet
mixer 1 outlet
mixer 2 outlet
mixer 3 outlet
Pag. 29
TROUBLESHOOTING GUIDE
The machine is provided with a program of self-diagnosis, that allows to visualize
on the display the messages of breakdown or machine stopped :
HYDRAULIC CONNECTION
INSIDE TANK
The machine is already set for the inside tank working.
Message
Description
Probable cause
ERR. CUP-RELEAS.
during the cup-releasing, the board has not
received the change of state of the cup-releaser
micro switch.
Fuses, cup-releaser motor, cup-releaser micro
switch, electronic board.
ERROR ARM 0
The electronic board has not received the “sugar
position” of the cup -arm signal by the relative
sensor on the cup-station board.
Fuses, cup blocked in the cup-arm, cup-arm
motor, position sensor, electronic board.
ERROR ARM 1
The electronic board has not received the “cup
position” of the cup -arm signal by the relative
sensor on the cup-station board.
Fuses, cup blocked in the cup-arm, cup-arm
motor, position sensor, electronic board.
ERROR ARM 2
The electronic board has not received the
“supply position” of the cup -arm signal by the
relative sensor on the cup-station board.
Fuses, cup blocked in the cup-arm, cup-arm
motor, position sensor, electronic board.
ERROR GROUP 1
the coffee-group has not reached the “supply
position” given by its right micro switch.
Fuses, group right micro switch, group motor,
electronic board.
ERROR GROUP 0
the coffee-group has not reached the “normal
position” given by its left micro switch.
Fuses, group left micro switch, group motor,
electronic board.
ERR. COFFEE FLOW
During espresso supplying, the board has not
received signals from the flowmeter.
Fuses, too finer coffee, coffee pump, coffee
electro valve, flowmeter, electronic board.
ERR. SOLUB.FLOW
During soluble supplying, the board has not
received signals from the flowmeter.
Fuses, solubile pump, solubile electro valve,
flowmeter, electronic board.
ERROR GRINDER 1
During the coffee grinding, the board has not
received the signal given by the doser-switch in
the maximum time of 25 seconds.
Too fine coffee, fuses, doser micro-switch,
grinder motor, grinder blocked by something
hard, electronic board.
LACK OF CUPS
The board doesn’t receive the signal from the
cups sensor.
Lack of cups, cups sensor, electronic board.
LACK OF WATER
The board doesn’t receive the signal from the
float.
Lack of water, float, water container micro
switch, electronic board.
ERROR BOILER 1
The board has not received the programmed
value temperature from the boiler probe in the
maximum time of 15 minutes.
Safety thermostat, boiler heating element,
electronic board.
EMPTY GROUNDS!
The coffee grounds decounter has reached the
programmed value.
Empty the grounds and execute the quick
function nr.5.
ERROR EXECUTIVE
At the power-on, the board has not received
signals by the payment payment, Executive or
MDB, programmed.
Payement system, cables, electronic board..
WATER SYSTEM CONNECTION (OPTIONAL)
•
•
•
•
•
•
Pag. 28
disconnect the silicon pipe, which comes from the tank, from the limestone
filter.
connect the silicon pipe coming from the water resevoir to the filter.
connect the connector with the two grey wires coming from the water reservoir to the connector with two grey wires of the machine.
disconnect the wires of the float and connect the black and green wires coming from the water reservoir to the black and green wires into the machine.
check that the net-system pressure doesn't overcome the 2 bars, otherwise it is
necessary to install a pressure reductor.
Connect the water inlet tube to the inlet electrovalve with a ¾ " fitting.
Pag. 5
PRODUCTS LOADING
QUICK FUNCTIONS
Fill up the containers of the products as the labels on them.
In this section, it is possible to perform some of the most useful functions by the
operator.
CUPS LOADING
Rotate the cup container towards left and open the cover slightly lifting it.
Load the cup columns, assuring that the two columns are jammed by the magnets.
Close the cover and insert again the container.
To access press the button “QUICK MENU” of the keyboard.
On display you will see “QUICK MENU”
Pushing the relative number, you will execute these following functions::
STIRRERS LOADING
1. mixers washing: a washing for each mixing group is executed.
Load the container and position the stirrer’s weight above all of them to facilitate
also the expulsion of the last ones.
2. boiler 1 temperature visualization: you see for 2 seconds the present
temperature of the boiler 1.
3. boiler 2 temperature visualization: you see for 2 seconds the present
temperature of the boiler 2.
PAYMENT SYSTEM CONNECTION
• VALIDATOR 12V: connect to the keyboard connector COIN12V (see figure).
• VALIDATOR 24V: connect to the keyboard connector COIN12V (see figure).
• EXECUTIVE / MDB: connect to the relative cables, positioned near the keyboard.
• SINGLE IMPULSE SYSTEM (obliterator, token system, etc.): connect to the
6 pins connector in the back side of the machine.
After the electric connection, it is necessary to set the used system into the program (see page 16).
4. free mode working: setting the “free mode” working. After 1 minute
of inactivity the machine comes back in regular working.
5. grounds counter reset: the coffee grounds counter is reset to the
value programmed on the “level 2 menu”. The message “empty
grounds !” will disappear and the machine will continue to work.
6. filter counter reset: the filter counter is reset to the value programmed in “level 2” menu. After that, the symbol “*” will disappear.
7. espresso group motor test: you can test the espresso group movement.
Pushing the button 7, you will supply the motor, while keeping
pressed it, the motor will move to the next position, “supply position”
or “normal position”.
KEYBOARD
8. coffee decounter reset: the coffee decounter is reset to the value programmed.
PROG
QUICK MENU
9. chocolate decounter reset: the chocolate decounter is reset to the value programmed.
0. total counter visualization: the display will show the total counter of the machine for 3 seconds. It is not possible to reset this counter.
Pag. 6
Pag. 27
Movements nr 38 and 39 (Decounter coffee and
chocolate)
The movements nr38 (decounter coffee) and nr39 (decounter chocolate), where
inserted, decrease the relative decounter by a unit.
To set the value of the decounter, it is enough to change it in one selection which
contains it, automatically it will be modified also in all the other selections.
If the parameter “type” is set=0, every time it is reset, see at page 22, the decounter restart to the set value, while if the parameter “type” is set=1, at every reset,
the decounter value will be the sum of the set value plus the value before the reset.
Example with value= 100 and type=0
If the decounter is reset when its value was 20, the new decounter value is 100.
Example with value=100 and type=1
If the decounter is reset when its value was 20, the new decounter value is 120
(100+20).
In both of cases, when the decounter reaches 0, the display will show “Machine
ready coffee finished” or “Machine ready choco finished” or “Machine ready
No coffee&choco” and the machine will disable the selections which contains the
relative decounter (movements 38 and 39).
OPERATING
After have followed all the instructions of installation, it is possible to turn on the
machine through the light switch situated on the rear side.
At the switch on of the machine, it appears on display for a brief time the message
of the version software, after that it will begin the heating of the boiler that will be
visualized with the message “HEATING” that will be replaced, to reached temperature, by the flowing message “. ….INSERT THE CREDIT AND SELECT
YOUR DRINK…”.
Note: it is advisable to execute a manual washing immediately after the
switch on, to load with more facility the hydraulic circuit and the boiler.
To do this, make reference to the “QUICK FUNCTIONS” at page 27.
Drink choice
The choice of the drink happens through the composition of a numerical code that
corresponds to the desired drink.
The codes and the relative associations can be varied in base to the demands of
the consumer.
Sugar choice
The choice happens after the selection of the drink and within 5 seconds, through
the keys A and B; during the choice on display it will appear “CHOOSE
SUGAR” that it will disappear once selected.
The functions of the 2 keys and the supply by default of the sugar depend on the
setting of the parameter " Default Bitter Drink" described at page 20.
The quantities of the sugar are programmable for every single drink, while the
extra-sugar quantity is 50% more.
Change of language
It is possible to change the language of visualization among those present in the
version.
Pressing the key D, the language changes and it will be hold on for a maximum of
10 sec, after this time it will return to be that programmed by default.
This function is useful in those places where the users speak different languages
(airports, stations, etc)
Pag. 26
Pag. 7
26
27
TIME SOLUB.5
UNHOOK CUP
28
29
30
31
32
SEARCH CUP
ON TIME WATER
SOLUBLE 6
TIME SOLUBLE 6
LIOF. SOLUBLE 4
33
LIOF. SOL4 SUG V.
The main menu is useful to the technical sector of the management and is for setting the various parameters of the machine.
34
LIOF. SOL4 SUG T.
35
LIOF. SOLUBLE 5
The buttons used in the programming are the followings:
36
LIOF. SOL5 SUG V.
A (+) has the function of increase or advancement in the program
B (-) has the function of diminution or withdrawal in the program
C (esc) has the function of exit
D (enter) has the function of confirmation
37
LIOF. SOL5 SUG T.
38
39
40
41
42
43
44
45
46
47
COFFEE DECOUNTER
CHOCO DECOUNTER
J13-6 ON
J13-6 OFF
J13-5 ON
J13-5 OFF
J13-6 ON
J13-6 OFF
GRINDER 1
GRINDER 2
PROGRAMMING
There are 2 levels of program: a frequent menu and a main menu.
The frequent menu is useful to the operator to regulate the dosing of the drinks, to
set the prices, to notice the counters and to visualize the events of the machine.
FREQUENT MENU
The access to this menu happens through the key PROG of the keyboard.
On display the following menus will appear:
•
SET DRINKS
•
SET PRICES
•
COUNTERS & AMOUNTS
•
EVENTS
The machine makes the soluble 5 cycle with time control.
The cup-arm goes in “cup” position and the cup-dispenser (turrets
type) releases a cup”.
A cup searching (turrets type) happens.
A hot water quantity (in seconds) is supplied.
The machine makes the soluble 6 with volumetric control.
The machine makes the soluble 6 with time control.
The machine gives the soluble 4 ( coffee) powder (used for light
kinds of powder).
The machine gives a dose of sugar into the soluble 4 mixing group
and a quantity of water with volumetric control.
The machine gives a dose of sugar into the soluble 4 mixing group
and a quantity of water with time control.
The machine gives the soluble 5 ( coffee) powder (used for light
kinds of powder).
The machine gives a dose of sugar into the soluble 5 mixing group
and a quantity of water with volumetric control.
The machine gives a dose of sugar into the soluble 5 mixing group
and a quantity of water with time control.
the coffee decounter decreases by one unit.
the chocolate decounter decreases by one unit.
not used
not used
not used
not used
not used
not used
the grinder 1 produces a dose of coffee with time control
the grinder 2 produces a dose of coffee with time control
Note: some movements could not work, depending on the model of the machine.
Consult the manufacturer in case you want to modify the sequence of movements.
To scroll, use the buttons A (+) or B (-); to enter in the selected menu press D
(enter) while to exit press C (esc).
Pag. 8
Pag. 25
It is possible to eliminate, modify or insert movements or to change its regulations
where possible, for example the dosing of the products.
•
•
•
•
•
to move the selection cursor movement use A and B
to insert a new movement in the selected position press “2”
to eliminate the selected movement press “1”
to modify the selected movement press" 3"
to modify the regulations (es: dosing) to press D
To modify the name of the drink use the keys:
“ 1” to withdraw with the cursor on the character to modify
“ 2” to advance with the cursor on the character to modify
“A” or “B” to modify the character
The movements are the following:
01
CUP
02
03
04
05
SUPPLY POSITION
SUGAR POSITION
GRINDER 1
SOLUB 1 VOLUM.
06
SOLUB.2 VOLUM.
07
SOLUB.3 VOLUM.
08
09
SUGAR
ESPRESSO 1
10
11
12
13
SPOON
CUP POSITION
START POS. GROUP
SOLUB.4 VOLUM.
14
SOLUB.5 VOLUM.
15
16
17
18
19
20
21
HOT WATER
GRINDER 2
PAUSE TYPE 1
PAUSE TYPE 2
PAUSE TYPE 3
PAUSE TYPE 4
ESPRESSO 2
22
23
TIME SOLUB.1
TIME SOLUB.2
24
25
TIME SOLUB.3
TIME SOLUB.4
the cup-arm goes in “cup” position and the cup-dispenser (single
type) releases a cup.
the cup-arm goes in “supply” position.
the cup-arm goes in “sugar” position.
the grinder 1 produces a dose of coffee.
The machine makes the soluble 1 (milk) cycle with volumetric
control (in cc).
The machine makes the soluble 2 (chocolate) cycle with volumetric control (in cc).
The machine makes the soluble 3 (tea) cycle with volumetric
control (in cc).
the machine gives a dose of sugar in the cup.
the coffee dose is released into the infusion chamber and the
espresso supplying is executed.
The machine gives a spoon.
A cup searching happens.
The espresso group is moved to the normal position.
The machine makes the soluble 4 (coffee) cycle with volumetric
control (in cc)..
The machine makes the soluble 5 cycle with volumetric control
(in cc)..
A hot water quantity (in cc) is supplied.
the grinder 2 produces a dose of coffee.
A pause is executed.
A pause is executed.
A pause is executed.
A pause is executed.
the coffee dose is released into the infusion chamber and the
espresso 2 supplying is executed.
The machine makes the soluble 1 (milk) cycle with time control.
The machine makes the soluble 2 (chocolate) cycle with time
control.
The machine makes the soluble 3 (tea) cycle with time control.
The machine makes the soluble 4 (coffee) cycle with time control.
Pag. 24
SET DRINKS
Entering the program through D, you will see the sequence of the existing drink
codes.
11-12-13-14-15-1
Sel.11
The flashing cursor points out the drink code selected, to move it use the keys A
to advance or B to withdraw; contemporarily to the movement of the cursor, in the
underlying line, the name of the selection will be visualized related to the drink
code.
To modify the parameters of the drink code press D.
A sequence of numbers will be visualized that correspond to the doses of the selection, to the line price (P) and to the menu of the name of the drink (MS).
08-09-P1-MS
DOSE SUGAR
As in precedence, the cursor points out the dosing code selected, therefore to
move it use the keys A or B; on the underlying line the description of the selected
dosing will appear.
To modify its value, after having selected it to press D.
DOSE SUGAR
15
Use the numerical keys from 0 to 9 to insert the desired value and to confirm
pressing D.
To go out of the menu press C.
SAVE CHANGES ?
YES=1
NO=3
Press" 1" to confirm the changes or" 3" to cancel it.
Pag. 9
To modify the name of the drink use the keys:
" 1" to withdraw with the cursor on the character
" 2" to advance with the cursor on the character
"A" or" B" to modify the character
Example: change the water quantity of the coffee of the selection “ long coffee “
n°13
•
•
•
•
•
•
•
•
•
Enter in “ set drinks “ with D
Position the cursor on the code drink n°13 with the key A
Enter with D the sequence dosing
Position the cursor on the dosing n°9 with A
Press D to enter the change value
Use the numerical keys to set the desired value and press D to confirm it
Press C to go out of the menu “dosing drink”
Press “ 1” to confirm the changes
Press C to go out of the menu" set drinks"
SET PRICES
In this menu it is possible to set the value of 9 lines prices, to which the selections
are linked.
To select the line price to set, use the keys A or B, enter the change of the value
pressing D and set the value with the numerical keys, after that press D to confirm.
If all the prices values are 0, the machine will go automatically in “free mode”.
SET DRINKS
Premise: every selection or drink is composed by a sequence of movements which
correspond to a single operation of the machine.
The single movements are only performed after the correct event of the previous
movement, in case of incorrect operation the machine will go to alarm.
THE CORRECT SEQUENCE OF COMPOSITION OF THE SELECTIONS
IS ALREADY SET FROM THE MANUFACTURER, THEREFORE HE
RECOMMENDS YOU TO DO NOT MODIFY THE CORRECT SEQUENCE WITHOUT CONSULTING THE MANUFACTURER.
Entering the program through D you will see the sequence of the existing drink
codes.
11-12-13-14-15-1
Sel. 11
The flashing cursor points out the code drink, to move it use the keys A to advance or B to withdraw; contemporarily to the cursor movement, in the underlying line the name of the selection will be visualized related to the code drink.
To modify the parameters of the code drink, press D.
A sequence of numbers will be visualized each of which corresponds to a movement of the machine.
01-04-03-08-17-1
PRENDI BICCHIERE
As for the drinks, the cursor points out the code movement, therefore to move it
use the keys A or B; on the underlying line the description of the movement will
appear.
Every drink is composed therefore by a sequence of “movements”, by a line price
and by the menu of its name" MS."
Pag. 10
Pag. 23
BOILER 1 WORKING
Enable of the boiler 1.
COUNTERS & AMOUNTS
BOILER 2 WORKING
Enable of the boiler 2.
In this menu it is possible to notice the counters of the various selections and
eventually to reset them.
Nota 1: to avoid the blocks in the mixing group, the software controls the powder
and water values in the way explained in the diagram.
Press D to enter the menu that is composed in the following way:
TOTAL COUNTERS&AMOUNTS
total in normal working of counters and amounts (Pcs.) from the last zero
resetting. To reset, press" #" and" 3" to confirm.
TEST MODE: TOTAL COUNTERS&AMOUNTS
total in test working of counters and amounts (Pcs.). To reset, press" #"
and" 3" to confirm.
FREE MODE: COUNTERS&AMOUNTS
total in "free test" working of the done tests and of theirs "loss" in relationship to the price of the effected selections. To reset, press" #" and" 3"
to confirm.
OUTPUT LIST
Nr
DESCRIPTION
0.
1.
2.
3.
4.
5.
6.
7.
8.
9.
10.
11.
12.
13.
14.
15.
16.
17.
18.
19.
20.
21.
22.
23.
24.
25.
26.
27.
28.
29.
Soluble pump
Espresso pump
Espresso group motor
Cup-arm motor
Not used
Grinder motor
ETV espresso
ETV solub. 4
ETV solub. 3
ETV solub. 1 & 2
ETV solub. 5
Stirrer releaser solenoid
Coffee-releaser solenoid
Not used
Not used
Cup-releaser motor
Column-releaser 1 solenoid
Column-releaser 2 solenoid
Not used
Not used
Not used
Not used
ETV water
Not used
Sugar motor
Solub. 1 motor
Solub.2 motor
Solub. 3 motor
Solub. 4 motor
Solub. 5 motor
TOTAL IN PRICE-PERIOD 1
total of the loss and of the counters in the working in period 1 of price.
To reset, press" #" and" 3" to confirm.
TOTAL IN PRICE-PERIOD 2
total of the loss and of the counters in the working in period 2 of price.
To reset, press" #" and" 3" to confirm.
RESET COUNTERS?
Zero resetting of all the counters. Press "1" to reset or "3" to cancel.
Pag. 22
Pag. 11
EVENTS
In this menu it is possible to notice the last 100 events of the machine.
Entering the menu with D the following data will be visualized:
DATA: time & date
ID:XX RESULT POS
In the line of the date, you see the time and date of the event.
ID indicates the kind of event, that can be a code drink or an internal operation of
the machine (see chart).
RESULT indicates if the event has gone to good end (GOOD) or an error is occurred (Ennn) where nnn corresponds to a number that the type of error represents
(see chart).
POS indicates the position of the event (from 1 to 100).
To scroll the various events use the keys A and B.
Internal operation codes
SET NUMBER OF COFFEE GROUNDS
Counter for coffee grounds emptying. Once reached, the machine will
show “EMPTY GROUNDS” and it will stop (see also at page 27).
REGULAR MODE COUNTERS&AMOUNTS
Regular mode counter. To reset it, press # and D.
TEST MODE COUNTERS&AMOUNTS
Test mode working counter. To reset it, press # and D.
FREE MODE COUNTERS&AMOUNTS
Free mode working counter. To reset it, press # and D.
TOTAL IN PRICE-PERIOD 1
Price-period 1 counter. To reset it, press “#” and D.
TOTAL IN PRICE-PERIOD 2
Price-period 2 counter. To reset it, press “#” e D.
94 espresso group positioning
95 cups searching
96 filter counter reached
97 boiler 1 refilling
98 boiler 2 refilling
99 washing
RESET COUNTERS&AMOUNTS
Reset of all the counters above. Press “1” to confirm or “3” to cancel.
ENABLE SLAVE MACHINE
Enable the “slave” machine.
Error codes
E100
E101
E102
E103
E104
E105
E106
E107
E108
E109
E110
E111
E112
SET FILTER COUNTER
Counter for the limestone filter substitution. Once reached, the machine
will show “*” on display but it will continue to work (see also at page 27).
arm-cup positioning in “sugar position”
arm-cup positioning in “cup position”
arm-cup positioning in “supplying position”
espresso group positioning in “normal position”
espresso group positioning in “supply position”
espresso supplying
soluble supplying
coffee grinding (grinder 1)
coffee grinding (grinder 2)
sequence file
cup releasing
lack of cups
lack of water
Pag. 12
ENABLE TEMPERAT.ON DISPLAY:
Visualization of the boiler temperature on display .
SERIAL NUMBER
Set the serial number of the machine.
CAUTION ! OUTPUT TEST !:
Test of all the electrical output of the electronic board (see the LIST at
page 22). Choose the output with A or B; to supply it, press D.
TYPE OF MACHINE
Set-up of the model of the machine.
Pag. 21
OPTIONS: LEVEL 2 (manager- technician)
After have inserted the correct password, that it initially is "222", you will enter
the following menu:
MODIFY PASSWORD LEVEL 1
Insert the new password and press D to confirm.
MODIFY PASSWORD LEVEL 2
Insert the new password and press D to confirm.
E113
E114
E115
E116
E117
E118
E119
E120
E121
boiler 1 temperature
boiler 2 temperature
coffee grounds counter
boiler 1 off by timer
boiler 2 off by timer
boiler 1 heating
“executive or MDB” communication during working
“executive or MDB” communication at power on
boiler 2 heating
SET DRINK
See ”set drinks” chapter at page 23.
LOAD DEFAULT DATA
Original data loading. To confirm press “1” while to cancel press “3”.
SET LANGUAGE
Language of all the message .
SET DELAY POWDER
Set the delay between the water and the powder, measured in cc if the
movement is “volumetric” or in tenth of seconds if it is by time (see note
1).
SET WATER QUEUE
Reserve of water without powder at the end of the selection, measured in
cc if the movement is “volumetric” or in tenth of seconds if it is by time
(see note 1).
SET PAUSE ESPRESSO GROUP
Time for coffee grounds drying, measured in tenth of seconds.
ENABLE BITTER DRINK AS DEFAULT
Kind of sugar / no sugar drink.
If ENABLE, the drink will be without sugar and the buttons A and B will
have the function of “sweet” and “extra sweet” respectively.
If DISABLED, the drink will be with sugar and the buttons A and B will
have the function of “no sugar” and “extra sweet” respectively.
Pag. 20
Pag. 13
MAIN MENU
To access this menu, keep pressed the button PROG for 5 seconds.
The menu is composed by the followings programs:
SET TIME
Setting of the clock and the schedules of some functions.
PAYMENT SYSTEM
Setting of the system of payment and its options.
SET TEMPERATURE
Setting of temperatures and other functions on the boilers.
OPTIONS: INSERT PASSWORD
Entry to the options related to the levels of programming: operator and
technician or manager.
OPTIONS: LEVEL 1 (operator)
After have inserted the correct password, which initially is "111”, the following
menu will appear:
MODIFY PASSWORD LEVEL 1
Insert the new password and press D to confirm.
TEST MACHINE MODE
Set the machine in Test mode working.
FREE MODE
Set the machine in Free mode working.
SINGLE DRINK COUNTERS&AMOUNTS
Choose the id drink to analyse with A or B and D to confirm.
REGULAR COUNTERS
Regular working counter. To reset it, press “#” and D.
TEST MODE COUNTERS&AMOUNTS
Test mode working counter. To reset it press “#” and D.
FREE MODE COUNTERS&AMOUNTS
Free mode working counter. To reset it press “#” and D.
TOTAL IN PRICE-PERIOD 1
Price-period 1 counter. To reset it, press “#” e D.
TOTAL IN PRICE-PERIOD 2
Price-period 2 counter. To reset it, press “#” e D.
RESET COUNTERS&AMOUNTS
Resetting all the counters above. Press “1” to confirm or “3” to cancel.
NOTE: these counters are the same of the “frequent menu” ones (see page 11).
Pag. 14
Pag. 19
OPTIONS
SET TIME
This menu is constituted by 2 different levels which are protected by a password:
To enter this menu, press D:
1st level: Operator - dedicated to the operator of the machine
2nd level: Management - dedicated to the technician / manager of the machine
SET DATE AND HOUR
Date and clock setting.
The access to the first level is also possible from the 2nd level.
TIMER ON/OFF BOILER 1
Set the period of inactivity of boiler 1.
The machine has 3 kinds of working which have different counters and amounts
of selections :
normal:
test :
Free test:
normal working with priced selection
working with priced selections but with the money which doesn’t
go into the coin box (example: the technician has to test the machine and the payment system).
working with free selections.
Besides, where the price-periods are activated, there are the two counters of selections and amounts.
The counters of every level are independent one with the other, therefore the zero
resetting of the counters of a level doesn't influence the counters of the other levels.
ENABLE TIMER ON/OFF BOILER 1
Enable the period of inactivity of boiler 1.
TIMER ON / OFF BOILER 2
Set the period of inactivity of boiler 2.
ENABLE TIMER ON /OFF BOILER 2
Enable the period of inactivity of boiler 2
AUTOMATIC WASHING 1
Set the time for automatic washing cycle 1.
ENABLE AUTOMATIC WASHING 1
Enable the automatic washing cycle 1.
AUTOMATIC WASHING 2
Set the time for automatic washing cycle 2.
ENABLE AUTOMATIC WASHING 2
Enable the automatic washing cycle 1.
To set the times, use the numerical buttons.
To enable the function, press A while to disable it use the button B.
To confirm press D, while to exit press C.
The settings of boiler 1 and 2 work if they are present ( make reference to the
model of the machine).
Pag. 18
Pag. 15
PAYMENT SYSTEM
SET TEMPERATURE
The followings programs compose this menu:
The followings programs compose this menu:
SET COIN VALUE PARALLEL SYSTEM
Setting of the coin values (see note 1).
SET BOILER 1 TEMPERATURE
Set-up of the boiler 1 temperature.
TIME 1ST PRICE PERIOD
Setting of the period 1 during which you can apply a discount.
SET BOILER 2 TEMPERATURE
Set-up of the boiler 2 temperature (if present).
1ST PRICE-PERIOD DISCOUNT
Value of discount to apply to the period 1.
TIME OVERHEATING BOILER 1
After this time of “machine stopped” the boiler 1 is overheated.
TIME 2ND PRICE PERIOD
Setting of the period 2 during which you can apply a discount.
SET OVERHEATING BOILER 1
Value of overheating of the boiler 1 (max. 5°C).
2ND PRICE-PERIOD DISCOUNT
Value of discount to apply to the period 2.
TIME OVERHEATING BOILER 2
After this time of “machine stopped” the boiler 2 is overheated.
DECIMAL POINT
Setting of the decimal point to be applied coin and prices to the values.
SET OVERHEATING BOILER 2
Value of overheating of the boiler 2.
NAME OF CURRENCY
Setting of the currency name.
TIME FILLING UP BOILER 1
Every “minute set” the pump refills the boiler 1 to keep the maximum
level.
SINGLE SALE NO CHANGE GIVEN
Setting of the sale without maintenance of the residual credit.
MAXIMUM CHANGE GIVEN
Maximum value of credit to be given (for MDB change-giver systems only).
TYPE OF PAYMENT SYSTEM
Type of payment system used on the machine (see note 2).
After have programmed the type of system of payment, it is necessary to go
out of the program with C and switch off the machine.
Note 1: this menu is only valid for parallel selectors.
To memorize the values coin proceed in the following way:
• Set the value of the coin to accept with the numerical buttons
• introduce the coin in the selector
• if accepted, on the display the channel will appear on which is programmed
• press D to confirm the memorization.
• Repeat the procedure for the other coins.
Pag. 16
SET FILLING UP BOILER 1
Duration of refilling for boiler 1.
TIME FILLING UP BOILER 2
Every “minute set” the pump refills the boiler 2 to keep the maximum
level.
SET FILLING UP BOILER 2
Duration of refilling for boiler 2.
If the boiler 2 is not available, the relative settings will not work.
Pag. 17