1
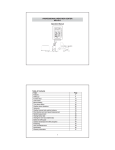
PROFESSIONAL WEATHER CENTER
WS-1510-IT
PROFESSIONAL WEATHER CENTER
WS-1510-IT
Instruction Manual
Instruction Manual
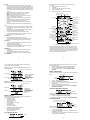
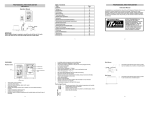
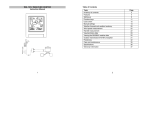
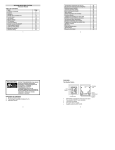
Table of Contents
Topic
Features
Setting up
Function keys
LCD Screen
Manual Setting
Time alarm setting
Weather alarm operations
Hysteresis
Weather forecast and weather tendency
Wind direction and wind speed measurement
Rainfall measurement
Viewing history data
Viewing the min/ max weather data
Switch On/ Off buzzer
Outdoor transmission 915 MHz reception
Positioning
Care and Maintenance
Specification
Warranty Info
FAQ
Page
2
4
7
9
10
13
14
16
17
19
19
19
20
24
25
25
27
28
29
30
Congratulations on purchasing this state-of-the-art Professional
Weather Center as an example of excellent design and innovative
technology. Featuring time, date, calendar, weather forecast, wind
direction and speed, rainfall, indoor temperature, outdoor temperature
and outdoor humidity, air pressure and various alarm settings for
different weather conditions, this Weather Center will provide you with
extensive weather information and forecast.
INSTANT TRANSMISSION is the
state-of-the-art new wireless
transmission technology,
exclusively designed and developed
by LA CROSSE TECHNOLOGY.
INSTANT TRANSMISSION offers
you an immediate update (every 4.5
seconds!) (6.5 seconds for rain) of
all your outdoor data measured
from the transmitters: follow your
climatic variations in real-time!
This product offers:
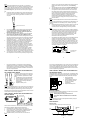
FEATURES:
Weather Center
Stand
Hanging hole
LCD
Battery
compartment
Function keys
1
•
•
•
•
•
•
•
•
•
•
•
•
•
•
•
•
•
•
•
•
•
•
•
•
•
•
•
Time display (manual setting)
12/24 hour time display
Calendar display (weekday, date, month, year)
Time alarm function
Weather forecasting function with 3 weather icons and weather
tendency indicator
Dew point display in ºF/°C
Outdoor temperature display in ºF/°C
Outdoor Humidity display as RH%
Indoor temperature display in ºF/°C
Display MIN/MAX value of outdoor temperature, outdoor humidity,
dew point, wind chill and relative pressure with time and date of
recording
Low/High outdoor temperature and humidity alarm
Relative air pressure displayed in inHg or hPa
Air pressure tendency indicator for the past 12 hours (bar graph
format)
LCD contrast selectable
Low battery indicator
Wind direction displayed in 16 steps
Wind speed and gust displayed in mph, km/h, or m/s, and
Beaufort scale
Wind chill displayed in F of C
High alarm function for wind speed
Manual reset of outdoor temperature, outdoor humidity, dew point,
wind chill, pressure, wind speed, gust, and 24h rainfall
24h rainfall display in inch or mm
Total rainfall display in inch or mm
Storm warning alarm
Buzzer on/off selectable
Storage of 140 sets of history weather data recorded in 3-hour
intervals
Wireless transmission at 915 MHz
Transmission range up to 330 feet (100 meters)
2
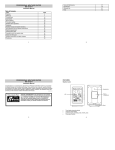
Wind Sensor
•
•
Connected to the thermo-hygro
sensor by cable
Can be installed onto a mast or a
horizontal panel
Rain Sensor
•
•
Remote transmission of the rainfall
data to the Weather Center at 915
MHz
To be mounted onto a horizontal
panel
SETTING UP:
Wireless transmission
at 915 MHz - thermohygro and rain sensor
to the Weather Center
Weather Center
Thermo-hygro Sensor
•
Remote transmission of the outdoor temperature
and humidity to the Weather Center at 915 MHz
•
Weather-resistant casing
•
Wall mounting case (to be mounted in a
sheltered place. Avoid direct rain and sunshine)
Rain sensor
Cable connection between the wind
sensor and the thermo-hygro sensor
3
4
Wind sensor
Note:
When putting the Weather Center into operation, it is important to
perform in close proximity (e.g. on a table) a complete wiring and set-up
of the system. This step is important to test all components for correct
function before placing and mounting them at their final destinations
(See Positioning below). Spin the wind vane and tip the rain gauge to
test.
1.
Unwind the cables of the Wind sensor. Connect the Wind sensor
to the Thermo-hygro transmitter by plugging the connector head
into the socket of the Thermo-hygro sensor. Cord should “click”
into place.
7.
8.
gauge by moving the wind-vane; tilting the rain sensor to hear the
impact of the internal moving seesaw, etc. (see Positioning
below).
Time and date shall be manually set (See Manual Setting below).
After the Weather Center has been checked for correct function
with regard to the above points and found fit, the initial set up of
the weather station system is finished and the mounting of the
system components can take place. It must be ensured however
that all components work properly together at their chosen
mounting or standing locations. If e.g. there appear to be
problems with the 915 MHz radio transmission, they can be
overcome by slightly changing the mounting locations or turning
the base station.
Note:
The radio communication between the receiver and the transmitters in
the open field reaches distances of max 330 feet, provided there are no
interfering obstacles such as buildings, trees, vehicles, high voltage
lines, etc.
9.
Sockets for wind sensor
2.
3.
4.
5.
6.
First insert the batteries into the Thermo-hygro sensor and Rain
sensor “How to install and replace the batteries into the
Thermo-hygro sensor“ and “How to install and replace the
batteries into the Rain sensor” below).
Then insert the batteries into the Weather Center (see “How to
install and replace the batteries into the Weather Center”
below). Once the batteries are installed, all segments of the LCD
will light up briefly and a short signal tone will be heard. It will then
display the time as 12:00, the date as 1.1.05, the weather icons,
and air pressure value. "- - -" will be shown for outdoor data.
Afterwards, the Weather Center will start receiving data from the
transmitter. The transmission reception icon will be blinking to
indicate that the station is trying to get the thermo-hygro
transmitter data. The outdoor temperature, humidity, wind data
should then be displayed on the Weather Center. If this does not
happen after 135 seconds, the batteries will need to be removed
from all units. You will have to start again from step 2.
The transmitter reception icon is now blinking again to indicate
that the station is trying to get the rain sensor data. It will stop
blinking once the rain sensor has been detected. If this does not
happen after 135 seconds, you will need to start again from step 2.
You may need to check the cable for correct connection and all
the components for correct function by manually turning the wind-
Radio interferences created by PC screens, radios or TV sets can
in some cases entirely cut off radio communication. Please
consider this when choosing standing or mounting locations.
Note :
•
After batteries are installed in the transmitter, install the batteries
in the weather center to receive the signal from the transmitters as
soon as possible. If the weather center is powered more than 5
hours after the transmitter is powered, the weather center will
never receive signal successfully from the transmitters. In this
case, user will need to reinstall the batteries from all the
transmitters to redo set-up procedure.
•
After batteries are installed, there will be synchronization between
weather center and the transmitters. At this time, the signal
reception icon will be blinking. When the signal is successfully
received by the weather center, the icon will be switched on. (If it
is not successful, the icon will not be shown in LCD) So the user
can easily see whether the last reception was successful (icon on)
or not (icon off). On the other hand, the short blinking of the icon
shows that a reception is in progress.
Transmitter signal
reception icon
5
•
6
If the signal reception is not successful on the first frequency
(915MHz) for 45 seconds, the frequency is changed to 920MHz
and the learning is tried another 45 seconds. If still not successful,
the reception is tried for 45 seconds on 910MHz. This will also be
done for re-synchronization.
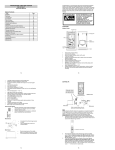
HOW TO INSTALL AND REPLACE THE BATTERIES INTO
THE THERMO-HYGRO SENSOR
The outdoor Thermo-hygro sensor works with
2 x AA, IEC LR6 1.5V batteries. To install and
replace the batteries, please follow the steps
below:
1. Uninstall the rain cover of the transmitter.
2. Remove the battery compartment cover.
3. Insert the batteries, observing the correct
polarity (see the marking in the battery
compartment).
4. Replace the battery cover.
Note:
In the event of changing batteries in any of the units, all units need to be
reset by following the setting up procedures. This is because a random
security code is assigned by the thermo-hygro sensor at start-up and
this code must be received and stored by the Weather Center in the first
several minutes of power being supplied to it.
HOW TO INSTALL AND REPLACE THE BATTERIES INTO
THE RAIN SENSOR
In the event of changing batteries in any of the units, all units need to be
reset by following the setting up procedures. This is because a random
security code is assigned by the rain sensor at start-up and this code
must be received and stored by the Weather Center in the first several
minutes of power being supplied to it.
HOW TO INSTALL AND REPLACE THE BATTERIES INTO
THE WEATHER CENTER
The Weather Center works with 3 x AA, IEC LR6, 1.5V batteries. When
the batteries need to be replaced, the low battery symbol will appear on
the LCD. To install and replace the batteries, please follow the steps
below:
1. Remove the battery
compartment cover.
2. Insert the batteries observing
the correct polarity (see the
marking in the battery
compartment).
3. Replace the battery cover.
BATTERY CHANGE:
It is recommended to replace the batteries in all units every 24 months
to ensure optimum accuracy of these units.
Please participate in the preservation of the
environment. Return used batteries to an authorized
depot.
Note:
The stored History record will not be kept after the battery change is
done on the Weather Center.
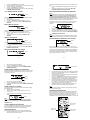
FUNCTION KEYS:
Figure 1
Figure 2
Figure 3
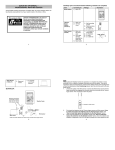
The rain sensor works with 2 x AAA, IEC LR3, 1.5V batteries. To install
and replace the batteries, please follow the steps below:
1.
Press tabs back to unlock rain sensor cover. (Figure 1)
2.
Lift rain sensor cover to access battery compartment. (Figure 2)
3.
Insert the batteries, observing the correct polarity (see the
marking in the battery compartment). (Figure 3)
4.
Replace the battery cover and the rain cover onto the unit.
Note:
Weather Center:
The Weather Center has 5 easy-to-use function keys.
MIN/MAX
key
SET
key
+ key
7
HISTORY key
8
ALARM key
SET key
•
Press and hold to enter manual setting modes: LCD contrast,
Manual time setting, 12/24 hour time display, Calendar setting, ºF/
ºC temperature unit, Wind speed unit, Rainfall unit, Pressure unit,
Relative pressure reference setting, Weather tendency threshold
setting, Storm warning threshold setting and Storm Alarm On/ Off
setting
•
Press to toggle between the display of Mode 1 or Mode 2:
Mode 1: "Wind speed + outdoor temp + rel. pressure"
Mode 2: "Gust + Dew Point temp + rainfall"
(Mode 2 displayed will be shown for 30 seconds. Then it will
return to normal display automatically.)
•
In normal display mode, press and hold to switch on/ off the
Buzzer
•
In the weather alarm setting mode, press and hold to adjust
different alarm value and switch the alarm On/ Off
•
Press to activate the reset mode when max or min record is
shown
•
Stop the alarm during the time alarm or weather alarm ringing
The LCD screen is split into 5 sections displaying the following
information:
1.
Time and date/ indoor temp/ second
2.
Wind data
3.
Outdoor temperature, Dew point and humidity,
4.
Air pressure, Rainfall data,
5.
Air pressure history and Weather forecast icon.
Low battery Indicator
Time alarm icon
(weather center)
Time display
Buzzer off indicator
Wind direction
display and wind
speed in Beaufort
scale
+ key
•
•
•
•
•
In display Mode 1, press to toggle between the display of Preset
alarm time, date, weekday + date, Indoor temp, or second in the
time display
In display mode 2, press to toggle between the display of Rel.
Pressure, 24 hour rainfall and Total rainfall
Press to adjust (increase) the level of different settings
Stop the alarm during the time alarm or weather alarm ringing
Press to confirm to reset the max/min record
HISTORY key
•
Press to display the weather data history records
•
Stop the alarm during the time alarm or weather alarm ringing
•
Press to exit manual setting mode and alarm setting mode
ALARM key
•
Press to enter the time alarm and weather alarm setting mode
•
Confirm particular alarm setting
•
Press to exit the manual setting mode
•
Stop the alarm during the time alarm or weather alarm ringing
•
Press to exit max/ min record display mode
MIN/MAX key
•
Press to display minimum and maximum records of various
weather data
•
Press to adjust (decrease) the level of different settings
•
Stop the alarm during the time alarm or weather alarm ringing
Calendar display
Wind speed Hi
alarm icon
Wind Chill
in F or
Wind speed or
gust in mph, km/h
C
Outdoor temperature
or dew point
in °F or ºC
Outdoor temp.
alarm icon
Outdoor relative
humidity in %
Outdoor Humidity
alarm icon
Relative air pressure
display in inHg or
hPa, or total and 24h
rainfall display in inch
Transmitter signal
reception icon
Weather tendency
indicator
Air pressure
histogram
Weather forecast
icon
Low battery Indicator (Thermo-hygro)
Low battery Indicator (rain sensor)
* When the signal from the transmitter/ or Rain sensor is successfully
received by the Weather Station, this icon will be switched on. (If not
successful, the icon will not be shown on the LCD). User can therefore
easily see whether the last reception was successful (“ON” icon) or not
(“OFF” icon). On the other hand, the short blinking of the icon shows
that a reception is being done at that time.
LCD SCREEN
9
10
*In normal display user may press the SET key shortly to toggle
between Mode 1 and Mode 2 display:
Mode 1 : Wind speed, outdoor temperature and relative pressure
reading are shown.
Wind speed icon
The LCD contrast can be set within 8 levels, from "LCD 1" to "LCD 8"
(default setting is LCD 5):
1.
Press the SET key, the contrast level digit will start flashing.
2.
Use the + or MIN/MAX key to adjust the level of contrast.
3.
Confirm with the SET key and enter the MANUAL TIME
SETTING.
MANUAL TIME SETTING:
Outdoor temp
icon
In Mode 1, this reception
icon is showing the
condition of the
reception of the signal
from Thermo-hygro
transmitter
Rel Pressure
icon
Mode 2 : Wind Gust, Dew Point temperature and 24 Hour and Total
Rainfall reading are shown.
You then may manually set the time of the clock by following the steps
below:
Minutes flashing
Hour
flashing
1.
2.
3.
Wind gust icon
4.
5.
Dew point icon
In Mode 2, this
reception icon is
showing the condition
of the reception of the
signal from Rain
sensor
Rainfall icon
MANUAL SETTING:
The following manual settings can be changed once the SET key is
pressed and hold for about 3 seconds:
•
LCD contrast setting
•
Manual time setting
•
12/24 hour time display
•
Calendar setting
•
°F/ °C temperature unit setting
•
Wind speed unit
•
Rainfall unit setting
•
Air pressure unit setting
•
Relative pressure reference value setting
•
Weather tendency threshold value
•
Storm warning threshold value
•
Alarm On/ Off setting
LCD CONTRAST SETTING
The hour digit will start flashing.
Use the + or MIN/MAX key to set the hour.
Press the SET key to switch to the minutes. The minute digit will
start flashing.
Use the + or MIN/MAX key to set the minute.
Confirm the time with the SET key and enter the 12/24 HOUR
TIME DISPLAY SETTING.
12/24 HOUR TIME DISPLAY SETTING:
Digit flashing
The time can be set to view as 12-hour or 24-hour format. The default
time-display mode is 12-h. To set to 24-h time display:
1.
Use the + or MIN/MAX key to toggle the value.
2.
Confirm with the SET key and enter the CALENDAR SETTING.
CALENDAR SETTING:
"Date. Month." (for 24h time display)
"Month. Date." (for 12h time display)
Année
The date default of the Weather Center is 1. 1. of year 2005. The date
can be set manually by proceeding as follows.
1.
The year digit starts flashing.
2.
Use the + or MIN/MAX key to set the year. The range runs from
"00" (2000) to "99" (2099).
3.
Press the SET key to confirm the year and enter the month setting.
The month digit will start flashing.
Flashing
11
12
4.
5.
6.
7.
Use the + or MIN/MAX key to set the month.
Press the SET key to confirm the month and enter the date setting
mode. The date digit will start flashing.
Use the + or MIN/MAX key to set the date.
Confirm all calendar settings with the SET key and enter the °F/°C
TEMPERATURE UNIT SETTING.
°F/°C TEMPERATURE UNIT SETTING
The relative air pressure can be set as inHg or hPa. The default unit is
inHg.
1.
Use the + or MIN/MAX key to toggle between the unit “inHg" or
“hPa”
2.
Confirm the unit with the SET key and enter the RELATIVE
PRESSURE REFERENCE VALUE SETTING.
RELATIVE PRESSURE REFERENCE VALUE SETTING
Flashing
The temperature display can be selected to show temperature data in
°F or °C. (default °F)
1.
The temperature unit is flashing
2.
Use the + or MIN/MAX key to toggle between “°F” or “°C”.
3.
Confirm with the SET key and enter the WIND SPEED UNIT
SETTING.
Note:
The default reference pressure-value of the barometer is 29.91inHg
when batteries are first inserted. For an exact measurement, it is
necessary to first adjust the barometer to your local relative air
pressure (related to elevation above sea level). Ask for the current
atmospheric pressure of your home area (Local weather service, www,
optician, calibrated instruments in public buildings, airport).
The relative air pressure can be manually set to another value within
the range of 27.17 to 31.90 inHg (919 to 1080 hPa) for a better
reference.
WIND SPEED UNIT SETTING
Flashing
Flashing
The wind speed unit can be set as mph (mile per hour), km/h (kilometer
per hour), or m/s (meter per second). The default unit is mph.
1.
Use the + or MIN/MAX key to toggle between the unit “mph”,
“km/h” or “m/s”
2.
Confirm with the SET key and enter the RAINFALL UNIT
SETTING.
RAINFALL UNIT SETTING
1.
2.
3.
The current relative pressure value will start flashing
Use the + or MIN/MAX key to increase or decrease the value.
Continually holding the key will allow the value to increase faster.
Confirm with the SET key and enter the WEATHER TENDENCY
SENSITIVITY VALUE SETTING.
Note:
This feature is useful for those who live at elevations above sea level,
but want their air pressure display to be based on sea level elevation.
WEATHER TENDENCY SENSITIVITY LEVEL SETTING
Flashing
Flashing
The rainfall unit can be set as inch or mm. The default unit is inch.
1.
Use the + or MIN/MAX key to toggle between the unit “inch” or
“mm”
2.
Confirm the unit with the SET key and enter the RELATIVE AIR
PRESSURE UNIT SETTING
RELATIVE AIR PRESSURE UNIT SETTING
Flashing
Flashing
You may select a definite switching sensitivity value, .06, .09, or .12
inHg for the change in the display of weather icons. This represents the
"sensitivity" of the weather forecast (the smaller the value selected, the
more sensitive the weather forecast). The default value is 0.09 inHg.
Select lower numbers for high humidity areas, i.e. Oceanside. Select
high numbers for arid areas, i.e. desert.
13
1.
2.
3.
14
The sensitivity value will start flashing
Use the + or MIN/MAX key to select the value.
Confirm with the SET key and enter the STORM WARNING
SENSITIVITY SETTING.
Alarm time digit
Alarm-On icon
STORM WARNING THRESHOLD VALUE SETTING
You may also define a switching sensitivity value for the Storm warning
display at a decrease of air pressure from .09 inHg to .27 inHg over 6
hours (Default 0.15 inHg).
2.
3.
Flashing
Flashing
1.
2.
3.
The sensitivity value will start flashing.
Use the + or MIN/MAX key to select the value.
Confirm with the SET key and enter the STORM ALARM ON/OFF
SETTING.
STORM ALARM ON/ OFF SETTING
You may also choose to switch On or Off the acoustic Storm warning
alarm (Default OFF).
1.
The digit "AOF" will start flashing.
2.
Use the + key to switch On or Off the alarm. ("AOF" = OFF;
"AON" = On)
3.
Confirm with the SET key and the normal display mode will be
shown.
Flashing
4.
5.
6.
Press and hold the SET key for about 2 seconds. The hour digit of
the alarm time will start flashing. Press the + or MIN/MAX key to
set the hour of the alarm time.
Press the SET key to confirm and advance to the minute setting.
The minute digit will be flashing.
Press the + or MIN/MAX key to set the minute of the alarm time.
Press the ALARM key to confirm. Wait for about 30 seconds and
the display will return to normal display mode automatically.
In the normal display mode, press the ALARM once key to go to
the time alarm-setting mode again. Then press shortly the SET
key to switch on or off the time alarm. (The showing of the icon
(((y))) means that the time alarm is switched on.)
Press the HISTORY key or wait for about 30 seconds and the
display will return to normal display mode automatically.
Note:
The alarm ringing duration is 2 minutes. To stop the alarm, press any
key during the alarm ringing.
WEATHER ALARM OPERATIONS
The Weather alarms can be set when certain weather conditions are
met according to your requirements. For example, you can set the
thresholds for the outdoor temperature to +104°F (high) and 14°F (low),
while only enabling the high alarm and disabling the low alarm (i.e.
temperatures <14°F won’t trigger alarm, but temperatures >+104°F will).
Note:
In case a storm warning alarm is activated, the downward weather
tendency arrow will be flashing. (Also see WEATHER TENDENCY
INDICATOR below)
High wind speed
Alarm-On icon
TO EXIT THE MANUAL SETTING MODE
To exit the manual setting anytime during the manual setting modes,
press the ALARM key (or HISTORY key) or wait for the automatic
timeout. The mode will return to the normal time display.
Outdoor temp
Alarm-On icon
TIME ALARM SETTING
Outdoor humidity
Alarm-On icon
The alarm time can be set by the use of the ALARM and SET key.
1.
Press the ALARM key once. The “ALARM” icon and time digits
are shown at the top right of the LCD.
15
16
The Weather Center can be set to alert when a specific weather
condition is reached.
6.
The following Weather Alarm settings can be adjusted in the
ALARM setting mode.
•
High outdoor temperature alarm
•
Low outdoor temperature alarm
•
High outdoor humidity alarm
•
Low outdoor humidity alarm
•
High wind speed alarm
7.
Default alarm values:
Temperature
Relative
Humidity
Wind speed
Low
High
Low
High
High
32°F
104°F
45%
70%
62.0mph
HIGH AND LOW OUTDOOR TEMPERATURE ALARM
SETTING
Note:
The High and Low outdoor temperature alarm can be set On/Off
independently, according to your needs.
Set the Outdoor temperature alarm value (High or Low alarm
value) :
1.
In the normal display mode, press the ALARM key twice. The
High Outdoor Temperature alarm display will be shown.
In case the temperature value meets the condition for high alarm or low
alarm, the value will be blinking, along with the corresponding icon ("HI
AL"/ "LO AL").
And the buzzer will ring for 2 minutes. User then may press any key to
stop the ring.
User may quit the alarm setting and return to the normal display mode
by pressing the HISTORY key.
HIGH AND LOW OUTDOOR HUMIDITY ALARM SETTING
Note:
The High and Low outdoor humidity alarm can be set On/Off
independently according to your needs.
Set the Outdoor temperature alarm value (High or Low alarm
value):
1.
In the normal display mode, press the ALARM key 4 times. The
High Outdoor Humidity alarm display will be shown.
2.
High alarm icon
3.
Alarm-On icon
2.
3.
4.
5.
Press and hold the SET key for about 2 seconds. The
temperature digit will start flashing. Press the + or MIN/MAX key
to set the high outdoor temp alarm value. (Keep holding the key
will allow the value to increase faster.)
Press the ALARM key to confirm the setting. The digit will stop
flashing. Press the SET key to switch on or off the alarm. (The
showing of the icon (((y))) means that the alarm is switched on.)
Press the ALARM key once. The Low Outdoor Temperature alarm
display will be shown.
Press and hold the SET key for about 2 seconds. The
temperature digit will start flashing. Press the + or MIN/MAX key
to set the low outdoor temp alarm value. (Keep holding the key
will allow the value to increase faster.)
Press the ALARM key to confirm the setting. The digit will stop
flashing. Press the SET key to switch on or off the alarm. (The
showing of the icon (((y))) means that the alarm is switched on.)
Press the HISTORY key or wait for about 30 seconds and the
display will return to normal display mode automatically.
4.
5.
6.
7.
Press and hold the SET key for about 2 seconds. The humidity
digit will start flashing. Press the + or MIN/MAX key to set the high
outdoor humidity alarm value.
Press the ALARM key to confirm the setting. The digit will stop
flashing. Press the SET key to switch on or off the alarm. (The
showing of the icon (((y))) means that the alarm is switched on.)
Press the ALARM key once. The Low Outdoor humidity alarm
display will be shown.
Press and hold the SET key for about 2 seconds. The humidity
digit will start flashing. Press the + or MIN/MAX key to set the low
outdoor humidity alarm value.
Press the ALARM key to confirm the setting. The digit will stop
flashing. Press the SET key to switch on or off the alarm. (The
showing of the icon (((y))) means that the alarm is switched on.)
Press the HISTORY key or wait for about 30 seconds and the
display will return to normal display mode automatically.
17
In case the humidity value meets the condition for high alarm or low
alarm, the value will be blinking, along with the corresponding icon ("HI
AL"/ "LO AL"). And the buzzer will ring for 2 minutes. User may press
any key to stop the sound.
WIND SPEED ALARM SETTING
The High wind speed alarm can be set by following the steps below.
1.
In the normal display mode, press the ALARM key six times. The
High wind-speed alarm display will be shown.
18
indicate that the current weather condition is out of the pre-set limit(s)
WEATHER FORECAST AND WEATHER TENDENCY
WEATHER FORECASTING ICONS:
Weather forecasting icons are displayed in any of the following
combinations at the right bottom part of LCD:
TENDENCY
Sunny
2.
3.
4.
Press and hold the SET key for about 2 seconds. The wind speed
digit will start flashing. Press the + or MIN/MAX key to set the high
wind speed alarm value.
Press the ALARM key to confirm the setting. The digit will stop
flashing. Press the SET key to switch on or off the alarm. (The
showing of the icon (((y))) means that the alarm is switched on.)
Press the ALARM key once to return to the normal display mode.
In case the wind speed exceeds the condition for high wind speed
alarm, the value will be flashing, along with the corresponding high
alarm icon ("HI AL"). And the buzzer will ring for 2 minutes. User may
press any key to stop the sound.
HYSTERESIS
To compensate for fluctuation of the measured data, which may cause
the weather alarm to sound constantly if the measured reading is close
to your set level, a hysteresis function has been implemented for each
weather alarm. For example, if the high temperature alarm is set to
+77°F and the current value moves to +77°F, the alarm will be activated
(if it has been enabled). Now when the temperature drops to +76.8°F or
below and thereafter again increases to beyond +77°F, the data will be
blinking, but no alarm will be activated. It has to drop to below +75.2°F
(with a pre-set hysteresis of 1.8°F) so that the alarm can be produced
again. Hysteresis values for the various weather data types are given in
the following table:
Weather data
Temperature
Humidity
Wind speed
Hysteresis
1.8°F
3% RH
3.1 mph
Note:
The temperature or humidity data will keep on flashing even after a key
has been pressed to stop the alarm or buzzer has been switched off, to
19
TENDENCY
Cloudy with sunny
intervals
TENDENCY
Rainy
For every sudden or significant change in the air pressure, the weather
icons will update accordingly to represent the change in weather.
(Every time a new average pressure value has been obtained (once per
minute), this value is compared with an internal reference value. If the
difference between these values is bigger than the selected weather
tendency sensitivity, the weather-icon changes, either for worse or for
better. In this case, the current pressure value becomes the new
weather tendency reference.)
If the icons do not change, either the air pressure has not changed or
the change has been too small for the Weather Center to register. So
you may adjust the "sensitivity" of the pressure change checking in the
setting mode –see WEATHER TENDENCY SENSITIVITY VALUE
SETTING above.
However, if the icon displayed is a sun or raining cloud, there will be no
change of icon if the weather gets any better (with sunny icon) or worse
(with rainy icon) since the icons are already at their extremes.
The icons displayed forecasts the weather in terms of getting better or
worse and not necessarily sunny or rainy as each icon indicates. For
example, if the current weather is cloudy and the rainy icon is displayed,
it does not mean that the product is faulty because it is not raining. It
simply means that the air pressure has dropped and the weather is
expected to get worse but not necessarily rainy.
Note:
After setting up, readings for weather forecasts should be disregarded
for the next 48-60 hours. This will allow sufficient time for the Weather
station to collect air pressure data at a constant altitude and therefore
result in a more accurate forecast.
Common to weather forecasting, absolute accuracy cannot be
guaranteed. The weather forecasting feature is estimated to have an
accuracy level of about 75% due to the varying areas the Weather
Center has been designed for use. In areas that experience sudden
changes in weather (for example from sunny to rain), the Weather
20
Center will be more accurate compared to use in areas where the
weather is stagnant most of the time (for example mostly sunny).
If the Weather Center is moved to another location significantly higher
or lower than its initial standing point (for example from the ground floor
to the upper floors of a house), discard the weather forecast for the next
48-60 hours, as the Weather Center may mistake the new location as
being a possible change in air-pressure when really it is due to the
slight change of altitude.
WEATHER TENDENCY INDICATOR
Working together with the weather icons is the weather tendency
indicators (arrow located on the left and right sides of the weather
icons). When the indicator points upwards, it means that the airpressure is increasing and the weather is expected to improve, but
when indicator points downwards, the air-pressure is dropping and the
weather is expected to become worse.
Taking this into account, one can see how the weather has changed
and is expected to change. For example, if the indicator is pointing
downwards together with cloud and sun icons, then the last noticeable
change in the weather was when it was sunny (the sun icon only).
Therefore, the next change in the weather will be cloud with rain icons
since the indicator is pointing downwards.
Note:
Once the weather tendency indicator has registered a change in air
pressure, it will remain permanently visualized on the LCD.
AIR PRESSURE HISTORY (ELECTRONIC BAROMETER
WITH BAROMETRIC PRESSURE TREND)
The bottom section of the LCD also shows the relative air pressure
value and the air pressure history.
Depending on programming conditions, display of the history of air
pressure is in the form of a graph consisting of vertical bars.
The bar graph of the electronic barometer shows the air pressure
history of the past 12 hours in five 3-hour steps.
compares the result. The "0" in the middle of this scale determines the
current air pressure.
The vertical axis represents the air pressure changes in inHg (+0.12,
+0.06, 0, -0.06, -0.12. The “0” represents the current air pressure). The
newly measured pressure was compared to the previously recorded
pressure reading. The pressure change is expressed by the difference
between the current ("0h") and the past readings in division of ±2 hPa
or ±0.06 inHg. If the bars are rising, this indicates that the weather is
getting better due to an increase in air pressure. If the bars go down it
indicates a drop of the air pressure and the weather is expected to get
worse from the present time "0".
At every full hour, the current air pressure is used as a basis for the
display of a new graph bar. The existing graph is then moved one
column to the left.
Note:
For accurate barometric pressure trend, the Weather Center should
operate at the same altitude. For example, it should not be moved.
Should the unit be moved, for instance from the ground to the second
floor of the house, the readings for the next 48-60 hours shall be
discarded.
Note:
The bar graph will scroll right to light regularly to prevent LCD burnout.
WIND DIRECTION AND WIND SPEED MEASUREMENT
In normal display mode, the second section of the LCD shows the
following wind data.
•
Wind direction (shown on the a compass scale of 16 divisions)
and wind speed/ gust in Beaufort scale
•
Wind chill in °F or °C
•
Wind Speed in km/h, mph or m/s
•
Gust in km/h, mph or m/s (displayed when in Mode 2, by pressing
the SET key shortly)
Text showing wind speed
in Beaufort scale
Pointer indicates the
currently detected wind
direction
Air pressure
changes in inHg
This alarm symbol
indicates that the alarm
is set On
Air pressure
changes in hPa
The horizontal axis represents the last 12 hours air pressure recording
(-12, -9, -6, -3 and 0 hour). The bars are plotted at each of the 5 steps
and give the trend over the recorded period. The scale on the right
Wind chill
21
22
RAINFALL MEASUREMENT
The total rainfall and 24 hour rainfall measurement is displayed in the
fourth section of the LCD, in the unit of mm or inch.
To View the 24-hour rainfall or the Total rainfall reading:
1.
In normal display, press SET key once and the display will shift to
Mode 2.
2.
Press + key consecutively key to toggle between the 24-hour
rainfall, Total rainfall and Rel. pressure reading.
24 hour
rainfall icon
Wind speed or gust will be show
Note: If user wants to choose to view total rainfall or 24-hour rainfall in
history records, he shall first in normal display choose to show the
particular rainfall data, the press History key and SET key to view the
particular rainfall data in History records.
24 hour rainfall
amount
Total
rainfall
icon
Total rainfall
amount
VIEWING THE HISTORY DATA
The weather station can store up to 140 sets of weather data which are
recorded automatically at 3-hour intervals after the weather station is
powered up, at the nearest time of 0:00, 03:00, 06:00, 09:00, 12:00,
15:00, 18:00 and 21:00. For instance, if user has manually set the time
as 14:52 after installing batteries, the first history record will be made at
the coming 15:00 automatically. Then the second record will be on
18:00 and so on.
Each weather record includes the Wind direction, Wind speed/ gust in
Beaufort scale, Wind chill temperature, wind speed/gust, dew point,
Outdoor temp and humidity, relative pressure, 24-hour rainfall and total
rainfall, pressure history and weather tendency. Also, the time and date
of recording will be displayed.
Note:
In order to acquire the correct time of recording of the history records,
you shall manually set the current time as soon as installing batteries to
the weather station. Afterwards, you should avoid changing the pre-set
time as it will also alter the recorded "time of recording" of each history
record, which may lead to confusion.
To view the weather history:
1.
In normal display, press the HISTORY key. The latest weather
record will be shown with the date and time of recording. The
"HISTORY" icon will be displayed at the bottom of the LCD.
2.
When viewing History records, user may shift to see the Mode 1
or Mode 2 data by pressing the SET key.
(Mode 1: with wind speed + outdoor Temp + Rel. pressure;
Mode 2 : with wind gust + Dew point + rainfall data)
HISTORY icon
3.
When viewing History records, press MIN/ MAX to view older
records.
(Press MIN/MAX and + key to view "Previous" and "Next" record
respectively. The records are made at 3-hour intervals)
Note:
•
•
The stored history records will not be retained after battery
change or whenever battery is removed.
The total rainfall value will be exhibited in whole number (no
decimal place) in the history record.
VIEWING THE MAXIMUM/ MINIMUM WEATHER DATA
The weather station will record the maximum and minimum value of the
various weather data with time and date of recording automatically. The
following stored maximum and minimum weather data can be viewed
by pressing the MIN/MAX key in normal display mode.
1.
Min outdoor temperature with the date and time of recording
Time and date of
recording
MIN outdoor
temperature
value
23
24
7.
2.
3.
Min Wind chill temperature with the date and time of
recording
Max outdoor temperature with the date and time of recording
Min dewMIN
point
icontemperature with the date and time of
recording
Time and date
of recording
Time and date
of recording
MIN wind chill
value
MIN dew point
value
MIN icon
MIN icon
8.
4.
5.
6.
Max dew point temperature with the date and time of
recording
Min outdoor humidity with the date and time of recording
Max outdoor humidity with the date and time of recording
9.
10.
Max Wind chill temperature with the date and time of
recording
Min Relative pressure with the date and time of recording
Max Relative pressure with the date and time of recording
Time and date
or recording
Time and date
of recording
MAX outdoor
humidity value
MAX relative
pressure value
MAX icon
MAX icon
11.
Maximum wind speed with the date and time of recording
25
26
Time and date
of recording
MAX wind
speed value
24h rainfall value
MAX icon
MAX icon
RESET THE MAXIMUM AND MINIMUM WEATHER DATA
12.
Maximum Gust with the date and time of recording
Time and date
of recording
MAX wind gust
value
To reset the aforementioned maximum or minimum weather data 1. to
13., you shall need to reset each of the data independently.
1.
Press MIN/MAX key to show the desired weather data. For
instance, if you want to reset the minimum humidity, in the normal
display you shall press the MIN/MAX key three times to show the
min humidity value.
2.
Press and hold the SET key for about 2 seconds, then the
"RESET" icon will appear at the bottom part of the LCD.
3.
Press the + key once, then the stored value will be reset to the
current value and current time.
4.
Press the ALARM key to return to normal display mode.
14. Total rainfall amount
The total rainfall measurement is displayed in the fourth section of the
LCD, in the unit of mm or inch. It shows the total rainfall accumulated
since last reset of the weather station.
In normal display mode, press the MIN/MAX key fourteen times to show
the total rainfall value. The "RESET" icon will also be shown at the
same time.
MAX icon
13.
Max 24 hour rainfall with the date and time of recording
27
28
2.
Press ALARM key once to return to the normal display mode. The
"BUZZER OFF" icon will still be shown.
BUZZER OFF icon
The total rainfall value is
counted from this time and
date
To re-enable the buzzer:
1.
When the BUZZER OFF icon is shown on LCD, press and hold
the SET key until the BUZZER OFF icon disappears.
2.
Press ALARM key once to return to the normal display mode. The
"BUZZER OFF" icon will no longer be shown. Then the alarm will
sound normally.
LOW BATTERY INDICATOR
Total rainfall
icon
Total rainfall amount
The low battery indicator of the weather station and the transmitter will
be displayed at the top and bottom portion of the LCD respectively
when the battery power is low. It is recommended to replace the
batteries in all units on an annual basis to ensure optimum accuracy of
the system.
Note:
•
•
To reset the rainfall reading, press the + key once when the Rainfall
value and "Reset" icon is shown. Then the total rainfall amount will be
reset to 0, and the time updated to current time.
Note:
After power up, the time and date and total rainfall are displayed as "- - ". After time is adjusted manually, the set time will be shown.
SWITCHING ON/OFF THE BUZZER
User may choose to turn off the buzzer so that when the time alarm is
switched on and activated, the buzzer will not sound but we can still see
the alarm icon (((y))) flashing on the LCD for time alarm.
On the other hand, when the buzzer is turned off and any weather
alarm is activated, the particular weather digits will flash to show user
that the weather condition is being out of the preset threshold value, yet
the buzzer will not sound.
To switch off the buzzer:
1.
In normal display mode, press and hold the SET key until the icon
"BUZZER OFF" is shown at the right side above the Wind
direction scale. The LCD will change to setting mode.
After battery change, both the Weather Station and the
transmitters need to be reset (see note ”Setting up”)
The History data record will be clear after the battery change.
OUTDOOR TRANSMITTER 915 MHz RECEPTION CHECK
The outdoor temperature, humidity, wind data are transmitted from
thermo-hygro transmitter every 4.5 seconds; the rainfall data are
transmitted from the rain sensor every 6.25 seconds. The receiver will
be synchronized to the thermo-hygro transmitter and rain sensor then.
The transmission range (supposedly up to about 330 feet /100 meters)
of the thermo-hygro transmitter/ rain sensor may be affected by the
ambient temperature. At cold temperatures, the transmitting distance
may be decreased. Please keep this in mind when placing the
transmitter and the rain sensor.
If (1) the outdoor data are not being received within first several minutes
after setting up; (2) the outdoor display always show “- - -“ on the
outdoor display; or (3) the reception icon of thermo-hygro transmitter
(Mode 1) and rain sensor (Mode 2) is not displayed on the display, user
shall check the following points:
1.
2.
The distance of the Weather Center or transmitter/ rain sensor
should be at least 5 to 6.5 feet (1.5 to 2 meters) away from any
interfering sources such as computer monitors or TV sets.
Avoid positioning the Weather Center onto or in the immediate
proximity of metal doors or window frames.
29
3.
4.
5.
Using other electrical products such as headphones or speakers
operating on the same signal frequency (915 MHz) may prevent
correct signal transmission and reception.
Neighbors using electrical devices operating on the 915 MHz
signal frequency can also cause interference.
“Visibility” of weather center and transmitters increases the range.
Note:
When the 915 MHz signal is received, do not re-open the battery
compartment cover of either the transmitter/ rain sensor or Weather
Center, as the batteries may spring free from the contacts and force a
false reset. Should this happen accidentally then reset all units (see
Setting up above) otherwise transmission problems may occur.
During normal operation, after the outdoor display shows "- - -", the
weather center will change to receive the outdoor data every 15
minutes, until the data is read. Then the reception period for thermohygro transmitter will return to 4.5 seconds (6.25 seconds for rain
sensor).
If no reception is possible despite the observation of these factors, all
system units have to be reset (see Setting up).
30
The Weather Center
The Weather Center has been designed to be hung onto wall or free
standing.
To wall mount
Choose a sheltered place. Avoid direct rain and
sunshine.
Before wall mounting, please check that the outdoor
values can be received from the desired locations.
To wall mount:
1.
2.
Fix a screw (not supplied) into the desired wall,
leaving the head extended out the by about
5mm.
Hang the station onto the screw. Remember to
ensure that it locks into place before releasing.
The Thermo-hygro Sensor
Rain Cover
POSITIONING:
Prior to permanently affixing any of the units, please ensure the
following points are considered:
•
Cable lengths of the units meet with your distance requirements at
the point of fixing
•
Signals from the sensors can be received by the base station at
points of mounting
La Crosse Technology Sensor Extension Cable
Main nit
An ideal mounting place for the thermo-hygro sensor would be the outer
Wall
wall beneath the extension of a roof,
asBracket
this will protect the sensor from
direct sunlight and other extreme weather conditions.
When you require additional length to properly mount your sensor, you
can use La Crosse Technology extension cable. The extension cable is
32 feet in length and comes with the appropriate connecter attached.
Please visit your local retailer or www.greatbigoutlet.com to purchase.
To wall mount, use the 2 screws to affix the wall bracket to the desired
wall, plug in the thermo-hygro sensor to the bracket and secure both
parts by the use of the supplied screw and ensure that the cables from
the wind and rain sensors are correctly plugged in otherwise data
transmission errors could occur.
Phone cables and connections have much more resistance than our
extension cable and are not recommended for use. Using phone
cable/connection may damage your sensors.
The Wind Sensor
Note: Using extension cables will shorten battery life.
Wind
vane
Vertical
mast
Warning: Never cut, splice, shorten or modify your sensor cables or
extension cables. Doing so may damage your sensors and will void
your warranty.
Wind fan
Horizontal
panel
31
32
First, check that the wind-cups and the wind-vane can rotate freely
before fixing the unit. For correct and accurate readings, it is important
to mount the sensor so that the front (marked E) is pointing in EastWest direction. The wind sensor should now be mounted using the
screw or cable tie provided onto a solid wall/ panel mast or mast to
allow the wind to travel around the sensor unhindered from all directions
(ideal mast size should be from diameter 0.62” to 1.29” (16mm to
33mm). Do not over tighten.
Once the wind sensor is fixed onto the mast, connect the cable to the
corresponding thermo-hygro sensor socket so that operating power
supply can be received and data can be transmitted to the base station.
Secure cord from blowing. Do not use staples. Using PVC pipe or metal
as a mast may cause static. Wood is recommended.
When you require additional length to properly mount your sensor, you
can use a La Crosse Technology extension cable. The extension cable
is 32 feet in length and comes with the appropriate connecter attached,
Please visit your local retailer or www.greatbigoutlet.com to purchase.
Phone cable and connections have much more resistance than our
extension cable and is not recommended for use. Using phone
cable/connection may damage your sensors.
Note:
Using extension cables will shorten battery life.
Warning:
Never cut, splice, shorten or modify your sensor cables or extension
cables. Doing so may damage your sensors and will Void you Warranty.
CARE AND MAINTENANCE:
•
The Rain Sensor
•
•
Horizontal
panel
For best results, the rain sensor
should be
securely mounted onto a
horizontal surface about 39.37” (1 meter) above the ground (or higher)
and in an open area away from trees or other coverings where rainfall
may be reduced causing inaccurate readings.
When securing into place, check that rain excess will not collect and
store at the base of the unit but can flow out between the base and the
mounting surface (test by pouring clean water).
•
•
•
After mounting the rain sensor and placing battery, the rain sensor is
now operable. For testing purposes, very slowly pour a small amount of
clean water into the rain sensor funnel. The water will act as rainfall and
will be received and displayed at the base station i.e. when the reading
interval is reached.
•
Note:
You will need to be able to access your rain gauge periodically to clean
debris and possible insect nests. Please keep this in mind when
mounting.
•
•
Extreme temperatures, vibration and shock should be avoided as
these may cause damage to the unit and give inaccurate
forecasts and readings.
Precautions shall be taken when handling the batteries. Injuries,
burns, or property damage may be resulted if the batteries are in
contact with conducting materials, heat, corrosive materials or
explosives. The batteries shall be taken out from the unit before
the product is to be stored for a long period of time.
Immediately remove all low powered batteries to avoid leakage
and damage. Replace only with new batteries of the
recommended type.
When cleaning the display and casings, use a soft damp cloth
only. Do not use solvents or scouring agents as they may mark
the LCD and casings.
Do not submerge the unit in water.
Special care shall be taken when handling a damaged LCD
display. The liquid crystals can be harmful to user's health.
Do not make any repair attempts to the unit. Return them to their
original point of purchase for repair by a qualified engineer.
Opening and tampering with the unit may invalidate their
guarantee.
Never touch the exposed electronic circuit of the device as there
is a danger of electric shock should it become exposed.
Do not expose the units to extreme and sudden temperature
changes, this may lead to rapid changes in forecasts and
readings and thereby reduce their accuracy.
SPECIFICATIONS:
LA CROSSE TECHNOLOGY SENSOR EXTENSION CABLE
Temperature measuring range:
33
Indoor
:
32°F to +140°F with 0.2°F resolution
0ºC to +59.9ºC with 0.1ºC resolution
(“OF.L” displayed if outside this range)
Outdoor / dew point :
-40°F to +140°F with 0.2°F resolution
-40ºC to +59.9ºC with 0.1ºC resolution
(“OF.L” displayed if outside this range)
Relative humidity measuring range:
Outdoor
: 1% to 99% with 1% resolution
(“- -” displayed if < 1%, "99" displayed if ≥ 99%)
Wind speed/ gust :
0 to 111.8 mph (0 to 50 m/s)
(displayed "OF.L" when > 111.8 mph; 50m/s)
Wind chill/ dew point:
-40°F to +140°F (-40ºC to +59.9ºC)
(displayed "OF.L" if outside this)
Relative pressure pre-set range :
27.17 to 31.90 inHg (919 to
1080 hPa)
24h rainfall
:
0" to 39.36" (0 to 999.9 mm)
(displayed "OF.L" when > 999.9mm)
Total rainfall
:
0" to 393.6" (0 to 9999 mm)
(displayed "OF.L" when > 9999mm)
Outdoor data reception :
every 4.5 seconds (from thermo-hygro
transmitter)
every 6.25 seconds (from rain sensor)
Air pressure checking interval:every 15 seconds
Transmission range
:
up to 330 feet (100 meters) in open
space
Power consumption:
Weather Center
:
3 x AA, IEC LR6, 1.5V
Thermo-hygro transmitter :
2 x AA, IEC LR6, 1.5V
Rain sensor
:
2 x AAA, IEC LR3, 1.5V
Battery life
:
approximately 24 months (Alkaline
batteries recommended)
Dimensions (L x W x H):
Weather Center
:
4.59” x 0.94” x 7.01”
(116.8 x 24 x 178.1mm)
Thermo-hygro transmitter :
2.25” x 2.44” x 6.18”
(57.3 x 62 x 157mm)
Wind sensor
:
9.84” x 5.74” x1087”
(250 x 145.9 x 276.2mm)
Rain sensor
:
5.67” x 2.15” x3.46”
(144 x 54.6 x 88mm)
LIABILITY DISCLAIMER
•
•
The electrical and electronic wastes contain hazardous
substances. Disposal of electronic waste in wild country and/or in
unauthorized grounds strongly damages the environment.
Please contact your local or/and regional authorities to retrieve
the addresses of legal dumping grounds with selective collection.
35
34
•
•
•
•
•
•
•
•
•
All electronic instruments must from now on be recycled. User
shall take an active part in the reuse, recycling and recovery of
the electrical and electronic waste.
The unrestricted disposal of electronic waste may do harm on
public health and the quality of environment.
As stated on the gift box and labeled on the product, reading the
“User manual” is highly recommended for the benefit of the user.
This product should not be thrown in general rubbish collection
points.
The manufacturer and supplier cannot accept any responsibility
for any incorrect readings and any consequences that occur
should an inaccurate reading take place.
This product is designed for use in the home only as indication of
the temperature.
This product is not to be used for medical purposes or for public
information.
The specifications of this product may change without prior notice.
This product is not a toy. Keep out of the reach of children.
No part of this manual may be reproduced without written
authorization of the manufacturer.
WARRANTY INFORMATION
La Crosse Technology, Ltd provides a 1-year limited warranty on this
product against manufacturing defects in materials and workmanship.
This limited warranty begins on the original date of purchase, is valid
only on products purchased and used in North America and only to the
original purchaser of this product. To receive warranty service, the
purchaser must contact La Crosse Technology, Ltd for problem
determination and service procedures. Warranty service can only be
performed by a La Crosse Technology, Ltd authorized service center.
The original dated bill of sale must be presented upon request as proof
of purchase to La Crosse Technology, Ltd or La Crosse Technology,
Ltd’s authorized service center.
La Crosse Technology, Ltd will repair or replace this product, at our
option and at no charge as stipulated herein, with new or reconditioned
parts or products if found to be defective during the limited warranty
period specified above. All replaced parts and products become the
property of La Crosse Technology, Ltd and must be returned to La
Crosse Technology, Ltd. Replacement parts and products assume the
remaining original warranty, or ninety (90) days, whichever is longer.
La Crosse Technology, Ltd will pay all expenses for labor and materials
for all repairs covered by this warranty. If necessary repairs are not
covered by this warranty, or if a product is examined which is not in
need or repair, you will be charged for the repairs or examination. The
owner must pay any shipping charges incurred in getting your La
36
Crosse Technology, Ltd product to a La Crosse Technology, Ltd
authorized service center. La Crosse Technology, Ltd will pay ground
return shipping charges to the owner of the product to a USA address
only.
Your La Crosse Technology, Ltd warranty covers all defects in material
and workmanship with the following specified exceptions: (1) damage
caused by accident, unreasonable use or neglect (including the lack of
reasonable and necessary maintenance); (2) damage occurring during
shipment (claims must be presented to the carrier); (3) damage to, or
deterioration of, any accessory or decorative surface; (4) damage
resulting from failure to follow instructions contained in your owner’s
manual; (5) damage resulting from the performance of repairs or
alterations by someone other than an authorized La Crosse Technology,
Ltd authorized service center; (6) units used for other than home use (7)
applications and uses that this product was not intended or (8) the
products inability to receive a signal due to any source of interference..
This warranty covers only actual defects within the product itself, and
does not cover the cost of installation or removal from a fixed
installation, normal set-up or adjustments, claims based on
misrepresentation by the seller or performance variations resulting from
installation-related circumstances.
LA CROSSE TECHNOLOGY, LTD WILL NOT ASSUME LIABILITY
FOR INCIDENTAL, CONSEQUENTIAL, PUNITIVE, OR OTHER
SIMILAR DAMAGES ASSOCIATED WITH THE OPERATION OR
MALFUNCTION OF THIS PRODUCT. THIS PRODUCT IS NOT TO
BE USED FOR MEDICAL PURPOSES OR FOR PUBLIC
INFORMATION. THIS PRODUCT IS NOT A TOY. KEEP OUT OF
CHILDREN’S REACH.
This warranty gives you specific legal rights. You may also have other
rights specific to your State. Some States do no allow the exclusion of
consequential or incidental damages therefore the above exclusion of
limitation may not apply to you.
For warranty work, technical support, or information contact:
La Crosse Technology, Ltd
2809 Losey Blvd. S.
La Crosse, WI 54601
Phone: 608.782.1610
Fax: 608.796.1020
e-mail:
[email protected]
(warranty work)
[email protected]
(information on other products)
web:
www.lacrossetechnology.com
For more information, please visit:
www.lacrossetechnology.com/1510
FAQ WS-1510-IT
Congratulations on purchasing this state-of-the-art Professional
Weather Center.
Remember, for your Weather Station to work properly, it must be
started correctly, using good quality alkaline batteries, and the time
must be set manually.
Before calling for technical support (1-888-211-1923), you may be able
to correct the problem by first performing a Proper Restart, an Initial
Set-up, and problem-solving with the trouble-shooting guide.
-Proper Restart (Quick Set-up Guide)
-Mounting Sensors
– Program Set Up
--Indoor Temperature Readings
– Outdoor Temperature/Humidity Readings
--Wind Readings
--Rain reading
– Minimum and Maximum Readings
--Alarms
--History
– Forecast Icons
-Display information
– Power Source
FIRST THINGS FIRST, OR BATTERIES, BATTERIES, BATTERIES
Batteries are the number one warranty issue that we have. We
recommend new, plain alkaline batteries for our products.
A good alkaline battery will have an expiration date printed on it.
Alkaline batteries are dated six to seven years beyond the current year.
Therefore a battery with an expiration date three years beyond the
current year has already been sitting on a shelf for three to four years.
Consider what happens to your car battery if you let it sit unused for
three to four years.
If you have a voltmeter and your older batteries test to 1.48 or better,
they should power our products. New plain alkaline batteries often test
to 1.6 or better.
Use good quality alkaline batteries with an expiration date of at least six
years into the future or newer. If you are using questionable batteries,
be sure they measure at least 1.48 on a voltmeter. Generic or store
brand batteries, and batteries labeled super, ultra, max, heavy duty,
lithium and rechargeable should be avoided. These batteries provide
their power at different rates than plain alkaline batteries. This may
cause problems, especially with the display unit. It is not always a low
battery that causes problems. It may be an overpowered battery.
– Proper Restart (Quick Set-up Guide)
37
In the event of installing or changing batteries in any of the units, all
units need to be reset by following the setup procedures.
1.
Remove batteries from the Thermo-hygro (outdoor) sensor, Rain
sensor and the Base station. With the batteries out of the Base
station, press any button 20 times. Let everything sit without
batteries for 10 minutes. Verify that the Base station is completely
blank before proceeding.
2.
Then disconnect and reconnect the Wind sensor cable (be sure it
clicks into place). Reinsert the batteries into the Thermo-hygro
sensor and the Rain sensor. Be sure to use a new, quality alkaline
battery (heavy duty and rechargeable types should be avoided)
3.
Reinstall batteries in the Base station and do not press any other
buttons for AT LEAST 10 minutes while the station completes its
startup sequence. Pressing buttons before that time may prevent
a good connection to the sensors.
4.
All of your sensors should be reading on your display.
Batteries: Use good quality alkaline batteries with an expiration date of
at least six years into the future or newer. If you are using questionable
batteries, be sure they measure at least 1.48 on a voltmeter. Generic
or store brand batteries, and batteries labeled super, ultra, max, heavy
duty, lithium and rechargeable should be avoided. These batteries
provide their power at a different rate than plain alkaline batteries. This
may cause problems, especially with the display unit. It is not always a
low battery that causes problems. It may be an overpowered battery.
Mounting Sensors
It is best to set everything up in the house to be sure it works before
mounting the sensors. Tip the Rain gauge and spin the Wind sensor, to
be sure they read to the base.
We do not have a complete sensor installation guide as each Home
Installation is different and covering all of the variables would result in a
guide far longer than anyone would be willing to read. Our website
http://www.lacrossetechnology.com/support/setup.php has some tips.
With that said, here are a few general guidelines to remember when
installing your sensors:
Place the Wind sensor as high as you can install it. In most cases 4-6 ft
above the peak of your roof (or more) is required for accurate readings.
(Avoid tall trees or other obstructions that may block or reflect the wind).
Be sure to observe the Directions listed on the sensor. The point of the
vane will tell you where the wind is coming from.
Please carefully thread the Wind cord through the mast and be sure the
cord fits in the slot or hole designed to prevent pinching. Please note
the proper Direction when mounting.
Be sure not to overtighten U bolts to mast, as they can crack the mast.
39
38
Avoid: Transmitting antennas. PVC pipe (unless electrical grade) as a
mast, improper extension cords (phone cord is much more resistant
than our sensor cord) and modifications of the cords in any way.
Please note most recording stations have sensors mounted 33 ft up or
higher.
5.
6.
7.
89-
Install the Rain gauge on a level platform that is stationary. If the
gauge isn't level it will read low, and it it isn't stationary wind will
cause it to read rain that isn't falling.
Tip: Be sure not to screw the rain sensor down too tightly as that
will result in a low or inaccurate reading.
Place the Rain gauge 2-3ft (or more) above the ground. This will
prevent dirt from clogging the gauge and will place it higher than
most insects are willing to climb. Placing the gauge extremely
high is generally not a good idea as you may need to periodically
clear debris such as leaves, spider nests etc.
Place the Thermo-hygro sensor in a well-shaded area that is
protected from direct rainfall and sun, as it will read high if
exposed to the sun. If the sensor gets too wet it will never read
accurate humidity again, so take care to ensure that it will not be
exposed to a downpour. Light incidental exposure to water
typically will not harm the sensor.
A good location is under the eaves on the north side of the house.
You can also build a small roof or box for it if you do not have an
overhang. Please be sure it is well vented.
Your Wind cord, must be plugged into the Thermo-hygro sensor
before installing batteries. Be sure the cord is secured from
blowing around (do not staple or pinch), and occasionally check
for animals chewing through.
–Program Set Up Menu
There are five function keys: SET, +, HISTORY, ALARM, and
MIN/MAX/ You begin by pressing the SET button until the display
flashes. When you press and release the SET button after each step,
you will be moved to the next step. You may exit the programming
mode at any time by pressing the ALARM button.
If you take more than 5 seconds to change a setting, the unit will return
to normal display mode. If you are not finished with changing your
settings, you do not need to repeat the steps you have already
completed. You can skip steps by pressing and releasing the SET
button until you get to the next step.
1.
CONTRAST SETTING:
Press and hold the SET button for five seconds. LCD and a number
from 1-8 will be flashing. To increase the contrast of the LCD display,
press and release the PLUS button. To decrease the contrast of the
LCD, press and release the MIN/MAX button. Press and release the
SET button once to move to the next menu item.
40
2.
SETTING THE HOUR MANUALLY:
The Hour will be flashing. Use the PLUS button to increase the hour.
Use the MIN/MAX button to decrease the hour. If using 12-hour Time
Mode, be sure to set the hour for AM or PM. Press and release the
SET button once to move to the next menu item.
3.
SETTING THE MINUTES MANUALLY:
The Minutes will be flashing. Use the PLUS button to set the minutes.
Press and release the SET Button once to move to the next menu item.
4.
12/24-HOUR TIME MODE:
Either 12h or 24h will be flashing on the display. Use PLUS or
MIN/MAX button to change from 12 to 24 hour format time (12h for
AM/PM, 24h for world time). Note: When in the 12h mode, there is
only a "PM" display, which appears under the word TIME. During the
"AM" hours, this area will be blank. Press and release the SET button
once to move to the next menu item.
5.
SETTING THE YEAR MANUALLY:
The Year will be flashing. Use the PLUS or MIN/MAX button to set the
year. Press and release the SET button once to move to the next menu
item.
6.
SETTING THE MONTH MANUALLY:
The Month will be flashing. Use the PLUS or MIN/MAX button to set
the month. Press and release the SET button once to move to the next
menu item.
7.
SETTING THE DATE MANUALLY:
The numeric day will be flashing. Use the PLUS or MIN/MAX button to
set the date correctly. (The unit will determine the Day of the week
automatically.) Press and release the SET button once to move to the
next menu item.
8.
SETTING FAHRENHEIT OR CELSIUS:
A degree symbol will be flashing, followed by F or C. Use the PLUS or
MIN/MAX button to select F or C. Press and release the SET button
once to move to the next menu item.
9.
WIND SPEED UNIT OF MEASUREMENT:
MPh should now be flashing. To change, press and release the PLUS
or MIN/MAX button to select MPH, KM/h, or M/S. Press and release
the SET button once to move to the next menu item.
10.
RAINFALL READING:
Inch should now be flashing. To change, press and release the PLUS or
MIN/MAX button to select MM if desired. Press and release the SET
button once to move to the next menu item.
11.
RELATIVE AIR PRESSURE UNIT:
InHG (inches of mercury) should now be flashing. This can be set in
inHG or hPa (hectopascal). To change, press and release the PLUS or
MIN/MAX button to make your selection. Press and release the SET
button once to move to the next menu item.
12.
RELATIVE PRESSURE:
The Barometric Pressure (lower part of screen) will flash. Press and
release the PLUS or MIN/MAX button to select the desired relative air
pressure value. Note: This will be based off your local weather report or
can be found on the Internet. Press and release the SET button once to
move to the next menu item. Press and release the SET button once to
move to the next menu item.
13.
FORECAST TENDENCY SENSITIVITY:
Two air-pressure tendency arrows will appear (lower right portion of
screen) and a flashing number will appear in the "pressure" area. Press
and release the PLUS or MIN/MAX buttons to select the desired
forecast sensitivity setting of 0.06, 0.09, or 0.12 inHG.
The lowest (most sensitive) number is used near the high humidity
areas, the highest (least sensitive) number is for the low humidity, arid
areas, and middle number is for everywhere else. Press and release
the SET button once to move to the next menu item.
14.
STORM WARNING THRESHOLD VALUE:
Use the PLUS or MIN/MAX buttons to select a value from the range of
0.09 to 0.27. This value is used to trigger a Storm Warning Alarm
based on a drop in air pressure. Press and release the SET button
once to move to the next menu item.
15. STORM WARNING ALARM:
Use the PLUS or MIN/MAX buttons to select AOF (Alarm Off) or AON
(Alarm On). When the pressure falls by the Storm Warning Threshold
Value you have selected, an alarm (if on) will be triggered.
16. FINAL STEP:
Press and release the SET button once to return to normal display.
Congratulations. You are done!
TROUBLE-SHOOTING GUIDE
If you continue to experience problems with your Weather Station after
a Proper Restart and Initial Set-up, please see if your problem is
described in this Trouble-Shooting Guide and follow the suggestions to
attempt to correct the problem before contacting technical support.
Please familiarize yourself with the function buttons. These are located
on the bottom of the Base station and the Alarm button is on the top.
They are: SET, PLUS, HISTORY, MIN/MAX and SNOOZE. These
buttons will be used in the trouble-shooting guide.
41
42
– Indoor Temperature Readings
Display
Plus Button: Indoor Temperature is an optional display in the upper
right-hand corner. In normal display mode, press the PLUS button to
toggle between Indoor Temperature, Seconds counting, Alarm Time, or
the Date in two different formats.
Outdoor Temperature/Humidity is Inaccurate
Batteries: Be sure you have good alkaline batteries for both the sensor
and the base station.
Indoor Temperature Displays as --. - (dashes) or is missing
Batteries: Be sure you have good alkaline batteries for the base
station. This is almost always a power issue.
Indoor Temperature Displays as OFL
Batteries: Be sure you have good alkaline batteries for the base
station. This is almost always a power issue.
Indoor Temperature is Blank
If only the Indoor Readings portion of the indoor unit is totally blank (not
showing dashes or OFL), this may a problem with the indoor unit or the
batteries. Remove all batteries from all units and follow the directions in
the Proper Restart section above, using fresh alkaline batteries. If the
problem continues, contact Customer Support for further instructions.
– Outdoor Temperature/Humidity Readings
Outdoor Temperature/Humidity Displays as --.- (dashes)
Distance: It may also be that the distance between the transmitter and
the receiver is too great or has too many obstacles between the units to
allow the signal to reach the transmitter.
The maximum transmission range is 330 feet in a straight line (line of
sight). Trees, walls, windows, and obstructions will reduce transmission
range by as much as half. (An obstruction would include anything that is
in the line of sight like a roof, walls, floors, ceilings, trees, etc.). Certain
building materials such as glass, stucco, and metal framework or siding,
can greatly reduce the range.
In order to get an accurate reading and to prolong the life of your
sensor, we recommend that you place the sensor in a sheltered area
out of the sun and direct rain. Fog and mist will not affect the sensor,
but a soaking in water may.
Sensor is wet: If your sensor becomes soaked, bring the unit inside,
remove the batteries and allow the unit to dry overnight; then restart the
station using the Proper Restart instructions. You can mount the sensor
outside under an eave of your house or any other suitable place that will
keep it out of the sun and rain. Do not wrap the sensor in plastic or seal
it in a plastic bag. You may also put it in a two-sided bird feeder with a
roof.
Placement: The sensor will measure the temperature in the location
where it is placed. A good location is under the eaves on the north side
of the house. You can also build a small roof or box for it if you do not
have an overhang. Please be sure it is well vented.
Worn out: Also, your transmitter may be defective or worn out due to
age or weather conditions. If you continue to have problems, please
call for technical support.
Outdoor Temperature/Humidity Displays as OFL
Batteries: Be sure you have good alkaline batteries for both the sensor
and the base station.
If the display shows OFL, your batteries may be weak or dead. Follow
the “Proper Restart” instructions. If you continue to have problems,
please call for technical support.
Outdoor Readings are Totally Blank
If only the Outdoor Readings portions of the indoor unit are totally blank
(not showing dashes or OFL), this may a problem with the indoor unit or
the batteries. Remove all batteries from all units and follow the
directions in the Proper Restart section above, using fresh batteries. If
the problem continues, contact Customer Support for further
instructions.
-Rain Readings
Viewing Rain: From normal mode, press and release the SET button
one time to get to” mode 2”. Then use the PLUS button to toggle
between, Relative Pressure, 24 hour Rain, and Total Rain. Please note:
After 20 seconds, this will revert to the normal display.
Rain Reads 0.00:
The Rain will always read 0.00, even if no rain gauge is being used. If
you are using the Rain gauge and have had rain, but are still reading
0.00, please check the following:
Debris: Is the rocker free of debris, insect nests, leaves, etc. If it has
never worked, is there tape on the rocker?
Batteries: Are you using good alkaline batteries dated 6-7 years in
advance?
Mounting: Is the rain gauge mounted level? If mounted with screws
through the base, please be sure they are only snug and not too tight.
Restart: Remove batteries from all units and follow the directions in the
Proper Restart section above.
43
44
Distance: It may also be that the distance between the transmitter and
the receiver is too great or has too many obstacles between the units to
allow the signal to reach the transmitter.
Rain is inaccurate
Interference: Are there sources of radio frequency or electromagnetic
interference near the Base or the Rain sensor? Ham radios, Baby
monitors, Cordless Phones, etc can cause loss of signal or erratic
readings.
Mounting: Is the rain gauge mounted level? If mounted with screws
through the base, please be sure they are only snug and not too tight.
Accuracy Test:
To test any La Crosse Technology rain gauge, follow these steps:
1.
Erase the Total rainfall or make note of this amount.
2.
Pour water into the gauge very slowly until it clicks exactly ten
times
3.
Allow a minimum of ten minutes for this "rainfall" to accumulate,
and check the amount listed on the Total rainfall counter
4.
Your total should be .19 inches.
Please follow the Proper Restart listed above.
Wind Sensor
Wind speed inaccurate: Is the wind speed reading 0.00 or dashes or
something else? Do the cups spin freely? Are the cups clear of insect
nests leaves etc? Do all the other sensors work properly?
Mounting: Where is your wind sensor mounted and how high is it
above the ground? In most cases, the sensor needs to be 3-4ft above
the highest point on your roof in order to clear nearby obstructions and
read accurately. The wind cups need to be installed below the
mounting bracket. If possible please also email a few pictures of your
sensor installation and the surrounding area to this address
[email protected].
Cord: Check that the wind cord is in good repair, free of cuts, animal
bites, pinch marks etc. Be sure it is secured from blowing around, by
twist ties or zip ties. Do not use staples. Did you shorten, lengthen,
splice or modify the cord in any way?
Check that the port on the Thermo-hygro sensor where the wind cord
plugs in free of corrosion or bent wires.
Interference: Are there sources of radio frequency or electromagnetic
interference near the Base or the Wind sensor? Ham radios, Baby
monitors, Cordless Phones, etc can cause loss of signal or erratic
readings.
Direction is stuck but speed is correct:
45
Setting The Time Alarm
Press and hold ALARM button for about 5 seconds until the alarm time
shows in the date area.
Press and hold the SET button until the Alarm Hour flashes. Use the
PLUS or the MIN/MAX button to set the alarm hour. Press the SET
button and the Alarm Minutes will start flashing. Use the PLUS or the
MIN/MAX button to set the alarm minutes. Press ALARM when done to
save the setting. You will see an Alarm Icon ((●)) showing in front of
the alarm time. This indicates the time alarm is ON.
Turning off the Time Alarm:
An alarm icon ((●)) will appear in the upper right area of the Base
means that Time Alarm is turned on. The time at which an alarm is set
to ring will also be displayed. Press and hold ALARM button for about 5
seconds until the alarm time shows in the date area. Press and release
the SET button so the icon ((●)) disappears.
Storm Alarm
In the Set Up Menu-Press and release the SET button 13 times until
you see the up and down arrow and a number in the pressure area
flashing. Use the PLUS or MIN/MAX buttons to select a value from the
range of 0.09 to 0.27. This value is used to trigger a Storm Warning
Alarm based on a drop in air pressure. Press and release the SET
button once to move to turn the Storm Alarm on or off.
Turning Storm Alarm ON or OFF: Use the PLUS or MIN/MAX buttons
to select AOF (Alarm Off) or AON (Alarm On). When the pressure falls
by the Storm Warning Threshold Value you have selected, an alarm (if
on) will be triggered.
Alarms for Outdoor Temperature, Humidity, & Wind Speed:
To set the weather data Alarms you shall need to set each alarm
independently.
Press and hold ALARM button for about 5 seconds until the alarm time
shows in the date area. Press and release the ALARM button to move
to Outdoor Temperature high alarm, Outdoor Temperature low alarm,
Outdoor Humidity high alarm, Outdoor Humidity low alarm, and Wind
Speed high alarm.
To set the alarm in each of these areas, Press and hold the SET button
until the alarm flashes. Use the PLUS or the MIN/MAX button to set the
alarm value. Press ALARM when done to save the setting. You will
see an Alarm Icon ((●)) showing in front of the alarm time. This
indicates the alarm is ON.
Turn Alarms ON or OFF: An alarm icon ((●)) will appear next to the
alarm value set. This indicates the alarm is turned ON. To turn the
alarm off Press and hold ALARM button for about 5 seconds until the
alarm time shows in the date area. Press and release the ALARM
47
Check that nothing is binding the wind vane. Is it sticking in one
particular direction? Check sources of interference above.
Direction is incorrect speed is fine:
Be sure to observe the Directions listed on the sensor (N, S, E, W) The
point of the vane will tell you where the wind is coming from.
The large arrow on the compass rose of the base station will tell you the
average of where the direction was coming from in the past 4.5 second
update. The smaller arrows if they appear, indicate the directional
changes during that same period.
Direction is fine but there is no Wind speed:
Check that the cups are there and spinning freely.
Please follow the Proper Restart listed above.
– Minimum and Maximum Records
The Weather Center will record the Minimum and Maximum value of
Outdoor Temperature, Dew Point, Wind Chill, and Relative Air Pressure
with Time and Date of recording automatically. The Weather Center will
also record Maximum Wind Speed, Wind Gust, and 24 hour Rain with
Time and Date of recording automatically.
MIN/MAX weather data can be viewed by pressing the MIN/MAX key in
normal display mode. Keep pressing to toggle through the different Min
and Max readings.
Reset the Min/Max data
To reset the MIN/MAX weather data, you shall need to reset each of the
data independently.
1.
2.
3.
4.
Press MIN/MAX key to show the desired weather data.
Press and hold the SET key for about 2 seconds, then the
"RESET" icon will appear at the bottom part of the LCD.
Press the PLUS key once, and then the stored value will be reset
to the Current value and Current time.
Press the ALARM key to return to normal display mode.
Reset Total Rainfall
In normal display mode, press the MIN/MAX key 14 times to show the
total rainfall value. The "RESET" icon will also be shown at the same
time.
To Reset the Rainfall reading, press the PLUS key once when the
Rainfall value and "Reset" icon is shown. Then the total rainfall amount
will be reset to 0, and the time updated to Current time.
Alarms
46
button to move to Outdoor Temperature high alarm, Outdoor
Temperature low alarm, Outdoor Humidity high alarm, Outdoor
Humidity low alarm, and Wind Speed high alarm. In each area press
and release the SET button so the icon ((●)) disappears.
Master Buzzer
The Master Buzzer may be used to silence the alarms. The Buzzer will
not sound but we can still see the alarm icon ((●)) flashing on the base
for the Alarm. When any weather alarm is activated, the particular
weather digits will flash to show user that the Alarm is triggered, yet the
buzzer will not sound.
To switch off the Buzzer:
1.
In normal display mode, press and hold the SET key until the icon
"BUZZER OFF" is shown at the right side above the Wind
direction scale. The base will change to setting mode.
2.
Press ALARM key once to return to the normal display mode. The
"BUZZER OFF" icon will still be shown.
To re-enable the Buzzer:
1.
When the BUZZER OFF icon is shown on base, press the SET
key shortly and the BUZZER OFF icon will disappear.
2.
Press ALARM key once to return to the normal display mode. The
"BUZZER OFF" icon will no longer be shown. Then the alarm will
sound normally.
- History
The Weather Center can store up to 140 sets of weather data (not
min/max values) which are recorded automatically at 3-hour intervals
after the weather center is powered up, at the nearest time of 0:00,
03:00, 06:00, 09:00, 12:00, 15:00, 18:00 and 21:00.
Each History record includes the Wind Direction, Wind Speed in
Beaufort Scale, Wind Chill Temperature, Wind Speed, Wind Gust,
Outdoor Temperature and Humidity, Relative Pressure, 24 hour
Rainfall, Total Rainfall, Pressure History and Weather Tendency. The
Time and Date of history recording will be displayed.
Note:
In order to acquire the correct time of recording of the history records,
the Time and Date should be manually set as soon as installing
batteries to the Weather Center.
To view the Weather History:
1.
Press the HISTORY key. The latest weather record will be shown
with the date and time of recording. The "HISTORY" icon will be
displayed at the bottom of the LCD. HISTORY icon
48
2.
Press MIN/ MAX to view older records. Press MIN/MAX and
PLUS key to view "Previous" and "Next" record respectively. The
records are made at 3-hour intervals)
Press the SET key to see items normally viewed in “mode 2”.
- Forecast Icons
Forecast Icon Shows Incorrect Conditions
This feature indicates what the weather may be like 12 hours into the
future and not what is happening right now. The weather forecasting
feature is estimated to be 75% accurate. The weather forecast is based
solely upon the change of air pressure over time; creating a necessity to
disregard all weather forecasting for about 24 hours after the unit has
been set-up, reset, or moved from one altitude to another (i.e. from one
floor of a building to another floor). In areas where the weather is not
affected by the change of air pressure, this feature will be less accurate.
To adjust forecast settings see section 2.
If your screen has black on it that may look like and ink blob, this is
likely do to the display unit falling or being impacted in some way.
Unfortunately, this is not a warranty issue.
– Power Source
Battery Leakage
Battery leakage is not a warranty issue. We recommend you contact the
battery manufacturer if this occurs.
Prevention: Be aware of expiration dates. Do not mix old and new
batteries.
Store batteries at room temperature or allow coming back to room
temperature before using.
Remove weak batteries from you device to prevent leakage.
What Do the Sun/Clouds/Rain Icons Indicate?
Three possible weather icons will be displayed:
Sunny-indicates that the weather is expected to improve (not that the
weather will be sunny).
Sun with Clouds-indicates that the weather is expected to be fair (not
that the weather will be sunny with clouds).
Clouds with Rain-indicates that the weather is expected to get worse
(not that the weather will be rainy).
Forecast Icon is Blinking
Occasionally the word “tendency,” the up (or down) arrow, and the
clouds or sun will become animated. This is a visual indication that
there has been a recent/sudden change in the weather conditions.
Generally, this is the result of a fast low front coming in.
– Display Information
Entire Display is Blank
Batteries: If your weather station has a blank display, it is generally a
power issue. Please be sure you are using good alkaline batteries
dated at least six years in advance. Remove the batteries from the unit,
press the SET button 20 times to clear any electricity, and install good
alkaline batteries.
Segmented Numbers
If your weather station has missing segments on numbers or letters, it is
generally a power issue. Please be sure you are using good alkaline
batteries dated at least six years in advance. Remove the batteries
from the unit, press the SET button 20 times to clear any electricity, wait
10 minutes with batteries out. Then install good alkaline batteries.
All rights reserved. This handbook must not be reproduced in any form, even in
excerpts, or duplicated or processed using electronic, mechanical or chemical
procedures without written permission of the publisher.
This handbook may contain mistakes and printing errors. The information in this
handbook is regularly checked and corrections made in the next issue. We accept
no liability for technical mistakes or printing errors, or their consequences.
All trademarks and patents are acknowledged.
Display Has Black “ink blob” on it.
49
50