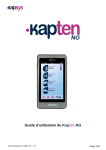
1
SmartVision SmartVision Lite USER GUIDE SmartVision & SmartVision LITE – User Guide (Rev. 2.5 – version SW 1454) 1 Introduction Congratulations on purchasing SmartVision or SmartVision Lite. SmartVision is the first Android Smartphone especially designed for people with low vision and visual impairment. SmartVision combines a physical keypad, a full voice interface, and a touchscreen, making it a fully accessible device. SmartVision is the latest generation smartphone that provides you with a fully adaptive interface and functionalities that are easy to navigate for everyday use. Its applications are organised by favorites, its user interface has been simplified with a large display (large icons, 4 font sizes), voice command, speech-to-text (dictation mode for message writing), voice over description of what is on your screen, Kapten GPS(1) with voice control, a magnifier feature with contrast filter panels, NFC tags(1), web based assistance, character recognition(1), etc… it’s all there! SmartVision gives you the best of smartphones with ease-of-use and unique accessibility. This User Guide has been developed to help you learn step by step, with the help of screen shots, how to use the various basic functions in any of the three operating modes that you have chosen. It is complementary to the Quick Guide, and will allow you to make the most of your SmartVision. How to use this material This User guide describes SmartVision’s main features and operating modes. Features are described in a generic manner without reference to the more specific requirements of the advanced accessibility mode (default mode) which are fully described in the "Accessibility mode" section. (1) : Not available on SmartVision Lite. SmartVision & SmartVision LITE – User Guide (Rev. 2.5 – version SW 1454) 2 Content of the box SmartVision by KAPSYS includes: A battery A 220/110V - 5V USB mains charger A docking station for charging (1). A USB / micro USB cable A lanyard Two stereo earphones with microphone and a push-to-talk button. A protective case(1). This list of accessories may vary depending on the country, device configuration or model version. (1) : Not available on SmartVision Lite. SmartVision & SmartVision LITE – User Guide (Rev. 2.5 – version SW 1454) 3 Table of Contents Introduction Content of the box Introducing SmartVision Installation Keypad, Touchscreen and Voice control Accessibility Mode Voice interface Screen reading Home screen The notification status bar Applications Favorites Telephone Messaging E-Mail Settings People SOS Function Kapten(1) Assistance Calendar Alarm Clock Camera Calculator Gallery Video Player Magnifier Colors Detections Sound recorder Music Browser NFC(1) OCR(1) FM Radio Search Downloads Legal notice and Warranty Troubleshooting Technical Specifications SmartVision & SmartVision LITE – User Guide (Rev. 2.5 – version SW 1454) 2 3 5 8 13 16 22 29 30 31 33 34 36 42 46 50 57 63 65 78 80 80 80 81 81 81 82 82 83 83 84 84 85 86 86 86 87 91 93 4 Introducing SmartVision Front panel The numeric keypad at the bottom part of the front panel enables you to dial a phone number or type characters for text messaging using multi-tap mode. 4 control keys are located above the keypad: - "OK" key to pick up a call, or confirm your entry. - The two arrow keys "" allow to scroll or browse within a menu or a current page. - "C" key to end a call or clear an entry. Above these 4 control keys, there are 3 easily recognizable Android recessed push buttons: - “Menu” on the left: press to access the ongoing "Menu". - “Home” in the middle: press to go back to the "Home screen" any time. - “Back” on the right: press to go "Back" to the previous screen. Top: The "On Off" and screen off mode button is located on the top right side of the handset. Press and hold this button to start or stop your SmartVision. A short key press will set the handset to standby mode and an additional short press will reactivate it. On the middle, a clip for the necklace. Then, the audio 3.5 jack on the left side of the "On Off" button connects to the earphones supplied with the device. Right side: SmartVision & SmartVision LITE – User Guide (Rev. 2.5 – version SW 1454) 5 The voice control key is located on the right side of your SmartVision. Press briefly this key to send a voice command and press and hold if you want to write a message through dictation. The mini-USB port on top of the handset provides for connection to a PC or to a mains charger using the cable included in the box. Bottom: Connection terminals at the bottom of the handset are used to connect to a docking station to charge the battery, and a microphone. Left side: The two keys located on the left side of the handset are used to increase (volume up key) or decrease (volume down key) the sound volume. SmartVision & SmartVision LITE – User Guide (Rev. 2.5 – version SW 1454) 6 Rear: The emergency orange button is located on the back panel top left. Push down this button to start an emergency instance. On the right of this SOS button are found the camera lens and a port for amplified listening. SmartVision & SmartVision LITE – User Guide (Rev. 2.5 – version SW 1454) 7 Installation Inserting the SIM Card The SIM Card is issued by a telephone service provider when you take out your telephone contract. Please note: only Mini-SIM (2-FF) Cards are supported by SmartVision. If you have a different SIM card, please ask your telephone service provider to replace it with a Mini SIM. It is recommended to change the format of the SIM card rather than using an adapter. Inserting the SIM Card: 1. Turn the device upside down, look for the notch at the bottom left, and lift the back cover. 2. Install the SIM Card, with the chip downwards and the tapered angle to the bottom right. Slide the SIM card pushing upwards to fit it snugly into its compartment. Please note: the Micro-SD memory card reader is located right above the SIM Card holder. Depending on the configuration of your product, the Micro-SD may be already installed in the product. SmartVision & SmartVision LITE – User Guide (Rev. 2.5 – version SW 1454) 8 The battery Inserting the battery: 1. Insert first the bottom of the battery into the slots. 2. Snap the battery into place. 3. Put back the rear panel fitting the top part first. 4. Snap firmly and close your device. SmartVision & SmartVision LITE – User Guide (Rev. 2.5 – version SW 1454) 9 Charging the battery The battery you purchased with your SmartVision is not fully charged. Before using the device, we recommend that you charge the battery for at least 4 hours. You may subsequently charge it as needed and depending on your use and the available charge of the battery. You may check the icon located in the top right bar at anytime to know how much charge is available in the battery. You can also short press the control key and say clearly the keyword “Battery level” To charge the battery, plug the USB cable (included in the box) into the mains charger. You may also charge your SmartVision using the docking charge. Please note(1): the protective case should be removed when using the docking station. If you don’t want to remove the protective case to charge the device, you may use the USB port located on the right side of the device. (1) : Not available on SmartVision Lite. SmartVision & SmartVision LITE – User Guide (Rev. 2.5 – version SW 1454) 10 Switch ONOFF your SmartVision Press and hold the "On Off" button (on the top of the device) to start your SmartVision. Release the button as soon as the device vibrates. Please note: if the device does not start, please check if the battery has been properly installed, if not, please repeat the installation procedure. Press and hold the "On Off" button to switch off your SmartVision. A screen called “Main menu” appears. Click on "Power off" and confirm. You will feel a slight vibration as the device goes off. Please note: The "Main Menu" screen also provides shortcuts to other direct options: Aeroplane mode, Explore by touch, Screen off mode and configuration of the ringer. To learn more about these different modes, refer to chapter "Settings" and "Accessibility Mode". Please note: The "Screen off" mode is only available when "explore by touch" is enabled. This mode allows you to turn the screen of the SmartVision into black during use in order to save the battery and protect your privacy data. Screen off mode When your SmartVision is on, a short key press of the "On Off" button will bring it to standby mode (screen off), or back to running mode (screen on). In standby mode, SmartVision’s screen is off but its features remain enabled. You can still receive incoming calls, messages, emails and navigation instructions. Please note: as a default setting, the handset automatically switches to screen off mode after two minutes of inactivity in order to save the battery. SmartVision & SmartVision LITE – User Guide (Rev. 2.5 – version SW 1454) 11 Unlocking the PIN on the SIM Card The SIM Card has a 4 digit identification code called PIN. PIN helps you lock your SIM Card to avoid fraudulent use of your SmartVision. To unlock the SIM Card and access the various functions in your SmartVision, enter your PIN using the keypad then confirm with "OK". If you click on "Dismiss" from this screen, you still have access to all the features of the device but no communication functions provided by your telephone service provider are available. Please note: for confidentiality reasons, retrieving your PIN using text-to-speech is possible through earphones only. SmartVision & SmartVision LITE – User Guide (Rev. 2.5 – version SW 1454) 12 Keypad, Touchscreen and Voice control The three interfaces or operating modes by SmartVision: - The Keypad operating mode is for those who know how to easily handle keys and buttons on a mobile phone. To become familiar with SmartVision keypad, please refer to the section where functions specific to each key and button are described in detail. (See page 5). Please note: the advanced accessibility mode (set by default on your SmartVision) supports additional keypad shortcuts for easy navigation through the screens and interact with yours smartphone, they are described in the "Accessibility mode" section. - Touchscreen mode is smartphone typical operating mode. It allows you to navigate through the various menus from the tip of your finger. To select an item or confirm an action, simply touch the relevant item on the screen. Please note: the advanced accessibility mode (set by default on your SmartVision) includes additional gesture commands which enable navigation between screens and interaction with your smartphone. These commands are described in the "Accessibility mode" section below. - Voice control enhances the use of the device by freeing the user from keypad handling whether it is a physical or virtual keypad. The voice control function is activated by pressing the voice key located on the right side of the unit. Depending on your option, please read the explanations and recommendations below provided for easy handling of each interface. Keypad interface Your SmartVision includes four control keys located horizontally on the top of the keypad. They are, from left to right: - "OK" key: to confirm an option, a selection or to accept an incoming call. In some instance, when pressing this key, a context menu is displayed with additional options available for the selected item (a contact, an application, a message, etc.). - "" The up and down arrow keys: to scroll up and down the various items displayed on the screen. - "C" key: to clear a character or digit, reject or end a call. SmartVision & SmartVision LITE – User Guide (Rev. 2.5 – version SW 1454) 13 The alphanumeric keypad located under these control keys, is presented in three rows of number keys organized from left to right as follows: - First row: 1, 2, 3, star keys. Second row: 4, 5, 6, 0 keys. Third row: 7, 8, 9, # keys. The alphanumeric keypad (key 1 to #) is used to enter text or characters depending on the input field. Each key gives access to several characters: number key "2" b, c, 2, A (capital), B (capital), C (capital). gives access to a, To select the appropriate character, press repeatedly the relevant number key to access the various characters associated with this key. Number key "1" is used to insert punctuation marks and number key “Hash Mark” is used to insert a space. The “star “ key is used to switch a character in uppercase or lowercase Touchscreen interface By default "Explore by touch" is live in SmartVision. This feature has the effect of modifying the behaviour of the touch screen interface to suit the persons with vision impairment. The rest of this section describes how to use the standard touchscreen interface when that feature is disabled. To learn more about this feature (how to enable/disable it) please refer to the "Accessibility mode" section. Standard Touchscreen mode The touchscreen helps you navigate through the screens from the tip of your finger. Touch the screen with your fingertip to select an item, touch the entry window to display the virtual keypad, type on it to write a message, or slide your finger up and down to scroll the display. SmartVision & SmartVision LITE – User Guide (Rev. 2.5 – version SW 1454) 14 Selecting or activating an item on the screen: Make a short key press or click on an item to select it, confirm an action, or display the virtual keypad in the provided input field. Make a long key press to get more options for the selected item (context menu). Scrolling a list: Scroll up and down a displayed list by sliding your finger up and down without removing your finger of the screen. Zooming in/out (available on specific applications such as Image Viewer, Email, etc.): Use two fingers to touch the screen, pinch inwards to zoom out, and pinch outward to zoom in. SmartVision & SmartVision LITE – User Guide (Rev. 2.5 – version SW 1454) 15 Accessibility Mode This section describes specific commands and gestures as well as keypad shortcutshot-keys to help you control and interact with your SmartVision when the accessibility mode is enabled (default setting). From the home screen, click on "Settings" to enable or disable the accessibility mode, then click on "Accessibility" and check or uncheck the "Explore by touch" option in the list. Keypad control mode: SmartVision allows quick access to some functions by pressing and holding the hash key "Hash Mark" located at the bottom right of the physical keypad, and pressing on another key of the physical keypad. A beep will signal the switch to "keypad control mode". If no other key is pressed right after, another beep will go off If you press the "Hash Mark" control key with another key, the device will perform the following commands: - Press and hold the "Hash Mark" key and press "1": inform you about your smartphone’s status (time, battery level, current network status, Wi-Fi status, GPS status, Bluetooth status, NFC Status, ringer mode and alarm status). - Press and hold the "Hash Mark" key and press "2": lets you read the content of the current screen. - Press and hold the "Hash Mark" key then press "3": displays the smartphone status bar. - Press and hold the "Hash Mark" key then press "4": increases the speed of speech. - Press and hold the "Hash Mark" key then press "5": decreases the speed of speech. - Press and hold the "Hash Mark" key then press "" up key: moves to the left, for example, when browsing through the various categories of the "Music" application. - Press and hold the "Hash Mark" key then press "" down key: moves to the right. - Press and hold the "Hash Mark" key then press "volume up" key: increases the volume of the ringtone. - Press and hold the "Hash Mark" key then press "volume down" key: decreases the volume of the ringtone. SmartVision & SmartVision LITE – User Guide (Rev. 2.5 – version SW 1454) 16 Edition mode: SmartVision allows a quick and easy editor mode. This mode allows navigating into an input area to modify or insert a character or a word. To edit an input area, press continuously on star “*” key and simultaneously press one of keys as follow: - Continuous press on "Star" key and short press on "#": selects the whole text - Continuous press on "Star" key and short press on "1": moves the cursor one character to the left - Continuous press on "Star" key and short press on "2": moves the cursor one character to the right - Continuous press on "Star" key and short press on "3": copy the selected text - Continuous press on "Star" key and short press on "4": moves the cursor one word to the left - Continuous press on "Star" key and short press on "5": moves the cursor one word to the right - Continuous press on "Star" key and short press on "6": cut the selected text - Continuous press on "Star" key and short press on "7": moves the cursor back to the beginning of the text - Continuous press on "Star" key and short press on "8": moves the cursor at the end of the text - Continuous press on "Star" key and short press on "9": paste the selected text Android keypad shortcuts: - Press and hold the "" up key to open the current page menu (same as "Menu" ). - Press and hold the "" down key to go back to the home screen at anytime (same as "Home screen" ). - Press and hold the "C" key to go back to the previous screen (same as "Back" ). SmartVision & SmartVision LITE – User Guide (Rev. 2.5 – version SW 1454) 17 Gesture control of the Touchscreen: How to have an audio description of what is on the screen, place your finger on the screen, slide it from right to left then from left to right. You will hear a voice over description of items displayed on the screen. How to browse and activate items on the screen, move your finger about the screen. The text-to-speech feature will tell you which item your finger is hovering over. To activate this item, press "OK" key without removing your finger from the screen. How to get back to the Home screen, place your finger on the screen, slide it up then left. You can also move your finger down and to the middle of the screen, the voice over feature will indicate "Home screen". Press the "OK" key without removing your finger from the screen. SmartVision & SmartVision LITE – User Guide (Rev. 2.5 – version SW 1454) 18 How to move back to the previous display, place your finger on the screen, slide it down then left without removing your finger of the screen. You can also slide your finger down and to the right, you will hear the text-to-speech feature say "Back". Then, press the "OK" key without removing your finger from the screen. How to access the menu or the options for the active application, place your finger on the screen, slide it up then right without removing the finger. You can also slide your finger down and left, the voice over feature will say "Menu". Then press the "OK" key without removing your finger from the screen. . How to scroll a list, place your finger on the screen and slide it up or down to scroll a page or a list upwards or downwards. SmartVision & SmartVision LITE – User Guide (Rev. 2.5 – version SW 1454) 19 How to open the "Notification" status bar, place your finger on the screen and slide it from left to right and down. The voice over feature will indicate the status of your smartphone (Wi-Fi, Bluetooth, GPS, etc...), as well as the last ten notifications. SmartVision & SmartVision LITE – User Guide (Rev. 2.5 – version SW 1454) 20 The virtual keypad To enter text into the input field, you can use the real keypad but also the virtual keypad. To access the virtual keypad, move your finger until you touch the input field, then press "OK" key without removing your finger from the screen. The virtual keypad appearance changes from numeric to alphabet to suit the content of SmartVision’s input field. Select the character to be entered by sliding your finger on the bottom virtual keypad, and confirm the character by pressing the keypad "OK" key without removing your finger from the screen. If you want to enter a digit while only alphabetical characters are available, press the “Symbol” key at the bottom left of the virtual keypad, then to switch back to the alphabet, press the “ABC” key . Pressing "Back" will close the virtual keypad. Please note: use the "C" key on the physical keypad to erase a typing mistake at anytime. SmartVision & SmartVision LITE – User Guide (Rev. 2.5 – version SW 1454) 21 Voice interface Free yourself from the keypad, either physical or virtual. To activate the voice mode, look for the voice control key located on the right side of your handset, press it. SmartVision’s voice interface integrates the latest generation voice recognition technology which makes it the major asset of this smartphone. The voice interface enables you to control fully your handset as well as to input text, using the two options below: - Short press of the control key to browse the various screens and menus, get information or performance from your device using the built-in keywords as voice commands. - Long press of the control key to perform speech-to-text entry in an input field. The following pages focus on the voice control interface. Please note: to enhance voice control performance, you should use it in a quiet environment and speak clearly. SmartVision & SmartVision LITE – User Guide (Rev. 2.5 – version SW 1454) 22 Controlling the screens through voice commands The voice control feature enables audio description of all texts displayed on your SmartVision freeing you from using the physical or non physical keypad. 1. Press and release the voice control key (short key press), a signal tone is heard and a "Voice Command" window opens. 2. Pronounce clearly the displayed text to activate screen reading, for example, an application name, an item in a list. Warning: Screen reading of items that are not displayed on the screen is not possible. Voice command A voice command is an audio instruction given by the user using their own voice. The purpose is to obtain audio information from your SmartVision, enable or disable a functionality, or perform more complex operations on the unit. Voice commands are managed through key words which have been predefined and incorporated into the product. You can use these commands at anytime and under any circumstances. 1. Press and release the voice control key (short key press), a beep sounds. SmartVision & SmartVision LITE – User Guide (Rev. 2.5 – version SW 1454) 23 2. The "Voice Command" window opens, say clearly the keyword, for example "What time is it?" The answer is given by SmartVision’s text-to-speech functionality, for example: "It’s1:46pm". Here are two additional examples of voice commands. You want to make a call to Paul Thomas 1. Press briefly the voice control key. A beep sounds. You are prompted to dictate a command. 2. There are two possible commands: - "Call Paul Thomas", if this contact has been added to your "People" list. - "Call Paul Thomas mobile", if several numbers have been recorded for this contact. 3. The system asks for confirmation, confirm to make your call to Paul Thomas. You want to disable the ring mode on your SmartVision 1. Make a short press. A beep sounds. The screen prompts for your instruction. 2. Say "Activate silent mode". 3. The ring mode is disabled as SmartVision switches to silent mode. SmartVision & SmartVision LITE – User Guide (Rev. 2.5 – version SW 1454) 24 Voice command keywords The following voice commands have been implemented in the product and are the only words recognizable by SmartVision. SmartVision keywords fall into three categories: - Keywords to get information about your smartphone’s current status. - Keywords to enable or disable a setting or an option. - Keywords to manage commands and options within an application. Keywords about SmartVision’s different statuses What time is it? Gives the current time. Date? Gives the current date. Keywords? Gives the list of all the keywords currently enabled. Battery level? Gives the battery available charge. Network status? Gives the cellular service’s signal strength. Wi-Fi status? Gives the Wi-Fi current status(connected or disconnected). Bluetooth status? Gives the Bluetooth current status (connected or disconnected). GPS status? Gives the GPS current status(connected or disconnected). NFC status? (1) Gives the NFC current status (connected or disconnected)(1). Ringtone status? Gives the ring mode current setting (standard, silence, meeting). Phone status? Gives the Bluetooth). (1) telephone operation mode (Wi-Fi, GPS, : Not available on SmartVision Lite. SmartVision & SmartVision LITE – User Guide (Rev. 2.5 – version SW 1454) 25 Keywords used for activating a function or a setting Menu Opens the menu of the current application. Home Restores the main screen. Back Displays the previous screen. Notifications Opens the notification status bar. Activate GPS Enables GPS localisation. Deactivate GPS Disables GPS localisation. Activate Wi-Fi Enables the Wi-Fi. Deactivate Wi-Fi Disables the Wi-Fi. Activate Bluetooth Enables the Bluetooth. Deactivate Bluetooth Disables the Bluetooth. Activate NFC(1) Enables the NFC reader(1). Disable NFC(1) Disables the NFC reader(1). Activate Standard ringtone Activates the standard ring mode with ringtone and vibration. Activate silent mode Activates the vibration ring mode. Activate meeting mode Deactivates the ringtone and vibration. Activate outdoor mode Activates the ringtone to maximum volume. Volume up Increases the sound volume. Volume down Decreases the sound volume. (1) : Not available on SmartVision Lite. Application specific keywords "Start application" followed by the name of the application: the named application is started. Example: "Start application Magnifier". "Send Message to" followed by the name of the contact: a message is created for the named contact. Example: "Send Message to Paul Thomas". "Call" followed by the name of the contact: a call is sent to the named contact. Example: "Call Paul Thomas". "Call" followed by the name of the contact and "Mobile" or "Office": a call is made to the named contact on his/her mobile or office line. Example: "Call Paul Thomas Mobile". SmartVision & SmartVision LITE – User Guide (Rev. 2.5 – version SW 1454) 26 Speech-to-text or Dictation mode The voice interface also makes it possible to input text in a text field using speech-totext. This feature is particularly useful for message or email writing, web searching or voice dialling a phone number. 1. When a text field is displayed, the smartphone is ready for dictation mode. 2. Press and hold the voice control key while dictating your text, all the way through. Example: With the "Dictation" window displayed, speak out clearly and audibly: "Would you like to come over for lunch next Sunday?" 3. Release the voice control key when dictation is complete. 4. The dictated text is shown in the text field. SmartVision & SmartVision LITE – User Guide (Rev. 2.5 – version SW 1454) 27 Please note: to add punctuation marks (,? ! …), you must pronounce the name of the punctuation mark you want. Example: "Would you like to come over for lunch next Sunday question mark". Please note: Speech-to-text can be used for up to 30 seconds at a time. Warning: Speech-to-text feature requires a data connection such as Wi-Fi or 3G. If you are not connected to a data network or if the connection speed is too low, the service will not be available and you will get the following alert. You are free to use the 3 interfaces on your SmartVision, either separately or in turn. You can start with the touchscreen mode and continue with the voice control mode or the other way round, as described in the example below. Open the "Messaging" application by clicking on the “Messaging” icon from the touchscreen. As soon as the input field is displayed, choose speech-to-text for your message. To do so, press and hold the voice control key while you dictate. Release the key at the end of the message then, briefly press on the same key to "Send". SmartVision & SmartVision LITE – User Guide (Rev. 2.5 – version SW 1454) 28 Screen reading SmartVision is equipped with a speech synthesizer that reads the content of the screen to you. Screen reading occurs in the following instances: - A new screen appears, the title and the highlighted item are read back to you. - A new item has been selected. - A command has been executed, such as enabling an option. - An unexpected event occurs, such as the phone going into screen off mode or receiving an incoming message. - Whilst navigating the screen with your finger, the touched item is identified to you through text-to-speech. You will find out more about text-to-speech functionality as you use it on your SmartVision. Please note: slide your finger from left to right, then from right to left to get a voice over full description of the screen, your finger must remain on the screen for the command to work. You can also use the keypad control mode: long press on "Hash Mark" key then press "2": SmartVision & SmartVision LITE – User Guide (Rev. 2.5 – version SW 1454) 29 Home screen The home screen operates like a start menu from which you can start any application you need. To go back to the home screen, press the “Home” key the display. , the middle button below The Home screen presents SmartVision’s six basic functions. "Phone" is an application for making calls, recording missed calls and accessing your voicemail. "Messaging" is an application for sending, reading SMS/ MMS (short message with multimedia attachments such as images, photos or videos, etc…). "E-Mail" is an application for sending and receiving emails, you will need to have an email account correctly set up. "Settings", this application lets you modify the settings on your phone. "Applications", this application shows you a list from which you can access all the applications available on your SmartVision. "Favorites", this application stores all your preferred or most frequently used applications (SOS, Calculator, or Magnifier, for example) under this special directory. SmartVision & SmartVision LITE – User Guide (Rev. 2.5 – version SW 1454) 30 Whenever one of the above icons appears flagged with a red bubble that contains a number, it means there is one or more events for that application (such as missed calls, or incoming messages). The notification status bar The status bar is the first line of icons located on top of the display. Status icons are on the right and alert icons (related to the various applications) are on the left. Please note: you can check on the status of your SmartVision at anytime by simply sending a "Phone status" voice command, or use long press on “Dash Mark” key followed by “2” key. Samples of status icons: Battery level of charge indicator. Network signal strength indicator. Wi-Fi signal strength indicator. Samples of notification icons: You have unread messages. Missed call. You have voice messages. SmartVision & SmartVision LITE – User Guide (Rev. 2.5 – version SW 1454) 31 The status bar gives access to the panel of notifications where all alerts and events on your smartphone have been reported. Thanks to these notifications, you know exactly what event has occurred on your smartphone. To flick the panel open, slide your finger from the top of the display towards the bottom, your finger must remain on the screen throughout the command for it to work. Please note: You can also use the keypad control mode : long press on "Hash Mark" key then press "3" to open the notification panel. SmartVision's settings are available on the upper part of the notification panel. These are, from left to right: Activate / Deactivate Wi-Fi connection. Activate / Deactivate Bluetooth. Activate / Deactivate GPS localisation. Adjust display brightness (Auto / Level 1 / Level 2/ Level 3). Delete all notifications Notifications in the lower part describe the various incoming events. When you select an event from this panel, the corresponding application is instantly launched. For example, if you select a missed call , SmartVision opens the "History" window of the "Phone" application where missed calls are saved. You can choose the missed call (number or contact name) to call back that number/contact. Notifications are automatically deleted after they are read. This panel also includes notifications such as alerts, updates, etc. … To close the notification panel, press the Android "Back" button. SmartVision & SmartVision LITE – User Guide (Rev. 2.5 – version SW 1454) 32 Applications From the home screen, press the "Applications" icon and find a list of all the applications available in your SmartVision. These applications are listed by alphabetical order. To start an application, scroll the list until you reach the desired application and select it. Please note: you can also use the voice control feature to start an application, by sending a "Start application" command followed by the application name. You can re-organise the applications into a grid format, to do so, press the "Menu" button, and click on "By matrix". The list of pre-installed applications on your SmartVision may vary depending on the country, the telephone service providers and the configuration of the product. Please note: you can quickly reach an item in the list of applications using the keys 29 on the keypad. For example, pressing the "6" key to select the first application beginning with the letter "M". Press twice the "6" key to select the first application beginning with the letter "N" etc. The "Star" and "Hash" keys to quickly access the beginning and end of the list. SmartVision & SmartVision LITE – User Guide (Rev. 2.5 – version SW 1454) 33 Favorites The "Favorites" application is SmartVision’s most convenient functionality and is available from the home screen. It works like a directory in which your preferred applications or the ones you use most frequently are stored. Creating a favorite For example, add the "Calculator" application into "Favorites". 1. From the home screen, select "Applications" 2. Scroll the list until the "Calculator" . application is highlighted. 3. Press and hold the "OK" key of the keypad to open the context menu. 4. From this context menu, click on "Insert to favorite" to store "Calculator" in your preferred applications. 5. Confirm with "Yes". SmartVision & SmartVision LITE – User Guide (Rev. 2.5 – version SW 1454) 34 The "Calculator" application can now be directly accessed from the "Favorites" screen. Managing Favorites To remove a Favorite application, access the "Favorites" menu, click on the application to be removed, press and hold the keypad "OK" key. Click on "Remove from favorite" in the context menu then confirm deletion with "Yes". To organise your applications within the list, click on "Up into the list" or "Down into the list" option from the context menu. Please note: in the same manner as for listing the applications, if you wish a matrix format (lines/columns), press the "Menu" button, and click on "By matrix". SmartVision & SmartVision LITE – User Guide (Rev. 2.5 – version SW 1454) 35 Telephone The "Phone" of options. application by SmartVision is a very user friendly feature with a lot How to make a call? 1. From the Home screen, click on "Phone" appears. icon, the application main screen 2. You can either type your correspondent’s number using your telephone keypad, or retrieve a number from the "People" application, a contact name from "Favorite", or from the call "History". 3. When the number or contact name has been entered, press the keypad "OK" key to send the call. 4. The screen shows that the call is in progress. Press the "End" end of the call, or the "C" key to hang up. The unit will display "End". key at the SmartVision & SmartVision LITE – User Guide (Rev. 2.5 – version SW 1454) 36 During a call, the following three icons will show at the bottom of the screen, offering you 3 additional options: Turn on the loudspeaker (hands free mode). Mute the microphone. Show the virtual keypad, to key in digits when using an automated answering service, for example The above options are also available using the "Menu" button. Please note: when the accessibility mode is enabled, you can switch to hands free mode and turn the loudspeaker on by pressing and holding the voice control key (on the right side of your smartphone).To switch back to audio mode, press and hold the voice control key again. SmartVision & SmartVision LITE – User Guide (Rev. 2.5 – version SW 1454) 37 Managing phone calls The "Phone" application allows you to manage your phone numbers by priorities. When in the "Phone" application, press the "Menu" button. A menu appears: The "Quick Dial" option allows you to set your preferred numbers for direct access from the keypad. For example, if you wish to save a phone number that you use very often for a quick access by assigning to number key “2” of the keypad. First, click on "Quick Dial", then click on line two to choose 2. Press and hold the "OK" key and enter the requested details, then hit "OK" to confirm. Next time you call this number, simply press and hold the “2” key on the real keypad, from the home screen. SmartVision will automatically make the dialling and send the call. Please note: number key "1" is dedicated to direct access to SmartVision voicemail, it may be preset by your telephone service provider depending on your contract and SIM Card. The "Settings" option allows configure the "Phone" application specific options to suit your preferences: - "Ringtone": activate or deactivate the ringing/vibration. "Voicemail": choose a service and set up your telephone service provider’s voicemail number. "Call forwarding": forward the incoming calls to a different number. "Call barring": forbid the outgoing and incoming calls on your SmartVision while you are abroad, for example. "Missed call notification": activate or deactivate incoming call alerts. "Fixed Dialling Numbers": restrict calls to specific numbers saved on your SIM Card. "Quick responses": send a quick reply using an SMS template. "Caller ID": show or hide your phone number. "Call waiting": activate the call waiting option. "Cell Broadcast": receive messages from the network. "Minute reminder": have a beep sound every minute while on a call. "TTY Mode": activate or deactivate data transfer mode. SmartVision & SmartVision LITE – User Guide (Rev. 2.5 – version SW 1454) 38 How to answer a call? When you receive an incoming call, a ringtone is heard. The unit immediately shows two keys: "Accept" and "Refuse", even in screen off mode. The caller’s number appears in large format on the top of the screen. If the caller is a contact that has been added to your list of "People", his/her name will be shown instead of the phone number. Press the "OK" key of the keypad or the "Accept" key on the screen if you want to answer. If not, click on the "C" key or select "Refuse" from the screen. If you have missed a call, this call will be listed in the call "History" as a missed call, with a red arrow . You will be able to call back simply by selecting this number or contact from the History menu. The missed call will also be shown on the home screen with a red bubble over the "Phone" icon, and a message alert in the notification panel. If you click on the missed call from these locations, you immediately reach the "History" menu. Please note: the missed call can also be indicated by the voicemail symbol in the status bar. Please refer to the next page to learn how SmartVision voicemail operates. Voicemail SmartVision is equipped with a voicemail that works like an answering machine. Configuration and features of the voicemail service depend on your service provider. To set up your voicemail, please click on "Phone". Press the "Menu" button, and click on "Settings", then on "Voicemail". Enter the number for the voice mail supplied by your telephone service provider and confirm. SmartVision & SmartVision LITE – User Guide (Rev. 2.5 – version SW 1454) 39 Whenever a caller leaves you a voice message, the message will show in the status bar with the Voicemail symbol. To listen to your voice message, simply call your voicemail service making a long press on number key"1" from the physical keypad. Call History The "History" menu stores calls recently made or received by you. They are listed from newer to older. This feature presents two advantages: it keeps you informed of any call you have missed, and gives you direct access to phone numbers and contacts. SmartVision makes use of the symbols below for each call: Blue arrow to indicate an incoming call, either accepted or rejected by you. Green arrow to indicate an outgoing call made by you. Red arrow to indicate a missed call. SmartVision & SmartVision LITE – User Guide (Rev. 2.5 – version SW 1454) 40 Calling a number or a contact from the Call History To call back a number or a contact from the Call History, simply click on the number/contact from this screen, and the call is made instantly. At the end of the call, press the "C" key of the keypad or press the “Hang up” icon to end the call. You can also call back a missed call from the notification panel - , as follows: Open the notification panel. Select the missed call alert, you will instantly reach the "History" menu of your smartphone. Please note: To remove an item from the history, select it and press and hold the "OK" key, then select from the contextual menu the item "remove from call log". You can also remove all call history from the "Menu" in the "History" page. SmartVision & SmartVision LITE – User Guide (Rev. 2.5 – version SW 1454) 41 Messaging The "Messaging" application lets you send and receive short messages or SMS and MMS (text messages containing a multimedia item such as an image or a video, etc.) How to send a message? 1. From the Home screen, click on the "Messaging" 2. Click on "New Message" on top of the screen. icon. 3. Several options are available to enter the recipient details: type his/her phone number into the "To" input field using the keypad, or select one or more recipients in the "People" list, or choose your contact(s) from the "Favorite" menu. 4. When the recipient’s details are entered, click on "Write Message". The "Type message" screen appears. SmartVision & SmartVision LITE – User Guide (Rev. 2.5 – version SW 1454) 42 5. Type your message in the text field using the physical keypad, the virtual keypad or speech-to-text (press and hold the voice control key to dictate). 6. When the entry is completed, click on "Send", your message will be sent and a conversation is opened. Please note: if you wish to attach an image or a video to your message, click on the attach symbol at the screen bottom left, or press the "Menu" button. SmartVision & SmartVision LITE – User Guide (Rev. 2.5 – version SW 1454) 43 Messaging menu Options Click on the "Messaging" icon from the Home screen. Press the "Menu" button to access the "Messaging" application various options. The options below let you configure the "Messaging" application to suit your own preferences. - "Delete all threads": deletes all threads stored on your smartphone. - "Search": allows search of a message on your smartphone. - "Settings": - "Storage settings": transfer your SMS to and from your SIM Card and set the storage capacity with a maximum number of SMS / MMS. - "Notification settings": set an alert (ringing or vibration) for an incoming message. - "Text-message (SMS) settings": configure text message options. - "Multimedia message (MMS) settings": configure Multimedia messages options. Reading an SMS/MMS You have received a message, which is notified to you by the "Messaging" icon flagged with a red bubble containing a number, on the home screen. An alert is also displayed in the notification panel. SmartVision & SmartVision LITE – User Guide (Rev. 2.5 – version SW 1454) 44 To read your received messages from the home screen, click on "Messaging" icon or on "New message" from the notification panel. Messages sent or received are listed by recipient or "discussion thread". Discussion threads with unread messages are placed on top of the list with a blue triangle . To show the content of the message, click on the discussion thread you wish in the list. Sent and received messages are listed in chronological order from newer at the bottom the list to older going up, and are colour-coded to differentiate them: - Green messages are messages sent by you. - Blue messages are messages received by you. - Red messages are unsent messages or messages being sent. Deleting an SMS/MMS To delete a discussion thread or a message, select the item to be deleted, press and hold the "OK" key on the keypad. A context menu opens, click on "Delete" to remove the selected item. You can also access the discussion thread and message related options by pressing the "Menu" button. SmartVision & SmartVision LITE – User Guide (Rev. 2.5 – version SW 1454) 45 E-Mail The "E-Mail" application lets you send and receive emails from your email account. The "E-Mail" application by SmartVision will not work unless you have an existing email account with an email service provider. Email account setup When opening the "E-Mail" application for the first time, you will need to set up your email account. You will need to have your email account information handy such as your email address and password. From the home screen, click on "E-Mail" appears. 1. 2. 3. 4. icon. An account set up screen Please enter your Email address. Enter your password. Click on "Next". Then follow the instructions on the screen to set up account (verification of the incoming and outgoing email servers). your email 5. SmartVision initiates the verification procedure. You must now configure the following options for your Email account: Email Fetch frequency, Notification, Automatic download, etc…, 6. Click on "Next" to end the procedure. Synchronisation of your account is started, and your inbox appears. Please note: some Email accounts may have special configuration options, please refer to our websitewww.kapsys.com, section "Support", for more details. SmartVision & SmartVision LITE – User Guide (Rev. 2.5 – version SW 1454) 46 Sending an email 1. From the home screen, click on the "E-Mail" displayed. 2. Click on "Compose". application. The Inbox is 3. Enter the recipient into the "To" field, the subject of your email into "Subject" and then the full text into "Compose email" text field. For additional options – insert an attachment, add more recipients, etc. – please refer to the instructions below. 4. Click on "Send" when you have completed the message, your Email is sent. Additional available options: - - To add an attachment to the email (Photo, Music, File …): click on the attachment pictogram at the bottom left of the screen, or press the "Menu" button and click on "Attach file" from the list of options. To add a recipient, press the "Menu" button, and click on "Add Cc/Bcc". To save the message in order to send it later, press the "Menu" button and click on "Save draft". To delete the message without saving, press the "Menu" button and click on "Discard". You can also delete an email doing a long press on the email from the inbox. SmartVision & SmartVision LITE – User Guide (Rev. 2.5 – version SW 1454) 47 Receiving and reading an email When you receive an email, the home screen will show the Email icon flagged with a red bubble. This will also be notified to you via the status bar (provided the "Email notification" option has been enabled when you set up your email account). To access the Inbox and read your incoming emails, click on the "E-Mail" application from the Home screen, or on the new email notification from the notification panel. Click on the new email. Emails that are unread are placed on top of the list and flagged with . To read the contain of an email you can also use the “text mode” option through “menu” , this option allows a better and easier vocalization. Once the email read, you can press again "menu" and "reply" or "forward" the email. You can also "move" it to another folder or "delete" it. SmartVision & SmartVision LITE – User Guide (Rev. 2.5 – version SW 1454) 48 Delete an email You can delete an email unitarily or by group. To delete an email unitarily, simply open the email you want to delete and select "Delete" from "Menu". It is also possible to delete an email without consulting him. In this case, select from the list of emails, the email you want to delete and perform a long press on the "OK" button. Then select "Delete". To delete a group of emails, press "Menu" from the list of emails and select "Start multiple selection". When “Multiple selection” is enabled, the list of emails is displayed again and a short press on the "OK" button checks the selected email. To check all the emails, press "Menu" then "select all". To delete the emails that have been checked, press again "Menu" then "Delete all selected." Please note: Multiple selection is automatically disabled after a deletion. Managing email accounts You can add, edit or remove Email accounts in your SmartVision. - - If you wish to modify an account configuration, press the "Menu" button, click on "Settings", and select the account to be edited. If you wish to remove an account, press the "Menu" button, click on "Settings", select the account to be removed, then click on "Remove account" at the end of the list. If you wish to add an account, press the "Menu" button, click on "Settings", then on "Menu" , and lastly on "Add account". If you wish to change account, press the "Menu" button, click on "Settings", and select the account to be used, from the list. Please note: you can also manage your email accounts from the Home screen by clicking on the "Settings" icon, then on "Account& sync" item. SmartVision & SmartVision LITE – User Guide (Rev. 2.5 – version SW 1454) 49 Settings The parameters and settings for your SmartVision can be found under the "Settings" application. This application can also be accessed from the home screen in order to enable and disable specific functions or modify existing settings. SmartVision comes with a number of editable default settings such as the time setting, the language option, the display format, etc. Editing a setting To edit a setting: 1. From the home screen, click on "Settings" . The list of settings appears. 2. Scroll the list and select the category of setting or the setting to be edited. 3. When all settings have been edited, press the "Home screen" button to save your changes. SmartVision settings are organised into categories such as: - "SIM management": manage the SIM Card settings. - "Wi-Fi": activate and manage the Wi-Fi connection. - "Bluetooth": activate and manage connection with accessories and Bluetooth peripherals. - "Data usage": activate and monitor data usage. - "More…": configuration and connection to wireless networks (Mobile networks, NFC(1), data networks …). - "Audio profiles": configure sound settings on your handset (ringtone, message alerts, sound volume, …). - "Display": configure the display settings (font size, brightness, wallpaper, etc.). - "Storage": manage storage usage by application. - "Battery": monitor battery usage - "Apps": manage the applications installed in your product. - "Accounts& sync": manage your email accounts and synchronisation. SmartVision & SmartVision LITE – User Guide (Rev. 2.5 – version SW 1454) 50 - "Location services": activate and manage localisation services (GPS and network). "Security": manage security settings (PIN, lock screen, password, …). "Language &input": configure display and keyboard language. "Backup & reset": remove personal data and restore default settings. "Date &time": set date and time on the unit(time zone, time format …) "Schedule power on off": schedule automatic turn on/ off. "Accessibility": configure accessibility mode settings. "Developer options": settings reserved for the more experienced users. "About phone": check the condition/status of your smartphone and install updates. (1) : Not available on SmartVision Lite. Here are some examples of configuration. Accessibility settings SmartVision includes options that let you personalize and adapt your Smartphone to meet your needs. Go to "Settings" icon, and click on "Accessibility". "Kapsys Accessibility" is the accessibility capability developed by KAPSYS. To access the various options, select "Accessibility", then press the "Menu" button, and click on "Settings". The settings are as follows: - "Screen Reader": enables or disables text-to-speech functionality. - "Echo on input": defines whether text-to-speech feature should announce your input by character, by word or by the whole sentence. - "Notifications": enables text-to-speech of notifications and alerts when they are received in the notification panel, (reception of an SMS, for example). - "TTS speed": adjusts text-to-speech speed. - "TTS voice": chooses a male or female voice. - "Speech Recognition": enables or disables the voice recognition mode via the voice control key located on the unit right side. SmartVision & SmartVision LITE – User Guide (Rev. 2.5 – version SW 1454) 51 - "Caller Id alert": announces the name or phone number associated with an incoming call. "Voicemail alert": announces an incoming message to your voice mail "Stop on shake": stops text-to-speech mode by shaking the handset "Stop on proximity": stops text-to-speech mode if the smartphone is closed to your ear. "Speak when locked": enables text-to-speech when the unit is in screen off mode. The other accessibility typical options are: - "Large text": increases the font size. This setting is also available in the section about the Display. - "Power button ends call": ends the ongoing call via the on off key. - "Auto-rotate screen": toggles instantly between portrait/landscape depending on the screen position. We recommend you leave this option inactive. - "Speak passwords": enables to enter the password using text-to-speech. For confidentiality reasons, you will need to use the earphones to enter your password in text-to-speech mode. - "Explore by touch": activates screen reading as well as specific gesture commands for the visually impaired users. - "Touch & hold delay": adjusts multi-tap detection speed on the touchscreen. - "Install web scripts": authorises scripts to be installed on your web browser to improve your accessibility. - "Hearing aid compatibility (HAC)": increases the sound level for users with impaired hearing. - "Disable Android Keys": disables Android buttons such as "Menu", "Home screen" and "Back". In such case, you should apply gesture commands on the touchscreen. This setting is only available when "Explore by touch" is enabled - "Backgound color": allows you to select the color of the background in menus and lists. Please note that this operation is not instantaneous and requires a complete upgrade of the system - « Play a beep after the validation of a character » allows you to play a beep after the validation of a character into an entry field. - « Make a vibration after the validation of a character » allows you to make a vibration after the validation of a character into an entry field. - « Validation timeout » allows you to set the timeout of the validation of a character (1,2,3,4 or 5 seconds) Please note: enable or disable "Explore by touch" feature is also available with direct access via a long press on the “On Off” button. SmartVision & SmartVision LITE – User Guide (Rev. 2.5 – version SW 1454) 52 Connecting to Wi-Fi 1. From the home screen, click on "Settings" 2. Press the ONOFF connection. icon, and on "Wi-Fi". switch on the screen top right to enable Wi-Fi The list of available Wi-Fi networks appears. 3. Choose the network you wish to connect to. 4. If you wish to connect to a secure Wi-Fi network, please enter a password. 5. Click on "Connect", an icon will appear in the status bar indicating that the unit is connected to the Wi-Fi network. Please note: password and security keys (WEP / WPA2) are supplied by your service provider. Please refer to these details to set up your connection and bear in mind the password may be case sensitive. SmartVision & SmartVision LITE – User Guide (Rev. 2.5 – version SW 1454) 53 Adjusting the ringtone 1. From the home screen, click on "Settings" 2. Select "General". icon, then on "Audio profiles". 3. Select "Voice call ringtone". 4. Select to listen to a ringtone. 5. Once your choice is made, press the "Menu" to save your change. button, then click on "Apply" Please note: to adjust the volume on your SmartVision, use the up and down volume keys on the left side of your handset. The volume control will apply to the audio source currently in use. SmartVision & SmartVision LITE – User Guide (Rev. 2.5 – version SW 1454) 54 Airplane mode The airplane mode disables all sources of radio frequency on the device (Wi-Fi, Bluetooth, cellular network, etc.). To activate the "Aeroplane mode", press and hold the "On Off" key. "Main menu" is displayed. Select "Aeroplane mode". You will be notified that this mode is activated by the pictogram in the status bar. Please note: airplane mode can also be activated from the "Settings" application, by selecting "More…" option, then "Airplane mode". SmartVision & SmartVision LITE – User Guide (Rev. 2.5 – version SW 1454) 55 Updating the SmartVision Updates for your smartphone will be notified on the home screen with the red bubble over the "Settings" icon. To activate the update, click on "Settings" . Select "Download". Download will start automatically and will last for about 30 to 40 minutes depending of your network bandwidth. Subsequently, the device will reboot automatically until “Home screen” is displayed and announced. Note: - You must have data connection, Wi-Fi or 3G enabled to download the software update. Because of important size of this update (about 1GB), we recommend to use the Wi-Fi connection for downloading. - Please do not use SmartVision when the download is in progress. - If the device goes to sleep mode during the download process, just make a short press on ON/OFF button to wake-up the device, then when the download is complete, the upgrade process will start automatically. Please note: as SmartVision checks for updates on a regular basis, you will be instantly informed whenever an update is available. However, you can also check for available updates manually by selecting the "About phone "option, and "System updates" from the "Settings" application. SmartVision & SmartVision LITE – User Guide (Rev. 2.5 – version SW 1454) 56 People The "People" application acts as a phone book in which all your contacts are found. This application has been placed by default in the "Favorites" list giving you a direct access to the "People" list. How to create a contact You wish to add a new contact. 1. From the home screen, click on "Favorites" icon, then on "People" . 2. Select "Add Contact", a "New Contact" record appears. 3. Fill in the details for the contact clicking on the relevant fields (Photo, Surname, Name, Telephone, Email, Address). 4. When all fields are entered, save your contact by pressing "OK" at the bottom, of the record or press the "Menu" button, and click on "Save". The contact is now saved and listed in alphabetical order among your other contacts. If you want to assign a photo to this contact, click on the grey area on top of the record. SmartVision suggests you to either take a picture now or choose one from the Gallery icon. Please note: more fields can be added by simply pressing the "Menu" and clicking on" Add Field". SmartVision & SmartVision LITE – User Guide (Rev. 2.5 – version SW 1454) button, 57 Editing a contact 1. Scroll the list until you reach the contact to be edited, select this contact. 2. The contact’s record is displayed. 3. Press the "Menu" button, and click on "Edit". SmartVision & SmartVision LITE – User Guide (Rev. 2.5 – version SW 1454) 58 4. The contact record is displayed in edit mode allowing you to modify, add or delete any field. 5. Save your changes by clicking on "OK" at the bottom of the list, or press the "Menu" button, and click on "Save". Please note: if you wish to assign a specific ringtone to a contact, open the contact’s record, and access the relevant menu pressing the "Menu" button, then click on "Set ringtone". Favorite Contact "Favorite" Contact is a very convenient function of your SmartVision. It allows you to choose among all your contacts those you wish to get in touch with very easily."Favorite" Contact works like a mini directory that you can easily access from the "Phone" and "Messaging" applications. To create a "Favorite" Contact, access the contact’s record. Select a phone number, press and hold the "OK" key. A context menu appears, click on "Set as favorite". SmartVision & SmartVision LITE – User Guide (Rev. 2.5 – version SW 1454) 59 The selected number is shown with a star. In the example below, Pierre Durand is now available in the "Favorite" Contact list within the "Phone" and "Messaging" applications. Please note: the "Favorite" Contact The "Favorites0" list applies to contacts, it is different from application reserved for preferred applications. Find a Contact If you wish to quickly access one of the People saved on your SmartVision, you can use the search option: - From the "People" application, click on "Menu" - From the list of options, click on "Search". A search input box is displayed in the top bar. - Enter the first characters of the contact name you want search using the physical or virtual keypad. - SmartVision shows all contacts matching the search criteria. Please note: you can also activate the search mode directly from your "People" list by pressing any key on the keypad. Please note: you can quickly reach an item in the list of contacts using the keys 2 to 9 on the keypad. For example, pressing the "6" key to select the first contact beginning with the letter "M". Press twice the "6" key to select the first contact beginning with the letter "N". The start "*" and hash mark "#" keys to quickly access the beginning and end of the list. SmartVision & SmartVision LITE – User Guide (Rev. 2.5 – version SW 1454) 60 Import, Export contacts To avoid problems with specific format of contacts stored on the SIM card, the SIM contacts are not displayed by default in the SmartVision. To view, edit and use contacts from the SIM card, it is necessary to import them previously in the internal memory of SmartVision. 1. To import contacts from the SIM card to the internal memory of the phone, start the application « People » . 2. Press « Menu » key, then « Import/Export ». 3. Select the copy source, that is your SIM card. 4. Then select the destination of the copy. In this case, the « Phone ». SmartVision & SmartVision LITE – User Guide (Rev. 2.5 – version SW 1454) 61 5. The list of all contacts stored on the SIM card appears. 6. Select the contacts you want to save in the phone's internal memory and complete the import by selecting "OK". Please note: you can also select all the contacts from the SIM card via the "Menu" key, then "Select All" Delete a Contact From the contacts list, select the contact you want to delete. Once the profile opens, click and "Menu" and select "Delete". Confirm the deletion of this contact with "OK". The contact will then be removed from the phone memory. Please note: You can also delete all contacts stored into the phone memory by pressing "Menu" from the contacts list and select "Delete all contacts". SmartVision & SmartVision LITE – User Guide (Rev. 2.5 – version SW 1454) 62 SOS Function For your security, SmartVision offers an SOS function which can be used to make location-based emergency calls or send urgent messages to pre-defined contacts (10 au maximum). Warning: KAPSYS shall not be held liable for any damage, either direct or indirect, in the event the SOS feature fails to operate due to a technical problem with the unit or the telephone network being unavailable. Activating the SOS function This application is used to programme "automatic" sending of an alert such as a phone call or a message or both, to one or several contacts chosen by you. The SOS is enabled by activating the orange pushbutton located on the back of the phone. Push and slide the button downwards as shown. Please note: the SOS function is disabled by default. It must be activated before use. If it is not properly activated, you will be notified by an alert in the status bar. Please note: A warning window appears when the SOS button is activated and as the process of SOS is underway. SmartVision & SmartVision LITE – User Guide (Rev. 2.5 – version SW 1454) 63 SOS application set up Before using the SOS function, you need to configure the application as follows: 1. From the home screen, click on "Favorites" , then on "SOS" Icon. 2. Read the warning and "Accept" to continue. 3. The SOS function configuration screen appears. The SOS application configuration options are: - "SOS button", enables or disables the SOS button on the back of the handset. - "Play an alarm", activates the emission of a loud warning signal. - "Set Phone Numbers", sets emergency numbers that you want to call or send an SMS to in an emergency. - "Phone Call", activates telephone calls to your emergency numbers. Calls are made one by one, in the order defined in the "Set Phone Numbers" option until a call is answered. - "Answer delay", modifies the maximum wait time for a call to be answered before moving on to the next contact on the emergency contact list (30 seconds by default). - "Send Message", programmes the sending of SMS to your emergency numbers. - "Send Location", reports your geographical location in the message, if the information is available when the emergency call is sent. - "Message text", customises the contents of the message to be sent to your emergency numbers. SmartVision & SmartVision LITE – User Guide (Rev. 2.5 – version SW 1454) 64 Kapten(1) (1) : Not available on SmartVision Lite. Introduction The Kapten application is primarily a navigation system designed for people with visual impairment. It relies on the satellite-positioning system (GPS) to make your journey easier and improve your mobility thanks to its content rich features, such as geo localization, navigation, and map discovery. In addition, Kapten will allow you to save your preferred points of interest in order to guide you there whenever you want. These points of interest are called K-Tags. Lastly, Kapten map data is stored on SmartVision Micro-SD card, therefore you can use this application without being connected to a data network (3G type). Disclaimer The Kapten application is a navigation assistance system based on SmartVision’s positioning system, intended for pedestrians, but it can also be used in a car. During a navigation session, please respect the warnings described herein. Whatever your travel mode, navigation instructions given by the Kapten application should not free you from respecting the road traffic rules and behave responsibly. Your attention should be focused primarily on your environment. Stay alert and attentive during your trip and respect other users, either pedestrians, cyclists, motorcyclists, or motorists. Finally, use common sense before obeying a navigation instruction from the Kapten application. Carefully observe the signs and the geometry of sidewalks and streets. If you are unable to take the direction indicated by the Kapten application, it will automatically recalculate your trip from your new position. Please note that this product relies on the positioning system of your Smartphone. Accurate determination of your position depends on the GPS signal strength, which depends heavily on your environment, where you are, how you carry your handset, and also on digital mapping data. As a result, we cannot guarantee that the instructions given by the navigation system are accurate. SmartVision & SmartVision LITE – User Guide (Rev. 2.5 – version SW 1454) 65 Starting the navigation application From the home screen, click on "Applications" , then on "Kapten" . The Kapten application is not operational until the GPS feature is activated. If the GPS is not active, you will be requested to activate it upon starting the application. Select the "GPS Settings" button. Check the "GPS satellites" box when you reach GPS settings menu, and press the "Back" button to go back to Kapten application. The Kapten application is started, loading map data, then the application main screen appears. If you use it for the first time, the application will request your default country. Select the desired country from the list. You can change the default country subsequently from the Kapten application's settings by pressing the "Menu" button, then clicking on "Parameters", then "System" and "Default Country". Please note: loading the application may take time depending on the size of the map installed on your unit. SmartVision & SmartVision LITE – User Guide (Rev. 2.5 – version SW 1454) 66 Different navigation modes Select the navigation mode you want to use. "Pedestrian Navigation": navigation is adapted for use on foot. "Car Navigation": navigation is adapted for use in a car. "Direct Guidance": used to guide you towards your destination regardless of the actual road network, by giving you distance and direction related information, with the cardinal direction to take and for how long. "Map Discovery": used to read the map and move you virtually from junction to junction, while giving you a description of each. "Free navigation": free navigation is enabled providing you with real time description of your environment. Selecting a destination Regardless of the navigation mode you have chosen, you must now select a destination among the suggested destinations below: SmartVision & SmartVision LITE – User Guide (Rev. 2.5 – version SW 1454) 67 Navigate to a "New Address" This setting is used to specify a postal address as the destination. Two options are available to define the postal address as the destination. "Standard" input mode: enables you to enter this address in a single step using the voice recognition feature, in the following sequence: Town/city name, street name, and then street number. To enable this mode, from the address input screen, press and hold the voice control key to enter the address and release the key after it is entered. Kapten will then suggest likely candidates matching your request, select one and a navigation session will start for that particular destination. "Step by step" Input: in this mode, you must enter the various details of your destination address in successive stages, i.e. town/city name, then street name and street number. Select "Step by Step Entry" to access this input method and proceed step by step. SmartVision & SmartVision LITE – User Guide (Rev. 2.5 – version SW 1454) 68 At each stage, you can either use the keypad or speech recognition. Press and hold the voice control key and speak after the signal tone. A list of candidates will be suggested, select one and proceed to the next step. When you have entered the various fields for the destination address, the trip will be calculated and guidance will start instantly. Navigate to "New address by ZIP code" Select the destination town and enter its postal code, street name and number, in sequence. Navigate to "Last Destinations" Select your destination address from the "Last Destinations" list. You can remove the list of your “previous trips”. Please refer to the "Parameters" section to clear your list of recent trips. Navigate to "K-TAG" Select the category then the K-Tag you want to navigate to. For more details on K-TAGs and how to add and manage them, please refer to "KTags" chapter. Navigate to "Point of Interest" This option allows you to choose a useful address or point of interest (POI): - by category near to my current position. - by category near to new address. - by name near to a specific address. Prepare your "Itinerary" Select a departure address and a destination address, Kapten will calculate the best route for the chosen navigation method. The calculated route will be described as a road book. Navigate using the up and down arrows included in the road book and listen to the navigation instructions for your trip. SmartVision & SmartVision LITE – User Guide (Rev. 2.5 – version SW 1454) 69 During navigation Guidance instructions are displayed and announced during your entire trip. From top to bottom of the screen, you will find: - The name of the street you are in (pink zone). - The distance to the next manoeuver (black zone). - The symbol for the next manoeuver (black zone). - The name of the next street (blue zone). To play back the various guidance messages, you can: - In advanced accessibility mode, when screen reading is enabled, slide your finger from right to left, then from left to right without removing it from the screen, in order to read the full content of the screen. - In standard mode, when screen reading is disabled, use the up and down keys to read the various details on the screen. - In voice recognition mode, you can use keywords of the Kapten application as "Last Instruction". The list of keywords is available via the "Menu" button. Please note: if free navigation is enabled during a guidance session, instructions for free navigation will be provided alongside the usual navigation instructions. During navigation, the keys of the physical keyboard are also associated with specific keywords. Make a short press on one of these buttons to get an information related to your journey: - Key "1": Where am I? - Key "2": Last instruction - Key "3": Next instruction - Key "4": Current speed - Key "5": Speed limit - Key "6": Remaining distance - Key "7": Point of interest - Key "8": Enable / Disable the free navigation - Key “9”: GPS signal. SmartVision & SmartVision LITE – User Guide (Rev. 2.5 – version SW 1454) 70 Direct Guidance mode "Direct guidance" mode provides you with real-time information on the distance and direction to your destination point. Such information is calculated as the shortest distance between the two points and does not take into account any road network. This navigation mode is particularly useful to reach a destination point in or off road. Please note that information is provided for convenience only and does not take into account the topography and possible dangers you may come across such as rivers, bridges, barriers, or similar obstacles. Kapsys decline any and all liability for damages either direct or indirect resulting from the use of this mode. The following information is provided in "Direct guidance" mode: - Cardinal orientation from your point of arrival to your current position, i.e. North, North-East, East, South-East, South, South-West, West and NorthWest. - Distance from your current position to your point of arrival, in meters or kilometers. - Direction you need to take to get to your destination. This information is expressed in hours using the clock position format, from 1 to 12 hours, based on your last known direction. When “Direct guidance” mode is enabled, distance cardinal direction and heading information is announced at regular time intervals. Please note that the Kapten application will accurately calculate your direction only if you are moving. If you are at standstill, Kapten gives you the previous and correct direction. The application will additionally send the message "No direction information" when it is unable to provide any reliable information on the direction to follow. Example of "Direct guidance" messages: "Destination point, North-West at 250 meters, please make a right: your destination point is 250 meters in a North-West direction, you must turn right. "Direct guidance" does not automatically stop after you reach your final destination; you must press the "Back" button to stop it. Please note: “Direct guidance” settings (see settings) can be used to define the frequency of automatic repetition of messages or to enable or disable the "Direct guidance" mode at the end of navigation. SmartVision & SmartVision LITE – User Guide (Rev. 2.5 – version SW 1454) 71 Free navigation In free navigation mode, information on your environment is available in real time. Once this mode is enabled, the Kapten application announces the street you are on and described the next intersection to you. When you get close to an intersection, Kapten describes it by giving you the names of streets in the intersection. After leaving the intersection, Kapten announces the next street you are heading to. By default, free navigation mode is automatically enabled each time you start a navigation session. However this mode can be enabled or disabled as you please by pressing the "Menu" button from the Kapten application screen. As soon as the "Free navigation" option is enabled or disabled, Kapten sends you a message of confirmation that this mode is active or inactive. You can configure the "Free navigation" mode, for example: - Configure the announcement of nearby K-Tags and useful addresses. - Automatically repeat the announcements made by the “free navigation” mode. Please refer to Kapten application "Settings" section for more details. K-TAG Kapten application integrates geo-tagging capabilities, called K-Tag, which allows you to save any location associated with relevant information. You can use K-Tags as waypoints. In addition, you can have nearby K-Tags announced to you whilst you are in free navigation mode. A K-Tag is a geographical marker that includes: - A geographical location or an address - A voice memo to identify your K-Tag - A category - A "favorite" attribute (used for direct access)as a navigation destination. SmartVision & SmartVision LITE – User Guide (Rev. 2.5 – version SW 1454) 72 "K-TAG" Menu From the Kapten application, press the "Menu" following options are available: - "Create K-Tag". - "Modify K-Tag". - "Delete K-Tag". button, and click on "K-Tag". The Create a K-Tag To create a K-Tag, select one of the options below: - "Current Position": create a new K-Tag using your current position. - "New address": create a new K-Tag by entering an address. - "Coordinates": create a new K-Tag by specifying the latitude and longitude coordinates. 1. When you have defined a geographical position for your K-Tag, you can assign a voice memo in order to find it more easily. Please select the option "Enter voice memo for your KTAG", then speak after the beep. SmartVision & SmartVision LITE – User Guide (Rev. 2.5 – version SW 1454) 73 If you do not wish to assign a voice memo, select "Skip", in this case, the nearest postal address will be used as K-Tag identification. 2. Select the category you wish to assign this K-Tag to: "Contact", "Hotel and restaurant", "Transportation", etc… 3. Lastly, Kapten suggests that you define your K-Tag as a "Favorite". SmartVision & SmartVision LITE – User Guide (Rev. 2.5 – version SW 1454) 74 Modify a K-Tag From the "K-Tag" screen, click on "Modify K-Tag", and choose the category as well as the K-Tag to be edited. When the K-Tag is selected, you may modify its "Category", "Voice memo" or "Favorite" attribute. Select an option and make the required changes by following the steps below: Remove a K-Tag From the "K-Tag" screen, click on "Delete K-Tag", and select the category and the K-Tag to be removed. Voice command keywords The Kapten application includes voice command key words which are permanently operational when the application is active. Generic keywords: The following generic keywords are always active, even when the navigation function is off. Activate free navigation Stop free navigation K-Tag Speed limit Where am I? Parameters Current position GPS Signal POI around Current speed Enables free navigation mode. Disables free navigation mode. Activates the K Tag menu. Gives speed limit applied to the road you are on. Gives your current position. Activates the settings menu. Gives latitude and longitude information in degrees, minutes and seconds, altitude information in meters. Gives GPS signal strength. Indicates Point of interests of any category around your current position. Gives your current speed. SmartVision & SmartVision LITE – User Guide (Rev. 2.5 – version SW 1454) 75 "Navigation" specific keywords The following keywords are operational only if the Navigation mode is active. Stop navigation Roadbook Remaining distance Last Instruction Current destination Arrival time Current Navigation mode Switch to Pedestrian mode Switch to Car mode Next Instruction Stops the current navigation session. Activates the road book during navigation. Gives the remaining distance to destination. Repeats the previous navigation instruction. Gives the current destination. Gives the time of arrival. Gives the navigation mode currently in use. Switches to pedestrian navigation mode without entering again the address for the destination. Switches to car navigation without entering again the destination address. Gives the next navigation instruction. Settings This section describes how to configure your Kapten application. Press the "Menu" button to access the options, select the "Parameters" menu. Settings are grouped by categories: - "System": lets you specify the system settings. - "Pedestrian Navigation": lets you specify the pedestrian navigation settings. - "Car Navigation": lets you specify the car navigation settings. - "Free Navigation": lets you specify the free navigation settings. - "Direct Guidance": lets you specify the direct guidance settings. - "Details and update": retrieves information about software and map updates. Please note: you can also access the Kapten application settings by sending the voice command: "Parameters" from this application. The "System" settings are: - "Default Country" specifies the default country set for address “standard” input mode. - "Measurement unit": specifies distance and speed units used in the navigation instructions (metric and imperial). - Delete Last Destinations": clears the addresses selected from the list of previous trips. - "Restore default settings" restores the Kapten application factory settings. - "Reset the Product": resets all settings and clears all personal data saved in the Kapten application (Recent trips, K-Tags). SmartVision & SmartVision LITE – User Guide (Rev. 2.5 – version SW 1454) 76 "Pedestrian navigation" settings: - "Automatic instruction repeat": defines the time interval for repeating navigation announcements (None, 1, 3, 5 or 10 minutes). - "Hour indication" enables or disables the hour indication in the instructions related to manoeuvers. "Car navigation" settings: - "Routing parameter": specifies the criteria used for route calculation (Fastest, Shortest). - "Enable highways": specifies route calculation with or without highways. - "Allow toll roads": specifies route calculation with or without toll roads. - "Automatic instruction repeat": specifies time interval for navigational messages playback (None, 1, 3, 5 or 10 minutes). "Free navigation" settings: - "P.O.I announcements": selects and screens the P.O.I category to be announced when you get close. - "K-Tag announcements": selects and screens the various K-Tag categories to be announced when you get close. - "Type of announcement": defines the POI or K-Tag announcement mode when one is nearby (No notification, Sound alert or voice announcement). - "Cardinal direction information": enables or disables the cardinal direction announcements of the current road. - "Automatic instruction repeat": specifies the time interval for pedestrian navigation message playback (None, 1, 3, 5 or 10 minutes). "Direct guidance" settings: - "Automatic instruction repeat": specifies the time interval between direct guidance instructions (None, 1, 3, 5 or 10 minutes). - "Direct guidance when destination is reached": enables or disables automatic switch to Direct Guidance at the end of a pedestrian or car navigation session. SmartVision & SmartVision LITE – User Guide (Rev. 2.5 – version SW 1454) 77 Assistance This feature enables you to get support from a third party via a private and secured VPN based server, which will have temporary access to your smartphone and assist you in setting up your SmartVision. Request of assistance From the home screen, click on "Favorites" , then on "Assistance" . Enter the third party’s phone number to send him/her a SMS or E-mail address. Click on "Request assistance" to send an assistance request message that contains your handset’s connection information. Remote access to SmartVision Once the message has been sent, connection is established with the support person. Upon receiving the message, the support person will download a remote control software (VNC type) to a pc in order to be able to enter the details (server address and password) received in the SMS or Email. Please note: to find out more about VNC compatible applications, please visit our websitewww.kapsys.com, under Support, and SmartVision by KAPSYS. The support person will take control of your smartphone via the pc keyboard and mouse: SmartVision & SmartVision LITE – User Guide (Rev. 2.5 – version SW 1454) 78 "F1" key is assigned to SmartVision "Menu" "F2" key is assigned to SmartVision "Home screen" "F3" key is assigned to SmartVision "Back" Arrow keys SmartVision. The mouse left button button. button. button. are used to navigate through screens and menus on your is used to select an item on the SmartVision’s screen. Click on the "Ends with assistance" option on your smartphone to stop the sharing session at any time. The support person can also end the session by pressing the "F11" his/her computer. SmartVision & SmartVision LITE – User Guide (Rev. 2.5 – version SW 1454) key on 79 Calendar The "Calendar" application opens a calendar showing the current week. Press the "Menu" button to access the various options of the "Calendar" menu: - "New event "schedules an appointment by filling out all the fields (event title, location, date, etc.). "Refresh" updates the agenda. "Search" searches an already scheduled event. "Calendars to be displayed" synchronises this calendar with another in a PC for example. "Settings" accesses the general settings and lets you personalize the events, display, reminders, notifications, etc, based on your preferences. Please note: if you wish to modify the display format of the calendar, click on the top bar and choose between day, week, month, or list-of-events formats. Alarm Clock Select the "Clock" application, and press the "Menu" button to access the menu. Click on "Add alarm" to set an alarm, the date, the time and ring mode you want. To disable, modify or remove the alarm, click on the item and press and hold the "OK" key to access the context menu. Camera Select the "Camera" settings. application, and press the "Menu" button to access the Adjust the camera settings one by one. When done, press "OK" key to take a picture. You will hear the shutter sound when the picture is captured. Pictures taken are saved into the phone memory in the "DCIM" folder. They are also viewable from the "Gallery" application. SmartVision & SmartVision LITE – User Guide (Rev. 2.5 – version SW 1454) 80 Calculator The "Calculator" application lets you perform the basic operations such as addition, subtraction, multiplication, and division. For more complex operations i.e. sine, cosine, logarithm, etc. calculation, press the "Menu" button to access the menu, and click on "Advanced panel". You also have an option for removing previous calculations. Gallery The Gallery function works like a photo album where photos and videos captured with your SmartVision are stored. Select the "Gallery" application. The album content is organised in 2 categories: all pictures and all videos . Select an album to view its content. Press the "Menu" button to access the various options of the album: - "Capture picture" lets you use the camera feature to take a picture. - "Capture video" lets you use the video camera feature to take a video. - "Slideshow" lets you view your photos as a slide show. - "Multi-select" lets you select several items of the gallery to be shared or removed. - "Settings" lets you manage the Gallery options: image size, sorting order and confirmation of deletion for photos and videos. Video Player The "Video Player" application is used to view videos stored in the phone internal memory or a micro SD card on your SmartVision. The micro SD is a removable memory card used for storing information, it extends the overall storage capacity of your smartphone. SmartVision & SmartVision LITE – User Guide (Rev. 2.5 – version SW 1454) 81 Magnifier SmartVision includes a digital magnifier for an enhanced user experience. The digital magnifier lets you enlarge text or entire documents and adapts to your visual acuity using the different settings available for the zoom and colour contrasts. The digital magnifier is accessed by selecting "Favorites" "Magnifier" from the home screen. , then clicking on Pass your SmartVision above the text to be enlarged, move up or down to adjust the sharpness and use number keys"2"and"3"to zoom in and out. Additional options are: - Key 1: increases or decreases the brightness level. - Key * (star): freezes the screen. - Key 0: takes a picture and saves it to the gallery. - Key # (hash): chooses from the 9 colour contrast levels available. You can also access these options by pressing the "Menu" button. Please note: For best results, proper lighting conditions are required. Colors Detections "Colors detections" , allows you to use the phone's camera for the recognition and detection of colors. - « Announce colors »: point the camera on an object, and the color will be announced automatically. Press the "OK" key to repeat. - « Find color »: select a color from the list and when the camera will see this color, a sound is played. Please note: it is recommended to position the phone about twenty centimeters from the target and in a bright environment in order to optimize the result. SmartVision & SmartVision LITE – User Guide (Rev. 2.5 – version SW 1454) 82 Sound recorder The "Sound Recorder" application is used to record voice memos. Select "Record" to start recording the memo, click on "Pause" to hold and on "Stop" to end the recording. You can listen to a recorded memo by selecting the "Play" option. You may also "Discard" or "Save" it. Lastly, you can play back any of the voice memos recorded, from the home screen after clicking on the "List" option. You can also edit a voice memo from this list by long press the item you want to change. Then select from the window "Rename the record" or "Delete Record". Music The "Music" application allows you to play music or voice memos stored on your phone memory or micro SD card. SmartVision & SmartVision LITE – User Guide (Rev. 2.5 – version SW 1454) 83 Browser The "Browser" application is used to access the Internet. Press the "Menu" button to access the internet settings. Through "search" item from the menu you can launch a simple search using the default browser. Please note: You can also search the web using the "Search" application. Web page loading is indicated by a beep. NFC(1) (1) : Not available on SmartVision Lite. NFC (Near Field Communication) technology lets smartphones and other devices to communicate with NFC tags. SmartVision offers this feature, therefore you can set up and read your NFC tags. The different options available in this application will let you assign either information or an action to an NFC Tag which can then be automatically executed when you read the TAG. These options are: - "Dial" assigns a phone number to a contact, and dials that number. - "Profile Setting" assigns a phone mode (Wi-Fi, Bluetooth, Airplane mode, ringtone) and enables it. - "Application" assigns an application which can be automatically launched. - "Internet bookmark" assigns a link to a webpage, and loads the webpage in the web browser. - "Text" assigns a text and reads it using speech recognition. - "Set Wifi" assigns Wi-Fi login details (username and password) and automatically logs in. - "Voice memo" assigns a voice memo and plays it. To write or read an NFC Tag, bring the back side of your smartphone close to the tag, a beep will notify you that the action was registered. SmartVision & SmartVision LITE – User Guide (Rev. 2.5 – version SW 1454) 84 OCR(1) (1) : Not available on SmartVision Lite. The OCR function scans a text by means of optical character recognition, and reads it, using text-to-speech function. The conversion rate depends on the text capture quality. The OCR application is equipped with intelligent document recognition and automated data capture system that has the capability to accurately convert an A4 document with text in font size 12 or higher. To ensure automated detection, your document must be placed in front of you in vertical position on a clear, one coloured, well-lit, even support base which strongly contrasts with the document to be scanned. Two capture modes are available: 1. "Page detection" capture mode is particularly useful for blind people. The user is voice guided throughout the process of having the document detected and captured automatically. 2. "Camera" mode allows to capture text documents without voice guidance. Select "Applications" from the home screen, and click on "OCR" . From the OCR menu, select the source: "From camera" to take a picture of the text to be converted: - In "Page detection" mode: place your SmartVision on the text, press the "OK" key. Hold the handset horizontally and slowly move it up while following the audio instructions until your SmartVision automatically captures the text. Optical recognition will start instantly. In this mode you have a sound support to keep the horizontality. More the beeps are distant from each other, near you are from the horizontality. - In "Camera" mode: frame and focus the text document. Take a picture of it by pressing the shutter button. Click on "Confirm" to launch optical character recognition. SmartVision & SmartVision LITE – User Guide (Rev. 2.5 – version SW 1454) 85 "From gallery": Select a document stored in the photo gallery on your SmartVision. Character recognition will start instantly. Once the text is converted, you can browse it using the up ""and down "" keys on the keypad. You can press the "Menu" button to access the OCR menu settings: languages, conversion mode and auto or manual captures. From menu you have the choice to read the result line by line or full contain If the auto detection function fails, we recommend that you go back to the OCR menu page and start the procedure over again from the beginning. FM Radio SmartVision lets you listen to your preferred radio station. Use the various keys to scan the various frequencies. To save a preferred station, press and hold one of the (physical) keypad number keys (0 to 9). Press briefly the key assigned to the station to be played. Press the "Menu" to access the application options. Please note: the FM radio only works when earphones are connected to the phone as they serve as an antenna. Search Use this application to find any item on your SmartVision (application, contact, Email address, music, …). This application is very useful to make searches on the internet. Downloads The "Downloads" application gives the list of all items downloaded from the internet browser. SmartVision & SmartVision LITE – User Guide (Rev. 2.5 – version SW 1454) 86 Legal notice and Warranty 1. PRECAUTIONS FOR USEAND RECOMMENDATIONS - - - Handle your KAPSYS device and accessories with care, do not drop it or knock it Your device is equipped with a touchscreen, please use your fingers only Do not dismantle the product as this will result in the warranty being voided and could cause damage liable to render the product unusable Clean the product using only a soft, slightly damp cloth. Do not use chemicals, detergents or abrasive products, which could damage the device Do not rub the product with a sharp tool, which could damage it This product is not waterproof. Protect it from damp and splashes of liquid. If your device is wet or has been exposed to humidity, remove the battery and let it dry. Never use the device near a source of heat, and avoid storing the device in a hot, humid or corrosive place. Do not use the product in areas with very high or low temperatures. Do not use the product near magnetic fields. Do not use your device if the screen is broken or cracked, as this could cause injury. Do not use the product in potentially explosive areas Do not use the product in health care facilities and ask for authorisation before using your phone near medical equipment. Your product contains a built-in lithium-polymer battery. To increase the battery life, always charge it fully and do not charge the product in temperatures below 0°C (32°F) or above 45°C (113°F) Do not expose your product to extreme temperatures. Operating temperature range: -10°C (14°F) to +55°C (131°F). Short-term storage temperature: -20°C (-4°F) to +60°C (140°F). Long-term storage temperature: -10°C (-4°F) to +25°C (77°F) Prolonged use of the product may cause the product to heat, but this is normal. For optimal performance of your device, we recommend that you switch it off from time to time and remove the battery. 2. SAFETY AND HEALTH - - Keep the product away from small children as small parts in the product or the product’s accessories may cause choking Keep your hands free when you drive: drive your car in a safe and responsible manner and observe traffic rules. Protect your hearing: avoid prolonged exposure to high sound levels when using the earphones, loudspeakers or the receiver. If you wear a pacemaker or live near a person who wears one, you may seek advice with your doctor or the manufacturer of the pacemaker for any queries you might have regarding the use of your wireless device. Radio transmitting equipment may interfere with the safe and effective use of some medical equipment that may not be adequately protected. 3. WARRANTY – LIMITATION OF LIABILITY GUARANTOR The guarantor is Kapsys, manufacturer of the device, with registered office at 790, avenue du Docteur Maurice Donat, Mougins Sophia Antipolis (06250), France. SmartVision & SmartVision LITE – User Guide (Rev. 2.5 – version SW 1454) 87 LIMITED WARRANTY Kapsys warrants to the purchaser that the product complies with the description thereof (as shown on www.kapsys.com website) in accordance with the provisions of Articles L.211-1 et seq. of the French Consumer Code. Kapsys warrants to the initial purchaser that the product, from the date of purchase, is free from any defects in workmanship and materials when it is used under normal conditions and according to its intended purpose. This product is guaranteed for a period of two (2) years and the battery is guaranteed for a period of six (6) months from the date of purchase. During this commercial warranty period, the product will be either repaired by Kapsys and/or any Kapsys-approved service provider, free of charge or replaced, as Kapsys sees fit, free of charge. This warranty applies to KAPSYS telephone in France where the warranty is registered. Please contact your vendor for any queries about warranty service. Users who apply for coverage will be requested to provide a proof of purchase of their product (address and date of purchase). In accordance with article L 211.16 of the French Consumer Code, the warranty period of a product repaired under warranty where the product is unavailable for use or cannot be used for more than seven days (7) is automatically extended by the duration of repair. Kapsys warranty does not cover: - Accessories supplied with the product - Normal wear and tear of the product and reduction in the battery charge holding capacity; - Damage resulting from improper use, exposure to humidity or liquid, or close proximity to a heat source; - Cracked or broken devices, or devices with visible signs of knocks; - Failure to respect the precautions for use, accidents, negligence, misuse or use inconsistent with the instructions provided with the device, or commercial use of the product; - Short-circuits of the battery or use of the battery in another device than your device - Use of accessories or connectors not recommended by KAPSYS - Damage as a result of attempt repair by anyone not authorized by Kapsys. The limited warranty included herewith and complying with the applicable legislation excludes any other implied warranty and/or duty incumbent upon the seller, in particular but not limited to any obligation in terms of satisfactory quality, reliability or availability of the accuracy or completeness of responses, results and information supplied by the product or of data accessibility. You are recommended to make one or several backups of your data stored in your product. KAPSYS cannot be held responsible for loss of data resulting from the product malfunction, repair or replacement. 4. LIMITATION OF LIABILITY Under no circumstances can Kapsys be held liable for any loss or damage of any kind whatsoever, direct or indirect, general or specific, that you or any third parties may suffer that is caused by or related to the use of this instruction manual or the products or services that it describes or any inability to use the product or any of the product’s functions. Network servers and or cellular system services are provided by third parties via communication systems, networks and media on which KAPSYS does not have any control and therefore cannot ensure availability and efficient operation of the same. We recommend that you contact directly the relevant providers for any support related to their services. SmartVision & SmartVision LITE – User Guide (Rev. 2.5 – version SW 1454) 88 5. ABOUT SPECIFIC ENERGY ABSORPTION RATE Your SmartVision by KAPSYS is a radio transmitter/receiver. It was designed and manufactured to comply with the radiofrequency (RF) exposure thresholds recommended by the European Union. The exposure standards for mobile phones are determined by a measurement unit known as the Specific Absorption Rate or “SAR”. The highest rate according to ICNIRP guidelines for use of the device at the ear is 0.297 W/kg over 10 grams of body tissue. The SAR limit is set by ICNIRP to 2 watts/kilogram (W/kg) averaged over 10 grams of body tissue. Tests used to determine SAR levels were carried out on the basis of standard usage modes with the phones transmitting at their maximum power level over the entire range of frequency bands. The actual SAR level of a device in operation can be lower than the maximum value, as the device is designed to use only the power level required to access the network. This value varies depending on a number of factors such as how close you are from a network base station. The use of accessories may affect SAR values. SAR limits may vary according to test standards and information presentation requirements in application in different countries and according to the network bandwidth. 6. CUSTOMER SERVICE For more details, please contact your vendor’s Customer Service or send us a mail to : Service Clients KAPSYS – 790 avenue du Docteur Maurice Donat 06250 MOUGINS SOPHIA ANTIPOLIS, France. You can also visit our website: www.kapsys.com. 7. TRADEMARKS Company and product brands referred to in this document and in the manuals are trademarks, either registered or not, owned by the respective holder. Kapsys words, brands and logos are registered trademarks of Kapsys SAS. Words, brands and logos such as Android, Clavier Google, Lecteur Google, Play Store, Google Play Music, Google Parameters are registered trademarks of Google Inc. in the United States and/or other countries. ABBYY names, brands and logos are registered trademarks of ABBYY Software Ltd. Bluetooth names, brands and logos are registered trademarks of Bluetooth SIG Inc. Nuance is a registered trademark of Nuance Corporation Inc. All brand names and product names are trade names or registered trademarks of the respective companies. SmartVision & SmartVision LITE – User Guide (Rev. 2.5 – version SW 1454) 89 ABOUT THIS DOCUMENT Information published in this document is liable to change without notice. Kapsys reserves the right to amend the contents of this document with no obligation to notify any person or entity whatsoever thereof. Kapsys cannot be held liable in the event of any technical or publishing errors or omissions contained herein, or in the event of accidental or indirect loss or damage resulting from the product operation or from using this document. Kapsys endeavours to continuously improve our product and its features’ quality and performance. Kapsys therefore invites you to visit their website (www.kapsys.com) for the latest update on the use and operation of this product. This product complies with the CE marking requirements for use in residential, commercial or light industry installations. Prolonged exposure to music at maximum volume can cause hearing damage. SmartVision & SmartVision LITE – User Guide (Rev. 2.5 – version SW 1454) 90 Troubleshooting Prior to contacting the Customer service, please read the recommendations below: - For optimal performance of your device, we recommend that you switch it off from time to time. - It is recommended to fully charge ( ) the battery for improved operation. And carry out the following checks: My mobile phone will not switch on / I get a black screen: - Press the "On Off" key until the screen comes on. - Check the battery charge level. - Check the battery contacts, remove and reinstall your battery, then switch your telephone back on. My screen is difficult to read: - Clean your screen. - Adjust screen brightness to your environment lighting conditions (quick setting from the notification panel). My mobile phone switches off by itself: - Press the "On Off" key to bring it back on. - Check the battery charge level. My mobile phone has a low level of autonomy: - Make sure you respected the full charge timing (minimum 4 hours). - To increase the battery life, you can disable Wi-Fi, Bluetooth and GPS functions if you do not need them (quick setting from the notification panel). My mobile phone will not charge properly: - Make sure that your battery is not completely discharged. - Make sure charging is carried out under normal conditions (0°C +40°C) - Check that the battery is inserted. It must be inserted before plugging in the charger. - Make sure you are using the battery and charger provided by KAPSYS. - When abroad, check that the electrical current is compatible. My mobile phone will not connect to a network: - Try connecting from another location. - Verify the network coverage with your telephone service provider. - Make sure the airplane mode is disabled. - Check with your telephone service provider that your SIM card is valid. - Try connecting at a later time if the network is overloaded. - Remove and re-install the SIM card. The voice interface will not operate: - If you are in speech-to-text mode, check your data connection (Wi-Fi, 3G). - Incorrect use of the keyword or voice command (refer to page 25). SmartVision & SmartVision LITE – User Guide (Rev. 2.5 – version SW 1454) 91 SIM card error / No phone feature can be accessed: - Check if the SIM card has been correctly inserted. - Check if the chip on your SIM card is not damaged or scratched. Unable to make outgoing calls: - Make sure you have dialled a valid number and pressed the "OK" key. - For international calls, check the country and area codes. - Make sure your mobile phone is connected to a network, and that the network is not overloaded or unavailable. - If you are abroad, check with your telephone service provider that you have subscribed to international calling options. - Make sure the airplane mode is disabled. Unable to receive incoming calls: - Make sure your mobile phone is switched on and connected to a network (check for overloaded or unavailable network). - Make sure the airplane mode is disabled. Call quality is poor: - You can adjust the volume while on a call using the volume up and down Keyon the left side. - Check the network signal strength indicator in the status bar . When I select a number from my contact list, the number is not dialled: - Make sure the number has been correctly saved. - Make sure you selected the country prefix when calling from abroad. My correspondents are unable to leave messages on my voicemail: - Check with your telephone service provider if this service is available. I cannot access my voicemail: - Check if you have correctly entered your telephone service provider’s voice mail number (click on "Phone", "Menu", "Settings", and "Voicemail"). - Try later if the network is busy. SIM card locked - You have entered 3 incorrect PIN codes, contact your telephone service providers to obtain the PUK code. SmartVision & SmartVision LITE – User Guide (Rev. 2.5 – version SW 1454) 92 Technical Specifications - Operating System : Android 4.0 - Design : Size : 130 x 60 x13 mm Weight : 140g Touchscreen : capacitive multitouch, IPS QVGA, 3.5″ with automatic backlight management - Hardware : Sim card format : Standard (2FF) Connectors: Micro USB OTG 2.0, jack audio 3.5mm Cellular connectivity : o HSUPA / HSDPA (3G+) o UMTS (3G) o GSM 850 / 900 / 1800 / 1900 Wireless connectivity : o Bluetooth 3.0 o WLAN IEEE 802.11 a/b/g/n 2.5GHz / 5GHz o NFC (not available on SmartVision Lite) Power consumption : o Battery : 2000 mAh Li-ion o Standby time (idle) : 220h o Talk time : 10h Processor Type : Cortex A9 @ 1Ghz Internal memory : 4Go External memory : microSD slot – up to 64GB GPS receiver : Yes, with A-GPS support Other sensors : accelerometer, gyro, digital compass SAR : 0,297 W/kg - Camera : Resolution : 5 Megapixels Vidéo : HD 720p @ 30 fps Focus : manuel and autofocus Digital zoom : 4x Flash : LED SmartVision & SmartVision LITE – User Guide (Rev. 2.5 – version SW 1454) 93