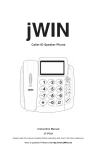
1
CD MICRO SYSTEM
Instruction Manual
JX-CD7160
Please read this manual carefully before operating and save it for future reference.
Have a question? Please visit http://www.jWIN.com
Mini Portable Stereo Audio System
V10M10_IM_EN_04102007
USER SAFETY GIUDE
IMPORTANT SAFETY INSTRUCTIONS
WARNING: To prevent fire or shock hazard, do not expose this appliance to rain or moisture.
These markings are located on the bottom, side or back of the unit.
CAUTION: To prevent the risk of electric shock, do not remove cover (or back). Non- userserviceable parts inside. Refer servicing to a service professional.
•
The lightning flash with an arrowhead symbol, within an equilateral triangle, is intended to
alert the user to the presence of un-insulated "dangerous voltage" within the product's
enclosure that may be of sufficient magnitude to constitute a risk of electric shock to a
person.
•
The exclamation point within an equilateral triangle is intended to alert the user to the
presence of important operating, maintenance and servicing instructions in the literature
accompanying the appliance.
Dripping warning: "This product shall not be exposed to any dripping or splashing, and no
objects filled with liquids, such as vases, shall be placed on or near the product."
Ventilation warning: "The normal ventilation of the product shall not be impeded for intended
use." (Minimum distances must be kept around the apparatus for sufficient ventilation,
especially while use of the apparatus is in tropical and/or moderate climates.)
Dispose of old batteries safely. Do not throw them into a fire.
LASER SAFETY
This unit utilizes laser technology. Only a qualified professional should
remove the cover or attempt to service this device, due to possible eye
injury.
CAUTION
•
Use of controls or adjustments or performance of procedure other than
specified herein may result in hazardous radiation exposure.
•
Hazardous laser radiation when open and interlock defeated.
DANGER
Invisible laser radiation when open and interlock failure. Avoid direct
exposure to beam.
-1-
www.jWIN.com
Mini Portable Stereo Audio System
V10M10_IM_EN_04102007
USER SAFETY GIUDE
INSTRUCTIONS ON ENVIRONMENT PROTECTION
Do not dispose of this product in the usual household garbage at the end of its
life cycle; bring it to a collection point for the recycling of electrical and electronic
appliances. This symbol on the product means the instructions for use or the
packing will inform about the methods for disposal. The materials are recyclable
as mentioned in its marking. By recycling, material recycling, or other forms of
re-utilization of old appliances, you make an important contribution to protect the environment.
Please inquire at your local community administration for the authorized disposal location.
IMPORTANT SAFETY PRECAUTIONS
1.
READ INSTRUCTIONS - All safety and operating instructions should be read before the
appliance is operated.
2.
RETAIN INSTRUCTIONS - The safety and operating instructions should be retained in a
secure place for future reference.
3.
HEED WARNINGS - All warnings on the appliance and in the operating instructions should
be observed.
4.
FOLLOW INSTRUCTIONS - All operating and use instructions should be followed.
5.
WATER AND MOISTURE - The appliance should not be used near water. For example:
near a bathtub, kitchen sink, laundry tub, and swimming pool or even in a wet basement.
6.
VENTILATION - The appliance should be situated so that its location and position does not
interfere with its proper ventilation. For example, the appliance should not be situated on a
bed, sofa, rug or similar surface that may block the ventilation openings; or, be placed in a
built-in installation, such as a bookcase or cabinet that may impede the flow of air through the
ventilation openings.
7.
HEAT - The appliance should be situated away from heat sources such as radiators, heat
registers, stoves, or other appliances (including amplifiers) that produce heat.
8.
POWER SOURCES - The appliance should be connected to a power supply only of the type
described in the operating instructions or as marked on the appliance.
9.
GROUNDING AND POLARIZATION - Precautions should be taken to ensure that the
grounding or polarization of the appliance is correct.
10. POWER CORD PROTECTION - Power supply cords should be routed so that they are not
likely to be walked on or obstructed by items placed upon or against them. Pay particular
attention to cords at plugs, convenience receptacles, and the point at which they exit from
the appliance.
11. CLEANING - The appliance should be cleaned only as recommended by the manufacturer.
12. POWER LINES - An outdoor antenna should be located away from power lines.
13. NONUSE PERIODS - The power cord of the appliance should be unplugged from the outlet
when the appliance is to be left unused for an extended period of time.
-2-
www.jWIN.com
Mini Portable Stereo Audio System
V10M10_IM_EN_04102007
USER SAFETY GIUDE
IMPORTANT SAFETY PRECAUTIONS – CONTINUED
14. OBJECT and LIQUID ENTRY - Care should be taken so that objects do not fall and liquids
are not spilled into the device’s openings.
15. CARTS AND STANDS - The appliance should be used only with a cart or
stand that is recommended by the manufacturer. An appliance and cart
combination should be moved with care. Quick stops, excessive force, and
uneven surfaces may cause the appliance and cart combination to overturn.
16. WALL OR CEILING MOUNTING - If the appliance is mounted to a wall or ceiling, it
should be mounted only as recommended by the manufacturer.
17. DAMAGE REQUIRING SERVICE - The appliance should be serviced by qualified service
professional when:
a. The power-supply cord or plug has been damaged.
b. Objects have fallen into, or liquid has been spilled into the appliance’s apertures.
c. The appliance has been exposed to rain.
d. The appliance has been dropped and suffered damage.
e. The appliance does not appear to operate normally or exhibits a marked change
in performance.
18. SERVICING - The user should not attempt to service the appliance beyond that described
in the user's operating instructions. All other servicing should be referred to qualified
service professional.
19. PROTECTIVE ATTACHMENT PLUG - The appliance is equipped with an attachment
plug that has an overload protection. This is a safety feature. If replacement of the plug is
required, be sure the service technician has used a replacement plug specified by the
manufacturer that has the same overload protection as the original plug. (UK Version
Only)
FCC NOTICE (USA)
This device complies with Part 15 of the FCC Rules. Operation is subject to the following two
conditions: (1) this device may not cause harmful interference, and (2) this device must accept
any interference received, including interference that may cause undesired operation.
FCC regulations state that any change or modification to the equipment, not expressly
approved by maker or its authorized parties, could void user’s authority to operate this
equipment.
•
•
To prevent fire or electric shock, do not expose the unit to rain or moisture.
Never attempt to open the cabinet. Dangerous high voltages are present in the unit.
Always refer servicing to a qualified technician.
IC NOTICE (CANADA)
This digital apparatus does not exceed the Class B limits for radio noise emissions from digital
apparatus as set out in the Radio Interference Regulations of Industry Canada.
-3-
www.jWIN.com
Mini Portable Stereo Audio System
V10M10_IM_EN_04102007
TABLE OF CONTENTS
1.
2.
3.
Getting Started
a.
Introduction ………………………………………………………………………
5
b.
Location of Controls (top, speaker, right, left) ……………………………….
6
c.
Location of Controls (Back Panel) …..………………………………………..
7
d.
Location of Controls (Remote) ………………………………...………………
7
e.
Connecting the Speakers ………………………………………………………
8
f.
AC Operation ……………………………………………………………………
8
g.
Antennas …………………………………………………………………………
8
h.
Listening with Stereo Headphones ……………………………………………
8
i.
Installing the Batteries in the Remote Control ……………………………….
8
Operational Instructions
a.
Loading a CD into the Player ……….………………………..……………....
9
b.
Listening to CDs ………………………………………………………………...
9
c.
Repeat Mode ……...………………………………………………….………..
10
d.
Skip and Search Mode ………………….…………………………………….
10
e.
Program Mode …………………………………………………………………..
10
f.
Listening to the Radio …………………………………………………………..
11
g.
FM Stereo Indicator …………………………………...………………………..
11
h.
Bass Boost ………………………………………………………………………
11
Maintenance & Specifications
a.
Notes on CDs …………………………………………………………………..
12
b.
Cleaning the lens ……………………………………………………………….
12
c.
Cleaning the cabinet …………………………………………………………...
12
d.
Troubleshooting…………………………………………………………………
13
e.
Technical specifications ……………………………………………………….
14
-4-
www.jWIN.com
Mini Portable Stereo Audio System
V10M10_IM_EN_04102007
GETTING STARTED
Thank you for purchasing the JX-CD7160. Unpack the unit and make sure to put aside all
accessories so they will not be lost. We recommend that you retain the original carton and
packaging materials for future use, should you transport or ship the unit in the future.
Portable stereo audio system
•
•
•
•
•
•
•
•
•
CD top loading mechanism
Detachable satellite speakers
Programmable memory for 20 audio tracks
Supports repeat, skip and search functions
Liquid crystal display (LCD) for CD playback and AM / FM Radio Display
Dynamic bass boost system (DBBS)
Built-in AM / FM stereo radio
Playable Media: Audio CD (CD-R / CD-RW)
Total audio output: 2.0WRMS / Channel
What’s included
•
•
•
CD mini system
Remote control
Instruction manual
-5-
www.jWIN.com
Mini Portable Stereo Audio System
V10M10_IM_EN_04102007
GETTING STARTED
Location of Controls (top, speaker, right, left)
1.
2.
3.
12.
13.
14.
4.
15.
16.
17.
5.
6. 7.
8.
9. 10. 11.
19.
18.
1. STANDBY/MUTE LED INDICATOR
2. POWER BUTTON
3 CD REPEAT BUTTON
4. CD PROGRAM BUTTON
5. REMOTE CONTROL SENSOR
6. CD SKIP/SEARCH BACKWARD BUTTON
7. CD SKIP/SEARCH FORWARD BUTTON
8. LCD SCREEN
9. CD COMPARTMENT DOOR
10. CD STOP BUTTON
20.
11. CD PLAY/PAUSE BUTTON
12. BAND SWITCH (AM, FM, FM ST.)
13. FUNCTION SWITCH (CD/RADIO)
14. BASS BOOST SELECTOR
15. CD DOOR-OPEN BUTTON
16. VOLUME UP BUTTON
17. VOLUME DOWN BUTTON
18. STEREO SPEAKER (LEFT AND RIGHT
BOTH INCLUDED WITH UNIT)
19. STEREO HEADPHONE JACK
20 TUNING KNOB
-6-
www.jWIN.com
Mini Portable Stereo Audio System
V10M10_IM_EN_04102007
GETTING STARTED
Location of Controls (back)
1.
2.
1. FM ANTENNA CONNECTION
3.
2. SPEAKER TERMINALS
3. AC CORD CONNECTION
Location of Controls (Remote Control)
1.
2.
3.
4.
5.
1. POWER BUTTON
2. PLAY/PAUSE
BUTTON
3. RANDOM BUTTON
4. REPEAT BUTTON
5. SEARCH - BUTTON
6. VOLUME - BUTTON
7. INFRARED SENSOR
(TOP)
8. STOP BUTTON
9. MUTE BUTTON
10. SEARCH + BUTTON
11. VOLUME + BUTTON
12. BATTERY DOOR
(REAR)
7.
8.
9.
10.
11.
6.
Note: For best results, point
the infrared transmitter on
the remote control directly at
the remote sensor on the
main unit.
12.
-7-
www.jWIN.com
Mini Portable Stereo Audio System
V10M10_IM_EN_04102007
GETTING STARTED
Connecting the Speakers
Connect the SPEAKER cables to the SPEAKER
terminals in the rear of the unit properly.
AC Operation
Before operating this unit, make sure the voltage indicated on the JX-CD7160 matches the
voltage in the wall outlet.
1. Plug the AC POWER CORD into a standard AC wall outlet.
2. The STANDBY/MUTE INDICATOR will light.
3. Press the POWER button. The LCD DISPLAY will light and the STANDBY/
MUTE INDICATOR will go off.
Antennas
For best FM reception, fully extend the FM antenna. For AM reception, this unit has a built-in
antenna.
Listening with Stereo Headphones
For private listening, insert the 3.5mm plug of a stereo headphone set (not included) into the
STEREO HEADPHONE JACK on the left side panel of the
JX-CD7160. Volume on the headphones is controlled by
the VOLUME knob on the unit of the VOLUME -/+ button
on the remote control. When headphones are used, sound
on the external speakers cuts off.
Note: Be sure that your headphones have an impedance of 32ohms.
Installing Batteries in the Remote Control
1. Slide open the BATTERY
DOOR in the direction of the
arrow imprinted on the door
itself.
2. Install two (2) AA size batteries
according to the polarity (+/-)
marked inside the compartment
3. Close the BATTERY DOOR.
Note: Remote Control buttons correspond with the similarly labeled buttons on the main unit.
The recommended distance for remote operation is 16 feet or less.
-8-
www.jWIN.com
Mini Portable Stereo Audio System
V10M10_IM_EN_04102007
OPERATIONAL INSTRUCTIONS
Loading a CD into the Player
1.
Press the OPEN button on the front of the
unit to open the CD compartment.
2.
Place a CD into the compartment with the
label facing up and close the CD door.
OPEN button
3.
Set the FUNCTION switch to CD.
4.
5.
The total number of tracks on the CD will appear on the LCD display.
When the FUNCTION switch is in the CD position and there is no disc inside, the LCD
display will show “00” and remain in the STOP mode.
Listening to CDs
1.
In the STOP mode, press the PLAY/PAUSE button to begin playback.
The first track on the CD will play. The PLAY indicator and the
number of the track playing will appear on the LCD display.
Track number
2.
Press the PLAY/PAUSE button once to pause the playback. The PLAY indicator will flash
while the music is paused.
Track number
3.
4.
5.
Press the PLAY/PAUSE button again to resume playback from the same position where it
was stopped.
Press the STOP button stop playback.
Press the POWER button once to turn off the unit. The LCD light will go off and the
STANDBY/MUTE LED indicator will light.
-9-
www.jWIN.com
Mini Portable Stereo Audio System
V10M10_IM_EN_04102007
OPERATIONAL INSTRUCTIONS
Repeat Mode
1.
2.
Press the REPEAT button once to enter the REPEAT 1 mode.
The REPEAT indicator will light and flash continuously. A single CD track will be repeated.
3.
4.
Press the REPEAT button twice to enter the REPEAT ALL mode.
The REPEAT indicator will now display constantly. The entire disc will now repeat
continuously.
5.
To exit REPEAT mode, press and hold the REPEAT button until the REPEAT indicator
goes off.
Skip and Search Mode
1.
Press the SKIP FORWARD () or SKIP BACKWARD () button once during PLAY or
PAUSE mode to skip to the next track or return to the beginning of the current track.
2.
Press and hold the SKIP FORWARD () or SKIP BACKWARD () button during the
PLAY or PAUSE mode to search the tracks with audible high-speed forward or backward
playback.
Program Mode
1.
Press the PROGRAM button once to enter the PROGRAM mode.
2.
The PROGRAM indicator will light and blink
continuously.
3.
The number of programs (beginning at 01) to
memorize will also appear on the LCD display
blinking continuously.
4.
Press the SKIP FORWARD () or SKIP BACKWARD () button to find the desired
track.
5.
When the desired track number appears on the LCD
display, press the PROGRAM button to store the
track into memory (ie. Track 7).
6.
Press the CD STOP button or open the CD door
during the STOP mode to cancel the PROGRAM mode. The PROGRAM indicator will
disappear from the LCD screen.
- 10 -
www.jWIN.com
Mini Portable Stereo Audio System
V10M10_IM_EN_04102007
OPERATIONAL INSTRUCTIONS
Listening to the Radio
1.
Slide the FUNCTION switch to the RADIO position.
2.
Slide the BAND switch to the desired
waveband (AM, FM or FM ST.).
3.
Turn the TUNING knob to the desired radio
station (appears on the LCD display).
4.
Adjust the sound level using the VOLUME (+/-) control.
5.
To turn off the radio, press the POWER button once. Until the LCD display goes off and
the STANDBY/MUTE LED indicator goes on.
FM Stereo Indicator
Slide the BAND switch to FM ST. When listening to an FM
station with strong reception, this function will allow it to
broadcast in stereo. When the FM signal is weak, slide the
switch to the FM position.
Bass Boost
To enhance the low frequency sound, slide the BASS
BOOST switch to the ON position. To release the
super bass, slide the BASS BOOST button to OFF.
- 11 -
www.jWIN.com
Mini Portable Stereo Audio System
V10M10_IM_EN_04102007
MAINTENANCE
Notes on CDs
1.
Before playing, clean the CD with a cleaning cloth.
Wipe the CD from the center out to the ends.
2.
Do not use solvents such as benzine, thinner,
commercially available cleaners or anti-static spray
intended for vinyl LPs.
3.
Do not expose the CD to direct sunlight or heat sources such as hot air ducts. Do not
expose to direct sunlight, nor leave CDs in a car, as there can be a considerable rise in
temperature.
4.
Do not stick paper or sticker on the CD. Do not scratch, dirt or fingerprints on the CD, for
it may cause tracking error.
Cleaning the lens
If the lens becomes dirty, it may cause a skipping of sound during CD operation. Clean with a
commercially available lens cleaner.
Cleaning the cabinet
Clean the cabinet, panel and controls with a soft cloth slightly moistened with a mild detergent
solution. Do not use any type of abrasive pad, scouring powder, or solvent, such as alcohol or
benzine.
- 12 -
www.jWIN.com
Mini Portable Stereo Audio System
V10M10_IM_EN_04102007
TROUBLESHOOTING GUIDE
When the instructions in this manual are followed, this unit should function properly. However, if
any of the following difficulties occur and cannot be corrected by the user or if a problem arises
that is not mentioned here, please contact jWIN Customer Service or a qualified service
technician.
1.
Unit Does Not Play
•
Unit may be disconnected from power source. Check connection.
•
Disc is not correctly set. CDs should be inserted label side up.
•
Disc is scratched or dirty. Please clean.
•
The lens is dirty. Wipe clean gently with soft, dry cloth. Follow the instructions of the
lens cleaner.
•
There is moisture on the lens wait an hour and try again.
2.
No Sound, Distorted Sound or Feedback
•
Ensure plugs are inserted firmly.
•
Wipe off plugs with clean cloth.
•
Disc is scratched or dirty. Please clean.
•
Volume control is turned down. Please increase.
3.
Sound from Only One Side (or inverted)
•
Speaker cords are not properly connected.
•
Input cords are not properly connected.
4.
Radio Reception is Unclear
•
Radio station frequency may be weak. Adjust antenna.
•
If FM station, BAND switch may be set to FM ST. Slide BAND switch to FM.
- 13 -
www.jWIN.com
Mini Portable Stereo Audio System
V10M10_IM_EN_04102007
SPECIFICATIONS
•
Audio Output: 2.0W RMS/ Channel
•
Frequency Range
o
AM: 530kHz – 1710kHz
o
FM: 88MHz – 108MHz
•
Connectivity
o
3.5mm stereo headphone jack
•
Power Requirement
o
Main Unit: AC 120V / 60Hz
•
Power Consumption: ≤ 15W
•
Main Unit Dimensions (W x H x D): Approx. 290 mm x 82 mm x 220 mm
•
Speaker Dimensions (W x H x D): Approx. 120 mm x 212 mm x 150 mm
•
Unit Weight: Approx. 3.75 lbs (1.7 kg)
* Specifications and features are subject to change without prior notice.
- 14 -
www.jWIN.com
TEL: 516-626-7188
FAX: 516-626-7105
website: www.jWIN.com
© 2007 jWIN Electronics Corp. All rights reserved. No portion of this printed material or product
enclosed herewith including design, shape and graphics, may be reproduced or transmitted in
any form without prior written consent of jWIN Electronics Corp. by any means, electronic or
mechanical, including photocopying, recording or use of an information storage and retrieval
system. Any unauthorized distribution or reproduction of this printed material or product, or any
portion thereof, will be prosecuted to the fullest possible extent of the law.
Printed in China