1
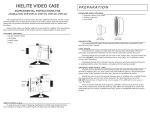
IK EL IT E V ID E O CASE
PREPARATION
SU P P L E M E N T AL I N S T R UC T I O N S F O R
# 6 0 4 7 C a no n Z R 9 0 0 , 9 30 , 9 50
M D2 0 0 , 2 0 5 , 2 1 5 , 2 16 , 2 35 , 2 5 5
PA CK AG ED WI TH H OUS IN G_________________________________________________
• External UR/Pro Color Filter
• Silicone Lubricant
External
Color Filter
#6045 Canon ZR900
COL OR F I LT E R______________________________________________________________
#6045 Canon MV200
The installation and usage of the external UR/Pro color filter is described in the
general instruction manual.
OP T IO NA L W I DE AN G LE L EN S__________________________________
This supplemental set of instructions describes additional features specific to your
housing model. Prior to testing the system in the water, please read this supplement along
with the general instruction manual to become familiar with its features and functions.
Ikelite Video Cases are slightly negative in salt water for stability. This housing has
been water pressure tested at the factory and has a working depth of 60m 200.
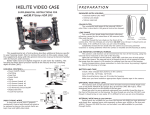
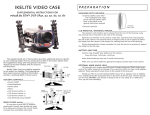
HOU SI NG C ON TROL S________________
• Power On/Off
Lens Switch
• Start/Stop
Port
• 1P2, Easy
Mirror
• Power Zoom
• Function
Joy Stick
#1
MAI N O- R IN G # 0109_____________
O-rings last several years if properly
maintained. Control seals should not need
to be replaced as long as the control shafts
are kept clean and lightly lubricated.
Joy Stick
#2
Base
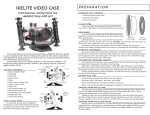
LC D MO NI T OR / EX TER NA L MI RR OR________________________________________
SuperEye
Power On/Off
Start/
Stop
During transportation, please remember to close the mirror by pressing it against
the side of the housing.
Open the LCD monitor on the camera, rotate 180°, and then press it back against
the side of the camera. The external mirror is hinged so that it can be opened to reflect
the image from the cameras LCD monitor for viewing from the rear of the housing.
The image is reversed in the LCD display. Looking in the mirror, Right is Left, Left
is Right as you view your subject.
Zoom
• Joy Stick #2
• Lens Switch
Should you elect to use the optional Epoque, Inon or Sea&Sea lens, carefully thread
the waterproof lens on the front of the lens port. The lens threads are very fine;
DO NOT cross thread. It should screw on very easily. If it is difficult to turn, you are
cross threading.
The cameras LCD monitor can be viewed from the rear of the housing, using the
external mirror featured on the side of the housing.
Bottom Bar
• Joy Stick #1 - Focus,
White Balance, Image Effect,
Program AE & Digital Effect.
The lens port on the front of the housing accepts the optional wide angle lenses
offered by Epoque DCL-20, Inon UWL-100 and Sea&Sea 58070. These waterproof
lenses secure to the outside of the lens port, and are not marketed by Ikelite.
P/Easy
B ATTER Y A N D TAP E_________________________________________________________
• Install a fully charged Canon battery on the camera:
Canon NB-2LH, BP-2L13
• Other brand batteries may not fit inside the housing.
• Make sure you have loaded an appropriate digital cassette tape in the camera.
FIN A L PR EP A RA TIO N________________________________________________________
The program selector on the camera MUST be in the 1P2 position for the focus lock
button to function.
The cameras auto focus feature is utilized underwater. For best results, move
in close to your subject and use the wide angle range to shoot thru as little water as
possible. The full zoom range is accessible underwater. Chart shows recommended
initial settings underwater.
C AM E R A
Power On/Off
Zoom Lever
Focus
Exposure
Lens Cover Switch
S E T TI N G
P Camera On
P Wide Angle Setting
P Auto Mode
P Auto Mode
P Open
W HI TE B A LA N CE____________________________________________________________
Initially set the white balance to Auto. Use the touch screen controls on the
housing to change white balance.
C o l o r F i l t e r : When using the color filter during the day, set camera white balance
to Indoor for 0-15 foot depth. For 15-80 foot depth, set white balance to Outdoor.
V i de o - L i t e : When using optional Video Lite at NIGHT, set the camera white balance
to the Indoor position. During the DAY, use the Outdoor setting for subjects beyond
4-5 feet and the Indoor setting for closer subjects.
INSTALLATION
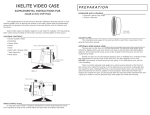
CA MER A T RA Y_________________
SuperEye
O’ring
Back Plate
The camera mounts to the tray,
which extends from the back plate of the
housing. D O N O T remove the tray from
the back plate.
Position the camera against the two
stabilizing pins on the tray and secure
camera with the tripod mounting bolt.
The camera should fit easily on the tray
and should be parallel with the sides
of the tray.
IN SE RT I N G TH E C AME RA___________
Stabilizing
Pins
Camera Tray
Camera Mounting Bolt
Check that the oQring is clean and
properly positioned on the lip of the clear housing back plate.
Once the camera is mounted to the tray as shown above, pull the housing
controls out to provide clearance for installing the camera. Slowly slide the camera
tray with camera mounted back into the housing. As the camera slides into the
housing, make sure the camera lens fits into the port recess in the front of the
housing.
D O N O T force this installation; the camera and tray should slide easily into
place so the housings back plate oQring is resting against the main housing body.
In this position the lid snaps can be positioned over the lid hooks on the housing
back plate and snapped into position to seal the housing.
HO USI N G CON T RO L S________________________________________________________
Slide the housing controls back in place making sure they properly align with the
camera functions.
Operate each control to see how it works with the camera. Some controls such as
start/stop will be used frequently. Other controls may seldom be utilized. Refer to
your camera owners manual for the proper function of each camera control. Look
thru the back to be sure that you can see into the viewfinder.
When using the housing controls, especially the start/stop, do NOT use excessive
force because you could damage the camera.
C A UT I O N
Remove the lens cap and cord from the camera.
Otherwise, the cord may interfere with the housing seal.
If the housing controls are not properly positioned,
they could interfere with the housing seal.
I KE L I T E U N D E R W A T E R S Y S T E M S
50 West 33rd Street • PO Box 88100 • Indianapolis, IN 46208 USA
317.923.4523
Email: [email protected] • www.ikelite.com
6047-01-0708