1
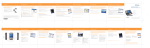
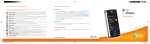
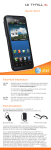
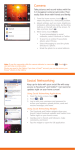
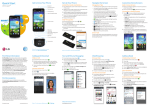
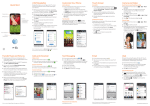
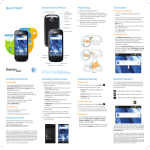
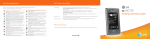
HTC Surround
Quickstart
TM
Welcome to AT&T
Please use this Quickstart to get a brief overview of the major features and
services available with your new smartphone.
OR
Use our interactive web tutorial available at:
att.com/Tutorials
for the most complete and up-to-date information available to set up your
device and services. The online tutorials include step-by-step instructions
and screen shots to assist your learning as well as providing an easy search
function.
Your device controls are
shown on this foldout.
Set up your HTC Surround™
Remove the back cover
Insert the SIM card
Make sure that your device is turned off before
you remove the back cover or battery.
The SIM card contains your phone number and
service details.
1.Hold the device securely.
1.Insert the SIM card with its gold contacts
facing down and its cut-off corner facing
out from the slot.
2.Pry the device’s back cover up by the notch
at the bottom of the back cover.
2. Slide the SIM card completely into the slot.
3.Carefully remove the back cover.
Cut-off corner
Set up your HTC Surround™ (continued)
Insert the battery
Charge the battery
Your device comes with a rechargeable
lithium ion battery and is designed to use only
manufacturer-specified original batteries.
Charge the battery before you start using your
device.
1.Align the battery’s exposed copper
contacts with the battery connectors inside
the battery compartment.
1.Connect the device to the AC adapter
using the USB sync cable.
2.Insert the contact side of the battery first
and then gently push the battery into
place.
2.Plug in the AC adapter to an electrical
outlet to start charging.
Note: T o reinstall the back cover, first align the
upper portion of the back cover, and
then press the rest of the back cover
against the phone until it clicks down
into place.
Note: U
se only the provided AC adapter and
USB sync cable to charge the device.
When the battery is charging, the Notification
LED lights up in solid amber (when off), and
this icon (
) displays in the status bar of
the Start screen (when on).
When the battery is fully charged, the
Notification LED lights up in solid green (when
off), and the full battery icon (
) displays in
the status bar of the Start screen (when on).
Set up your HTC Surround™ (continued)
Turn on your HTC Surround™
Lock and unlock the screen
Press the power button on the top panel to
turn your device on.
To lock the screen, briefly press the power
button.
To unlock the screen, press the power button,
then drag or flick the lock screen or incoming
call wallpaper to the top of the screen.
Power button
Sign into your phone
A Windows Live ID is the email address you
use to sign in to services like Xbox LIVE®,
Zune®, Hotmail® and so on. If you can’t
remember the email address you use:
For Xbox LIVE: On your Xbox 360® console,
sign in with your gamertag, then press the
Guide button on your controller (the one in the
middle that looks like the Xbox logo).
Note: T his step can be skipped until a later
time. To add an account after the initial
set up, go to Settings, and then tap
email & accounts > add an account >
Windows Live.
For Zune: Sign in to the Zune software on
your PC. Right-click your profile picture and
click Switch user to see your Windows Live ID.
To reset your password or get a reminder, go to
http://account. live.com/ResetPassword.aspx.
About the Start screen
The Start screen contains tiles that are associated with apps and hubs on your phone. Flick up
or down on the screen to see the other tiles that are on the Start screen. Pin your frequently
accessed apps, contact cards, and more on the Start screen.
What you will find on the Start
screen
Tap the top of the
screen to display
the status bar.
Tap to go to the
application list.
Tap a tile to open
the application
or hub.
Pin items to the Start screen
You can pin all sorts of things to the Start
screen, including apps, websites, map locations
and even contacts. When you pin a contact to
the Start screen, you’ll get all of that person’s
feed updates—right from that tile.
•To pin most things to the Start screen, tap
and hold the item until the menu appears,
then tap pin to start. For others, you can
tap pin
in the app bar at the bottom.
•If you’d like to move a tile somewhere else
on the Start screen, tap and hold the tile,
and move it wherever you’d like it.
•To remove a tile, tap and hold it, and tap
unpin
.
Make calls and check your voicemail
Make a phone call
Check your voicemail messages
1.On the Start screen, tap the Phone tile to
open the Phone screen.
From your device
2. Tap
.
3.Tap the desired phone number.
4.Tap call to make the call.
1.Press and hold the number 1 key.
2.Follow the voice prompts.
From other phones
1.Dial your 10-digit wireless number.
*
2.Tap the key when you hear your
personal greeting.
3.Enter your personal password.
4.Follow the voice prompts.
5.To open the in-call options, tap
while
on a call. To adjust the in-call volume, press
the Volume Control buttons on the upper
right side of the device.
6.To end the call, tap end call.
Manage contacts
Import your contacts
When you set up your Facebook, Outlook or
Google account, your contacts are imported
automatically into your People hub. And when
you add Facebook, your friends’ feeds appear
in your People hub, their photos show up in
your Pictures hub, and your own feeds pop up
in your Me tile.
To set up a Facebook (or any kind of email)
account:
1.Tap the arrow
on Start to go to your
App list.
2. Tap Settings > email & accounts.
Getting your contacts from your old phone
is also easy. Put your old SIM card into your
new phone, then go to Settings. Flick to
applications, tap people, then tap import SIM
contacts.
Add a new contact
1.From the Start screen, tap the People tile.
2.From the all screen of the People hub, tap
.
3.Tap Name to add your contact’s name,
company and other personal information.
When you’re finished, tap
.
4.Tap additional items such as phone and
email to add the desired information. When
you’re finished, tap
.
5.Tap Add photo and then follow the
instructions to assign a picture to the
contact.
6.Tap
when you’re done.
Note: T ap Account, and then tap an account
(such as Google or Outlook) to change
the account where your contact
information will be stored.
Scroll up or down your contacts list by sliding
your finger on the screen. You can also tap any
letter box, for example
, to go to a particular
letter on your People list.
Manage contacts
(continued)
Facebook
Link contacts
Use Facebook
You can link contacts if you have two or
more versions of the same contact because
you have contact info for that person on
different social networks or email accounts (for
example, Windows Life and Facebook).
When you sign in to your Facebook (or
Windows Live) account, your Me tile is
automatically created on the Start screen.
Note: S
ee Manage Contacts for information on
signing into Facebook and other (email)
accounts.
Tap your Me tile on the Start screen (or in all of
the People hub) and check status updates you
have posted, comments you have received, and
pics that you have uploaded to your Windows
Live and/or Facebook accounts.
1. From the Start screen, tap the People tile.
2.In all of the People hub, tap the name of
the contact you want to link to.
3.At the bottom of the screen, tap
.
4.Any contact that is already linked will
appear under Linked profiles. If you see the
contact you want to link under Suggested
links, tap it. If you don’t see the contact you
want to link, tap Choose a contact to find
the right one.
Tap Share a quick message to update your
status.
Change your ringtone
Send text messages
Select a ringtone
Send a text message
1.From the Start screen, tap
ringtone & sounds.
> Settings >
2.Tap
2.Tap the Ringtone box.
3.Preview the ringtone by tapping
the name of the ringtone.
1.From the Start screen, tap the Messaging
tile.
beside
to compose.
3.Enter one or more recipients in the To field.
You can:
• E
nter phone numbers or contact names.
Select any matching contacts from
the drop-down list. Use semicolons to
separate recipients.
• T ap
and select names from your
contact list.
4.Tap “type a message” and compose.
5. If desired, tap
6.Tap
4.Tap the name of the ringtone to set it as
your ringtone.
10
to attach a photo.
to send the message.
Please don’t text and drive.
Take and share photos
Take videos
Take a photo
Record a video
1.Press the Camera Shutter to open the
camera application.
2.Frame your subject on the screen, and then:
1.Press the Camera Shutter.
• p
ress the Camera Shutter all the way
down to take the photo.
• p
ress the Camera Shutter halfway down
to focus the shot; and then press it all
the way down to take the photo.
2.Tap
to switch to video mode.
3.Press the Camera Shutter to start recording
video.
Camera Shutter
Camera Shutter
4.Press the Camera Shutter again to stop
recording.
View the video
Share the photo
1.Drag the previous image to the right.
2.Press and hold the photo.
To watch the video right away, swipe right and
press
.
Use Music + Videos to play back your videos.
3.Tap the preferred option on the pop-up
menu and follow the prompts.
Note: y ou can view all your photos by tapping
the Pictures tile on the Start screen.
11
Browse the Web
Open a Web page
Navigate Web pages
1.From the Start screen, tap the Internet
Explorer tile.
Rotate your device to view the web page in
landscape view. Use finger gestures to move
around on the Web page.
2.Tap the address bar and enter a website
address, then tap
.
Note: Y
ou need to hold the device in portrait
orientation to see the address bar.
To bookmark a Web page, tap
To open, swap or close tabs, tap
.
.
Double tap to zoom in or out.
You can also pinch to zoom.
12
Search becomes find
Voice recognition
Search is your one-button gateway to all kinds
of answers. Want to find a contact? Press
Search from People or call history.
Looking for an email message? Press Search
in email. Or press it in Maps to find an address,
coffee shop, zoo or any other place. Looking
for a movie time? Flight info? Weather? Stock
prices? Just press Search.
From anywhere on your phone, press and hold
the Start button
to bring up voice
recognition, which lets you use your voice to
call people, start apps and search the web
without using your hands.
•To make a phone call, you’d say “Call Oliver
Lee, mobile.”
•To start an app, like Calendar, say “Open
Calendar.”
•To search for something, just tell the phone
what you want, like “Find movie theaters,”
and Bing™ will look for an answer.
•If you’re not sure, say “What can I say?”
13
Send email
Types of email accounts
Set up additional email accounts
You can access different email account types
on your Windows phone:
If you didn’t set up an account when you set
up your phone for the first time, tap the Email
setup tile on the Start screen then go to step 3.
•Internet-based (POP3/IMAP) email
accounts from your internet service
provider (ISP).
•Web-based accounts like Hotmail, Yahoo! or
Gmail.
•Corporate Email Accounts from your
Microsoft® Exchange server. Contact your
IT administrator for assistance with your
Microsoft Exchange account.
1.From the Start screen, tap
> Settings >
email & accounts > add an account.
2.Tap the account you want to set up. If you
don’t see the account you want to set up,
tap other account or advanced setup.
Advanced setup requires you to enter
addresses for the incoming and outgoing
servers.
3.Enter the email address and password,
then tap sign in.
4.A tile for your email account will be added
to the Start screen. Additional email
account titles will show up at the bottom of
the screen.
Note: C
ontact your IT administrator for
assistance with setting up your Microsoft
Exchange account.
14
Send email (continued)
Send email
1.From the Start screen, tap the email tile
you want to use.
2.Tap
Tip: W
hen composing a long email message,
turn the phone sideways to use a bigger
keyboard for text entry.
.
3.Enter one or more recipients in the To field.
You can:
• E
nter email addresses or contact names.
Select any matching contacts from
the drop-down list. Use semicolons to
separate recipients.
and select names from your
• T ap
contact list.
Tip: T ap
to add cc and bcc lines and
change the priority.
4.Enter the email subject then tap the space
below the subject line to compose.
5.To add an attachment, tap
6.Tap
.
to send.
15
Wi-Fi and Bluetooth
Stay in sync
Connect to a Wi-Fi network
To sync your music, videos, pictures and
updates from your computer to your phone (or
vice versa), you’ll need the Zune software.
Wi-Fi provides a fast, seamless connection at
home, in the office and at thousands of hotspots.
Using Wi-Fi is convenient and helps you save
on your mobile data usage. To help you take
advantage of the speed and flexibility of Wi‑Fi,
your phone arrives with Wi-Fi on.
1.From the Start screen, tap
> Settings >
Wi-Fi.
Note: Y
ou can’t connect to a Wi-Fi network that
doesn’t broadcast its network name (SSID).
2.Tap a Wi-Fi network to connect.
3. If required, enter a password and tap done.
When connected,
appears in the status bar.
To turn Wi-Fi off, From the Start screen, tap
> Settings > Wi-Fi and tap the slider.
Connect a Bluetooth headset
1.Make sure that the headset is discoverable.
Please refer to its documentation.
2.From the Start screen on your device, tap
> Settings > Bluetooth.
3.Tap the slider to turn on Bluetooth. Your
phone will scan for devices.
4.Tap your headset name to connect.
5.If required, enter the passcode for your
headset.
When connected,
displays in the status bar.
16
1.Connect your phone to your computer
using the cable.
2.Go to windowsphone.com to install the
Zune software.
3.Open the Zune software, then follow the
instructions to get your music, videos,
pictures and so on into your collection.
4.Click collection, then drag everything you
want to sync to the phone icon in the
lower left.
Get apps or music from the Marketplace
On Windows® Marketplace, it’s easy to download and purchase new apps, games and music that
fit your needs and make your phone truly personal. A wide range of free and premium programs
is available, from games to powerful business applications.
Find apps or music
Install apps
1.From the Start screen, tap the Marketplace
tile.
1.From the Start screen, tap the Marketplace
tile.
2.Do any of the following to find an app:
2.Search and then tap the app that you want
to install. Refer to the previous section on
how to find apps in the Marketplace.
• B
rowse through featured apps or music.
Scroll through the list of featured apps
when you open the Marketplace.
• B
rowse apps or music by categories.
First, tap apps, games, or music and
then tap a category or genre.
• P
ress Search on the Marketplace screen,
enter the name or type of app you’re
looking for, and then tap
.
3.In the app details screen, tap install.
If you are not signed in to your Windows
Live account, you’ll be asked to sign in.
4.Follow on-screen instructions to install the
app.
17
Frequently used applications
Icon
Description
Alarms: Set alarms.
Calculator: Perform basic and advanced calculations on your device.
Calendar: Create, send and sync events on your device and on the Web.
Camera: Take photos and videos.
Games: Play games on your phone and access XBox Live.
HTC Hub: Browse and download apps and widgets made by HTC.
Internet Explorer: Browse the web.
AT&T Navigator: Find places and get directions.
Marketplace: Find and install applications, games and music on your device.
Messaging: Send text and multimedia messages.
Music + Videos: Playback music and video and listen to the radio and your podcasts.
Office: Use OneNote, Word, Excel and PowerPoint.
People: Add, import and manage your contacts.
Pictures: Browse through and share your photo collection.
18
© 2010 AT&T Intellectual Property. All rights reserved. AT&T, the AT&T logo and all other marks
contained herein are trademarks of AT&T Intellectual Property and/or AT&T affiliated companies.
All other marks contained herein are the property of their respective owners.
HTC Surround September 2010 Quickstart
19
Find more information
On the Web
•
Interactive Web tutorials are available at att.com/Tutorials.
Select Manufacturer: HTC and Model: Surround from the drop down menus.
•
Detailed support information including device specifications, user guide,
troubleshooting, user forums and knowledgebase articles are available at
att.com/DeviceSupport.
•
For information about your wireless account, service plan or network, visit
att.com/Wireless.
On the device
Call AT&T Customer Care at 1-800-331-0500 or dial 611 from any AT&T mobile phone
for assistance with your service or device.
Find Accessories
Accessories for your smartphone are available at att.com/WirelessAccessories or visit
your local AT&T store.
91H00795-40M Rev.A
HTC Surround™ key functions
Audio jack
Connect a 3.5mm
stereo headset here.
Earpiece
Search
Press to search
information on
the Web or on the
current application.
Start
Press to return to
the Start screen.
Power
Sound enhancer
Press to enable
Dolby or SRS
surround.
Volume up
Press to increase
the ringer or media
volume.
Volume down
Press to lower the
ringer or media
volume.
Surround
speakers
Touch screen
Back
Press to return to
the previous screen.
Microphone
Camera
shutter
USB connector
Connect the USB sync
cable to sync files or
charge the battery.
Important icons and indicators
Notification LED
Tells you when the battery is
fully charged, low in power, or
is being charged.
Connected to the 3G
network.
Signal strength
Battery is charging
Battery is charged
Wi-Fi enabled but not
connected to a network
Connected to a Wi-Fi
network
No SIM card
SIM card locked
Airplane mode is on
A Bluetooth device is
connected
Roaming
Call forwarding is on
Phone is set to vibrate
Phone is set to silent