1
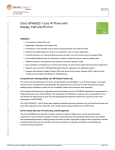
Frequently Used applications
Find More Information
Take some time to explore the applications that are available on your LG eXpo.TM
Here are a few applications to get you started.
On the web
AT&T AppCenter: Shop for games, ringtones, graphics, multimedia, goodies and other applications.
AT&T Navigator: Find your way with voice guided turn-by-turn GPS driving directions, real-time
traffic alerts, full color 3D moving maps and more.
AT&T Music: Shop for music, songs, music videos, streaming media and access AT&T’s music player.
ActiveSync: Synchronize your phone with a computer or Exchange Server.
Calendar: View and create appointments.
• Tutorials, Tips & Tricks, FAQs and additional support are available at att.com/Tutorials.
Select Manufacturer: LG and Model: LG eXpoTM from the drop-down menus.
• Detailed support information including device specifications, user manual, troubleshooting, user forums and knowledgebase articles are available at att.com/DeviceSupport.
•Enterprise and Government customers can go to wireless.att.com/BusinessSupport
for device tutorials, device setup and online technical support chat for instant answers to
questions about your device and its features.
•For information about your wireless account, service plan or network,
visit att.com/Wireless.
Contacts: Save contact information for friends and colleagues.
On the phone
Internet Explorer: Browse the web and download new programs and files.
•C
all AT&T Customer Care at 1-800-331-0500 or dial 611 from any AT&T mobile phone
for assistance with your service or device.
Mobile Web: Access sports, entertainment, news, finance information and more.
Email: Send and receive email.
Text Messages: Send and receive text messages.
Office Mobile: Use the complete suite of Microsoft Office applications for your phone.
Find accessories
Accessories for your smartphone are available at att.com/WirelessAccessories or visit your
local AT&T store.
Phone: Make and receive calls, switch between calls and set up conference calling.
Windows Media Player: Play music and videos.
Wireless Manager: Turn on or off Wi-Fi, Bluetooth or your phone’s wireless service connection
and change settings.
MMBB0360102 (1.0) G
LGeXpo_cover_PRESS.indd 1
11/11/09 7:24 PM
LG eXpo
TM
Welcome to AT&T
Use this Quickstart to get a brief overview of the major features and services
available with your device
OR
Use our Interactive Web Tutorial available at
att.com/Tutorials
for the most complete and up to date information available for setting up and
using your new smartphone and all the services available. The online tutorials
include step-by-step instructions, easy search, as well as clear screen shots to
assist your learning.
Left
Right
Hands-free connector/
charger/cable connector
Stylus
connector
slot
Proximity
sensor
Power
Earpiece
MicroSD
card slot
Task manager
key
Thanks again for choosing AT&T.
Volume keys
Touch
screen
Fingerprint
navigation
sensor
Your device controls are shown on
the foldout. Please keep this page
open as you read this guide.
Send key
Camera key
End key
Microphone
Back button
© 2009 AT&T Intellectual Property. Service provided by AT&T Mobility.
All rights reserved. AT&T, the AT&T logo and all other marks contained herein
are trademarks of AT&T Intellectual Property and/or AT&T affiliated companies.
All other marks contained herein are the property of their respective owners.
31
LGeXpo_cover_PRESS.indd 2
11/11/09 7:24 PM
Table of Contents
What’s in the Box............................................................................................................................................... 4
Device Setup........................................................................................................................................................ 5
Learn to Use the Basic Functions.................................................................................................................... 9
Voice Calls & Voicemail...................................................................................................................................13
Contacts & Appointments...............................................................................................................................14
Ringtone.............................................................................................................................................................15
Sending a Text Message..................................................................................................................................16
Camera & Multimedia Messages....................................................................................................................17
Web/Internet....................................................................................................................................................19
Email...................................................................................................................................................................20
AT&T Navigator.................................................................................................................................................22
Video Share........................................................................................................................................................23
Bluetooth...........................................................................................................................................................24
Music & Video....................................................................................................................................................25
Wi-Fi....................................................................................................................................................................27
Troubleshooting................................................................................................................................................28
Tips & Tricks.......................................................................................................................................................29
3
LGeXpo_11709_PRESS.indd 3
11/11/09 7:38 PM
What’s in the Box
Device Setup
The following items are included in the box to help you set up your LG eXpo.TM
Insert the SIM card and battery
Power adapter
Data cable
1. Pull the latch and and remove the battery cover.
2. Remove battery (if present).
3. If your SIM card is already inserted, proceed to step 5.
4. With the gold metal contacts on the SIM card facing down
and the cutoff corner towards the bottom of the device, slide
the SIM card into the SIM card holder.
5. Insert the battery so that the metal contacts on the battery
align with the metal contacts on your device.
6. Slide the battery cover back onto the device so that it clicks
into place.
Note: Your battery can take up to 3 hours to fully charge
using the power adapter. It will take much longer using
the data cable connected to your computer.
Stylus
4
LGeXpo_11709_PRESS.indd 4-5
Battery
Hands-free
headset
with 3.5mm
adapter
5
11/11/09 7:38 PM
Device Setup
(cont.)
Charge the battery
Insert a microSD™ memory card
1. Before connecting the charger to the phone, check to make sure the
battery is installed.
2. Connect the small end of the data cable to the USB port on the top of
your LG eXpo.TM
3. Connect the large end of the data cable to the power adapter.
4. Plug the power adapter into a power outlet.
5. Charge the battery until “Battery full” appears on the screen.
To turn on the device, press the
button.
Calibrate the touchscreen
When turning on your phone for the first time, a touch calibration screen will
appear. Calibrating the device screen involves tapping with the stylus in the
center of the cross as it moves around the screen.
1. Tap Start > Settings > System > Screen.
2. On the Alignment tab, tap the Align Screen button and follow the
instructions on the screen. After calibration is completed, Align
Screen reappears. Click OK on upper right corner to return to the
home screen.
6
LGeXpo_11709_PRESS.indd 6-7
Top of device
USB
port
Power on the device
(Sold separately)
Use a memory card to extend the memory available on your
LG eXpoTM for storing media files such as ringtones, videos,
pictures or songs.
Power
button
1. Lift the top edge of the cover and rotate to expose the
memory card slot.
2. Insert the memory card into the slot with the metal contacts
facing down.
3. Slide the card into the memory card slot until the card clicks
into place.
4. Rotate the cover back to its original position and press into
place.
5. To remove the card, open the memory card slot cover.
Push on the memory card. The card will partially eject.
Grab the end of the card and gently pull to remove completely.
Note: Do not force the memory card into the slot.
If the card does not slide in easily, please check
that the card is being inserted the correct way or
if there is a foreign object in the slot.
7
11/11/09 7:38 PM
Device Setup
Learn to Use the Basic Functions
(Cont.)
Explore the Today screen
The Today screen will appear when you turn on your LG eXpo.™ The Today screen displays current
information and alerts, including new email, text messages, upcoming appointments, voicemails
and missed calls.
•
•
•
•
•
•
•
•
•
•
Pictures: Displays pictures and videos saved on
your smartphone.
Music: Quickly play your stored music.
Getting started: A shortcut for setting up your
Start menu
smartphone features.
Phone: Displays the number of missed calls.
Voicemail: Displays the number of new voicemails.
Clock: Shows the current time and date (if highlighted)
and allows you to set alarms.
Text: Displays the number of new messages.
Email: Displays the number of new emails.
Calendar: Displays upcoming appointments.
Favorites: Displays bookmarked websites.
Note: Swipe your finger up or down to scroll through
the menu. Tap on the item to open it.
Network status
indicator
Volume icon
Battery strength
indicator
The title bar contains important icons that display the current status of your wireless signal, connection
type and signal strength, battery power and any alerts received. Always check to make sure that your
device’s phone function is turned on and that your device is receiving a signal before placing a call or
using any data service.
Message List Status Indicators
New email or text messages.
New voicemail.
There are notifications. Tap the icon to view all.
Battery Strength Indicators
Indicates the remaining battery power.
Indicates the battery is very low.
Indicates the battery is charging.
Network Status Indicators
Maximum signal strength and connected to the 3G network.
Maximum signal strength.
Searching for phone service.
No phone service.
No signal.
8
LGeXpo_11709_PRESS.indd 8-9
9
11/11/09 7:38 PM
Learn to Use the Basic Functions
(Cont.)
Touchscreen menu navigation
• There’s no need to press hard, the touchscreen is sensitive enough to pick up on a light yet
firm touch.
• Use the tip of your finger to touch the icon or application you want to open.
• Do not cover the phone with any screen cling as the touchscreen will not work with any
material covering it.
Using your keypad
Your LG eXpoTM has a slide out keypad for easy text entry.
End key: End a call. Go
back to the Today screen.
Scrolling
Back Key: Go back to
the previous screen.
• Slide your finger from side to side on the touchscreen to scroll left and right. On some screens, such as the Today screen or web pages, you can also scroll up or down.
• Optionally, slide your finger across the fingerprint sensor to scroll.
• Press the fingerprint sensor key to select the highlighted item.
Zooming in or out
• When viewing web pages, tap the touchscreen twice to zoom in. Tap the touchscreen twice again to zoom out.
10
LGeXpo_11709_PRESS.indd 10-11
Send key: Make a call.
Fingerprint
navigation sensor
: To enter
numbers and
symbols press
FN and then
the desired key.
Press and hold
FN to lock and
keep typing
symbols and
numbers.
: To enter a capital letter press
CAPS and then press the desired
key. Press and hold CAPS to lock
and type capitals continuously.
11
11/11/09 7:38 PM
Learn to Use the Basic Functions
Voice Calls & Voicemail
(Cont.)
Making a call
Entering text with your on-screen keyboard
1. From the Today screen, press the Send key
to open the keypad.
2. Using the keypad on the screen, dial a phone number then press the
Send button on the screen or the Send Key
.
3. To end the call, press the End button on the screen or the End Key
Full QWERTY
In portrait mode, the Full QWERTY mode lets you enter characters
by tapping the key labeled with the required letter.
Half QWERTY
In Half QWERTY mode, a single tap will display the first letter of
the key you tapped. Quickly tapping the key a second time results
in entering the second letter on the key.
Note: Tap FN and then the DEL key to switch
between Full QWERTY and Half QWERTY keyboards.
Accessing symbols
The symbol mode enables you to enter symbols or special characters.
Press the FN key then the Sym key to display the symbol keyboard.
Accessing numbers/capitals
Tap FN to enter just one number. Tap and hold FN to enter
numbers continuously. Tap FN again to unlock the number
function.
Full
QWERTY
(Default
mode)
Half
QWERTY
.
Setup voicemail
1. Press and hold the 1 key.
2. Follow the voice prompts.
Note: After you have setup your voicemail, you
can press and hold 1 to access your voicemail
messages.
Note: Tap
to open or
close the onscreen keyboard.
Tap CAPS to enter just one capital. Tap and hold CAPS to enter
capitals continuously. Tap CAPS again to unlock the capitals
function.
12
LGeXpo_11709_PRESS.indd 12-13
13
11/11/09 7:39 PM
Contacts & Appointments
Ringtone
Add a contact
Change ringtone
1. Tap Start > Contacts > New.
2. Select the contact type.
3. Enter contact information.
4. When finished, tap OK.
1. Tap Start > Settings > Sounds & Notifications.
2. Tap the Notifications tab.
3. Select Event, Type and Tone from dropdown menus.
4. Tap OK to save changes.
Add a recent caller to contacts
1. Press Send to display recent call history.
2. Tap the recent call number to save.
3. Tap Menu > Save to contacts.
4. Enter a name, number and number type.
5. Tap Save.
Copy contacts from the SIM card to the device
1. Tap Start > Contacts.
2. Tap Menu > Copy Contact.
3. Check the contact to copy to your handset.
Schedule an appointment
1. Tap Start > Calendar.
2. Tap Menu > New Appointment.
3. Enter Subject, Location, Date, Reminder and so on.
4. Tap OK.
14
LGeXpo_11709_PRESS.indd 14-15
15
11/11/09 7:39 PM
Sending a Text Message
Camera & Multimedia Messages
When you need to communicate privately and quickly, use text messaging. You can send text messages to
other wireless phones and email addresses.
Capture those special moments right from your phone and send them to your friends and family.
1. Tap Start > Text.
2. Tap Menu > New.
3. Tap in the message box and type your message.
4. Select your recipient by typing his/her name or enter the number.
5. Tap Send.
Note: To view your text messages, tap Text on the
Today screen.
1. P
ress the camera key located on the lower right edge
of your phone.
2. Press
or the camera key to take the picture.
3. T ap to access customizable options. Tap Ok to return to
the viewfinder.
4. Y
ou can tap
to send the picture to someone or tap
delete the photo. To take another picture, tap
.
to
Note: You can convert from camera mode to video mode by sliding the
16
LGeXpo_11709_PRESS.indd 16-17
down.
17
11/11/09 7:39 PM
Camera & Multimedia Messages
(Cont.)
Multimedia messaging lets you share photos, videos, audio and more.
1. Tap Start > Pictures & Video.
2. Tap the picture you want to send.
3. After selecting a picture, tap Send > Messages.
4. The file will attach automatically and the message screen will
appear. To insert another image or video file, tap Insert.
5. Enter the recipient’s phone number or tap Menu > Add Recipient
to choose a phone number from Contacts.
6. Enter a subject for your message.
7. Enter text.
8. Tap Send to send the message.
Note: If an image, video or sound is added to
a text message, it will automatically convert to
a multimedia message (MMS) and additional
charges may apply.
18
LGeXpo_11709_PRESS.indd 18-19
Web/Internet
View your favorite websites from your phone.
1. Tap Start > Internet Explorer.
2. Tap in the address bar, enter a web address and tap .
3. Navigate with your finger or scroll with the fingerprint sensor.
To add a web page to your favorites list:
1. Tap .
2. Tap .
3. Enter the name and address for your page.
4. Select the folder.
5. Tap Add.
Note: To show the address bar and menu, tap
.
19
11/11/09 7:39 PM
Email
Corporate/personal email overview
Your LG eXpoTM is capable of accessing your corporate or personal email. You can setup multiple email
accounts, all accessible from the email section of the Today screen. When you setup corporate email, you
may need to talk to your company’s IT administrator to get server name and settings necessary for access.
Set-up personal email
1. From the Today screen, tap Email > Setup email.
2. Enter your Email address and Password, then tap Next. Auto configuration downloads necessary
email server settings so that you do not need to enter them manually.
3. Once Auto configuration has finished, tap Next.
4. Enter your name (the name you want displayed when you send email) and account display name,
tap Next.
5. Select how often you want to have your email synchronized with your device from the
automatic Send/Receive drop down menu.
Note: Your LG eXpoTM can detect personal email settings for most common
email service providers. If it does not detect your settings automatically,
please refer to your service provider’s website for server information and
security settings.
20
LGeXpo_11709_PRESS.indd 20-21
Send email
1. Scroll to Email on the Today screen. Scroll left or right to access multiple email accounts.
Tap the email account you want to access.
2. Tap Menu > New.
3. Enter recipient’s email address.
4. Tap the Subject field and then enter the subject.
5. Tap in the message box and enter the message.
6. Tap Send at the lower left of the screen.
Read email
1. Scroll to Email on the Today screen. Scroll left or right to access multiple email accounts.
Tap the email account you want to access.
2. Scroll to the message and tap to open.
Note: From the Inbox menu, you can view the sub folders.
Corporate email setup
To setup corporate email on your LG eXpo,TM contact your IT administrator for setup instructions and
support for Microsoft Direct Push. Microsoft Direct Push provides wireless access to your corporate email,
contacts, calendar and tasks for Microsoft Exchange Server. Activate an appropriate smartphone data plan
on your AT&T account before using Microsoft Direct Push.
21
11/11/09 7:39 PM
AT&T Navigator
Video Share
AT&T Navigator helps you get around town by providing voice guided turn-by-turn GPS driving directions
with real-time traffic alerts and 3D maps. As you drive, the directions are spoken over the speakerphone so
you can keep your hands on the wheel and eyes on the road. AT&T Navigator automatically monitors traffic
ahead of you and gives you the option to route around traffic with the click of a button.
Share events the moment they happen. Video Share allows you to stream
one-way live or pre-recorded video while on a mobile-to-mobile voice call.
Video Share is a one-way video, two-way audio connection. Only the sender
is charged.
Note: Additional fees may apply for the use of these GPS services.
Download and install AT&T Navigator
1. Tap Start > AT&T Navigator
2. Read the Terms and Conditions, then tap Accept.
3. On the login page confirm your phone number, then enter your first and last name.
4. Tap Login. When you log in to AT&T Navigator for the first time you may need to confirm your phone
number and enter your name and PIN. (Your PIN may be sent to you via text message and is usually
the last four digits of your mobile number.)
5. Read the warning, then tap Go.
6. Tap Yes to view the AT&T Maps tour (or tap No to skip this tour).
7. To activate the GPS features of AT&T Navigator, tap Upgrade to AT&T Navigator.
8. Choose your subscription option and tap Go.
Get directions
1. Tap Drive To.
2. Tap Address.
3. Tap Type It and enter address manually (or tap Speak It to enter address verbally).
4. Tap Done to generate your route.
Note: Both devices must be provisioned for Video Share and be
in 3G service areas. Additional fees may apply for the use of these
services.
Make a Video Share call
1. When on a voice call, Video Share Ready button will be displayed.
2. If you tap this button, Video Share will activate.
Accept a Video Share call
1. When receiving a Video Share request, the name or number of
the person initiating the call will appear on the screen with the
prompt ...wants to share video with you.
2. Select Accept and the Video Share session will begin automatically.
End a Video Share call
1. To end a Video Share session and continue with the voice call, press
Stop and continue talking.
2. To end both the Video Share session and the voice call, press End.
Note: To exit AT&T Navigator, tap Exit from the main menu of AT&T
Navigator. Maps and information may not be available for all locations.
22
LGeXpo_11709_PRESS.indd 22-23
23
11/11/09 7:39 PM
Bluetooth
Music & Video
Bluetooth enables compatible mobile devices, accessories and
computers that are in close proximity to communicate directly with
each other wirelessly.
How to sync media files with your computer
Turn on Bluetooth
1. On the Today screen, tap Start > Settings > Bluetooth.
2. If Bluetooth is off, you will be asked if you want to turn
Bluetooth on. Tap Yes to turn on.
Tip: To turn Bluetooth off, tap Disable Bluetooth twice.
Sync to a Bluetooth headset
1. On the Today screen, tap Start > Settings > Bluetooth.
2. Tap Add a device.
3. Tap Audio Devices in the dropdown menu, then tap Continue.
4. Enter device passcode if necessary.
5. Tap OK. Your Bluetooth headset is now paired with
your LG eXpo.TM
24
LGeXpo_11709_PRESS.indd 24-25
Before you start syncing media files with your computer, you will need:
• Data cable
• MicroSD card
• Current version of the Windows Media Player (10 or higher) installed on your computer.
• Microsoft ActiveSync or Windows Mobile Device Center installed on your computer. You can download these programs at download.microsoft.com.
To sync media files:
1. Connect your LG eXpo™ to your computer using your data cable.
2. Allow Windows Mobile Device Center or ActiveSync to open and connect to your device.
4. Open Windows Media Player on your computer and click the Sync tab.
5. Drag and drop files to the Sync List.
6. Click Start Sync to transfer the files to your smartphone.
7. Click Start Sync button again to move files to your smartphone.
25
11/11/09 7:40 PM
Music & Video
(Cont.)
How to play music and videos from
Windows Media Player
1. Tap Start > Windows Media.
2. Tap Menu > Library.
3. Select the file to play.
Note: When playing the media file you can pause, stop
and play again by tapping the buttons below the video.
Wi-Fi
Wi-Fi provides a high-speed data connection for your smartphone. You can access
your email and connect to the Internet using a Wi-Fi network at home, work or public
hotspots—including thousands of AT&T Wi-Fi Hot Spots.
Note: Some Wi-Fi hotspots may require additional fees and
security credentials.
Connect to an available network
1. Tap Start > Settings > Connections > Wireless Manager.
2. Tap Wi-Fi to turn it on. A bubble window appears to display
available networks.
3. Select a network and tap OK.
4. To turn off Wi-Fi, tap Start > Settings > Connections >
Wireless Manager > Wi-Fi.
AT&T Hot Spot locator
When Wi-Fi is enabled on your LG eXpo,TM your smartphone will automatically
connect to over 20,000 AT&T Wi-Fi Hot Spots.
Note: AT&T services, such as Mobile Web, App Center and
Mobile Video, cannot be accessed over Wi-Fi. You must
disconnect from a Wi-Fi hotspot before using these services.
26
LGeXpo_11709_PRESS.indd 26-27
27
11/11/09 7:40 PM
Troubleshooting
Tips & Tricks
SIM does not activate
TO: DO:
Try the following actions:
• Verify that your SIM card is inserted correctly.
Turn speaker phone
on or off during a call.
Tap Speaker On/Off.
Change the default
Today screen.
Tap Start > Settings > Today
Select LGIdles for alternate theme.
Modify the date or time
settings.
Tap Start > Settings > Date & Time
Select the appropriate time zone and change the time or date.
Lock the screen.
Long press End key
Unlock the screen.
Press
Phone cannot be switched on
Try the following actions:
• Press On/Off key for at least two seconds.
• Try charging the device using the power adapter. The LED will appear amber when the device
is charging.
Cannot connect to a wireless network
Try the following actions:
• Verify that your SIM card is inserted correctly.
• Verify that you have turned on the connection to the wireless network.
• If you were traveling and you selected a network manually, your LG eXpoTM should remain
connected to that network until you select your home network again.
28
LGeXpo_11709_PRESS.indd 28-29
.
and drag the unlock button left or right.
29
11/11/09 7:40 PM
30
LGeXpo_11709_PRESS.indd 30
11/11/09 7:40 PM
LG eXpo
TM
Welcome to AT&T
Use this Quickstart to get a brief overview of the major features and services
available with your device
OR
Use our Interactive Web Tutorial available at
att.com/Tutorials
for the most complete and up to date information available for setting up and
using your new smartphone and all the services available. The online tutorials
include step-by-step instructions, easy search, as well as clear screen shots to
assist your learning.
Left
Right
Hands-free connector/
charger/cable connector
Stylus
connector
slot
Proximity
sensor
Power
Earpiece
MicroSD
card slot
Task manager
key
Thanks again for choosing AT&T.
Volume keys
Touch
screen
Fingerprint
navigation
sensor
Your device controls are shown on
the foldout. Please keep this page
open as you read this guide.
Send key
Camera key
End key
Microphone
Back button
© 2009 AT&T Intellectual Property. Service provided by AT&T Mobility.
All rights reserved. AT&T, the AT&T logo and all other marks contained herein
are trademarks of AT&T Intellectual Property and/or AT&T affiliated companies.
All other marks contained herein are the property of their respective owners.
31
LGeXpo_cover_PRESS.indd 2
11/11/09 7:24 PM
Frequently Used applications
Find More Information
Take some time to explore the applications that are available on your LG eXpo.TM
Here are a few applications to get you started.
On the web
AT&T AppCenter: Shop for games, ringtones, graphics, multimedia, goodies and other applications.
AT&T Navigator: Find your way with voice guided turn-by-turn GPS driving directions, real-time
traffic alerts, full color 3D moving maps and more.
AT&T Music: Shop for music, songs, music videos, streaming media and access AT&T’s music player.
ActiveSync: Synchronize your phone with a computer or Exchange Server.
Calendar: View and create appointments.
• Tutorials, Tips & Tricks, FAQs and additional support are available at att.com/Tutorials.
Select Manufacturer: LG and Model: LG eXpoTM from the drop-down menus.
• Detailed support information including device specifications, user manual, troubleshooting, user forums and knowledgebase articles are available at att.com/DeviceSupport.
•Enterprise and Government customers can go to wireless.att.com/BusinessSupport
for device tutorials, device setup and online technical support chat for instant answers to
questions about your device and its features.
•For information about your wireless account, service plan or network,
visit att.com/Wireless.
Contacts: Save contact information for friends and colleagues.
On the phone
Internet Explorer: Browse the web and download new programs and files.
•C
all AT&T Customer Care at 1-800-331-0500 or dial 611 from any AT&T mobile phone
for assistance with your service or device.
Mobile Web: Access sports, entertainment, news, finance information and more.
Email: Send and receive email.
Text Messages: Send and receive text messages.
Office Mobile: Use the complete suite of Microsoft Office applications for your phone.
Find accessories
Accessories for your smartphone are available at att.com/WirelessAccessories or visit your
local AT&T store.
Phone: Make and receive calls, switch between calls and set up conference calling.
Windows Media Player: Play music and videos.
Wireless Manager: Turn on or off Wi-Fi, Bluetooth or your phone’s wireless service connection
and change settings.
MMBB0360102 (1.0) G
LGeXpo_cover_PRESS.indd 1
11/11/09 7:24 PM