1
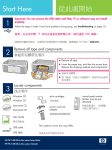
Ԫۖ 1 Start Here USB!ᨱᒵࠌृشΚ!ءڇਐতਐق൞հছΔᓮ֎ຑ൷!USB!ᨱᒵΔܡঞຌ ᧯ױ౨ྤऄإᒔڜᇘΖ USB cable users: Do not connect the USB cable until this guide instructs you to or the software may not install properly. ᓮࠌءشਐতࡳ࿏᧯ࠀຑ൷!HP All-in-One!ࠩ൞ऱሽᆰࢨጻሁΖ࣠ڕ൞ڜڇᇘழ࿇سٚ۶ംᠲΔᓮᔹءਐত࿑ ৵ऱψ!ᅸᜲ௶၌!ωΖ Use this guide to set up the hardware and connect the HP All-in-One to either your computer or a working network. If you have problems during setup, see Troubleshooting later in the guide. 2 ᐺൾࢬڶᓄ Remove all tape ඊದᚾ॰Δྥ৵ᐺൾᇘᆜؐᢰऱᓄΖ Lift the access door and remove tape on the left side of the device. 3 נބሿٙ Locate components 1 5 2 6 3 HP Photosmart 2600/2700 series all-in-one User Guide 7 4 8 1! Windows CD 2! Macintosh CD 3! ࠌृشਐত 4! ሽᄭᒵፖሽᄭ᠏൷ᕴ 5! 4x6!ٹΰ10x15!ֆ։αઌׂ 6! ٨ٱᕠܚ 7! USB!ᨱᒵ 8! Ԭ֜ጻሁᨱᒵ 9! ൳ࠫࣨ૿ΰױ౨բቃ٣ᇘړα ! ץᇘฏփ୲ױ౨ࢬڶฆΖءਐত࿑৵ᄎ ᎅࣔࠡהጻሁໂΖ 9 HP Photosmart 2570 All-in-One series!Ԋ၆ࡾࠒ HP Photosmart 2570 All-in-One series Setup Guide 1 2 3 4 5 6 7 8 9 Windows CD Macintosh CD User Guide Power cord and adapter 4x6 in (10x15 cm) photo paper print cartridges USB cable Ethernet cable Control panel faceplate (may be preattached) The contents of your box may differ. Additional network equipment specified later in guide. 4 ᇘՂ൳ࠫࣨ૿ΰૉࡸآᇘՂα Attach the control panel faceplate (if not attached) a!! ല൳ࠫࣨ૿ᆜ࣍ᇘᆜհՂΖ b! ڇ።ׂऱࢬڶᢰᒴՂ݁شԺਊՀאᇘՂ،Ζ a Position the control panel faceplate above the device. b Press down firmly on all edges of the overlay to secure it. HP All-in-One!ؘႊᇘՂ൳ࠫࣨ૿թ౨ሎ܂Μ The control panel faceplate must be attached for the HP All-in-One to work! 5 ඊದۥቹق᧩ݮᕴ Lift color graphics display Աᛧ່ࠋᛀီய࣠Δᓮᐺൾ᧩قᕴՂऱঅᥨᓂΖ For best viewing, remove the protective film from the display. 2 • HP All-in-One 6 ࣋Եཏຏػ Load plain white paper a b c d 7 ൷Ղሽᄭᒵ Connect the power cord USB!ᢟጣٺҢޱȈ!!ءڇਐত࿑৵ਐقհছΔ լຑ൷!USB!ᨱᒵΖ USB cable users: Do not connect the USB cable until instructed later in this guide. HP All-in-One • 3 8 ਊՀψၲඔωਊၨ Press the On button ం / On !b! ൞ਊՀψ!ం!ω !ਊၨհ৵ΔጸᗉᄎೂᡩΔྥ৵᧢ګᥛॽጸᗉΖڼመ࿓ױ౨क़ ԫ։ᤪऱழၴΖ !c! ᓮଢ٨ٱᕠق༼ܚ৵٦ᤉᥛΖ a After you press the On button, the green light flashes, and then becomes solid. This may take up to a minute. b Wait for the print cartridge prompt before continuing. 9 ၲඔᚾ॰ Open the access door ඊದᚾ॰ऴࠩ،ೖ۰ַΖ ٨ٱᄶ೯ਮᄎฝ೯ࠩ׳ೡΖ Lift the access door until it stops. The print carriage moves to the right. 10 ᐺൾࠟଡᕠܚՂऱᓄ Remove tape from both cartridges ࢮ೯ృદۥᑑ᧘אᐺൾ!ڍএ!٨ٱᕠܚऱᓄΖ Pull the pink tab to remove the tape from both print cartridges. ᓮ֎൷ᤛᎭۥऱ൷រࢨૹᄅലᓄ၀ڃᕠܚΖ Do not touch the copper-colored contacts or retape the cartridges. 4 • HP All-in-One 11 ༺ԵԿۥ٨ٱᕠܚ Insert the tri-color print cartridge ༺ڇԵ٨ٱᕠܚհছΔᇘᆜؘႊ!ڇం!णኪΖ ᅝᇘᆜၲඔழΔ٨ٱᕠܚᄎ׳ڇೡΖ a!! ༽۰!έՓ!٨ٱᕠܚΔᨃ!HP!ᑑ᧘ཛՂΖ b! ല!έՓ!٨ٱᕠܚᆜԵᑑقጸۥᑑ᧘ऱ!Ѿ !༺ᑒছֱΖ c!! ᅝچലᕠܚංၞ༺ᑒխΔ ऴࠩ،ࡐࡳַΖ The device must be On before you can insert the print cartridges. When the device is on, the print carriage is on the right side. a Hold the tri-color print cartridge with the HP label facing up. b Place the tri-color print cartridge in front of the left slot marked with the green label. c Push the cartridge firmly into the slot until it snaps into place. HP All-in-One • 5 12 ༺Ե႕ۥ٨ٱᕠܚ Insert the black print cartridge a!! ༽۰!༃Փ!٨ٱᕠܚΔᨃ!HP!ᑑ᧘ཛՂΖ b! ല!༃Փ!٨ٱᕠܚᆜԵᑑق႕ࡉۥᖪۥᑑ ᧘ऱ!ѡ!༺ᑒছֱΖ c!! ᅝچലᕠܚංၞ༺ᑒխΔ ऴࠩ،ࡐࡳַΖ d!! ᣂຨᕠֽޓܚངᚾ॰Ζ a Hold the black print cartridge with the HP label facing up. b Place the black print cartridge in front of the right slot marked with the black and orange label. c Push the cartridge firmly into the slot until it snaps into place. d Close the access door. 6 • HP All-in-One 13 ீإ٨ٱᕠܚ Align the print cartridges a! ڇ൳ࠫऱޢଡ༼قխਊψOK!ωאၲࡨீإ٨ٱᕠܚΖ ீإመ࿓ױ౨ᄎक़༓։ᤪऱழၴΖ b! ٨إீٱհ৵Δீإ༉ጩګݙΖᛀီۥቹق᧩ݮᕴאणኪΔྥ৵ਊ ψ!OK!ωΖإீ࣠ڕ؈ඓΔᓮࠌشཏຏػ٦ᇢԫڻΖᓮᔹπࠌृشਐতρ אᛧᇡาᇷಛΖ هࢨگڃඵᇠீإΖ a Press OK at each of the prompts on the control panel to start print cartridge alignment. The alignment may take a few minutes. b After the page prints, alignment is complete. Check the color graphics display for the status, and then press OK. If it fails, try again with plain white paper. See the User Guide for more information. Recycle or discard the alignment page. 14 ؚၲሽᆰऱሽᄭ Turn on your computer a!! ؚၲሽᆰऱሽᄭΔؘழᓮ࿆ԵΔ൷ထଢோ૿נΖ b!! ᣂຨٚ۶ၲඔऱ࿓ڤΖ a Turn on your computer, login if necessary, and then wait for the desktop to appear. b Close any open programs. HP All-in-One • 7 15 ᙇᖗψԫጟωຑᒵᣊীΰA!ࢨ!Bα Choose ONE connection type (A or B) AȈUSB!ጣ!.!ӑϚौጣ A: USB Connection - Do not connect yet ࣠ڕ൞უऴ൷ലᇘᆜຑ൷ࠩԫሽᆰΔᓮࠌڼشຑᒵᣊীΖ!ȞӵᡝࡾҰ ௌ໌ϞࠉȂϼȟȄ! ᏁऱໂڶΚ!USB!ᨱᒵΖ !षٺҢ!VTC!ጣȂᎧ!A!ഋϷࡾޟҰȞ!9!ॲȟȄ! Use this connection type if you want to connect the device directly to one computer. (Do not connect until the software instructs you to.) Equipment needed: USB cable. For a USB connection, go to Section A (page 9) for instructions. BȈΚЊȞԤጣȟᆩၯ B: Ethernet (Wired) Network ࣠ڕ൞უڇᇘᆜࡉሽᆰհၴࠌشԬ֜ጻሁᨱᒵຑᒵΔᓮࠌڼشຑᒵᣊীΖ ᏁऱໂڶΚ!ႃᒵᕴ0ሁطᕴ0ٌངᖲࡉԬ֜ጻሁᨱᒵΖ !षٺҢΚЊᆩၯᢟጣጣȂᎧ!B!ഋϷࡾޟҰȞ!11!ॲȟȄ! Use this connection type if you want an Ethernet cable connection between the device and your network. Equipment needed: hub/router/switch and Ethernet cable. For an Ethernet cable connection, go to Section B (page 11) for instructions. !୰ᚠȈ!!ڕᏁࡳጻሁऱᇷಛΔᓮ۟!!www.hp.com/support!ΔᙁԵ!Photosmart 2570!Δྥ৵ჼ༈! Network Setup!ΰጻሁࡳαΖ Questions: For information on how to set up a network, go to www.hp.com/support, enter Photosmart 2570, and search for Network Setup. 8 • HP All-in-One A!ഋϷȈUSB!ጣ Section A: USB Connection A1 ᙇᖗإᒔऱ!CD Choose the correct CD Windows!ٺҢޱȈ ق᧩ڶ࣠ڕඔ೯ ૿ΔᓮຑਊࠟՀψ!ޟר Ⴋသ!ωΕຑਊࠟՀ! CD-ROM!!ቹقΔྥ৵ຑ ਊࠟՀ!setup.exeΖ Windows Users: If the startup screen does not appear, double-click My Computer, doubleclick the CD-ROM icon, and then double-click setup.exe. Macintosh!ٺҢޱȈ a!! !נބHP All-in-One Macintosh CDΖ b! ᤉᥛࠩՀԫΖ Macintosh Users: a Locate the HP All-in-One Macintosh CD. b Continue to the next page. a!! ༺Ե!HP All-in-One Windows CDΖ b!! ࠉᅃᘛኟՂऱਐڜقᇘຌ᧯Ζ c!! ڇψጣω૿Δᓮᒔࡳᙇ࠷ψޢ ՍԪႫသωΖᤉᥛࠩՀԫΖ a Insert the HP All-in-One Windows CD. b Follow the onscreen instructions to install the software. c On the Connection Type screen, make sure to select directly to this computer. Continue to the next page. HP All-in-One • 9 A2 ຑ൷!USB!ᨱᒵ Connect the USB cable Macintosh!ٺҢޱȈ a! ല!USB!ᨱᒵൕሽᆰຑ൷۟ᇘᆜ৵ֱऱ! USB!കΖ Macintosh Users: a Connect the USB cable from your computer to the USB port on the back of the device. Windows!ٺҢޱȈ a! ࠉᅃᘛኟՂऱਐقၞ۩Δऴࠩ൞ࠩ༼قຑ ൷!USB!ᨱᒵΖ ΰຍױ౨ᄎक़༓։ᤪऱழၴαΖ ! נ༼قழΔല!USB!ᨱᒵԫᙰຑ൷ࠩ! HP All-in-One!৵ֱऱຑ൷കՂΔྥ৵ലԫ ᙰຑ൷ࠩ൞ሽᆰՂऱ!ӈդΙএ!USB!ஃ!Ζ b! ࠉᅃᘛኟՂऱਐقၞ۩Ζګݙ ψ!!ҳ։ຝыω૿Ζ b!! ຑਊࠟՀ!!HP All-in-One Installer!!ቹقΖ c!! ᒔࡳ൞ڶࢬګݙ૿ΔץਔψSetup Assistant ΰࡳ࠰ܗαωΖ Windows Users: a Follow the onscreen instructions until you see the prompt to connect the USB cable. (This may take several minutes.) Once the prompt appears, connect the USB cable to the port on the back of the HP All-in-One, and then to any USB port on your computer. b Follow the onscreen instructions. Complete the Sign up now screen. A3 b Double-click the HP All-in-One Installer icon. c Make sure you complete all screens, including the Setup Assistant. ᓮᔹਐতऱહ૿Δᐙٱԫٝྒྷᇢ Go to back of the guide to make a test copy 10 • HP All-in-One B!ഋϷȈΚЊȞԤጣȟᆩၯ Section B: Ethernet (wired) network B1 ຑ൷Ԭ֜ጻሁᨱᒵ Connect the Ethernet cable a!! ஞנᇘᆜ৵૿ऱ႓༺ۥΖ !b! ലԬ֜ጻሁᨱᒵऱԫጤຑ൷ࠩᇘᆜ৵૿ऱԬ֜ጻሁຑ൷കΖ c! ലԬ֜ጻሁᨱᒵऱԫጤຑ൷ࠩႃᒵᕴ0ሁطᕴ0ٌངᖲΖ࣠ڕᨱᒵլജ ९Δאױ၇ለ९ऱᨱᒵΖ ! ौȈ!ᓮլലԬ֜ጻሁᨱᒵຑ൷ࠩᨱᒵᑇᖕᖲΖ १ ൞ؘႊຑՂጻሁΖ࣠ڕ൞բᆖຑ൷!USB!ᨱᒵΔᓮլຑ൷Ԭ֜ጻሁᨱᒵΖ a Remove the yellow plug from the back of the device. b Connect one end of the Ethernet cable to the Ethernet port on the back of the device. c Connect the other end of the Ethernet cable to the hub/router/switch. If the cable is not long enough, you can purchase a longer cable. Important: Do not connect the Ethernet cable to a cable modem. You must have a working network. If you already connected the USB cable, do not connect the Ethernet cable. B2 ᙇᖗإᒔऱ!CD Choose the correct CD Windows!ٺҢޱȈ Macintosh!ٺҢޱȈ a! ༺Ե!HP All-in-One Windows CDΖ a! ༺Ե!HP All-in-One Macintosh CDΖ Windows Users: a Insert the HP All-in-One Windows CD. Macintosh Users: a Insert the HP All-in-One Macintosh CD. HP All-in-One • 11 B2 ᥛՂ Continued ق᧩ڶ࣠ڕඔ೯૿ΔᓮຑਊࠟՀψ!ޟרႫ သ!ωΕຑਊࠟՀ!!CD-ROM!ቹقΔྥ৵ຑਊࠟՀ! setup.exeΖ If the startup screen does not appear, double-click My Computer, double-click the CD-ROM icon, and then double-click setup.exe. Macintosh!ٺҢޱȈ Windows!ٺҢޱȈ b! ࠉᅃᘛኟՂऱਐڜقᇘຌ᧯Ζ c!! ڇψ!!ጣω૿Δᓮᒔࡳᙇ࠷ ψ!!ആႆᆩၯωΖࠉᅃᘛኟՂऱਐقၞ۩Ζ d! ൞ؘႊڶࢬڇऱႇ᧯ಛஒנழᙇᖗ! !unblock!ΰᇞೈαࢨ!!acceptΰ൷࠹αΔܡঞڜ ᇘᄎ؈ඓΖࠉᅃࢬڶᘛኟՂऱਐقၞ۩Ζᤉᥛ ࠩՀԫΖ b!! ຑਊࠟՀ!HP All-in-One Installer!!ቹقΖ c!! ᒔࡳ൞ڶࢬګݙ૿ΔץਔψSetup Assistantΰࡳ࠰ܗαωΖ ᤉᥛࠩՀԫΖ Macintosh Users: b Double-click the HP All-in-One Installer icon. c Make sure you complete all screens, including the Setup Assistant. Continue to the next page. Windows Users: b Follow the onscreen instructions to install the software. c On the Connection Type screen, make sure to select through the network. Follow the onscreen instructions. d You must choose unblock or accept on all firewall messages or setup will fail. Follow all onscreen instructions. Continue to the next page. ! ᚠ!Κ!ຌ᧯ࢨႇ᧯࿓ױڤ౨ᄎॴᡶຌ᧯ڜᇘΖڕᏁᇡาᇷಛΔᓮ۟!!www.hp.com/supportΔᙁԵ! ୰ !Photosmart 2570!Δྥ৵ჼ༈!Firewallsΰ־ᛥαΖ Questions: Anti-virus or firewall programs can block software installation. For details, go to www.hp.com/support, enter Photosmart 2570, and then search for Firewalls. 12 • HP All-in-One B3 הࠡڇሽᆰՂڜᇘຌ᧯! Install software on additional computers ࣠ڕ൞ऱጻሁՂהࠡڶሽᆰΔᓮޢڇԫሽᆰՂڜᇘ!HP All-in-One!ຌ᧯Ζڜڻޢᇘ ழᓮᙇᖗإᒔऱ!HP All-in-One CDΖ ࠉᅃᘛኟՂऱਐقၞ۩Ζᓮᒔࡳڇጻሁࡉ!HP All-in-One!հၴΰլਢሽᆰࡉጻሁհ ၴαᙇᖗຑᒵᣊীΖ If you have additional computers on your network, install the HP All-in-One software on each computer. Choose the correct HP All-in-One CD for each installation. Follow the onscreen instructions. Make sure that you choose the connection type between the network and your HP All-in-One (not between your computer and the network). B4 ᓮᔹ່৵ԫᐙٱԫٝྒྷᇢ Go to the last page to make a test copy ጊᣄඈᇞ Troubleshooting ! ᚠȈ!נψ!ྤଢ଼࢜њ՞!ωಛஒΖ ୰ !ଢ଼հȈ!ၲඔᚾ॰Ζ堚ೈᇘᆜᇙ૿ऱᓄΖലሽᄭᣂຨΔྥ৵ଢԫ։ᤪΖ٦ၲඔሽᄭΖ Problem: A Carriage Jam message appears. Action: Open the access door. Remove the tape from inside the device. Turn the power off, and then wait one minute. Turn the power on again. HP All-in-One • 13 ጊᣄඈᇞ Troubleshooting ! ᚠȈ!!ڶߠᘛኟ༼ق൞ຑ൷!USB!ᨱᒵΖ ୰ !ଢ଼հȈ!!ஞ!נHP All-in-One Windows CDΔ٦ૹᄅ༺ԵΖᔹ!A!ຝ։Ζ Problem: You did not see the screen prompting you to connect the USB cable. Action: Remove, and then re-insert the HP All-in-One Windows CD. Refer to Section A. ! ᚠȈ!!נψ!᠍ߔٺҢཱིቨᡝᆠ!ω૿Ζ ୰ !ଢ଼հȈ!!ਊԫՀψ!ڥੑ!ωΖࢸൾ!USB!ᨱᒵΔ٦༺Ե!HP All-in-One Windows CDΖ ᔹ!A!ຝ։Ζ Problem: The Microsoft Add Hardware screen appears. Action: Click Cancel. Unplug the USB cable, and then insert the HP All-in-One Windows CD. Refer to Section A. ! ᚠȈ!!נψ!၆ညԊ၆ฒݲցׇԙ!ω૿Ζ ୰ !ଢ଼հȈ!!ᛀ൳ࠫࣨ૿ਢڶܡࡐᇘړΖࢸՀ!HP All-in-One!ऱ༺ᙰΔྥ৵٦ല،༺ՂΖ ᛀࢬڶຑᒵΖᒔࡳ!USB!ᨱᒵբ༺ࠩሽᆰΖᓮ֎ല!USB!ᨱᒵ༺ࠩᒌࢨਢሽᄭآၲඔ ऱႃᒵᕴΖᔹ!A!ຝ։Ζ Problem: The Device Setup Has Failed To Complete screen appears. Action: Verify that the control panel faceplate is firmly attached. Unplug the HP All-in-One and plug it in again. Check all connections. Make sure the USB cable is plugged into the computer. Do not plug the USB cable into a keyboard or non-powered hub. Refer to Section A. 14 • HP All-in-One ӖӟΙӋกၐॲ ൞ڇբڜګݙᇘΔאױၲࡨࠌ!شHP All-in-OneΖ٨ٱԫ່ٝფऱઌׂΖ a a! ஞנཏຏػΔྥ৵ᇘԵ!4 x 6!ٹ ΰ10x15!ֆ։αऱઌׂΖലઌׂऱ٠૿ཛՀΖ ല്ᓳᖞᕴฝ೯ࠩᦤऱலᢰΖ b b!! !נބ4x6!ٹΰ10x15!ֆ։αऱઌׂΖ c c!! ലઌׂΰ૿ཛՀα࣋ᆜڇੲᑿࣨऱ׳ছֱߡᆵΖᒔ ࡳઌׂऱ९ᢰऎထੲᑿࣨऱছֱ࣋ړΖᣂՂ።Ζ d d! ਊՀψ!ۖኇӟ!.!ிՓ!ωਊၨΖ HP All-in-One!ᄎᐙٱԫٝࡨઌׂΖ ૉᛵᇞൕಖᖋ٨ٱઌׂࡉࠡפה౨Δᓮᔹπࠌृش ਐতρࡉᒵՂᎅࣔΖڕᏁࠡהᎅࣔΔᓮោᥦ! www.hp.com/support!Ζ ࠌ!֟۟ش50%!ऱݙ٤!֟۟֗گڃ10%!ऱ٦ࠧٱسΖ © Copyright 2005 Hewlett-Packard Development Company, L.P. Printed in []. *Q7211-90284* *Q7211-90284* Print a test copy Q7211-90284 Now that you have finished setup, it is time to use your HP All-in-One. Make a copy of a favorite photo. a a Remove the plain white paper and load the 4 x 6 in (10x15 cm) photo paper. Place the paper glossy side down. Move the paper adjusters next to the stack of paper. b b Find a 4x6 in (10x15 cm) photo. c c Place the photo (face down) on the right front corner of the glass. Make sure the long edge of the photo is along the front of the glass. Close the lid. d d Press the Start Copy Color button. The HP All-in-One makes a copy of your original photo. To learn about printing photos from memory cards and other features, see the User Guide and online help. For additional help, see www.hp.com/support. Printed on at least 50% total recycled fiber with at least 10% post-consumer paper. © Copyright 2005 Hewlett-Packard Development Company, L.P. Printed in [].