1
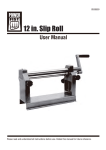
12” SLIP ROLL
Model 36698
Assembly & Operating Instructions
®
3491 Mission Oaks Blvd. / Camarillo, CA 93011
Visit our Web site at: http://www.harborfreight.com
Copyright 1997 by Harbor Freight Tools®. All rights reserved.
No portion of this manual or any artwork contained herein may be reproduced in any
shape or form without the express written consent of Harbor Freight Tools.
For technical questions and replacement parts, please call 1-800-444-3353.
Specifications
ITEM #
Minimum Roll Diameter
Maximum Roll Length
Maximum Thickness (Steel)
Maximum Thickness (Brass)
Maximum Thickness (Aluminum)
Wire Forming Grooves
Weight
Overall Dimensions
36698
1”
12”
20 Gauge
18 Gauge
17 Gauge
1/8”, 1/4”, 3/8”
37.4 Lbs.
23” x 6.68” x 9.43”
SAVE THIS MANUAL
You will need this manual for the safety instructions,
operating instructions, and parts list. Put it in a safe,
dry place for future reference. Keep your invoice with
this manual. Write the invoice number on the inside
front cover.
READ ALL INSTRUCTIONS
BEFORE ASSEMBLING OR
OPERATING THE SLIP ROLL.
SAFETY WARNINGS & CAUTIONS
WARNING: When using electric tools, machines or equipment, basic safety precautions should
always be followed to reduce the risk of fire, electric shock and personal injury.
READ ALL INSTRUCTIONS BEFORE USING THIS TOOL
1.
KEEP WORK AREA CLEAN. Cluttered areas invite injuries.
2.
CONSIDER WORK AREA CONDITIONS. Do not use in damp, wet or poorly lit
locations. Do not expose to rain. Keep work area well lit.
3.
KEEP CHILDREN AWAY. All children should be kept away from the work area. Do not
let them handle machine.
4.
STORE IDLE EQUIPMENT. When not in use, tools should be locked up in a dry
location to inhibit rust. If possible, store in an area out of reach of children.
5.
DO NOT FORCE THE MACHINE OR TOOL. It will do the job better and more safely at
the rate for which it was intended.
6.
USE THE RIGHT TOOL. Do not force a small tool or attachment to do the work of a
larger industrial tool. Do not use a tool for a purpose for which it was not intended.
7.
DRESS PROPERLY. Do not wear loose clothing or jewelry. They can be caught in
moving parts. Protective gloves and non-skid footwear are recommended when
working. Wear restrictive hair covering to contain long hair, preventing it from getting
caught in machinery.
Page 2 -- SKU 36698
8.
USE EYE AND EAR PROTECTION. Use a full face mask if the work you are doing
produces metal filings, dust or wood chips. Goggles are acceptable in other situations.
Wear a clean dust mask if the work creates a lot of fine or coarse dust. When
operating for extended periods of time, use approved ear protection. Safety goggles
and ear protectors are available from Harbor Freight Tools.
9.
SECURE WORK. Use clamps or a vise to hold the work if possible. It is safer than
using your hands and it frees both hands to operate the tool.
10.
DO NOT OVERREACH. Keep proper footing and balance at all times.
11.
MAINTAIN TOOLS WITH CARE. Keep tools sharp and clean for better and safer
performance. Follow instructions for lubricating and changing accessories. Keep
handles dry, clean and free from oil and grease.
12.
STAY ALERT. Watch what you are doing, use common sense. Do not operate any tool
when you are tired.
13.
CHECK DAMAGED PARTS. Before using any tool, any part that appears damaged
should be carefully checked to determine that it will opeate properly and perform its
intended function. Check for alignment of moving parts, binding of moving parts,
breakage of parts, mounting and other conditions that may affect its operation. Any
parts that is damaged should be properly repaired or replaced by an authorized service
center unless otherwise indicated elsewhere in the instruction manual.
14.
REPLACEMENT PARTS AND ACCESSORIES. When servicing, use only identical
replacement parts. Only use accessories intended for use with this tool. Approved
accessories are available from Harbor Freight Tools.
15.
DO NOT OPERATE TOOL IF UNDER THE INFLUENCE OF ALCHOHOL OR DRUGS.
Read warning labels on prescriptions to determine if your judgment or reflexes are
impaired while taking drugs. If there is any doubt, do not operate machine.
UNPACKING
If any parts are missing or broken, please call Harbor Freight Tools at the number on the cover
of this manual.
Page 3 -- SKU 36698
MOUNTING
Step 1:Bolt the Slip Roll to a secure work surface using the four holes in the BASE (#25).
Step 2:You must purchase your own hardware. Buy four 5/16” bolts, nuts and lock washers,
and eight washers. Add 1” to the thickness of your workbench to determine the
appropriate length of your bolts.
Step 3:Place the Slip Roll in the desired location, making sure that there is enough room for
the handle (positioned on the right when looking from the front) to be moved. Make
sure there is enough room behind the Roll to accommodate stock.
Step 4:Mark the bench through the holes in the BASE.
Step 5:Remove Slip Roll.
Step 6:Drill 11/32” holes in the workbench.
Step 7:Place the Slip Roll so the holes in the BASE line up with the drilled holes.
Step 8:Install hardware in the following order:
A. Bolt
B. Slip Roll
C. Workbench
D. Washer
E. Lock Washer
F. Washer
G. Nut
Page 4 -- SKU 36698
ADJUSTMENTS
1.
To increase the gap between SHAFT I (#17) and SHAFT II (#18) to allow for varying
thickness of materials, screw out the ADJUSTMENT KNOB (#24). To decrease the
gap, screw it in. Make sure to adjust both KNOBS an equal amount. See Figure 1.
2.
To increase the gap between SHAFT I and SHAFT III (#8) to increase the diameter of
your rolls, screw out the ADJUSTMENT KNOB (#4). For smaller diameter rolls, screw
the KNOB in. For even rolls, adjust both KNOBS an equal amount. To create cones,
adjust one side more than the other. See Figure 2.
Page 5 -- SKU 36698
OPERATION
Step 1:Perform all adjustments as required (see ADJUSTMENTS section) depending upon
material thickness and whether you are engaging in straight rolls or cones.
Step 2:Insert material’s edge between SHAFT I (#17) and SHAFT II (#18). See Figure 3.
Step 3:Turn HANDLE (#19) to process material.
Step 4:If you are only performing partial rolls and need to remove the material, slide out the
SHAFT BUSHING (#11) and pull Shaft I forward. See Figure 4.
Shaft Bushing (#11)
Page 6 -- SKU 36698
Step 5:To form wires, select the smallest groove that you can use and put the edge of that wire
on the groove of SHAFT II. Other operations are identical to sheet metal forming.
See Figure 5.
Step 6:To form rings from wire, process the wire until the end meets the length of the stock.
Remove SHAFT I as mentioned above. Cut the stock where the end meets it.
Page 7 -- SKU 36698
MAINTENANCE
Keep rolls free of oil, dirt and grease at all times.
Lubricate the gears as necessary by injecting grease through the hole in the OIL CUP (#2).
See Figure 6.
Page 8 -- SKU 36698
PARTS LIST
ITEM#
1
2
3
4
5
6
7
8
9
10
11
12
13
14
DESCRIPTION
Adjustment Screw
Grease Cap
Rotating Support
Adjustment Knob
Left Stand
Bushing
Flat Key 4x8
Shaft III
Handle Bushing
Right Stand
Shaft Bushing
Washer 6
Spring Washer 6
Screw M6x16
Page 9 -- SKU 36698
QTY
1
1
1
2
1
1
2
1
1
1
1
1
1
1
ITEM#
15
16
17
18
19
20
21
22
23
24
25
26
27
28
29
DESCRIPTION
Bushing
Gear
Shaft I
Shaft II
Handle
Nut M10
Handle Grip
Bolt M10x110
Pin
Adjustment Knob
Base
Washer 10
Spring Washer 10
Bolt M10x20
Bolt M6x6
QTY
1
2
1
1
1
1
1
1
2
2
1
4
4
4
1
REV 09/03
PARTS DIAGRAM
Page 10 -- SKU 36698