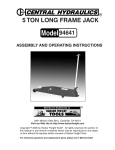
1
Leveling scissor jack
5,000 lb. capacity
Model 96406
Operation Instructions
Due to continuing improvements, actual product may differ slightly from the product described herein.
®
3491 Mission Oaks Blvd., Camarillo, CA 93011
Visit our website at: http://www.harborfreight.com
To prevent serious injury, read and understand
all warnings and instructions before use.
Copyright© 2007 by Harbor Freight Tools®. All rights reserved. No portion of this manual
or any artwork contained herein may be reproduced in any shape or form without the
express written consent of Harbor Freight Tools.
For technical questions or replacement parts, please call 1-800-444-3353.
Specifications
Jack Construction
10 Gauge Sheet Steel Plate
Crank Handle Construction
and Dimensions
Steel Rod Rubber Grip and Attached Socket
25-3/4” L X 15/32” Diameter (5” Long Rubber Handle and Grip)
Jack Capacity
5000 lb. maximum capacity with height not less than 13-3/4”
Lift Range
4-5/8” Minimum Height to 23-1/2” Maximum Height
Overall Dimensions
26-1/4” Total Length X 4-5/8” High X 6-3/4” Wide (Collapsed for Storage)
Jack Mounting
Bolt-On (see directions on page 5 of this manual)
Weld-On (see directions on page 5 of this manual)
Unmounted use is NOT recommended
Weight
14.35 lb. (Jack Only)
Save This Manual
You will need this manual for the safety warnings and precautions, assembly, operating,
inspection, maintenance and cleaning procedures, parts list and assembly diagram. Keep your
invoice with this manual. Write the invoice number on the inside of the front cover. Write the
product’s serial number in the back of the manual near the assembly diagram, or write month
and year of purchase if product has no number. Keep this manual and invoice in a safe and
dry place for future reference.
SAFETY RULES and warnings
WARNING!
READ AND UNDERSTAND ALL INSTRUCTIONS
Failure to follow all instructions listed below may result in
serious injury.
SAVE THESE INSTRUCTIONS
1.
DO NOT USE THIS LEVELING JACK FOR LIFTING. Do not use to change tires.
2.
Keep space around Jack as uncluttered as possible when using this Leveling
Scissor Jack. Clutter can hinder smooth operation and possibly cause accidents
and/or serious personal injury. Keep area well lit.
3.
Keep out from under trailer or RV. Keep hands away from scissor mechanism.
4.
Do not exceed maximum weight capacity of 5000 lb.
5.
Wear ANSI-approved safety goggles and heavy duty work gloves during use.
6.
Level only at trailer or RV manufacturer’s recommended lifting points.
7.
Install this Leveling Scissor Jack in accordance with DMV regulations.
8.
Keep children away. Children must never be allowed in the Leveling Jack area. Do
not let them handle the Jack at any time.
SKU 96406
For technical questions, please call 1-800-444-3353
Page 9.
Use the right tool for the job. There are certain applications for which this Leveling Scissor Jack was designed. It will do the job better and more safely at the rate for
which it was intended. Do not modify this Jack and do not use this Jack for a purpose
for which it was not intended.
10.
Dress properly. Do not wear loose clothing or jewelry as they can be caught in moving
parts. Wear restrictive hair covering to contain long hair.
11.
Do not overreach. Keep proper footing and balance at all times. Do not reach over or
across a Leveling Jack under a load.
12.
Maintain tools with care. Keep tools clean for better and safer performance. Follow
instructions for lubricating and changing accessories. The handle must be kept clean,
dry, and free from oil and grease at all times.
13.
Check for damaged parts. Before using any tool, any part that appears damaged
should be carefully checked to determine that it will operate properly and perform its
intended function. Check for alignment and binding of moving parts; any broken parts
or mounting fixtures; and any other condition that may affect proper operation. Any part
that is damaged should be properly repaired or replaced by a qualified technician.
14.
Replacement parts and accessories. When servicing, use only identical replacement
parts. Use of any other parts will void the warranty. Only use accessories intended for
use with this tool. Approved accessories are available from Harbor Freight Tools.
15.
Stay alert. Watch what you are doing, use common sense. Do not operate any tool
when you are tired.
16.
Do not operate tool if under the influence of alcohol or drugs. Read warning labels
if taking prescription medicine to determine if your judgment or reflexes are impaired
while taking drugs. If there is any doubt, do not operate the tool.
17.
Stand clear of the Leveling Jack when attempting to level any trailer or RV.
18.
Never exceed the Jack’s capacity of 5,000 lb. Check the trailer or RV’s manual to
determine the actual gross weight before attempting to level it. This Jack’s weight
capacity is 5,000 lb. only between 13-3/4” and 23-1/2”; the weight capacity drastically reduces as the height drops below this level. Do not apply a load to this
jack below 13-3/4” in height.
19.
Never stand on the Jack and never have people or pets in the trailer or RV you
are attempting to level.
20.
Place the Leveling Jack on a flat, level surface. Only use this Jack on a stable,
clean, dry surface that is capable of sustaining the weight of the Jack and the load it
is stabilizing.
21.
Stabilize the load. Ensure that the load remains stable at all times. Do not move the
load while it is on the Leveling Jack.
22.
Block all of the wheels when leveling an RV or trailer.
SKU 96406
For technical questions, please call 1-800-444-3353
Page 23.
Do not use this leveling scissor jack for aircraft purposes.
24.
Some RV sub-frames are not capable of handling any additional forces beyond
its intended design strength to support the cabin weight. Contact your RV manufacturer for the sub-frame strength information before use of this Scissor Jack.
25.
The warnings, cautions, and instructions discussed in this instruction manual
cannot cover all possible conditions and situations that may occur. It must be
understood by the operator that common sense and caution are factors which
cannot be built into this product, but must be supplied by the operator.
Unpacking
When unpacking, check to make sure the item is intact and undamaged. If any parts
are missing or broken, please call Harbor Freight Tools at the number on the cover of this
manual as soon as possible.
Assembly
This Leveling Scissor Jack comes completely assembled. For further information on
parts and assembly break-down, see the diagram on page 7 of this manual.
INSTALLATION
WARNING! Do not use THIS LEVELING SCISSOR JACK while unmounted.
1.
Park RV or Trailer on level ground. Prevent the wheels from rolling by applying emergency brake and wheel blocks (not included).
2.
Check the following before proceeding with the installation:
a. Attach Jack to the frame of the RV or Trailer using two c-clamps (not included) or two
vise grips (not included). Close the Jack using the Handle Wrench (16) to check the
frame location. Make sure the Jack will clear any chassis components nearby.
b. Open the Jack enough to touch the ground. Recheck the location on the frame and
adjust if needed.
c. Once in place, apply enough pressure between the ground and the Jack to ensure
that it will not move during the rest of the installation process. Remove the c-clamps
(not included) or vise grips (not included).
SKU 96406
For technical questions, please call 1-800-444-3353
Page BOLT-ON INSTALLATION
1.
WARNING! BEFORE DRILLING HOLES, CHECK FOR ANY CHASSIS COMPONENTS WHICH MAY BE INSIDE THE FRAME. LOOK FOR ELECTRICAL LINES
AND WIRES, GAS TANK, GAS LINES, WATER AND HOLDING TANKS, GENERATOR FUEL LINES AND WATER HEATER LINES. MAKE SURE AREA IS CLEAR
OF THESE COMPONENTS BEFORE DRILLING.
2.
Hold the Jack against the frame and using the Mounting Brackets (9) as a template, mark
the locations of the 8 mounting holes on the RV or Trailer frame. Remove the Jack.
3.
Use a center punch (not included) and hammer (not included) to mark the center of
each hole.
4.
Use a drill (not included) to make a pilot hole 1/8”. Then use a 5/16” drill bit (not included) to complete each hole. Use eight 3/8” tapping screws (not included) with eight
lock washers (not included) to attach the Jack to the frame.
WELD-ON INSTALLATION
1.
Refer to “Installation” and steps 1 and 2 under “Bolt-on Installation” on pages 4 and 5
of this manual.
2.
Weld at least four 1” welds on the Jack Mounting Brackets (9) when attaching to the
frame.
Operation
TRAILERS, TRAVEL TRAILERS AND 5TH WHEELS
1.
Park on level ground.
2.
Level trailer (travel trailer, 5th wheel) front and back with small carpenter’s level (not included), or round bubble level (not included). Place leveling blocks (not included) in front
of one tire on trailer. Slowly pull forward to drive the trailer up onto the blocks. When
the trailer is level, stop and block all tires to keep from rolling forward or backward.
3.
Using Handle Wrench (16) lower the Scissors Jack on the lowest side first to get level.
Use Jacks on opposite sides for best stabilization.
4.
After Jack makes firm contact with ground, turn Handle Wrench (16) twice to insure
Jack will not loosen from trailer during use.
NOTE: When RV or trailer will not be moved for several days, periodically check Jacks to be
sure they have not worked loose.
MOTOR HOMES
1.
Park on level ground and level motor home front and back (see step 2 in previous section).
SKU 96406
For technical questions, please call 1-800-444-3353
Page 2.
Using Handle (16) lower Jacks on opposite sides for stabilization (see steps 3 and 4
in previous section).
NOTE: If motor home comes with factory installed hydraulic levelers, the Leveling Scissor
Jack can be used to provide additional stabilization. Follow the directions for installation
found in this manual on pages 4 and 5.
Maintenance
1.
Before use, inspect the Leveling Scissor Jack for cracks, dirt or debris in threads, loose
welds or bolts and anything else that looks or feels abnormal. If anything is found, do
not use the Jack. Have it repaired or replaced.
2.
Keep the Leveling Scissor Jack clean and dry.
3.
Periodically lubricate Screw Rod (4) Threads with high quality light weight oil (not included).
LIMITED 90 DAY WARRANTY
Harbor Freight Tools Co. makes every effort to assure that its products meet high quality
and durability standards, and warrants to the original purchaser that this product is free from
defects in materials and workmanship for the period of 90 days from the date of purchase. This
warranty does not apply to damage due directly or indirectly, to misuse, abuse, negligence or
accidents, repairs or alterations outside our facilities, criminal activity, improper installation,
normal wear and tear, or to lack of maintenance. We shall in no event be liable for death, injuries to persons or property, or for incidental, contingent, special or consequential damages
arising from the use of our product. Some states do not allow the exclusion or limitation of
incidental or consequential damages, so the above limitation of exclusion may not apply to
you. This warranty is expressly in lieu of all other warranties, express
or implied, including the warranties of merchantability and fitness.
To take advantage of this warranty, the product or part must be returned to us with
transportation charges prepaid. Proof of purchase date and an explanation of the complaint
must accompany the merchandise. If our inspection verifies the defect, we will either repair or
replace the product at our election or we may elect to refund the purchase price if we cannot
readily and quickly provide you with a replacement. We will return repaired products at our
expense, but if we determine there is no defect, or that the defect resulted from causes not
within the scope of our warranty, then you must bear the cost of returning the product.
This warranty gives you specific legal rights and you may also have other rights which
vary from state to state.
3491 Mission Oaks Blvd. • PO Box 6009 • Camarillo, CA 93011 • (800) 444-3353
Record Product’s Serial Number Here:
Note: If product has no serial number, record month and year of purchase instead.
Note: Some parts are listed and shown for illustration purposes only, and are not available
individually as replacement parts.
SKU 96406
For technical questions, please call 1-800-444-3353
Page PARTS LIST AND DIAGRAM
Part
Q’ty
Part
Q’ty
Part
1
Base
Description
1
7
Axis w/out Thread
Description
1
13
Retaining Ring
Description
Q’ty
4
2
Lower Lifting Arm
2
8
Upper Fixing Frame
1
14
Bearing
1
3
Lower Fixing Frame
1
9
Mounting Brackets
2
15
R-Clip
1
4
Screw Rod
1
10
Upper Lifting Arm
2
16
Handle Wrench
1
5
Axis with Thread
1
11
Hex Bolt M10 X 70
2
17
Hex Bolt M10 X 80
2
6
Flat Washer 16
2
12
Lock Nut M10
4
PLEASE READ THE FOLLOWING CAREFULLY
The manufacturer and/or distributor has provided the parts list and assembly diagram in
this manual as a reference tool only. Neither the manufacturer or distributor makes any
representation or warranty of any kind to the buyer that he or she is qualified to make any
repairs to the product, or that he or she is qualified to replace any parts of the product.
In fact, the manufacturer and/or distributor expressly states that all repairs and parts
replacements should be undertaken by certified and licensed technicians, and not by
the buyer. The buyer assumes all risk and liability arising out of his or her repairs to the
original product or replacement parts thereto, or arising out of his or her installation of
replacement parts thereto.
SKU 96406
For technical questions, please call 1-800-444-3353
Page