1
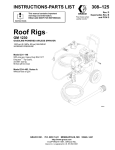
INSTRUCTIONS-PARTS LIST
307–760
This manual contains IMPORTANT
INSTRUCTIONS and WARNINGS.
READ AND RETAIN FOR REFERENCE.
Rev G
Supersedes E
50 Hz, 220/240 Volts, 0.5 Amp
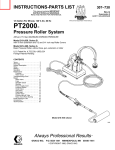
PT2000 Pressure Roller System
17.5 bar (250 psi) MAXIMUM WORKING PRESSURE
Model 220–240, Series E
Complete System
with hose, roller valve, extension and roller
Model 221–076, Series E
Basic System
without hose, roller valve, extension or roller
PATENT NO, 4,652,024
GRACO INC.
P.O. BOX 1441 MINNEAPOLIS, MN
COPYRIGHT 1986, GRACO INC.
55440–1441
TABLE OF CONTENTS
TERMS
Terms . . . . . . . . . . . . . . . . . . . . . . . . . . . . . . . . . . . . . . . . . . . . . . 2
Warnings . . . . . . . . . . . . . . . . . . . . . . . . . . . . . . . . . . . . . . . . . . . 2
PT2000 Pressure Roller System Description . . . . . . . . . . . . 3
Setup . . . . . . . . . . . . . . . . . . . . . . . . . . . . . . . . . . . . . . . . . . . . . . 4
Startup . . . . . . . . . . . . . . . . . . . . . . . . . . . . . . . . . . . . . . . . . . . . . 5
Operation . . . . . . . . . . . . . . . . . . . . . . . . . . . . . . . . . . . . . . . . . . 5
Maintenance
Flushing . . . . . . . . . . . . . . . . . . . . . . . . . . . . . . . . . . . . . . . . 6
Installing & Removing a Roller Cover . . . . . . . . . . . . . . . 7
Cleaning the Roller Diffuser . . . . . . . . . . . . . . . . . . . . . . . 7
Troubleshooting Chart . . . . . . . . . . . . . . . . . . . . . . . . . . . . . . . 8
Repair
Roller Valve . . . . . . . . . . . . . . . . . . . . . . . . . . . . . . . . . . . . 9
Fuse . . . . . . . . . . . . . . . . . . . . . . . . . . . . . . . . . . . . . . . . . . 10
ON/OFF Switch . . . . . . . . . . . . . . . . . . . . . . . . . . . . . . . . 10
Rectifier . . . . . . . . . . . . . . . . . . . . . . . . . . . . . . . . . . . . . . . 10
Power Supply Cord . . . . . . . . . . . . . . . . . . . . . . . . . . . . . 10
Pressure Switch . . . . . . . . . . . . . . . . . . . . . . . . . . . . . . . . 11
Outlet Valve . . . . . . . . . . . . . . . . . . . . . . . . . . . . . . . . . . . 11
Inlet Valve . . . . . . . . . . . . . . . . . . . . . . . . . . . . . . . . . . . . . 11
Diaphragm . . . . . . . . . . . . . . . . . . . . . . . . . . . . . . . . . . . . 12
Suction Tube . . . . . . . . . . . . . . . . . . . . . . . . . . . . . . . . . . 12
Priming Valve & Tube . . . . . . . . . . . . . . . . . . . . . . . . . . . 12
Motor, Connecting Rod & Bearing . . . . . . . . . . . . . . . . . 13
Parts Drawing & Lists . . . . . . . . . . . . . . . . . . . . . . . . . . . . . . . 14
Accessories . . . . . . . . . . . . . . . . . . . . . . . . . . . . . . . . . . . . . . . 18
Technical Data . . . . . . . . . . . . . . . . . . . . . . . . . . . . . Back Cover
Warranty . . . . . . . . . . . . . . . . . . . . . . . . . . . . . . . . . . Back Cover
Be sure you read and understand each of these terms before reading the rest of the manual.
WARNING Alerts user to avoid or correct conditions
which could cause serious bodily injury.
CAUTION Alerts user to avoid or correct conditions
which could damage or destroy the equipment.
NOTE Gives additional explanation or helpful hints.
WARNING
Be sure all operators of this equipment read, understand,
and follow the warnings and instructions in this manual!
GENERAL SAFETY
Use extreme care not to splash paint, contaminated
flushing water or solvent into your eyes. Wear protective
eyewear.
Be sure the area in which you are working is extremely
well-ventilated, to avoid a buildup of harmful paint fumes.
To reduce the risk of electric shock, do not expose the
system to rain. Always store the system indoors. Do not
operate the pump with the pump base cover removed.
ELECTRICAL GROUNDING
Electrical grounding is essential to reduce the risk of an
electric shock or other serious bodily injury from static
sparking. Read and follow the grounding instructions on
page 4 of this manual.
EXTENSION MISUSE HAZARD
THIS IS NOT AN AIRLESS GUN EXTENSION (for example, pole gun). Do not attempt to modify the extension
or roller frame, or to use parts which are not designed for
use with this system.
Improper use of the extension, roller frame, hose or roller
valve can result in component rupture or explosion and
cause serious bodily injury.
AVOID POWER LINES
Avoid contacting any power lines with the extension.
Contact with power lines could cause extremely serious
bodily injury, including burns or electrocution.
307–760
EQUIPMENT
ARD
MISUSE
HAZ-
This system is designed for be used at 17.5 bar (250 psi)
Maximum Working Pressure. Use only components
and accessories which are designed for use with the
PT2000 System.
Any misuse of this equipment, such as modifying parts,
using incompatible paint or solvent, or using worn or
damaged parts, can cause the equipment to rupture and
result in serious bodily injury, fire or explosion, and property damage.
Never alter or modify any part of this equipment; doing so
could cause it to overpressurize or malfunction.
Check all parts of the system regularly and repair or replace any worn or damaged parts immediately.
HAZARD OF USING FLUIDS CONTAINING
HALOGENATED HYDROCARBONS
Never use 1, 1, 1-trichloroethane, methylene chloride,
other halogenated hydrocarbon solvents or fluids containing such solvents in this equipment. Such use could
result in a serious chemical reaction, with the possibility
of explosion, which could cause death, serious bodily injury and/or substantial property damage.
Consult your fluid suppliers to ensure that the fluids being
used are compatible with aluminum and zinc parts.
PT2000 PRESSURE ROLLER SYSTEM DESCRIPTION
SUCTION TUBE
PRIMING TUBE
INLET VALVE
PRIMING VALVE
MOTOR
ON/OFF
SWITCH
PAINT STRAINER
7.6 M (25 FT) HOSE
POWER SUPPLY CORD
Add plug according to
local code
SPRING GUARD
MUST BE AT
THIS END
460 TO 920 MM (18 TO 36 IN.)
TELESCOPING EXTENSION
ROLLER VALVE
Fig 1
LOCKNUT
Motor
The motor drives the connecting rod which
moves the diaphragm.
ROLLER FRAME
Pressure Switch
The pressure switch at the pump outlet turns the motor
on and off to control paint pressure.
Diaphragm
The diaphragm is the heart of the pump. Driven by the
connecting rod and motor, the movement of the diaphragm draws paint from the suction tube and through to
the outlet valve.
Priming Valve
The priming valve assists in priming the pump during
startup. Turning the priming valve counterclockwise
causes the paint to drain directly back into the pail
through the priming tube. Turning the knob clockwise
causes the paint to flow through the fluid outlet valve and
to the hose, roller valve and extension.
12 MM (1/2 IN.) NAP
ROLLER COVER
Outlet Hose
The hose has swivel–type couplings for easy assembly.
A larger diameter outlet hose and chemical-resistant outlet and suction hoses are available. See ACCESSORIES
on page 17.
Outlet Valve
The outlet valve has a ball check which prevents paint
from flowing backwards into the pump. This helps keep
an even supply of paint to the roller each time you trigger
the roller valve.
Roller Valve
Inlet Valve
As the diaphragm draws paint from the suction tube the
paint passes through the inlet valve which opens to allow
paint into the pump.
The pressure roller has a telescoping extension and a
roller cover for use on smooth surfaces. Longer extensions and different types of roller covers are available.
See the ACCESSORIES on page 17.
307–760
3
The roller valve controls paint flow to the roller by triggering it on and off.
Pressure Roller
SETUP
HAND TIGHTEN NUT
SUCTION TUBE
PRIMING TUBE
TIGHTEN SNUGLY WITH
LIGHT WRENCH
INLET VALVE
PRIMING VALVE
MOTOR
ON/OFF
SWITCH
PAINT STRAINER
POWER SUPPLY CORD
Add plug according to
local code
7.6 M (25 FT) HOSE
SPRING GUARD
MUST BE AT
THIS END
USE TWO
WRENCHES
TO TIGHTEN
460 TO 920 MM (18 TO 36 IN.)
TELESCOPING EXTENSION
LOCKNUT
ROLLER VALVE
HAND TIGHTEN ONLY
TRIGGER
12 MM (1/2 IN.) NAP
ROLLER COVER
USE TWO
WRENCHES
TO TIGHTEN
ROLLER FRAME
Apply PTFERtape
to male threads
HAND TIGHTEN ONLY
to avoid cracking roller cover
Fig 2
CAUTION
To avoid premature wear of the pressure switch,
never use more than 7.6 m (25 ft) of 1/4 in. ID outlet
hose. When longer outlet hose is needed, use 3/8
in. ID hose at a maximum of 30 m (100 ft) long. Never use 1/4 in. ID and 3/8 in. ID hose together.
See ACCESSORIES, page 17, for ordering optional
hoses.
WARNING
Never remove the grounding pin of the power supply cord plug. Be sure the outlet is properly
grounded. In the event of an electrical short circuit,
grounding reduces the risk of an electric shock by
providing an escape wire for the electric current.
Inspect the power supply cord and extension cord
before each use. Be sure they are in good condition
and have undamaged three-pin plugs. Replace
immediately if either cord is worn or damaged.
4
307–760
1. Assemble the system as shown in Fig 2, following the
notes on the drawing.
2. Prepare the paint according to the manufacturer’s
recommendations. Remove any skin from the top of
the paint. Strain the paint. Thin the paint as needed.
3. Be sure the electrical service is properly rated for
your sprayer and that the outlet you use is properly
grounded. Install an appropriate plug on the power
supply cord, according to your local electrical code.
Do not use an adapter. All extension cords must have
three wires. Use the chart below for selecting the appropriate wire gauge for the extension cord.
Extension Cord Chart
Cord Length
meters
feet
1 – 30
30 – 61
61 – 92
1 – 100
100 – 200
200 – 300
Extension Cord
Cross Sectional Area
0.75 mm2
1.0 mm2
1.5 mm2
4. Loosen the locknut on the telescoping extension and
adjust the extension to the desired length. Firmly
tighten the locknut.
STARTUP
1. Place the suction tube in the pail of paint.
2. Plug in the sprayer.
3. Open the priming valve 2 turns counterclockwise.
4. Turn the ON/OFF switch ON.
5. You can see the paint being drawn into the suction
tube (if the tube is clean). As soon as you see paint
flow through the priming tube, close the priming
valve. This usually takes less than 30 seconds.
CAUTION
Failure to completely close the priming valve after
the system is primed will cause the valve to erode,
greatly shortening the valve life.
NOTE: If your system is hard to prime, first try to force
feed the suction tube. Hold the suction tube in a
vertical position and pour paint into it. Turn on the
system. If the system does not prime within one
minute, shut it off. Heavy viscosity paint may
need to be thinned. Be sure to follow the paint
manufacturer’s recommendations on thinning.
6. When the outlet hose and extension tube are fully
primed, the motor will run when there is paint demand, but appears to shut itself off when there is no
paint demand.
NOTE: An occasional start and stop of the motor when
the roller valve is not triggered is normal.
OPERATION
WARNING
To reduce the risk of electric shock, do not expose
the system to rain. Always store the system indoors.
CAUTION
Always allow cold equipment to warm to room temperature before using to prevent damaging the system. Always store the system indoors.
CAUTION
Do not use lacquer or lacquer thinner in the suction
and outlet hoses supplied with this system. These
fluids quickly destroy the hose material. Use the optional chemical–resistant hoses.
See ACCESSORIES, page 17, for ordering optional
hoses.
1. With the system fully primed, trigger the roller valve
briefly until paint comes to the roller.
2. Experiment with triggering and rolling the paint until
you determine just how often you need to trigger the
roller valve to keep an even flow of paint to the roller.
3. To adjust the extension tube length, loosen the locknut and extend or retract the tube. If retracting, some
paint in the tube will be pushed out to the roller. Roll
this excess paint onto the wall, or completely retract
the tube, drain the excess paint into a pail, and then
adjust the tube length. Tighten the locknut securely.
4. Whenever you stop painting, turn the ON/OFF
switch to OFF and trigger the roller valve. Elevate the
roller end of the tube to prevent paint from draining
out the roller end.
5. Flush the system thoroughly and immediately after
each use to keep it in good working order. See
page 6.
307–760
5
MAINTENANCE
CAUTION
Thorough flushing and proper maintenance are essential to keep your system working properly
6. Raise the suction tube above the water and run the
pump for a few seconds to drain the flushing solution.
Shut off the pump.
Improper flushing or maintenance may prevent the
system from working the next time you need it, and
may result in costly damage to the system.
7. Wash off all external parts of the hoses, extension,
roller frame, roller valve and pump.
ALWAYS flush your system thoroughly and immediately after each use.
ALWAYS fully extend the telescoping extension
when flushing to clean it thoroughly.
ALWAYS drain all water out of the roller valve and
extension and leave the system filled with mineral
spirits to prevent corrosion.
Flushing (Latex Paint Only)
1. Turn the ON/OFF switch to OFF.
2. Fully extend the telescoping extension.
3. Trigger the roller valve and roll out the excess paint
onto a wall or newspaper. Remove the roller cover
and diffuser, and soak in a pail of warm soapy water.
4. Place the suction tube in the pail of warm, soapy water. Hold the roller frame over the paint pail, turn on
the system and trigger the roller valve to drain and
save the paint in the hoses. Release the trigger and
shut off the pump as soon as all paint is drained, to
avoid contaminating the paint with the flushing water.
5. Now hold the roller frame over the flushing pail. Turn
on the pump and trigger the roller valve. Circulate the
solution for three to five minutes (five to ten minutes
if it is cold). Pump the extension in and out a few
times to clean it, and then leave it extended. Open
the priming valve for a few seconds to clean the priming tube. Close the valve.
8. Using clean, clear water, flush again, changing water
as often as necessary, until the system is thoroughly
cleaned.
9. Finally, flush the system with clean mineral spirits for
just a few seconds. Open the priming valve and turn
off the pump. Some mineral spirits must be left in the
system to prevent corrosion. Retract the extension
before storing it.
CAUTION
Never leave water or water-based paint (latex) in the
system. To prevent corrosion in the pump, extension, roller valve and roller frame, your final flush
must be mineral spirits.
10. Clean the roller cover thoroughly by rinsing it inside
and out. Clean the diffuser as explained on page 3.
11. Oil the needle in the roller valve and trigger the valve
a few times to distribute the oil. See Detail A, Fig 3.
Flushing (Oil–based Paint Only)
NOTE: Follow the instructions above, except use mineral spirits. Do not heat the mineral spirits.
OIL REGULARLY
EXTENSION MUST
BE FULLY EXTENDED
WHEN FLUSHING
Fig 3
6
307–760
MAINTENANCE
Installing and Removing a Roller Cover (See Fig 4)
1. To install a cover, hold the diffuser and unscrew the
retainer nut. Slide the cover over the diffuser assembly and reinstall the nut. Do not overtighten the nut.
3. Disassemble if further cleaning is needed.
2. To remove a cover, hold the cover and unscrew the
retainer nut. Slide the cover and diffuser assembly
off the roller frame. Press on the end of the diffuser
assembly to separate it from the cover.
Cleaning the Roller Diffuser (See Fig 5)
1. For water base paint (latex), vigorously shake the
diffuser in a pail of hot soapy water to remove undried
paint. For oil–base paint, use mineral spirits. Use a
soft brass bristle brush to remove dried paint.
2. To clear an obstruction in the frame, or for more thorough cleaning, remove the setscrew. Be sure to reinstall it after cleaning.
a. Remove the two screws. Pull off the outside end
cap. Disassemble all parts and clean thoroughly
in water or mineral spirits.
b. Install the inside end cap on the frame. Lightly
grease the u-cup seal with petroleum jelly. Slide
the diffusers onto the roller frame. Twist and
press the last diffuser to snap the pieces together.
c.
Install the outside end cap and the two screws.
Holding the inside end cap, press on the screws
and rotate the diffusers to seat the screws. Tighten the screws evenly into the inside end cap. Be
sure there is no binding and that the diffusers
move freely.
DIFFUSER
COVER
NUT
SETSCREW
ÉÉÉ
ÉÉÉ
ÉÉÉ
ÉÉÉ
U-CUP SEAL
Grease lightly with petroleum jelly
FRAME
Lips of seal must face diffuser
Fig 4
SCREW
INSIDE END CAP
DIFFUSER
OUTSIDE END CAP
Fig 5
307–760
7
TROUBLESHOOTING GUIDE
WARNING
Pressure Relief Procedure
To reduce the risk of serious bodily injury, including
injury from moving parts or electric shock, always
follow this procedure whenever you shut off the system, when checking or servicing any part of the system, and whenever you stop painting.
1. Turn the ON/OFF switch to OFF.
2. Unplug the power supply cord.
3. Trigger the roller valve to relieve pressure.
CAUTION
Thoroughly flush the system after each use to reduce down time and costly repair bills.
NOTE: If you are not able to determine the cause of the
problem, or the problem and solution is not discussed in this chart, return the system to an authorized service agencyfor repair.
If you suspect that pressure is not fully relieved after
following the steps above, open the priming valve 2
turns counterclockwise.
PROBLEM
CAUSE
SOLUTION
Pump will not prime or primes slowly
Clogged suction tube strainer
Clean.
Paint too thick
Thin; try pouring paint into suction tube;
use 3/8 in. ID hose if necessary.
Outlet valve spring worn
Pour paint into suction tube and try to prime
system. If it doesn’t prime in one minute, replace the outlet valve spring. See page 11.
Inlet valve stuck or damaged.
Depress inlet valve gently and pour in
about 1 teaspoon mineral spirits. Try to
prime pump. Replace inlet valve if necessary. See page 10.
DEPRESS LIGHTLY.
POUR IN 1 TEASPOON
MINERAL SPIRITS
Pump wil not start
Low paint flow or no paint flow.
Loose inlet hose nut
Tighten.
Power cord unplugged
Plug in.
ON/OFF switch turned off
Turn on.
Damaged motor
Replace. See page 13.
Fuse burned out.
Replace. See page 10. If it burns out again
quickly, return the system for repair.
Clogged roller valve, diffuser, roller frame, Clean thoroughly after each use. See page
roller valve or hose
6.
Using more than 7.6 m (25 ft) of
1/4 in. ID hose
Use up to 30 m (100 ft) of 3/8 in. ID hose.
See CAUTION on page 17.
Loose inlet hose nut
Tighten.
Worn priming valve
Replace. See page 12.
Priming valve is open
Close.
Paint too thick
Thin.
Damaged pressure switch
Replace. See page 11.
Worn inlet and/or outlet valve
Replace. See page 11.
Pump runs after roller valve trigger is Worn pressure switch
released.
8
307–760
Replace. See page 11.
Worn inlet valve
Replace. See page 11.
Worn priming valve
Replace. See page 12.
Worn roller valve packings or needle
Repair. See page 9.
REPAIR
Roller Valve
WARNING
Always follow the Pressure Relief Procedure
Warning on page 8 before attempting any repair.
NOTE: Order repair kit no. 218–960 to repair this roller
valve.
1. Tap out the pin (A) and slide the trigger (B) off of the
valve. See Fig 6.
N
J
K
D
2. Remove the cap (C).Unscrew the fluid housing (D).
See Fig 6.
C
3. Pull the needle (K) out.
B
4. Tap the seat (G) out of the roller valve (N). See Fig
6.
E
A
F
G
H
5. Remove the ball (F) and spring (E). See Fig 6.
6. Turn the nylon screw (L) into the packing. Insert the
needle (K) through the housing (D) and push out the
packing (H). See Fig 7.
7. Clean all parts thoroughly. Use a cotton–tipped swab
or pipe cleaner to clean small orifices.
TORQUE TO
1.7 – 2.2 N.m
(15–20 in-lb)
Fig 6
8. Grease the needle (K) and packing (H). Insert the tapered end of the needle into the back (flat) side of the
packing. See Fig 8.
L
9. Guide the tapered end of the needle into the assembly tool (M) and press the lips of the packing over the
end of the tool. See Fig 8.
H
10. Grease the free end of the needle. Guide the tool (M)
into the fluid housing until the needle protrudes
through the top of the housing. Lightly tap the tool
end until you hear the packing bottom in the housing.
Remove the tool with pliers. See Fig 8.
D
K
Fig 7
TAPERED END
LIPS FACE OUT
OF HOUSING (D)
M
11. Grease the seat (G) and place it on the fluid housing
so the seat which is formed on the inside diameter
faces out. See Fig 9.
12. Install the spring (E) in the spring cavity of the valve
handle, then install the ball (F) so it is centered on the
spring. See Fig 6.
D
K
H
Fig 8
SEAT MUST
FACE BALL
13. Place the o-ring (J) around the fluid housing. Pushing
lightly with your fingers, start the threads of the housing into the valve handle. Torque the housing to
1.7–2.2 N.m (15–20 in–lb). See Fig 6.
N
14. Push on the needle until you feel some resistance.
F
E
15. Grease the cap (C) and place it on the end of the
needle. See Fig 6.
16. Slide the trigger (D) into place. Install the pin (A). See
Fig 6.
CAUTION
Never attempt to remove the adapter fittings from
either end of the valve body (N). Doing so could
crack the body.
C
D
G
Fig 9
307–760
9
REPAIR
WARNING
These repair procedures should be performed only
by qualified repair personnel with an electrical back
ground, using the proper tools. Failure to do the procedures correctly can result in electric shock, or other serious injury and damage to the pump.
WARNING
Always follow the Pressure Relief Procedure
Warning on page 8 before attempting any repair.
NOTE: For all electrical repair, follow the Pressure Relief
Procedure Warning on page 8, and then remove
the base plate (42), screws (33) and bumpers
(43). Reinstall these parts, making sure all wires
are tucked in neatly, before checking or operating the system.
Fuse (See Fig 10)
1. Remove the old fuse (67) and install a new one. Use
only a 3AG, 1 amp fuse.
Rectifier (See Fig 11)
1. Disconnect the four leads from the rectifier.
2. Remove the boot (36). Pull the switch (34) out of the
base. See Fig 10.
3. Install the new switch, aligning the tab in the base
with the slot in the switch. See Fig 10. Install the boot.
4. Connect a pressure switch lead to the power-out terminal, and a jumper wire lead to the power-in terminal of the new ON/OFF switch.
WARNING
To maintain grounding continuity in your system, and
reduce the risk of electric shock, be sure the green
ground wire from the power supply cord is properly
connected to the grounding screw (83) as instructed
in Step 4, above. Also be sure the screw (25) is tightly
screwed into the base. See Fig 10 and 11.
Power Supply Cord (See Fig 11)
1. Disconnect the power supply cord leads from the terminal strip (71) by loosening the three screws on the
cord side of the strip. See Fig 11.
2. Loosen the screw in the side of the strain relief bushing (38) and pull out the cord.
2. Remove the rectifier (39).
3. Install a new rectifier so the positive terminal (+) is
closest to the fuse holder (65).
4. Connect the blue lead to an unmarked terminal, and
the pressure switch lead to the other unmarked terminal. Connect the black motor lead to the negative
(–) terminal, and the red motor lead to the positive (+)
terminal.
72
ON/OFF Switch (See Fig 10 & 11)
1. Disconnect the two leads from the ON/OFF switch
terminals. See Fig 11.
3. Strip approximately 6 mm (1/4 in.) of insulation off
each end of the new cord. Install the new cord and
connect the leads to the terminal strip as shown in
Fig 11, being sure that each color lead is across from
a like-colored lead.
4. Install an appropriate, three-pin plug on the other end
of the power supply cord.
31
33b
36
71
70
34
70
82
38
28
25
Fig 10
10
JUMPER
WIRE
42
65
43
BLACK
RED
MOTOR LEADS
33
Fig 11
307–760
BROWN
BLUE
ÉÉÉÉÉÉÉÉ
ÉÉÉ
ÉÉÉ
ÉÉÉ
41
26
83
65
68
67
YELLOW/GREEN
SCREW
26
34
39
33
71
70
39
28
PRESSURE
SWITCH (2)
LEADS
25
41
83
REPAIR
Pressure Switch (See Fig 11, 12 & 13)
Inlet Valve (See Fig 13)
1. Disconnect the pressure switch leads from the ON/
OFF switch and from the rectifier. See Fig 11.
1. Unscrew the suction hose (44). Unscrew the inlet
valve (3). Remove the gasket (4) and replace it if it
is worn.
2. Remove the front cover (23). See Fig 13.
2. Screw the new valve into the pump housing, torquing
to 27–29 N.m (240–260 in–lb).
3. Unscrew the retainer (14) and remove the pressure
switch (12) and o–ring (12a). See Fig 12.
NOTE: To torque the inlet valve, have someone firmly
hold the pump housing (9).
4. Grease and install a new o–ring (12a) in the pump
housing (9). See Fig 12.
3
10
5. Slide the retainer (14) over the pressure switch and
screw the retainer into the pump housing. Torque the
retainer to 6.2–7.4 N.m (55–65 in–lb). See Fig 12.
6. Guide the pressure switch leads through the base.
Connect a lead to the power–out side of the ON/OFF
switch (34) and a lead to an unmarked terminal on
the rectifier (39). See Fig 11.
2e
2d
9
2c
2b
2a
12a
7. Reinstall the front cover (23).
TORQUE TO
13.5– 16 N.m
(120–140 in-lb.)
12
CAUTION
To avoid damaging the pressure switch, do not drop
it, and do not press on the center of the switch.
2
2f
14
TORQUE TO
6.2–7.4 N.m
(55–65 in-lb.)
TORQUE TO
32–34 N.m
(280–300 in-lb.)
Outlet Valve (See Fig 12)
1. Remove the outlet hose (64). Unscrew the outlet fitting (2a) and remove the gasket (2b).
Fig 12
2. Tip the pump forward to remove the ball (2d).
44
3. Use a 1/4 in. square socket wrench extension to
screw out the seat (2e).
4. Use a pointed tool, such as a dentist’s pick, to remove the seal (2f).
5. Thoroughly clean all parts and dry.
6. Tip the pump back. Install a new seal (2f), making
sure it lays flat.
7. Install the seat (2e) and torque it to 13.5–16 N.m
(120–140 in–lb).
3
TORQUE TO
27–29 N.m
(240–260 in-lb.)
4
8. Drop in the ball, making very sure it stays there!
9
CAUTION
Do not drop the ball into the pressure switch cavity
(12). If it does, and the outlet fitting (2a) is then installed, the switch will be permanently damaged.
9. Check the ball stop pin in the outlet fitting (2a) for
wear, and replace the fitting if necessary. Place a
new gasket (2b) around the fitting. The last coil on
one end of the spring (2c) is turned in. Place this end
on the ball stop pin. Screw the fitting into the pump
housing, and torque to 32–34 N.m (280–300 in–lb).
23
Fig 13
307–760
11
REPAIR
Diaphragm (See Fig 14)
CAUTION
To avoid leaks and costly pump damage, replace the
diaphragm whenever the pump housing (9) is removed or after each 100 hours of use, whichever
comes first. During use, small grooves are formed in
the diaphragm which cannot be realigned properly.
LUBRICATE
THREADS
TORQUE TO
85 in-lb
(9.6 N.m)
15,16
44
47
45
46
11
17
1. Remove the screws (15). Tip the pump housing (9)
back, being careful not to damage the wires. Remove the front cover plate (23).
2. Check the diaphragm guide (11), and replace it if
necessary. Clean the pump housing thoroughly, and
then lay the flat side of the guide into the housing and
use your fingers to press it evenly into place.
9
D
3. Unscrew the diaphragm (17).
23
4. Use a soft bristle brush to clean the top of the connecting rod and housing. Gently clean the bottom of
the pump housing (9), avoiding damage to the diaphragm grooves.
5. Check the rod, motor bearing and eccentric for
paint. If there is any paint or damage, clean or replace the connecting rod assembly as explained on
page 13.
Fig 14
CAUTION
To ensure the diaphragm will work properly, do not
turn the diaphragm more than 1/2 turn when torquing it.
52
45
6. Screw the new diaphragm (17) into the connecting
rod just until it bottoms out. Then turn it 1/4 to 1/2 turn
(2.7–3.6 N.m [6–8 in–lb]).
46
1
10e
10d
10c 10
10b
10a
7. Apply thread lubricant to the screws (15) and install
them with the lockwashers in the pump housing.
Torque the screws a little at a time, oppositely and
evenly, to 9.8 N.m (85 in–lb).
48
49
8. Spin the motor shaft (D) to be sure it turns freely.
E
9. Reinstall the front cover (23).
WRAP WITH
PTFE TAPE
Priming Valve & Tube (See Fig 15)
NOTE: Each new priming valve kit includes a priming
tube and fittings.
9
Fig 15
1. Unscrew the nut (E) of the priming valve (10a), and
then unscrew the stem of the handle.
2. Unscrew the priming valve (10a).
Suction Tube (See Fig 15)
3. Wrap the threads of the priming valve with PTFE R
tape, and then screw it snugly into the pump housing.
The valve handle should be parallel with the angled
edge of the housing to avoid interference with the inlet or outlet valves.
1. Unscrew the hose nut (45). Remove the hose camp
(47). Slit the suction hose to free the nipple (46).
4. Slide the nut (10d) and ferrule (10c) onto the tube
(10e), and then install the tube support (l0b) in the
end of the tube. Screw the nut onto the priming valve,
which will seat the ferrule.
5. Screw the stem of the handle (E) onto the priming
valve until it bottoms, then back it out two turns.
Screw the nut hand tight onto the priming valve, then
tighten the stem into the valve.
307–760
12
2. With the nipple (46) inserted through the nut (45),
dampen the new hose (44) with warm water and
press the hose over the nipple. Screw the nut onto
the inlet valve housing, and then press the hose further onto the nipple. Leave about a 1/8 in. (3 mm) gap
between the nut and hose end.
3. Install the hose camp (47) and tighten snugly.
4. Remove the filter housing (48) and strainer (49) and
install them on the new hose. Dampen the hose with
warm water to ease assembly.
REPAIR
Connecting Rod and Bearing (See Fig 16)
1. Remove the front cover plate (23). Remove the
screws (15) and tip the pump housing (9) out of the
way. Unscrew the diaphragm (17) and discard.
17
15
PRESS FIT
INTO 22
16
30
CAUTION
Replace the diaphragm (17) whenever you remove
the pump housing (9). During use, small grooves are
formed in the diaphragm which cannot be realigned
properly. Reusing a diaphragm may cause leaking
which will result in costly damage to the pump.
9
69
2. Remove the motor screws (20). Lift the motor (30)
slightly. Holding the connecting rod, pull the motor
away from the housing (22).
3.
21
20
18a
18b
34
GREASE
BEARING
THOROUGHLY
Inspect the bearing (18b) in the connecting rod (18).
If it is worn or any rollers are broken, replace the
bearing and rod assembly (18). Inspect the motor eccentric (F), and replace the motor if the eccentric is
worn.
4. Use your fingers to pack high–quality bearing grease
thoroughly in between the bearing rollers.
CAUTION
Thorough greasing of the bearing is essential to ex
tend the life of the bearing and the motor eccentric.
5. Use a soft brass or nylon bristle brush to clean the top
of the connecting rod and housing. Gently clean the
bottom of the pump housing (9), avoiding damage to
the diaphragm grooves.
6. Install the connecting rod (18) in the connecting rod
housing (22). Screw a new diaphragm (17) into the
rod just until it bottoms. Turn the diaphragm only1/4
to 1/2 turn more (2.7–3.6 N.m [6–8 in–lb]).
7. Align the motor with the pins in the connecting rod
housing (22), guiding the motor eccentric through the
connecting rod bearing (18b). Spin the motor shaft to
be sure it moves freely.
8. Loosely install the lockwashers (21) and screws (20).
Spin the motor shaft again. Now alternately tighten
the screws. Spin the motor shaft again.
CAUTION
Spinning the motor shaft while assembling the
pump ensures that parts are properly aligned. If they
are not, and you start the pump, serious damage
could result to the motor, bearing, and connecting
rod. If you feel binding or resistance, disassemble
the parts, checking the spin often, until you determine the cause of the binding.
9. Position the pump housing (9) on the sprayer. Lubricate the screws (15) and install them and the Iockwashers (16) loosely. Torque the screws a few inch–
pounds (N.m) at a time, oppositely and evenly, to 85
in–lb (9.8 N.m).
10. Reinstall the front cover plate (23).
43
33
23
22
42
Fig 16
Motor (See Fig 16)
1. Remove the front cover plate (23).
2. Remove the bumpers (43) and the bottom cover
plate (42). Disconnect the motor leads from the positive and negative rectifier terminals. See Fig 11, page
12.
3. Remove the motor screws. Lift the motor (31)) slightly. Holding the connecting rod, pull the motor away
from the housing (22).
4. Inspect the bearing (18b) in the connecting rod (18).
If it is worn or any rollers are broken, replace the
bearing and rod assembly (18) as instructed to the
left.
5. Use your fingers to pack high-quality bearing grease
thoroughly in between the bearing rollers.
6. Feed the motor leads through the rubber grommet
(69). Align the motor with the pins in the connecting
rod housing (22), guiding the motor eccentric
through the connecting rod bearing (18b). Spin the
motor shaft to be sure it moves freely.
7. Loosely install the lockwashers (21) and screws (20).
Spin the motor shaft again. Alternately tighten the
screws. Spin the motor shaft again. See the CAUTION in Step 8 to the left.
8. Connect the red motor lead to the positive (+) terminal and the black motor lead to the negative (–) terminal of the rectifier (39). Refer to Fig 11.
9. Reinstall the front cover plate.
307–760
13
PARTS DRAWING
Model 221–076, Series E
Basic System
Includes items 2 – 54 and 65 – 87
Model 220–240, Series E
Complete System
Includes items 2 – 87
52
44
52
NOTE: See Wiring Schematic on page 15.
15
LUBRICATE
THREADS
TORQUE TO
9.6 N.m
(85 in-lb)
47
45
46
10
48
16
49
32
30
53
11
69
36
37
17
27
See Detail A,
page 17
22
54
38
21
20
18
71
72
31
70
29
65
68
34
70
82
26
41
26
67
28
42
83
25
43
39
33
33
53
14
307–760
23
24
PARTS LIST
PRESSURE ROLLER SYSTEM
Model 220–240, Series E
Complete System
Includes items 2–87
Model 221–076, Series E
Basic System
Includes items 2 – 54 and 65 – 87
NOTE: Part numbers and drawings for items 2, 3, 4, 9, 12, 14, and 55 – 64 are given on pages 16 and 17.
104–008
275–619*
218–981
108–237
21
22
100–079
181–147
1
1
4
4
1
1
4
4
Always order two of Ref No. 27
when replacing housing
23
24
25
181–839
108–236
102–313
26
100–028
27
28
108–213
108–230
29
30
181–215
181–575
30a
31
32
33
596–421
181–573
181–182
108–224
34
35
36
37
38
39
40
105–679
181–213
105–659
181–626
106–013
108–420
065–120
COVER, front
SCREW, mach, fiIh, No. 8–32 x 1.75”
CAPSCREW, hex head;
1/4–20 x 1.75”
LOCKWASHER, internal;
shakeproof; 1/4”
PIN, dowel
SCREW, mach, hex washer head;
self tapping; 1/4–14 x 1”
LABEL, designation, front
MOTOR, electric
Includes two item 30a and one of item 53
.TERMINAL
BASE, pump
HANDLE
SCREW, thd forming, pnh;
No. 8 x 7/8”
SWITCH, toggle
LABEL, designation, right hand
TOGGLE, boot
CORD, power supply
BUSHING, strain relief
RECTIFIER, bridge
WIRE, jumper
specify length when ordering
41
42
43
44
183–301
181–799
108–220
181–231
TERMINAL, ground
COVER, base
BUMPER
TUBE, suction
1
1
4
45
46
47
48
49
52
53
54
65
67
68
181–159
181–160
108–231
181–163
181–164
178–342
181–613**
181–214
108–199
104–188*
108–223
69
70
71
72
181–218
100–072
108–421
104–038
78
82
83
102–799
103–181
103–854
85
86
87
108–716
065–239
065–236
DESCRIPTION
2
3
2
2
1
1
6
1
QTY
NUT, coupling
1
NlPPLE, hose
1
CLAMP, hose
2
HOUSING, filter
1
FILTER
1
CLAMP, hose
2
LABEL, Warning
1
LABEL, designation, left hand
1
HOLDER, fuse
1
FUSE, electrical, 3AG, 1 amp
1
SCREW, thd forming, pnh;
No. 6 x 1/2”
1
GROMMET, rubber
1
NUT, hex, mscr; No. 6–32 UNC–2B
3
STRIP, terminal
1
SCREW, mach, pnh;
No. 6–32–2a x 0.75”
2
TERMINAL (for ground wire)
2
LOCKWASHER, No. 6
1
SCREW, mach, bdgh;
No. 6–32 UNC–2a x 1/4”
1
TERMINAL
1
WIRE specify length when ordering
8 in.
WIRE specify length when ordering
8 in.
*Recommended “tool box’ spare parts.
**Extra warning labels available at no charge.
6
1
1
1
1
1
1
5 in.
1
1
4
1
WIRING SCHEMATIC
Ref
34
30a
Ref
12
85
Ref
39
40
30a
Ref
65
30a
87
86
Ref
71
BLUE
RED M BLACK
30a
78
41
16
17
18
20
PRIMING VALVE KIT
GUIDE, diaphragm
CAPSCREW, socket head;
5/16–18x 1–1/8” long
LOCKWASHER, spring, 5/16”
DIAPHRAGM
CONNECTING ROD & BEARlNG
CAPSCREW, socket head;
No.8–32 x 5/8”
LOCKWASHER, spring, 0.168”
HOUSING, conn rod;
REF
NO. PART NO.
218–973*
181–152
108–225
QTY
10
11
15
DESCRIPTION
REF
NO. PART NO.
YLW/GRN
78
307–760
15
PARTS LIST
REF
NO. PART NO.
2
220–970
2a
2b
2c
2d
2e
2f
3
222–349
180–454
107–521
101–956
218–968
180–455
220–931*
DESCRIPTION
QTY
OUTLET VALVE KIT
Includes items 2a–2f
.FITTING, outlet
.GASKET
.SPRING
.BALL
.HOUSING, seat, valve
.SEAL, washer
INLET VALVE KIT
1
1
1
1
1
1
1
1
1
1
Includes replaceable item 4
4
9
12
183–419
181–146
218–974
12a
14
108–195
181–209
.GASKET
HOUSING, pump
PRESSURE SWITCH KIT
1
1
1
Includes item 12a
.O–RING
RETAlNER
REF
NO. PART NO.
DESCRIPTION
55
218–935
FRAME, roller
55a
55b
55c
55d
55e
60
218–934
108–808
183–420
218–582
101–983
218–954
DIFFUSER, roller
SEAL, u-cup, retainer
NUT, retainer
FRAME, roller
SETSCREW
ROLLER VALVE
QTY
1
1
1
1
1
1
Includes items 55a–55e
Replaceable parts are shown in the
drawing below for Kit 218–960
62
63
107–590
218–775
64
108–356
1
COVER, roller, 1/2” nap
1
EXTENSION, adjustable, 0.45–0.9 m
(18–36”) long
1
HOSE, fluid, nitriIe rubber; 6 m
(1/4”) ID; cpld 3/8 npsm(f);
7.6 m (25’) long
1
*Recommended “tool box’ spare parts.
PARTS DRAWING
ROLLER VALVE REPAIR KIT 218–960
Kit includes items A through F
Individual parts are not sold separately.
See page 9 or the manual supplied with the
kit for repair instructions.
Ref No. 55
Roller Frame
Includes items 55a - 55e
55b
55c
55d
55a
E
F
55e
A
B
D
C
16
307–760
PARTS DRAWING
DETAIL A
Pump Housing Parts
3
4
APPLY
THREAD
SEALANT
Ref 10
9
2e
2f
TORQUE TO
13.5–16 N.m
(120–140 in-lb
2d
2c
2b
2a
12a
TORQUE TO
32–34 N.m
(280–300 in-lb
2
12
14
TORQUE TO
6.2–7.4 N.m
(55–65 in-lb
DISPENSING ACCESSORIES
Not included with Basic System 221–076
60
SEE PARTS DETAIL ON PAGE 16
64
62
63
55
SEE PARTS DETAIL ON PAGE 16
307–760
17
ACCESSORIES
Must be purchased separately.
CAUTION
To avoid premature wear of the pressure switch,
never use more than 7.6 m (25 ft) of 6 mm (1/4 in.)
ID outlet hose. When longer outlet hose is needed
use 9 mm (3/8 in.) ID hose at a maximum of 30 m
(100 ft) long. Never use 6 mm (1/4 in.) ID and 9 mm
(3/8 in.) ID hose together.
Do not use lacquer or lacquer thinner in the suction
and outlet hoses supplied with this system. These
fluids quickly destroy the hose material. Use the optional chemical–resistant hoses.
CHEMICAL–RESISTANT SUCTlON &
HOSES
For use with lacquer and lacquer thinners.
OUTLET
205–142
Outlet Hose; Nylon; 9 mm (3/8”) ID; cpld
3/8 npsm(fbe); 7.6 m (25’);
21 bar (300psi) MAXIMUM WORKING
PRESSURE
219–095
Suction Hose; Nylon
LARGER DIAMETER OUTLET HOSE
Use this hose when using more than 7.6 m (25 ft) of outlet
hose. Not intended for use with lacquer or lacquer
thinners.
220–009
Outlet Hose; 9 mm (3/8”) ID; cpld 3/8
npsm(fbe); 15 m (50’); 17.5 bar (250 psi)
MAXIMUM WORKING PRESSURE
3 INCH ROLLER FRAME & DlFFUSER 220–234
Same as 9 in. version but shorter. (See page 16)
Must order cover separately.
3 INCH ROLLER COVER
108–402
1/2 in. (12 mm) nap, for semi–rough to
smooth surfaces.
9 INCH ROLLER COVERS
107–590
12 mm (1/2 in.) nap, for semi–rough to
smooth surfaces
107–591
19 mm (3/4 in.) nap, for semi–rough surfaces
107–592
32 mm (1–1/4 in.) nap, for rough surfaces
ADJUSTABLE EXTENSION TUBES
218–775
0.45–0.9 m (18–36 in.)
218–776
0.9–1.8 m (3–6 ft)
218–777
1.8–3.7 m (6–12 ft)
218–778
2.4–4.8 m (8–16 ft)
SPRAY WAND
220–236
4050 psi (260 bar) MAXIMUM WORKING PRESSURE
Creates soft spray when used with the PT2000.
NlPPLE
108–228
Needed to couple two lengths of hose 220–009.
3/8 npsm(mbe)
ADAPTER FITTING
220–265
5000 psi (350 bar) MAXIMUM WORKING PRESSURE
Couples roller frame directly to roller valve.
18
307–760
TWO ACCESSORY ADAPTER 220–232
1000 psi (70 bar) MAXIMUM WORKING PRESSURE
Adapts pump outlet of PT2000 to use two accessory
applicators simultaneously.
FLUSH ADAPTER
220–231
Allows you to use the city water supply to quickly flush
the PT2000.
SERVICE INFORMATION
Listed below by the assembly changed are OLD, NEW,
ADDED and DELETED parts. OLD and NEW parts are
interchangeable. ADDED and DELETED parts may not
be interchangeable individually.
Assembly
Changed
Part
Status
Ref
No.
Part No.
Name
220–970
Outlet Valve
Old
New
2a
220–952
222–349
Fitting
Fitting
220–240
Sprayer
Old
New
3
220–930
220–931
Inlet Valve
Inlet Valve
To Series E
Old
New
23
181–166
181–839
Cover
Cover
Added (1) 26
100–028
Lockwasher
Added (4) 30a
596–421
Terminal
Added (1) 33
108–224
Screw
Old
New
40
181–167
183–301
Terminal
Terminal
Old
New
41
181–574
181–799
Cover
Cover
Old
New
67
108–419
104–188
Fuse
Fuse
Added (1) 78
102–799
Terminal
Old
New
83
103–584
103–854
Screw
Screw
Deleted
84
158–223
Washer
Added
85
108–716
Terminal
Added
86
065–239
Wire
Added
87
065–236
Wire
218–935
Old
Roller Frame New
55b
108–186
108–808
O–ring
Seal
Old
New
55c
275–644
183–420
Nut
Nut
NOTE: A Basic System, Model 221–076, has been added to this manual. It is identical to Model
220–240 except it does not include a hose, roller
valve, extension or roller.
307–760
19
TECHNICAL DATA
Maximum Operating Pressure . . . . . . . . . . . . . . . . . . . . . . . . . . . . . . 17.5 bar (25l) psi)
Power Requirements . . . . . . . . . . . . . . . . . . . . 50Hz, 220/240 Vac, 1 Phase, 0.5 amp
Pump Output . . . . . . . . . . . . . . . . . . . . . . . . . . . . . . . . . . 3.8 liter (1 gallon) in 5 minutes
Power Supply Cord . . . . . . . . . . . . . . . . . . . . . . No. 16 AWG, 3 wire, 6 ft (1.7 m) long
Weight . . . . . . . . . . . . . . . . . . . . . . . . . . . . . . . . . . . . . . . . . . . . . . . . . . . . 6.1 Kg. (13.5 lb)
THE GRACO WARRANTY AND DISCLAIMERS
WARRANTY
Graco warrants all equipment manufactured by it and bearing its name to be free from defects in material and
workmanship on the date of sale by an authorized Graco distributor to the original purchaser for use. As
purchaser’s sole remedy for breach of this warranty, Graco will, for a period of twelve months from the date of
sale, repair or replace any part of the equipment proven defective, with the exception of defects in parts on
the drive train/gear box, which will be repaired or replaced for forty-eight months from the date of sale, and
the electric motor (excluding brush replacement, which is routine maintenance) or pressure control
assembly which will be repaired or replaced for twenty-four months from the date of sale. This warranty
applies only when the equipment is installed, operated and maintained in accordance with Graco’s written
recommendations.
This warranty does not cover, and Graco shall not be liable for, any malfunction, damage or wear caused by
faulty installation, misapplication, abrasion, corrosion, inadequate or improper maintenance, negligence,
accident, tampering, or substitution of non–Graco component parts. Nor shall Graco be liable for
malfunction, damage or wear caused by the incompatibility with Graco equipment of structures,
accessories, equipment or materials not supplied by Graco, or the improper design, manufacture,
installation, operation or maintenance of structures, accessories, equipment or materials not supplied by
Graco.
This warranty is conditioned upon the prepaid return of the equipment claimed to be defective to an
authorized Graco distributor for verification of the claim. If the claimed defect is verified, Graco will repair or
replace free of charge any defective parts. The equipment will be returned to the original purchaser
transportation prepaid. If inspection of the equipment does not disclose any defect in material or
workmanship, repairs will be made at a reasonable charge, which charges may include the costs of parts,
labor and transportation.
DISCLAIMERS AND LIMITATIONS
The terms of this warranty constitute purchaser’s sole and exclusive remedy and are in lieu of any
other warranties (express or implied), including warranty of merchantability or warranty of fitness
for a particular purpose, and of any non–contractual liabilities, including product liabilities, based
on negligence or strict liability. Every form of liability for direct, special or consequential damages
or loss is expressly excluded and denied. In no case shall Graco’s liability exceed the amount of the
purchase price. Any action for breach of warranty must be brought within two (2) years of the date of
sale.
EQUIPMENT NOT COVERED BY GRACO WARRANTY
Graco makes no warranty, and disclaims all implied warranties of merchantability and fitness for a
particular purpose, with respect to accessories, equipment, materials, or components sold but not
manufactured by Graco. These items sold, but not manufactured by Graco (such as electric motor,
switches, hose, etc.) are subject to the warranty, if any, of their manufacturer. Graco will provide purchaser
with reasonable assistance in making any claim for breach of these warranties.
Factory Branches: Atlanta, Chicago, Dallas, Detroit, Los Angeles, West Caldwell (N.J.)
Subsidiary and Affiliate Companies: Canada; England; Switzerland; France; Germany; Hong Kong; Japan
GRACO INC. P.O. BOX 1441 MINNEAPOLIS, MN 55440–1441
PRINTED IN U.S.A.
20
307–760
307–760 1–86 Revised 8–89