1
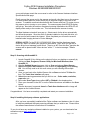
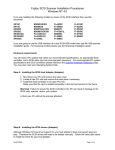
Fujitsu SCSI Scanner Installation Procedures
Windows 95\98\98SE\ME\2000\XP
If you are installing the following models by means of the SCSI interface then use this
document.
SP10C
SP15C
SP600C
SP620C
SP3091DC
SP3092DC
SP93GX
M3093GX\DG
M3096GX
M3097G\G+\DG
M3099G\GX\GH
FI-4120C\C2
Fi-4220C\C2
Fi-4340C
Fi-4530C
Fi-4640S
M4097D
Fi-4750C\L
M4099D
Fi-4860C
Fi-4990C
Fi-5120C
Fi-5220C
Fi-5530C
Fi-5650C
Fi-5750C
Fi-5900C
If you are going to use the USB interface of a dual SCSI/USB model then use the USB scanner
installation guide. For Scansnap models please use the Scansnap installation guide.
Hardware requirements.
You will need a PC system that meets our recommended specifications, an appropriate SCSI
controller, and a SCSI cable (six foot recommended maximum). For recommended PC system
specifications and SCSI controllers please reference the Scanner Hardware Reference page.
You may also need your Operating System Disk.
Step A: Installing the SCSI Host Adapter (Adaptec).
1. Shut down your PC and remove the case cover.
2. Locate a free PCI slot and remove the back plate if necessary.
3. Install the SCSI controller in an open PCI slot.
Make sure that the card is seated completely in the slot and secured in the frame
Warning! Failure to secure the SCSI controller in the PC can result in damage to the
SCSI card, scanner, and/or your system.
4. Boot your PC without the scanner attached.
Step B: Installing the SCSI drivers (Adaptec).
5. When the New Hardware wizard comes up, allow Windows to finish installing the
hardware files for the SCSI controller.
6. Then either install/update the ASPI drivers from the CD or go to www.adaptec.com,
and click on the “search” tab.
7. For Windows 95\98 or ME scroll down to the “Enter key word or quoted phrase” box
and type in “aspi32”.
8. Next scroll down to the drivers section, click on ASPI32 and follow the prompts to
download it your desktop or a new folder.
9. Afterwards go to that location and double click on the "aspi32.exe" icon and follow
the prompts.
10. When the message “ASPI is up to date” appears, reboot and go to the next step.
Rev051906A
Page 1 of 7
Fujitsu SCSI Scanner Installation Procedures
Windows 95\98\98SE\ME\2000\XP
11. For Windows 2000 or XP scroll down to the “Enter key word or quoted phrase” box
and type in “aspi”.
12. Next scroll down to the drivers section, click on ASPI_v470 or higher and follow the
prompts to download it.
13. Afterwards go to that folder and unzip the file to the default Adaptec\ASPI folder.
14. Then go to start, run, browse to the Adaptec\ASPI folder, select ASPIINST.EXE and
run it.
15. When the message “ASPI is up to date” appears, reboot and go to the next step.
Step C: Installing the drivers from the Setup CD.
To begin it is recommended that you install the drivers first before connecting the scanner.
Installing the STI-Twain driver.
1. Insert the Scanner Setup CD into your CD Rom.
2. Next please complete the pre-registration box when it appears and click the submit
button.
3. Afterwards close your browser and click the Install Products button on the Scanner
Setup Menu.
4. On the next screen click on Twain Driver and you may be presented with the option
to install the Error Recovery Guide.
5. After you have installed the Error Recovery Guide (or not) follow the prompts to
complete the twain driver installation.
6. Do not reboot at this time!
Installing the ASPI-Twain driver.
Some of our scanners are not supported by the STI-Twain drivers. For those units you
must install the ASPI-Twain driver. Please refer to the driver download page to see if
your model is one of them.
7. Insert the Scanner Setup CD into your CD Rom.
8. Next please complete the pre-registration box when it appears and click the submit
button.
9. Afterwards close your browser and click the Install Products button on the Scanner
Setup Menu.
10. On the next screen click on Twain Driver and you may be presented with the option
to install the Error Recovery Guide.
11. After you have installed the Error Recovery Guide (or not) follow the prompts to
complete the twain driver installation.
12. Do not reboot at this time!
Installing the ISIS driver.
13. Next go back to the Scanner Setup Menu and click on ISIS Driver.
14. If you didn’t install the Error Recovery Guide during the Twain driver installation you
will be asked again. Proceed and follow the prompts to complete the ISIS driver
installation.
15. Do not reboot at this time!
Rev051906A
Page 2 of 7
Fujitsu SCSI Scanner Installation Procedures
Windows 95\98\98SE\ME\2000\XP
Installing ScandAll 21.
16. Back to the Scanner Setup Menu and click on Software Utility - ScandAll 21.
17. The ScandAll 21 installation wizard will appear. Click next and follow the prompts to
complete the installation.
18. Once all of the above is completed then remove the Scanner Setup CD, Reboot
your system, and go to Step E.
Step D: Installing the drivers from our Web Page.
Installing the STI-Twain driver.
1. Create a new folder and name it Fujitsu Downloads.
2. Next go to the following link Drivers and Downloads.
3. Fill in the pre-registration box when it pops up and continue to the drivers download
page.
4. Afterwards click on STI Twain Software Drivers.
5. Scroll down the list of scanner models in the left column and select the appropriate
STI Twain driver to the right of your scanner model.
6. Double click on the driver file name and the File Download box will popup.
7. Click on Save and then use the browse (or other folder navigation) button until you
have the Twain Download folder you created in the Save As box.
8. Click Save.
9. When completed close the Download Complete window and go to the Twain
Download folder.
10. Open the folder and you will see the saved driver file. Double click on the file to
unzip it and the WinZip* self-extractor box will popup. Click on browse and select the
Fujitsu Downloads folder, then click on Extract. The file will begin to unzip and
when finished a message box will report the number of files unzipped. Click on OK
and close WinZip.
11. In the STI Twain Download folder locate the setup.exe file and double click.
Afterwards follow the prompts and reboot when finished
Installing the ASPI-Twain driver.
Some of our scanners are not supported by the STI-Twain drivers. For those units you
must install the ASPI-Twain driver. Please refer to the driver download page to see if
your model is one of them.
1. Create a new folder and name it Fujitsu Downloads.
2. Next go to the following link and click on Drivers and Downloads.
3. Fill in the pre-registration box when it pops up and continue to the drivers download
page.
4. Afterwards click on ASPI Twain Software Drivers.
5. Scroll down the list of scanner models in the left column and select the appropriate
ASPI Twain driver to the right of your scanner model.
6. Double click on the driver file name and the File Download box will popup.
7. Click on Save and then use the browse (or other folder navigation) button until you
have the Twain Download folder you created in the Save As box.
8. Click Save.
9. When completed close the Download Complete window and go to the Twain
Download folder.
Rev051906A
Page 3 of 7
Fujitsu SCSI Scanner Installation Procedures
Windows 95\98\98SE\ME\2000\XP
10. Open the folder and you will see the saved driver file. Double click on the file to
unzip it and the WinZip* self-extractor box will popup. Click on browse and select the
Fujitsu Downloads folder, then click on Extract. The file will begin to unzip and
when finished a message box will report the number of files unzipped. Click on OK
and close WinZip.
11. In the ASPI Twain Download folder locate the setup.exe file and double click.
Afterwards follow the prompts and reboot when finished
Installing the ISIS driver.
1. Create a new folder and name it Fujitsu Downloads.
2. Next go to the following link and click on Drivers and Downloads.
3. Fill in the pre-registration box when it pops up and continue to the drivers download
page.
4. Afterwards click on ISIS Software Drivers.
5. Scroll down the list of scanner models in the left column and select the appropriate
ISIS driver to the right of your scanner model.
6. Double click on the driver file name and the File Download box will popup.
7. Click on Save and then use the browse (or other folder navigation) button until you
have the ISIS Download folder you created in the Save As box.
8. Click Save.
9. When completed close the Download Complete window and go to the ISIS
Download folder.
10. Open the folder and you will see the saved ISIS driver file. Double click on the file to
unzip it and the WinZip* self-extractor box will popup. Note and accept the default
folder it is creating then click on Extract. The file will begin to unzip and when
finished a message box will report the number of files unzipped. Click on OK and
close WinZip.
11. In the new ISIS folder that you noted earlier locate the setup.exe file and double
click. Afterwards follow the prompts and reboot when finished.
Installing ScandAll 21.
1. Create a new folder and name it Fujitsu Downloads.
2. Next go to the following link and click on Drivers and Downloads.
3. Fill in the pre-registration box when it pops up and continue to the drivers download
page.
4. Afterwards click on Software Utilities.
5. Double click on the file name and the File Download box will popup.
6. Click on Save and then use the browse (or other folder navigation) button until you
have the Scandall Download folder you created in the Save In Box.
7. Click Save.
8. When completed close the Download Complete window and go to the Scandall
Download folder.
9. Open the folder and you will see the saved Scandall file. Double click on the file to
unzip it and the WinZip* self-extractor box will popup. Click on browse and select the
Scandall Download folder, then click on Extract. The file will begin to unzip and
when finished a message box will report the number of files unzipped. Click on OK
and close WinZip.
10. In the Scandall Download folder locate the Scandall.exe file and double click.
Afterwards follow the prompts and when completed go to Step E.
Rev051906A
Page 4 of 7
Fujitsu SCSI Scanner Installation Procedures
Windows 95\98\98SE\ME\2000\XP
Step E: Unlocking the shipping lock.
If your model scanner does not have a flatbed then proceed to Step F.
The flatbed model scanners typically include a lock on the flatbed designed to protect
the scanner during shipment. Before the scanner can be used the shipping lock must be
unlocked. To unlock it do the following:
1. Located the shipping lock slider tab or knob underneath the end of the scanner.
2. Slide or rotate the lock to the unlock position.
If your model has the old style “L” bracket shipping lock.
3. Slide the scanner to its side as shown in figure below.
4. Unscrew the retainer screw and remove the shipping bracket.
5. Place the shipping bracket in the “use position” slot and secure it with the retainer
screw (see figure below)
6. Place scanner back in its normal position
Rev051906A
Page 5 of 7
Fujitsu SCSI Scanner Installation Procedures
Windows 95\98\98SE\ME\2000\XP
Step F: Connecting the Scanner.
Warning! Before proceeding ensure that the power is off when connecting or disconnecting the
SCSI cable to the scanner or workstation. Failure to follow the procedure above could result in
damage to the SCSI card, scanner, and/or your system.
The default SCSI ID setting for the 5000/4000 series scanners is 5 and for the 3000
series scanners is 6. However, selecting a different SCSI ID may be required when
there are several devices on a SCSI chain. Changing the SCSI ID will vary depending on
the model that you have. On some models you change the SCSI ID by accessing the
scanner’s Setup Menu through the front panel. On other models you physically change
the SCSI ID selector on the back of the unit. Please consult your user manual for which
method to use with your model. Setting the SCSI ID to 0, 1, or 7 is NOT recommended
as these settings are typically reserved for hard drives and the SCSI host adapter.
Next if the scanner is the last device (only device) on the SCSI chain then it must be
terminated. If the scanner is not the last device on the SCSI chain, then the terminator
should be removed or turned off before connecting it to the next SCSI device. Many
models of our scanners have automatic termination built in. Some of our older models
will require a plug in terminator (see figure below). Please consult your user manual for
which method to use with your model.
Typically the SCSI ports are located on the back of the scanner (the one exception being
the Fi-5650C which is on the front). Depending on the model the SCSI port connector(s)
may be any one of the following:
A.
B.
C.
D.
DB25 Pin
50-pin Centronics
50-pin High Density (HD-50) or
68-pin Wide SCSI.
Use the appropriate cable to connect the scanner to the SCSI controller in your PC and
ensure that all connections are securely fastened. To identify the type of connector for
Rev051906A
Page 6 of 7
Fujitsu SCSI Scanner Installation Procedures
Windows 95\98\98SE\ME\2000\XP
your model please consult the user manual or refer to the Scanner Hardware Interface
Specifications Web page.
Finally connect the power cord to the scanner and a wall outlet then turn on the scanner.
For those models without a power switch plug in the power supply to the back of the
scanner. To establish communication between the Scanner and your PC system turn on
the scanner prior to turning on your system. The scanner power and LED/LCD display
will light up. Next after the scanner completes its startup initialization the LED/LCD will
display either ready or the number one. This indicates that the scanner is ready.
The New Hardware wizard will now pop up. Select search for the driver automatically
and follow the prompts. Since the driver is already installed on the hard disk drive you
do not need to select search the internet. When completed you will see the scanner
installed under Imaging devices in Device Manager.
SPECIAL NOTE: For the SP10C\15C\600C\620C When the New Hardware wizard
comes up, allow it to search your system for the scanner. Next, when you get the no
device driver found message, select finish. There is no INF file at this time, therefore the
scanner will be placed under "other devices" with a “?” in device manager. This is
normal.
Step G: Scanning with ScandAll 21.
1. Launch ScandAll 21 by clicking on the shortcut link on your desktop or manually by
clicking on Start, Programs, Scanner Utility for Microsoft Windows, then
ScandAll 21.
2. After the Untitled Screen has open, click on Scan and choose Select Source.
3. Select the Fujitsu Twain source for your scanner by Highlighting it and clicking
OK. You will only need to do this once unless you are scanning with multiple
sources.
4. Once you are back at the Untitled Screen click on Scan and select To View this
time. The Twain User Interface will popup.
5. Select the scanning parameters that you wish to use – Color mode, resolution,
paper size, etc…
6. Next under Scan Type choose either ADF or Flatbed in the dropdown box.
7. Place your document in the ADF or on the Flatbed face down and click on the Scan
button.
8. After the document is scanned close the Twain User Interface and the image will
appear on the Untitled Screen.
Congratulations! You have successfully completed and tested your scanner installation.
Step H: Installing third party software applications.
After you have successfully installed all the Fujitsu software and hardware, then it is time
to install any additional third party scanning software that you wish to use. Please follow
the software manufacturer’s instructions for installation.
*If you do not have any unzipping software installed on your system, you can download a free
evaluation copy at www.winzip.com.
Rev051906A
Page 7 of 7