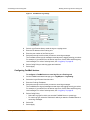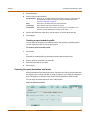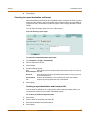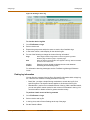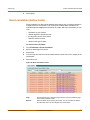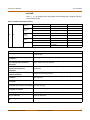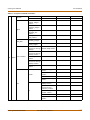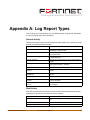
1
Administration Guide
FortiLog
FortiLog-400
FortiLog-100
4
1
FortiLog-800
8
FortiLog Administration Guide
Version 1.6
January 15, 2004
05-16000-0082-20050115
© Copyright 2005 Fortinet Inc. All rights reserved.
No part of this publication including text, examples, diagrams or illustrations may be reproduced,
transmitted, or translated in any form or by any means, electronic, mechanical, manual, optical or
otherwise, for any purpose, without prior written permission of Fortinet Inc.
FortiLog Administration Guide
Version 1.6
January 15, 2005
05-16000-0082-20050115
Trademarks
Products mentioned in this document are trademarks or registered trademarks of their respective
holders.
Regulatory Compliance
FCC Class A Part 15, UL, CE
CAUTION: RISK OF EXPLOSION IF BATTERY IS REPLACED BY AN INCORRECT TYPE.
DISPOSE OF USED BATTERIES ACCORDING TO THE INSTRUCTIONS.
For technical support, please visit http://www.fortinet.com.
Send information about errors or omissions in this document or any Fortinet technical documentation to
[email protected].
Contents
Table of Contents
Introduction ............................................................................................................ 7
Operational Modes.............................................................................................................. 8
Active Mode .................................................................................................................... 8
Passive Mode ................................................................................................................. 9
About this guide ................................................................................................................ 10
FortiLog documentation .................................................................................................... 10
Related documentation ..................................................................................................... 11
FortiGate documentation .............................................................................................. 11
FortiManager documentation ........................................................................................ 12
FortiClient documentation ............................................................................................. 12
FortiMail documentation................................................................................................ 12
Fortinet Knowledge Center ........................................................................................... 12
Comments on Fortinet technical documentation........................................................... 12
Customer service and technical support........................................................................... 13
Setting up the FortiLog unit................................................................................ 15
Checking the package contents........................................................................................
Hardware specifications................................................................................................
Dimensions ...............................................................................................................
Weight .......................................................................................................................
Power requirements ..................................................................................................
Environmental specifications.....................................................................................
Air flow ......................................................................................................................
Mechanical loading ...................................................................................................
Planning the installation ....................................................................................................
Connecting the FortiLog unit.............................................................................................
Configuring the FortiLog unit.............................................................................................
Using the web-based manager .....................................................................................
Using the command line interface.................................................................................
Using the front panel buttons and LCD.........................................................................
15
16
16
16
17
17
17
17
17
18
19
19
20
21
Connecting to the FortiLog Unit......................................................................... 23
Sending device logs to the FortiLog unit........................................................................... 23
Configuring FortiGate unit running FortiOS 2.8 ............................................................ 23
Configuring FortiGate devices running FortiOS 2.5 ...................................................... 24
Configuring FortiMail devices........................................................................................ 25
Configuring the FortiLog unit............................................................................................. 26
Adding a device ............................................................................................................ 26
Defining device port interfaces.................................................................................. 27
Creating Device Groups................................................................................................ 28
FortiLog Administration Guide
05-16000-0082-20050115
3
Contents
Managing the FortiLog unit................................................................................. 29
Status................................................................................................................................
Status............................................................................................................................
Changing the FortiLog host name.............................................................................
Changing operating modes .......................................................................................
Viewing system resources information......................................................................
Changing the firmware..................................................................................................
Installing firmware from a system reboot ..................................................................
Testing a new firmware image ..................................................................................
Installing a backup firmware image...........................................................................
Switching to a backup firmware image......................................................................
Switching to the default firmware image ...................................................................
Backing up system settings ..........................................................................................
Downlading the FortiLog debug log ..............................................................................
Restoring system settings.............................................................................................
Restore factory default system settings ........................................................................
Restoring a FortiLog unit...............................................................................................
RAID .............................................................................................................................
Config................................................................................................................................
Network.........................................................................................................................
RAID .............................................................................................................................
Log settings...................................................................................................................
Log policy ..................................................................................................................
Time ..............................................................................................................................
Options..........................................................................................................................
Admin............................................................................................................................
Configure Administrator access ................................................................................
Administrator account levels .....................................................................................
Administrator options ................................................................................................
Changing the Administrator password ......................................................................
Devices (Active mode) ......................................................................................................
Device list......................................................................................................................
Adding and registering a device....................................................................................
Editing device information.............................................................................................
Alert Email.........................................................................................................................
Server ...........................................................................................................................
Local .............................................................................................................................
Device (Active mode)....................................................................................................
Creating a new device alert.......................................................................................
Alerts.................................................................................................................................
Network Sharing ...............................................................................................................
Defining IP aliases ............................................................................................................
4
05-16000-0082-20050115
29
29
31
31
32
32
33
35
36
38
38
39
39
40
40
40
41
42
42
43
44
45
46
46
46
47
48
48
49
49
50
50
50
51
51
52
52
52
54
55
55
Fortinet Inc.
Contents
Reports ................................................................................................................. 57
Creating and generating a report ......................................................................................
Configuring report parameters ......................................................................................
Configuring a report query ............................................................................................
Creating a query profile.............................................................................................
Selecting the devices for the report ..............................................................................
Creating a device profile ...........................................................................................
Select filtering options...................................................................................................
Creating a filter profile ...............................................................................................
Setting a report schedule ..............................................................................................
Creating a report schedule profile .............................................................................
Choosing the report destination and format..................................................................
Creating a report destination and format profile........................................................
Reports on demand ......................................................................................................
Viewing reports .................................................................................................................
Roll up report ................................................................................................................
Individual reports...........................................................................................................
Vulnerability reports ..........................................................................................................
Creating and generating a report ..................................................................................
Selecting report result parameters................................................................................
Selecting plug-ins..........................................................................................................
Creating a plug-in profile ...........................................................................................
Selecting the scan targets for the report .......................................................................
Creating a scan target profile ....................................................................................
Choosing the report destination and format..................................................................
Creating a report destination and format profile........................................................
Viewing the vulnerability report .....................................................................................
57
58
59
60
60
61
61
62
62
63
63
64
64
65
66
66
67
67
68
68
69
69
70
71
71
72
Using Logs ........................................................................................................... 73
The Log view interface......................................................................................................
Viewing logs......................................................................................................................
Finding log information..................................................................................................
Importing log files..............................................................................................................
Log Search........................................................................................................................
Log watch (Active mode) ..................................................................................................
Event correlation (Active mode)........................................................................................
74
74
75
77
78
78
79
Using the FortiLog unit as a NAS....................................................................... 81
Connecting to the FortiLog file system..............................................................................
Providing access to the FortiLog hard disk .......................................................................
Selecting a file sharing protocol ....................................................................................
Adding and modifying user accounts ............................................................................
FortiLog Administration Guide
05-16000-0082-20050115
81
82
82
82
5
Contents
Adding and modifying group accounts.......................................................................... 83
Assigning access to folders .......................................................................................... 83
Modifying the user or group folder access ................................................................ 85
Setting folder and file properties ....................................................................................... 86
FortiLog CLI reference ........................................................................................ 87
CLI documentation conventions........................................................................................ 87
Connecting to the CLI ....................................................................................................... 88
Connecting to the FortiLog-800 console ....................................................................... 88
Setting administrative access for SSH or Telnet........................................................... 89
Connecting to the FortiLog CLI using SSH ................................................................... 90
Connecting to the FortiLog CLI using Telnet ................................................................ 90
CLI commands.................................................................................................................. 91
execute branch ............................................................................................................. 91
get branch ..................................................................................................................... 92
set branch ..................................................................................................................... 94
set alertemail............................................................................................................. 94
set console ................................................................................................................ 97
set log........................................................................................................................ 98
set NAS ................................................................................................................... 103
set report ................................................................................................................. 104
set system ............................................................................................................... 104
unset branch ............................................................................................................... 110
Appendix A: Log Report Types ........................................................................ 113
Network Activity....................................................................................................... 113
Web Activity ............................................................................................................ 113
FTP Activity ............................................................................................................. 114
Terminal Activity...................................................................................................... 115
Mail Activity ............................................................................................................. 115
Intrusion Activity ...................................................................................................... 116
Antivirus Activity ...................................................................................................... 116
Web Filter Activity ................................................................................................... 116
Mail Filter Activity .................................................................................................... 117
VPN Activity ............................................................................................................ 118
Content Activity ....................................................................................................... 118
Index .................................................................................................................... 121
6
05-16000-0082-20050115
Fortinet Inc.
FortiLog Administration Guide Version 1.6
Introduction
FortiLog units are network appliances that provide integrated log collection, analysis
tools and data storage. Detailed log reports provide historical as well as current
analysis of network and email activity to help identify security issues and reduce
network misuse and abuse.
FortiLog units operate in one of two modes:
•
In Active mode as a log collection and analysis tool to collect logs from FortiGate
and FortiMail devices and generate reports based on log data.
•
In Passive mode as a Network Attached Storage (NAS) server to act as an
additional storage device.
The models in the FortiLog family:
•
FortiLog-100, desktop model with one hard drive.
•
FortiLog-400, desktop model with four hard drives.
•
FortiLog-800, rackmount model with four hard drives.
Figure 1: FortiLog models
FortiLog-400
FortiLog-100
1
4
FortiLog-800
8
FortiLog Administration Guide
05-16000-0082-20050115
7
Operational Modes
Introduction
Operational Modes
The FortiLog device can operate in two modes: Active mode or Passive mode. The
web-based interface provides an interface that reflects each models’ functionality.
Active Mode
Active mode is the default mode for the FortiLog unit. In Active mode, the FortiLog unit
can receive log files from FortiGate, FortiClient, FortiMail and syslog devices. Using
the reporting features, you can use the FortiLog unit to view the log files and generate
more than 130 different reports for hourly, daily, weekly, monthly, and even quarterly
reviews of any device traffic.
Figure 2: FortiLog unit in Active mode
Using FortiLog to analyze logs and generate reports enables you to proactively secure
networks before threats arise, avoid network abuses, manage bandwidth
requirements, monitor Web site visits, and ensure appropriate usage of the network by
employees.
The FortiLog unit also acts as a Network Attached Storage (NAS) device. Use the
FortiLog unit as a means of backing up or storing important information or using the
extra hard disk space as a file server or repository. Any computer using NFS or
Windows sharing can mount the FortiLog hard drive to save and retrieve files.
8
05-16000-0082-20050115
Fortinet Inc.
Introduction
Operational Modes
Figure 3: FortiLog Active mode network architecture
FortiGate Unit
Esc
1
CONSOLE
Enter
2
3
FortiMail Unit
4 / HA
FortiGate Unit
Esc
CONSOLE
1
Enter
CONSOLE
1
2
3
4 / HA
2
PWE
Esc
Enter
CONSOLE
1
2
3
4 / HA
FortiGate Unit
Esc
Enter
CONSOLE
1
2
3
4 / HA
Internet
FortiGate Unit
Esc
Enter
CONSOLE
1
2
3
4 / HA
FortiGate Unit
Switch
Management PC
Esc
Enter
CONSOLE
1
2
3
Reports
4 / HA
FortiGate Unit
4
FortiLog Unit
Passive Mode
Passive mode enables you to use the FortiLog unit solely as a Network Attached
Server (NAS) storage device. The collection of device log files and the log reporting
features are not available in passive mode.
Figure 4: FortiLog unit in Passive mode
FortiLog units running in Passive mode provide secure storage space. Using the
integrated RAID (Redundant Arrays of Inexpensive Disks) functionality provides better
data security.
Note: RAID functionality is only available on the FortiLog-400 and 800. These units contain four
hard disks and support RAID level 0, 1, and 5.
FortiLog Administration Guide
05-16000-0082-20050115
9
About this guide
Introduction
About this guide
This document describes how to set up and configure the FortiLog unit. The
configuration and features of the FortiLog unit are similar in either mode. Section titles
indicate where the features or configuration differs or is unique to each mode. For
example, Devices (Active mode).
This document has the following sections:
•
Setting up the FortiLog unit describes how to set up and install the FortiLog unit in
your network.
•
Connecting to the FortiLog Unit describes how to connect a FortiGate and
FortiMail device to the FortiLog unit to for collecting log files. It also discusses the
requirements to help users to connect and view files on the FortiLog hard disk.
•
Managing the FortiLog unit describes how to view and configure the FortiLog
system settings, such as system time, session information, and user management.
•
Reports describes how to generate, customize and view log reports and generate
vulnerability reports for selected devices.
•
Using Logs describes how to select, and view device and FortiLog log files. It also
describes customizing the log views to find information in the logs easier, as well
as watch logs in real time.
•
Using the FortiLog unit as a NAS describes how to use the FortiLog unit as a file
storage device and how to provide access to users and groups.
•
FortiLog CLI reference is a source for commands when accessing the FortiLog unit
from the CLI.
•
Appendix A: Log Report Types provides an extensive list of the more than 130 log
reports that the FortiLog unit can generate.
This document is available in online help format from the web-based manager. To
access the online help, select the question mark icon in the upper-right corner of the
web-based manager window.
FortiLog documentation
•
FortiLog Administration Guide
Describes how to install and configure a FortiLog unit to collect FortiGate and
FortiMail log files. It also describes how to view FortiGate and FortiMail log files,
generate and view log reports, and use the FortiLog unit as a NAS server.
•
FortiLog online help
Provides a searchable version of the Administration Guide in HTML format. You
can access online help from the web-based manager as you work.
•
FortiLog QuickStart Guide
Explains how to install and set up the FortiLog unit.
10
05-16000-0082-20050115
Fortinet Inc.
Introduction
Related documentation
Related documentation
Additional information about Fortinet products is available from the following related
documentation.
FortiGate documentation
Information about FortiGate products is available from the following guides:
•
FortiGate QuickStart Guide
Provides basic information about connecting and installing a FortiGate unit.
•
FortiGate Installation Guide
Describes how to install a FortiGate unit. Includes a hardware reference, default
configuration information, installation procedures, connection procedures, and
basic configuration procedures. Choose the guide for your product model number.
•
FortiGate Administration Guide
Provides basic information about how to configure a FortiGate unit, including how
to define FortiGate protection profiles and firewall policies; how to apply intrusion
prevention, antivirus protection, web content filtering, and spam filtering; and how
to configure a VPN.
•
FortiGate online help
Provides a context-sensitive and searchable version of the Administration Guide in
HTML format. You can access online help from the web-based manager as you
work.
•
FortiGate CLI Reference Guide
Describes how to use the FortiGate CLI and contains a reference to all FortiGate
CLI commands.
•
FortiGate Log Message Reference Guide
Describes the structure of FortiGate log messages and provides information about
the log messages that are generated by FortiGate units.
•
FortiGate High Availability Guide
Contains in-depth information about the FortiGate high availability feature and the
FortiGate clustering protocol.
•
FortiGate IPS Guide
Describes how to configure the FortiGate Intrusion Prevention System settings and
how the FortiGate IPS deals with some common attacks.
•
FortiGate VPN Guide
Explains how to configure VPNs using the web-based manager.
FortiLog Administration Guide
05-16000-0082-20050115
11
Related documentation
Introduction
FortiManager documentation
•
FortiManager QuickStart Guide
Explains how to install the FortiManager Console, set up the FortiManager Server,
and configure basic settings.
•
FortiManager System Administration Guide
Describes how to use the FortiManager System to manage FortiGate devices.
•
FortiManager System online help
Provides a searchable version of the Administration Guide in HTML format. You
can access online help from the FortiManager Console as you work.
FortiClient documentation
•
FortiClient Host Security User Guide
Describes how to use FortiClient Host Security software to set up a VPN
connection from your computer to remote networks, scan your computer for
viruses, and restrict access to your computer and applications by setting up firewall
policies.
•
FortiClient Host Security online help
Provides information and procedures for using and configuring the FortiClient
software.
FortiMail documentation
•
FortiMail Administration Guide
Describes how to install, configure, and manage a FortiMail unit in gateway mode
and server mode, including how to configure the unit; create profiles and policies;
configure antispam and antivirus filters; create user accounts; and set up logging
and reporting.
•
FortiMail online help
Provides a searchable version of the Administration Guide in HTML format. You
can access online help from the web-based manager as you work.
•
FortiMail Web Mail Online Help
Describes how to use the FortiMail web-based email client, including how to send
and receive email; how to add, import, and export addresses; and how to configure
message display preferences.
Fortinet Knowledge Center
The most recent Fortinet technical documentation is available from the Fortinet
Knowledge Center. The knowledge center contains short how-to articles, FAQs,
technical notes, product and feature guides, and much more. Visit the Fortinet
Knowledge Center at http://kc.forticare.com.
Comments on Fortinet technical documentation
You can send information about errors or omissions in this document, or any Fortinet
technical documentation, to [email protected].
12
05-16000-0082-20050115
Fortinet Inc.
Introduction
Customer service and technical support
Customer service and technical support
For antivirus and attack definition updates, firmware updates, updated product
documentation, technical support information, and other resources, please visit the
Fortinet technical support web site at http://support.fortinet.com.
You can also register FortiGate Antivirus Firewalls from http://support.fortinet.com and
change your registration information at any time.
Fortinet email support is available from the following addresses:
[email protected] For customers in the United States, Canada, Mexico, Latin
America and South America.
[email protected] For customers in Japan, Korea, China, Hong Kong, Singapore,
Malaysia, all other Asian countries, and Australia.
[email protected]
For customers in the United Kingdom, Scandinavia, Mainland
Europe, Africa, and the Middle East.
For information on Fortinet telephone support, see http://support.fortinet.com.
When requesting technical support, please provide the following information:
FortiLog Administration Guide
•
Your name
•
Company name
•
Location
•
Email address
•
Telephone number
•
FortiGate unit serial number
•
FortiGate model
•
FortiGate FortiOS firmware version
•
Detailed description of the problem
05-16000-0082-20050115
13
Customer service and technical support
14
Introduction
05-16000-0082-20050115
Fortinet Inc.
FortiLog Administration Guide Version 1.6
Setting up the FortiLog unit
This chapter includes:
•
Checking the package contents
•
Hardware specifications
•
Planning the installation
•
Connecting the FortiLog unit
•
Configuring the FortiLog unit
Checking the package contents
The FortiLog family includes three models. Check the model number on the front
panel of your FortiLog unit. All three models are shown in the picture below.
•
FortiLog-100, desktop model with one hard drive.
•
FortiLog-400, desktop model with four hard drives.
•
FortiLog-800, rackmount model with four hard drives.
Table 1: FortiLog unit connectors
Connector
FortiLog Administration Guide
Speed
Protocol Description
LAN for FortiLog-100 RJ-45
LAN1 for
FortiLog-400
and 800
Type
10/100Base-T
(FortiLog-100 and
400)
10/100/1000Base-T
(FortiLog-800)
Ethernet
Connection to the network.
CONSOLE
(FortiLog-800 only)
9600 bps
RS-232
serial
Connection to the
management computer.
Provides access to the
command line interface
(CLI).
DB-9
05-16000-0082-20050115
15
Checking the package contents
Setting up the FortiLog unit
Figure 5: FortiLog front and back diagrams
FortiLog-100
FortiLog-400
Front
LED indicators:
Power, Error, Network, LCD
and Disk Access
Panel
Setting
Switches
A and B
Reset
Switch
1
Power
Switch
LAN1
(Network Connection)
LCD Setting Switches
Panel
A and B
Back
LAN2 and LAN3
For Future Use
Power
Switch
Power
Connection
Reset
Switch
ATX
Redundant
Power
Supplies
4
LAN
Front
Power
Connection
Back
Accessories for each model
FortiLog-800
Front
Ethernet Cables:
Orange - Crossover
Grey - Straight-through
8
Rack-Mount
Brackets
LED indicators:
LCD
Hard Disk
LEDs Power, Error, Network, Panel
and Disk Access
Setting
Switches
A and B
Null-Modem Cable
(RS-232)
for FortiLog-800
Hard Disk
LEDs
AC Adapter
for FortiLog-100
Back
Power
Switch
Power Cable
Power
ATX Redundant
Connection Power Supplies
RS-232 SCSI Connector
Serial
For Tape Drive
Connection For Future Use
LAN2
LAN1
For Future Use
(Network
Connection)
FortiLog-100,400, 800
8
USER MANUAL
QuickStart Guide
Copyright 2004 Fortinet Incorporated. All rights reserved.
Trademarks
Products mentioned in this document are trademarks.
Documentation
Hardware specifications
Dimensions
•
FortiLog-100: 38 x 17 x 31 cm
•
FortiLog-400: 54 x 33 x 44 cm
•
FortiLog-800: 78 x 65 x 25 cm
Weight
16
•
FortiLog-100: 2.5 kg
•
FortiLog-400: 11 kg
•
FortiLog-800:14 kg
05-16000-0082-20050115
Fortinet Inc.
Setting up the FortiLog unit
Planning the installation
Power requirements
•
FortiLog-100
•
•
•
•
AC input voltage: 100 to 240 VAC
AC input current: 1.0 A
Frequency: 47 to 63 Hz
FortiLog-400 and 800
•
•
•
AC input voltage: 115 to 230 VAC
AC input current: 4 to 2 A
Frequency: 47 to 63 Hz
Environmental specifications
•
Operating temperature: 41 to 95°F (5 to 35°C)
If you install the FortiLog unit in a closed or multi-unit rack assembly, the
operating ambient temperature of the rack environment may be greater than room
ambient temperature. Therefore, make sure to install the equipment in an
environment
compatible with the manufacturer's maximum rated ambient temperature.
•
Storage temperature: -4 to 176°F (-20 to 80°C)
•
Humidity: 10 to 90% non-condensing
Air flow
•
For rack installation, make sure that the amount of air flow required for safe
operation of the equipment is not compromised.
•
For free-standing installation, make sure that the appliance has at least 1.5 in.
(3.75 cm) of clearance on each side to allow for adequate air flow and cooling.
Mechanical loading
For rack installation, ensure an even mechanical loading of the FortiLog unit to avoid a
hazardous condition.
Planning the installation
You can add the FortiLog unit to your local network to receive log messages from your
local FortiGate and FortiMail devices or act as a NAS server.
You can also connect the FortiLog unit to devices remotely through the Internet.
To connect the FortiLog unit to devices remotely, you must configure the DNS server
and the default gateway.
To manage the FortiLog unit, you can use a computer within the local network or over
the Internet.
FortiLog Administration Guide
05-16000-0082-20050115
17
Connecting the FortiLog unit
Setting up the FortiLog unit
Figure 6: FortiLog connection option
FortiMail unit
FortiGate units
Esc
Enter
Esc
CONSOLE
1
Enter
2
PWE
Internal Network
FortiGate unit
FortiLog unit
Esc
Enter
Management PC
4
Internet
Management PC
Esc
Enter
FortiGate unit
Esc
Enter
FortiGate unit
Esc
Enter
FortiGate unit
Connecting the FortiLog unit
You can install the FortiLog unit as a free-standing appliance on any stable surface.
You can mount the FortiLog-800 unit in a standard 19-inch rack. It requires 1 U of
vertical space in the rack.
To connect the FortiLog unit to the network
18
1
Place the unit on a stable surface.
2
If you have a FortiLog-800 unit, you can also mount it in a 19-inch rack. The units
require 1.5 inches (3.75 cm) clearance on each side to allow for cooling.
3
Make sure the power of the unit is turned off.
4
Connect the network cable to the LAN interface.
5
Connect the power cable to a power outlet.
6
Turn on the power switch.
05-16000-0082-20050115
Fortinet Inc.
Setting up the FortiLog unit
Configuring the FortiLog unit
Configuring the FortiLog unit
Use the web-based manager or the Command Line Interface (CLI) to configure the FortiLog unit
IP address, netmask, DNS server IP address, and default gateway IP address.
Table 2: Factory defaults
Administrator
account
LAN
User name:
admin
Password:
(none)
IP:
192.168.1.99
Netmask:
255.255.255.0
Management Access:
HTTPS, Ping
Using the web-based manager
The web-based manager provides a GUI interface to configure and administer the
FortiLog unit. The web-based manager has a similar look and feel as the FortiGate 2.8
family.
You can use the web-based manager to configure most FortiLog settings. You can
also use the web-based manager to monitor the status of the FortiLog unit, administer
users, groups and set access rights.The web-based manager has a similar look and
feel as a FortiGate 2.8 web-based manager.
Using a secure HTTPS connection from any computer running Internet Explorer, you
can configure and manage the FortiLog unit.
Configuration changes made using the web-based manager are effective immediately
without resetting the firewall or interrupting service. Once you are satisfied with a
configuration, you can download and save it. You can restore the saved configuration
at any time.
For all the three FortiLog models, use the following procedure to connect to the
web-based manager for the first time.
To connect to the web-based manager, you need:
•
An Ethernet connection between the FortiLog unit and management computer.
•
Internet Explorer version 4.0 or higher on the management computer.
To connect to the web-based manager
1
Connect the LAN interface of the FortiLog unit to the Ethernet port of the management
computer.
2
Use a cross-over Ethernet cable to connect the devices directly. Use straight-through
Ethernet cables to connect the devices through a hub or switch.
3
Configure the management computer to be on the same subnet as the FortiLog LAN
interface.
4
To do this, change the IP address of the management computer to 192.168.1.2 and
the netmask to 255.255.255.0.
5
To access the FortiLog web-based manager, start Internet Explorer and browse to
https://192.168.1.99 (remember to include the “s” in https://).
FortiLog Administration Guide
05-16000-0082-20050115
19
Configuring the FortiLog unit
6
Setting up the FortiLog unit
Type admin in the Name field and select Login.
After connecting to the Web-based manager, you can configure the FortiLog unit IP
address, DNS server IP address, and default gateway to connect the FortiLog unit to
the network.
To configure the FortiLog unit using the web-based manager
1
In the web-based manager, go to System > Config > Network.
2
Enter the IP address, netmask, primary DNS server IP address, secondary DNS
server IP address (optional), and the default gateway IP address if the FortiLog unit
connects to the Internet.
Using the command line interface
You can use a terminal emulation software to connect to the command line interface
(CLI) from any network that is connected to the FortiLog unit, including the Internet.
This applies to all FortiLog models.
You can also access the FortiLog-800 CLI by using the null-modem cable provided to
connect to the unit’s console port.
The CLI supports the same configuration and monitoring functionality as the
web-based manager. In addition, you can use the CLI for advanced configuration
options that are not available from the web-based manager.
To connect to the FortiLog-800 unit
1
Use a null modem cable to connect the FortiLog-800 serial port to the management
computer serial port.
2
Start a terminal emulation program (such as HyperTerminal) on the management
computer. Use these settings:
•
Baud Rate (bps) 9600
•
Data bits 8,
•
Parity None
•
Stop bits 1
•
Flow Control None.
3
At the login: prompt, type admin and press Enter twice.
4
(The login prompt is preceded by the server IP address.)
After connecting to the CLI, you can configure the FortiLog-800 unit IP address, DNS
server IP address, and default gateway to connect the FortiLog-800 unit to the
network.
To configure the FortiLog unit using the CLI
20
1
Set the IP address and netmask of the LAN interface:
set system interface port1 mode static ip <IP_address>
<netmask>
2
Confirm that the address is correct:
get system interface
05-16000-0082-20050115
Fortinet Inc.
Setting up the FortiLog unit
Configuring the FortiLog unit
3
Set the primary DNS server IP address:
set system dns primary <IP_address>
4
Optionally set the secondary DNS server IP address:
set system dns secondary <IP_address>
5
Set the default gateway:
set system route number <route_no> dst 0.0.0.0 0.0.0.0 gw1
<gw_ip>
Using the front panel buttons and LCD
You can use the front panel buttons to set up the FortiLog unit’s IP address, netmask,
and default gateway.
FortiLog Administration Guide
05-16000-0082-20050115
21
Configuring the FortiLog unit
22
Setting up the FortiLog unit
05-16000-0082-20050115
Fortinet Inc.
FortiLog Administration Guide Version 1.6
Connecting to the FortiLog Unit
In order for FortiLog to receive log files, you need to configure the FortiGate, FortiMail
or syslog devices to send log files to the FortiLog unit. You also need to configure the
FortiLog unit to accept the log files from these devices.
This chapter explains how to set up your devices to send log files to the FortiLog unit
running in Active mode. If you are using the FortiLog device in Passive mode, you do
not have to read this chapter.
This chapter includes:
•
Sending device logs to the FortiLog unit
•
Configuring the FortiLog unit
Sending device logs to the FortiLog unit
When running in Active mode, the FortiLog unit collects log files from FortiGate,
FortiMail and syslog devices and uses those logs to generate detailed reports. Before
this can occur, you need to configure the devices to send the log files to the FortiLog
unit. You also need to configure the FortiLog unit to receive the log files.
Configuring FortiGate unit running FortiOS 2.8
To configure the FortiGate unit to send log files to the FortiLog unit
1
Log on to the FortiGate unit.
2
Go to Log&Report > Log Config.
3
Select FortiLog.
4
Select the blue arrow beside the FortiLog selection.
FortiLog Administration Guide
05-16000-0082-20050115
23
Sending device logs to the FortiLog unit
Connecting to the FortiLog Unit
Figure 7: FortiGate 2.8 log settings
5
Enter the IP address of the FortiLog unit.
6
Set the level that the FortiGate unit logs messages to the FortiLog unit.
The FortiGate unit logs all messages at and above the logging severity you select. For
example, if you select Error, the device logs Error, Critical, Alert and Emergency level
messages. For a list of severity levels, see “Log policy” on page 45.
7
Select Enable encryption to send the log files through an IPsec connection.
If you choose to send encrypted log files:
•
Enter a Local ID for the FortiGate unit. Use an ID that represents the FortiGate
unit. For example, FGT-500A. You will use this entry on the FortiLog unit as the
device name when registering the FortiGate unit.
•
Enter an encryption key. You must also specify the identical value on the FortiLog
unit. For security reasons, the encryption key should be more than six characters
in length and contain a mixture of alpha and numeric characters.
Configuring FortiGate devices running FortiOS 2.5
If your FortiGate unit is running with FortiOS version 2.5, use the following procedure
to configure the FortiGate unit to record log messages on a remote system.
To configure the FortiGate unit to send log files to the FortiLog unit
1
24
Go to Log&Report > Log Setting.
05-16000-0082-20050115
Fortinet Inc.
Connecting to the FortiLog Unit
Sending device logs to the FortiLog unit
Figure 8: FortiGate 2.5 Log settings
2
Select Log to Remote Host to send the logs to a syslog server.
3
Enter the IP address of the FortiLog unit.
4
Enter the port number of the FortiLog unit.
5
Select the severity level for which you want to record log messages.
The FortiGate device logs all messages at and above the logging severity you select.
For example, if you select Error, the device logs Error, Critical, Alert and Emergency
level messages. For a list of severity levels, see “Log policy” on page 45.
6
Select Config Policy to select log types and activities.
7
Select Apply.
Configuring FortiMail devices
To configure a FortiMail device to send log files to a FortiLog unit
1
On the FortiMail web-based manager, go to Log&Report > Log Setting.
2
Select the Log to Remote Host check box.
3
Enter the FortiLog IP address.
4
Select the severity level for which you want to record log messages.
The FortiMail device logs all messages at and above the logging severity you select.
For example, if you select Error, the device logs Error, Critical, Alert and Emergency
level messages. For a list of severity levels, see “Log policy” on page 45.
5
Select Config Policy.
•
Select the Log type for which you want the FortiMail Server to record logs.
•
For each Log type, select the activities for which you want the FortiMail Server to
record log messages.
6
Select OK.
7
Select Apply.
FortiLog Administration Guide
05-16000-0082-20050115
25
Configuring the FortiLog unit
Connecting to the FortiLog Unit
Configuring the FortiLog unit
When you configure a device to send logs to the FortiLog unit, an entry for the device
appears automatically in the Unregistered Devices tab.
Adding a device
The Devices screen provides a easy access to all devices currently sending log files
to the FortiLog unit. It also provides a way to add unregistered or other new devices to
the FortiLog unit so it can receive log files.
Figure 9: FortiLog device tabs
All
Displays all registered devices available to the FortiLog unit.
Groups
Displays the groups available. You can also edit, delete and create new
groups from this tab.
Unregistered
Displays a list of unregistered devices available to the FortiLog unit. This
does not indicate that a FortiGate device is not registered with Fortinet.
Device tabs
A tab is available for each device supported by the FortiLog unit.
To add a device
1
For a FortiGate device, go to System > Devices > Unregistered.
For devices that are not automatically registered, such as a syslog server, select the
device tab and select Create New.
2
In the Register column, select Add for the device you wish to add.
Figure 10: Adding/registering a new device to the FortiLog unit
26
05-16000-0082-20050115
Fortinet Inc.
Connecting to the FortiLog Unit
3
Configuring the FortiLog unit
Enter a device name.
For a FortiGate device, this is the same entry as entered as the Local ID set in the
Log&Config settings for FortiLog. For example, FGT-500A.
4
Select a group to add the device to if desired. For details on creating a group see
“Creating Device Groups” on page 28.
5
For Secure Connection, select Yes.
If you select secure connection between the FortiLog unit and the FortiGate unit, the
device name must match the local ID you entered on the FortiGate unit. For
information about how to configure the FortiGate unit, see “Configuring FortiGate unit
running FortiOS 2.8” and “Configuring FortiGate devices running FortiOS 2.5” on
page 24.
6
If you select Secure connection, enter the Pre-shared Key. The preshared key must
be the same as what you entered on the device. You must enter the key in the exact
same way including upper and lower case.
7
Enter the Allocated Disk Space. Set disk quota from 0 to 4000 MB. A disk quota of 0 is
unlimited.
8
Enter the size limit for the log files.
9
For Max Logfile Age, enter the time limit for the FortiLog unit to keep the log files.
10
Select what the FortiLog unit should do when the allocated disk space for the
FortiGate device is used up.
11
When adding a FortiGate unit, expand the device Interface Specification to set the
default port settings for the device.
Define the port interface options using the arrow buttons. For details on port interface
settings see “Defining device port interfaces” on page 27.
If you want to add a VLAN or other interface, type the name of the interface and select
Add.
12
Select Apply.
Defining device port interfaces
FortiLog Network activity log reports include information on inbound and outbound
traffic flow. Traffic flow information is based on the source and destination interfaces
of the device and how they are configured to send and receive information.
To ensure that the traffic information is represented correctly in these reports, you
need to assign the FortiGate interfaces to an interface type. The device interface can
include an interface name or a defined VLAN on the device.
FortiLog Administration Guide
05-16000-0082-20050115
27
Configuring the FortiLog unit
Connecting to the FortiLog Unit
You can classify the device interfaces as one of None, LAN, WAN or DMZ to match
the type of traffic the interface will process. When the FortiLog unit generates the
traffic log report, the FortiLog unit compares the source and destination interface
classifications and determines the traffic direction. The traffic direction is one of:
•
Incoming
•
Outgoing
•
Internal
•
External
•
Unclassified.
The table below illustrates how the source and destination interface types are
represented in the log report as traffic direction.
Table 3: Log report traffic direction identification
Source
Destination
Traffic Direction
None
All types
Unclassified
All types
None
Unclassified
WAN
LAN, DMZ
Incoming
WAN
WAN
External
LAN, DMZ
LAN, DMZ
Internal
LAN, DMZ
WAN
Outgoing
Creating Device Groups
if you have a number of devices belonging to a department or section of the company,
you can create groups to keep these devices together for easier access. Once you
create a group you can add or remove devices from the groups as required.
To create a device group
1
Go to System > Devices > Groups.
2
Select Create New.
3
Enter a group name.
4
Select the devices you wish to add to the group.
5
Select OK.
You do not have to add device to the group when you first create the group. There are
a number of alternate ways of adding a device to a group:
28
•
add devices when registering them
•
select Edit to add or remove devices when required.
•
In the selected devices tab, select the device and select Assign Selected.
05-16000-0082-20050115
Fortinet Inc.
FortiLog Administration Guide Version 1.6
Managing the FortiLog unit
Using the FortiLog system settings, you can view the operating status of the FortiLog
unit and configure the FortiLog unit for your network. You can also use system
settings to configure RAID (Redundant Arrays of Inexpensive Disks) settings for the
FortiLog unit (for the FortiLog-400 and FortiLog-800), set email alerts and set system
time. This chapter includes topics on:
•
Status
•
Config
•
Devices (Active mode)
•
Alert Email
•
Network Sharing
Status
Use system status pages to view and monitor the status of the FortiLog unit. The
status information includes basic system information, alerts information, CPU usage,
memory usage, hard disk usage and network utilization, RAID information (for the
FortiLog-400 and FortiLog-800), and a list of all of the communication sessions with
the FortiLog unit.
•
Status
•
RAID
•
Config
Status
You can connect to the web-based manager and view the current system status of the
FortiLog unit. The status information displays basic system information such as the
host name, firmware version, and serial number of the FortiLog unit.
FortiLog Administration Guide
05-16000-0082-20050115
29
Status
Managing the FortiLog unit
Figure 11: System status (Active mode)
Automatic Refresh Select to control how often the web-based manager updates the system
status display.
Interval
Go
Select to set the selected automatic refresh interval.
Refresh
Select to manually update the system status display.
Alerts
Provides immediate information on any system alerts from connected
devices. Select More when available to view the details of the alerts for the
FortiLog unit and connected devices. For details on the alert messages
see “Alerts” on page 54.
Notifications
Select Password to change the password for administrative access. See
“To change the admin account password” on page 49.
Up time
The time in days, hours, and minutes since the FortiLog unit was last
started.
System Time
The current time according to the FortiLog unit internal clock.
Log Hard Disk
The current RAID status. Select Intact to set automatic refresh interval and
view the detailed log device configuration and status information. See
“RAID” on page 41.
Host Name
The current host name of the FortiLog unit. See “Changing the FortiLog
host name” on page 31.
Operating Mode
The current mode for the FortiLog unit. The mode is either Active or
Passive. For details on the different modes see “Operational Modes” on
page 8. To change the operating mode for the FortiLog unit, see “To
change the operating mode in the CLI” on page 31.
Firmware version The current FortiLog firmware version. To upgrade the firmware, see
“Changing the firmware” on page 32.
30
Serial number
The serial number of the FortiLog unit. The serial number is a unique
identifier for the FortiLog unit and is required when you register the
FortiLog unit.
System Settings
Backup and restore system settings. See “Backing up system settings” on
page 39 and “Restoring system settings” on page 40. Restore system
settings to factory defaults, “Restore factory default system settings” on
page 40. You can also download a debug log, see “Downlading the
FortiLog debug log” on page 39.
Reports Status
List the generated log reports, log reports being generated, and the
scheduled time to generate next log report.
05-16000-0082-20050115
Fortinet Inc.
Managing the FortiLog unit
Status
CPU Usage
The current CPU status. The web-based manager displays CPU usage for
core processes only. CPU usage for management processes (for
example, for HTTPS connections to the web-based manager) is excluded.
Memory Usage
The current memory status. The web-based manager displays memory
usage for core processes only. Memory usage for management processes
(for example, for HTTPS connections to the web-based manager) is
excluded.
Hard Disk Usage
The current status on the hard disk. The web-based manager displays
how much hard disk space is free and how much is used.
Active Sessions
The number of communications sessions being processed by the FortiLog
unit.
History
Select History to view a graphical representation of the last minute of CPU,
memory, sessions, and network usage.
System Command Restart or shutdown the FortiLog unit.
Changing the FortiLog host name
The FortiLog host name appears on the Status page and in the FortiLog CLI prompt.
To change the FortiLog unit host name
1
Go to System > Status > Status.
2
Select Change.
3
Enter a new host name.
4
Select OK.
Changing operating modes
The FortiLog unit can operate in two modes; Active mode and Passive mode. The
default is Active mode. For details see “Operational Modes” on page 8.
To change the operating mode in the web-based manager
1
Go to System > Status > Status.
2
Select Change.
3
Select the desired mode.
4
Select OK.
To change the operating mode in the CLI
1
For all three FortiLog models, use a terminal emulation software to access the
unit’s CLI.
For the FortiLog-800 unit, you can also access the unit’s CLI by connecting the
null-modem cable provided to the unit’s console port.
2
Enter the following command:
set system opmode {active|passive}
where {active|passive} is the mode you want to use. The FortiLog unit informs
you that log collection and reporting will not be available in Passive mode.
3
FortiLog Administration Guide
Enter y to change the mode or n to leave the FortiLog unit in its current mode.
05-16000-0082-20050115
31
Status
Managing the FortiLog unit
Viewing system resources information
On the Status page, you can view the CPU, memory and hard disk usage information
and the session information.
By selecting the History link under System Resources, you can also view the statistics
for the previous minute.
If CPU and memory use is low, the FortiLog unit is able to process much more traffic
than is currently running. If CPU and memory use is high, the FortiLog unit is
performing near its full capacity. Putting additional demands on the system might
cause log message processing delays.
Changing the firmware
Use the following procedure to upgrade the FortiLog unit to a newer firmware version
or revert to a previous firmware version.
If you are reverting to a previous firmware version, the procedure reverts the FortiLog
unit to its factory default configuration and deletes all configuration on the unit. When
you upgrade the firmware, the FortiLog unit maintains the configurations you define.
Back up the FortiLog unit configuration before beginning this procedure. For
information, see “Backing up system settings” on page 39.
Note: If you revert to a previous firmware version, because the configuration is reset, you will
need to reconfigure the IP address from the front panel of the FortiLog-100 and FortiLog-400,
and the console for the FortiLog-800.
To change the firmware using the web-based manager
1
Copy the firmware image file to your management computer.
2
Log on to the web-based manager as the administrative user.
3
Go to System > Status > Status.
4
Select Update.
5
Type the path and filename of the firmware image file, or select Browse and locate the
firmware image file.
6
Select OK.
If you are reverting to a previous version of the firmware, a message appears
informing you that the system configuration will be set to default and all the original
configuration will be lost.
7
Select OK.
8
32
•
If you upgrade the firmware, the FortiLog unit uploads the firmware image file,
upgrades to the new firmware version, resets the configuration, restarts, and
displays the FortiLog login. This process takes a few minutes.
•
If you revert to a previous firmware version, the FortiLog unit uploads the firmware
image file, reverts to the old firmware version, resets the configuration, restarts,
and displays the FortiLog unit login. This process takes a few minutes.
Restore your configuration. See “Restoring system settings” on page 40.
05-16000-0082-20050115
Fortinet Inc.
Managing the FortiLog unit
Status
To change the firmware using the CLI
Use the following procedure to upgrade the FortiLog unit to a newer firmware version
or revert to a previous firmware version.
To use the following procedure you must have a TFTP server that the FortiLog unit
can connect to.
This procedure reverts your FortiLog unit to its factory default configuration and
deletes all configuration on the unit.
Back up the FortiLog unit configuration before beginning this procedure using the
command execute backup config.
1
Make sure that the TFTP server is running.
2
Copy the new firmware image file to the root directory of the TFTP server.
3
Log into the CLI as the admin administrative user.
4
Make sure the FortiLog unit can connect to the TFTP server.
Use the following command to ping the computer running the TFTP server. For
example, if the IP address of the TFTP server is 192.168.1.168:
execute ping 192.168.1.168
5
Enter the following command to copy the firmware image from the TFTP server to the
FortiLog unit:
execute restore image <name_str> <tftp_ip>
Where <name_str> is the name of the firmware image file on the TFTP server and
<tftp_ip> is the IP address of the TFTP server. For example, if the firmware image
file name is FortiLog_400-v120.out and the IP address of the TFTP server is
192.168.1.168, enter:
execute restore image FortiLog_400-v120.out 192.168.1.168
•
If you upgrade the firmware, the FortiLog unit uploads the firmware image file,
upgrades to the new firmware version, resets the configuration, restarts, and
displays the FortiLog login. This process takes a few minutes.
•
If you revert to a previous firmware version, the FortiLog unit uploads the firmware
image file, reverts to the old firmware version, resets the configuration, restarts,
and displays the FortiLog unit login. This process takes a few minutes.
6
Reconnect to the CLI.
7
To confirm that the new firmware image is successfully installed, enter:
get system status
8
Restore your previous configuration. Use the following command:
execute restore config
Installing firmware from a system reboot
This procedure installs a specified firmware image and resets the FortiLog unit to
default settings. You can use this procedure to upgrade to a new firmware version,
revert to an older firmware version, or re-install the current firmware version.
FortiLog Administration Guide
05-16000-0082-20050115
33
Status
Managing the FortiLog unit
To perform this procedure you need to install a TFTP server that you can connect to
from the FortiLog unit LAN port. The TFTP server should be on the same subnet as
the LAN port.
Before beginning this procedure you can back up the FortiLog unit configuration. For
information, see “Backing up system settings” on page 39.
To install firmware from a system reboot
1
For all three FortiLog models, use a terminal emulation software to access the
unit’s CLI.
For the FortiLog-800 unit, you can also access the unit’s CLI by connecting the
null-modem cable provided to the unit’s console port.
2
Make sure that the TFTP server is running.
3
Copy the new firmware image file to the root directory of the TFTP server.
4
Make sure that the LAN port is connected to the same network as the TFTP server.
5
To confirm that the FortiLog unit can connect to the TFTP server, use the following
command to ping the computer running the TFTP server. For example, if the IP
address of the TFTP server is 192.168.1.168, enter:
execute ping 192.168.1.168
6
Enter the following command to restart the FortiLog unit:
execute reboot
As the FortiLog unit starts, a series of system startup messages is displayed.
When the following message appears:
Press any key to enter configuration menu.....
7
Immediately press any key to interrupt the system startup.
Note: You have only 3 seconds to press any key. If you do not press a key soon enough, the
FortiLog unit reboots and you must log in and repeat the execute reboot command.
If you successfully interrupt the startup process, the following message appears:
[G]:
[F]:
[B]:
[Q]:
[H]:
Get firmware image from TFTP server.
Format boot device.
Boot with backup firmware and set as default.
Quit menu and continue to boot with default firmware.
Display this list of options.
Enter G,F,B,Q,or H:
8
Type G to get the new firmware image from the TFTP server.
9
Type the address of the TFTP server and press Enter.
The following message appears:
Enter Local Address [192.168.1.188]:
10
34
Type the address of the LAN port and press Enter.
05-16000-0082-20050115
Fortinet Inc.
Managing the FortiLog unit
Status
Note: The local IP address is used only to download the firmware image. After the firmware is
installed, the address of this interface is changed back to the default IP address for this
interface.
The following message appears:
Enter File Name [image.out]:
11
Enter the firmware image filename and press Enter.
The TFTP server uploads the firmware image file to the FortiLog unit and a message
similar to the following is displayed:
Save as Default firmware/Run image without saving:[D/R]
Save as Default firmware/Backup firmware/Run image without
saving:[D/B/R]
12
Type D.
The FortiLog unit installs the new firmware image and restarts. The installation might
take a few minutes to complete.
Testing a new firmware image
You can test a new firmware image by installing the firmware image from a system
reboot and saving it to system memory. After completing this procedure, the FortiLog
unit operates using the new firmware image with the current configuration. This new
firmware image is not permanently installed. The next time the FortiLog unit restarts, it
operates with the originally installed firmware image using the current configuration. If
the new firmware image operates successfully, you can install it permanently.
To run this procedure you need to install a TFTP server that you can connect to from
the FortiLog unit LAN port. The TFTP server should be on the same subnet as the
LAN port.
To test a new firmware image before installing it
1
For all three FortiLog models, use a terminal emulation software to access the unit’s
CLI.
For the FortiLog-800 unit, you can also access the unit’s CLI by connecting the
null-modem cable provided to the unit’s console port.
2
Make sure the TFTP server is running.
3
Copy the new firmware image file to the root directory of the TFTP server.
4
Make sure that the LAN port is connected to the same network as the TFTP server.
You can use the following command to ping the computer running the TFTP server.
For example, if the TFTP server's IP address is 192.168.1.168:
execute ping 192.168.1.168
5
Enter the following command to restart the FortiLog unit:
execute reboot
6
As the FortiLog unit reboots, press any key to interrupt the system startup.
As the FortiLog unit starts, a series of system startup messages are displayed.
When the following message appears:
Press any key to enter configuration menu.....
FortiLog Administration Guide
05-16000-0082-20050115
35
Status
Managing the FortiLog unit
7
Immediately press any key to interrupt the system startup.
Note: You have only 3 seconds to press any key. If you do not press a key soon enough, the
FortiLog unit reboots and you must log in and repeat the execute reboot command.
If you successfully interrupt the startup process, the following message appears:
[G]:
[F]:
[Q]:
[H]:
Get firmware image from TFTP server.
Format boot device.
Quit menu and continue to boot with default firmware.
Display this list of options.
Enter G,F,Q,or H:
8
Type G to get the new firmware image from the TFTP server.
9
Type the address of the TFTP server and press Enter.
The following message appears:
Enter Local Address [192.168.1.188]:
10
Type the address of the LAN port and press Enter.
Note: The local IP address is used only to download the firmware image. After the firmware is
installed, the address of this interface is changed back to the default IP address for this
interface.
The following message appears:
Enter File Name [image.out]:
11
Enter the firmware image file name and press Enter.
The TFTP server uploads the firmware image file to the FortiLog unit and a message
similar to the following appears.
Save as Default firmware/Run image without saving:[D/R]
12
Type R.
The FortiLog unit image is installed to system memory and the FortiLog unit starts
running the new firmware image but with its current configuration.
13
You can log into the CLI or the web-based manager using any administrative account.
14
To confirm that the new firmware image has been loaded, from the CLI enter:
get system status
You can test the new firmware image as required.
Installing a backup firmware image
If the FortiLog unit is running BIOS version v3.x, you can install a backup firmware
image. Once the backup firmware image is installed you can switch to this backup
image when required.
To run this procedure you need to install a TFTP server that you can connect to from
the FortiLog unit LAN port. The TFTP server should be on the same subnet as the
LAN port.
36
05-16000-0082-20050115
Fortinet Inc.
Managing the FortiLog unit
Status
To install a backup firmware image
1
For all three FortiLog models, use a terminal emulation software to access the
unit’s CLI.
For the FortiLog-800 unit, you can also access the unit’s CLI by connecting the
null-modem cable provided to the unit’s console port.
2
Make sure that the TFTP server is running.
3
Copy the new firmware image file to the root directory of your TFTP server.
4
To confirm that the FortiLog unit can connect to the TFTP server, use the following
command to ping the computer running the TFTP server. For example, if the IP
address of the TFTP server is 192.168.1.168:
execute ping 192.168.1.168
5
Enter the following command to restart the FortiLog unit:
execute reboot
As the FortiLog unit starts, a series of system startup messages are displayed.
When the following message appears:
Press any key to enter configuration menu.....
6
Immediately press any key to interrupt the system startup.
Note: You have only 3 seconds to press any key. If you do not press a key soon enough, the
FortiLog unit reboots and you must log in and repeat the execute reboot command.
If you successfully interrupt the startup process, the following message appears:
[G]: Get firmware image from TFTP server.
[F]: Format boot device.
[B]: Boot with backup firmware and set as default.
[Q]: Quit menu and continue to boot with default firmware.
[H]: Display this list of options.
Enter G,F,B,Q,or H:
7
Type G to get the new firmware image from the TFTP server.
8
Type the address of the TFTP server and press Enter.
The following message appears:
Enter Local Address [192.168.1.188]:
9
Type the address of the interface of the FortiLog unit that can connect to the TFTP
server and press Enter.
The following message appears:
Enter File Name [image.out]:
10
Enter the firmware image file name and press Enter.
The TFTP server uploads the firmware image file to the FortiLog unit and a message
similar to the following appears.
Save as Default firmware/Backup firmware/Run image without
saving:[D/B/R]
11
Type B.
FortiLog Administration Guide
05-16000-0082-20050115
37
Status
Managing the FortiLog unit
The FortiLog unit saves the backup firmware image and restarts. When the FortiLog
unit restarts it is running the previously installed firmware version.
Switching to a backup firmware image
Use this procedure to switch the FortiLog unit to operating with a backup firmware
image that you previously installed. When you switch the FortiLog unit to the backup
firmware image, the FortiLog unit operates using the configuration that was saved with
that firmware image.
If you install a new backup image from a reboot, the configuration saved with this
firmware image is the factory default configuration. If you use the procedure
“Switching to the default firmware image” on page 38 to switch to a backup firmware
image that was previously running as the default firmware image, the configuration
saved with this firmware image is restored.
To switch to the backup firmware image
1
For all three FortiLog models, use a terminal emulation software to access the unit’s
CLI.
For the FortiLog-800 unit, you can also access the unit’s CLI by connecting the
null-modem cable provided to the unit’s console port.
2
Enter the following command to restart the FortiLog unit:
execute reboot
As the FortiLog unit starts, a series of system startup messages are displayed.
When the following message appears:
Press any key to enter configuration menu.....
3
Immediately press any key to interrupt the system startup.
Note: You have only 3 seconds to press any key. If you do not press a key soon enough, the
FortiLog unit reboots and you must log in and repeat the execute reboot command.
If you successfully interrupt the startup process, the following message appears:
[G]: Get firmware image from TFTP server.
[F]: Format boot device.
[B]: Boot with backup firmware and set as default.
[Q]: Quit menu and continue to boot with default firmware.
[H]: Display this list of options.
Enter G,F,B,Q,or H:
4
Type B to load the backup firmware image.
The FortiLog unit loads the backup firmware image and restarts. When the FortiLog
unit restarts, it is running the backup firmware version and the configuration is set to
factory default.
Switching to the default firmware image
Use this procedure to switch the FortiLog unit to operating with the backup firmware
image that had been running as the default firmware image. When you switch to this
backup firmware image, the configuration saved with this firmware image is restored.
38
05-16000-0082-20050115
Fortinet Inc.
Managing the FortiLog unit
Status
To switch back to the default firmware image
1
For all three FortiLog models, use a terminal emulation software to access the
unit’s CLI.
For the FortiLog-800 unit, you can also access the unit’s CLI by connecting the
null-modem cable provided to the unit’s console port.
2
Enter the following command to restart the FortiLog unit:
execute reboot
As the FortiLog unit starts, a series of system startup messages are displayed.
When the following message appears:
Press any key to enter configuration menu.....
3
Immediately press any key to interrupt the system startup.
Note: You have only 3 seconds to press any key. If you do not press a key soon enough, the
FortiLog unit reboots and you must log in and repeat the execute reboot command.
If you successfully interrupt the startup process, the following message appears:
[G]: Get firmware image from TFTP server.
[F]: Format boot device.
[B]: Boot with backup firmware and set as default.
[Q]: Quit menu and continue to boot with default firmware.
[H]: Display this list of options.
Enter G,F,B,Q,or H:
4
Type B to load the backup firmware image.
5
The FortiLog unit loads the backup firmware image and restarts. When the FortiLog
unit restarts it is running the backup firmware version with a restored configuration.
Backing up system settings
You can back up system settings by downloading them to a text file on the
management computer.
To backup up system settings
1
Go to System > Status > Status.
2
For System Settings, select Backup.
3
Select Backup system settings.
4
Type a name and location for the file.
The system settings file is backed up to the management computer.
5
Select Return to go back to the Status page.
Downlading the FortiLog debug log
Download a debug log to send debug information to Fortinet Tech Support to help
diagnose a problem with the FortiLog unit.
FortiLog Administration Guide
05-16000-0082-20050115
39
Status
Managing the FortiLog unit
To download a FortiLog debug log
1
Go to System > Status > Status.
2
For System Settings, select Backup.
3
Select download debug log.
4
Type a name and location for the file.
The debug log file is backed up to the management computer.
5
Select Return to go back to the Status page.
Restoring system settings
Restore system settings by uploading a previously downloaded system settings text
file.
To restore system settings
1
Go to System > Status > Status.
2
For System Settings, select Restore.
3
Enter the path and filename of the system settings file, or select Browse and locate
the file.
4
Select OK to restore the system settings file to the FortiLog unit.
The FortiLog restarts, loading the new system settings.
5
Reconnect to the web-based manager and review your configuration to confirm that
the uploaded system settings have taken effect.
Restore factory default system settings
Use the following procedure to restore system settings to the values set at the factory.
This procedure does not change the firmware version.
!
Caution: This procedure deletes all changes that you have made to the FortiLog configuration
and reverts the system to its original configuration, including resetting interface addresses.
To restore system settings to factory defaults
1
Go to System > Status > Status.
2
For System Settings, select Restore Factory Defaults.
3
Select OK to confirm.
The FortiLog unit restarts with the configuration that it had when it was first
powered on.
Restoring a FortiLog unit
Use the following procedure if the FortiLog unit cannot complete the startup
procedure. When this event occurs, you cannot connect to the FortiLog unit through
the web-based manager or the CLI. The cause may be a corrupted firmware image.
To use the following procedure you must have a TFTP server that the FortiLog unit
can connect to. The TFTP server IP address must be set to 192.168.1.168
40
05-16000-0082-20050115
Fortinet Inc.
Managing the FortiLog unit
Status
To upload the firmware image to the FortiLog unit
1
Make sure the TFTP server is running.
2
Copy the firmware image file to the root directory of the TFTP server. Ensure the file
name is image.out.
3
Start the FortiLog unit.
As the FortiLog unit starts, the following message appears:
Press any key to begin download.....
4
Immediately press any key to begin the automatic download.
The FortiLog unit connects to the TFTP server and begin downloading the firmware
image. Once downloaded, the FortiLog will load the firmware and proceed with the
system startup.
RAID
Use the RAID (Redundant Arrays of Inexpensive Disks) tab to set automatic refresh
interval and view detailed log device information.
Note: RAID functionality is only available on the FortiLog-400 and 800. These units have four
hard disks and support RAID level 0, 1, and 5.
Figure 12: RAID
Automatic Refresh Select to control how often the web-based manager updates the RAID
information.
Interval
FortiLog Administration Guide
Go
Select to set the selected automatic refresh interval.
Refresh
Select to manually update the RAID information.
Create Date
Date and time when the RAID was created. This information may be
incorrect if the FortiLog clock is changed after creating the RAID.
05-16000-0082-20050115
41
Config
Managing the FortiLog unit
Level
The RAID level. See “RAID” on page 43.
Array Size
The total disk space available.
Device Size
The disk space used on each drive of the array.
RAID Disks
The number of disks used by the array for data storage.
Total Disks
Total Disks include spare and failed disks.
Update Time
The time of the last status change.
State
State of the log device includes dirty, clean, no-errors, and errors. Dirty
means that parts of a redundant array (RAID1 and RAID5) need to be
synchronized (which is automated). No-errors indicates that the log device
is usable.
Working Drives
Active and spare drives. Display color is black.
Active Drives
Drives used for data storage and are trusted. Display color is green.
Failed Drives
Drives used for data storage and are not trusted. Display color is red.
Spare Drives
Drives never used for data storage. Display color is yellow.
Config
Use system config to configure the FortiLog network settings, RAID settings, log
message settings, time settings, and other options. You can also add and remove
FortiLog administrator accounts and change administrator passwords.
•
Network
•
RAID
•
Log settings
•
Time
•
Options
•
Admin
Network
To configure the FortiLog network settings, go to System > Config > Network. You
can configure the FortiLog unit IP address, netmask, DNS server, and default
gateway.
Figure 13: Network settings
42
05-16000-0082-20050115
Fortinet Inc.
Managing the FortiLog unit
Config
IP Address
Enter the static IP address required by the FortiLog unit to be able to
connect to your network.
Netmask
Enter the netmask required by the FortiLog unit to connect to your
network.
Primary DNS Server Enter the primary DNS server IP address. Several FortiLog functions
use DNS. Add the IP address of the DNS servers that your FortiLog unit
can connect to.
Second DNS Server Enter the secondary DNS server IP address.
Default Gateway
Enter the IP address of the default gateway for the network that your
FortiLog is connected to.
RAID
To configure the FortiLog RAID level and check the RAID disk space, go to System >
Config > RAID.
Figure 14: RAID settings
Note: RAID functionality is only available on the FortiLog-400 and 800. These units have four
hard disks and support RAID level 0, 1, and 5.
FortiLog Administration Guide
RAID Level
Select the RAID level. The FortiLog unit supports the linear, 0, 1, and 5
RAID levels. The default RAID level is linear. Changing the RAID level
deletes all log messages from the FortiLog hard disk.
Linear
Linear disk volume. Combines two or more disks into one larger disk.
During file saving, the files are saved on physical disks sequentially but
do not have a disk failure file protection function. The overall capacity of
linear disks is the sum of all disks. Linear disks are generally used for
storing large amounts of data and not for protection of important data.
Level 0
Striping disk volume. Combines two or more disks into one larger disk.
Stripping disk RAID offers the fastest disk access but does not provide
data protection of the data when the striped array fails. The disk capacity
equals the number of disks in the array times the size of the smallest disk.
Select striping disk to maximize disk capacity or for fast disk access but
not for protection of important data.
05-16000-0082-20050115
43
Config
Managing the FortiLog unit
Level 1
Mirroring disk volume. Protects data by automatically backing up the
contents of one disk onto the second disk of a mirrored pair. Mirroring
protects data if one disks fails. Disk capacity is equal to a single hard disk
because the second hard disk is used to automatically back up the first.
Use Level 1 to protect important personal or corporate data.
Level 5
RAID 5 disk group. Three or more hard disks can be teamed up to form a
large-capacity RAID 5 disk group. RAID 5 distributes and stores data
among member disks as it is received. At the same time RAID uses an
amount of space roughly equivalent to a whole disk to store reference
numbers with the same elements. If one of the disks in the group is
damaged, you can shut down the computer and install a new disk, and
the FortiLog unit can restore the data on the new disk using the reference
information.
If you have a system with four disks but use only three in your RAID 5
group, the fourth serves as a backup disk. If one of the three disks is
damaged the FortiLog unit automatically reverts to the fourth disk without
powering down.
The approximate capacity of a RAID 5 disk group is one hard disk worth
of space less than the total rated capacity of the group.
Log settings
To configure the FortiLog unit to log locally or to send FortiLog log messages to a
remote syslog server, go to System > Config > Log Settings. You can configure the
log level and you can use config policy to record event log messages. See “Log
policy” on page 45 for information about the types of logs and how to configure them.
Figure 15: Log settings
44
Log Locally
Select this option to save the log messages on its own hard disks.
Level
Select the severity for which you want to record log messages locally. The
FortiLog unit logs all levels of severity down to, but not lower than, the
level you select. For example, if you want to record emergency, critical,
and error messages, select Error. “Log policy” on page 45 lists the log
message levels.
Config Policy
Select Config policy for which activities you want the FortiLog unit to
record log messages.
Log to Host
Select Log to Host to configure the FortiLog unit to send log messages to
a remote syslog server.
IP
The IP address of the remote syslog server.
Port
The port that the remote syslog server uses to receive log messages. The
default port is 514.
05-16000-0082-20050115
Fortinet Inc.
Managing the FortiLog unit
Config
Level
Select the severity level for which you want to record log messages to a
remote syslog server. The FortiLog unit logs all levels of severity down to,
but not lower than, the level you select. For example, if you want to record
emergency, alert, critical, and error messages, select Error. “Log policy”
on page 45 lists the log message levels.
Config Policy
Select Config policy for which activities you want the FortiLog unit to
record log messages.
CSV format
Enable CSV format to record log messages in comma-separated value
(CSV) formatted files. Log message fields are separated by commas.
Log policy
Levels
Description
Generated by
0 - Emergency
The system has become unstable.
Emergency messages not
available.
1 - Alert
Immediate action is required.
NIDS attack log messages.
2 - Critical
Functionality is affected.
DHCP
3 - Error
An error condition exists and functionality Error messages not available.
could be affected.
4 - Warning
Functionality could be affected.
Antivirus, Web filter, email filter,
and system event log messages.
5 - Notice
Information about normal events.
Antivirus, Web filter, and email
filter log messages.
6 - Information
General information about system
operations.
Antivirus, Web filter, email filter log
messages, and other event log
messages.
Select Config Policy to configure the FortiLog unit to send event log messages to a
local or remote syslog server.
Enable Event Log to record management and activity events. Management events
include changes to the FortiLog unit configuration as well as administrator and user
logins and logouts. Activity events include system activities such as IPSec negotiation
events
Figure 16: Config log policy
FortiLog Administration Guide
05-16000-0082-20050115
45
Config
Managing the FortiLog unit
Time
To change the FortiLog unit time, go to System > Config > Time. For effective
scheduling and logging, the FortiLog system time must be accurate. You can either
manually set the FortiLog system time or you can configure the FortiLog unit to
automatically keep its system time correct by synchronizing with a Network Time
Protocol (NTP) server.
Figure 17: Time settings
Options
To change the FortiLog administration options, go to System > Config > Options. On
the System Config Options page, you can set:
•
the system idle timeout.
•
the language for the web-based manager.
Figure 18: Options
Idle Timeout
Enter an idle timeout number in minutes. Idle Timeout controls the
amount of inactive time that the web-based manager waits before
requiring the administrator to log in again.
The recommend idle time out is 5 minutes. The maximum idle time out is
480 minutes (8 hours).
Language
Select a language for the web-based manager to use. You can choose
English, Simplified Chinese, Japanese, Korean, or Traditional Chinese.
Admin
To change the FortiLog administrator settings, go to System > Config > Admin. Use
admin options to add and configure FortiLog administrators. For information on
FortiLog administrators, see “Devices (Active mode)” on page 49.
46
05-16000-0082-20050115
Fortinet Inc.
Managing the FortiLog unit
Config
Figure 19: Admin
Create New
Select Create New to add an administrator account.
Name
The login name for the administrator account.
Trusted host
The trusted host IP address for the location from which the administrator can
log into the web-based manager. If Trusted Host is 0.0.0.0 the administrator
can log in from any IP address.
Netmask
The trusted host netmask for the location from which the administrator can log
into the web-based manager. If Netmask is 0.0.0.0 there is no restriction on the
netmask.
Permission
The permission level for the administrator. Permission can be all, read & write,
or read only.
Modify
Select Edit to change an administrator account. Select Change Password to
change an administrator account password.
Administrative Configure administrative access to control how administrators access the
FortiLog unit.
Access
HTTPS
To allow secure HTTPS connections to the FortiLog web-based manager.
PING
If you want the FortiLog unit to respond to pings. Use this setting to verify your
installation and for testing.
HTTP
To allow HTTP connections to the FortiLog web-based manager. HTTP
connections are not secure and can be intercepted by a third party.
SSH
To allow secure SSH connections to the FortiLog CLI.
SNMP
To allow a remote SNMP manager to request SNMP information by connecting
to this interface.
TELNET
To allow Telnet connections to the FortiLog CLI. Telnet connections are not
secure and can be intercepted by a third party.
Configure Administrator access
Configure administrative access to allow remote administration of the FortiLog unit.
However, allowing remote administration could compromise the security of your
FortiLog unit. To improve the security of a FortiLog unit use the following principles
when configuring administrative access:
FortiLog Administration Guide
•
Use secure administrator passwords,
•
Change these passwords regularly,
•
Enable secure administrative access to this interface using only HTTPS or SSH,
•
Do not change the system idle timeout from the default value of 5 minutes.
05-16000-0082-20050115
47
Config
Managing the FortiLog unit
To configure administrative access to the FortiLog unit
1
Go to System > Config > Admin.
2
Select the Administrative Access methods for the FortiLog unit.
3
Select Apply.
Administrator account levels
When the FortiLog unit is initially installed, it is configured with a single administrator
account with the user name of “admin”. From this administrator account, you can add
and edit administrator accounts. You can also control the access level of each of
these administrator accounts and control the IP address from which the administrator
can connect to the FortiLog unit.
There are three administration account access levels:
admin
Has all permissions. Can view, add, edit, and delete administrator accounts.
Can view and change the FortiLog configuration. The admin user is the only
user who can go to the System Status page and manually update firmware,
restore the FortiLog unit to factory defaults, restart the FortiLog unit, and shut
down the FortiLog unit. There is only one admin user.
Read & Write Can view and change the FortiLog configuration. Can view but cannot add,
edit, or delete administrator accounts. Can change own administrator account
password. Cannot make changes to system settings from the System Status
page.
Read Only
Can view the FortiLog configuration.
Administrator options
When you add an administrator you can configure the following options.
Figure 20: Administrator options
Administrator The login name for the administrator account. The login name can contain
numbers (0-9), uppercase and lowercase letters (A-Z, a-z), and the special
characters - and _. Other special characters and spaces are not allowed.
Password/
Confirm
Password
48
The password for the administrator account.
For improved security, the password should be at least 6 characters long. The
password can contain any characters except spaces.
05-16000-0082-20050115
Fortinet Inc.
Managing the FortiLog unit
Devices (Active mode)
Trusted host
The trusted host IP address for the location from which the administrator can
log into the FortiLog unit.
If you want the administrator to be able to access the FortiLog unit from any
address, set the trusted host to 0.0.0.0 and the netmask to 0.0.0.0.
To limit the administrator to only access the FortiLog unit from a specific
network, set the trusted host to the address of the network and set the netmask
to the netmask for the network.
For example, to limit an administrator to accessing the FortiLog unit from your
internal network, set the trusted host to the address of your internal network
(for example, 192.168.1.0) and set the netmask to 255.255.255.0.
Netmask
The trusted host netmask for the location from which the administrator can log
into the web-based manager. If Netmask is 0.0.0.0 there is no restriction on the
netmask.
Permission
The permission level for the administrator.
To add an administrator account
1
Go to System > Config > Admin.
2
Select New.
3
Enter a login name for the administrator account.
4
Enter and confirm a password for the administrator account.
5
Optionally type a Trusted Host IP address and netmask for the location from which the
administrator can log into the web-based manager.
6
Set permission to Read Only or Read & Write.
7
Select OK.
Changing the Administrator password
The admin administrator and administrators with read & write permissions can change
their administrator account password.
To change the admin account password
1
Go to System > Config > Admin.
2
For your administrator account, select Change Password.
3
Enter and confirm a new password.
4
Select OK.
Devices (Active mode)
When using the FortiLog unit in Active mode, you can add the FortiGate, FortiMail and
Syslog devices for the FortiLog unit to collect log files.
FortiLog Administration Guide
•
Device list
•
Adding and registering a device
•
Editing device information
05-16000-0082-20050115
49
Devices (Active mode)
Managing the FortiLog unit
Device list
To add and manage devices connecting to the FortiLog unit, go to System > Devices.
Figure 21: Device list
Adding and registering a device
Add FortiGate, FortiMail and Syslog devices to the FortiLog configuration so that the
FortiLog unit can receive logs from the devices. For details on adding a device, see
“Sending device logs to the FortiLog unit” on page 23.
The unregistered devices on the network that you configured to send logs to the
FortiLog unit are listed at the bottom of the devices page. Before the FortiLog unit can
generate log reports for the unregistered devices, you must register them.
To register an unregistered device, select Add to the right of the device name. For
complete details on registering a device, see “Configuring the FortiLog unit” on
page 26.
Editing device information
After adding a FortiGate, FortiMail or Syslog device to the FortiLog unit, you can
modify the device information as required.
Figure 22: Editing a device
50
05-16000-0082-20050115
Fortinet Inc.
Managing the FortiLog unit
Alert Email
To edit a device
1
Go to System > Devices.
2
For the device you want to edit, select Edit.
3
Modify the device information and select an Interface Type for each interface, as
required.
4
Select OK.
Alert Email
Use Alert Email to configure the FortiLog unit to monitor logs for specific alert
messages, and to send an email to inform an Administrator of the problem
encountered. You can apply these settings to the local FortiLog unit and selected
registered devices. FortiLog will also monitor its own log as well.
•
Server
•
Local
•
Device (Active mode)
Server
Set the mail server options so the FortiLog unit can connect to and use the SMTP mail
facilities to alert a user of any attack issues. You must configure at least one DNS
server. The FortiLog unit uses the SMTP server name to connect to the mail server,
and must look up this name on your DNS server.
To set the mail server options go to System > Alert Email > Server. Set the SMTP
mail server connection information for sending alert messages to specified recipients.
Figure 23: Alert email settings
FortiLog Administration Guide
Authentication
Enable or disable SMTP authentication for sending alert email.
SMTP Server
Enter the IP address of the SMTP server for sending alert email.
SMTP User
Enter the user name for logging on to the SMTP server to send alert
mails. You only need to do this if you have enabled the SMTP
authentication.
Password
Enter the password for logging on to the SMTP server to send alert
email. You only need to do this if you selected SMTP authentication.
05-16000-0082-20050115
51
Alert Email
Managing the FortiLog unit
Testing E-mail
Address
Enter the email address where the FortiLog unit sends an email message
to verify the mail server settings.
Test
Select to verify that the SMTP information you entered is correct.
Local
To set the email alert notification for the FortiLog unit, go to System > Alert Email >
Local. Set the options when the FortiLog unit alerts an individual or group of
individuals.
Figure 24: Local alert settings
Enable
Select to toggle the FortiLog alert email settings on and off.
Email Address(es) Enter a recipient or number of recipients to receive alert email.
Level
The FortiLog unit sends alert email for all messages at and above the
logging severity level you select.
When N or more
events
Select the number events at the specified level before the FortiLog unit
sends an alert email. Use this setting in conjunction with the setting
below.
In N hours
Select the wait time for the number of events to occur within before
sending an alert email for the specified level log messages. Use this
setting in conjunction with the setting above.
Device (Active mode)
To set alert messages for specific FortiGate and FortiMail devices, select System >
Alert Email > Device. You can define log alert messages for specific devices
connected to the FortiLog unit. The FortiLog unit monitors all log messages and when
a device log contains specific alert messages, the FortiLog unit sends an email to the
specified recipients.
Creating a new device alert
When you add a new device alert, you can set the following options.
52
05-16000-0082-20050115
Fortinet Inc.
Managing the FortiLog unit
Alert Email
Figure 25: Device alert settings
Alert Name
Enter a name to identify the alert settings.
Devices to Monitor Select the device logs the FortiLog unit monitors. Expand the device
groups to select individual devices.
Level
Set the level of message that the FortiLog unit monitors for. The FortiLog
unit sends alert email for all messages at and above the logging severity
level you select.
Level wait interval Set the number of events and the time frame. The FortiLog unit will send
an alert email when the conditions are satisfied. For example, if you set
the alert to three events in one hour, after three events within that time the
FortiLog unit sends an alert email.
FortiLog Administration Guide
Attack Type
Set the type of attack that the FortiLog device should look for. Select any
attack or specific attack identifiers.
Attack Type Entry
and listing
When you select “Just these” for the attack type, enter the names of the
virus and select Insert.
Level of wait
interval
Set the number of attacks and the time frame. The FortiLog unit will not
send an alert email until the conditions are met.
05-16000-0082-20050115
53
Alerts
Managing the FortiLog unit
Single Source Only Set to have the FortiLog unit send and alert email only when the defined
attack settings originate from a single source IP rather than many
different sources. A single source attack can indicate a targeted attack on
the network.
Virus Type
Set the type of virus that the FortiLog device should look for. Select any
virus or specific virus identifiers.
Virus Type Entry
and listing
When you select “Just these” for the virus type, enter the names of the
virus and select Insert.
Level of wait
interval
Set the number of virus attacks and the time frame. The FortiLog unit will
send an alert email when the conditions are met.
Single Source Only Set to have the FortiLog unit send and alert email only when the defined
virus settings originate from a singe source IP. A single source virus
attack can indicate a targeted attack on the network.
Email Address(es) Enter the email addresses of the recipients to receive the alert warning
messages. For multiple addresses, separate each address with either a
semi-colon, comma or a space.
To add a device alert
1
Go to System > Alert Email > Device.
2
Select Create New.
3
Set the Alert email options as required.
4
Select Enable to set the FortiLog unit to send alert email messages for selected
devices.
5
Select OK.
Alerts
Use Alerts to view the system alert messages for the FortiLog unit and any other
systems monitored by the FortiLog unit.
54
05-16000-0082-20050115
Fortinet Inc.
Managing the FortiLog unit
Network Sharing
Figure 26: Device alert messages
Alert Inclusion
Select the minimum level of alert messages you would like displayed. The
selection you make and any messages with higher priority will appear in
the window.
Keep
unacknowledge
alerts for
Select the number of days of alert messages you want to keep. If you
change the number of days from a longer period to a shorter period, the
FortiLog unit removes the older alert messages. You will not be able to
change back to a longer period and see the older messages again.
Acknowledge
check box
Select the check boxes for those alert messages and select acknowledge
at the bottom of the column to remove the selected alert messages.
Device
Displays the name of the device with the alert message.
Event
The type of alert message logged.
Severity
The severity of the alert message
Time
The date and time when the alert message was logged.
Network Sharing
Use Network Sharing to configure the FortiLog unit to use file sharing (Windows
workgroups or NFS) to view and share log reports and other files. You can define the
users, groups and file access privileges.
For details on setting protocols adding user and group access to the FortiLog hard
disk see “Using the FortiLog unit as a NAS” on page 81.
Defining IP aliases
The IP Aliases list provides a means of mapping a meaningful name to hosts,
networks or IP ranges. The names you add here appear in the log report filters.
FortiLog Administration Guide
05-16000-0082-20050115
55
Defining IP aliases
Managing the FortiLog unit
Figure 27: IP aliases
To set host alias names
1
Go to Reports > IP Aliases.
2
Select Create New.
3
Enter a name of the host, network or IP address range in the Alias text box.
4
Enter the IP address of the host, network or the IP range. For example:
5
56
•
10.1.1.1
•
10.1.1.1/24 10.1.1.0/24
•
10.1.0.0/16-10.9.0.0
•
10.1.0.0/16-10.9.0.0/16.
Select OK.
05-16000-0082-20050115
Fortinet Inc.
FortiLog Administration Guide Version 1.6
Reports
The FortiLog unit collates information collected from device log files and presents the
information in tables and graphs. There are over 130 different reports, in 11
categories. The reports provide detailed information on the type of traffic, attacks and
preventative actions occurred during a specific period on your network. For a full list of
report types see “Appendix A: Log Report Types” on page 113.
Using reports you can:
•
manage your network more effectively and to make informed decisions.
•
view the network usage and security information.
•
discover and address vulnerabilities across dispersed device installations.
•
minimize the effort required to monitor and maintain acceptable user policies,
identify attack patterns and prevent attacks.
•
monitor Internet surfing patterns for compliance with company policy.
•
identify visitors to your web site for potential customers.
Reports are available in multiple file formats including HTML, PDF, RTF and
ASCII text.
Note: In Passive mode, the FortiLog unit does not receive logs or generate reports. To create
reports the FortiLog unit must be set to Active mode.
This chapter describes:
•
Creating and generating a report
•
Viewing reports
•
Vulnerability reports
Creating and generating a report
To generate a report, begin by creating and saving a report configuration. You can
use this report configuration for a scheduled report or for generating reports on
demand.
To create a report
1
Go to Reports > Config.
2
Select New and enter a name for the report.
FortiLog Administration Guide
05-16000-0082-20050115
57
Creating and generating a report
3
4
Reports
Set the following:
•
“Configuring report parameters” on page 58
•
“Configuring a report query” on page 59
•
“Selecting the devices for the report” on page 60
•
“Select filtering options” on page 61
•
“Setting a report schedule” on page 62
•
“Choosing the report destination and format” on page 63.
Select Run now.
Configuring report parameters
Report parameters defines the reporting period the FortiLog unit uses when gathering
the information from the device logs. Report parameters include:
•
the reporting period.
•
the specific device or all device logs submitted to the FortiLog unit.
•
the top ranked values for specific report categories.
Figure 28: Report parameter settings
To define report parameters
58
1
Go to Reports > Config.
2
Select new.
3
Enter a report name and select OK.
4
Configure the following options:
Time Period
Select a date range from the list or select a specific reporting period.
When making a time selection, some times include variables. For example,
Last N days. When you select this setting, a text box appears. Enter the
numeric value for N.
From Date
Select the year, month, day and hour for the start of the reporting period.
To Date
Select the year, month, day and hour for the ending of the reporting period.
05-16000-0082-20050115
Fortinet Inc.
Reports
Creating and generating a report
Per Virtual
Domain
Select to generate the report based on the virtual domains configured on the
FortiGate devices.
For all devices
Select to generate the report for all devices.
Per device
Select to generate a separate report for each device.
Resolve Host
Names
Select to display host names by name rather than IP addresses. For
details on configuring IP address host names see “Defining IP
aliases” on page 55.
Resolve Service Select to display network service names rather than port numbers.
Names
For example, HTTP rather than port 80.
In 'Ranked
Reports' show
top
5
For some report types, you can set the top ranked items for the
report. When setting top ranked items, the report will only include the
most active content. For example, report the most active mail clients
within the organization rather than all mail clients.
Select Apply.
Configuring a report query
Select the specific information you need to generate a more concise report. Each
report category includes a refined list of sub-categories that reports specific
information. For example, you can generate an extensive intrusion activity report, or
only generate intrusion activity by attacks by top types, or by hour of the day.
The default is to run a report for all information in the log files. Select the specific
information you want to include in the report. Reports are listed by categories and
sub-categories.You can save the report query selections to use in other reports.
Figure 29: Report query options
To set the report queries
1
Go to Reports > Config.
2
Select a report from the list.
3
Select Queries.
FortiLog Administration Guide
05-16000-0082-20050115
59
Creating and generating a report
Reports
4
Select the plus sign next to a category to expand and view the sub categories.
5
Select the content from the sub-categories to include in the reports.
6
Select Apply.
Creating a query profile
You can save the selections as a query profile. After creating a query profile, you can
select the profile for use in other reports.
To create a query profile
1
Select New.
or
Start with an existing profile by selecting the profile and selecting Clone.
2
Enter a name for the profile and select OK.
3
Select the log information to include in the query profile.
4
Select Apply.
Selecting the devices for the report
Specify the devices to include in the report. If you have many devices sending log files
to the FortiLog unit, you can to run reports for specific devices or groups of devices.
The default is to run a report for all devices. You can save the device selections to use
in other reports.
Figure 30: Selecting devices
To select the devices
60
1
Go to Reports > Config.
2
Select a report from the list.
3
Select Devices.
4
Select These to select specific devices or groups of devices.
5
Select the Plus sign to expand the list of devices for a specific group.
05-16000-0082-20050115
Fortinet Inc.
Reports
Creating and generating a report
6
Select the group or individual devices to use in the report.
7
Select Apply.
Creating a device profile
You can save the selections as a device profile. After creating a device profile, you
can select the profile for use in other reports.
To create a device profile
1
Select New.
or
Start with an existing profile by selecting the profile and selecting Clone.
2
Enter a name for the profile and select OK.
3
Select the devices to include in the profile.
4
Select Apply.
Select filtering options
Filtering enables you to view or remove information from a report to provide a more
concise report. For example, you only want reports on specific error messages, or you
do not want include certain IP address destinations.
Figure 31: Filter options
To set the filtering on a log report
1
Go to Reports > Config.
2
Select a report from the list.
3
Select Filter.
FortiLog Administration Guide
05-16000-0082-20050115
61
Creating and generating a report
4
Reports
Select the type of matching for the filter criteria:
•
Select Any to find any matches for the criteria specified.
•
Select All to find all criteria. All criteria must match to display in the results.
5
Select whether to have log messages less than and equal, equal or greater than and
equal to the level you selected. For a list of log policies levels and how they relate to
each other, see “Log policy” on page 42.
6
Select the filtering criteria for the remaining fields. The number of fields and the
information you can filter on depends on the type of log you are filtering.
Select the Not option when you want to exclude specific information. For example, for
the Source IP field, do not include any information from a specific source IP address in
the log report.
Creating a filter profile
You can save the filter options as a filter profile. After creating a filter profile, you can
select the profile for use in other reports.
To create a report filter profile
1
Select New.
or
Start with an existing profile by selecting the profile and selecting Clone.
2
Enter a name for the profile and select OK.
3
Select the filter options for the report.
4
Select Apply.
Setting a report schedule
Set a schedule so that FortiLog generates reports at a consistent time. The default is
to run a report for daily at 6pm. You can save a schedule to use in other reports.
Figure 32: Report scheduling
To create a scheduled report
62
1
Go to Reports > Config.
2
Select a report from the list.
05-16000-0082-20050115
Fortinet Inc.
Reports
Creating and generating a report
3
Select Schedule.
4
Select a day from the following:
Not Scheduled Select to not run a daily report. Use this setting when you only want to run
the reports as needed. For details on running on demand reports see
“Reports on demand” on page 64.
Daily
Select to run the report every day at the same time.
These Days
Select specific days of the week to run reports.
These Dates
Select specific days of the month to run the report. For example, to run
reports on the first and fifteenth of every month, enter 1,15.
5
Select a specified time of the day to run the report, up to three times per day.
6
Select Apply.
Creating a report schedule profile
You can save the schedule as a schedule profile. After creating a schedule profile,
you can select the profile for use in other reports.
To create a report schedule profile
1
Select New.
or
Start with an existing profile by selecting the profile and selecting Clone.
2
Enter a name for the profile and select OK.
3
Select the schedule for the report.
4
Select Apply.
Choosing the report destination and format
Select destination and format for the report. Configure the FortiLog unit to either save
the reports to the FortiLog hard disk or email the report to any number of recipients or
both. The default is to save the report to the FortiLog hard disk in HTML format.
You can save the output options for use in other reports.
Figure 33: Select a file format
FortiLog Administration Guide
05-16000-0082-20050115
63
Creating and generating a report
Reports
To select the report destination and format
1
Go to Reports > Config.
2
Select a report from the list.
3
Select Output.
4
Set the following options:
File
Select the file format for the generated reports that are saved to the FortiLog
Browse/Reports hard disk. To access the reports on the hard disk, see “Viewing reports” on
page 65.
5
Email it
Select the file formats for the generated reports that the FortiLog unit sends
as an email attachment.
Email address
list
Enter the email addresses of the recipients of the report. Add multiple
recipients by pressing Enter after each email address.
Select Apply.
Creating a report destination and format profile
You can save the selections in a output profile. After creating an output profile, you
can select the profile for use in other reports.
To create a pre-defined output selection
1
Select New.
or
Start with an existing profile by selecting the profile and selecting Clone.
2
Enter a name for the profile and select OK.
3
Select the destination and format options.
4
Select Apply.
Reports on demand
Reports on demand provides an instant report. When requesting a report, the FortiLog
unit compiles the data from the available device logs and immediately generates a
report based on your requirements and the log data available.
The on demand reports include the same information and options as a scheduled
report.
To generate a report on demand
64
1
Go to Reports > Config.
2
Select a report from the list or select options for the report.
3
Select Run now.
05-16000-0082-20050115
Fortinet Inc.
Reports
Viewing reports
Viewing reports
Use the FortiLog web-based manager to view a list of the generated reports. The
generated reports are available in HTML, PDF, RTF and ASCII text formats,
depending on the output configuration. For details on setting output options see
“Choosing the report destination and format” on page 63.
There are two ways of viewing reports from the web-based manager; a roll up of all
reports selected or individual reports.
Reports are categorized by the date and time the FortiLog unit generated the reports.
The report appears in the reports list with the report name, date and time the report
was generated.
For example, a report name of “Report 1-2004-12-15-2112”, is a report called “Report
1”, generated on December 15, 2004 at 9:12pm.
To view a generated report
1
Go to File Browse > Reports.
Figure 34: Viewing reports
Report
categories
Report
sub-categories
2
Do one of the following:
Report Files
Select the report name to view a roll up of all reports in HTML format.
Select the Plus sign to expand the report to view the individual reports in
HTML format.
Action
Select Edit to rename the report.
Select Delete to remove the report from the FortiLog hard disk.
Check
Select to select all reports for removal from the FortiLog hard disk.
All/Check None
Other Formats
FortiLog Administration Guide
Select an alternate format to view the report.
05-16000-0082-20050115
65
Viewing reports
Reports
Roll up report
The roll up report contains all reports that you selected for the FortiLog unit to
generate. Select the report name to view the report roll up in HTML format.
Figure 35: Roll up report
Report title
Report information
compiled from
device logs.
Select a report category to expand the list of report sub-categories. Selecting a report
name in the left frame displays the report in the right frame.
Individual reports
Individual reports have the same look and functionality as the roll up reports when
viewing the HTML file format. When you view the report in one of the alternate
formats, only the right frame with the report information is included.
66
05-16000-0082-20050115
Fortinet Inc.
Reports
Vulnerability reports
Figure 36: VPN activity report in PDF
Vulnerability reports
Vulnerability reports show any potential weaknesses to attacks that may exist for
selected devices by displaying the available ports on a FortiGate device. Rather than
using the device logs for this report, the FortiLog unit queries for open ports and
where possible and gathers information about the services running. Any known
vulnerabilities that exist for the specific service or version of the service, are included
in the reports.
Creating and generating a report
To generate a vulnerability report, begin by creating and saving a report configuration.
You can use this report configuration for a scheduled report or for generating reports
on demand.
To create a report
1
Go to Reports > Config > Vulnerability.
2
Select New and enter a name for the report.
FortiLog Administration Guide
05-16000-0082-20050115
67
Vulnerability reports
Reports
3
4
Set the following:
•
“Selecting report result parameters” on page 68
•
“Selecting plug-ins” on page 68
•
“Selecting the scan targets for the report” on page 69
•
“Choosing the report destination and format” on page 71.
Select Run now.
Selecting report result parameters
Report results parameters define how the FortiLog unit displays the vulnerability
report results. Report results parameters include:
•
the specific device or all device logs submitted to the FortiLog unit.
•
the device IP addresses or alias names.
Figure 37: Vulnerability report parameters
To define report result parameters
1
Go to Reports > Config > Vulnerabilities.
2
Select new.
3
Enter a report name and select OK.
4
Configure the following options:
For all devices
Select to generate the report for all devices.
Per device
Select to generate a separate report for each device.
Resolve Host
Names
Select to display host names by name rather than IP addresses. For details
on configuring IP address host names see “Defining IP aliases” on page 55.
Resolve Service Select to display network service names rather than port numbers. For
example, HTTP rather than port 80.
Names
5
Select Apply.
Selecting plug-ins
Select the port scans the FortiLog unit will perform on the selected device(s).
68
05-16000-0082-20050115
Fortinet Inc.
Reports
Vulnerability reports
Figure 38: Vulnerability plugin options
To select the plug-ins
1
Go to Reports > Config > Vulnerabilities.
2
Select a report from the list.
3
Select Plug-ins.
4
Select the plug-ins to include in the report.
5
Select Apply.
Creating a plug-in profile
You can save the selections as a plug-in profile. After creating a plug-in profile, you
can select the profile for use in other vulnerability reports.
To create a plug-in profile
1
Select New.
2
Enter a name for the profile and select OK.
3
Select the plug-ins to include in the query profile.
4
Select Apply.
Selecting the scan targets for the report
Scan targets are the devices the FortiLog scans for vulnerability threats. You can save
the device selections to use in other reports.
FortiLog Administration Guide
05-16000-0082-20050115
69
Vulnerability reports
Reports
Figure 39: Selecting scan targets
To select the scan targets
1
Go to Reports > Config > Vulnerability.
2
Select a report from the list.
3
Select Scan Targets.
4
Select devices from the Available IP Aliases list.
5
Select the right arrow to move the device to the Selected IP Aliases list.
6
To add additional devices, select Create New, and repeat step 4 and 5.
7
Select Apply.
To add additional devices
1
Select Create New.
2
Enter a name of the host, network or IP address range in the Alias text box.
3
Enter the IP address of the host, network or the IP range.
4
Select OK.
5
Select the device from the Available IP Aliases list.
6
Select the right arrow to move the device to the Selected IP Aliases list.
7
Select Apply.
Creating a scan target profile
You can save the selections as a scan target profile. After creating a scan target
profile, you can select the profile for use in other vulnerability reports.
To create a scan target profile
70
1
Select New.
2
Enter a name for the profile and select OK.
3
Select the devices to include in the profile.
05-16000-0082-20050115
Fortinet Inc.
Reports
Vulnerability reports
4
Select Apply.
Choosing the report destination and format
Select destination and format for the vulnerability report. Configure the FortiLog unit to
either save the reports to the FortiLog hard disk or email the report to any number of
recipients or both. The default is to save the report to the FortiLog hard disk in HTML
format.
You can save the output options for use in other reports.
Figure 40: Selecting report output
To select the report destination and format
1
Go to Reports > Config > Vulnerability.
2
Select a report from the list.
3
Select Output.
4
Set the following options:
File
Select the file format for the generated reports that are saved to the FortiLog
Browse/Reports hard disk.
5
Email list
Select the file formats for the generated reports that the FortiLog unit sends
as an email attachment.
Email address
list
Enter the email addresses of the recipients of the report. Add multiple
recipients by pressing Enter after each email address.
Select Apply.
Creating a report destination and format profile
You can save the selections in a output profile. After creating an output profile, you
can select the profile for use in other vulnerability reports.
To create a pre-defined output selection
1
Select New.
2
Enter a name for the profile and select OK.
3
Select the destination and format options.
4
Select Apply.
FortiLog Administration Guide
05-16000-0082-20050115
71
Vulnerability reports
Reports
Viewing the vulnerability report
The FortiLog unit saves the vulnerability report either to it hard disk or sends the
report as an email attachment.
Figure 41: Viewing the list of vulnerability reports
To view the vulnerability report saved to the FortiLog hard disk
1
Go to File Browse > Reports > Vulnerability.
2
Select the report name from the list of completed reports.
Report Files
The name of the report. Select the report name to view the vulnerability
report file. Select the check box next to the report name to select it for
removal from the list.
Action
Select Edit to rename the report. Select Delete to remove the report from the
list.
Started
The date and time the FortiLog unit started running the report.
Size
The size of the report file in bytes.
Alternate
Formats
Select an alternate file format for the report. The default format is HTML and
the alternate format is ASCII text.
Check
Select the checkbox to select all reports in the list to quickly delete all
All/Check None reports from the list.
Select Delete to delete the reports you selected to delete by selecting the
report’s check box.
72
05-16000-0082-20050115
Fortinet Inc.
FortiLog Administration Guide Version 1.6
Using Logs
The FortiLog unit collects log files from various sources and stores them on its hard
disk. With the log viewer you can:
•
view log files collected from FortiGate, FortiManager, FortiMail and syslog devices
•
customize the log file view
•
download log files to your hard disk
•
filter the logs for specific information using various criteria
•
search multiple log files for unique entries
•
import older log files
•
watch active log files for real-time logging information of a selected device.
This chapter includes:
FortiLog Administration Guide
•
The Log view interface
•
Viewing logs
•
Importing log files
•
Log Search
•
Log watch (Active mode)
•
Event correlation (Active mode)
05-16000-0082-20050115
73
The Log view interface
Using Logs
The Log view interface
The log viewer interface provides a means of viewing device log files.
Figure 42: Viewing the logs
Device Tabs
Access to the specific device logs. Selecting a tab will display the available
logs for any device within a group.
Import Log file
Use this field to import older log files to view and run log reports. For details
on importing log files see “Importing log files” on page 77.
Log files
A list of log files on the FortiLog unit. Any device groups you create also
appear here. Select the group name to expand the list of devices within the
group.
Select the device name to see the available log files.
#
The number of devices in a group, and the number of logs for a device.
Last Access
Time
The last time the log was updated from the device.
Size (bytes)
The size of the log file.
Action
Select Delete to remove the log file from the FortiLog hard disk.
Select Download to save the log file to your local hard disk.
Select Display to view the contents of the log file. For details on viewing the
log file see “Viewing logs” on page 74.
Select Watch to view the log file updates in real time. For details on
watching log files see “Log watch (Active mode)” on page 78.
Device List
Provides quick access to a specific device’s logs.
Viewing logs
The log viewer interface provides a display of log data that you can organize and
format.
74
05-16000-0082-20050115
Fortinet Inc.
Using Logs
Viewing logs
Figure 43: Viewing a device log
To view the device log files
1
Go to File Browse > Logs.
2
Select a device tab.
3
Expand the group name and device name to see the list of available logs.
4
In the Action column, select Display for the desired log file.
5
Do one of the following to change the views of the log information”
Page
Select Page forward or Page back to move through the log entries.
Enter the page number to jump to a specific page.
Raw
Select to view the log information as it appears in the log. Select Formatted
to return to the column view.
Column
headers
Select the column header to change the sort order between
ascending and descending order.
For information about log messages, see the FortiGate Log Message Reference
Guide.
Finding log information
You can filter the contents of the log file to find specific information within a large log
file. There are two methods of finding information in the log:
•
Basic filter - provides a simple filtering mechanism to search the log file for a
specific keyword. The keyword search applies to all columns of the log file.
•
Standard filter - perform a more detailed search of the log. With a standard search,
you can set specific search criteria for each column of information in the log. You
can also enable or disable a filter for greater search accuracy.
To perform a basic search of the log contents
1
Go to File Browse > Logs.
2
Select a device and log file.
3
In the log view, select Column Settings at the top of the page.
4
Set the Search to Basic.
FortiLog Administration Guide
05-16000-0082-20050115
75
Viewing logs
Using Logs
Figure 44: Basic log filter
5
Do the following to search the log using the Basic log filter:
Show
Select the columns of information you want to view in the log.
Lines per page Enter the number of entries of the log you want to see on each page.
Keyword
6
Enter the words you want to find in the log.
Select Apply.
To perform a standard search of the log contents
1
Go to File Browse > Logs.
2
Select a device and log file.
3
In the log view, select Column Settings at the top of the page.
4
Set the Search to Standard.
Figure 45: Standard log filter
5
Do the following to search the log using the Standard log filter:
Show
Select the columns of information you want to view in the log.
Lines per page Enter the number of entries of the log you want to see on each page.
76
05-16000-0082-20050115
Fortinet Inc.
Using Logs
Importing log files
Match
Select Any to find any matches for the criteria specified.
Select All to find all criteria. All criteria must match to display in the results.
Up and Down
arrows
Select a row and select the up and down arrows to reposition the column
within the display.
6
Select each row in the Filter column.
7
Each row of information provides criteria for the search:
Device time
Set the time span .
Log time
Set the time span of the logged information.
Level
The alert level.
Service
The type of service, such as POP3.
Source
The source IP address
Destination
The destination IP address
Sent
The volume of information sent.
Received
The volume of information received.
The row criteria available reflect the content within the selected log file.
8
Select Enable for each row you want the search criteria to use.
9
Select Apply.
Importing log files
If you have older log files from various devices, you can import these logs onto the
FortiLog unit to generate log reports.
Importing log files is also useful when changing your RAID configuration (for the
FortiLog-400 and FortiLog-800). Changing your RAID configuration wipes the hard
disk. If you backup your FortiLog log, you can import the FortiLog log onto the device.
Figure 46: Import log file
To import a log file
1
Go to File Browse > Logs.
2
Enter the path and file name of the log file, or select Browse.
3
Select the device name from the list above the Action column.
4
Select Import.
FortiLog Administration Guide
05-16000-0082-20050115
77
Log Search
Using Logs
Log Search
Use the Log Search, to perform a simple search of all log files on the FortiLog unit.
The FortiLog unit maintains a search history for future use. If you need to clean out a
long search history, select Clear History.
To search the log files for specific information
1
Go to File Browse > Log Search.
2
Enter the keywords for the search and select Search.
The search results appear below the search fields.
Log watch (Active mode)
Log watch enables you to monitor a device log as it is updated to the FortiLog unit.The
FortiLog unit refreshes the view of the device log for the selected interval.
Note: The feature is only available to active log files. That is, log files that are continually
updated from a registered device.
To set log watching
1
Go to File Browse > Logs.
2
Select the device you wish to monitor from the device list.
3
Select Watch in the Action column.
Figure 47: Log watch settings
4
78
Select Column Settings to set the log information you want to view:
Refresh
Select an automatic refresh rate between zero (none) and 30 seconds.
Select Refresh to manually refresh the screen.
Raw
Select to view the log information as it appears in the log. Select Formatted
to return to the column view.
Show
Select the columns of information you want to view in the log.
Up and Down
arrows
Select a row and select the up and down arrows to reposition the column
within the display.
05-16000-0082-20050115
Fortinet Inc.
Using Logs
Event correlation (Active mode)
5
Select Apply.
Event correlation (Active mode)
Event correlation is a data mining feature that provides a way of reviewing attacks on
multiple devices in one location. The FortiLog unit collates attack events from all
submitted logs and displays the information in a table. With even Correlation you can
view:
•
all attacks on your network.
•
attacks targeted to specific devices.
•
the target and source of the attack.
•
when the attack occurred.
•
details on the type of attack.
To run an event correlation:
1
Go to File Browse > Event Correlation.
2
Select an attack type from the list
3
Select Next.
4
From the drop list, select to view the attacks from the same source IP or targets of the
same attack.
5
Select Show me.
Figure 48: Event Correlation results
FortiLog Administration Guide
Page
Use the page arrows or enter the page number to move to a different page
of the event correlation results.
Sort list
Select an attack sort for viewing the results. You can choose from Attacks
from the same source or other targets of the same attack.
05-16000-0082-20050115
79
Event correlation (Active mode)
80
Using Logs
Show me
Select Show me to view the selection from the sort list.
#
The number of entries for the attack report.
Log time
The date and time of the attack.
Device ID
The name of the device subjected to the attack.
Source
The source IP address of the attack.
Destination
The IP address of the device subjected to the attack.
Message
The attack message logged for the device. The message also includes a
link to the FortiProtect web site for further details on the type of attack.
05-16000-0082-20050115
Fortinet Inc.
FortiLog Administration Guide Version 1.6
Using the FortiLog unit as a NAS
Users can save, store and access information on the FortiLog hard disk as an
alternate means of storing important files and work. To provide users with access to
the FortiLog file system you must:
•
configure the FortiLog unit to use Windows sharing or Network File System (NFS)
•
configure users and user groups with access to read and write files on the FortiLog
hard disk.
This chapter includes:
•
Connecting to the FortiLog file system
•
Providing access to the FortiLog hard disk
•
Setting folder and file properties
Use the FortiLog web-based manager to view and manage files on the FortiLog hard
disk. You can also use the web-based manager to set up and manage user and group
access to the FortiLog hard disk directories and files.
To view and manage files stored on the FortiLog hard drive
1
Go to File Browse > Files.
2
Navigate the folder structure by double-clicking the folders.
Connecting to the FortiLog file system
Before a user can access files on the FortiLog hard disk, create user and group
accounts and set their access permissions.
When users connect to the FortiLog unit, consider the following:
•
Microsoft Windows users connect to the FortiLog hard disk by mapping a drive
letter to a network folder.
•
For Macintosh users, enable the FortiLog Windows networking selection.
Macintosh users can use the SMB sharing protocol to connect to the FortiLog unit.
•
UNIX or Linux users:
•
•
FortiLog Administration Guide
mount the FortiLog hard disk as smbfs if you are using Windows Networking.
mount the FortiLog hard disk as nfs if you select Network File System.
05-16000-0082-20050115
81
Providing access to the FortiLog hard disk
Using the FortiLog unit as a NAS
Providing access to the FortiLog hard disk
To enable user access to the FortiLog hard disk to store and access files you need to
add user and group accounts to the FortiLog unit. Along with user and group
accounts, you define the write or read/write access to files and folders.
Selecting a file sharing protocol
Enable sharing protocols before providing user and group access to the FortiLog hard
disk folders and files.
To set the file sharing for the FortiLog unit
1
Go to Network Sharing > Protocols.
2
Select Enable for a file sharing protocol.
Windows
A means of file sharing native to Microsoft Windows.
Networking
3
Workgroup
Enter a workgroup name that the users can identify on the Windows network.
NFS
A means file sharing native to Unix and Linux.
Select Apply.
Adding and modifying user accounts
When you add user accounts, you add the user name and set a password. You can
then add the user to a group or set specific access rights to folders on the FortiLog
hard disk. The users you add will not have administrative access to the FortiLog hard
disk or FortiLog unit. To add administrative users see “Configure Administrator
access” on page 47.
To add a user account
1
Go to Network Sharing > Users.
2
Select Create New.
3
Enter the following information for the user account:
User name
Enter a user name. For example, twhite. The name cannot include spaces.
UID
Enter a user ID.
Use this field only if you are using the NFS protocol. The NFS protocol uses
the UID to determine the permissions on files and folders.
Password
Enter a password for the user.
Display Name Enter the user name to identify who the user is. For example, Terry White.
You can include spaces in this field.
If you are using the Windows Networking protocol, you only need to complete the
information for the User name, Password and Display Name.
82
4
Select OK.
5
Select Edit in the Modify column to update the user name or password.
05-16000-0082-20050115
Fortinet Inc.
Using the FortiLog unit as a NAS
Providing access to the FortiLog hard disk
Adding and modifying group accounts
Create user groups to assign directory access to many users at once rather than
individually.
To add a user group
1
Go to Network Sharing > Groups.
2
Select Create New.
3
Enter the following information for the group account:
Group
Enter a user name. For example, Finance. The name cannot include spaces.
GID
Enter a Group ID. Use this field if you are using Network File System.
4
Select the users from the Available members area and select the Right arrow to add
them to the group.
To remove a member, select a user from the Members area and select the Left arrow.
5
Select OK.
6
Select Edit in the Modify column to add or remove users from the group.
Assigning access to folders
With users, groups and a file sharing protocol defined, you can apply access rights to
users and groups. You can apply read only and read/write access for users and
groups to the folder structure of the FortiLog hard disk.
To add a new Windows share configuration
1
Go to Network Shares > Access > Windows Shares.
2
Select Create New.
FortiLog Administration Guide
05-16000-0082-20050115
83
Providing access to the FortiLog hard disk
Using the FortiLog unit as a NAS
Figure 49: Windows sharing configuration
Local Path
Button
3
Select the Local Path button to select the folder for the users or groups to access.
Note: The default permissions for files and folders is read and execute privileges. The owner of
the document also has write privileges. To enable write permissions for users and groups, you
must select the write permission for the folder and for the user and the group. For details see
“Setting folder and file properties” on page 86.
4
Select OK.
5
Enter the Share Name to describe the shared folder.
6
Select user and group names from the Available Users & Groups box. Hold the Ctrl
key to select multiple users.
7
Select the type of access rights the users and groups will have and select the
appropriate right arrow to move the user or group name to the Read-Only Access or
Read-Write Access boxes.
8
Select Ok.
To add a new NFS share configuration
84
1
Go to Network Shares > Access > NFS Exports.
2
Select Create New.
05-16000-0082-20050115
Fortinet Inc.
Using the FortiLog unit as a NAS
Providing access to the FortiLog hard disk
Figure 50: NFS share configuration
Local Path
Button
3
Select the Local Path button to select the folder for the users or groups to access.
Note: The default permissions for files and folders is read and execute privileges. The owner of
the document also has write privileges. To enable write permissions for users and groups, you
must select the write permission for the folder and for the user and the group. For details see
“Setting folder and file properties” on page 86.
4
Select OK.
5
Enter the IP address of the remote system or user ID.
6
Select user and group names from the Available Users & Groups box. Hold the Ctrl
key to select multiple users.
7
Select the type of access rights the users and groups will have and select the
appropriate right arrow to move the user or group name to the Read-Only Access or
Read-Write Access boxes.
8
Select Ok.
Modifying the user or group folder access
At any time you can modify a user or group folder access to the FortiLog unit. You can
also delete the access rights.
To modify the FortiLog folder access
1
Go to Network Sharing > Access.
2
In the Modify column, select Edit to update the access rights for a user or group.
or
In the Modify column, select Delete to remove the user or group access from the
FortiLog unit.
FortiLog Administration Guide
05-16000-0082-20050115
85
Setting folder and file properties
Using the FortiLog unit as a NAS
Setting folder and file properties
The FortiLog unit enables you to administer the folders and files on the FortiLog hard
disk. Using the file browser you can:
•
rename and delete files and folders
•
set the access permissions
•
download files to your local hard disk.
Figure 51: Set file and folder properties
Each folder and file has its own access permissions. You can set three types of
permissions:
Owner
The original user for the file or folder. This is the user who creates or
uploads the file to the FortiLog hard disk.
Group
A group of users you define. The default group is the Admin group.
Other
All other users that are not otherwise the owner of the file or within a group.
By default, when a user adds a new file or folder, the access rights are Read, Write,
Execute for the owner (user), and Read and Execute for the Admin group and Others.
To set file and folder permissions
1
Go to File Browse > Files.
2
Navigate to the folder or file you wish to set the permissions and select Edit.
3
Set the read, write and execute permissions for the folder.
4
Select OK.
For example, if you wanted only users in the Finance group to view a folder with
financial information, create a user group called Finance that includes the users from
the Finance department. Set the following permissions to the folder:
86
Owner
Select the user name or Admin and Read, Write, Execute
Group
Select Finance from the list and select Read
Other
No selections
05-16000-0082-20050115
Fortinet Inc.
FortiLog Administration Guide Version 1.6
FortiLog CLI reference
This chapter explains how to connect to and use the FortiLog command line interface
(CLI). You can use CLI commands to view all system information and to change all
system configuration settings.
•
CLI documentation conventions
•
Connecting to the CLI
•
CLI commands
CLI documentation conventions
This guide uses the following conventions to describe CLI command syntax.
•
angle brackets < > to indicate variable keywords
For example:
execute restore config <filename_str>
You enter restore config myfile.bak
<xxx_str> indicates an ASCII string variable keyword.
<xxx_integer> indicates an integer variable keyword.
<xxx_ip> indicates an IP address variable keyword.
•
vertical bar and curly brackets {|} to separate alternative, mutually exclusive
required keywords
For example:
set system opmode {active | passive}
You can enter set system opmode active or set system opmode
passive
FortiLog Administration Guide
05-16000-0082-20050115
87
Connecting to the CLI
FortiLog CLI reference
Connecting to the CLI
The FortiLog-800 model has serial port and you can use the null modem cable to connect it to
your management computer.
The FortiLog-100 and 400 models do not support serial cable connections. You can use a
terminal emulation software such as HyperTerminal for Windows to access the CLI.
•
Connecting to the FortiLog-800 console
•
Setting administrative access for SSH or Telnet
•
Connecting to the FortiLog CLI using SSH
•
Connecting to the FortiLog CLI using Telnet
Connecting to the FortiLog-800 console
You require:
•
A computer with an available communications port,
•
A null modem cable to connect the FortiLog console port and a communications
port on your computer,
•
Terminal emulation software such as HyperTerminal for Windows.
Note: The following procedure describes how to connect to the FortiLog CLI using
Windows HyperTerminal software. You can use any terminal emulation program.
To connect to the FortiLog-800 console
1
Connect the FortiLog console port to the available communications port on your
computer.
2
Make sure the FortiLog unit is powered on.
3
Start HyperTerminal, enter a name for the connection, and select OK.
4
Configure HyperTerminal to connect directly to the communications port on the
computer to which you have connected the FortiLog console port.
5
Select OK.
6
Select the following port settings and select OK.
Bits per second 9600
Data bits
8
Parity
None
Stop bits
1
Flow control
None
7
Press Enter to connect to the FortiLog CLI.
8
A prompt appears:
FortiLog-800 login:
9
88
Type a valid administrator name and press Enter.
05-16000-0082-20050115
Fortinet Inc.
FortiLog CLI reference
Connecting to the CLI
10
Type the password for this administrator and press Enter.
The following prompt appears:
Welcome!
You have connected to the FortiLog CLI, and you can enter CLI commands.
Setting administrative access for SSH or Telnet
To configure the FortiLog unit to accept SSH or Telnet connections, you must set
administrative access to SSH or Telnet for the FortiLog interface to which your
management computer connects. To use the web-based manager to configure
FortiLog interfaces for SSH or Telnet access, see “Admin” on page 46.
To use the CLI to configure SSH or Telnet access
1
Connect and log into the CLI using the FortiLog console port and your terminal
emulation software.
2
Use the following command to configure an interface to accept SSH connections:
set system interface port1 config allowaccess ssh
3
Use the following command to configure an interface to accept Telnet connections:
set system interface port1 config allowaccess telnet
Note: Remember to press Enter at the end of command. As well, remember to type end and
press Enter to commit the changes to the FortiLog configuration.
FortiLog Administration Guide
05-16000-0082-20050115
89
Connecting to the CLI
FortiLog CLI reference
4
To confirm that you have configured SSH or Telnet access correctly, enter the
following command to view the access settings for the interface:
get system interface
The CLI displays the settings, including the management access settings, for the
port1 interface.
Connecting to the FortiLog CLI using SSH
Secure Shell (SSH) provides strong secure authentication and secure
communications to the FortiLog CLI from your internal network or the internet. Once
the FortiLog unit is configured to accept SSH connections, you can run an SSH client
on your management computer and use this client to connect to the FortiLog CLI.
Note: The Fortilog unit supports the following encryption algorithms for SSH access: 3DES and
Blowfish.
To connect to the CLI using SSH
1
Install and start an SSH client.
2
Connect to the FortiLog port1 interface that is configured for SSH connections.
3
Type a valid administrator name and press Enter.
4
Type the password for this administrator and press Enter.
The FortiLog model name followed by a # is displayed.
You have connected to the FortiLog CLI, and you can enter CLI commands.
Connecting to the FortiLog CLI using Telnet
You can use Telnet to connect to the FortiLog CLI from your internal network or the
Internet. Once the FortiLog unit is configured to accept Telnet connections, you can
run a Telnet client on your management computer and use this client to connect to the
FortiLog CLI.
!
Caution: Telnet is not a secure access method. SSH should be used to access the FortiLog CLI
from the internet or any other unprotected network.
To connect to the CLI using Telnet
1
Install and start a Telnet client.
2
Connect to the FortiLog port1 interface that is configured for Telnet connections.
3
Type a valid administrator name and press Enter.
4
Type the password for this administrator and press Enter.
You have connected to the FortiLog CLI, and you can enter CLI commands.
90
05-16000-0082-20050115
Fortinet Inc.
FortiLog CLI reference
CLI commands
CLI commands
The FortiLog CLI commands include:
•
execute branch
•
get branch
•
set branch
•
unset branch
execute branch
Use execute to run static commands, to reset the FortiLog unit to factory defaults, to
back up or restore FortiLog configuration files, and to reboot or shut down the FortiLog
system.
Table 4: execute command architecture
reload <return>
restore
backup
execute
config <string> <xxx.xxx.xxx.xxx> <return>
image <string> <xxx.xxx.xxx.xxx> <return>
config <name_str> <xxx.xxx.xxx.xxx> <return>
reboot <return>
factoryreset <return>
save
config <return>
shutdown <return>
formatlogdisk <return>
Commands
Description
execute reload
If you set your console to batch mode, use this command to flush the
current configuration from system memory and reload the configuration
from a saved configuration file.
execute restore config <string>
<xxx.xxx.xxx.xxx>
Restore system settings from tftp server.
• <string> is the configuration file name on the tftp server.
• <xxx.xxx.xxx.xxx> is the IP address of the tftp server.
execute restore image <string>
<xxx.xxx.xxx.xxx>
Restore system images from tftp server.
• <string> is the image file name on the tftp server.
• <xxx.xxx.xxx.xxx> is the IP address of the tftp server.
execute backup config <name_str>
<xxx.xxx.xxx.xxx>
Backup system settings to tftp server.
• <name_str> is the system configuration file name.
• <xxx.xxx.xxx.xxx> is the IP address of the tftp server.
execute reboot
Restart the FortiLog system.
execute factoryreset
Set the FortiLog system back to factory defaults.
execute save config
Save the FortiLog system configuration.
execute shutdown
Shut down the FortiLog system.
execute formatlogdisk
Format the local log hard disk.
FortiLog Administration Guide
05-16000-0082-20050115
91
CLI commands
FortiLog CLI reference
get branch
Use get to display settings, logs, or system information.
Table 5: get command architecture
alertemail
config <return>
configuration <return>
setting <return>
<keyword_str> <return>
console <return>
report
resolve
alias
client <return>
elog <return>
logsetting <return>
query <return>
name <string>
querysets
log
report <return>
devicesets
filters
schedules
get
otuputs
raid <return>
policy <return>
destination
{syslog | local | console} <return> event <return>
status <return>
serialno <return>
performance <return>
interface <return>
dns <return>
system
route
time
table <return>
time <return>
ntp <return>
session_ttl
option <return>
mainregpage <return>
admin <return>
Commands
Description
get alertemail configuration
Display alert email configuration.
get alertemail setting
Display alert email setting status.
get config
Display system configuration.
get console
Display console information, including page number, mode and baudrate.
92
05-16000-0082-20050115
Fortinet Inc.
FortiLog CLI reference
CLI commands
get report resolve
Display the settings (what is turned on) for resolving host and service
names.
get report aliases
Display a list of IP aliases and their IP address.
get log client
Display the FortiGate units connected to the FortiLog unit.
get log elog
Display event logs.
get log logsetting
Display log settings.
get log query
Display log queries.
get log report
Display a matrix of all set reports.
get log report name <string>
Display information on a specific report name.
get log report querysets
Display information on the queries set for each report.
get log report devicesets
Display information on the devices sets for each report.
get log report filters
Display the information on the filtering options for the reports.
get log report schedules
Display the scheduling information for the reports.
get log report outputs
Display the output options for the reports.
get log raid
Display RAID levels.
get log policy destination {syslog | local |
console}
Display log policies of the remote syslog server, the FortiLog hard disk, or
the console.
get log policy destination event
Display log policy event setting of the selected destination.
get system status
Display system status.
get system serialno
Display the FortiLog unit serial number.
get system performance
Display the FortiLog unit system performance, including CPU, memory, and
if the system is up.
get system interface
Display port1 interface information.
get system dns
Display domain name server configuration.
get system brctl
Display system interface information and MAC address.
get system route table
Display system route table information, including table number, destination,
gateway, and interface.
get system time time
Display current system time.
get system time ntp
Display NTP server name and information.
get system session_ttl
Display the idle time length for a session.
get system option
Display system options, including system idle timeout, authentication
timeout, and language for the web-base manager.
get system mainregpage
Display main registration message.
get system admin
Display admin user information.
FortiLog Administration Guide
05-16000-0082-20050115
93
CLI commands
FortiLog CLI reference
set branch
Use set to configure settings, logs, or system information.
set alertemail
Use set alertemail to configure alert mails.
Table 6: set alertemail command architecture
auth {enable | disable} <return>
mailto <string> <string> <string>
<return>
configuration
none <return>
passwd <string> <return>
server <server_address>
<return>
user <name_str> <return>
critical <return>
setting
option
diskfull <return>
none <return>
alert {enable disable} <return>
localmailaddr <string><return>
local
level {emergency | alert | critical |
error | warning | notification |
information}
eventnum {1 | 5 | 10 | 20 | 50 | 100
| 500 | 1000} <return>
time {0.5 | 1.0 | 3.0 | 6.0 |12.0 |
24.0 | 72.0 | 168.0}
set
alertemail
name <string><return>
devlist <string><return>
levelalert {enable | disable}<return>
levelnum {emergency | alert | critical | error |
warning | notification | information} <return>
eventnum {1 | 5 | 10 | 20 | 50 | 100 | 500 |
1000} <return>
leveltime {0.5 | 1.0 | 3.0 | 6.0 |12.0 | 24.0 |
72.0 | 168.0} <return>
device {enable |
disable}
leveldevice {all | per } <return>
add
attackalert {enable | disable}<return>
attackany {any | some} <return>
attackeywords <keyword1 | keyword2>
<return>
attacknum {1 | 5 | 10 | 20 | 50 | 100 | 500 |
1000} <return>
attacktime {0.5 | 1.0 | 3.0 | 6.0 |12.0 | 24.0 |
72.0 | 168.0} <return>
attackdevice {all | per } <return>
attacksingle {y | n} <return>
94
05-16000-0082-20050115
Fortinet Inc.
FortiLog CLI reference
CLI commands
Table 6: set alertemail command architecture
virusalert {enable | disable}<return>
virusany {any |some| <return>
viruskeywords <keyword1 | keyword2>
<return>
set
alertemail
device {enable |
disable}
virusnum {1 | 5 | 10 | 20 | 50 | 100 | 500 |
1000} <return>
add
virustime {0.5 | 1.0 | 3.0 | 6.0 |12.0 | 24.0 |
72.0 | 168.0} <return>
virusdevice {all | per } <return>
virussingle {y | n} <return
devicemailaddr <string>
Commands
Description
set alertemail configuration auth {enable |
disable}
Enable or disable SMTP authentication for sending alert emails.
set alertemail configuration mailto <string>
<string> <string>
Enter the email addresses of three alert email recipients.
• <string> is the email address of an alert email recipient.
set alertemail configuration mailto none
Clear all email addresses of the alert email recipients.
set alertemail configuration passwd <string>
Set the password for logging on to the SMTP server to send alert emails.
• <string> is the password.
set alertemail configuration server
<server_address>
Set the IP address of the SMTP server for sending alert emails.
• <server_address> is the IP address of the SMTP server.
set alertemail configuration user <name_str>
Set the user name for logging on to the SMTP server to send alert emails.
• <name_str> is the user name.
set alertemail setting option critical
Configure the alertemail to report critical incidents.
set alertemail setting option diskfull
Configure the alertemail to report if the FortiLog hard disk is full.
set alertemail setting option none
Clear all alert email option configuration.
set alertmail local alert {enable | disable}
Enable the alert messages for the FortiLog unit.
set alertmail local localmailaddr <string>
Set the email address where the FortiLog unit will send the alert
messages.
set alertmail local level {emergency | alert |
critical | error | warning | notification |
information}
Set the level to monitor before sending an alert message. The FortiLog
unit sends alert email for all messages at and above the logging severity
level you set.
set alertmail local eventnum {1 | 5 | 10 | 20 | 50 | Set the number of selected events that occur before the FortiLog unit
sends an alert message. Use this setting in conjunction with the setting
100 | 500 | 1000}
below.
set alertmail local time {0.5 | 1.0 | 3.0 | 6.0 |12.0 | Set the wait time for the number of events to occur within before sending
an alert email for the specified level log messages. Use this setting in
24.0 | 72.0 | 168.0}
conjunction with the setting above.
set alertmail device {enable | disable}
Enable or disable the monitoring of device logs for alert messages.
set alertmail device enable add name <string>
Add a device name to the alertmail list.
set alertmail device enable add devlist <string> Add a device group to the alertmail list.
set alertmail device enable add levelalert
{enable | disable}
FortiLog Administration Guide
Enable the level alert option to set the level the FortiLog unit will monitor
before sending an alert message.
05-16000-0082-20050115
95
CLI commands
FortiLog CLI reference
set alertmail device enable add levelnum
{emergency | alert | critical | error | warning |
notification | information}
Set the level to monitor before sending an alert message. The FortiLog
unit sends alert email for all messages at and above the logging severity
level you set.
set alertmail device enable add eventnum
{1 | 5 | 10 | 20 | 50 | 100 | 500 | 1000}
Set the number of selected events that occur before the FortiLog unit
sends an alert message. Use this setting in conjunction with the setting
below.
set alertmail device enable add leveltime
{0.5 | 1.0 | 3.0 | 6.0 |12.0 | 24.0 | 72.0 | 168.0}
Set the wait time for the number of events to occur within before sending
an alert email for the specified level log messages. Use this setting in
conjunction with the setting above.
set alertmail device enable add leveldevice
{all | per}
Set level setting to monitor each device separately or as a group.
set alertmail device enable add attackalert
{enable | disable}
Enable or disable the monitoring of specific attack types.
set alertmail device enable add attackany
{any | some}
Set the FortiLog to monitor for any attack types or specific attacks. Use in
conjunction with the next command.
set alertmail device enable add attackeywords
<keyword1 | keyword2}
Set the attack types the Fortilog should monitor for in the device logs. Use
in conjunction with the command above.
set alertmail device enable add attacknum
{1 | 5 | 10 | 20 | 50 | 100 | 500 | 1000}
Set the number of attack events that occur before the FortiLog unit sends
an alert message. Use this setting in conjunction with the setting below.
set alertmail device enable add attacktime
{0.5 | 1.0 | 3.0 | 6.0 |12.0 | 24.0 | 72.0 | 168.0}
Set the wait time for the number of attack events to occur within before
sending an alert email for the specified level log messages. Use this
setting in conjunction with the setting above.
set alertmail device enable add attackdevice
{all | per}
Set level setting to monitor each device separately or as a group.
set alertmail device enable add attacksingle
{y | n}
Set to the FortiLog unit send and alert email only when the defined attack
settings originate from a singe source IP.
set alertmail device enable add virusalert
{enable | disable}
Enable or disable the monitoring of specific virus types.
set alertmail device enable add virusany
{any | some}
Set the FortiLog to monitor for any virus types or specific attacks. Use in
conjunction with the next command.
set alertmail device enable add viruskeywords
<keyword1 | keyword2}
Set the virus types the Fortilog should monitor for in the device logs. Use
in conjunction with the command above.
set alertmail device enable add virusnum
{1 | 5 | 10 | 20 | 50 | 100 | 500 | 1000}
Set the number of virus events that occur before the FortiLog unit sends
an alert message. Use this setting in conjunction with the setting below.
set alertmail device enable add virustime
{0.5 | 1.0 | 3.0 | 6.0 |12.0 | 24.0 | 72.0 | 168.0}
Set the wait time for the number of virus events to occur within before
sending an alert email for the specified level log messages. Use this
setting in conjunction with the setting above.
set alertmail device enable add virusdevice
{all | per}
Set level setting to monitor each device separately or as a group.
set alertmail device enable add virussingle
{y | n}
Set to the FortiLog unit send and alert email only when the defined virus
settings originate from a singe source IP.
set alertmail device enable add devicemailaddr Set the email addresses of the recipients to receive the alert warning
messages.
<string>
96
05-16000-0082-20050115
Fortinet Inc.
FortiLog CLI reference
CLI commands
set console
Use set console to set console configuration.
Table 7: set console command architecture
baudrate {9600 | 19200 |
38400 | 57600 | 115200}
<return>
set
console
batch <return>
mode
line <return>
page <integer/0> <return>
Commands
Description
set console baudrate {9600 | 19200 |
38400 | 57600 | 115200}
Set the console baudrate to one of the five values.
set console mode {batch | line}
Set the console mode to batch or line. The default setting is line.
set console page <integer/0>
Set the number of lines that appear on each page of command line console output.
The default setting is 25.
Set this value to 0 to allow output to flow without paging.
• <integer/0> is the number of lines that appear on each page of command line
console output.
FortiLog Administration Guide
05-16000-0082-20050115
97
CLI commands
FortiLog CLI reference
set log
Use set log to configure log settings
Table 8: set log command architecture
client
deviceid
<string> <string>
secure {yes | no}
psk <string>
space
<number>
<return>
status {enable |
disable} <return>
loglevel
<severity_integer>
<return>
status {enable |
disable} <return>
loglevel
csv {enable |
<severity_integer> disable}
<return>
filesz
fileage
spacefull
<integer> <integer> {overwrite
<return> <return> _oldest |
stop_
logging}
raid
uuid <raid_
<raid
uuid>
level>
<return>
devicegr
oup
<string>
console
local
diskfull
set log
setting
memory
<enable |
disable>
<return>
loglevel
<severity_integer>
remote {enable |
disable} <return>
server <server_ip> port
<return>
<port_integer>
<return>
loglevel
csv
<severity {enable |
_integer> disable}
<return>
local
status {enable |
disable} <return>
loglevel
<severity_integ
er> <return>
csv
{enable |
disable}
event
status <enable |
disable> <return>
category
configura ipsec
tion
login
ipmac
system
routegate
way
none
syslog
policy
98
destination
<syslog |
local |
console>
05-16000-0082-20050115
Fortinet Inc.
FortiLog CLI reference
CLI commands
Table 8: set log command architecture
from <YY-MMDD-HH> to
<YY-MM-DDHH>
today |
yesterday
period
this {year
|quarter|month|
week}
last
{year|quarter|m
onth|week}
nweeks<
weeks>
ndays<d
ays>nho
urs<hour
s>
vdom
name <report
name><Return>
results
all
top
resolve
set
log
devtype report
<string>
dev
x <integer
0..99>
y <integer
0..99>
ip
port
queryset <string>
deviceset <string>
filters<return>
<string>
schedule
<return>
<string>
output <string>
run
queryset <name of <qry_indexes>
queryset><return>
deviceset
<string><return>
{all | 0,4,5}
filters<return>
<string><return>
none
hours <hour>
schedule
<string><return>
daily
days <mon, tue,
wed...>
dates <1,2,3..>
storage
output
<string><return>
destination
05-16000-0082-20050115
<html,pdf
,rtf,text>
address
mail
FortiLog Administration Guide
formats
<return>
formats
<return>
<html,pdf
,rtf,text>
99
CLI commands
FortiLog CLI reference
Commands
Description
set log client <client_string> deviceid <id_string>
secure {yes | no} psk <psk_string> space
<number> filesz <filesz_integer> fileage
<fileage_integer> spacefull {overwrite_oldest |
stop_logging}
Configure the FortiLog to log a FortiGate client.
• <client_string> is the name of the client.
• <id_string> is the FortiGate client ID, for example, the serial number.
• {yes | no} provides the option to configure secured connection or not.
• <psk_string> is the pre-shared key number.
• <number> is the amount of the allocated disk space. Set disk quota
from 0 to 4000 MB. A disk quota of 0 is unlimited.
• <filesz_integer> is the size limit for the log files. The default log file size
is 10 MB.
• <fileage> is the time limit for the FortiLog unit to keep the log files. The
default log file age is 10 days.
• {overwrite_oldest | stop_logging} allows you to select what you want
the FortiLog unit to do when the allocated disk space for the FortiGate
device is used up.
set log raid <raid_level>
Set the log RAID level: linear, 0, 1, or 5. There is no default value for this
option.
set log raid uuid <raid_uuid>
Set the log RAID universal unique identifier.
set log devicegroup <string>
Create a device group to add devices to.
set log setting console loglevel
<severity_integer>
Set the console log severity level
0 = Emergency, 1 = Alert, 2 = Critical, 3 = Error, 4 = Warning, 5 =
Notification, 6 = Information
The log levels will be up to but not higher than the value you set.
set log setting local status {enable | disable}
Enable or disable logging to the FortiLog unit hard disks.
set log setting local filesz <file-sz_integer>
Set the maximum size for the Fortilog local log file.
set log setting local logtime <days_integer>
Set the number of days before the FortiLog unit starts a new log file.
set log setting local diskfull
set log setting local memory status <enable |
disable>
Configure the FortiLog unit to log to the local memory.
set log setting local memory loglevel
<severity_integer>
Set the local FortiLog unit log severity level
0 = Emergency, 1 = Alert, 2 = Critical, 3 = Error, 4 = Warning, 5 =
Notification, 6 = Information
The log levels will be up to but not higher than the value you set.
set log setting syslog local status loglevel
<severity_integer>
Set the local FortiLog unit log severity level
0 = Emergency, 1 = Alert, 2 = Critical, 3 = Error, 4 = Warning, 5 =
Notification, 6 = Information
The log levels will be up to but not higher than the value you set.
set log setting syslog local status loglevel
<severity_integer> csv {enable | disable}
Enable or disable CSV format to record log messages to the FortiLog
unit hard disk in comma-separated value (CSV) formatted files. Log
message fields are separated by commas.
set log setting syslog remote {enable | disable}
Enable or disable logging to the remote syslog server.
set log setting syslog remote server <server_ip> Configure the remote syslog server log setting.
• <server_ip> is the IP address of the remote server.
set log setting syslog remote server <server_ip> Configure the port that the remote syslog server uses to receive log
messages.
port <port_integer>
• <port_integer> is the port number of the server.
The default port is 514.
100
05-16000-0082-20050115
Fortinet Inc.
FortiLog CLI reference
CLI commands
set log setting syslog remote server <server_ip> Set the remote syslog severity level
port <port_integer> loglevel <severity_level>
0 = Emergency, 1 = Alert, 2 = Critical, 3 = Error, 4 = Warning, 5 =
Notification, 6 = Information
The log levels will be up to but not higher than the value you set.
set log setting syslog remote server <server_ip> Enable or disable CSV format to record log messages to the remote
port <port_integer> loglevel <severity_level> csv syslog server in comma-separated value (CSV) formatted files. Log
message fields are separated by commas.
{enable | disable}
set log policy destination <syslog | local |
console>
Set the destination where log policy information will reside.
set log policy destination <syslog | local |
console>event status <enable | disable>
Enable or disable the event log recording of management and activity
events. Management events include changes to the FortiLog and
administrator login/logout. System activities include activities such as
IPSec negotiation.
set log policy destination <syslog | local |
Set the management events and system activities to log.
console> event <enable | disable> configuration
<configuration | ipsec | login | ipmac | system |
routegateway| none>
set log devtype <string> report name <report
name>
Define the report name for a device
• devtype<string> is one of FortiGate, FortiMail, FortiManager and
Syslog
• <report name> define a name for the report.
set log devtype <string> report <report name>
Set the start and ending period the FortiLog unit pulls the data from the
period {from<YY-MM-DD-HH> to <YY-MM-DD-HH> logs.
set log devtype <string> report <report name>
period {today | yesterday}
Set the period the FortiLog unit pulls the data from the logs.
set log devtype <string> report <report name>
period this {year|quarter|month|week}
Set the period the FortiLog unit pulls the data from the logs.
set log devtype <string> report <report name>
period last {year|quarter|month|week}
Set the period the FortiLog unit pulls the data from the logs.
set log devtype <string> report <report name>
results {vdom | dev | all}
Set the devices or virtual domains to include in the report.
• all - all available devices
• dev -display results per device
• vdom - display results per virtual domain
set log devtype <string> report <report name>
top {x | y}<integer>
Set the top values for specific log reports, where the top values are
reported. This can be useful when you have many email clients yet you
only need to report on the top ten.
set log devtype <string> report <report name>
resolve {ip |port}
Set the resolving of IP addresses and port numbers to meaningful
names. You must first add IP aliases to use this option. For details, see
the report alias command on page 92.
set log devtype <string> report <report name>
queryset <string>
Select a defined query profile to use in the report.
set log devtype <string> report <report name>
deviceset <string>
Select a defined device profile to use in the report.
set log devtype <string> report <report name>
filters <string>
Select a defined filter profile to use in the report.
set log devtype <string> queryset
<name><qry_indexes>
Select the queries to include in a report and store as a profile for later
use in other reports.
set log devtype <string> deviceset
<string><all|0,4,5>
Select the devices to include in a report and store as a profile for later
use in other reports.
FortiLog Administration Guide
05-16000-0082-20050115
101
CLI commands
FortiLog CLI reference
set log devtype <string> filters <string>
Select the filter options to include in a report and store as a profile for
later use in other reports.
set log devtype <string> schedule <string>
{none|hours<hour> | daily | days <mon, tue,
wed...> | dates <1,2,3...>
Select the schedule for the report to run and store as a profile for later
use in other reports. Select from various time frames. A setting of none
indicates a report will only be run on demand manually.
set log devtype <string> output <string>
destionation {storage formats <html, pdf, rtf,
text>} | {mail address<[email protected]>
formats <html, pdf, rtf, text>}
Select the type of output the FortiLog unit generates for the reports and
whether to save to a file on the FortiLog hard disk or send the results via
email to set recipients. Store the settings as a profile for later use in
other reports.
102
05-16000-0082-20050115
Fortinet Inc.
FortiLog CLI reference
CLI commands
set NAS
Use set NAS to configure the FortiLog NAS server settings when using the FortiLog
unit in Passive mode.
Table 9: set NAS command architecture
protocol
share
workgroup <workgroup>
uid <uid>
name <display name>
name <display name>
password <password>
group <group gid <gid>
name>
members <members>
<return>
members <members>
user <user
name>
set
nas
nfs
share <share
name>
nfs
path <local path> <return>
ro <ro list> <return>
password <password>
rw <rw list> <return>
rw <rw list>
path <local path> <return>
ro <ro list> <return>
rw <rw list> <return>
rw <rw list>
Commands
Description
set nas protocol {nfs | share}
Set the FortiLog unit’s passive mode sharing to either Network File System or
windows sharing.
set nas protocol share workgroup
<workgroup>
When using Windows sharing, set the workgroup name.
set nas user <username> uid <uid>
name <display name> password
<password>
Set up a user to have access to file sharing by setting their user name, user ID
number, display name and password.
set nas user <username> name
<display name> password
<password>
Set up a user to have access to file sharing by setting their user name, display name
and password.
set nas group <group name> gid<gid> Set up a user group to have access to file sharing by setting the group name, group
ID number and including members.
members <members>
set nas group <group name> members Set up a user group to have access to file sharing by setting the group name and
adding members.
<members>
set nas share <share name> path
<local path>
Set a Windows share name and path to the shared directory.
set nas share <share name> path
Set user permissions, either read only or read and write for a specified Windows
<local path> {ro <ro list> | rw <rw list>} share name and path.
set nas share <share name> path
<local path> rw<rw list>
Set user read & write permissions for a specified Windows share name and path.
set nas nfs path <local path>
Set a directory path for the network file system directory.
set nas nfs path <local path> {ro <ro
list> | rw <rw list>}
Set the users and their permissions, either read only or read and write for a specified
network file share path.
set nas nfs path <local path> rw<rw
list>
Set the user read & write permissions for a specified network file share path.
FortiLog Administration Guide
05-16000-0082-20050115
103
CLI commands
FortiLog CLI reference
set report
Use set report to configure the FortiLog report settings.
Table 10: set report command architecture
set
resolve <services | aliases>
report
alias <alias>
hostnetrange <x.x.x.x/n-y.y.y.y/n>
Commands
Description
set report resolve <services | aliases
Select Resolve IP Ports to Service Name to view the port number by its
service name. For example, display HTTP rather than port 80
set alias hostnetrange <x.x.x.x/ny.y.y.y/n>
Set the alias name for the IP address of the host, network or the IP range.
set system
Use set system to configure the FortiLog system settings.
Table 11: set system command architecture
password
<password_str>
<return>
admin
permission {readonly |
readwrite}<return>
username
<name_str>
trusthost
<xxx.xxx.xxx.xxx> or
<0.0.0.0> for anyip
address
<xxx.xxx.xxx.xxx> or
<0.0.0.0> for anynet
mask <return>
status <enable |
disable>
set system dns
primary
{xxx.xxx.xxx.xxx |
none} <return>
secondary
{xxx.xxx.xxx.xxx |
none} <return>
hostname
<hostname_str>
<return>
ping <return>
https <return>
interface
<intf_str>
config
allowaccess
ssh <return>
snmp <return>
http <return>
telnet <return>
104
05-16000-0082-20050115
Fortinet Inc.
FortiLog CLI reference
CLI commands
Table 11: set system command architecture
ping <return>
https <return>
denyaccess
ssh <return>
snmp <return>
http <return>
telnet <return>
wins <xxx.xxx.xxx.xxx>
<return>
macaddr
{xxx.xxx.xxx.xxx |
factorydefault} <return>
log {enable | disable}
<return>
mtu <mtu_integer>
<return>
speed <speed_str>
<return>
status {down | up}
<return>
config
secip <xxx.xxx.xxx.xxx> <xxx.xxx.xxx.xxx>
(secondary interface ip) (netmask of secondary
ip) <return>
interface
<intf_str>
ping <return>
set system
https <return>
secallowaccess
ssh <return>
snmp <return>
http <return>
telnet <return>
ping <return>
https <return>
secdenyaccess
ssh <return>
snmp <return>
http <return>
telnet <return>
stp-passthrough
{enable | disable}
mode
session_ttl
static
ip <xxx.xxx.xxx.xxx>
(interface ip)
<xxx.xxx.xxx.xxx>
(ip netmask)
<return>
port
timeout <timeout_int>
<port_num><return>
default <default_val>
mainregpage
FortiLog Administration Guide
hide <return>
show <return>
05-16000-0082-20050115
105
CLI commands
FortiLog CLI reference
Table 11: set system command architecture
ping <return>
https <return>
denyaccess
ssh <return>
snmp <return>
http <return>
telnet <return>
wins <xxx.xxx.xxx.xxx>
<return>
macaddr
{xxx.xxx.xxx.xxx |
factorydefault} <return>
log {enable | disable}
<return>
mtu <mtu_integer>
<return>
speed <speed_str>
<return>
status {down | up}
<return>
config
secip <xxx.xxx.xxx.xxx> <xxx.xxx.xxx.xxx>
(secondary interface ip) (netmask of secondary
ip) <return>
interface
<intf_str>
ping <return>
set system
https <return>
secallowaccess
ssh <return>
snmp <return>
http <return>
telnet <return>
ping <return>
https <return>
secdenyaccess
ssh <return>
snmp <return>
http <return>
telnet <return>
stp-passthrough
{enable | disable}
mode
session_ttl
static
ip <xxx.xxx.xxx.xxx>
(interface ip)
<xxx.xxx.xxx.xxx>
(ip netmask)
<return>
port
timeout <timeout_int>
<port_num><return>
default <default_val>
mainregpage
106
hide <return>
show <return>
05-16000-0082-20050115
Fortinet Inc.
FortiLog CLI reference
CLI commands
Table 11: set system command architecture
opmode
active <return>
passive <return>
admintimeout
<timeout_integer>
<return>
option
authtimeout
<<timeout_integer>
<return>
language
<language_str>
<return>
refresh {interval |
none} <return>
alert_table
alert_severity
<serverity_integer>
alert_period
<period_integer>
dst
<xxx.xxx.xxx.xxx> (ip
<xxx.xxx.xxx.xxx> (ip address mask) <return>
address)
gw1
<xxx.xxx.xxx.xxx> (ip
address) <return>
set system route <number>
dev1 <intf_name>
<return>
gw2
<xxx.xxx.xxx.xxx> (ip
address) <return>
dev2 <intf_name>
<return>
date <mm/dd/yyyy>
<return>
manual
clock <hh.mm.ss>
<return>
zone <No.> <return>
dst {enable | disable}
<return>
ntpsync {enable |
disable} <return>
time
ntpserver
{xxx.xxx.xxx.xxx |
hostname} <return>
ntp
syncinterval <Syn
interval> <return>
zone <No.> <return>
dst {enable | disable}
<return>
FortiLog Administration Guide
05-16000-0082-20050115
107
CLI commands
Commands
FortiLog CLI reference
Description
set system admin username
Enter system administrator user name, password, and access permission.
<name_str> password
• <name_str> is the administrator user name.
<password_str> permission {readonly • <password_str> is the password.
| readwrite}
set system admin username
<name_str> trusthost <trusthost_str>
or <0.0.0.0> <netmask_str> or
<0.0.0.0>
Enter the administrator trusted host IP address and netmask. The trusted host IP
address is the location from which the administrator can log into the web-based
manager. If trusted host is 0.0.0.0 the administrator can log in from any IP address.
The trusted host netmask is the location from which the administrator can log into
the web-based manager. If netmask is 0.0.0.0 there is no restriction on the netmask.
• <trusthost_str> is trusted host IP address.
• <netmask_str> is the netmask.
set system admin username status
<enable | disable>
set system dns primary
{xxx.xxx.xxx.xxx | none}
Enter the primary DNS server IP address. Enter none to delete the primary DNS
server.
• <xxx.xxx.xxx.xxx> is the primary DNS server IP address.
set system dns secondary
{xxx.xxx.xxx.xxx | none}
Enter the secondary DNS server IP address. Enter none to delete the secondary
DNS server.
• <xxx.xxx.xxx.xxx> is the secondary DNS server IP address.
set system hostname <hostname_str> Enter the name for this FortiLog unit.
• <hostname_str> is the name of the FortiLog unit.
set system interface <nativist> config Select the management access to the FortiLog unit interface (port1).
allowaccess {ping | https | ssh | snap | • <nativist> is system interface name.
http | telnet}
set system interface <nativist> config Select the management access that you want to deny to the FortiLog unit interface
denatures {ping | https | ssh | snap | (port1).
• <nativist> is system interface name.
http | telnet}
set system interface <nativist> config Enter the WINS server IP address.
wins <xxx.xxx.xxx.xxx>
• <xxx.xxx.xxx.xxx> is the WINS server IP address.
set system interface <nativist> config Set the mac address for this interface. You can also set it back to the factory default
matador {xx:xx:xx:xx:xx:xx | factory value.
• <xx:xx:xx:xx:xx:xx> is the interface mac address.
default}
set system interface <intf_str> config Enable or disable logging on traffic to the FortiLog unit from this interface.
log {enable | disable}
set system interface <intf_str> config Enter the maximum transportation unit for this interface. Enter “default” to cancel the
mtu.
mtu <mtu_integer>
• <mtu_integer> is the maximum transportation unit for this interface.
set system interface <intf_str> config Enter the transportation speed of this interface.
speed <speed_str>
• <speed_str> is the speed type (auto, 10full, 10half, 100full, or 100half).
set system interface <intf_str> config Set the interface down or up.
status {down | up}
set system interface <intf_str> config Enter the secondary IP address of the interface.
secip <xxx.xxx.xxx.xxx>
• <xxx.xxx.xxx.xxx> is the secondary IP address of the interface.
set system interface <intf_str> config Select management access to the port1 interface with a secondary IP.
secallowaccess {ping | https | ssh |
snmp | http | telnet}
set system interface <intf_str> config Select the management access with a secondary IP that you want to deny to the
port1 interface.
secdenyaccess {ping | https | ssh |
snmp | http | telnet}
108
05-16000-0082-20050115
Fortinet Inc.
FortiLog CLI reference
CLI commands
set system interface config
stp_passthrough
set system interface <intf_str> config Set the interface mode to static.
mode static
set system mainregpage hide
Hide main registration message.
set system session_ttl port
<port_num> timeout <timeout_int>
Set the session timeout maximum for the port.
set system session_ttl port
<port_num> default <default_val>
Set a default value for the session time for the port.
set system mainregpage show
Show main registration message.
set system opmode active
Set the FortiLog unit to active mode.
set system opmode passive
Set the FortiLog unit to passive mode.
set system option admintimeout
<timeout_integer>
Enter an idle timeout number in minutes. Idle Timeout controls the amount of
inactive time that the web-based manager waits before requiring the administrator to
log in again.
The default idle time out is 5 minutes. The maximum idle time out is 480 minutes
(8 hours).
• <timeout_integer> is the idle timeout number in minutes.
set system option authtimeout
<timeout_integer>
Enter an auth timeout number in minutes. Auth Timeout controls the amount of
inactive time that the FortiLog unit waits before requiring users to authenticate
again.
The default Auth Timeout is 15 minutes. The maximum Auth Timeout is 480 minutes
(8 hours).
• <timeout_integer> is auth timeout number in minutes.
set system option language
<language_str>
Enter a language for the web-based manager to use. You can choose English,
Simplified Chinese, Japanese, Korean, or Traditional Chinese.
• <language_str> is the language you choose.
set system option refresh {interval |
none}
Set system option refresh interval. Enter none to cancel refresh interval.
set system alert_table alert_severity
<severity_integer>
Set the monitor severity level for alert table.
0 = Emergency, 1 = Alert, 2 = Critical, 3 = Error, 4 = Warning.
The log levels will be up to but not higher than the value you set.
get system alert_table alert_period
<period_integer>
Set the length of time to keep unacknowledged alerts in number of days between 1
and 7.
set system route <number> dst
Set the FortiLog system route destination IP address and IP address mask.
<ipaddress_str> <ipaddressmask_str> • <ipaddress_str> is the destination IP address.
• <ipaddressmask_str> is the IP address mask.
set system route <number> gw1
<xxx.xxx.xxx.xxx>
Set the FortiLog system route primary gateway IP address.
• <xxx.xxx.xxx.xxx> is the primary gateway IP address.
set system route <number> dev1
<intf_name>
Set the FortiLog system route primary device (FortiGate unit) interface name.
• <intf_name> is the primary device interface name.
set system route <number> gw2
<xxx.xxx.xxx.xxx>
Set the FortiLog system route secondary gateway IP address.
• <xxx.xxx.xxx.xxx> is the secondary gateway IP address.
set system route <number> dev2
<intf_name>
Set the FortiLog system route secondary device (FortiGate unit) interface name.
• <intf_name> is the secondary device interface name.
set system time manual date
<mm/dd/yyyy>
Set the system time by month, day, and year.
set system time manual clock
<hh:mm:ss>
Set the system time by hour, minute, and second.
FortiLog Administration Guide
05-16000-0082-20050115
109
CLI commands
FortiLog CLI reference
set system time manual zone <No.>
Set the system time zone by number.
set system time manual dst {disable | Enable or disable daylight saving time.
enable}
set system time ntp ntpsync {disable | Enable or disable FortiLog unit synchronization with NTP server.
enable}
set system time ntp ntpserver
{xxx.xxx.xxx.xxx | hostname}
Enter NTP server IP or hostname.
• <xxx.xxx.xxx.xxx> is the NTP server IP address.
set system time ntp syncinterval
<sync_interval>
Set system synchronization time interval from 1 to 1440 minutes.
• <sync_interval> is the system synchronization time interval.
set system time ntp zone <No.>
Set NTP server time zone by number.
set system time ntp dst {disable |
enable}
Enable or disable daylight saving time.
unset branch
Use unset to remove configuration of alert email, log, and system.
Table 12: unset command architecture
system
admin
username <name_str> <return>
route
number <xxx> <return>
hostname <return>
session_ttl <number>
log
client <string> <return>
alertemail
configuration <return>
unset
nfs
protocol
nas
share
user <user name>
group <group name>
share <share name>
nfs
report
path <local path>
resolve
alias <alias> <return>
Commands
Description
unset system admin username
<name_str>
Enter the system administrator name that you want to remove.
• <name_str> is the system administrator name.
unset system route number <xxx>
Enter the system route number that you want to remove.
• <xxx> is the system route number.
unset system hostname
Enter the system hostname that you want to remove.
unset system_ttl <number>
Remove the system time-to-live session timeout.
unset log client <string>
Remove a client added to the FortiLog unit.
• <string> is the name of the client.
unset alertemail configuration
Remove alert email configuration.
unset nas protocol {nfs | share}
Remove the nas configuration settings.
110
05-16000-0082-20050115
Fortinet Inc.
FortiLog CLI reference
CLI commands
unset nas user <user name>
Remove a user name.
unset nas group <group name>
Remove a group name.
unset nas share <share name>
Remove a Windows-shared folder setting.
unset nas nfs path <local path>
Remove a Network File Share path folder setting.
unset report resolve
Remove resolve alias setting when generating log reports. When removed, the
actual IP addresses will appear on the report rather than the alias names.
unset report alias <alias>
Remove the alias association to a particular IP address.
• <alias> is the name of the alias for the IP address. The IP address will appear on
the log report rather than the alias name.
FortiLog Administration Guide
05-16000-0082-20050115
111
CLI commands
112
FortiLog CLI reference
05-16000-0082-20050115
Fortinet Inc.
FortiLog Administration Guide Version 1.6
Appendix A: Log Report Types
Your FortiLog unit is can generate over 130 different types of log reports. Listed here
are the log reports and a short description.
Network Activity
Network activity log reports record total network traffic activities by a specific time and
direction as well as top traffic activities.
Log report
Description
Traffic By Date And Direction
Incoming and outgoing network traffic in kilobytes for a
specified day or range of days.
Traffic By Day Of Week And Direction Daily incoming and outgoing network traffic in kilobytes
for a specified week.
Traffic By Hour Of Day And Direction Hourly incoming and outgoing network traffic in kilobytes
for a specified period.
Traffic By Direction
Report of total incoming and out going network traffic in
kilobytes.
Traffic By Top Services And Direction Network traffic by Internet service by incoming and
outgoing network traffic in kilobytes.
Traffic By Top Sources
Network traffic volume in megabytes by source IPs.
Traffic By Top Sources And Top
Services
Network traffic by the source IPs and Internet services in
kilobytes.
Traffic By Top Sources And Top
Destinations
Network traffic by the source IPs and destination IPs in
kilobytes.
Traffic By Top Destinations
Network traffic by the destination IPs in kilobytes.
Traffic By Top Destinations And Top
Services
Network traffic by the destination IPs and Internet
services in kilobytes.
Traffic By Top Destinations And Top
Sources
Network traffic of the top destination IPs and their source
IPs in kilobytes.
Web Activity
Web Activity reports record total web access activities including blocked site access
attempts by a specific time and top web access activities.
FortiLog Administration Guide
Report
Description
Web Traffic By Date
Web traffic in megabytes for a specified day or range of
days.
Web Traffic By Day Of Week
Daily web traffic in megabytes for a specified week.
Web Traffic By Hour Of Day
Hourly web traffic in kilobytes for the specified period.
05-16000-0082-20050115
113
Appendix A: Log Report Types
Web Traffic By Direction
Total incoming and outgoing web traffic in kilobytes.
Blocked Web Site Attempts By Date
Attempts to access blocked web sties for a specific day
or range of days.
Blocked Web Site Attempts By Day
Of Week
Daily attempts to access blocked web sites for a
specified week.
Blocked Web Site Attempts By Hour Hourly attempts to access blocked web sites for a
Of Day
specified period.
Top Web Sites (Connections)
Most visited web sites by volume of web events.
Top Web Sites (Traffic)
Most popular web sites by traffic in kilobytes.
Top Pages
Most visited web pages by volume of web events.
Top Pages By Top Sources
Most visited web pages by source IP and web events.
Top Sources By Top Pages
Web activity by source IP and most visited web pages by
web events.
Top Web Clients (Connections)
Source IP connections by web events.
Top Web Clients (Traffic)
Web client source IP by total traffic volume in
megabytes.
Top Clients By Top Web Sites
(Connections)
Web client source IP connections and destination web
site IP by web events.
Top Clients By Top Web Sites (Traffic) Web client source IP traffic by destination in kilobytes.
Top Blocked Web Sites
Most commonly blocked web sites.
Top Client Attempts To Blocked Web Most commonly blocked web sites by source IP.
Sites
FTP Activity
FTP reports record total FTP access activities including traffic direction, sites and
connections.
114
Report
Description
FTP traffic by date
Records total FTP access activities including traffic
direction, sites and connections.
FTP traffic by day of week
FTP traffic in kilobytes for a specified day or range of
dates.
FTP traffic by hour of day
Daily FTP traffic in kilobytes for a specified week.
FTP traffic by direction
Hourly FTP traffic in kilobytes for a specified period
Top FTP sites (connection)
Total incoming and out going FTP traffic in kilobytes.
Top FTP sites (traffic)
Most popular FTP sites by FTP events.
Top FTP clients (connection)
Most popular FTP sites by traffic in kilobytes.
Top FTP clients (traffic)
FTP source IP connections by FTP events.
Top clients by top FTP sites
(Connections)
FTP source IP connections by volume in kilobytes.
Top clients by top FTP sites (traffic)
Top source IP by destination IP by volume in kilobytes.
05-16000-0082-20050115
Fortinet Inc.
Appendix A: Log Report Types
Terminal Activity
Terminal activity reports record total Terminal/CLI access activities.
Report
Description
Terminal Traffic By Date And Service Terminal activity by service for a specific day or range of
dates.
Terminal Traffic By Day Of Week And Daily terminal activity by service for a specified week.
Service
Terminal Traffic By Hour Of Day And Hourly terminal activity by service for a specified period.
Service
Telnet Traffic By Direction
Telnet traffic by direction in kilobytes.
SSH Traffic By Direction
SSH traffic by direction in megabytes.
Top Terminal Servers By Service
(Connections)
Top destination IPs by service and terminal events.
Top Terminal Servers By Service
(Traffic)
Terminal server traffic by service in kilobytes.
Top Terminal Clients By Service
(Connections)
Terminal client by service in terminal events.
Top Terminal Clients By Service
(Traffic)
Terminal server traffic by service in kilobytes.
Top Telnet Clients By Top Terminal
Servers (Traffic)
Terminal servers using Telnet and destination IPs in
kilobytes.
Top Telnet Clients By Top Terminal
Servers (Connections)
Terminal servers using Telnet and destination IPs in
terminal events.
Top SSH Clients By Top Terminal
Servers (Traffic)
Terminal servers using SSH and destination IPs in
kilobytes.
Top SSH Clients By Top Terminal
Servers (Traffic)
Terminal servers using SSH and destination IPs in
terminal events.
Mail Activity
Mail activity reports record Email traffic and connections.
FortiLog Administration Guide
Report
Description
Mail Traffic By Date
Email traffic by date or range of days.
Mail Traffic By Day Of Week
Daily email traffic for a specified week.
Mail Traffic By Hour Of Day
Hourly email traffic for a specified period.
Mail Traffic By Direction
Outgoing and incoming email traffic.
Top Mail Servers (Connections)
Email servers by traffic in mail events.
Top Mail Servers (Traffic)
Email servers by volume in megabytes.
Top Mail Clients (Connections)
Email clients by mail events.
Top Mail Clients (Traffic)
Email clients by traffic in megabytes.
Top Mail Servers By Top Clients
(Connections)
Email servers by top email client by mail event.
Top Mail Servers By Top Clients
(Traffic)
Email servers by top email client by traffic in megabytes.
05-16000-0082-20050115
115
Appendix A: Log Report Types
Intrusion Activity
Intrusion activity reports record top network attacks and top attacks by a specific time.
Report
Description
Attacks By Date And Top Attack
Types
Network attack types by intrusion event for a specified
date or range of days.
Attacks By Day Of Week And Top
Attack Types
Daily network attack types by intrusion event for a
specified week.
Attacks By Hour Of Day And Top
Attack Types
Hourly network attack types by intrusion event for a
specified period.
Attacks By Top Attack Types
Attack types by number of intrusion events.
Attacks By Top Attack Types And
Target Device
Attack types by target device and number of intrusion
events.
Attacks By Top Attack Types And Top Attack types by source IP and number of intrusion
Attack Source IP
events.
Attacks By Target Device And Top
Attack Types
Destination IP and attack types by number of intrusion
events.
Antivirus Activity
Antivirus activity reports record total antivirus attacks by time, attack event types, top
senders, and top receivers.
Report
Description
Total AV Events By Date And AV
Event Type
Antivirus events by antivirus event and number of events
for a specified date or range of days.
Total AV Events By Day Of Week And Daily antivirus events and number of events for a
AV Event Type
specified week.
Total AV Events By Hour Of Day And Hourly antivirus events by antivirus event and number of
AV Event Type
antivirus events for a specified period.
Total AV Events By Device And AV
Event Type
Antivirus events by Fortinet device and number of
antivirus events.
Total AV Events By Service And AV
Event Type
Antivirus events by Internet service and number of
antivirus events.
AV Events By Top Senders And AV
Event Type
Antivirus events by senders and number of antivirus
events.
AV Events By Top Receivers And AV Antivirus events by recipients and number of antivirus
Event Type
events.
AV Events By Top Virus Types
Listing of top viruses by antivirus events.
Web Filter Activity
Web filter activity reports record top web filter activities and total web filter activities by
a specific time and status.
116
Report
Description
Web Filter Events By Date And Top
Destinations
Web site destinations for a specified day or range of
days.
Web Filter Events By Day Of Week
And Top Destinations
Daily web events by top web site destinations for a
specified week.
05-16000-0082-20050115
Fortinet Inc.
Appendix A: Log Report Types
Web Filter Events By Hour Of Day
And Top Destinations
Hourly web events by top web site destinations for a
specified period.
Web Filter Events By Date And Top
URLs
Web events for a specified day or range of days by most
visited URLs.
Web Filter Events By Day Of Week
And Top URLs
Web events for a specified week by most visited URLs.
Web Filter Events By Hour Of Day
And Top URLs
Hourly web events by most visited URLs.
Web Filter Events By Date And Status Web events by status for a specified date or range of
days.
Web Filter Events By Day Of Week
And Status
Web events by status for a specified week.
Web Filter Events By Hour Of Day
And Status
Hourly web events by status for a specified period.
Web Filter Events By Device And Top Web events by Fortinet device and source IPs.
Sources
Web Filter Events By Top Sources
Web events by top source IP addresses.
Web Filter Events By Top
Destinations
Web events by top destination IP addresses.
Web Filter Events By Top URLs
Web events by the most visited URLs.
Total Web Filter Events By Status
List of web filter events by their status.
Mail Filter Activity
Mail filter activity reports record total and top mail filter activities by device, time, and
top senders and receivers.
Report
Description
Mail Filter Events By Date And Top
Senders
Mail filter events by the top email addresses by specified
day or range of days
Mail Filter Events By Days Of Week
And Top Senders
Daily mail filter events by top email for the specified
week.
Mail Filter Events By Hour Of Day
And Top Senders
Hourly mail events by top email addresses for a
specified period.
Mail Filter Events By Device And Top Mail filter events by Fortinet device and top email
Senders
addresses.
Mail Filter Events By Device And Top Mail filter events by Fortinet device and top recipient
Receivers
email address.
Total Mail Filter Events By Device And Mail filter events by Fortinet device and email blocking
Block Criteria
criteria.
FortiLog Administration Guide
Top Mail Senders
Most active email addresses sending email.
Top Blocked Mail Senders
Email addresses blocked when sending email.
Top Mail Receivers
Most active email recipient addresses.
Top Blocked Mail Receivers
Email addresses most blocked when receiving email.
Top Mail Receivers And Their Top
Senders
Most active email recipients and their sources.
05-16000-0082-20050115
117
Appendix A: Log Report Types
VPN Activity
VPN activity reports record total VPN activities by a specific time and direction as well
as top VPN activities.
Report
Description
Total VPN Activity By Date And
Direction (traffic)
VPN activity by specified date or range of dates and
direction of traffic.
Total VPN Activity By Day Of Week
And Direction (traffic)
Daily VPN activity and direction of traffic for the specified
week.
Total VPN Activity By Hour Of Day
And Direction (traffic)
Hourly VPN activity and direction of traffic for the
specified period.
VPN Activity By Top Devices (tunnels) VPN activity by Fortinet device by VPN events.
VPN Activity By Top Devices (traffic) VPN activity by Fortinet device by traffic in megabytes.
VPN Activity By Top Devices And Top VPN activity by Fortinet device and destination IPs by
Peers (tunnels)
VPN events.
VPN Activity By Top Devices And Top VPN activity by Fortinet device and destination IPs by
Peers (traffic)
traffic in megabytes.
VPN Activity By Devices And Top
Services (traffic)
VPN activity by Fortinet device and internet service
traffic in megabytes.
VPN Activity By Top Sources (traffic) VPN activity by source IP traffic in megabytes.
VPN Activity By Top Destinations
(traffic)
VPN activity by destination IP traffic in megabytes.
Total VPN Activity By Direction
(traffic)
VPN activity by traffic direction in megabytes.
Total VPN Activity By Date And Top
Tunnels (traffic)
VPN activity by specified date or range of dates and
traffic of the most active tunnels.
Total VPN Activity By Day Of Week
And Top Tunnels (traffic)
Daily VPN activity for the specified week of the most
active tunnels.
Total VPN Activity By Hour Of Day
And Top Tunnels (traffic)
Hourly VPN activity for the specified period of the most
active tunnels.
Total VPN Activity By Top Tunnels
(traffic)
VPN activity by the most active tunnels.
Content Activity
Content activity reports record content activities by a specific time and direction as
well as top content activities by client, service, virus and email.
Report
Description
Content Traffic By Date And Service Content traffic by Internet services in kilobytes for a
specified date or range of days.
Content Traffic By Date And Status
Email content status by specified date or range of days.
Content Traffic By Date And Top
Viruses
Top viruses by the specified date or range of days.
Content Traffic By Day Of Week And Daily content traffic by Internet services in kilobytes for a
Service
specified week.
Content Traffic By Day Of Week And Daily email content status in kilobytes for a specified
Status
week.
Content Traffic By Day Of Week And Daily top viruses status for a specified week.
Top Viruses
118
05-16000-0082-20050115
Fortinet Inc.
Appendix A: Log Report Types
Content Traffic By Hour Of Day And
Service
Hourly content traffic by Internet services in kilobytes for
a specified date or range of days.
Content Traffic By Hour Of Day And
Status
Hourly email content status in kilobytes for a specified
date or range of days.
Content Traffic By Hour Of Day And
Top Viruses
Hourly top viruses status in kilobytes for a specified date
or range of days.
Content Traffic By Status And Service Content traffic by status and Internet service in kilobytes.
Content Traffic By Service And Status Content traffic by Internet service and status in kilobytes.
Content Traffic By Service And Top
Viruses
Content traffic by Internet service and top viruses.
Content Requests By Status And
Service
Requested content by status and Internet service by
content events.
Content Requests By Service And
Status
Requested content by Internet service and status by
content events.
Content Requests By Service And
Top Viruses
Requested content by Internet service and top viruses.
Content Traffic By Top Clients And
Service
Content traffic by user and Internet service used in
kilobytes.
Content Traffic By Top Clients And
Status
Content traffic by user and content status in kilobytes.
Content Traffic By Top Clients And
Top Viruses
Content traffic by user and virus content in kilobytes.
Content Traffic By Top Servers And
Service
Content traffic by server and Internet service in
kilobytes.
Content Traffic By Top Servers And
Status
Content traffic by server and content status in kilobytes.
Content Traffic By Top Servers And
Top Viruses
Content traffic by server and virus content in kilobytes.
Web Traffic By Top Servers
Web traffic by URL in kilobytes.
Web Traffic By Status And Top
Servers
Web traffic by virus status and URL in kilobytes.
Web Traffic by Top URLs
Web traffic by URL in kilobytes.
Web Traffic by Status and Top URLs Web traffic by virus status and URL in kilobytes.
FortiLog Administration Guide
Mail Traffic by Mail Service and Top
Senders
Email traffic by mail service and sender address in
kilobytes.
Mail Traffic by Mail Service and Top
Receivers
Email traffic by mail service and recipient address in
kilobytes.
Mail Traffic by Status and Top
Senders
Email traffic by email status and sender address.
Mail Traffic by Status and Top
Receivers
Email traffic by email status and recipient address.
05-16000-0082-20050115
119
Appendix A: Log Report Types
120
05-16000-0082-20050115
Fortinet Inc.
FortiLog Administration Guide Version 1.6
Index
A
access to files 82
account levels 48
active and passive mode 8
administrator
account 48
read & write access 48
read only access 48
settings 46
administrator account
netmask 108
trusted host 49
Adobe Acrobat files 65
alerts 30, 54
attack correlation 79
B
backup
installing firmware image 36
switching to (firmware) 38
system settings 39
C
changing operating modes 31
CLI 10, 19, 20
CLI Structure 91
command line interface 10, 19, 20
config policy 45
configure
FortiGate device 23
FortiMail device 25
connecting
the FortiLog unit 18
to the CLI 88
to the FortiLog CLI using SSH 90
to the FortiLog CLI using Telnet 90
to the FortiLog console 88
CPU status 32
creating reports 57
D
debug log 39
default firmware 38
FortiLog Administration Guide
defining device port interfaces 27
download FortiLog debug log 39
E
environmental specifications 17
event correlation 79
F
factory default system settings 40
file
access 82
formats 65
properties 86
file formats 63
filtering 61
firmware
installing backup image 36
installing from reboot 33
re-installing current version 33
reverting to an older version 33
switching to a backup image 38
switching to the default image 38
testing new image 35
upgrading using the CLI 33
upgrading using the web-based manager 32
FortiGate
port interfaces 27
FortiLog
account levels 48
status 29
H
hard drive usage 32
hardware specifications 16
host name 31
HTTPS 19
I
idle timeout 46
importing log files 77
installation
firmware from reboot 33
planning 17
05-16000-0082-20050115
121
Index
L
language setting 46, 109
LCD panel 21
log policy 45
logs
download FortiLog debug log 39
importing 77
information 75
settings 44
watching 78
M
memory usage 32
MS Word files 65
N
network attached server 81
network file system 81
network settings 42
NTP server 46
O
on demand reports 64
operating modes
active 8
changing 31
passive 9
P
passive and active mode 8
PDF files 65
port interfaces 27
power requirements 17
properties 86
R
RAID
levels 43
settings 43
status 41
ranking 59
read & write access level 48
read only access level 48
re-installing firmware 33
report
parameters 58
reports
alternate formats 65
creating 57
filtering 61
on demand 64
types 113
viewing 65
122
resolve host name 59
restoring system settings 40
restoring the FortiLog unit 40
reverting to an older firmware version 33
RTF files 65
S
searching logs 75
settings
administrative access for SSH or Telnet 89
administrator 46
config policy 45
idle timeout 46
language 46
log 44
network 42
RAID 43
system date and time 46
specifications
environmental 17
hardware 16
status
RAID 41
system
resources 32
status 29
system settings
backup 39
factory defaults 40
restore 40
T
testing new firmware image 35
text files 65
TFTP server 40
traffic direction 27
trusted host 49
administrator account 49
U
user accounts 82
user groups 83
Using the CLI 87
V
viewing
logs 74
reports 65
system resources 32
virtual domain 59
vulnerability reports 67
W
watching logs 78
05-16000-0082-20050115
Fortinet Inc.
Index
web-based manager
connecting 19
idle timeout 46
introduction 19
language 46, 109
FortiLog Administration Guide
windows shares 81
05-16000-0082-20050115
123
Index
124
05-16000-0082-20050115
Fortinet Inc.