1
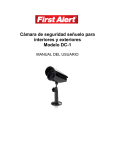
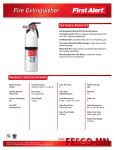
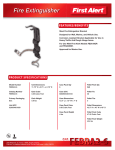
2013
JAN
FEB
MAR
APR
MAY
JUN
JUL
AUG
FILE INFORMATION
SEP
OCT
NOV
UPDATES
DEC
UPDATED BY
BCA
NOTES:
DATE
6-12-13
Use dieline drawing
for printing specifications
FILE NAME M08-0470-000
DIELINE M08-0470-XXX
CMYK
PMS
PMS
PMS
BACK
FRONT
COLOR INFORMATION
3901 Liberty St. Rd
Aurora IL, 60504
630.851.7330
SOFTWARE
CS6
Getting to Know Your DC-2
Indoor/Outdoor Decoy Camera
Model DC-2
Congratulations on purchasing your First Alert Security
Camera product. First Alert has been helping families and
businesses stay safe for over 50 years. By having a First Alert
Security Camera, you’re taking the first step in protecting your
home or business from damage or theft.
Setting Up
GENERAL INSTALLATION GUIDELINES
• Do not attempt to open a camera. There are no user-serviceable
parts inside.
• When using power tools wear safety goggles. Before drilling holes
through a wall or ceiling, check for hidden electricity cables and
water pipes.
SAFETY PRECAUTIONS
• Do not drop, puncture, or disassemble the
camera body.
• Do not expose the camera to high temperatures.
• Use the device with care. Avoid pressing hard on the
camera body.
CHECK PACKAGE CONTENTS
© 2013 BRK Brands, Inc. All rights reserved. Distributed
by BRK Brands, Inc., Aurora, Illinois 60504. BRK Brands,
Inc. is a subsidiary of Jarden Corporation (NYSE: JAH).
First Alert® is a registered trademark of the First Alert
Trust. Due to continuing product development, the product
inside the packaging may look slightly different than the
one on the package. 1 Year Limited Warranty- see inside
for details.
After unpacking the carton, check the contents for damage.
Contact your supplier or dealer immediately if any part is
missing or damaged. Your Model DC-2 decoy security camera
consists of:
• Indoor/outdoor decoy camera (1)
• Camera stand (1)
• Mounting Screws (3)
• User's manual (1)
INSTALLING THE DC-2 CAMERA
1) Select the position for the camera and install a mounting bracket
Screws and anchors are supplied. Use an appropriate screw type for the mounting surface.
2) Screw the camera onto the bracket. Tighten the lock nut to
secure the camera on the bracket
Angle Lock
Screw
Camera Mounting
Bracket
Camera Lock
Screw
Dimensions:
2.80”(H) 2.27”(W) x 5.50”(D)
Standing mount position,
stand at 90º
3) Adjust camera to the proper viewing angle.
M08-0470-000
Conociendo Su DC-2
Cámara Señuelo Para
Interiores/Exteriores
Felicitaciones por su compra de su Cámara de Seguridad
First Alert. First Alert ha estado ayudando a familias y
negocios a mantenerse seguros por más de 50 años. Al tener
una Cámara de Seguridad First Alert, usted está tomando el
primer paso para proteger su hogar o negocio de daño o robo.
Modelo DC-2
PRECAUCIONES DE SEGURIDAD
• No bote, perfore o desarme la carcasa de la cámara.
• No exponga la cámara a temperaturas altas.
• Use el dispositivo con cuidado. Evite presionar la carcasa de la
cámara.
REVISE EL CONTENIDO DEL PAQUETE
© 2013 BRK Brands, Inc. Todos los derechos reservados.
Distribuido por BRK Brands, Inc. Aurora, Illinois 60504.
BRK Brands, Inc. es una subsidiaria de Jarden Corporation
(NYSE: JAH). First Alert® es marca registrada de First
Alert Trust. Debido al desarrollo continuo del producto, el
producto dentro del empaque puede lucir levemente
diferente al que está en el empaque. Garantía Limitada de
1 Año – ver adentro para detalles.
Después de desempacar la caja, revise el contenido por
daños. Póngase en contacto con su proveedor o minorista
inmediatamente si hay alguna parte que hace falta o está
dañada. Su cámara de seguridad señuelo Modelo DC-2
consiste de:
• Cámara señuelo para Interiores/Exteriores (1)
• Soporte de Cámara (1)
• Tornillos de Montaje (3)
• Manual de Usuario (1)
Configuración
DIRECTRICES GENERALES DE INSTALACIÓN
• No intente abrir la cámara. No hay partes reparables por el usuario
en el interior.
• Al usar herramientas eléctricas use protección ocular. Antes de
taladrar agujeros a través de una pared o cielo, revise por cables
eléctricos y tubería de agua ocultos.
INSTALAR LA CÁMARA DC-2
1) Seleccione la posición para la cámara e instale el soporte de
montaje
Los tornillos y las anclas están incluidos. Use un tornillo adecuado al tipo de superficie de
montaje.
2) Enrosque la cámara en el soporte. Apriete la tuerca para asegurar
la cámara al soporte
Seguro de Ángulo
Soportede
Montaje de
la Cámara
Tornillo de
Seguridad de
la Cámara
Dimensiones:
2.80”(A) 2.27”(A) x 5.50”(H)
Posición de montaje parada, soporte a 90º
3) Ajuste la Cámara al ángulo de vista correcto.