1
User Guide
MediaLink®
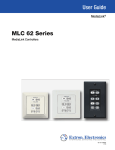
MLC 60 Series
MediaLink Controllers
68-2166-01 Rev. A
12 11
Safety Instructions • English
This symbol is intended to alert the user of important operating and
maintenance (servicing) instructions in the literature provided with the
equipment.
This symbol is intended to alert the user of the presence of uninsulated
dangerous voltage within the product’s enclosure that may present a risk of
electric shock.
Warning
Power sources • This equipment should be operated only from the power source indicated on the product. This
equipment is intended to be used with a main power system with a grounded (neutral) conductor. The third
(grounding) pin is a safety feature, do not attempt to bypass or disable it.
Power disconnection • To remove power from the equipment safely, remove all power cords from the rear of
the equipment, or the desktop power module (if detachable), or from the power source receptacle (wall plug).
Power cord protection • Power cords should be routed so that they are not likely to be stepped on or pinched
by items placed upon or against them.
Caution
Servicing • Refer all servicing to qualified service personnel. There are no user-serviceable parts inside. To prevent
the risk of shock, do not attempt to service this equipment yourself because opening or removing covers may
expose you to dangerous voltage or other hazards.
Retain Instructions • The safety instructions should be kept for future reference.
Slots and openings • If the equipment has slots or holes in the enclosure, these are provided to prevent
overheating of sensitive components inside. These openings must never be blocked by other objects.
Read Instructions • Read and understand all safety and operating instructions before using the equipment.
Follow Warnings • Follow all warnings and instructions marked on the equipment or in the user information.
Avoid Attachments • Do not use tools or attachments that are not recommended by the equipment
manufacturer because they may be hazardous.
Consignes de Sécurité • Français
Ce symbole sert à avertir l’utilisateur que la documentation fournie avec le
matériel contient des instructions importantes concernant l’exploitation et la
maintenance (réparation).
Ce symbole sert à avertir l’utilisateur de la présence dans le boîtier
de l’appareil de  tensions dangereuses non isolées posant des risques
d’électrocution.
Attention
Lire les instructions• Prendre connaissance de toutes les consignes de sécurité et d’exploitation avant
d’utiliser le matériel.
Conserver les instructions• Ranger les consignes de sécurité afin de pouvoir les consulter à l’avenir.
Respecter les avertissements • Observer tous les avertissements et consignes marqués sur le matériel ou
présentés dans la documentation utilisateur.
Eviter les pièces de fixation • Ne pas utiliser de pièces de fixation ni d’outils non recommandés par le
fabricant du matériel car cela risquerait de poser certains dangers.
Sicherheitsanleitungen • Deutsch
Dieses Symbol soll dem Benutzer in der im Lieferumfang enthaltenen
Dokumentation besonders wichtige Hinweise zur Bedienung und Wartung
(Instandhaltung) geben.
Dieses Symbol soll den Benutzer darauf aufmerksam machen, daß im Inneren
des Gehäuses dieses Produktes gefährliche Spannungen, die nicht isoliert sind
und die einen elektrischen Schock verursachen können, herrschen.
Achtung
Lesen der Anleitungen • Bevor Sie das Gerät zum ersten Mal verwenden, sollten Sie alle Sicherheits-und
Bedienungsanleitungen genau durchlesen und verstehen.
Aufbewahren der Anleitungen • Die Hinweise zur elektrischen Sicherheit des Produktes sollten Sie
aufbewahren, damit Sie im Bedarfsfall darauf zurückgreifen können.
Befolgen der Warnhinweise • Befolgen Sie alle Warnhinweise und Anleitungen auf dem Gerät oder in der
Benutzerdokumentation.
Keine Zusatzgeräte • Verwenden Sie keine Werkzeuge oder Zusatzgeräte, die nicht ausdrücklich vom
Hersteller empfohlen wurden, da diese eine Gefahrenquelle darstellen können.
Instrucciones de seguridad • Español
Este símbolo se utiliza para advertir al usuario sobre instrucciones
importantes de operación y mantenimiento (o cambio de partes) que se
desean destacar en el contenido de la documentación suministrada con los
equipos.
Este símbolo se utiliza para advertir al usuario sobre la presencia de
elementos con voltaje peligroso sin protección aislante, que puedan
encontrarse dentro de la caja o alojamiento del producto, y que puedan
representar riesgo de electrocución.
Precaucion
Leer las instrucciones • Leer y analizar todas las instrucciones de operación y seguridad, antes de usar el
equipo.
Conservar las instrucciones • Conservar las instrucciones de seguridad para futura consulta.
Obedecer las advertencias • Todas las advertencias e instrucciones marcadas en el equipo o en la
documentación del usuario, deben ser obedecidas.
Lithium battery • There is a danger of explosion if battery is incorrectly replaced. Replace it only with the
same or equivalent type recommended by the manufacturer. Dispose of used batteries according to the
manufacturer’s instructions.
Avertissement
Alimentations • Ne faire fonctionner ce matériel qu’avec la source d’alimentation indiquée sur l’appareil. Ce
matériel doit être utilisé avec une alimentation principale comportant un fil de terre (neutre). Le troisième
contact (de mise à la terre) constitue un dispositif de sécurité : n’essayez pas de la contourner ni de la
désactiver.
Déconnexion de l’alimentation• Pour mettre le matériel hors tension sans danger, déconnectez tous les
cordons d’alimentation de l’arrière de l’appareil ou du module d’alimentation de bureau (s’il est amovible) ou
encore de la prise secteur.
Protection du cordon d’alimentation • Acheminer les cordons d’alimentation de manière à ce que personne
ne risque de marcher dessus et à ce qu’ils ne soient pas écrasés ou pincés par des objets.
Réparation-maintenance • Faire exécuter toutes les interventions de réparation-maintenance par un
technicien qualifié. Aucun des éléments internes ne peut être réparé par l’utilisateur. Afin d’éviter tout danger
d’électrocution, l’utilisateur ne doit pas essayer de procéder lui-même à ces opérations car l’ouverture ou le
retrait des couvercles risquent de l’exposer à de hautes tensions et autres dangers.
Fentes et orifices • Si le boîtier de l’appareil comporte des fentes ou des orifices, ceux-ci servent à empêcher les
composants internes sensibles de surchauffer. Ces ouvertures ne doivent jamais être bloquées par des objets.
Lithium Batterie • Il a danger d’explosion s’ll y a remplacment incorrect de la batterie. Remplacer uniquement
avec une batterie du meme type ou d’un ype equivalent recommande par le constructeur. Mettre au reut les
batteries usagees conformement aux instructions du fabricant.
Vorsicht
Stromquellen • Dieses Gerät sollte nur über die auf dem Produkt angegebene Stromquelle betrieben werden.
Dieses Gerät wurde für eine Verwendung mit einer Hauptstromleitung mit einem geerdeten (neutralen) Leiter
konzipiert. Der dritte Kontakt ist für einen Erdanschluß, und stellt eine Sicherheitsfunktion dar. Diese sollte nicht
umgangen oder außer Betrieb gesetzt werden.
Stromunterbrechung • Um das Gerät auf sichere Weise vom Netz zu trennen, sollten Sie alle Netzkabel aus der
Rückseite des Gerätes, aus der externen Stomversorgung (falls dies möglich ist) oder aus der Wandsteckdose
ziehen.
Schutz des Netzkabels • Netzkabel sollten stets so verlegt werden, daß sie nicht im Weg liegen und niemand
darauf treten kann oder Objekte darauf- oder unmittelbar dagegengestellt werden können.
Wartung • Alle Wartungsmaßnahmen sollten nur von qualifiziertem Servicepersonal durchgeführt werden.
Die internen Komponenten des Gerätes sind wartungsfrei. Zur Vermeidung eines elektrischen Schocks
versuchen Sie in keinem Fall, dieses Gerät selbst öffnen, da beim Entfernen der Abdeckungen die Gefahr eines
elektrischen Schlags und/oder andere Gefahren bestehen.
Schlitze und Öffnungen • Wenn das Gerät Schlitze oder Löcher im Gehäuse aufweist, dienen diese zur
Vermeidung einer Überhitzung der empfindlichen Teile im Inneren. Diese Öffnungen dürfen niemals von
anderen Objekten blockiert werden.
Litium-Batterie • Explosionsgefahr, falls die Batterie nicht richtig ersetzt wird. Ersetzen Sie verbrauchte Batterien
nur durch den gleichen oder einen vergleichbaren Batterietyp, der auch vom Hersteller empfohlen wird.
Entsorgen Sie verbrauchte Batterien bitte gemäß den Herstelleranweisungen.
Advertencia
Alimentación eléctrica • Este equipo debe conectarse únicamente a la fuente/tipo de alimentación eléctrica
indicada en el mismo. La alimentación eléctrica de este equipo debe provenir de un sistema de distribución
general con conductor neutro a tierra. La tercera pata (puesta a tierra) es una medida de seguridad, no
puentearia ni eliminaria.
Desconexión de alimentación eléctrica • Para desconectar con seguridad la acometida de alimentación
eléctrica al equipo, desenchufar todos los cables de alimentación en el panel trasero del equipo, o desenchufar
el módulo de alimentación (si fuera independiente), o desenchufar el cable del receptáculo de la pared.
Protección del cables de alimentación • Los cables de alimentación eléctrica se deben instalar en lugares
donde no sean pisados ni apretados por objetos que se puedan apoyar sobre ellos.
Reparaciones/mantenimiento • Solicitar siempre los servicios técnicos de personal calificado. En el interior no
hay partes a las que el usuario deba acceder. Para evitar riesgo de electrocución, no intentar personalmente la
reparación/mantenimiento de este equipo, ya que al abrir o extraer las tapas puede quedar expuesto a voltajes
peligrosos u otros riesgos.
Ranuras y aberturas • Si el equipo posee ranuras o orificios en su caja/alojamiento, es para evitar el
sobrecalientamiento de componentes internos sensibles. Estas aberturas nunca se deben obstruir con otros
objetos.
Evitar el uso de accesorios • No usar herramientas o accesorios que no sean especificamente
recomendados por el fabricante, ya que podrian implicar riesgos.
Batería de litio • Existe riesgo de explosión si esta batería se coloca en la posición incorrecta. Cambiar esta
batería únicamente con el mismo tipo (o su equivalente) recomendado por el fabricante. Desachar las baterías
usadas siguiendo las instrucciones del fabricante.
安全须知 • 中文
警告
这个符号提示用户该设备用户手册中有重要的操作和维护说明。
这个符号警告用户该设备机壳内有暴露的危险电压,有触电危险。
注意
阅读说明书
保存说明书
遵守警告 •
避免追加 •
• 用户使用该设备前必须阅读并理解所有安全和使用说明。
• 用 户应保存安全说明书以备将来使用。
用户应遵守产品和用户指南上的所有安全和操作说明。
不要使用该产品厂商没有推荐的工具或追加设备,以避免危险。
电源 • 该设备只能使用产品上标明的电源。 设备必须使用有地线的供电系统供电。 第三条线(
地线)是安全设施,不能不用或跳过 。
拔掉电源 • 为安全地从设备拔掉电源,请拔掉所有设备后或桌面电源的电源线,或任何接到市电
系统的电源线。
电源线保护 • 妥善布线, 避免被踩踏,或重物挤压。
维护 • 所有维修必须由认证的维修人员进行。 设备内部没有用户可以更换的零件。为避免出现触
电危险不要自己试图打开设备盖子维修该设备。
通风孔 • 有些设备机壳上有通风槽或孔,它们是用来防止机内敏感元件过热。 不要用任何东西
挡住通风孔。
锂电池 • 不正确的更换电池会有爆炸的危险。必须使用与厂家推荐的相同或相近型号的电池。按
照生产厂的建议处理废弃电池。
FCC Class A Notice
This equipment has been tested and found to comply with the limits for a Class A digital device, pursuant to part 15
of the FCC Rules. Operation is subject to the following two conditions:
1. This device may not cause harmful interference.
2. This device must accept any interference received, including interference that may cause undesired operation.
The Class A limits are designed to provide reasonable protection against harmful interference when the equipment
is operated in a commercial environment. This equipment generates, uses, and can radiate radio frequency energy
and, if not installed and used in accordance with the instruction manual, may cause harmful interference to radio
communications. Operation of this equipment in a residential area is likely to cause harmful interference, in which
case the user will be required to correct the interference at his own expense.
NOTE: This unit was tested with shielded cables on the peripheral devices. Shielded cables must be used with
the unit to ensure compliance with FCC emissions limits.
For more information on safety guidelines, regulatory compliances, EMI/EMF compliance, accessibility, and
related topics, click here.
iii
Conventions Used in this Guide
Notifications
In this user guide, the following are used:
CAUTION: A caution indicates a potential hazard to equipment or data.
NOTE: A note draws attention to important information.
TIP: A tip provides a suggestion to make working with the application easier.
WARNING: A warning warns of things or actions that might cause injury, death, or
other severe consequences.
Software Commands
Commands are written in the fonts shown here:
^AR Merge Scene,,Op1 scene 1,1 ^B 51 ^W^C
[01] R 0004 00300 00400 00800 00600 [02] 35 [17] [03]
E X! *X1&* X2)* X2#* X2! CE}
NOTE: For commands and examples of computer or device responses mentioned
in this guide, the character “0” is used for the number zero and “O”
represents the capital letter “o.”
Computer responses and directory paths that do not have variables are written in the font
shown here:
Reply from 208.132.180.48: bytes=32 times=2ms TTL=32
C:\Program Files\Extron
Variables are written in slanted form as shown here:
ping xxx.xxx.xxx.xxx —t
SOH R Data STX Command ETB ETX
Selectable items, such as menu names, menu options, buttons, tabs, and field names are
written in the font shown here:
From the File menu, select New.
Click the OK button.
Copyright
© 2011 Extron Electronics. All rights reserved.
Trademarks
All trademarks mentioned in this guide are the properties of their respective owners.
iv
Contents
Introduction.......................................................... 1
About This Guide................................................. 1
About the MLC 60 Series MediaLink Controllers.. 1
MLC Models.................................................... 1
Features........................................................... 3
MLC Configuration Software........................... 5
Device Drivers.................................................. 5
Application Diagrams....................................... 5
System Requirements........................................... 7
Features, Installation, and Operation........ 8
Installation Overview............................................ 8
Front and Left Side Panels.................................... 9
MLC D Front Panels......................................... 9
MLC 62 RS EU and MLC 62 RS MK Front a
nd Side Panels............................................... 11
Buttons.......................................................... 13
Rear Panel Features............................................ 14
Rear Panel Features on MLC 62 RS EU and
MLC 62 RS MK Only..................................... 16
MLC 64 RS VC D Volume Control Module
Rear Panel..................................................... 16
Installation......................................................... 17
Removing and Replacing the Faceplates......... 17
Replacing Buttons.......................................... 21
Wiring for RS-232 Control
(RS Models Only)........................................... 22
Wiring for IR Control...................................... 23
Wiring the Relays Port (RS Models Only)......... 23
Wiring the Digital Input Port
(RS Models Only)........................................... 24
Wiring the Host/Config Port........................... 25
Wiring the Volume Control Module
(MLC 64 RS VC D Only)................................. 26
Connecting Power to the MLC....................... 26
Configuring the MLC via the USB Port............... 27
IR Learning..................................................... 30
Mounting the MLC 60 Series Controllers............ 31
Mounting an MLC 62 D ................................ 31
Mounting the MLC 64 RS VC D..................... 33
Mounting the MLC 62 RS EU and the
MLC 62 RS MK............................................. 35
Mounting the MLC EU in a Raceway Using
Spacers (Optional)......................................... 36
Accessing Covered Panel Features After
Mounting......................................................... 38
Accessing the Covered MLC D Front Panel
Features........................................................ 38
Accessing MLC 62 RS EU and
MLC 62 RS MK Side and Rear Panel
Features........................................................ 38
Front Panel Security Lockout.............................. 39
Locking Using the Front Panel Buttons .......... 39
Resetting the MLC Using the Reset Button ........ 40
Software-based Configuration................... 41
About the MLC Configuration Program............. 41
Computer System Requirements.................... 41
Installing the Configuration Software................. 42
Downloading and Installing the Software
from the Web............................................... 42
Installing the Software from the DVD ............ 42
Starting the Configuration Software.................. 43
Accessing the Help File................................... 45
Obtaining Device Drivers.................................... 46
Downloading Drivers Using the
Configuration Program ................................ 46
Downloading Drivers from the Disc................ 49
Downloading Drivers from the Web............... 52
SIS Control........................................................... 54
Host-to-Controller Communications................... 54
Controller-initiated Messages......................... 54
Error Responses............................................. 54
Using the Command and Response Table........... 55
Symbol Definitions......................................... 55
Command and Response Table for SIS
Commands....................................................... 58
Reference Information................................... 62
Specifications..................................................... 62
MLC 62 Series Specifications.......................... 62
MLC 64 RS VC D Specifications...................... 66
Part Numbers and Accessories............................ 69
Included Parts................................................ 69
Accessories.................................................... 72
MLC 60 Series MediaLink Controllers • Contents
v
MLC 60 Series MediaLink Controllers • Contents
vi
Introduction
This section gives an overview of the guide and describes the MLC 60 Series MediaLink®
Controllers and their features. Topics include:
•
About This Guide
•
About the MLC 60 Series MediaLink Controllers
•
System Requirements
About This Guide
This guide provides detailed information and best practice recommendations about cabling
and configuring the Extron MLC 60 Series MediaLink Controllers. It provides reference
information about specifications, dimensions, and programming of the controllers.
Throughout this guide the general terms “MLC” and “controller” are used interchangeably
to refer to any MLC 60 Series controller. “MLC D models” applies to the MLC 62 RS D,
MLC 62 IR D, and the MLC 64 RS VC D. “MLC 62” applies to all MLC 60 Series models
except the MLC 64.
About the MLC 60 Series MediaLink Controllers
The Extron MLC 60 Series MediaLink Controllers are panels that control a wide range of
audio/video systems in any classroom, meeting facility, or auditorium via RS-232 or IR. They
act as extended remote control panels, featuring eight (optionally six) labeled backlit buttons
for the MLC 62 models or six for the MLC 64 RS VC D. These buttons can be configured via
the MLC Windows®-based configuration software to control power, input switching, and
volume on a display device or switcher. If desired, you can replace these buttons with ones
having different labels, which also are provided with the controller.
The MLC 64 RS VC D model has, in addition to the configurable buttons, a volume control
module containing an analog volume control knob and a Mute button. An Extron amplifier
can be connected to this module for volume control via the MLC.
All models can control a projector, display, or switcher via IR. In addition, the MLC 62 RS
models can control display devices, switchers, and various other items such as lights, a
projector lift, or a motorized screen via RS-232, IR, relays, or digital input.
The MLC controllers are housed in secure, compact, one-gang and two-gang sized
enclosures, which can be mounted on a wall or furniture, with or without an electrical
junction box or mounting bracket.
MLC Models
MLC 62 IR D — US model. Controls devices by IR only; has a one-gang Decora® faceplate
and fits in a one-gang US electrical box.
MLC 62 RS D — US model. Controls devices by RS-232, IR, relays, and digital input; has a
one-gang Decora faceplate and fits in a one-gang US electrical box.
MLC 62 RS EU — European model. Controls devices by RS-232, IR, relays, and digital input;
has a one-gang Jung frame and fits over a standard one-gang EU electrical box.
MLC 60 Series MediaLink Controllers • Introduction
1
MLC 62 RS MK — UK model. Controls devices by RS-232, IR, relays, and digital input; has
a standard MK sized frame and fits into a standard one-gang MK electrical box.
MLC 64 RS VC D — US model. Controls devices by RS-232, IR, relays, and digital input;
has a two-gang Decora faceplate and fits in a two-gang US electrical box. Contains a
volume control module with an analog potentiometer for volume control of an Extron
amplifier.
NOTE: Only an Extron amplifier with remote volume control capability can be used
with this model.
DISPLAY
ON
DISPLAY
ON
OFF
VOLUME
OFF
VOLUME
PC
VIDEO
Extron
PC
VIDEO
LAPTOP
MUTE
Extron
MLC 62 IR D
MLC 62 RS D
DISPLAY
DISPLAY
ON
ON
OFF
PC
PC
OFF
VOLUME
VOLUME
VIDEO
VIDEO
LAPTOP
LAPTOP
MUTE
MUTE
Extron
Extron
MLC 62 RS EU
MLC 62 RS MK
DISPLAY
ON
OFF
VOLUME
PC
LAPTOP
VIDEO
MUTE
AUX
Extron
MLC 64 RS VC D
Figure 1. MLC 60 Series Models
MLC 60 Series MediaLink Controllers • Introduction
2
The five MLC models have the same button functionality and use the same configuration
software. All models can be controlled by pressing the front panel buttons or via a host
device using RS‑232 communication and simple ASCII commands (Simple Instruction Set,
SIS™). They differ from each other in the following ways:
•
The MLC 62 IR D rear panel does not contain the Relay, Digital Input, or RS-232
control ports that the RS models have.
•
The MLC 64 front panel has seven buttons, one of which (the Mute button) is located
below the Volume knob. This button is used only to mute and unmute the volume on
an Extron amplifier and cannot be configured to perform other functions.
•
Some front, side, and rear panel connectors are located in different places on the
MLC RS D (US), EU (Europe), and MK (United Kingdom) models (see “Panels and
Connectors” in the “Features, Cabling, and Operation” section).
Faceplate alternatives
The MLC 60 Series models are available with the following faceplate configurations:
•
MLC 62 IR D: The US IR model is delivered with two six-button faceplates in black and
white. One black and one white Decora wallplate are also provided. An eight-button
faceplate is available to order.
•
MLC 62 RS D: The US RS-232 model is delivered with two eight-button faceplates
in black and white. One black and one white Decora wallplate are also provided. A
six-button faceplate is available to order.
•
MLC 62 RS EU: The European model is delivered with six-button and eight-button
faceplates, both in RAL9010 white.
•
MLC 62 RS MK: The UK model is delivered with six-button and eight-button
faceplates, both in white.
•
MLC 64 RS VC D: The MLC 64 is delivered with seven-button faceplates in black and
white.
Features
Some of the features of MLC 60 Series include:
•
Customizable buttons — Eight buttons are standard on the MLC 62 RS models,
prelabeled as shown in figure 1 on the previous page. The MLC 62 IR D has six
prelabeled buttons, and the MLC 64 RS VC D has seven.
An additional set of prelabeled buttons is included with each model, enabling the
controller to be customized to suit the application.
Additional buttons are available to order for all models, labeled in English (the default)
and other languages. Buttons can be ordered with custom labeling as well.
•
Button backlighting — The front panel buttons are backlit to facilitate use in
low-light environments and to provide certain status (such as whether power is on or
off, or which input has been selected).
•
Alternative six-button configuration (MLC 62 RS models only) — For
applications in which input device or button functions are not necessary, the standard
eight-button faceplate on the MLC 62 RS can be replaced with a six-button one. Each
pair of source selection buttons can be changed to a long, single function button.
•
Device drivers — A wide variety of Extron certified, ready-to-use device drivers are
available via the MLC configuration software, the provided MLC software disk, and
the Extron website (www.extron.com).
MLC 60 Series MediaLink Controllers • Introduction
3
•
IR and RS-232 ports — The MLC 64 and the MLC 62 RS models each have a
dedicated serial port for communicating with most types of projectors or flat
panel displays via unidirectional RS-232. They also have an IR/S port, which can be
configured for IR or RS-232 control.
The MLC 62 IR D has only an IR port, which is used for IR communication only.
IR and RS-232 display drivers can be downloaded and used to configure the controller.
•
Relays (RS models) — Two relay ports enable control of room devices such as lights,
motorized screens, and projector lifts.
•
Digital Input (RS models) — A Digital Input port enables monitoring of a switch or
sensor to control devices.
•
IR Learning — The MLC can be configured by IR learning, using the remote control
of a switcher or display device to create an IR driver that enables the MLC to control
the device.
•
USB configuration port — The MLC can be configured via a USB mini B port,
located on the front or side panel (depending on the model). This port can also
temporarily provide power to the MLC during configuration.
•
Volume adjustment:
•
The MLC 62 models have individual Volume Up and Down buttons for audio level
control, with five LEDs that indicate current audio settings.
•
The MLC 64 has a volume control module with an analog potentiometer knob to
control the audio level for an Extron amplifier that is enabled for remote volume
control. The volume control module also contains a Mute button for muting and
unmuting the audio (this button cannot be reprogrammed).
NOTE: Only Extron amplifiers can be controlled via the MLC 64 volume
control module.
•
Macro capability — Each button can be configured to execute multiple actions
through the serial or IR control ports. For example, a button can be configured so that
a single press triggers commands to turn on a display, select the RGB input of the
display, and trigger a relay.
•
Toggling — Buttons can be placed in toggle mode, which adds flexibility by enabling
two different sets of commands to be executed with alternating presses of the button.
•
Built-in speaker — A speaker provides audible feedback to confirm user actions
when buttons are pressed (except for the Mute button on the VCM module of the
MLC 64 RS VC D).
•
Inactivity timer for display shutoff — An adjustable timer controls automatic
shutdown after a specified period of inactivity.
•
Front panel security lockout — If the MLC is installed in an unsecured environment
where easy access is not desirable, a security lockout feature can be implemented to
lock out all front panel controls.
•
Activity LED — A small LED at the top of the MLC front panel lights red, green, or
amber to indicate button presses, data transfer, front panel lockout, and other actions.
•
Section 508 Compliant — The MLC meets or exceeds accessibility standards
for Electronic Information Technology. For more information about the
Extron Commitment to Accessibility, see the Extron Accessibility web page at
www.extron.com/company/article.aspx?id=accessibility.
MLC 60 Series MediaLink Controllers • Introduction
4
MLC Configuration Software
The included MLC Configuration Program is used to configure the MLC buttons and
ports via an RS-232 or USB connection. This software, provided on a DVD that is
delivered with the product, enables you to set functions for the front panel buttons
and to configure the MLC ports in order to control devices via the MLC. The software
works in combination with the IR or RS-232 drivers, also provided with the MLC on
DVD or at www.extron.com (see “Installing the Configuration Software” in the
“Software-based Configuration” section to access this program).
Device Drivers
The MLC can control a switcher, projector, or other display device via IR or RS-232
communication. The MLC must have drivers loaded for the devices it will control in order
to send commands to those devices. Drivers can be obtained in the following ways:
•
You can install IR or an RS-232 driver files from a disk, download them from the
Extron website (www.extron.com), or download them from Extron via the driver
subscription feature within the Windows-based configuration program. The drivers
are saved on your computer in a folder located at c:\Documents and Settings\
All Users\Shared Documents\Extron\Driver2 (Windows XP) or c:\Users\
Public\Documents\Extron\Driver2 (Windows 7). You can upload the desired
drivers to the MLC using the MLC configuration software.
•
You can capture IR commands from the IR remote control of a device through
IR Learning using the MLC configuration program to create a driver that the MLC
can use. When a driver is created, it can be added to the configuration program so
that the commands can be used to configure the MLC to control the device (see the
MLC 60 Series help to configure the MLC using IR Learning).
Application Diagrams
AY
PL
DIS
ON
Relay
EO
RS-232 or
IR Projector
Control
Screen
Control
VID
PC
TE
MU
OP
PT
LA
RS-232
Switcher
Control
Extron
MLC 62 RS D
VGA
MediaLink Controller
CLASS 2 WIRING
Video
Projector
OFF
E
UM
L
VO
UT
TP FT
D OU LE
FIE
PLI
AM
HT
RIG
12V
Tx
DIO
AU
1
S
AU
DIO
UT
INP
5
AU
DIO
IX
X/M
ST
AU
JU
AD dB
-42
TO
dB
+24
EL
E LEV
LIN NO
MO
Rx
IR
C
S
UT
INP 2
B
ST
/IR
LC
2/M
-23 MP
RS EA R
PR
A
4/8
ER
EO
OR
DU
AL
MO
NO
ohm
L
UT
EO
L
LIN
R
L
L
R
R
R
Amplified Output
6
B
TS
TPU G
OU
OR
T
OU
NIT
MO
R
V
H
S
UT
VID
INP
Extron
MLS 304SA
V
50-6
0Hz
EO
2
-240
100
1
Audio
.
1.0A
MAX
MediaLink® Switcher
Audio
VGA
VGA
VGA
Extron
SI 3
Video
Laptop
w/ Audio
DVD/VCR
Surface-Mount
Speakers
PC
Figure 2. MLC 62 RS D Controlling an MLS 304 SA Switcher and a Projector
MLC 60 Series MediaLink Controllers • Introduction
5
IR Projector Control
Projector with
Internal Speakers
AY
PL
DIS
F
OF
E
ONLUM
VO
PC
EO
VGA
VID
Audio
Video
Audio
Extron
MLC 62 IR D
MediaLink Controller
•
•
•
•
PC
IR Display Control
On/Off Control
Input Switching
Volume Control
DVD
Figure 3. MLC 62 IR D Controlling a Projector
PC
Audio
Audio
DVD
VGA
RS-232
Display Control
DI
ON
Audio
Laptop
Y
LA
SP
Video
VGA
F
OF
ME
LU
VO
Relay
EO
VID
PC
E
T
MU
OP
PT
LA
Extron
SI 3
Surface-Mount
Speakers
TR
VE
LE
MPAPLIFIE
L
LE
R
AM
Projector
with Switched
Audio Output
WE
I PO
EO
STER
EB
2
12 R
SS
BA
MIN
ON
R
ITE
LIM
L
DUA O
MON
OFF
Extron
MPA 122
Screen
Control
Extron
MLC 62 RS EU
MediaLink® Controller
Mini Power
Amplifier
Figure 4. MLC 62 RS EU Controlling a Projector and Screen
MLC 60 Series MediaLink Controllers • Introduction
6
PC
DVD
Laptop
Audio
Video
VGA
Audio
RS-232
Display Control
Volume Control
Audio
Projector
with Switched
Audio Output
VGA
S-video
ME
LU
VO
AY
PL
DIS
F
OF
ON
PC
OP
PT
Relay
LA
TE
MU
O
E
VID
X
AU
Document
Camera
Extron
MPA 152
Mini Power
Amplifier
UT
TP
15
R
ING
2 WIR ND
SS GROU
CLANOT RT TS!
SHO TPU
DO OR OU
R
AKE
SPE
R
L
TE
MO
RE
E
MUT
VOL/ A
50m
S
UT
INP
ED
LIST
IDEO
17TTIO/VTUS
AUDARA
APP
Screen
Control
4/8 S
OHM
OU
2
MPA
US
C
R
10V
L
Extron
MLC 64 RS VC D
R
WE
PO
L
12VMA
3A
X
MediaLink Controller
Extron
SI 3
Surface-Mount
Speakers
Figure 5. MLC 64 RS VC D Controlling a Projector and Screen
System Requirements
The minimum PC system requirements for installing the configuration software include:
•
Intel® Pentium® III 1-GHz processor
•
Microsoft® Windows XP SP2 and Windows 7
•
Microsoft.NET Framework 2.0
•
512 MB of RAM
•
50 MB of available hard disk space
MLC 60 Series MediaLink Controllers • Introduction
7
Features,
Installation, and
Operation
This section describes the front, side, and rear panel features of the five MLC models, and
provides procedures for installing and operating them. Topics include:
•
Installation Checklist
•
Panels and Connectors
•
Installation
•
Configuring the MLC via the USB Port
•
Mounting the MLC 60 Series Controllers
•
Accessing Covered Panel Features After Mounting
•
Front Panel Security Lockout (Executive Mode)
•
Resetting the MLC Using the Reset Button
•
IR Learning
Installation Overview
1. Prepare the installation site as follows:
a. Measure and cut the hole in the mounting surface.
b. Prepare and pull the cables through the electrical box or mounting bracket.
c. Install the electrical box or mounting bracket. (Installation instructions for the electrical box are provided with it.)
2. (Optional) Make any desired changes to the buttons installed in the faceplate,
substituting any of the provided additional buttons (see Replacing Buttons, later in
this section).
NOTE: The Mute button on the MLC 64 volume control module cannot be
configured.
3. Attach the cables to the rear panel connectors of the MLC and to the display device
or switcher. Attach optional IR Emitters if used, and any switches or sensors needed
for other room devices, such as lights, a motorized screen, and so forth). See the
following sections as needed for cabling information:
•
Rear Panel Features
•
Wiring for RS-232 Control
•
Wiring for IR Control
•
Wiring the Relays Port
•
Wiring the Digital Input Port
MLC 60 Series MediaLink Controllers • Features, Installation, and Operation
8
4. Wire and connect the MLC power supply (see “Connecting Power to the MLC,”
later in this section). Connect all other power cords and turn on all the devices,
including the MLC.
5. Connect a configuration cable from the computer to the MLC by doing either of the
following:
•
Connect a USB A to mini B cable to the MLC USB configuration port and to a USB
port on your computer (see “Configuring the MLC via the USB Port,” later in
this section).
•
Connect an RS-232 cable to the provided 3-pole connector and connect it
between the MLC Host/Config port and the computer serial port (see “Wiring
the Host/Config Port,” later in this section).
6. Download and install the MLC Configuration Program (see “Installing the
Configuration Software,” in the “Software-based Configuration” section).
7. Download or create drivers for the devices you will be connecting (see “Obtaining
Device Drivers” or “Configuring Using IR Learning” in the “Software-based
Configuration” section).
8. Configure the MLC buttons and ports using the configuration program. (See the
configuration program help file for these procedures. To access the help file, see
“Installing the Configuration Software” in the “Software Configuration and
Control” section.)
If you are configuring via the USB port, remove the USB cable when you are finished.
9. Test the system: press the MLC buttons, watch the display, and listen to the audio
output to determine whether the connected devices are responding correctly
(powering on and off, switching inputs, and so forth). If not, ensure all devices are
plugged in and receiving power. Check the cabling and make needed adjustments.
10.Disconnect power from the MLC at the source and from all other devices in the
system.
11.Mount the MLC to the mounting surface, following the appropriate procedure for
your MLC model, discussed later in this section:
•
For MLC 62 D models, see “Mounting the MLC 62 D.”
•
For MLC 62 RS EU and MK models, see “Mounting the MLC 62 RS EU and the
MLC 62 RS MK.”
•
For the MLC 64, see “Mounting the MLC 64 RS VC D.”
12.Restore power to the MLC and to the connected devices.
Front and Left Side Panels
MLC D Front Panels
The front panels of the MLC 62 RS D, the MLC 62 IR D, and MLC 64 models contain
buttons and indicators that are visible and accessible after the MLC has been mounted.
Other front panel controls and connectors are located behind the MLC wallplate and are
not visible after mounting (see “Controls behind the wallplate,” later in this section).
MLC 60 Series MediaLink Controllers • Features, Installation, and Operation
9
The numbered callouts below apply to all the following MLC D front panel drawings.
a
b
c
Activity LED
Display power On
and Off Buttons
Volume buttons and LEDs (MLC 62 models only)
d
e
f
g
h
USB configuration port
i
j
k
l
DIP switches
Input Selection buttons
Reset LED
Reset button
IR Learning sensor
On button identification nub
Mute button (MLC 64 only)
Volume control knob
MLC 64 RS VC D only)
MLC 62 D front panels
By default, the MLC 62 RS D has eight front panel buttons, and the MLC 62 IR D has six.
Both models also have indicator LEDs for volume and activity.
1
DISPLAY
10
ON
DISPLAY
2
OFF
ON
VOLUME
OFF
VOLUME
3
PC
VIDEO
PC
4
4
VIDEO
MUTE
LAPTOP
Extron
Extron
MLC 62 RS D
MLC 62 IR D
Figure 6. MLC 62 RS D and MLC 62 IR D Front Panels
MLC 64 RS VC D front panel
The MLC 64 RS VC D front panel contains seven buttons, an Activity LED, and a volume
control knob.
1
DISPLAY
2
OFF
ON
VOLUME
PC
4
LAPTOP
AUX
12
MUTE
11
VIDEO
Extron
Figure 7. MLC 64 RS VC D Front Panel
MLC 60 Series MediaLink Controllers • Features, Installation, and Operation
10
Controls behind the wallplate
The front panels of the MLC D controllers contain some controls and connectors that are
located behind the wallplate when the controller is mounted. To access these features that
are covered during normal operation, you must remove the wallplate (see “Accessing the
Covered MLC D Front Panel Features,” later in this section).
5
DISPLAY
9
ON
DISPLAY
OFF
6
VOLUME
LAPTOP
7
VIDEO
LAPTOP
MUTE
VOLUME
PC
8
PC
OFF
ON
MUTE
VIDEO
AUX
Extron
Extron
MLC 62 RS D
MLC 64 RS VC D
Figure 8. MLC D Front Panel Controls Behind the Wallplate
MLC 62 RS EU and MLC 62 RS MK Front and Side Panels
The MLC 62 RS EU and MLC 62 RS MK front panels contain the same buttons and
indicators as the MLC 62 D models. Other connectors and controls are on the left side
panel; to access these features, you must remove the MLC from the installation surface.
When the MLC is removed, the wall frame is released from the mounting surface as
well, leaving the metal mounting bracket in place (see “Accessing the MLC 62 RS EU
and MLC 62 RS MK Side and Rear Panel Features,” later in this section, for removal
procedures).
1
DISPLAY
10
ON
OFF
2
9
VOLUME
3
PC
VIDEO
LAPTOP
MUTE
4
7
Extron
Front View
Left Side View
Figure 9. MLC 62 RS EU and MLC 62 RS MK Front and Side Panels
NOTE: The MLC 62 RS MK is the same size and has the same front and side panel
features as the MLC 62 RS EU, with the exception of its larger wall frame,
which fits over an MK electrical box.
MLC 60 Series MediaLink Controllers • Features, Installation, and Operation
11
Front panel features
a Activity LED — This bicolored LED lights green when the MLC front panel buttons
are pressed. It blinks red while enabling front panel lockout (executive mode).
b Display power On and Off buttons — After configuring these buttons, use them
to turn the connected display device or switcher on and off.
The face of the On button contains a nub (j), which helps you to identify the button
by touch. When the On button is pressed, it blinks rapidly while the connected device
is warming up. When the Off button is pressed, it blinks slowly while the device
is cooling down. When this delay period has elapsed, the power button that was
pressed remains brightly lit.
By default, only one of these two buttons can be selected (active) at once. Using the
MLC configuration software, you can associate other functions and relays with each
of these buttons (see the configuration software help file).
c Volume buttons and LEDs (MLC 62 models only) — Use these buttons to adjust
the audio volume. Each Volume button flashes when pressed and continues to flash
while being held.
The volume indicator LEDs above the buttons give indications of change to the volume
level as follows:
•
When the RS-232 or IR/S port has been configured with a serial driver that
contains a volume table, the five LEDs light in order from left to right to show
volume level increments.
•
If the current driver does not contain a volume table, the first two LEDs on the left
blink each time the Volume Down button is pressed, and the last two LEDs on the
right blink each time the Volume Up button is pressed, indicating a volume level
decrement or increment.
d Input selection buttons — These buttons can be used to select the desired audio or
video input for the connected device or for a variety of other functions. By default the
buttons are set up as follows:
•
MLC 62 RS models: Three of these buttons are set to input mode, meaning that
they are a mutually exclusive group and only one of the buttons can be selected
(active) at a time. The active input button remains brightly lit, while all other input
buttons remain dimly lit. The fourth button, labeled Mute, is set in Toggle mode
and is not grouped with the others.
•
MLC 62 IR D: Two double-sized buttons are grouped in input mode and are
mutually exclusive.
•
MLC 64 RS: Four double-sized buttons are grouped in input mode and are
mutually exclusive.
You can change this button behavior by using the configuration software to change
the operating mode of the button (see the MLC 60 Series configuration program help
file for more information).
e Reset LED — Indicates the status of a reset in progress.
f Reset button — Press this reset button to initiate factory firmware or configuration
resets (see “Resetting the MLC Using the Reset Button,” later in this section).
MLC 60 Series MediaLink Controllers • Features, Installation, and Operation
12
g USB configuration port — Connect a USB cable (USB A to mini B) between
your computer and this port to configure the MLC via the configuration software
and to update the firmware. This port can also provide power to the MLC during
configuration.
NOTE: Do not use this port as the permanent power source for the MLC. It
should be used for power only during button and port configuration.
•
On the MLC D models, the USB port is located at the right edge of the front
panel behind the wallplate. To access this port after installation, you must remove
the wallplate from the unit.
•
On the MLC 62 EU and MK, the USB port is located on the left side panel. To
access this port after installation, you must detach the MLC from the installation
surface.
h DIP switches — Reserved for future use
i IR Learning sensor — This sensor enables the MLC to learn IR commands from the
hand-held remote control of a display device or switcher. The IR-learned commands
are used to create an IR driver, then configured to be played back with any button
press (see “IR Learning,” later in this section).
NOTE: Before performing IR Learning to create a driver, check to see if an Extron
driver exists for your device (see “Obtaining Device Drivers” in the
“Software-based Configuration” section).
j On button Identification nub — Power On button face contains a raised nub that
helps you to identify the On button by touch in a dark or dimly lit room.
k Mute button (MLC 64 only) — Press this toggle button to mute and unmute the
volume on the Extron amplifier connected to the volume control module.
l Volume control knob (MLC 64 only) — Rotate this knob to increase or decrease the
volume on the Extron amplifier connected to the volume control module.
Buttons
The front panel button illumination provides status on what the MLC is doing. The buttons
are lit while the MLC has power. When a button has been pressed and is active or on, it
lights brightly. While a button is inactive or off, it is lit dimly.
When buttons are grouped together, only the button that is pressed lights brightly. The
other buttons in the group remain dim. (See the configuration software help file for
information on grouping buttons; see “Installing the Configuration Software” in the
“Software Configuration and Control” section to obtain the software.)
You can remove buttons and replace them with buttons having different labels. You can
then configure the new buttons with the functions that their labels represent, using the
configuration software (see the MLC 60 Series configuration program help file for detailed
procedures for configuring the buttons).
Each Display On/Off and input selection button can be set up to perform a sequence of
several functions, which can be combinations of the following options:
•
A driver operation — Execute an RS-232 or IR control command that is part of a
device driver (for a projector, VCR, DVD player, switcher, and so forth).
•
A relay operation — Execute a relay command to a room device such as a motorized
screen or a projector lift.
•
Setting a time delay — Insert delays between executed commands.
MLC 60 Series MediaLink Controllers • Features, Installation, and Operation
13
•
Setting the button flashing rate — Specify fast or slow flashing of a front panel
button and the number of seconds the button flashes.
NOTE: While a button is flashing, all other front panel buttons are disabled.
•
A user-defined RS-232 operation — Issue a non-driver-associated RS-232 command
(one that you programmed separately), such as an SIS command, via the IR/S or the
RS-232 port.
•
Button emulation — Initiate a series of button functions with a single button press.
Rear Panel Features
GROUND
Rx
GROUND
2
GROUND
5
GROUND
6
GROUND
PWR PORT A PORT B
IR/ S
RS-232
12 V
0.4 A MAX
1
Tx/IR
Tx
+12 VDC
4
GROUND
IR OUT
6
MLC 62 RS D and MLC 64 RS D
Rear Panel
GROUND
+12 VDC
PORT A
IR
COMMON
4
Tx
RELAYS
N/O
1
3
Rx
DIGITAL
INPUT
Tx
2
GROUND
1
PWR
12V
0.4 A MAX
1
HOST/
CONFIG
HOST/
CONFIG
See the wiring and installation sections, later in this section, for connection information.
MLC 62 IR D Rear Panel
Figure 10.MLC 60 Series D Models Rear Panels
3
1
C
RELAYS
N/O
Tx/
IR
5
Tx
PORT B PORT A
RS-232
IR/ S
1
2
DIGITAL
INPUT
Tx Rx
1
2
1
PWR
HOST/
CONFIG
R
7
0.4 A max
8
12 V
9
2
4
+
6
Figure
11.MLC
RS 62
EURS
and
RS MK Rear Panel
MLC 62 RS
EU and62
MLC
MKMLC
rear62
panel
MLC 60 Series MediaLink Controllers • Features, Installation, and Operation
14
a Host/Config port — This bidirectional RS-232 serial port can be used for
configuration and firmware updates in the same way as the USB port (g in the
“Front and Left Side Panels” section, earlier in this section). The baud rate is 9600
bps. This port can be used as a backup for the USB Configuration port (although you
cannot power a device through it).
b Digital Input port (RS models only) — This port enables the MLC to monitor
devices such as push buttons, switches, motion sensors, and moisture sensors and
provides an additional way to trigger functions on the MLC. Connect a switch or a
sensor to this 2-pole captive screw connector to initiate commands via the MLC to the
display device, switcher, or other room devices such as lights or a motorized screen.
c Relay ports (RS models only) — These relays allow control of room devices such as
motorized screens, lights, and projector lifts. They are normally open relays and are
rated at 24 V, 1 A. Low-power devices can be connected directly to the relay ports;
devices requiring more than 24 V can be connected through a third-party low-voltage
controller (LVC).
d IR/S or IR port — This port provides unidirectional communication to control a
switcher or a display via RS-232 or IR. For IR control, one or two IR emitters can be
connected with a maximum of 50 feet (15 m) distance from port to emitter.
•
RS models: On all MLC 60 Series RS models, this port is labeled “Port B IR/S.” It
can be set up via the configuration software to send out unidirectional RS-232
(the default) or IR commands. In the Configuration software, this port is called
Port B (IR/S)
•
MLC 62 IR D: On the IR-only model, this port is labeled “Port A IR” and issues
only IR commands. In the Configuration software, this port is called Port A (IR).
e RS-232 port (RS models only) — This serial port, labeled “Port A RS-232,” provides
unidirectional communication to control a switcher or a display via RS-232. In the
Configuration software, this port is called Port A (RS-232).
f PWR (power) connector — Connect the supplied 12 VDC, 1 A power supply (or
any other power supply capable of providing 12 VDC) to this 2-pole captive screw
connector.
CAUTIONS: • The power supply must not be permanently fixed to the building
structure or similar structures.
• The power supply must not be located within environmental air
handling spaces or the wall cavity.
• The installation must be in accordance with the applicable
provisions of the National Electrical Code ANSI/NFPA 70,
Article 725 and the Canadian Electrical Code, Part 1, Section 16.
• The power supply must be located within the same vicinity as
the Extron AV processing equipment in an ordinary location,
Pollution Degree 2, secured to a podium, a desk, or an equipment
rack within a dedicated closet.
• Always use a power supply specified by Extron for the MLC. Use
of an unauthorized power supply voids all regulatory compliance
certification and may cause damage to the supply and the MLC.
MLC 60 Series MediaLink Controllers • Features, Installation, and Operation
15
Rear Panel Features on MLC 62 RS EU and MLC 62 RS MK Only
The items listed in this section are located on the rear panel of the MLC 62 RS EU and the
MLC 62 RS MK only. On the MLC D models, these items are on the front panel, behind the
wallplate (see “Rear Panel Features” for the descriptions of features a through f).
1
2
C
RELAYS
N/O
Tx
1
0.4 A max
PWR
HOST/
CONFIG
2
8
12 V
9
Tx/
IR
PORT B PORT A
RS-232
IR/ S
DIGITAL
INPUT
R
+
1
Tx Rx
7
Figure 12.Features on MLC 62 RS EU and the MLC 62 RS MK Rear Panels Only
g Reset LED — Indicates the status of a reset in progress.
h Reset button — Press this reset button to initiate factory firmware or configuration
resets (see “Resetting the MLC Using the Reset Button,” later in this section).
i DIP switches — Reserved for future use
MLC 64 RS VC D Volume Control Module Rear Panel
VOL
GND
10V
The MLC 64 RS VC rear panel is illustrated below. The MLC module rear panel (right
side as you view it from the back) has the same features as that of the MLC 62 RS D (see
figure 11, earlier in this section).
10
Figure 13.MLC 64 RS VC D Rear Panel VCM Features
j Volume control module connector (MLC 64 RS VC D only) — Connect an Extron
amplifier to this 3-pole, 3.5 mm captive screw connector to enable volume and mute
control by the MLC (see “Wiring the Volume Control Module (MLC 64 RS VC D
Only),” later in this section).
NOTE: Use only Extron amplifiers with the MLC 64 RS VC D.
MLC 60 Series MediaLink Controllers • Features, Installation, and Operation
16
Installation
The MLC 60 Series can be installed as listed below:
•
The MLC 62 D models can be installed in a standard one-gang electrical wall box or a
one-gang Decora mounting bracket (“mud ring”).
•
The MLC 64 RS VC D can be installed a two-gang electrical box or mounting bracket.
•
The MLC 62 RS EU can be installed in a standard one-gang EU junction box.
•
The MLC 62 RS MK can be installed in a standard one-gang MK junction box.
CAUTIONS: • Installation and service must be performed by authorized personnel
only. UL listed electrical boxes are recommended.
• Ensure that the junction box is grounded properly.
• When stripping wires for use with the captive screw connectors, leave
3/16 (5 mm) of bare wire to insert into the connector.
• Exposing more than 3/16 inch of the copper wires could allow the
stripped wires to touch each other, causing a short circuit. This could
result in the external DC power supply overheating and burning.
• Stripping the wires to expose less than the recommended amount
may cause them to slide out of the connector too easily, even if they
are tightly pinched by the captive screws.
Removing and Replacing the Faceplates
Each MLC model is delivered with a faceplate (bezel) attached. This faceplate can be
removed if you want to replace any of the buttons or exchange the faceplate for another.
Replacement kits containing six-button or eight-button faceplates and additional buttons
can be ordered (see “Part Numbers and Accessories” in the “Reference Information”
section or the Extron website at www.extron.com for information on parts that are
provided or available to order for each MLC model).
Removing and replacing an MLC D faceplate
The MLC D models are delivered with a black faceplate attached. If desired, you can
remove this faceplate and replace it with the white one that is also provided with the
product. (Matching black and white Decora wallplates are also provided.)
1. Remove the faceplate from the MLC D as follows:
At the center top and bottom of the faceplate are tabs, which insert into slots on the
MLC main board and hold the faceplate in place. For each tab:
a. Insert the flat end of the provided Extron Tweeker or other small screwdriver into
the hole above or below the tab.
b. Pressing each tab in and up, pry the top and bottom of the faceplate away from
the board.
See the illustration on the next page.
MLC 60 Series MediaLink Controllers • Features, Installation, and Operation
17
DISPLAY
ON
OFF
VOLUME
PC
VIDEO
Extron
Figure 14.Removing the Faceplate (MLC 60 Series D Models)
2. If you are switching faceplates, transfer the buttons from the faceplate you removed
to the replacement one.
3. Make any desired button changes (see “Replacing Buttons,” later in this section).
4. To attach the faceplate, make sure that both the faceplate and the MLC board are
upright and line up the pegs in upper-left and lower-right corners on the back of the
faceplate with the two diagonal holes on the MLC board.
5. Press the faceplate onto the board with the pegs in the holes until the tabs at the top
and bottom of the faceplate snap into their slots on the board (see the illustration
below).
Insert peg
on faceplate
into hole.
Insert tab on faceplate
into slot.
Tab
Peg
Y
LA
SP
DI
F
OF
ON ME
LU
VO
EO
VID
PC
TE
P
MU
O
PT
Insert peg
on faceplate
into hole.
LA
Figure 15. Attaching the Faceplate (MLC 60 Series D Models)
MLC 60 Series MediaLink Controllers • Features, Installation, and Operation
18
Removing and replacing the MLC 64 VCM module knob and
faceplate
The MLC 64 is provided with one black and one white VCM faceplate and volume control
knob. You can change the faceplate, knob, or both on the volume control module as
described in the following procedures.
Replacing the MLC 64 volume control knob
NOTE: It is not necessary to remove the faceplate or the board from the wallplate
in order to replace the knob.
1. Rotate the knob to its lowest setting (the dot on the knob should be aligned with the
bottom edge of the volume icon on the faceplate) to line up the notch in the edge
of the knob with the notch in the edge of the hole in the faceplate, enabling you to
access the hex screw on the knob.
2. Insert the small Allen wrench (provided) into the opening created by the two notches,
until it stops.
3. Give the Allen wrench a one-half turn counterclockwise to loosen the hex screw
holding the knob.
Use Allen Wrench
to Loosen Screw
V
O
LU
M
E
M
U
TE
Turn Knob to
Expose Screw
Figure 16. Removing the Volume Knob
4. Lift off the knob.
5. Press the new knob onto the spindle of the VCM, making sure that the spindle is
turned all the way to the left and that the dot on the knob is aligned with the bottom
edge of the volume icon on the faceplate.
6. Tighten the hex nut by inserting the Allen wrench and giving it one-half turn
clockwise.
Replacing the MLC 64 volume control module faceplate
To change the faceplate on the MLC 64 volume control module, you must remove the
volume control module from the wallplate.
1. Remove the volume control knob from the faceplate (see “Replacing the MLC 64
volume control knob,” steps 1 through 4, above).
2. At the center top and bottom of the faceplate are tabs, which insert into slots on the
VCM module board and hold its faceplate in place. For each tab:
a. Insert the flat end of the provided Extron Tweeker or other small screwdriver into
the hole above or below the tab (see the illustration on the next page).
b. Pressing each tab in and up, pry the top and bottom of the faceplate away from
the board.
MLC 60 Series MediaLink Controllers • Features, Installation, and Operation
19
VOLUME
MUTE
Figure 17. Removing the MLC 64 Volume Control Module Faceplate
3. Making sure that both the faceplate and the volume control module board are
upright, line up the pegs in the upper-left and lower-right corners of the new
faceplate with the holes in the board.
4. Press the faceplate onto the board until the tabs at the top and bottom of the
faceplate snap into their slots on the board.
Removing and replacing the MLC 62 RS EU and MK faceplates
The MLC 62 RS EU and MK are each provided with an eight-button and a six-button
faceplate and matching wall frame. If desired, you can remove the faceplate to change
buttons or to replace it with a different one.
1. Remove the MLC 62 RS EU or MLC 62 RS MK faceplate as follows:
a. On the right and left edges of the MLC faceplate are two pairs of slots, into which
two small tabs on either side of the MLC fit. Insert the flat end of the provided
Extron Tweeker or other small screwdriver into one of the side slots.
DI
ON
SP
LA
Y
LUOFF
ME
VO
PC
LA
VID
PT
OP
EO
MU
TE
Slot
Figure 18.Removing the Faceplate (MLC 62 RS EU and MLC 62 RS MK)
b. Press inward with the screwdriver until the tab snaps free of its slot.
c. Repeat steps a and b for the other tab on the same side of the faceplate.
d. Lift the faceplate up and off the MLC. If the faceplate does not come free of the
MLC, repeat steps a through c for the two tabs on the other side of the unit.
MLC 60 Series MediaLink Controllers • Features, Installation, and Operation
20
2. If you are switching faceplates, transfer the buttons from the faceplate you removed
to the replacement.
3. Make any desired button replacements (see “Replacing Buttons,” below).
4. Replace the faceplate as follows:
a. Hold the MLC with its board against the back of the faceplate, aligning the two
tabs on each side of the unit with the two slots on each side of the faceplate.
DI
ON
SP
LA
Y
Ridge on tab
snaps into slot.
LUOFF
ME
VO
PC
LA
VID
PT
OP
EO
MU
TE
Slot
Figure 19. Replacing the Faceplate (MLC 62 RS EU)
b. Each tab has a ridge that must snap into a slot on the side of the MLC. Press the
MLC into the faceplate until the tab ridges snap into their slots. Check to make
sure that all four tabs are securely in place.
Replacing Buttons
Additional labeled buttons are provided with the MLC and are available to order from the
Extron website at www.extron.com. These buttons can be used to replace the factoryinstalled buttons in the MLC faceplate.
Each row of single-sized buttons is a single membrane. The entire membrane is removed,
so that the buttons are replaced in rows. To replace buttons on the MLC:
1. Remove the faceplate from the MLC (see “Removing and Replacing the
Faceplate,” earlier in this section).
2. From the front of the faceplate, press the button or button pair to be replaced back
through its slot in the faceplate until the membrane containing the buttons is free.
3. On the back of the faceplate, place the new button or row of buttons
through the one or two slots in which they will be installed. Line up
the two pegs in the upper-left and lower-right corners of the new
button membrane (see the illustration at right) with the holes located
at opposite corners of the empty pair of slots in the faceplate.
TE
P
TO
MU
P
LA
Pegs (2)
Figure 20. Replacing a Button Row
MLC 60 Series MediaLink Controllers • Features, Installation, and Operation
21
4. Press the two buttons into the faceplate until the pegs on the membrane are seated in
the corresponding holes.
5. Repeat steps 2 through 4 for any additional buttons that you want to replace, then
reattach the faceplate.
Wiring for RS-232 Control (RS Models Only)
The MLC 60 Series RS models can send out RS-232 commands through the Port A
RS-232 port (Port A) or the IR/S port (Port B) to control a display device or switcher that is
connected to the port.
GROUND
Rx
HOST/
CONFIG
Connecting to Port A RS-232
Tx
GROUND
1
DIGITAL
INPUT
Port A RS-232 is a unidirectional serial port to which you can connect a display device or
switcher for control via RS-232 as follows:
COMMON
RELAYS
N/O
1. Connect the Rx pin on the display device or switcher to the Tx pin of Port A RS-232.
2
1
GROUND
Tx/IR
GROUND
Tx
GROUND
+12 VDC
PWR PORT A PORT B
RS-232
IR/ S
12V
0.4 A MAX
2. Connect the ground pin of the output device to the MLC Ground pin.
Ground ( )
Transmit (Tx)
Ground ( )
Receive (Rx)
Display Device
MLC RS D Rear Panel
Figure 21. Connecting a Display Device to Port A RS-232 of an MLC RS D
Refer to the communication sheets for your device drivers for information on compatible
baud rates and cabling type and distance. These communication sheets are accessed via
the MLC configuration software and also on the Extron web page at www.extron.com,
Download tab (see “Obtaining Device Drivers” in the “Software-based Configuration”
section or the configuration program help file to view the communication sheets and
download the device drivers).
Connecting to Port B IR/S
GROUND
Rx
Tx
HOST/
CONFIG
This port can be used for either IR or RS-232 unidirectional serial communication. To
control a display device or switcher via RS-232 from this port, connect the device as
follows:
GROUND
1
DIGITAL
INPUT
1. Connect the Rx pin on the display device or switcher to the Tx/IR pin of Port B IR/S.
2
1
GROUND
Tx/IR
GROUND
Tx
GROUND
+12 VDC
PWR PORT A PORT B
IR/ S
RS-232
12V
0.4 A MAX
COMMON
RELAYS
N/O
2. Connect the ground pin of the output device to the MLC Ground pin.
Ground ( )
Transmit (Tx/IR)
Ground ( )
Receive (Rx)
Display Device
MLC RS D Rear Panel
Figure 22. Connecting a Display Device to Port B IR/S of an MLC RS D
MLC 60 Series MediaLink Controllers • Features, Installation, and Operation
22
Wiring for IR Control
To control devices via infrared (IR) commands from the MLC, connect one or two IR
emitters to the IR/S port (RS models) or the IR port (IR model). The IR and IR/S ports provide
unidirectional IR signal output to control a display, projector, switcher, or other device such
as a VCR or DVD player.
You can connect one or two single IR emitters or one dual IR emitter to the IR or IR/S port
to control one or two devices. Because the MLC captive screw plugs have small openings
that accept just one wire per pole, to connect two IR emitters to the MLC, insert one
ground wire (black) and one IR signal wire (black with a white stripe) in the MLC 62 IR or
IR/S port, then connect the IR emitters to those wires, as shown below.
VCR
Ground
(–)
IR Signal
(–)
(+)
(–)
(+)
IR Signal
Ground
(+)
One Dual IR Emitter
(+)
(–)
Two Single IR Emitters
DVD Player
Legend
(–)
(+)
Black Wire
Black Wire with White Stripe
Figure 23.IR Emitters for the MLC 60 Series
Tx
GROUND
DIGITAL
INPUT
GROUND
Rx
HOST/
CONFIG
For IR control, there can be a maximum of 50 feet (15 m) between the IR or IR/S port and
the IR emitters.
COMMON
2
1
GROUND
Tx/IR
GROUND
Tx
GROUND
+12 VDC
PWR PORT A PORT B
IR/ S
RS-232
12V
0.4 A MAX
1
RELAYS
N/O
Example: The illustration on the next page shows a single IR emitter connected to the
IR/S port of an MLC 62 RS D or an MLC 64 RS D.
Ground ( )
IR Signal
IR Emitter
50'
(15 m)
MLC RS D Rear Panel
Figure 24.Connecting an IR Emitter to the IR/S Port of an MLC RS D
Wiring the Relays Port (RS Models Only)
Connect one or two devices such as room lights, a projector lift, or a motorized screen
(shown in the example on the next page) to the Relays port. This port accommodates two
relay connections.
To connect a device to one of the relay ports:
1. Connect the ground wire of the device to pin 3 of the provided 3-pole captive screw
connector.
2. Connect the signal wire of the device to pin 1 or 2 of the 3-pole connector.
3. Plug the 3-pole connector into the MLC 3-pole captive screw Relays port.
Example: In the illustration on the next page, a low-voltage controller connected to a
motorized screen has been wired to pins 2 and 3 of the provided 3-pole captive screw
plug. When this connector is plugged into the rear panel Relays port, the device will
be connected to the MLC relay port 2 (pins 2 and Common of the MLC 3-pole Relays
connector).
MLC 60 Series MediaLink Controllers • Features, Installation, and Operation
23
COMMON
2
1
GROUND
Tx/IR
GROUND
HOST/
CONFIG
DIGITAL
INPUT
1
RELAYS
N/O
Tx
GROUND
Power
Supply
Pin:
3
2
1
Ground ( )
110/220 V
Ground ( )
Signal
PORT B
PWR
RS-232
IR/ S
12V
0.2 A MAX
GROUND
Rx
Low Voltage
Screen Control
MLC RS D Rear Panel
Tx
GROUND
Motorized
Screen
Figure 25.Connecting a Motorized Screen to the Relay Port of an MLC RS D
+12 VDC
To connect devices to both relay ports:
MLC 62 RS the
D
1. Connect
ground wires of both devices to pin 3 of the provided 3-pole captive
Rear Panel
screw connector.
2. Connect the signal wire of one device to pin 2 and the other device to pin 1 of the
3-pole connector.
3. Plug the 3-pole connector into the MLC Relays port.
To define the operation of a relay and associate it with a button or a digital input, use the
configuration software (see “Adding relays to buttons” or “Configuring the Digital
Input Port” in the “Software-based Configuration” section or the configuration software
help for setup procedures).
Wiring the Digital Input Port (RS Models Only)
The Digital Input port on the MLC rear panel lets you connect a switch or sensor to control
other devices in the room that are connected to the MLC serial, IR, and relay ports. This
port measures two states — high and low — of the connection between the switch or
sensor and the connected device. The port accepts 0 to 24 VDC input. The threshold
voltages are as follows: a voltage below 1.0 VDC is measured as logic low, and a voltage
above 1.5 VDC is measured as logic high.
There is also an internal, +5 VDC, selectable, pull-up resistor for this circuit. If a connected
device does not have its own power source and will be powered through the controller,
configure this port (via the MLC configuration software) with Input with Pullup as the
digital input mode. If the connected device provides its own power, select Input for the
digital input mode (see the MLC 60 Series Configuration Program Help File to select the
digital input mode).
In addition, you can program actions on this port, so that each time a high or low state is
detected, one or more functions are performed. An example of this is front panel lockout,
or executive mode (see the configuration software help file to configure the Digital Input
port).
To wire the Digital Input connector:
1. Connect the ground port of the input device to pin 2 of a provided 2-pole captive
screw connector.
2. Connect the signal port of the input device to pin 1 of the captive screw connector.
3. Plug the wired connector into the MLC rear panel Digital Input connector.
MLC 60 Series MediaLink Controllers • Features, Installation, and Operation
24
Example: The diagram below shows a two-position switch connected to the Digital Input
port of an MLC 62 RS D.
1
COMMON
DIGITAL
INPUT
Tx
GROUND
Pin:
2
1
Ground ( )
Digital Input 1
RELAYS
N/O
GROUND
Rx
HOST/
CONFIG
Two-position Switch
2
1
GROUND
IR/ S
MLC RS D Rear Panel
Tx/IR
GROUND
Tx
GROUND
PWR
RS-232
12V
0.2 A MAX
Figure 26.Connecting a Two-position Switch to the Digital Input Port
Wiring the Host/Config Port
+12 VDC
The Host/Config port provides an alternative connection by which the MLC can be
configured and controlled from a host device or computer. (The primary means of
configuring the MLC is through the USB port; see “Configuring the MLC via the USB
Port,” later in this section.) In addition, SIS commands can be issued through this port
from the computer to control the MLC (see the “SIS Control” section).
The RS-232 protocol for this connection is 9600 baud, 1 stop bit, no parity, 8 data bits, no
flow control.
Use a female 9-pin to bare wire RS-232 cable or a universal control cable (such as
UC 50', Extron part number 26-518-01, or UC 100', part number 26-518-02) to connect
a Windows-based PC or an RS-232 control system to the MLC via this 3-pole, 3.5 mm
captive screw connector as follows:
1. Wire the RS-232 cable to one of the 3-pole captive screw plugs provided with the
MLC, as follows:
Receive wire to pin 1, which plugs into the Tx (transmit) port
•
Transmit wire to pin 2, which plugs into the Rx (receive) port
•
Ground wire to pin 3, which plugs into the _ (ground) port
COMMON
2
1
GROUND
Tx/IR
DIGITAL
INPUT
1
Ground
Rx Receive
Tx Transmit
Ground ( ) 5
Transmit (Tx) 3
Receive (Rx) 2
RELAYS
N/O
Tx
GROUND
Pin:
3
2
1
9 pin HD
Connector
IR/ S
GROUND
Rx
HOST/
CONFIG
•
5
1
GROUND
Tx
GROUND
+12 VDC
PWR
RS-232
12V
0.2 A MAX
MLC 62 RS D Rear Panel
9
6
To RS-232 Port on Computer
or Control System
Figure 27. Connecting a Host Computer or Control System to the
Host/Config Port
2. Plug the 3-pole connector into the Host/Config port on the MLC rear panel.
MLC 60 Series MediaLink Controllers • Features, Installation, and Operation
25
Wiring the Volume Control Module (MLC 64 RS VC D Only)
Connect the remote volume control port of an Extron amplifier to the 3-pole captive screw
connector on the rear panel of the MLC 64 volume control module, as shown in the figure
below. No software configuration is required for this module.
NOTES: • Choose an Extron amplifier that is capable of remote volume control and
muting. Not all Extron amplifiers have remote volume control ports. The
MPA 122 or MPA 401 are examples of the type of amplifier to use.
• Use shielded cable for audio connections to avoid inducing noise.
1. Wire a 3-pole captive screw connector (provided) to an audio cable as shown below:
Vol/Mute
10V
Amplifier
Rear Panel
10V
VOL
10 V
Vol/Mute
Ground
GND
1 2 3
ABC
MLC 64 VCM
Rear Panel
Figure 28. Wiring the Volume Control Module
In figure 28:
•
A = ground
•
B = Volume and mute control with DC voltage. The range is 0 to 10 V, where 0 V is mute and 10 V is maximum volume.
•
C = 10 VDC reference voltage
2. Plug the wired connector into the 3-pole captive screw connector on the rear panel of
the MLC 64 volume control module.
3. Connect the other end of the audio cable to an Extron amplifier that is capable of
remote volume control (such as the XPA 1002).
Connecting Power to the MLC
See “f PWR (power) connector,” earlier in this section, for important cautions about
power supplies. Connect the provided 12 VDC, 1 A power supply to the MLC as follows:
1. Wire one of the supplied 2-pole captive screw connectors as shown below.
Smooth
A
Ridges
A
SECTION A–A
3/16” (5 mm) Max.
Power Supply Output Cord
Figure 29. Wiring the Power Connector
MLC 60 Series MediaLink Controllers • Features, Installation, and Operation
26
1
COMMON
HOST/
CONFIG
DIGITAL
INPUT
Tx
GROUND
RELAYS
N/O
GROUND
Rx
GROUND
Tx/IR
GROUND
Tx
GROUND
+12 VDC
PORT A
PWR
RS-232
12V
0.4 A MAX
2
1
IR/ S
2. Plug the connector into the rear panel Pwr connector. In the example below, a power
supply is being connected to the Pwr connector of an MLC 62 RS D.
Ground
12 VDC Input
MLC Rear Panel
Ground All Devices
External
Power Supply
(12 VDC)
Figure 30. Connecting a Power Supply to an MLC
Configuring the MLC via the USB Port
The mini-Type B USB port can be used to configure the MLC via the configuration software
and to update the firmware. This USB port also functions as a power source for the MLC
during configuration.
NOTE: Do not use this port as the permanent power source for the MLC. It should be
used for power only during button and port configuration.
1. If the MLC has already been installed, access the USB port as follows:
•
MLC D models: Remove the wallplate from the unit to access the USB port,
which is located on the front panel behind the wallplate (see “Accessing the
Covered MLC D Front Panel Features,” later in this section).
•
MLC 62 RS EU and MK: Remove the MLC from the installation surface to
access the USB port, which is located on the left side panel (see “Accessing
MLC 62 RS EU and MK Side and Rear Panel Features,” later in this section).
2. Connect a USB A to mini B cable between the USB configuration port and the USB
port on your computer.
DISPLAY
ON
Mini Type B
USB
OFF
Type A
USB
VOLUME
PC
VIDEO
LAPTOP
MUTE
USB
Ports
USB 1
USB Cable
Extron
MLC 62 D Front Panel
PC
Figure 31.USB Port Connection for MLC D Models
MLC 60 Series MediaLink Controllers • Features, Installation, and Operation
27
Mini Type B
USB
Type A
USB
USB Cable
USB 1
USB
Ports
MLC 62 RS EU or
MLC 62 RS MK
Left Side Panel
PC
Figure 32.USB Port Connection for MLC 62 RS EU and MLC 62 RS MK
3. If this is the first time you have connected an MLC to this USB port on your computer,
the Found New Hardware Wizard opens. On the first screen, you can specify whether
you want the computer to connect to Windows Update in order to search the web
for the driver that it needs to communicate with the MLC via the USB port. (If the USB
driver already exists on your computer, select No, not this time.)
Figure 33.Found New Hard Wizard Opening Screen
•
Select the Yes, this time only radio button if you want your computer to
connect to Windows Update only this one time.
•
Select Yes, now and every time I connect a device if you want the computer
to automatically connect to Windows Update to search the web every time the
MLC is connected to this USB port.
•
Select No, not this time if you do not want the computer to connect to
Windows Update to search the web (for example, if the driver is already present
on your computer).
MLC 60 Series MediaLink Controllers • Features, Installation, and Operation
28
4. Click Next. On the next screen, make sure that the Install the software
automatically (Recommended) radio button is selected, then click Next. (You do
not need to insert a disc.)
Figure 34.Selecting the Radio Button to Install the USB Driver Automatically
Your computer locates the driver needed for it to communicate with the MLC
via the USB port. This driver is loaded to the computer hard drive when the MLC
configuration program is installed.
5. When the Completed screen appears, click Finish to close the wizard.
NOTE: This wizard appears only the first time you connect the MLC to each USB
port. You do not see the wizard again unless you connect the MLC to a
different USB port on your computer.
6. Configure the MLC ports and buttons as desired, using the MLC configuration
program (see the configuration software help file for information on these
procedures). To obtain the software, see “Installing the Configuration Software”
in the “Software Configuration and Control” section.
7. When finished configuring, disconnect the USB cable from the MLC, and replace the
faceplate or return the MLC to its position in the installation surface.
NOTES: • Unlike the rear panel Host/Config port, which can also be used to
configure the MLC, the cable to the USB port cannot remain connected
when the MLC 62 RS EU or MLC 62 RS MK is mounted, or when the
MLC D wallplate is attached.
• If you want to upload a new configuration via USB after the MLC has
been mounted, you must detach the MLC D wallplate or remove the
MLC 62 RS EU or MLC 62 RS MK unit from the installation surface (see
“Accessing Covered Panel Features after Mounting,” later in this
section, for the procedures).
MLC 60 Series MediaLink Controllers • Features, Installation, and Operation
29
IR Learning
The IR learning transceiver sensor on the MLC front or left side panel can receive and
“learn” commands from the infrared remote controls of other devices via the MLC
configuration software. IR Learning enables you to create an IR driver file to control the
projector or input devices such as a VCR or DVD player. IR Learning of projector control
codes is necessary only if there is no driver available for your projector or if you need to
customize the driver.
The IR transceiver accepts infrared signals of 30 kHz to 60 kHz. Point the IR remote control
directly at the transceiver for best results. The diagrams below indicate the best distances
and angles at which to hold the remote control.
IR Learning
Transceiver
DISPLAY
VIDEO
SET
UP
TV
INPUT
OFF
PRG–
PRG+
PLAY
STOP
PAUSE
RGB1
UP
DOWN
+100
FF
RIGHT
+
RGB2
POWER
INPUTS
DIR B
TIME/
LEVEL+
DECK
A/B
TV
MUTE
6
9
3
VCR
DISP
TUNER
SKIP/CHAPTER
SLEEP
DLY/CNT/REAR
S-Video
LEFT
TIME/
LEVEL–
REW
–
DIR A
REC/
PAUSE
TAPE
EFFECT
ON/OFF
CD
2
INPUT SELECT
5
DVD/LD
8
1
0
PHONO
TEST
4
7
ENT
TV/DBS
ON
4"–14"
(10–36 cm)
VOLUME
VIDEOPanel
PC D Front
MLC 62
Figure 35.IR Learning on an MLC D Model
LAPTOP
MUTE
Extron
IR Learning Transceiver
VIDEO
SET
UP
TV
INPUT
S-Video
PRG+
PLAY
UP
RGB1
DLY/CNT/REAR
+
INPUTS
RGB2
POWER
DIR B
TV
MUTE
TIME/
LEVEL+
FF
RIGHT
DOWN
+100
DECK
A/B
6
9
3
VCR
DISP
TUNER
SKIP/CHAPTER
PRG–
–
STOP
SLEEP
PAUSE
DIR A
TIME/
LEVEL–
LEFT
REW
REC/
PAUSE
TAPE
EFFECT
ON/OFF
CD
2
INPUT SELECT
5
DVD/LD
8
1
0
PHONO
TEST
4
7
ENT
TV/DBS
4"–14"
(10–36 cm)
MLC 62 RS EU
and MLC 62 RS MK
Left Side Panel
Figure 36.IR Learning on an MLC 62 RS EU or MLC 62 RS MK
To set up the MLC for IR Learning, use the MLC configuration software (see the
configuration software help file for the procedures).
MLC 60 Series MediaLink Controllers • Features, Installation, and Operation
30
Mounting the MLC 60 Series Controllers
When the system has been cabled, configured, and tested, the MLC can be installed in
a wall or furniture. After you have any desired changes to the faceplate or front panel
buttons and configured the buttons, mount the MLC as described in the following
sections.
Mounting an MLC 62 D
You can mount an MLC 62 RS D or MLC 62 IR D to a UL-approved one-gang sized
electrical junction box or Decora mounting bracket (included).
Mounting an MLC 62 D to an electrical junction box
CAUTION: Ensure that the junction box is grounded properly.
1. Mount the electrical junction box in the wall or furniture, following the directions
provided with the box.
2. Run the cables through the electrical box.
3. Connect all cables and disconnect power from all devices at the source.
4. Insert the MLC unit into the mounted electrical box.
5. Secure the MLC to the box using two of the provided screws in the slots at the top
and bottom of the unit.
6. Fasten the Decora wallplate onto the unit using two of the provided screws in the
holes at the top and bottom.
AY
PL
DIS
F
OF
ON ME
Electrical
Box
U
OL
V
EO
VID
PC
TE
OP
MU
PT
LA
MLC 62 D
Decora
Wallplate
Figure 37. Mounting an MLC 62 D in an Electrical Junction Box
MLC 60 Series MediaLink Controllers • Features, Installation, and Operation
31
Mounting an MLC 62 D to a Decora Mounting Bracket
A one-gang, Decora style mounting bracket (“mud rings”) is provided with the MLC 62 D
models. If desired, you can mount the MLC to this type of bracket instead of to an
electrical box. To mount the controller to a Decora style mounting bracket, follow these
steps:
1. Cut a hole in the mounting surface large enough to accommodate the provided
one-gang mounting bracket.
2. Insert the mounting bracket into the hole.
3. Turn the two screws on the bracket so that the locking arms rotate behind the
mounting surface until they clamp securely to it. Do not overtighten.
4. Run the cables through the mounting bracket and attach them.
5. Place the MLC D onto the bracket so that the oval screw holes at the top and bottom
of the MLC line up with the oval holes at the top and bottom of the bracket.
6. Place the wallplate onto the MLC front panel, then attach both to the bracket, using
two of the provided screws in the holes at the top and bottom.
Wall
3.88"
2.16"
AY
PL
DIS
F
OF
ON ME
LU
VO
EO
VID
PC
TE
Wall Mounting
Bracket
OP
MU
PT
LA
MLC 62 RS D
Wallplate
Figure 38.Mounting an MLC 62 D to a Decora Mounting Bracket
MLC 60 Series MediaLink Controllers • Features, Installation, and Operation
32
Mounting the MLC 64 RS VC D
Mounting an MLC 64 RS VC D to an electrical junction box
CAUTION: Ensure that the junction box is grounded properly.
1. Mount a two-gang electrical junction box in the wall or furniture, following the
directions provided with the box.
2. Run the cables through the electrical box.
3. Connect all cables and disconnect power from all devices at the source.
4. Place the MLC and VCM units side-by-side into the mounted electrical box.
5. Secure the MLC and VCM to the box using the provided screws in the oval slots at the
top and bottom of the two boards.
6. Fasten the wallplate onto the unit using the four provided black or white screws in the
holes at the top and bottom of the wallplate.
Wall
Wall Box
ME
LU
VO
Y
LA
P
DIS
FF
O
ON
PC
OP
PT
LA
C
DO
TE
MU
M
CA
EO
VID
MLC 64 VC D
Wallplate
Figure 39.Mounting an MLC 64 D to an Electrical Box
MLC 60 Series MediaLink Controllers • Features, Installation, and Operation
33
Mounting an MLC 64 RS VC D to a Decora Mounting Bracket
A two-gang Decora mounting bracket is provided with the MLC 64. To mount the MLC 64
to this type of bracket:
1. Cut a hole in the mounting surface large enough to accommodate the provided
two-gang mounting bracket.
2. Insert the mounting bracket into the hole.
3. Turn the two screws on the bracket so that the locking arms rotate behind the
mounting surface until they clamp securely to it. Do not overtighten.
4. Run the cables through the mounting bracket and attach them.
5. Place the MLC 64 and the volume control module side-by-side onto the bracket so
that the centers of the oval screw holes at the top and bottom of both module boards
line up with the four holes on the bracket.
6. Insert the four provided silver, rounded Phillips head screws through the oval holes
in the two MLC boards and then the round holes in the Decora mounting bracket
behind, and tighten the screws.
7. Place the wallplate over the two MLC modules. The front panels should protrude
through the slots in the wallplate, while the two boards fit into the recessed area on
the back side of the wallplate.
8. Fasten the wallplate onto the MLC boards, using the four provided black or white
screws in the holes at the top and bottom of the wallplate.
Wall
4.06"
3.75"
ME
LU
VO
AY
PL
DIS
F
OF
ON
PC
OP
PT
LA
TE
MU
EO
VID
X
AU
Wall Mouting
Bracket
MLC 64 VC D
Wallplate
Figure 40.Mounting an MLC 64 D to a Two-gang Decora Mounting Bracket
MLC 60 Series MediaLink Controllers • Features, Installation, and Operation
34
Mounting the MLC 62 RS EU and the MLC 62 RS MK
CAUTION: Ensure that the junction box is grounded properly.
To mount the MLC 62 RS EU and MLC 62 RS MK to an electrical box:
1. Attach the provided metal mounting bracket to the mounted electrical box using two
of the included screws in the slots at the top and bottom of the bracket.
NOTES: • To keep the MLC securely in place and prevent it from being easily
pulled from its mounting surface, ensure that the side of the bracket
with the word “Front” engraved on it faces out (away from the
electrical box).
• If you want to be able to remove the MLC easily from its mounting,
attach the mounting bracket with “Front” facing inward, toward the
junction box.
2. Run the cables through the electrical box and the plastic wall frame.
3. Connect all cables to the MLC and disconnect power from all devices at the source.
4. Align the wall frame to the metal mounting bracket on the mounting surface.
5. Holding the wall frame in place on the bracket, press the MLC into the frame until the
unit snaps into place.
Electrical
Junction Box
Metal Bracket
AY
PL
DIS
F
OF
E
ONLUM
VO
EO
VID
Wall Frame
PC
OP
TE
MU
PT
LA
MLC 62 EU
Figure 41.Mounting the MLC 62 RS EU to an Electrical Box
MLC 60 Series MediaLink Controllers • Features, Installation, and Operation
35
Wall
Wall Box
Metal Bracket
Y
LA
SP
DI
F
OF
E
ONLUM
VO
EO
VID
PC
Frame
OP
TE
MU
PT
LA
MLC 62 MK
Figure 42.Mounting the MLC 62 RS MK to an External Electrical Box
Mounting the MLC EU in a Raceway Using Spacers (Optional)
If you are experiencing difficulty with the MLC EU staying in place when installed in a
cable raceway, this may be due to a gap between the metal mounting bracket and the
wall frame.
When this gap exists, the tabs on the sides of the MLC do not reach the metal mounting
bracket and the MLC does not snap completely into the wall frame.
You can remedy this situation by installing a spacer (provided with the MLC EU) between
the metal mounting bracket and the rim of the junction box. This spacer appears very
similar to the metal mounting bracket, except that it has holes instead of slots for the
mounting screws, it is engraved with the words “Optional Spacer” and “Place behind
bracket,” and has a slightly larger center opening than the mounting bracket.
NOTE: Do not attempt to use the spacer in place of the metal mounting bracket.
Because of its larger opening, the spacer will not hold the MLC EU in place in
the wall frame.
MLC 60 Series MediaLink Controllers • Features, Installation, and Operation
36
To mount the MLC EU to a raceway using the spacer:
Raceway
1. Mount the electrical box in the raceway.
2. Attach the spacer to the electrical box using two
of the included screws in the holes at the sides
of the spacer. Leave the screw heads protruding
approximately 1/8 inch from the surface of the spacer.
Junction Box
Mounting Bracket
3. With the “Front” label toward you, place the metal
mounting bracket onto the spacer so that the screw
heads pass through two of the slotted holes in
opposite sides of the bracket.
Spacer
NOTE: Ensure that the surface of the mounting bracket containing the word
“Front” is facing out (away from the spacer and junction box).
Junction Box
Metal Spacer
Metal Bracket
AY
PL
DIS
F
OF
E
ONLUM
VO
Wall Frame
EO
VID
PC
OP
TE
MU
PT
LA
Cable Raceway
MLC 62 RS EU
Figure 43.Mounting the MLC 62 RS EU Using a Spacer
4. Rotate the mounting bracket as necessary to ensure that the MLC will be positioned
straight on the mounting surface and not skewed to either side.
5. Tighten the screws to secure the bracket to the spacer.
6. Pull the cables through the electrical box and the wall frame.
7. Disconnect power from all devices at the source and connect all cables to the MLC.
8. Align the wall frame with the metal mounting bracket on the mounting surface.
9. Press the MLC into the frame until the unit snaps into place.
MLC 60 Series MediaLink Controllers • Features, Installation, and Operation
37
Accessing Covered Panel Features After Mounting
After the MLC is installed in the mounting surface, you can still access the covered
front panel features on the MLC D and the side and rear panel features on the
MLC 62 RS EU and MLC 62 RS MK, using the following procedures.
Accessing the Covered MLC D Front Panel Features
After the MLC D is mounted, the following front panel items are covered by the wallplate:
IR sensor, DIP switches, Reset button, and USB connector. To access these controls, remove
the two screws at the top and bottom of the wallplate and lift it off the MLC, as shown
below.
AY
PL
DIS
F
OF
ON ME
U
L
VO
EO
VID
PC
TE
OP
MU
PT
LA
MLC 62 D
Wallplate
Figure 44.Removing the MLC D Wallplate
Accessing MLC 62 RS EU and MLC 62 RS MK Side and Rear Panel Features
To access the MLC 62 RS EU or MK side and rear panel features after the MLC has been
mounted, you must remove the MLC from the installation surface, leaving the metal
mounting bracket attached. (Without the MLC unit to hold it in place, the wall frame also
is removed.) A removal tool (shown at right) is provided with the product.
To remove the MLC from the mounting surface:
1. Insert the flat tip of the removal tool in the center of the right or left edge of the MLC,
between the MLC and the wall frame, all the way to the line below the arrow on the
tool.
MLC 60 Series MediaLink Controllers • Features, Installation, and Operation
38
Y
LA
F
OF
E
ONLUM
Extron
SP
DI
VO
Insert to line.
EO
VID
PC
OP
TE
MU
T
AP
L
Figure 45. Inserting the Removal Tool in an MLC 62 EU
2. Press the removal tool inward or toward the mounting surface to release the tab
holding the MLC in place in the wall frame.
3. If the MLC does not immediately come free of the frame, pry the unit outward (away
from the wall) until it is free of the installation surface, then lift it out.
To reinstall the MLC, place it in the wall frame, then press the unit into the metal
mounting bracket until all four tabs snap into their slots.
Front Panel Security Lockout
To prevent accidental changes to settings, the MLC features a front panel security lockout
mode for disabling access to controls. When front panel lockout is enabled, all the front
panel buttons are disabled. If a button is pressed, all the buttons flash rapidly three times
to indicate lockout, but no action occurs.
You can lock and unlock the front panel by the following methods:
•
Front panel buttons
•
The MLC configuration software (see the MLC 60 Series Configuration Program Help
File).
•
SIS commands (see the Front panel lockout commands in the “SIS Control” section).
Locking Using the Front Panel Buttons
To lock the front panel using the buttons, press and hold the On and
Off (top two) buttons simultaneously for 3 seconds. All the front panel
buttons and the red Activity LED flash three times rapidly.
ON
To unlock the front panel, press and hold the On and Off buttons again
for 3 seconds. All front panel buttons flash three times slowly while the
Activity LED blinks green three times.
Press and hold
for 3 seconds.
DISPLAY
MLC 60 Series MediaLink Controllers • Features, Installation, and Operation
OFF
39
Resetting the MLC Using the Reset Button
If it becomes necessary to reset the MLC to its default factory firmware or to the default
configuration settings that were implemented at the factory, you can use either the Reset
button (see below) or the configuration software (see the software help file).
The Reset button is located on the front panel of the MLC D behind the wallplate, and on
the rear panel of the MLC 62 RS EU and MK. To access the Reset button, do one of the
following, depending on your MLC model:
•
Remove the wallplate from the MLC D (see “Accessing the Covered MLC D
Front Panel Features,” earlier in this section), or
•
Remove the MLC 62 RS EU or MLC 62 RS MK from the installation surface
(see “Accessing MLC 62 RS EU and MLC 62 RS MK Side and Rear Panel
Features,” earlier in this section).
Use the provided Extron Tweeker or other small screwdriver to press the Reset button.
1
Tx
1
PWR
2
DIGITAL
INPUT
Tx Rx
Reset
Button
R
1
VOLUME
Reset
Button
HOST/
CONFIG
OFF
Tx/
IR
PORT B PORT A
RS-232
IR/ S
0.4 A max
ON
C
12 V
DISPLAY
2
RELAYS
N/O
Reset
LED
+
Reset
LED
MLC PC
D Front
Panel
VIDEO
MLC 62 RS EU and
MLC 62 RS MK Rear Panel
MUTE
LAPTOP
Figure
46.Reset
Button Locations
Extron
You can perform two types of reset:
•
Resetting to the default configuration:
1. While the MLC is powered on, press and hold the Reset button. The Reset LED
remains lit while the button is being held.
2. After 3 seconds, the Reset LED blinks once. Release the button, then immediately
(within 1 second) press it again and release it quickly (momentary press).
When the reset is finished, the Reset LED blinks four times, indicating that the
reset was successful.
•
Resetting to the factory firmware defaults:
1. With the MLC powered off, press and hold the Reset button.
2. Continue to hold the button while applying power to the MLC.
3. When the reset is complete, the front panel buttons scroll (blink in succession in
clockwise order). Release the Reset button.
MLC 60 Series MediaLink Controllers • Features, Installation, and Operation
40
Software-based
Configuration
This section describes basic procedures for setting up the MLC using the MLC 60 Series
Windows-based configuration program. The following topics are covered:
•
About the MLC Configuration Program
•
Installing the Configuration Software
•
Starting the Configuration Software
•
Obtaining Device Drivers
For more detailed descriptions and additional configuration procedures, see the
configuration program help file.
About the MLC Configuration Program
An MLC controller must be configured in order for it to be able to control other devices.
The Extron MLC 60 Series Configuration Program is used to set up the MLC front panel
buttons and rear panel ports and to update firmware. Using this software, you can create
configurations on your computer for your MLC and then upload them to the computer via
the MLC USB or Host/Config serial port. (The MLC does not have to be connected to the
computer while you are creating the configurations.) See the “Features, Installation, and
Operation”section for pin assignments and other details on the configuration ports, and
the configuration software help file to create and upload the configurations.
NOTE: Extron recommends configuring and controlling the MLC via the USB port.
This port can supply power to the MLC during the configuration process.
Computer System Requirements
The minimum system requirements for the computer on which you install the MLC
configuration program include:
•
Intel Pentium III 1-GHz processor
•
Microsoft Windows XP SP2 (32 bit) or Windows 7 (64 bit)
•
Microsoft.NET Framework 2.0
•
512 MB of RAM
•
50 MB of available hard disk space
MLC 60 Series MediaLink Controllers • Software-based Configuration
41
Installing the Configuration Software
The software is provided on a DVD that is delivered with your MLC unit. You can also
download it free of charge from the Extron website.
Downloading and Installing the Software from the Web
If you do not have the software on DVD, download it to your computer from the Extron
website as follows:
1. Visit the Extron website at www.extron.com and select the Download tab.
2. On the Download Center screen, click the Control Software button. A Control
Software screen is displayed, containing a list of control software products.
3. Click M on the linked alphabet at the top or bottom of the screen.
4. On the “M” software products page, scroll to locate MLC, and click the Download link
at the far right.
5. On the next screen, fill in the required information.
6. Click the Download MLC60SWnxn.exe button.
7. Follow the instructions on the download screens to download the software and install
it on your computer.
Installing the Software from the DVD
If you have an Extron DVD containing the MLC software, install it on your computer as
follows:
1. Insert the disc into your computer drive. If the disc does not start automatically, open
your Windows Explorer and double-click Launch.exe on the disk drive to start it.
2. On the Extron software DVD screen, click the Software button.
Figure 47. Software Button on the DVD Opening Screen
MLC 60 Series MediaLink Controllers • Software-based Configuration
42
3. On the Control Software screen, scroll to locate the MLC 60 Series, and click the
Install link in the far right column.
4. Follow the on-screen instructions to complete the installation on your computer.
Starting the Configuration Software
To use the MLC to control devices, you must create one or more configurations for it,
using the MLC configuration program. A configuration is a set of specifications for button
command assignments and port parameters that enable the MLC to control your display
device or switcher.
NOTE: Configurations can be created away from the job site and without the MLC
being connected to the computer.
After you have downloaded and installed the software (see “Installing the
Configuration Software,” earlier in this section) and device drivers if necessary (see
“Obtaining Device Drivers,” later in this section), begin by creating a new project.
An MLC project is a file (with an .mlp extension) that contains port and button
configurations for one or more MLCs. A configuration must be created within a new or
existing project. A project can be saved, copied, and edited (for example, by adding or
changing configurations within it). You can also create a configuration and add it to an
existing project. You can start a new project either when first opening the MLC software
or while the software is open and another project is active.
To start the configuration program:
1. Open the MLC 60 Series software by selecting the MLC icon from the Start menu on
your computer desktop. Select All Programs\Extron Electronics\MLC 60\MLC 60.
The Start Options window opens in front of the MLC 60 Configuration Program main
window.
2. On the Start Options window, select the Create a New Project radio button.
Figure 48. Start Options Window
3. Click OK. The Add Device dialog box opens, displaying a diagram of your MLC front
panel.
4. On the Add Device window, enter a name for your MLC in the Device Name field.
This becomes the name of the first configuration in the new project.
MLC 60 Series MediaLink Controllers • Software-based Configuration
43
5. Select your MLC model from the Select Model drop-down menu.
Figure 49. Add Device Window with Select Model Menu Displayed
6. Click OK. The MLC 60 Series main window opens, with the device name you entered
displayed in the device configuration tree (left column).
Figure 50.The MLC 60 Series Main Window
MLC 60 Series MediaLink Controllers • Software-based Configuration
44
The MLC 60 Series main window is divided into the following major sections (see the
illustration on the previous page):
aThe device configuration tree enables you to view the list of devices that have
been configured, and to organize and save all these device configurations in a
single project file.
bThe Front Panel tab screen enables you to configure the buttons and assign all
commands to them.
The following is displayed on the MLC window:
•
The device configuration name appears in the configuration tree in the left
pane, with the names of the two ports to which a device can be connected and
controlled via RS-232 or IR: Port A (RS-232) and Port B (IR/S) for the MLC 60
Series RS-232 models, or Port A (IR) for the MLC 62 IR D.
•
The Front Panel screen is displayed in the main section of the window and
contains a diagram representing the front panel of your selected MLC. (If this
screen appears blank when the window is opened, click on the name of the MLC
device configuration in the left pane to display it.)
•
In the title bar, the project name is shown as “Unnamed Project*.” (The asterisk
following the name indicates that the project has not been saved since changes
were made.)
7. Save and name your project as follows:
a. From the File menu, select Save As... .
b. On the Save As window, give your project file a name and save it to the desired
location on your computer.
NOTE: Your project is saved as a file with the extension .mlp.
You are now ready to create configurations for your MLC device by specifying parameters
for its ports and buttons (see the configuration software help file for procedures).
Accessing the Help File
For instructions on creating configurations using the software, see the MLC 60 Series
Configuration Program Help File. You can access the help file the following methods:
•
From the Help menu, select MLC 60 Series Configuration Program Help.
•
Click the Help icon on the main window toolbar.
•
Press the <F1> key on your computer keyboard.
MLC 60 Series MediaLink Controllers • Software-based Configuration
45
Obtaining Device Drivers
The Extron drivers are control files (libraries) of commands created by Extron that are
specific to a particular display device or switcher. There are different sets of drivers for
serial (RS-232) and IR control. Before you can use the configuration software to configure
the MLC buttons and ports, the necessary drivers must be loaded onto your computer. You
must then load the appropriate driver for your device to the MLC in order to configure it
to control the device.
Serial and IR drivers are available at no charge from the Extron web site at
www.extron.com. You can download them directly from the web or through the
configuration software. The same drivers are also provided on the software DVD provided
with the MLC.
NOTES: By default,the drivers that you download are stored in the Driver2 folder on
your computer, located at:
• Windows XP — c:\Documents and Settings\All Users\
Shared Documents\Extron\Driver2
• Windows 7 — c:\Users\Public\Documents\Extron\Driver2
Downloading Drivers Using the Configuration Program
The easiest way to obtain the drivers for your devices is via the MLC configuration
program. (You can do this at any time while the software is open, regardless of whether a
project has been created.)
1. Click Start > Programs > Extron Electronics > MLC 60 or double-click
the MLC software icon (shown at right) on your desktop to launch the MLC
software application. The MLC Configuration Program main window opens,
with the Start Options window displayed in front of it.
2. On the Start Options window, click the Add Driver Subscriptions button.
Figure 51. Start Options Window
MLC 60 Series MediaLink Controllers • Software-based Configuration
46
The Driver Subscriptions window opens. In the Available Drivers Subscription section,
select the device types for which you want to download drivers.
Figure 52. Driver Subscription Window
•
To select all device types available from a manufacturer, select the check box in
front of the manufacturer name. Each manufacturer whose drivers you select is
listed in the Current Drivers Selection column.
•
To select individual device types from a manufacturer, click the plus (+) sign
in front of the manufacturer name to expand it and display all the device types of
that manufacturer for which drivers are available, then select the desired device
check boxes. To hide the devices, click the minus (–) sign.
•
To expand or collapse the list of manufacturers and view or hide
all their drivers, click the Expand all or Collapse all buttons
(shown at right) at the top of either column.
NOTE: When you select a device, both the IR and serial drivers for it are
downloaded.
3. Make any desired optional selections:
•
Select the Auto-check for new subscribed drivers check box if you want
the MLC to continually check for and download any updates to your subscribed
drivers. When a new version of any of your subscribed drivers is available on
the Extron website, that new version is automatically downloaded when the
configuration program is started.
•
Click Set Proxy if you want to download your drivers using proxy server settings.
(Refer to the configuration software help file for more information.)
If you want to close the window without downloading any drivers, click Close to save
any changes you have made on this window or Cancel if you want to discard your
changes.
MLC 60 Series MediaLink Controllers • Software-based Configuration
47
4. Click Download. The Driver Subscriptions Download window opens, displaying all
drivers that have been selected or previously downloaded to your computer. Figure 53. Driver Subscription Download Screen
•
If a driver on the list is new for your computer, it has the designation
“Waiting...” in the Status column.
•
If a driver already exists on your computer, its designation is “Already in Driver
Catalog.”
NOTE: Your computer must have an active internet connection to download the
drivers.
5. On the Driver Subscription Download window, click Begin to download the drivers
listed in the Driver File section. While the download is in progress:
•
The Progress Bar indicates the progress of the download.
•
The Elapsed Time section shows the amount of time that has passed since the
download process started.
•
As each new driver is downloaded, its designation in the Status column changes
to “Completed.”
6. When the Progress Bar and the Status column indicate that the download has
completed, click Close to close the Driver Subscription Download window.
Figure 54. Driver Subscriptions Download Screen after a Driver Download
7. Click Close on the Driver Subscriptions window when finished.
MLC 60 Series MediaLink Controllers • Software-based Configuration
48
Downloading Drivers from the Disc
The software DVD provided with the MLC contains the set of device drivers that are also
available from the web. To load the drivers from the DVD to your computer:
1. Load the Extron Software Products DVD into your CD or DVD drive. The disc should
start automatically. If it does not, open your Windows Explorer and double-click
Launch.exe on the CD or DVD drive to start it.
2. On the opening screen, click the Drivers button or select the Drivers tab at the top
of the screen.
Figure 55. Drivers Tab and Button on the Software DVD Opening Screen
3. On the Drivers screen, select MLC 60 Series Device Drivers.
Figure 56. MLC 60 Series Link on the Drivers Screen of the Software DVD
MLC 60 Series MediaLink Controllers • Software-based Configuration
49
The MLC 60 Series Device Drivers screen opens, displaying a list of all available drivers
for use with the MLC 60 Series controllers (see the example below).
Figure 57.MLC 60 Device Drivers Page on DVD
4. From the DVD, you can download either the current Extron driver package (containing
all IR and serial drivers that were available at the time the package was compiled), or
an individual driver.
To download the driver package:
NOTE: You do not need to choose a type from the Select Interface Type
menu because the driver package contains both types.
a. Click Download install for current driver package.
b. Click Run on each of the two File Download - Security Warning windows.
c. Follow the instructions on the Driver Install wizard screens to complete installation
of the driver package. Unless you specify otherwise, the driver file is placed at one
of the following locations on your computer:
•
Windows XP — c:\Documents and Settings\All Users\
Shared Documents\Extron\Driver2
•
Windows 7 — c:\Users\Public\Documents\Extron\Driver2
The MLC Configuration Program supports only driver package 8.1 or later.
MLC 60 Series MediaLink Controllers • Software-based Configuration
50
NOTE: The DVD may contain additional drivers that became available after the
current driver package was created. These new drivers may be on the
DVD, but have not been incorporated into the driver package.
To ensure that you are getting all the drivers currently available, use the
configuration program to download the drivers (see “Downloading the
Drivers Using the Configuration Program,” earlier in this section).
To download a single driver:
a. From the Select Interface Type drop-down menu, select IR or Serial for the
type of drivers to view. When you make this selection, only drivers in the current
driver package are displayed.
b. If you want to view all the drivers of the selected type, including those outside the
current package, click View All.
c. To view additional pages of driver listings, click Next. Click Previous to page
backward through the drivers list.
d. Right-click on the name of the desired driver. From the pop-up menu, select
Save Target As... .
Figure 58. Saving a Single Driver to the Computer
e. On the Save window that opens, save the driver file in the Driver2 folder.
MLC 60 Series MediaLink Controllers • Software-based Configuration
51
Downloading Drivers from the Web
Drivers can also be obtained directly from the Extron website as follows:
1. Visit the Extron website at www.extron.com, and click the Download tab.
2. Click the Device Drivers link on the left panel of the Download Center screen.
3. From the drop-down menu on the Device Drivers screen, select MLC 60 Series.
Figure 59.Selecting MLC 60 Series from the Device Drivers Drop-down Menu
4. From the menus on the Extron Online Search Tool screen, select search criteria for the
drivers you want to download:
•
From the Extron Product menu, select MLC 60 Series if it is not already
selected.
•
From the Protocol Type menu, select IR, Serial, or All.
•
From the Manufacturer menu, select the manufacturer of the device for which
you are downloading the drivers, or All to select all device manufacturers.
•
From the Product Category menu, select the type of device (for example, video
projector) or All.
•
From the Model menu, select the device model name or number, or All.
MLC 60 Series MediaLink Controllers • Software-based Configuration
52
As you make each selection, the driver list below changes to display all available
drivers meeting your selected criteria.
Figure 60.Entering MLC 60 Series Driver Search Criteria
5. Click on the device name whose driver you want to download.
To download all the drivers in the current package, click the Download install for
driver package (Version n) link.
NOTE: The website may contain additional drivers that became available after
the current driver package was created. These new drivers may be on the
website, but have not been incorporated into the driver package.
If you want to ensure that you are getting all the drivers currently
available, use the configuration program to download the drivers (see
“Downloading the Drivers using the Configuration Program,”
earlier in this section).
6. On the Download Center screen, enter the requested information, and click the
Download drivername button.
7. Follow the directions on the download screens that follow. Unless you specify
otherwise, the driver file is placed at one of the following locations on your computer:
•
Windows XP — c:\Documents and Settings\All Users\
Shared Documents\Extron\Driver2
•
Windows 7 — c:\Users\Public\Documents\Extron\Driver2
MLC 60 Series MediaLink Controllers • Software-based Configuration
53
SIS Control
The MLC can be remotely controlled via a host computer or other control device that is
attached to the MLC rear panel Host/Config port. You can issue Simple Instruction Set (SIS)
commands to the MLC via the RS-232 or USB interface of your computer or control device
with a communication software program such as Extron DataViewer or HyperTerminal. This
section contains a list of the SIS commands available for the MLC and describes procedures
for issuing them. The following topics are covered:
•
Host-to-Controller Communications
•
Using the Command and Response Table
•
Command and Response Table for SIS Commands
Host-to-Controller Communications
SIS commands consist of strings of one or more characters per field. No special characters
are required to begin or end a command sequence. When the MLC determines that a
command is valid, it executes the command and sends a response to the host device.
Most responses from the MLC to the host end with a carriage return and a line feed
(CR/LF = ]), which signals the end of the response character string.
Controller-initiated Messages
When a local event such as a front panel button press takes place, the MLC responds by
sending a message to the host, indicating what selection was entered. No response is
required from the host.
The MLC sends the following copyright message only when it first powers on.
(c) Copyright 20nn, Extron Electronics, MLC nn, vn.nn, 60-nnnn-nn
where MLC nn is the model name, vn.nn is the firmware version number and 60-nnnn-nn
is the model number.
This message does not appear with a USB connection.
Error Responses
If the MLC is unable to execute a command it receives because the command is invalid
or contains invalid parameters, the controller returns an error response to the host. This
response consists of the letter E followed by a number and a carriage return with a line
feed. The following error response codes can be returned:
E10 – Invalid command or parameter
E13 – Invalid value (out of range)
E14 – Not valid for this configuration
E22 – Busy
MLC 60 Series MediaLink Controllers • SIS Control
54
Using the Command and Response Table
The Command and Response Table on the following pages lists valid ASCII command
codes, the responses of the MLC to the host, and a description of the command function
or the results of executing the command. The ASCII to HEX conversion table below is for
use with the table.
Space
ASCII to Hex Conversion Table
•
Symbol Definitions
] = CR/LF (carriage return with line feed) (hex 0D 0A)
} = Soft carriage return (no line feed) (hex 0D; web | )
•
= Space
E = Escape key (hex 1B; web W)
X! = Button number: 01, 02, 03, 04, 05, 06, 07, 08, 09, or 10
Buttons are numbered from front panel top left (01) to bottom right (10).
NOTE: The Mute button on the MLC 64 VC D cannot be configured; therefore, it has
no number.
X@ = Relay port number
1 = Relay 1
2 = Relay 2
X# = Pulse length in increments of 0.5 seconds. The default is 1 (0.5 seconds).
1 = 0.5 seconds
2 = 1 second
...
255 ≈ 130 seconds
X^ = Digital input state
0 = low
1 = high
X* = Firmware version number (displayed to two decimal places: n.nn)
X( = Volume range level (a 3-digit number; for serial drivers with volume tables
only) NOTE: Only positive values are allowed. The volume table levels start with zero.
X1! = Lockout (executive) mode
0 = Off
1 = On
MLC 60 Series MediaLink Controllers • SIS Control
55
X1@ = Name of the MLC device.
May be up to 24 alphanumeric characters. The first character must be
alphabetic; the last character cannot be a hyphen or minus sign (-). No blank or
space characters are permitted.
X2#=Status
0 = disengaged (default)
1 = engaged
X2% = Firmware compatibility version number (a 3-digit number listed to three
decimal places: nnn.nnn)
X2^ = Device configuration compatibility version number (a 3-digit number listed to
three decimal places: nnn.nnn)
X4( = Default product name: MLC-62-RS, MLC-62-IR, or MLC-64-RS
X5) = LED status
A 32-digit number, each digit of which represents the status of an LED on the
MLC front panel. In X5), the LED statuses are represented in descending order
from 32 to 1; that is, the first digit on the left represents LED 32, the second digit
represents LED 31, and so on. The last digit of the number represents LED 1.
On the MLC 62 models, the LEDs are numbered as follows:
LED Number
LED Location
1
Transmit red
2
Transmit green
3, 4, 5, 6
Four LEDs behind “Display” text
7
Button row 1, first LED (button 1)
8
Button row 2, second LED (button 2)
9, 10, 11, 12
Four LEDs behind “Volume” text
13, 14, 15, 16, 17
Volume level indicator LEDs 1 through 5
18
Button row 2, first LED (button 3)
19
Button row 2, second LED (button 4)
20
Button row 3, first LED (button 5)
21
Button row 3, second LED (lights only if
buttons 5 and 6 are combined)
22
Button row 3, third LED (button 6)
23
Button row 4, first LED (button 7)
24
Button row 4, second LED (lights only if
buttons 7 and 8 are combined)
25
Button row 4, third LED (button 8)
26 through 32
Not used (always 0)
NOTE: Dual sized buttons, such as the input buttons on the MLC 62 IR D,
each take up an entire button row and have three LEDs apiece.
MLC 60 Series MediaLink Controllers • SIS Control
56
On the MLC 64, the LEDs are numbered as follows:
LED Number
LED Location
1
Transmit red
2
Transmit green
3, 4, 5, 6
Four LEDs behind “Display” text
7
Button row 1, first LED (button 1)
8
Button row 1, second LED (button 2)
9, 10, 11
Button row 2, LEDs 1 through 3
12, 13, 14
Button row 3, LEDs 1 through 3
15, 16, 17
Button row 4, LEDs 1 through 3
18, 19, 20
Button row 5, LEDs 1 through 3
21 through 32
Not used (The status is always 0.)
Each digit in the X21@ number can be 0 through 4, representing the following possible LED statuses:
0 = off
1 = dim
2 = on (bright)
3 = slow blink
4 = fast blink
NOTE: Unless otherwise indicated, commands are not case-sensitive.
MLC 60 Series MediaLink Controllers • SIS Control
57
Command and Response Table for SIS Commands
Command
ASCII Command
Response
E B* X! BTNO}
BtnoB* X! ]
(Host to Unit)
(Unit to Host)
Additional Description
Button Selection
Trigger a button
Execute the commands
programmed to button X!. (This
command produces the same
results as pressing button X! on
the front panel).
X! = 01, 02, 03, 04, 05, 06, 07,
08, 09, or 10.
NOTES: • When you press a dual-sized button, such as the Input buttons on the MLC 64, different
numbers appear on your screen depending on which side of the button is pressed. For
example, if you press the left side of the PC button on an MLC 64, the host response is
BtnoB*3, while pressing the right side of that button receives the response BtnoB*4. The
entire button lights, however, and the same command is issued regardless of which side is
pressed.
• Use the MLC 60 Series Windows-based configuration software to configure the buttons
with commands.
E B*5BTNO }
Example
BtnoB*05 ]
Perform commands assigned to
button 5.
Discrete Audio Volume Adjustment on Devices with Volume Tables (MLC 62 RS models only)
X( V
Set volume level14
NOTE:
Vol X( ]
Set volume table level to X(. X(
can be up to 3 digits; leading
zeros are optional.
Only positive values are allowed. Volume table levels start with 0 (zero). Setting a discrete volume level
that is outside of the volume table range results in an E13 error response.
Increment volume level
+V
Vol X( ]
Decrement volume level
–V
Vol X( ]
View current volume level
V
X( ]
Increase the volume by one
volume table increment.
X( = current volume level.
Decrease the volume by one
volume table increment.
Display the current volume level.
Increase and Decrease Audio Volume on Devices without Volume Tables (MLC 62 models only)
NOTE:
Attempts to enter an X( V (Set volume level) command to set a discrete volume level on a device whose
driver does not include a volume table result in an E14 error response.
Increment volume level
+V
Vol+
Decrement volume level
–V
Vol–
View volume level
V
---
Increase the volume level by one
step.
Decrease the volume level by
one step.
MLC 60 Series MediaLink Controllers • SIS Control
58
Command
ASCII Command
(Host to Unit)
Response
(Unit to Host)
Additional Description
Relay Functions (RS models only)
X@*3*X# O
Rly X@*X2# ]
2*3*1O
Rly2*1 ]
Toggle relay
X@*2 O
Rly X@*X2# ]
Force relay on
X@*1 O
Rly X@*1 ]
Force relay off
X@*0 O
Rly X@*0 ]
View relay state
X@ O
X2# ]
Pulse relay
Example:
Set the length X# of the
pulse specified for relay port
X@. Values for X# represent
increments of 0.5 seconds and
can range from 1 (0.5 seconds)
to 255 (approximately
130 seconds). The MLC
response includes status X2# for
the specified relay port.
For X@: 1 = Relay 1; 2 = Relay 2.
For X2#: 0 = open (disengaged;
1 = closed (engaged).
Relay port 2 will remain closed
for pulse intervals of 0.5
seconds.
Close and open relay port
X@. Each time the command
is issued, the MLC toggles
between the On and Off states.
The MLC response includes
status X2# for the specified relay
port.
Set relay port X@ to remain
closed (on).
Set relay port X@ to remain open
(off).
Show state X2# of relay port X@.
For X2#: 0 = open; 1 = closed.
Digital Input Data Port (RS models only)
X^ ]
View status X^ of the Digital
Input port. For X^:
0 = low; 1 = high.
0X
1X
X
Exe0 ]
Exe1 ]
Unlock front panel buttons.
Lock all front panel buttons.
View front panel lockout status.
X1!. For X1!, 0 = off; 1 = on.
Set unit name
E X1@ CN }
Ipn•X1@ ]
Set unit name to factory
default
E•CN }
Ipn•X4( ]
View unit name
E CN }
X1@ ]
View digital input state
]
Front Panel Lockout (Executive Mode)
Off
On
View
X1! ]
Device Naming
Set name X1@ for the MLC. X1@
can be up to 24 alphanumeric
characters. The first character
must be alphabetic; the last
character cannot be a hyphen or
minus sign. No blank or space
characters are permitted.
Set the name of the MLC to its
factory default name X4(.
X4( is:
• MLC-62-RS for RS models
• MLC-62-IR for IR models
• MLC-64-RS-D for MLC 64
Show the name of the MLC.
MLC 60 Series MediaLink Controllers • SIS Control
59
Command
ASCII Command
Response
E ZXXX }
ZapXXX ]
Reset the MLC configuration to
the factory default.
Q
X* ]
Q
1.00 ]
**Q
X2% ]
E DIMQ }
X2^ ]
Display firmware version X* to
two decimal places.
The current firmware version is
1.00.
Display firmware compatibility
version X2%.
View the device configuration
compatibility version number
X2^.
(Host to Unit)
(Unit to Host)
Additional Description
Reset/Erase
Configuration reset
Information Requests
Query firmware version
Example
Query firmware compatibility
version
Query device configuration
compatibility version
NOTE: Compatibility version numbers are used to track and check for compatibility between the configuration
software, firmware, and device configuration versions on the MLC. The device and firmware
compatibility numbers (X2% and X2^) each consist of six digits. The first three digits are called “major
numbers,” and the three digits following the decimal point are “minor numbers.”
Whenever the major numbers match, they are considered to be compatible. The minor numbers are
used to track changes that have been made but do not affect compatibility. However, if the minor
numbers do not match, the version may not be backward compatible. (See “Updating Firmware” in the
MLC help file for more information on checking compatibility.)
E DIMQ }
002.100 ]
Request controller part number
N
60-nnnn-nn ]
Query model name
I
MLC•62•RS•D ] or
MLC•62•RS•EU ] or
MLC•62•IR•D ] or
MLC•64•RS•D ]
Example
Display the current device
compatibility number 002.100.
Major number is 002; minor
number is 100.
Show the MLC part number:
MLC 62 RS D = 60-1005-02
MLC 62 RS EU = 60-1005-35
MLC 62 RS MK = 60-1005-23
MLC 62 IR D = 60-1006-02
MLC 64 RS D = 60-1182-02
Show the name of the MLC
model.
MLC 60 Series MediaLink Controllers • SIS Control
60
Command
ASCII Command
Response
E LC }
X5) ]
(Host to Unit)
Additional Description
(Unit to Host)
Query LED status
View LED status
On MLC 62 models, the LEDs are numbered as follows:
1 =Transmit red
2 = Transmit green
3-6 = Display text LEDs 1 through 4
7 = Button row 1, first LED
7
8 = Button row 1, second LED
9-12 = Volume text LEDs 1 through 4
13 – 17
13-17 = Volume LEDs 1 through 5
18
18 = Button row 2, first LED
19 = Button row 2, second LED
20
20 = Button row 3, first LED
21 = Button row 3, second LED
22 = Button row 3, third LED
23
23 = Button row 4, first LED
24 = Button row 4, second LED
25 = Button row 4, third LED
26-32 = Not used (Their status is always 0)
NOTE:
1
DISPLAY
ON
OFF
VOLUME
X5) is a 32-digit number, of
which each digit represents the
status of an LED on the MLC
front panel.
In X5), the LEDs are represented
in descending order from 32
to 1; that is, the first digit
represents LED 32, the second
digit represents LED 31, and
so on. The last digit represents
LED 1. Each digit in X5) can be
0 through 4, representing the
following possible LED statuses:
0 = off
1 = dim
2 = on (bright)
3 = slow blink
4 = fast blink
2
3 – 6
8
9 – 12
19
PC
21 VIDEO
22
MUTE
25
LAPTOP
Extron
24
Dual sized buttons, such as the input buttons on the MLC 62 IR D, each take up an entire button row and have
three LEDs apiece.
Example (MLC 62)
E LC}
00000001111121100000111124111104 ]
(This example is illustrated in the diagram below.)
In this LED status number, for example, the first digit on the right (LED 1) represents the red
Transmit LED. Its status is 4, which indicates that it is blinking rapidly. The LEDs behind the
display text (3 through 6) have a status of 1, which means they are dimly lit.
Buttons 7 and 8
(Button Row 4)
Not used
Buttons 1 and 2
(Button Row 1)
Buttons 3 and 4
(Button Row 2)
Buttons 5 and 6
(Button Row 3)
0 0 0 0 0 0 0 1 1 1 1 1 2 1 1 0 0 0 0 0 1 1 1 1
LED
No. 32
31
30
29 28 27 26 25 24 23 22
21 20 19 18 17 16 15 14 13 12 11 10
On the MLC 64, the LEDs are numbered as follows:
1 =Transmit red
2 = Transmit green
3-6 = Display text LEDs 1 through 4
7 = Button row 1, first LED
8 = Button row 1, second LED
9-11 = Button row 2, LEDs 1 through 3
12-14 = Button row 3, LEDs 1 through 3
15-17 = Button row 4, LEDs 1 through 3
18-20 = Button row 5, LEDs 1 through 3
21-32 = Not used (Their status is always 0.)
1
DISPLAY
7
ON
OFF
9
Transmit
Red
Behind “Display” Text
Behind “Volume” Text
Volume Indicators
Transmit Green
2 4 1 1 1 1 0 4
8
7
6
5
4
3
2
1
2
3 – 6
8
9
PC
10
11
12
LAPTOP
13
14
15
VIDEO
16
17
18
AUX
19
20
Extron
Example (MLC 64)
E LC}
00000000000011111111122231111103 ]
In this MLC 64 example, the red Transmit LED shows status 3 (blinking slowly). The LEDs
behind the Display text show status 1 (dimly lit). LEDs 9, 10, and 11 show status 2 (brightly
lit) because the PC button (row 2) is active.
MLC 60 Series MediaLink Controllers • SIS Control
61
Reference
Information
This section contains the specifications for all models of the MLC and lists names and part
numbers of included parts and optional accessories for the product. Topics include:
•
Specifications
•
Part Numbers and Accessories
Specifications
MLC 62 Series Specifications
Control — host ports
Serial control port��������������������������� 1 bidirectional RS-232 on a 3.5 mm captive screw connector, 3 pole
Baud rate and protocol������������������� 9600 baud, 8 data bits, 1 stop bit, no parity
Serial control pin configuration������� Pin 1 = Tx, pin 2 = Rx, pin 3 = GND
USB control ports
Decora® models����������������������� 1 front panel female mini USB B
MK and EU models������������������ 1 side panel female mini USB B
USB standards�������������������������������� USB 2.0, low speed
IR learning frequencies������������������� 30 kHz to 60 kHz
IR learning distance������������������������ 4" (10 cm) to 14" (36 cm) from the receiver (on front panel for Decora models,
side panel for MK and EU models)
Program control����������������������������� Extron configuration program for Windows®
Extron Simple Instruction Set (SIS™)
Control — serial port (RS models)
Display control port������������������������ (1) 3.5 mm captive screw connector, 2 pole for unidirectional RS-232 control
(±5 V)
Baud rate and protocol (RS-232)����� 9600 (default), 19200, 38400, 57600, 115,200 baud; 8 (default) or 7 data bits;
1 stop bit; no parity (default), or even or odd parity
Control — IR port (IR models) or IR/serial port (RS models)
IR control port�������������������������������� (1) 3.5 mm captive screw connector, 2 pole for IR or IR/Serial* (transmit only)
TTL level (0 to 5 V) modulated infrared control (all models) from 30 kHz up to
60 kHz, or ±5 V RS-232 control (RS models, transmit only)
*For RS models, IR/serial ports are configurable via software, serial
communication is the default.
Baud rate and protocol������������������� For RS models:
9600 (default), 19200, 38400, 57600, 115,200 baud; 8 (default) or 7 data bits;
1 stop bit; no parity (default), or even or odd parity
Control — relay (RS models)
Number/type���������������������������������� 2 momentary or latching (configurable via software)
Connector�������������������������������������� (1) 3.5 mm captive screw connector, 3 pole
Contact rating�������������������������������� 24 V, 1 A
MLC 60 Series MediaLink Controllers • Reference Information
62
Control — digital input monitoring port (RS models)
Number/type���������������������������������� 1 digital input (configurable)
Connector�������������������������������������� (1) 3.5 mm captive screw connector, 2 pole
Digital inputs
Input voltage range����������������� 0-24 VDC
Input impedance���������������������� 12k ohms
Programmable pullup��������������� 2k ohms to +5 VDC
Threshold low to high�������������� >1.5 VDC
Threshold high to low�������������� <1.0 VDC
General
Power supply���������������������������������� External
Input: 100-240 VAC, 50-60 Hz
Output: 12 VDC, 1 A, 12 watts
Power input requirements�������������� 12 VDC, 0.4 A, max.
Temperature/humidity�������������������� Storage: -40 to +158 °F (-40 to +70 °C) / 10% to 90%, noncondensing
Operating: +32 to +122 °F (0 to +50 °C) / 10% to 90%, noncondensing
Cooling������������������������������������������ Convection, no vents
Mounting
Rack mount����������������������������� No
Furniture or wall mount
Decora® models����������������� Mounts in a standard 1 gang US electrical junction box or with included mud
ring.
EU models������������������������� Mounts in a standard 1 gang EU electrical junction box with 60 mm mounting
centers. An adapter frame is included.
MK models������������������������ Mounts to a standard MK electric type British standard wall box or junction box.
Enclosure type�������������������������������� Plastic
Enclosure dimensions
MLC 62 IR D, MLC 62 RS D
Faceplate��������������������������� Fits the opening in a 1 gang Decora style wallplate.
Device�������������������������������� 4.2" H x 1.8" W x 1.5" D
(10.7 cm H x 4.6 cm W x 3.7 cm D)
(Depth includes connectors and buttons. Allow enough depth in the wall or
furniture for the device plus cable clearance.)
1.84”
(4.68 cm)
1.84”
(4.68 cm)
1.13"
(2.87 cm)
Tx
ND
OU
GR
IR
D
N
OU
GR
T
OU
IR
ND
OU
GR
DC
2V
+1
PWR
12V
0.4 A MAX
4.19”
(10.64 cm)
2.77”
(7.04 cm)
1.78”
(4.53 cm)
MLC 62 IR D Rear
1
ON
MM
CO
4.19”
(10.64 cm)
2
1
D
N
OU
GR
/IR
Tx
ND
OU
GR
Tx
ND
OU
GR
DC
2V
+1
HOST/
CONFIG
ND
DIGITAL
INPUT
OU
RELAYS
N/O
GR
Rx
Tx
2.77”
(7.04 cm)
IR/ S
ND
Rx
PWR
RS-232
12V
0.4 A MAX
OU
HOST/
CONFIG
GR
1.13"
(2.87 cm)
1.78”
(4.53 cm)
MLC 62 RS D Rear
MLC 60 Series MediaLink Controllers • Reference Information
63
MLC 62 RS EU
MLC 62 RS EU
Faceplate��������������������������� Fits the opening in a 1-gang EU, fits a Jung AS 500 wallplate or other European
frame that accepts 55 mm x 55 mm modules.
Wall frame������������������������� 3.2" H x 3.2" W x 0.4" D
8.1 cm H x 8.1 cm W x1.0 cm D
Device�������������������������������� 2.2" H x 2.2" W x 1.5" D
(5.5 cm H x 5.5 cm W x 3.7 cm D)
Depth includes connectors and buttons. Allow enough depth in the junction
box for device plus cable clearance.)
2.79”
(7.08 cm)
0.98"
(2.47 cm)
Tx
2
-23
RS
/
S
Y
LA
RE /O
N
0.4
V
12 max
A
/
ST
HO FIG
N
CO
+
Tx
Rx
L
ITA
DIG UT
INP
2.79”
(7.08 cm)
1.85”
(4.69 cm)
R
2
S
IR/
PW
C
Tx
IR
1
1
R
*1.83”
(4.64 cm)
* 2.02” (5.12 cm)
(including tabs)
MLC 62 EU Rear
MLC 62 RS MK
Faceplate��������������������������� Fits the opening in a 1-gang Jung AS 500 wallplate or other European frame
that accepts 55 mm x 55 mm modules.)
Wall frame������������������������� 3.4" H x 3.4" W x 0.4" D
8.6 cm H x 8.6 cm W x 1.1 cm D
Device�������������������������������� 2.2" H x 2.2" W x 1.5" D
(5.5 cm H x 5.5 cm W x 3.7 cm D)
Depth includes connectors and buttons. Allow enough depth in the junction
box for device plus cable clearance.)
0.41"
(1.05 cm)
3.40"
(8.65 cm)
0.98"
(2.47 cm)
Tx
1
S
IR/
PW
R
+
1.85"
(4.69 cm)
/
ST
HO FIG
N
CO
Tx
Rx
3.40"
(8.65 cm)
S
0.4
2
Y
LA
RE /O
N
2
-23
RS
V
12 max
A
C
/
Tx
IR
L
ITA
DIG UT
INP
1
R
*1.83"
(4.64 cm)
MLC 62 RS MK Rear
* 2.02" (5.12 cm)
(including tabs)
MLC 60 Series MediaLink Controllers • Reference Information
64
Product weight
MLC 62 IR D, MLC 62 RS D������ 1.0 lb (0.5 kg)
MLC 62 RS EU������������������������� 1.0 lb (0.5 kg)
MK models������������������������������ 1.0 lb (0.5 kg)
Shipping weight����������������������������� 3 lbs (2 kg)
Vibration���������������������������������������� ISTA 1A in carton (International Safe Transit Association)
Regulatory compliance
Safety�������������������������������������� CE, c-UL, UL
EMI/EMC��������������������������������� CE, C-tick, FCC Class A, ICES, VCCI Class A
Accessibility����������������������������� Section 508 of the Rehabilitation Act (29 U.S.C. 794d)
MTBF��������������������������������������������� 30,000 hours
Warranty���������������������������������������� 3 years parts and labor
NOTES:• All nominal levels are at ±10%.
• Specifications are subject to change without notice.
MLC 60 Series MediaLink Controllers • Reference Information
65
MLC 64 RS VC D Specifications
Control — host ports
Serial control port��������������������������� 1 bidirectional RS-232 on a 3.5 mm captive screw connector, 3 pole
Baud rate and protocol������������������� 9600 baud, 8 data bits, 1 stop bit, no parity
Serial control pin configuration������� Pin 1 = Tx, pin 2 = Rx, pin 3 = GND
USB control port����������������������������� 1 front panel female mini USB B
USB standards�������������������������������� USB 2.0, low speed
IR learning frequencies������������������� 30 kHz to 60 kHz
IR learning distance������������������������ 4" (10 cm) to 14" (36 cm) from the receiver
Program control����������������������������� Extron configuration program for Windows®
Extron Simple Instruction Set (SIS™)
Control — serial port
Display control port������������������������ (1) 3.5 mm captive screw connector, 2 pole for unidirectional RS-232 control
(±5 V)
Baud rate and protocol (RS-232)����� 9600 (default), 19200, 38400, 57600, 115,200 baud; 8 (default) or 7 data bits;
1 stop bit; no parity (default), or even or odd parity
Control — IR/serial port
IR control port�������������������������������� (1) 3.5 mm captive screw connector, 2 pole for IR/Serial* (transmit only)
TTL level (0 to 5 V) modulated infrared control from 30 kHz up to 60 kHz, or
±5 V RS-232 control (transmit only)
*IR/serial ports are configurable via software; serial communication is the
default.
Baud rate and protocol������������������� 9600 (default), 19200, 38400, 57600, 115,200 baud; 8 (default) or 7 data bits;
1 stop bit; no parity (default), or even or odd parity
Control — relay
Number/type���������������������������������� 2 momentary or latching (configurable via software)
Connector�������������������������������������� (1) 3.5 mm captive screw connector, 3 pole
Contact rating�������������������������������� 24 V, 1 A
Control — digital input monitoring port
Number/type���������������������������������� 1 digital input (configurable)
Connector�������������������������������������� (1) 3.5 mm captive screw connector, 2 pole
Digital inputs
Input voltage range����������������� 0-24 VDC
Input impedance���������������������� 12k ohms
Programmable pullup��������������� 2k ohms to +5 VDC
Threshold low to high�������������� >1.5 VDC
Threshold high to low�������������� <1.0 VDC
Control — peripheral audio equipment
Volume control������������������������������� 0 to 10 VDC variable voltage, positive logic (the higher the voltage, the higher
the volume)
Mute control���������������������������������� Momentary push switch with latching contact closure during mute; LED mute
indication
Pin configuration���������������������������� Pin 1 = +10 VDC, pin 2 = volume/mute (variable voltage), pin 3 = GND
Reference voltage��������������������������� 10 VDC
MLC 60 Series MediaLink Controllers • Reference Information
66
General
Power supply
MLC 64 RS D��������������������������� External
Input: 100-240 VAC, 50-60 Hz
Output: 12 VDC, 1 A, 12.0 watts
Remote volume control������������ 10 VDC, supplied by the Extron device being controlled
Power input requirements
MLC 64 RS D��������������������������� 12 VDC, 0.4 A, max.
Remote volume control������������ Unmute mode: 0.2 watts, 18 mA, 10 VDC Mute mode: 0.4 watts, 42 mA, 10 VDC
Temperature/humidity�������������������� Storage: -40 to +158 °F (-40 to +70 °C) / 10% to 90%, noncondensing
Operating: +32 to +122 °F (0 to +50 °C) / 10% to 90%, noncondensing
Cooling������������������������������������������ Convection, no vents
Mounting
Rack mount����������������������������� No
Furniture or wall mount����������� Mounts in a standard 2 gang US electrical junction box (1.50" depth) or with
included mud ring.
Enclosure type�������������������������������� Plastic
Enclosure dimensions
Faceplate��������������������������������� Fits the opening in a 2 gang Decora style wallplate.
Devices������������������������������������ 4.2" H x 3.6" W x 2.5" D or 1.9" D*
Depth includes connectors and buttons. Allow enough depth in the junction
box for device plus cable clearance.
*Depth including the knob
3.61"
(9.17 cm)
Tx
D
N
OU
DIGITAL
INPUT
ND
OU
GR
Rx
HOST/
CONFIG
1.13"
(2.87 cm)
2
D
UN
O
GR
/IR
Tx
ND
OU
GR
4.19"
(10.64 cm)
Tx
ND
OU
GR
DC
2V
+1
IR/ S
CO
1
2.77”
(7.04 cm)
PWR
RS-232
12V
0.4 A MAX
ON
MM
RELAYS
N/O
GR
1
1.74"
(4.4 cm)
MLC 64 Rear
Product weight������������������������������� 1.1 lb (0.5 kg)
Shipping weight����������������������������� 3 lbs (2 kg)
Vibration���������������������������������������� ISTA 1A in carton (International Safe Transit Association)
Regulatory compliance
Safety�������������������������������������� CE, c-UL, UL
EMI/EMC��������������������������������� CE, C-tick, FCC Class A, ICES, VCCI Class A
Accessibility����������������������������� Section 508 of the Rehabilitation Act (29 U.S.C. 794d)
MLC 60 Series MediaLink Controllers • Reference Information
67
MTBF��������������������������������������������� 30,000 hours
Warranty���������������������������������������� 3 years parts and labor
NOTES:• All nominal levels are at ±10%.
• Specifications are subject to change without notice.
MLC 60 Series MediaLink Controllers • Reference Information
68
Part Numbers and Accessories
Included Parts
These items are included with the MLC 60 Series controllers:
MLC 62 RS D
Included Parts
Replacement Part Number
MLC 62 RS D MediaLink Controller
60-1005-02
12 VDC, 1 A external power supply (PS 1210C)
70-775-01
Front faceplates, eight-button, 1 black and 1 white
(Include additional buttons with assorted labels)
70-688-12
Decora wallplate, 1-gang, black
Decora wallplate, 1-gang, white
Extron Tweeker (slotted Phillips #1 screwdriver)
MLC 60 Series Setup Guide
1-gang Decora-style mud ring mounting bracket
(2) 3.5 mm 3-pole captive screw connectors
(4) 3.5 mm 2-pole captive screw connectors
Extron Software Products DVD
MLC 62 IR D
Included Parts
Replacement Part Number
MLC 62 IR D MediaLink Controller
60-1006-02
12 VDC, 1 A external power supply (PS 1210C)
70-775-01
IR Emitter and Shield kit
70-283-01
Front faceplates, six-button, 1 black and 1 white
(Includes additional buttons with assorted labels)
70-688-02
Decora wallplate, 1-gang, black
Decora wallplate, 1-gang, white
Extron Tweeker (slotted Philips #1 screwdriver)
MLC 60 Series Setup Guide
1-gang Decora-style mud ring mounting bracket
(1) 3.5 mm 3-pole captive screw connectors
(2) 3.5 mm 2-pole captive screw connectors
Extron Software Products DVD
MLC 60 Series MediaLink Controllers • Reference Information
69
MLC 62 RS EU
Included Parts
Replacement Part Number
MLC 62 RS EU MediaLink Controller (RAL9010 white)
60-1005-35
12 VDC, 1 A external power supply (PS 1210C)
70-775-01
Front faceplate, 6 button (RAL9010 white)
Front faceplate, 8 button (RAL9010 white)
Jung AS500 wall frame (RAL9010 white)
Extron Tweeker (slotted Philips #1 screwdriver)
MLC 60 Series Setup Guide
(2) 3.5 mm 3-pole captive screw connectors
(4) 3.5 mm 2-pole captive screw connectors
Extron Software Products DVD
MLC 62 RS MK
Included Parts
Replacement Part Number
MLC 62 RS MK MediaLink Controller (white)
60-1005-23
12 VDC, 1 A external power supply (PS 1210C)
70-775-01
Front faceplate, 6-button (white)
Front faceplate, 8-button (white)
Front wall frame (white)
Extron Tweeker (slotted Philips #1 screwdriver)
MLC 60 Series Setup Guide
(2) 3.5 mm 3-pole captive screw connectors
(4) 3.5 mm 2-pole captive screw connectors
Extron Software Products DVD
MLC 60 Series MediaLink Controllers • Reference Information
70
MLC 64 RS VC D
Included Parts
Replacement Part Number
MLC 64 RS VC D MediaLink Controller
60-1182-02
12 VDC, 1 A external power supply (PS 1210C)
70-775-01
MLC 64 Front faceplate, black, six-button
(Includes additional buttons with assorted labels)
MLC 64 Front faceplate, white, six-button
(Includes additional buttons with assorted labels)
VCM front faceplates, 1 black and 1 white
Volume control knobs, 1 black and 1 white
Decora wallplates, 2-gang, 1 black and 1 white
Extron Tweeker (slotted Philips #1 screwdriver)
Allen wrench (hex key) (for volume control knob
removal)
MLC 60 Series Setup Guide
2-gang Decora-style mud ring mounting bracket
(2) 3.5 mm 3-pole captive screw connectors
(4) 3.5 mm 2-pole captive screw connectors
Extron Software Products DVD
MLC 60 Series MediaLink Controllers • Reference Information
71
Accessories
These optional items can be ordered separately:
Accessories
Part Number
For Model
English button kit
(MLC 62 RS EU and MLC 62 RS MK models)
70-728-01
MLC 62 RS EU,
MLC 62 RS MK
French and German button kit
(MLC 62 RS EU and MLC 62 RS MK models)
70-728-11
MLC 62 RS EU,
MLC 62 RS MK
MLA VC10 Plus Volume Control Module
(MLC 62 models)
60-1090-01
All MLC 62
MPA 152 Stereo Power Amplifier, 15 watts per
channel
MPA 152 ENERGY STAR® Qualified Stereo
Power Amplifier
60-844-01
60-844-02
All
MPA 401 Mono Power Amplifier, 40 watts per
channel
60-845-01
All
MLS 100A Four Input Stereo Audio MediaLink
Switcher
60-497-01
All
MLS 102 VGA Two Input VGA and Four Input
Stereo Audio MediaLink Switcher
60-497-04
All
MLS 304SA Four Input MediaLink Switcher with
60-550-02
stereo amplifier
All
USB CFG Cable, type A to mini B configuration
cable
26-654-06
All
MLC IR/RS-232 one projector communication
cable, plenum 50'
26-621-50
All
MLM 62 D 8B faceplate replacement kit,
8-button (MLC D models only)
70-688-12
MLC 62 RS D,
MLC 62 IR D
MLM 62 D 6B faceplate replacement kit,
6-button (MLC D models only)
70-688-02
MLC 62 RS D,
MLC 62 IR D
MLC 60 Series MediaLink Controllers • Reference Information
72
Extron Warranty
Extron Electronics warrants this product against defects in materials and workmanship for a period of three years
from the date of purchase. In the event of malfunction during the warranty period attributable directly to faulty
workmanship and/or materials, Extron Electronics will, at its option, repair or replace said products or components,
to whatever extent it shall deem necessary to restore said product to proper operating condition, provided that it is
returned within the warranty period, with proof of purchase and description of malfunction to:
USA, Canada, South America,
and Central America:
Extron Electronics
1001 East Ball Road
Anaheim, CA 92805
U.S.A.
Japan:
Extron Electronics, Japan
Kyodo Building, 16 Ichibancho
Chiyoda-ku, Tokyo 102-0082
Japan
Europe, Africa, and the Middle
East:
Extron Europe
Hanzeboulevard 10
3825 PH Amersfoort
The Netherlands
China:
Extron China
686 Ronghua Road
Songjiang District
Shanghai 201611
China
Asia:
Extron Asia
135 Joo Seng Road, #04-01
PM Industrial Bldg.
Singapore 368363
Singapore
Middle East:
Extron Middle East
Dubai Airport Free Zone
F12, PO Box 293666
United Arab Emirates, Dubai
This Limited Warranty does not apply if the fault has been caused by misuse, improper handling care, electrical
or mechanical abuse, abnormal operating conditions, or modifications were made to the product that were not
authorized by Extron.
NOTE: If a product is defective, please call Extron and ask for an Application Engineer to receive an RA (Return
Authorization) number. This begins the repair process.
USA: (714) 491-1500 Asia:65.6383.4400
Europe:31.33.453.4040
Japan:381.3.3511.7655
Units must be returned insured, with shipping charges prepaid. If not insured, you assume the risk of loss or damage
during shipment. Returned units must include the serial number and a description of the problem, as well as the
name of the person to contact in case there are any questions.
Extron Electronics makes no further warranties either expressed or implied with respect to the product and its quality,
performance, merchantability, or fitness for any particular use. In no event will Extron Electronics be liable for direct,
indirect, or consequential damages resulting from any defect in this product even if Extron Electronics has been
advised of such damage.
Please note that laws vary from state to state and country to country, and that some provisions of this warranty may
not apply to you.
Extron USA - West
Headquarters
Extron USA - East
Extron Europe
Extron Asia
Extron Japan
Extron China
Extron Middle East
+800.633.9876
+800.633.9876
+800.3987.6673
+800.7339.8766
+81.3.3511.7655
+81.3.3511.7656 FAX
Sales: + 4000.EXTRON
+4000.398.766
+971.4.2991800
+971.4.2991880 FAX
Inside USA/Canada Only
+1.714.491.1500
+1.714.491.1517 FAX
Inside USA/Canada Only
+1.919.863.1794
+1.919.863.1797 FAX
Inside Europe Only
Inside Asia Only
+31.33.453.4040
+31.33.453.4050 FAX
+65.6383.4400
+65.6383.4664 FAX
Inside China Only
+86.21.3760.1568
+86.21.3760.1566 FAX
© 2011 Extron Electronics. All rights reserved. www.extron.com