1
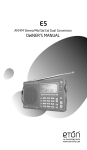
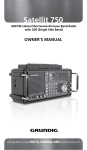
STEREO/
G5 AM/FM
MW.SW.LW DUAL CONVERSION
OWNER’S MANUAL
Grundig Radio Line By www.etoncorp.com
G5 OWNER’S MANUAL
Grundig Radio Line By
DO YOU NEED HELP?
Thank you for purchasing the G5 AM/FM/Shortwave Radio. We
want you to thoroughly enjoy the use of this product. To take advantage of its many excellent and unique features, we urge you to
carefully read the owner’s manual. If you need help while learning
its operation, please contact us, using the methods below.
Monday-Friday, 8:30 a.m. - 4:00 p.m., North American Pacific Time.
1-800-872-2228 from the U.S.
1-800-637-1648 from Canada
1-650-903-3866, worldwide
FAX: 650-903-3867
Web Site: www.etoncorp.com
Mailing Address:
Etón Corporation
1015 Corporation Way
Palo Alto, CA 94303
USA
1
G5 OWNER’S MANUAL
TABLE OF CONTENTS
1 WHAT THE G5 INCLUDES.....................................................................4
2 G5 FEATURES........................................................................................4
3 DIAGRAMS...........................................................................................5
4 GETTING STARTED................................................................................7
• INSTALLING BATTERIES AND BATTERY INFORMATION........................8
• AC ADAPTER INFORMATION..............................................................8
• CHARGING NI-MH BATTERIES IN THE G5...........................................9
5 BASIC RADIO OPERATION...................................................................11
• BEFORE USING THE E5; TURNING THE E5 ON/OFF;
USING THE SLEEP TIMER FEATURE....................................................11
• USING THE LOCK FEATURE..............................................................12
• VOLUME CONTROLS........................................................................12
• USING THE DX/LOCAL SWITCH.........................................................13
• SELECTING FM, AM AND SHORTWAVE (SW)....................................13
13
• LISTENING IN FM STEREO...................................................................
• SETTING UP AM AND FM OUTSIDE OF NORTH AMERICA.................14
• TUNING IN STATIONS.......................................................................15
•
BUTTONS...................................................................................15
• TUNING KNOB.................................................................................15
• DIRECT FREQUENCY ENTRY.............................................................15
• AUTO-SCAN TUNING.......................................................................16
• SHORTWAVE WITH THE G5..............................................................17
• SIGNAL STRENGTH INDICATOR........................................................19
6 CLOCK AND TIMER FEATURES............................................................19
• SETTING THE CLOCK........................................................................19
2
G5 OWNER’S MANUAL
TABLE OF CONTENTS
• SETTING/ACTIVATING/DEACTIVATING THE ALARMS ...................... 22
7 WORKING WITH MEMORY................................................................ 23
• STORING STATIONS INTO MEMORY............................................... 23
• LABELING MEMORY PAGES............................................................ 23
• ACCESSING WHAT IS STORED IN MEMORY.................................... 24
• CHECKING MEMORY CAPACITY..................................................... 24
• CHECKING PAGES AND MEMORIES................................................ 24
• USING THE PAGE COPY/PASTE FUNCTION...................................... 25
• ERASING MEMORY......................................................................... 25
• USING THE ATS MEMORY FEATURE............................................. 26
8 USING THE LIGHT.............................................................................. 27
9 USING THE EXTERNAL SHORTWAVE ANTENNA SOCKET.................... 27
10 STEREO/MONO BUTTON................................................................... 27
11 MUSIC/WIDE AND NEWS/NARROW SWITCH..................................... 28
12 LINE OUT SOCKET.............................................................................. 28
13 USING EARPHONES........................................................................... 28
14 REAR FOLDING STAND...................................................................... 29
15 RESET BUTTON.................................................................................. 29
16 INTRODUCTION TO SHORTWAVE...................................................... 30
17 TROUBLESHOOTING.......................................................................... 36
18 WARRANTY AND SERVICE INFORMATION......................................... 38
3
G5 OWNER’S MANUAL
2 WHAT THE G5 INCLUDES
• AC adapter
• Stereo earphones
• External wire antenna
• Carrying pouch
• Carrying strap (attached)
• Owner’s manual
Note: In the instructions below, numbers in parenthesis (), correspond to the numbered diagrams.
3 FEATURES
• M-Stereo, AM and Full-Shortwave Coverage (1711-29999 KHz).
• PLL Dual Conversion AM/SW Circuitry With SSB.
• 700 Programmable Memory Presets.
• FM Station Auto Tuning Storage (ATS).
• Alpha-Numeric Four Character Memory Bank Labeling.
• Tunes Via Auto-Scan, Manual-Scan, Direct Key-in Entry and
Tuning Knob.
• Selectable 9/10 kHz AM Tuning Steps.
• Clock, Sleep Timer and Four Programmable Timers (for alarm
or wake-up).
• Weekday Setting.
• World Time Zone Selection.
• Shortwave Narrow/Wide Bandwidth Selection.
• AM/FM News/Music Tone Selection.
• Stereo Earphone Socket.
• Stereo Line-Out Socket.
• Socket For External Shortwave Antenna.
• Display Light.
4
G5 OWNER’S MANUAL
3 FEATURES continued
• Button Lock Feature.
• Included: Owner’s Manual, One-Year Warranty, AC Adapter/
Charger and Protective Case.
• Internally Recharges Ni-MH Batteries.
• Dimensions: 6-5/8”W x 4-1/8”H x 1-1/8”D (167 x 105 x 27 mm).
• Weight: 12.2 oz. (346 g).
4 DIAGRAMS
1. POWER / SLEEP
2. HOLD
3. RESET
4. PAGE/TIME
5. VOL+/VOL6. AUTO SCAN
7. EDIT/BACKLIGHT SWITCH
8. MONO/STEREO/SSB INDICATOR
9. 0-9 NUMBER BUTTON
10. METER BAND
11. AM BAND
12. FM BAND
13. TIME-ZONE BUTTON
14.
15.
16.
17.
18.
19.
20.
21.
22.
23.
24.
25.
CHECK BUTTON
ERASE BUTTON
STORE BUTTON
BATTERY COMPARTMENT
(REAR)
SPEAKER
SUPPORT STAND (REAR)
ALARM 1
ALARM 2
ALARM 3
ALARM 4
LCD DISPLAY
CHARGE
5
G5 OWNER’S MANUAL
3 DIAGRAMS continued
LEFT SIDE
RIGHT SIDE
Telescopic Antenna
Jog Dial Wheel
External Antenna Jack
News/Music
Narrow/Wide Switch
LOCAL/DX Switch
Earphone Jack
SSB Fine Knob
External Power Jack
Line Out
JOG DIAL WHEEL: Turn the jog dial wheel, combine with other
button can adjust time, frequency, volume and memory operations.
LCD DISPLAY
26.
27.
28.
29.
30.
31.
32.
6
SLEEP
LOCK
ALARM INDICATOR
INFORMATION AREA
AM/FM
USB
WEEKDAYS/STATION AREA
33.
34.
35.
36.
37.
38.
39.
FREQUENCY
MHz
KHz
WIDE/NARROW
SIGNAL STRENGTH
STEREO/MONO
CHARGE INDICATOR
G5 OWNER’S MANUAL
4 GETTING STARTED
INSTALLING BATTERIES
The hinged battery compartment (17) is located on the back of the
G5. To open it, apply thumb pressure to the ribbed, down pointing
triangle and slide it about 1/8 inch (about 3 mm) towards the bottom
of the radio, then pull up. Install 4 AA batteries, observing the battery
polarity diagrams inside the compartment. When not using rechargeable AA batteries, use alkaline or lithium batteries. Lithium AA batteries yield the longest play-time.
BATTERY STRENGTH INDICATOR
The battery strength indicator appears in the upper right side of the
LCD display (24). When batteries are fresh or fully charged, it appears
solid black. As batteries wear down, the segments become clear from
right to left.
CAUTION! - PREVENTING BATTERY ACID LEAKAGE
To avoid battery acid leakage, only use high quality alkaline, lithium
or rechargeable nickel-metal-hydride batteries. Never use old batteries
and never intermix old with new or different brands or types of
batteries, as this may cause damage to the radio and may result
in an explosion causing injury. When the G5 is not being used for a
long period of time, remove the batteries to avoid leakage. Damage
caused by battery acid leakage is not covered by this product’s warranty. If the batteries leak, don’t throw them away and immediately
contact the manufacturer of the batteries to inquire about their
7
G5 OWNER’S MANUAL
4 GETTING STARTED continued
battery leakage warranty program.
CAUTION! Never attempt to recharge non-rechargeable batteries!
MORE IMPORTANT BATTERY USE INFORMATION
• When using batteries for long periods of time, disconnect the AC
adapter/charger.
• Do not attempt recharging non-rechargeable batteries. Only
recharge rechargeable Ni-MH batteries.
• Replace or recharge batteries when the sound becomes weak and
distorted or the power indicator indicates depleted.
• Stations stored in memory are permanently stored. However, when
power is removed or batteries deplete, the clock reverts to the
default 0:00 setting.
• The clock time will not be lost if batteries are replaced quickly –
within 3 minutes of removal.
POWERING THE G5 WITH THE INCLUDED
AC ADAPTER/CHARGER
To power the G5 with the included AC Adapter/Charger, first plug
it into an AC wall outlet (also called ‘mains’), then plug the tip into
the 6V socket (48) on the lower left side of the G5. Remove any
non-rechargeable batteries from the G5 while using the included AC
Adapter/Charger.
8
G5 OWNER’S MANUAL
4 GETTING STARTED continued
IMPORTANT AC ADAPTER/CHARGER INFORMATION
AND PRECAUTIONS
It is normal for the AC adapter/charger to feel warm during use.
When the AC adapter/charger is connected, the G5 automatically
switches to the AC adapter/charger’s power and installed batteries are
not used.
Disconnect the AC adapter/charger from the power outlet if it is not
being used.
Remove the batteries when using the AC adapter/charger for long
periods of time.
Use only the included AC adapter/charger or one specifically suggested by Etón Corporation.
The backlight will remain illuminated when using the AC adapter/charger.
CHARGING Ni-MH BATTERIES IN THE G5
With its included AC adapter/charger connected, the G5 internally
recharges 4 Ni-MH (nickel-metal-hydride) rechargeable batteries. Note
that the G5 can still play while the batteries are charging and the
alarm functions will work.
CAUTION! Never attempt to recharge non-rechargeable batteries!
To charge batteries:
1. Install 4 NI-MH batteries, observing the polarity diagram inside the
battery compartment.
2. Connect the AC adapter/charger, first to the wall outlet, then to
the G5.
3. Assure that the G5 is turned off.
9
G5 OWNER’S MANUAL
4 GETTING STARTED continued
4. Press the F7 button (25) for about 3 seconds, or until CHG (39)
appears in the upper right of the display and the charging hours
appear in the display.
5. Use the tuning knob (40) to select the charging time in hours
(00-23). See chart below. Press the PAGE/TIME button (4) when
finished. Note in the display that the battery symbol’s segments
continuously activate from left to right during charging. Battery
charging terminates once the set charge time has been reached.
BATTERY CHARGING TIME CHART
The charging times in the chart are based on the following formula:
Charging hours = battery capacity (in milliamp hours) / 100mA (the
charging current).
Ni-MH BATTERY
CAPACITY (in mAH)
CHARGING TIME
(hours)
1100
11
1500
15
1800
18
2300
23
BATTERY CHARGING NOTES AND CAUTIONS
• Never attempt to recharge non-rechargeable batteries!
• The G5 can be played while charging.
• Alarm settings and action are function while charging.
• The AC adapter/charger will not charge the batteries unless the G5
is set to charge mode.
• For improved life of rechargeable batteries, do not repeatedly
charge fully charged batteries.
• When using new rechargeable batteries or ones that have not been
in use for a lengthy period of time, charge them fully, then use them
until they are fully exhausted. Repeat this cycle several more times to
condition the batteries.
10
G5 OWNER’S MANUAL
4 GETTING STARTED continued
• At some point in their life cycle, all rechargeable batteries lose their
ability to charge. When this occurs, it may be all four batteries at
once, or only one of them. When this occurs, replace them all, not
one at a time. Never mix old rechargeable batteries with new and
always start with four, fresh, new Ni-MH batteries.
CAUTION! Never attempt to recharge non-rechargeable batteries!
5 BASIC RADIO OPERATION
BEFORE USING THE G5
Assure that it is powered with the AC adapter or batteries.
Assure that it is unlocked. See lock button instructions below.
Place the DX/LOCAL switch (46), on the left side of the G5, to the DX
position.
TURNING THE G5 ON AND OFF
The G5 is turned on and off with a quick, short press of the POWER/
SLEEP button (1).
USING THE SLEEP TIMER FEATURE
The sleep timer feature enables the G5 to play for a specified
number of minutes (00-99), then shut off. The sleep timer feature can
be activated and programmed with the G5 turned on or off. Note
that in sleep mode, the radio plays and the sleep symbol (26) appears
in the display. There are two methods to activate and program the
sleep timer. With either method, the sleep symbol (26) appears in the
display after the sleep time is set.
11
G5 OWNER’S MANUAL
5 BASIC RADIO OPERATION continued
Method 1
1. Use the numeric keypad to enter the desired time (00-99 minutes).
2. Within 3 seconds press the SLEEP button (1). The G5 turns on and
plays for the specified time.
Method 2
1. Press the SLEEP button for about 3 seconds or until the sleep
symbol (26) appears in the display and the G5 turns on.
2. Within 3 seconds, use the tuning knob (40) to select the sleep time
(in minutes) of your choice.
3. Within 3 seconds, press the PAGE/TIME button (4) when finished.
USING THE LOCK FEATURE (2)
With the G5 turned off, the lock feature prevents unwanted turn-on.
When it is turned on, the lock feature prevents unwanted frequency
changes. The lock feature also serves as an audio-mute.
G5 TURNED OFF
Giving the LOCK button (2) a short press causes the lock symbol (27)
to appear in the display and the on/off button does not work. Deactivate it with a longer press of about 2 seconds.
G5 TURNED ON
Giving the LOCK button (2) a short press disables only the tuning knob
(40). Note that the lock symbol (27) does not appear in the display.
Giving it another short press causes the lock symbol to appear and
disables all buttons. Deactivate it with a longer press
of about 2 seconds.
VOLUME CONTROL
The volume control buttons (5) are labeled +-/VOL. To increase the
volume, push the ‘+’ button. To decrease the volume, push the ‘–‘
button. The G5’s volume is divided into levels, 0-31. When adjusting volume, the corresponding level number appears in the display.
12
G5 OWNER’S MANUAL
5 BASIC RADIO OPERATION continued
Volume can be adjusted with the G5 turned on or off. Volume can
also be adjusted using the numeric keypad (9).
To adjust the volume with the numeric keypad:
1. Use the numeric keypad (9) to enter the desired volume level
(0-31).
2. Within 3 seconds, press either the + or – VOL button.
USING THE DX/LOCAL SWITCH (46)
The DX/LOCAL switch is located on the left side of the G5 and is
labeled DX/LO. Use DX as the default setting. This gives the G5
maximum sensitivity to signals. If strong stations seem distorted, then
use the local setting (labeled LO). This switch does not function in FM
mode.
SELECTING FM, AM and SHORTWAVE (SW)
Turn on the G5. To select AM press the AM BAND button (11), for FM
press the ‘FM BAND’ button (12) and for shortwave sequentially press
the ‘METERBAND’ button (10) until the shortwave band of your choice
is selected. The last used frequency is automatically displayed. The
most popular shortwave bands can also be accessed with the F1-F7
buttons (F1=49m, F2=41m, F3=31m, F4=25m, F5=22m, F6=19m and
F7=16m).
See more specific information about the G5 and shortwave under the
heading SHORTWAVE WITH THE E5.
SHORTWAVE NOTE: If you’re completely new to shortwave or need
a ‘refresher’, see the special shortwave section toward the end of this
manual.
The frequency digits (33) appear in the lower center portion of the
display. AM and FM is for listening to local stations, while shortwave
brings in stations from around the world.
13
G5 OWNER’S MANUAL
5 BASIC RADIO OPERATION continued
When listening to FM or shortwave, fully extend the telescopic antenna (44). It need not be extended when listening to AM stations (the
AM antenna is located inside the G5).
LISTENING IN FM STEREO
FM stereo can be heard when using earphones/headphones (47) or
when routing the audio to a stereo amplification device from the ‘LINE
OUT’ socket (43). To hear FM in stereo, press the ‘ST/MONO’ button
(8) while tuned to a FM station. Note that ‘STEREO’ appears in the
display (38) when the stereo mode is selected.
SETTING UP AM AND FM OUTSIDE OF NORTH AMERICA
NOTE: The G5 is factory set-up for use in North America. To use the
G5 in North America (U.S. or Canada), no changes are needed.
In North America, AM stations are spaced by 10 KHz and the AM
band extends from 520 kHz to 1710 kHz. In most other world areas,
they are spaced by 9 KHz and the band extends from 522-1710 kHz.
Follow these steps to select the 9 kHz AM spacing for outside of North
America:
1. Turn off the G5.
2. Press the F5 button for about 3 seconds, or until ‘9’ or ‘10’ flashes
in the display.
3. Release the button and give it a quick, short press to toggle to the
other setting.
4. When finished, press the ‘PAGE/TIME’ button (4) twice.
In North America, the FM band extends from 87.5-108 mHz. In other
parts of the world, it may extend from 87-108.1 or from 76-108.1. To
select the correct range for your region follow these steps:
14
G5 OWNER’S MANUAL
5 BASIC RADIO OPERATION continued
1. Turn off the G5.
2. Press the F5 button for about 3 seconds, or until ‘9’ or ‘10’
flashes in the display.
3. Release the button and give the PAGE/TIME button (4) a quick,
short press.
4. Sequentially press the F5 button until the beginning FM
frequency of your area appears.
5. Give the PAGE/TIME button (4) a quick, short press.
TUNING IN STATIONS
Described below are four methods of tuning-in stations:
Buttons
(6), Tuning-Knob (40), Direct Frequency Entry (9) and Auto-Scan (6).
BUTTONS (6)
Quick, short, sequential presses of the
buttons enables tuning up
or down frequency (33)(34)(35). All normal tuning for AM, FM and
shortwave stations can be performed with the
buttons. The tuning
steps used are 9 or 10 kHz in the AM band, 5 kHz in the shortwave
bands and 100 kHz in the FM band.
TUNING KNOB (40)
The tuning steps are 1 kHz in AM/SW and 25 kHz FM.
DIRECT FREQUENCY ENTRY (9)
Use this method when the desired frequency of a radio station is
known. AM and SW frequencies are entered in kilohertz (KHz), e.g.
810 KHz or 9475 KHz.; FM frequencies are entered in megahertz
(MHz), e.g. 102.9 MHz, ignoring the decimal point.
15
G5 OWNER’S MANUAL
5 BASIC RADIO OPERATION continued
To enter a frequency:
1. Use the numeric buttons (9) to enter the frequency.
2. Within 3 seconds, press the AM ‘enter’ button (10) if it’s an AM or
SW frequency, or the FM ‘enter’ button (12) for FM frequencies.
Here’s an example for an AM station at 810 kHz (For FM, ignore the
decimal point and use the FM enter button (12)):
1. Press 8 1 0.
2. Within 3 seconds, press the AM enter button (10).
NOTE: Regardless of what type of station is currently tuned (AM,
FM or SW), direct frequency entry can be used to enter any type of
frequency.
AUTO-SCAN TUNING (6)
Auto-scan tuning starts by pressing either the (up frequency) or
(down frequency) button for about 2 seconds. The G5 has 3
selectable auto-scan modes: STOP, ATS or D-5. These are described
below. Tuning steps are 100 kHz FM, 9/10 kHz AM and 5 kHz SW.
Auto scan tuning remains in the selected band, AM, FM or shortwave
meter band.
STOP: Auto-scanning stops on the next encountered station.
D-5: Auto-scanning stops for 5 seconds on each next encountered
station, then moves on.
ATS: (Auto Tuning Storage): Auto-scanning automatically stores the
strongest FM local stations This feature is describe more thoroughly in
a later section of the manual titled USING THE ATS MEMORY FEATURE.
16
G5 OWNER’S MANUAL
5 BASIC RADIO OPERATION continued
To select an auto-scan mode:
1. Hold down the F6 button for about 2 seconds, then release. Note
that the last chosen mode flashes in the screen.
2. While the mode flashes, perform quick, short presses of the F6
button to select alternate modes.
SHORTWAVE WITH THE E5
SHORTWAVE NOTE: If you’re completely new to shortwave or need
a ‘refresher’, see the special shortwave section toward the end of this
manual.
There are two ways to select shortwave.
1. Sequentially press the ‘METERBAND’ button (10) until the short
wave band of your choice is selected.
2. The seven most popular shortwave bands can also be accessed
with the F1-F7 buttons (F1=49m, F2=41m, F3=31m, F4=25m,
F5=22m, F6=19m and F7=16m). In each method, the last used
frequency is automatically displayed. To tune-in shortwave stations,
use the tuning methods described earlier. Below is a band chart
showing the G5’s shortwave coverage.
G5 SHORTWAVE COVERAGE AND TUNING SUGGESTIONS
The G5 has continuous frequency coverage from 150 to 29999
kilohertz (kHz). This includes Longwave (150-519 kHz), Medium Wave
(the AM broadcast band (520-1710 kHz) and Shortwave (1711-29999
kHz). To go to a specific shortwave frequency, use the direct-frequency-entry tuning method. When searching for shortwave stations in
an international broadcast band, use manual tuning, the tuning knob
(40) or auto tuning. Direct-frequency- entry, manual tuning and use of
the tuning knob enable tuning anywhere in the shortwave spectrum.
Auto-tuning scans only within the designated frequency limits of
17
G5 OWNER’S MANUAL
5 BASIC RADIO OPERATION continued
shortwave international bands. With auto-tuning, after one band
has been scanned, tuning resumes in the next band (see auto-tuning
band chart, below).
G5 Auto-Tuning Chart
SW BAND
(meters)
E5 FREQ. RANGE
(kilohertz)
120m
2300-2495
90m
3200-3400
75m
3900-4000
60m
4700-5100
49m
5700-6500
41m
6800-7700
31m
9200-10000
25m
11400-12200
22m
13500-13900
19m
15000-15800
16m
17450-17950
13m
21400-21900
11m
25650-26150
USING THE G5’s SSB (Single Side Band) FEATURE (8)
SSB enables listening to shortwave signals using the single-sideband
mode. This mode is used for a variety of signals including amateur
radio and other two-way communications, Morse code, weatherfax transmissions and other encoded signals often referred to as
‘utility’ signals. To use SSB, turn on the SSB circuit by pressing the
SSB button. Note that SSB appears in the display (31). Tune to the
shortwave frequency of your choice. Use the tuning knob to coarsetune the SSB signal, then fine-tune with the –FINE+ knob (42). This
SSB circuit allows tuning of both upper and lower sideband signals.
18
G5 OWNER’S MANUAL
5 BASIC RADIO OPERATION continued
For best SSB signal clarity, placing the DX/LOCAL switch in the LOCAL
position may be desirable.
SSB NOTE: If you’re new to SSB, see the SSB chart in the LISTENING
TO SHORTWAVE section, later in this manual.
SIGNAL STRENGTH INDICATOR (37)
The signal strength indicator (37) shows relative strength of AM and
SW signals. When signal strengths are somewhat weak, it is normal
for the indicator’s level to fluctuate. The indicator is not functional
with FM signals.
6 CLOCK AND ALARM FEATURES
NOTE: Turn off the G5 to set clock and alarm functions. Setting clock
and alarm features require that you work fast between steps. If you
don’t, the set mode will automatically exit. If this occurs, start over.
Carefully read through the procedure first.
SETTING THE CLOCK
The G5’s clock is a 24-hour format clock. For example, midnight is
00:00 hours; 6 am is 06:00 hours; 1 pm is 13:00 hours and 11 pm is
23:00 hours. Before setting the clock, select and activate your home
time zone, then set the clock.
To select and activate your time zone:
(Use this same procedure to change your time zone when traveling).
1. Quick, short press of TIME ZONE button (13). ‘Tzone’ appears in
the display.
2. Use the tuning knob to select your home time zone (see time zone
abbreviation list below).
19
G5 OWNER’S MANUAL
6 CLOCK AND ALARM FEATURES continued
3. Long, 3 second press of TIME ZONE button. ‘Tzone disappears
from the display.
Time Zone Abbreviation List
ANC-Anchorage
HNL-Honolulu
BEG-Beijing
JED-Jeddah
BKK-Bangkok
KHI-Kashi
CAI-Cairo
LAX-Los Angeles
CCS-Caracas
LON-London
CHI-Chicago
NOU-Noumea
DAC-Dhaka
NYC-New York City
DEL- Delhi
PAR-Paris
DEN-Denver
RIO-De Janeiro
DXB-Dubai
SYD-Sydney
GMT-GMT
TYO-Tokyo
HKG-Hong Kong
WLG-Wellington
SETTING THE CLOCK AND WEEKDAY:
In the clock set procedure below, while the hour or minute digits flash
in steps 2 or 4, press one of the buttons 1-7 to select the day of the
week (32). The ‘1’ button represents Sunday. The selected weekday
will then be within a box.
1. Press the PAGE/TIME button (4) for about 2 seconds or until the
hour digits (29) start flashing.
2. Within 3 seconds, use the tuning knob (40) to set the correct hour.
3. Give the PAGE/TIME button a quick, short press, noting that the
minute digits (29) start flashing.
4. Within 3 seconds, use the tuning knob to set the correct minutes.
5. Allow the minutes to stop flashing. The clock is set.
20
G5 OWNER’S MANUAL
6 CLOCK AND ALARM FEATURES continued
To view other time zones:
This allows viewing other time zones without changing the home time
zone.
1. Quick, short press of TIME ZONE button. ‘Tzone’ appears in the
display.
2. Use tuning knob to select desired time zone. Once selected, that
time zone’s time appears in the display for about 30 seconds.
3. To exit T-zone mode earlier, use a quick, short press of the TIME
ZONE button.
SETTING THE ALARMS 1 THROUGH 4 (20-23)
Alarms can be set with the G5 turned on or off.
The G5 has 4, independently programmable alarm timers (buttons
F1-4) to turn it on at a specified time. Additionally, each timer can be
programmed for a specific weekday, volume, playtime and memory
location.
To set an alarm:
In the procedure below, while setting hour or minutes, pressing one
of the 1-7 buttons selects/deselects the day of the week for the alarm
to activate. While the digits are flashing a box will appear around the
selected day of the week. The box will disappear once set mode is
finished, with the box then surrounding only the current day of the
week.
1. With the G5 turned off, perform a long press of one of the F1-4
buttons (about 3 seconds), causing the hour to flash.
2. Use the tuning knob to set the hour.
3. Press the PAGE/TIME button (4).
21
G5 OWNER’S MANUAL
6 CLOCK AND ALARM FEATURES continued
4. Use the tuning knob to set the minutes.
5. Press the PAGE/TIME button.
6. Use the tuning knob to set the wake-up volume.
7. Press the PAGE/TIME button.
8. Use the tuning knob to set the wake-up alarm’s play minutes.
9. Press the PAGE/TIME button.
10. Use the tuning knob to set the page number.
11. Press one of the F1-7 buttons to select the memory location on
the selected page (the square flashes).
12. Press the PAGE/TIME button to finish the set-up.
ACTIVATING/DEACTIVATING THE ALARMS
For an alarm to turn on the radio, it must be activated. To activate
the alarm to be used, turn off the G5 and press the appropriate alarm
button, F1-4. This causes the timer activation symbol (28) to appear in
the upper left corner of the display, activating the selected alarm. To
deactivate the alarm, press the appropriate F1-7 button, causing the
alarm activation symbol to disappear.
22
G5 OWNER’S MANUAL
7 WORKING WITH MEMORY
The G5 has 700 memories (also called presets), arranged in 100
pages, with each page holding 7 memories. Buttons F1-7 represent
memory locations.
STORING STATIONS INTO MEMORY
Note that when storing into an already occupied memory position, its
contents will be replaced with your new entry.
1. Turn on the G5.
2. Tune to the desired station.
3. Press the PAGE/TIME button (4) to place the G5 into MEMO mode.
4. To select the desired memory page (00-99) use the
buttons or
hold down the STORE button (16) and use the tuning knob.
5. While holding down the STORE button (16), press one of buttons
F1-7, storing the station into that memory. Note that a box
appears around the selected memory location.
6. Release the STORE button.
7. To store another station, tune to the station and repeat steps 4-6
above.
8. When finished storing stations, press the PAGE/TIME button (4) to
exit MEMO mode.
LABELING MEMORY PAGES
Memory pages can be uniquely labeled with four, intermixed digits or
letters.
23
G5 OWNER’S MANUAL
7 WORKING WITH MEMORY continued
1. Select memory mode with the PAGE/TIME button (4). MEMO
appears in the display.
2. Use the
buttons to select the desired memory page.
3. Press the EDIT button (7) until ‘_’ appears in the display (about 3
seconds).
4. Use the tuning knob to select the desired number or letter.
5. Press the PAGE/TIME button to select the next ‘_’.
6. Repeat until 4 letters/numbers are selected.
7. Press PAGE/TIME when finished.
ACCESSING WHAT IS STORED INTO MEMORY
1. Enter MEMO mode by pressing the PAGE/TIME button (4), causing
MEMO to appear in the display.
2. Select the desired memory page with the
buttons.
3. Select the desired memory with buttons F1-7.
CHECKING MEMORY CAPACITY
While holding down the CHECK button (14), turn the tuning knob to
select memory pages. Empty memories do not have the box around
them.
CHECKING PAGES AND MEMORIES
Checking allows reviewing of pages and their contents, even while
listening.
24
G5 OWNER’S MANUAL
7 WORKING WITH MEMORY continued
1. Press and release the PAGE/TIME button (4), causing PAGE to
appear in the display.
2. Press
or hold down the CHECK button (14) and turn the tuning
knob (40) to select the desired page.
3. While holding down the CHECK button press one of the F1-F7
buttons noting that the stored frequency shows in the display.
USING THE PAGE COPY/PASTE FUNCTION
This feature enables copying memory contents from one page to
another.
1. Press and release the PAGE/TIME button (4), causing PAGE to
appear in the display.
2. Press
or hold down the CHECK button (14) and turn the
tuning knob (40) to select the page to be copied.
3. While holding down the CHECK button (14) press and release the
PAGE/TIME button (4). This copies the page.
4. Press
or hold down the STORE button (16) and turn the
tuning knob (40), selecting the paste-to page.
5. While holding down STORE press and release PAGE. This pastes the
content of the page.
ERASING MEMORY
1. Enter MEMO mode by pressing the PAGE/TIME button (4), causing
MEMO to appear in the display.
2. Select the desired memory page with the
buttons.
25
G5 OWNER’S MANUAL
7 WORKING WITH MEMORY continued
3. While holding down the ERASE button (15), press the F1-7 button
that you wish to erase. Note that the box surrounding the memory
location disappears.
4. Release the ERASE button.
DELETING ALL MEMORY CONTENTS
Hold down the EDIT and SSB buttons simultaneously, then press RESET
(2). This deletes the contents of all memory pages.
USING THE ATS MEMORY FEATURE
Auto Tuning Storage (ATS) automatically stores the strongest FM local
stations into memory, starting with page 99 and continuing downward
until all are stored, e.g. 99, 98, 97, etc.
To select and start ATS:
3. Hold down the F6 button for about 2 seconds, then release. Note
that the last chosen mode flashes in the screen.
4. While the mode flashes, perform quick, short presses of the F6
button to select ATS, then press the PAGE/TIME (4) button.
5. Press the
ATS scan.
Auto Tuning button for about two seconds to start the
ATS NOTE: After the ATS scan, if too many memories are filled with
static, try the scan again with the DX/LOCAL switch set in the LOCAL
position.
26
G5 OWNER’S MANUAL
8 USING THE LIGHT
The light illuminates the display and buttons. There are three light
modes.
Normal Mode: Pressing any button activates the light. The light
automatically turns off after 15 seconds.
Always-On Mode: When powered by its AC adapter, the light
remains always-on when the G5 is turned on.
Manual Light-On/Off Mode: If the light is off, pressing the LIGHT
button (7) activates the light for 15 seconds. Pressing it again within
15 seconds turns the light off.
9 USING THE EXTERNAL SHORTWAVE
ANTENNA SOCKET (45)
The external antenna socket is used to connect the G5 to advanced
performance antennas using a 50 or 75-Ohm coaxial cable feedline. There are many such antennas on the market today. Typing in
‘shortwave antennas’ on your favorite Internet search site will provide
further information. Contact Etón Corporation if you have questions
about such antennas.
10 STEREO/MONO BUTTON (8)
When listening to FM stations this switch selects stereo or monaural.
Select stereo when using earphones. When not using earphones, it’s
OK to leave it on stereo. In either case, if the FM signal is poor, selecting mono may improve it.
27
G5 OWNER’S MANUAL
11 MUSIC/WIDE AND
NEWS/NARROW SWITCH (41)
Note the wide/narrow diagram in the display (36).
AM/FM – The MUSIC/WIDE position creates a ‘brighter’ music sound.
The NEWS/NARROW position creates a less ‘bright’ sound.
Shortwave – The MUSIC/WIDE position creates the best audio fidelity.
The NEWS/NARROW position helps to minimize interference from
other stations.
12 LINE-OUT SOCKET (43)
This socket provides an industry standard, fixed level audio output
source for safely routing the G5’s audio to the line-in socket of a stereo system or recording device. Follow your external device’s line-input
instructions. The G5’s volume control has no effect on this output.
13 EARPHONE SOCKET (47) AND
USING EARPHONES
Earphones/headphones with a 1/8 inch stereo plug can be used. Plug
them into the earphone socket (insert symbol) on the left side of the
radio. Turn the volume down before wearing the earphones, then turn
up the volume to your liking.
28
G5 OWNER’S MANUAL
14 REAR FOLDING STAND (19)
Pull the folding stand from the rear of the G5,
allowing viewing at a comfortable angle.
(see below)
15 RESET BUTTON (3)
The reset button is located inside the small hole (3) labeled RESET.
If the G5 operates erratically, poke a paper clip into the reset hole
to reset its microprocessor. Performing a reset does not erase what
is stored into the memory locations but does reset the clock to 0:00.
29
G5 OWNER’S MANUAL
16 INTRODUCTION TO SHORTWAVE
SW BANDS, SSB AND OTHER SHORTWAVE HELP
NEED HELP? CONTACT US.
Etón Corporation
1015 Corporation Way
Palo Alto, CA 94030
USA
U.S. States: 1-800-872-2228
Canada: 1-800-637-1648
Worldwide: 650-903-3866
www.etoncorp.com
Hours of Operation: M-F, 8:30-4, Pacific Time.
WHAT IS SHORTWAVE?
Shortwave is a broadcast frequency range that allows stations to be
heard over vast distances, usually thousands of miles. You’ll hear news
and information, as well as culturally oriented programming, including
music. Some programming is biased or propagandized.
Misconceptions: Note that shortwave has nothing to do with picking
up far away AM and FM stations or picking up local two-way communications such as police, fire, ambulance, local airport traffic and marine
harbor traffic. For example, it is not possible to hear Los Angeles’ AM
and FM stations in New York City. Local two-way communications does
not take place on shortwave, but rather on VHF and UHF frequencies,
requiring the use of a VHF/UHF scanner to hear them.
WHAT ARE SHORTWAVE BANDS?
The key to enjoying shortwave is understanding ‘bands’. If you have
30
G5 OWNER’S MANUAL
16 INTRODUCTION TO SHORTWAVE continued
ever listened to AM or FM radio, then you already know what a band
is. In North America, the AM band is a frequency range stretching
from 530 to 1710 kilohertz; the FM band is 88-108 megahertz. A
band is a frequency range in which stations are located. To find AM or
FM stations you tune around with the tuning buttons (or the tuning
knob on an analog radio) until you find a station you like. Shortwave
is similar and the shortwave bands have names like 25 meters, 31
meters, 49 meters, etc. These are abbreviated 25m, 31m and 49m.
Just like in AM and FM radio, one simply gets into the shortwave band
and tunes around, looking for stations.
Each band represents a frequency range, as shown in the accompanying band chart. For example, the 19 meter shortwave band
encompasses the frequency range of about 15100 to 15600 kilohertz.
Since some radios show frequency in megahertz (mHz) and some in
kilohertz (kHz), both are shown here. Look at your radio’s tuning scale
or its digital display to determine which frequency designation it uses
in shortwave. On some shortwave radios these frequencies will look
like 15100 kHz, 15105 kHz or 15110 kHz and on other radios they
might look like 15.1 mHz, 15.105 mHz or 15.11 mHz. The exact range
of a band may be slightly different in one band chart or another and
may even vary slightly from one radio to another. This is perfectly OK.
On some radios the band names, e.g. 19 meters, are clearly marked,
on others they are not marked at all. If it is not apparent how to get
into a band on your radio, consult the owner’s manual.
SIMPLIFIED SHORTWAVE BAND CHART
The table below shows the bands used for shortwave broadcasting.
For more detailed band information enter ‘shortwave broadcast band
allocations’ at an Internet search site.
31
G5 OWNER’S MANUAL
16 INTRODUCTION TO SHORTWAVE continued
BAND
MEGAHERTZ (MHz)
KILOHERTZ (kHz)
120 m
2,300 - 2,495 MHz
2300 - 2495 kHz
90 m
3,20 - 3,40 MHz
3200 - 3400 kHz
75 m
3,90 - 4,05 MHz
3900 - 4050 kHz
60 m
4,750 - 5,1 MHz
4750 - 5100 kHz
49 m
5,73 - 6,3 MHz
5730 - 6300 kHz
41 m
6,89 - 7,60 MHz
6890 - 7600 kHz
31 m
9,25 - 9,95 MHz
9250 - 9995 kHz
25 m
11,5 - 12,2 MHz
11500 - 12200 kHz
22 m
13,57 - 13,87 MHz
13570 - 13870 kHz
19 m
15,005 - 15,825 MHz
15005 - 15825 kHz
16 m
17,48 - 17,9 MHz
17480 - 17900 kHz
15 m
18,9 - 19,02 MHz
18900 - 19020 kHz
13 m
21,45 - 21,85 MHz
21450 - 21850 kHz
11 m
25,67 - 26,1 MHz
25670 - 26100 kHz
SOME BASIC RULES OF THUMB
• In general, the bands with frequencies below 13 mHz (13000 kHz)
are better at night and the bands with frequencies above 13 mHz
(13000 kHz) are best during the day. The best daytime shortwave
bands are 13, 15, 16, 19, and 22 meters; 16 and 19 usually the
best. At night, the best bands are 25, 31, 41 and 49 meters, with 31
and 49 usually best.
• Around sunset and sunrise, both the day and night bands may be
exceptionally good.
• Shortwave reception is usually better in the winter than at other
times of year.
• Because the construction materials of some buildings severely block
32
G5 OWNER’S MANUAL
16 INTRODUCTION TO SHORTWAVE continued
shortwave signals, it may be best to hold the radio in your hands and
get very close to a window or use an external antenna mounted next
to the window or outside.
SHORTWAVE TIME STATIONS
These stations broadcast Universal Time (GMT), usually 24 hours per
day.
CHU-time(Canada)
CHU-time(Canada)
CHU-time(Canada)
WWV-time/weather(US)
WWV-time/weather(US)
WWV-time/weather(US)
WWV-time/weather(US)
WWV-time/weather(US)
3330
7335
14670
2500
5000
10000
15000
20000
Best at night
Day/Night
Best during daylight
Best at night
Best at night
Day/Night
Best during daylight
Best during daylight
GETTING CLOSE TO A WINDOW
Getting close to a window may substantially improve reception. Shortwave signals penetrate single-level wood frame buildings easiest, while
concrete and brick buildings, multi-story and metal roofed structures
often block signals. In such situations, position the radio as close to a
window as possible. Holding it may also help. Use an external antenna
if necessary.
SHORTWAVE ANTENNAS
An external shortwave antenna, especially when mounted outside,
can greatly enhance shortwave reception. Some radios are equipped
with special antenna sockets. Etón Corporation does not manufacture
or sell shortwave antennas, however, there are many excellent models
available. A web search such as ‘shortwave antennas’ will result in
many sources for such products.
33
G5 OWNER’S MANUAL
16 INTRODUCTION TO SHORTWAVE continued
INTRODUCTION TO SINGLE SIDEBAND (SSB)
Many higher-end shortwave radios have special circuitry enabling
SSB, a highly efficient way of electronically processing transmitted
and received signals for two-way communication. Examples of this
are amateur radio (hams), maritime and aeronautical communication.
Either upper side band (USB) or lower side band (LSB) can be used.
Non-voice methods of communication can also be heard, including
CW (Morse code) and RTTY (radio teletype).
Receiving SSB signals is not always easy. Since this is two-way
communications, transmissions are often very short and sporadic. Also,
most two-way communication uses relatively low power, 50 to 1000
watts. The amateur radio operators are easiest to find, Best results
are experienced when using an outdoor shortwave antenna such as a
dipole.
Follow your radio’s instructions on how to engage its SSB feature.
Shown next are some selected frequency ranges on which SSB communications can be found. All frequencies are shown in kilohertz.
Amateur Radio Shortwave Bands (m=meters)
80m: 3500-4000 17m: 18068-18168
40m: 7000-7300
15m: 21000-21450
30m: 10100-10150
12m: 24890-24990
20m: 14000-14350
10m: 28000-29700
34
G5 OWNER’S MANUAL
16 INTRODUCTION TO SHORTWAVE continued
Aeronautical SW Frequency Ranges (usually USB)
2850-3155
11175-11400
3400-3500
13200-13360
4650-4750
15010-15100
5480-5730
17900-18030
6525-6765
21870-22000
8815-9040
23200-23350
10005-10100
Maritime SW Frequency Ranges (usually USB)
4063-4438
18780-18900
6200-6525
19680-19800
8195-8815
22000-22720
12230-13200
25070-25110
16360-17410
SHORTWAVE SSB WEATHER FREQUENCIES AND WEATHER FAX
FREQUENCIES
These are best found online by performing a search using your favorite
Internet search site, searching for ‘shortwave weather
frequencies’; ‘weather fax frequencies’. Your local library and bookstores may also be helpful.
FINDING SHORTWAVE ANTENNAS
Such resources are best found by performing a search using your
favorite Internet search site, searching for ‘shortwave antennas’ or
the specific antenna type, e.g. ‘shortwave dipole antennas’. Your local
library and bookstores may also be helpful.
35
G5 OWNER’S MANUAL
16 INTRODUCTION TO SHORTWAVE continued
SHORTWAVE MAGAZINES
Monitoring Times: 7540 Highway 64 West, Brasstown, NC 28902,
Telephone: (828) 837-9200/800-438-8155.
Website: http://www.monitoringtimes.com.
Popular Communications: A publication of CQ Communications, Inc.
25 Newbridge Road, Hicksville, NY 11801-2953, USA.
Telephone: 516-681-2922. www.popular-communications.com.
SHORTWAVE DIRECTORIES
Shortwave directories showing broadcaster’s language, target area,
broadcast time and frequency are listed below.
PASSPORT TO WORLD BAND RADIO Published by International
Broadcasting Services (IBS); IBS North America, Box 300, Penn’s Park PA
18943. Phone: (215) 598-9018. www.passband.com.
WORLD RADIO TV HANDBOOK Published in the USA by WatsonGuptill Publications, 770 Broadway, 7th Floor, New York, NY 100039595. www.watsonguptill.com.
17 TROUBLESHOOTING
RESET PROCEDURE
Perform a reset if the solutions outlined below don’t resolve the issue.
The RESET button (3) is the small hole on the front right of the G5.
To perform a reset, assure that fresh batteries are in the G5 or power
it with its AC adapter. Turn the G5 off and poke a paper clip into the
hole.
36
G5 OWNER’S MANUAL
17 TROUBLESHOOTING continued
WILL NOT TURN ON
1. Assure that the LOCK feature is not engaged.
2. Assure that the radio has power (batteries installed or AC adapter
plugged in).
3. Assure that batteries are inserted with correct polarity
4. Assure that the batteries are not depleted
5. If using an AC adapter, assure that it is plugged into the household
outlet (mains socket) and into the G5’s DC socket. Also, assure that
the AC adapter is of the correct DC voltage output and polarity and
that its plug-tip is of the correct inner and outer diameter.
SHUTS OFF ABRUPTLY WHILE PLAYING DURING BATTERY USE
This is caused by depleted batteries. Replace them.
SHUTS OFF ABRUPTLY WHILE BEING MOVED DURING
AC ADAPTER USE
This is usually caused by a broken wire or loose connection in the AC
adapter’s cord or if the AC adapter’s plug-tip is of the wrong diameter.
OPERATES ERRATICALLY
Perform a RESET, as described in the section titled RESET PROCEDURE.
STATIONS ARE RECEIVED TOO WEAK
• Assure that the ANTENNA GAIN switch is set to the DX position.
• Assure that the telescopic antenna is pulled up all the way for FM
and Shortwave reception.
• When listening to AM stations, swivel the radio. The AM internal
ferrite bar antenna is highly directional.
THERE IS NO SOUND FROM THE SPEAKER (18)
Assure that earphones/headphones are not plugged in and that the
volume control is turned up.
37
G5 OWNER’S MANUAL
17 TROUBLESHOOTING continued
A STATION CAUSES SEVERE AUDIO DISTORTION, BUT SEEMS TO
BE VERY STRONG IN SIGNAL STRENGTH
This is probably a strong, local station, very close to your location.
Because of its close proximity, its signal is too strong. To reduce signal
strengths, place the DX/LOCAL switch into the LOCAL position.
THE BATTERY COMPARTMENT HAS A STICKY LIQUID OR DRIED
WHITE POWDER IN IT
This is the result of battery acid leakage. To avoid battery acid leakage,
only use high quality alkaline or rechargeable nickel-metal-hydride
batteries. Never intermix old with new, or different brands or types of
batteries. If the batteries leak, immediately contact the manufacturer
of the batteries and don’t throw them away. Damage caused by battery acid leakage is not covered under warranty.
18 WARRANTY AND SERVICE INFORMATION
You may contact Etón Corporation Service Department for additional
information or assistance by calling toll-free Monday through Friday,
8:30am -4:00pm Pacific Standard Time:
1(800) 872-2228 (US)
1(800) 673-1648 (CN)
650-903-3866 (World-wide)
Call for a Return Authorization prior to shipping your unit. Should
you want to return your unit for service, pack the receiver carefully
using the original carton or other suitable container. Write your return
address clearly on the shipping carton and on an enclosed cover letter
describing the service required, symptoms or problems. Also, include
your daytime telephone number and a copy of your proof of purchase.
38
G5 OWNER’S MANUAL
18 WARRANTY AND SERVICE INFORMATION
continued
The receiver will be serviced under the terms of the Etón Corporation
Limited Warranty and returned to you.
ONE YEAR LIMITED WARRANTY
Etón warrants to the original purchaser this product shall be free from
defects in material or workmanship for one year from the date of
original purchase.
During the warranty period Etón or an authorized Etón service facility
will provide, free of charge, both parts and labor necessary to correct
defects in material and workmanship. At their option, Etón may
replace a defective unit.
(1) Complete and send in the Warranty Registration Card within
ten (10) days of purchase.
(2) Call Etón or the nearest authorized service facility, as soon as
possible after discovery of a possible defect. Have ready:
(a) the model and serial number.
(b) the identity of the seller and the approximate date of purchase.
(c) a detailed description of the problem, including details on
the electrical connection to associated equipment and the list of such equipment.
(3) Etón will issue a Return Authorization number and the address
to which the unit can be shipped. Ship the unit in its original
container or equivalent, fully insured and shipping charges prepaid.
Correct maintenance, repair, and use are important to obtain proper
performance from this product. Therefore carefully read the Instruction Manual. This warranty does not apply to any defect that Etón
determines is due to:
(1) Improper maintenance or repair, including the installation of parts or accessories that do not conform to the quality and
39
G5 OWNER’S MANUAL
18 WARRANTY AND SERVICE INFORMATION
continue
specification of the original parts.
(2) Misuse, abuse, neglect or improper installation.
(3) Accidental or intentional damage.
(4) Battery leakage.
All implied warranties, if any, including warranties of merchantability
and fitness for a particular purpose, terminate one (1) year from
the date of the original purchase. The foregoing constitutes Etón Corporation entire obligation with respect to this product, and the original
purchaser shall have no other remedy and no claim for
incidental or consequential damages, losses, or expenses. Some states
do not allow limitations on how long an implied warranty lasts or do
not allow the exclusions or limitation of incidental or consequential
damages, so the above limitation and exclusion may not apply to you.
This warranty give you specific legal rights and you may also have
other rights, which vary from state to state.
For service information contact:
Etón Corporation
1015 Corporation Way
Palo Alto, CA 94303
U.S.A.
40
Grundig Radio Line By
Etón Corporation
Corporate Headquarters
1015 Corporation Way
Palo Alto, California 94303 USA
tel +1 650-903-3866
tel +1 800-872-2228
fax +1 650-903-3867
Etón Europe/Lextronix Germany
Rosenstrasse 2
D-10178 Berlin, Germany
tel +49 [0]30 243102142
Etón Canada
1 Yonge Street, Suite 1801
Toronto, Ontario M5E 1W7 Canada
tel + 1 416-214-6885
v. 01-11-06