1
EX90
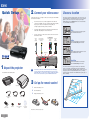
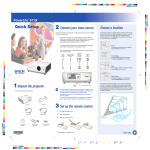
2Connect your video source
Quick Setup
Connect the projector to a computer or video source using any of the available
connections shown below.
•
Check the connectors on your video equipment. If more than one
connection is available, choose the one that provides the best quality.
The projector connectors from highest to lowest quality are
Computer (Component Video), S-Video, and Video.
•A computer cable is included. You can purchase optional video and
audio cables through Epson or an electronics store.
•You can connect up to 3 video devices and use the remote control to
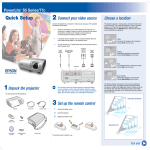
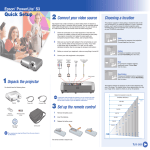
Choose a location
The projector supports 4 viewing setups. Choose the best one for
your environment. If you install the projector in a rear or overhead
position, you’ll need to choose the correct projection option,
identified below, from the Extended menu. See the User’s Guide
on your CD-ROM for instructions.
Table
Convenient for temporary front projection.
Choose Front from the menu.
switch between them.
S-Video
cable
(optional)
Component
video cable (optional)
to VGA component
adapter
(included)
RCA video cable
(composite video)
(optional)
Computer
cable
(included)
Ceiling
Professional installation recommended.
Choose Front/Ceiling from the menu.
Rear
For installation behind a translucent screen.
Choose Rear from the menu.
Audio ports
EPSON
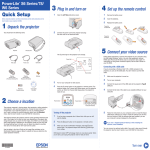
1Unpack the projector
NOTE You should have the following items:
Projector
VGA component
adapter
Projector
remote control
3Set up the remote control
Carrying case
Power cord
Batteries
ou can also connect an external monitor (to watch the display
Y
on your computer monitor while watching the projection screen),
and a USB cable to use the remote control to change presentation
slides. See the User’s Guide on your CD-ROM for instructions.
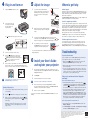
1
2Insert the batteries.
3
Remove the battery cover.
Replace the battery cover.
Computer cable
Password protect
sticker
User’s Guide
CD-ROM
The remote control is ready for use.
*411389900*
*411389900*
Rear/Ceiling
Professional installation recommended.
Choose Rear/Ceiling from the menu.
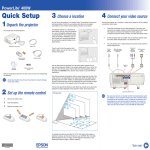
The distance between the projector and the screen determines
the size of the image. The diagrams below show approximately
how big your image will be (diagonally), based on where you set up
the projector. (For more help determining the size of your image,
try the Image Size Calculator on the Multimedia Projectors page on
Epson’s website.)