Download Epson 740i Product Information Guide
Transcript
PRODUCT INFORMATION GUIDE
EPSON
UPDATE
4/23/99
This package provides a new ink jet printer product section to be added to the EPSON Product Information
Guide. The table of contents of this section is listed below.
EPSON Stylus® COLOR 740i
TABLE OF CONTENTS
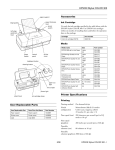
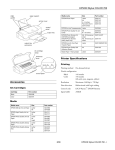
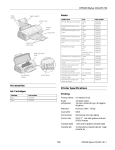
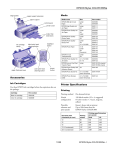
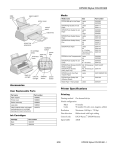
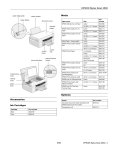
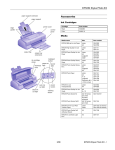
Accessories........................................................................................................ EPSON Stylus COLOR 740i - 1
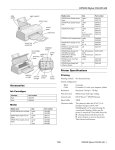
Printer Specifications ........................................................................................ EPSON Stylus COLOR 740i - 1
DOS Support ................................................................................................... EPSON Stylus COLOR 740i - 5
Interfaces .......................................................................................................... EPSON Stylus COLOR 740i - 6
Control Panel ................................................................................................... EPSON Stylus COLOR 740i - 6
Installing an Ink Cartridge for the First Time................................................... EPSON Stylus COLOR 740i - 7
Loading Paper .................................................................................................. EPSON Stylus COLOR 740i - 8
Testing the Printer............................................................................................ EPSON Stylus COLOR 740i - 8
Using Special Media ......................................................................................... EPSON Stylus COLOR 740i - 9
Replacing an Ink Cartridge............................................................................... EPSON Stylus COLOR 740i - 11
Cleaning the Print Head................................................................................... EPSON Stylus COLOR 740i - 12
Aligning the Print Head ................................................................................... EPSON Stylus COLOR 740i - 14
Cleaning the Printer ......................................................................................... EPSON Stylus COLOR 740i - 14
Transporting the Printer................................................................................... EPSON Stylus COLOR 740i - 14
Related Documentation.................................................................................... EPSON Stylus COLOR 740i - 14
4/99
EPSON Stylus COLOR 740i
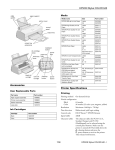
edge
guides
Media
paper support
printer cover
control
panel
output tray
output tray
extensions
paper thickness
lever
ink cartridge
holders
control panel
Media name
Size
Part number
EPSON 360 dpi Ink Jet Paper
Letter
A4
S041060
S041059
EPSON High Quality Ink Jet
Paper
Letter
A4
S041111
S041117
EPSON Photo Quality Ink Jet
Paper
Letter
A4
Legal
S041062
S041061
S041067
EPSON Photo Quality Glossy
Paper
Letter
A4
S041124
S041126
EPSON Photo Quality Glossy
Film
Letter
A4
A6
S041072
S041071
S041107
EPSON Photo Paper
Letter
A4
4×6
Panoramic (8.3 × 23.4
inches)
S041141
S041140
S041134
S041145
EPSON Ink Jet
Transparencies
Letter
A4
S041064
S041063
EPSON Photo Quality Ink Jet
Cards
A6
8 × 10
S041054
S041122
EPSON Photo Stickers Kit
(CD-ROM and paper)
EPSON Photo Stickers (refill)
A6; 16 frames
S041144-KIT
A6; 16 frames
S041144
EPSON Iron-On Cool Peel
Transfer Paper
Letter
S041153/
S041155
EPSON Photo Quality Self
Adhesive Sheets
A4
S041106
Accessories
Printer Specifications
Ink Cartridges
Printing
Cartridge
Part number
Printing method
On-demand ink jet
Black
S020189
Color
S020191
Nozzle
configuration
144 black nozzles
144 color nozzles (48 cyan, 48 magenta,
48 yellow)
Resolution
Maximum 1440 × 720 dpi
Input buffer
64KB
Print direction
Bidirectional with logic seeking
Control code
ESC/P 2 ™ and raster graphics code and
EPSON Remote
Character tables
1 italic and 10 graphics character tables
Character sets
14 international character sets and 1 legal
character set
User Replaceable Parts
Part name
Part number
Blueberry cover
C814131
Grape cover
C814161
Lime cover
C814171
Strawberry cover
C814151
Tangerine cover
C814141
4/99
EPSON Stylus COLOR 740i - 1
EPSON Stylus COLOR 740i
Bitmap fonts
EPSON Roman (proportional)
EPSON Sans Serif (proportional)
EPSON Courier
EPSON Prestige
EPSON Script
Ink Cartridges
All bitmap fonts are available in 10, 12,
and 15 cpi. You can select other font/pitch
combinations using ESC/P 2 commands.
Scalable fonts
EPSON Roman
EPSON Sans Serif
EPSON Roman T
EPSON Sans Serif H
All scalable fonts are available in sizes from
8 to 32 points, in 2 point increments, and
four styles: normal, bold, italic, and bold
italic.
The printer always uses the fonts you
select with your software application. You
need to use the printer’s internal fonts
only if your application doesn’t allow you
to select fonts.
Specification
Black ink cartridge
(S020189)
Color ink cartridge
(S020191)
Color(s)
Black
Cyan, magenta, and
yellow
Print capacity*
900 pages text (ISO/IEC
10561 letter pattern)
300 pages graphic (5%
coverage)
300 pages (15%
coverage)
Cartridge life
2 years from production date and up to within 6
months after opening package at 77 °C (25 °F)
Storage
temperature
–4 to 104 °F (–20 to 40 °C)
1 month at 104 °F (40 °C)
Transit
temperature
–22 to 140 °C (–30 to 60 °F)
1 month at 104 °F (40 °C)
120 hours at 140 °F (60 °C)
Freezing
temperature**
3.2 °F (–16 °C)
–0.4 °F (–18 °C)
Dimensions
1.09 (W) × 2.1 (D) × 1.5 (H)
inches
27.8 (W) × 52.7 (D) ×
38.5 (H) mm
1.7 (W) × 2.1(D) × 1.5 (H)
inches
42.9 (W) × 52.7 (D) ×
38.5 (H) mm
* The print capacity may vary depending on how often you clean the
print head.
** The ink thaws and is usable after approximately 3 hours at 77 °F
(25 °C).
Caution:
To ensure good results, use genuine EPSON cartridges
and do not refill them. Other products may cause
damage to your printer not covered by EPSON’s
warranty.
Do not use an ink cartridge after the expiration date on
the package.
2 - EPSON Stylus COLOR 740i
4/99
EPSON Stylus COLOR 740i
Paper
Paper type
Size
Paper types
Thickness
Single sheets
Letter (8.5 × 11 inches)
Legal (8.5 × 14 inches)
Half letter (statement, 5.5 × 8.5 inches)
Executive (7.5 × 10 inches)
A4 (210 × 297 mm)
A5 (148 × 210 mm)
B5 (182 × 257 mm)
Plain paper and special ink jet
papers distributed by EPSON
0.003 to 0.004 inch 17 to 24 lb
(0.08 to 0.11 mm)
(64 to 90 g/m2)
for plain bond paper
Weight
Transparencies, Glossy
film, Glossy paper
Letter (8.5 × 11 inches)
A4 (210 × 297 mm)
A6 (105 × 148 mm), glossy film only
Transparencies, glossy paper, and —
glossy film distributed by EPSON
—
Self-adhesive sheets
A4 (210 × 297 mm)
Self adhesive sheets distributed
by EPSON
—
—
Envelopes
Plain bond paper or air mail paper
No. 10, 9.5 × 4.1 inches (240 × 104 mm)
DL, 8.7 × 4.3 inches (220 × 110 mm)
C6, 4.4 × 6.4 inches (114 × 162 mm)
Ink jet note card, 5.2 × 8.7 inches (132 × 220 mm)
0.006 to 0.02 inch
(0.16 to 0.52 mm)
12 to 20 lb
(45 to 75 g/m2)
Ink jet cards
A6 (105 × 148 mm)
8 × 10 inches
Ink jet cards distributed by EPSON —
—
Photo paper
Letter (8.5 × 11 inches)
A4 (210 × 297 mm)
4 × 6 inches (102 × 152 mm)
Panoramic (210 × 594 mm)
Photo paper distributed by EPSON —
—
Photo stickers
A6 (105 × 148 mm) with 16 frames
Photo stickers distributed by
EPSON
—
—
Iron-On Cool Peel transfer
paper
Letter (8.5 × 11 inches)
Transfer paper distributed by
EPSON
—
—
Note:
Since the quality of any particular brand or type of paper may be changed by the manufacturer at any time, EPSON cannot attest to the quality of
any non-EPSON brand or type of paper. Always test samples of paper stock before purchasing large quantities or printing large jobs.
Poor quality paper may reduce print quality and cause paper jams and other problems. If you encounter problems, switch to a higher grade of
paper.
Print only under these conditions:
Temperature: 59 to 77 °F (15 to 25 °C)
Humidity:
40 to 60% RH
Store glossy film and self adhesive sheets under these conditions:
Temperature: 59 to 86 °F (15 to 30 °C)
Humidity:
20 to 60% RH
4/99
EPSON Stylus COLOR 740i - 3
EPSON Stylus COLOR 740i
Printable Area
A
A
BL
BR
BR
BL
C
Envelopes
C
Single sheets and cards
A
The minimum top margin is 0.12 inch (3.0 mm). When printing multiple sheets of EPSON Photo Quality Glossy Film, the minimum top margin
is 1.2 inches (30 mm).
BL The minimum left margin is 0.12 inch (3.0 mm).
BR The minimum right margin is:
0.35 inch (9.0 mm) for Letter and Legal
1.10 inches (28 mm) for #10 envelopes
0.28 inch (7.0 mm) for DL envelopes
0.12 inch (3.0 mm) for all other paper sizes.
C
The minimum bottom margin is 0.55 inch (14.0 mm) using the Standard printable area setting. This can be decreased to 0.12 inch (3.0 mm)
using the Maximum printable area setting. However, the print quality in the expanded printable area may be reduced.
Note:
Always load paper into the sheet feeder short edge first except envelopes. Load envelopes long edge first.
Mechanical
Environmental
Paper feed
method
Friction with auto sheet feeder, rear entry
Sheet feeder
capacity
Maximum 100 sheets of 17 lb (64 g/m 2)
paper
Dimensions
Storage
Width: 16.9 inches (429 mm)
Depth: 10.3 inches (261 mm)
Height: 6.6 inches (167 mm)
Printing
Width: 16.9 inches (429 mm)
Depth: 24.1 inches (613 mm)
Height: 12.2 inches (309 mm)
Weight
120V model
240V model*
99V to 132V
198V to 264V
Rated frequency range
50 to 60 Hz
Input frequency range
49.5 to 60.5 Hz
Rated current
0.4A
Power consumption
Approx. 18 W (ISO 10561 Letter Pattern)
Approx. 5 W in standby mode
0.2A
* Also designed for IT power systems with Phase to Phase voltage
220–240V
4 - EPSON Stylus COLOR 740i
Humidity
Operation: 20 to 80% RH
Storage*: 5 to 85% RH (without
condensation)
Safety Approvals
Electrical
Input voltage range
Operation: 50 to 95 °F (10 to 35 °C)
Storage*: –4 to 104 °F (–20 to 40 °C)
1 month at 104 °F (40 °C)
Transit*: –4 to 140 °F (–20 to 60 °C)
120 hours at 140 °F (60 °C)
* Stored in shipping container
11.5 lb (5.2 kg) without the ink cartridges
Specification
Temperature
4/99
Safety standards
UL 1950, CSA 22.2 No. 950
EMC
FCC part 15 subpart B class B
EPSON Stylus COLOR 740i
Character Tables
DOS Support
All character tables except Italic are the same as the PC437
table for hex codes 00 through 7F. Additional characters are
available for hex codes 80 through FF. You can select the
following character tables through the control panel or
software commands:
If driver support for the EPSON Stylus COLOR 740i is not
available from your software manufacturer, you can use one of
the other EPSON ESC/P 2 printer drivers (parallel port only).
These drivers don’t provide all the EPSON Stylus COLOR
740i features, such as 720 or 1440 dpi printing. Choose the
first printer available from the following two lists:
❏ PC437 (U.S./Standard Europe)
❏ PC850 (Multilingual)
Black printing only
❏ PC860 (Portuguese)
❏ LQ-870/1170
❏ PC861 (Icelandic)
❏ LQ-570(+)/1070(+)
❏ PC863 (Canadian-French)
❏ SQ-870/1070
❏ PC865 (Nordic)
❏ LQ-850
❏ Abicomp
❏ LQ-500
❏ BRASCII
Color and black printing
❏ Roman 8
❏ EPSON Stylus PRO
❏ ISO Latin 1
❏ EPSON Stylus COLOR 500
❏ Italic (no characters available for hex code 15)
❏ EPSON Stylus COLOR II
International
character sets
❏ LQ-860
❏ LQ-2550
Control Panel Settings
You can select a number of international
character sets with the control panel or the
ESC R command. Other sets can only be
selected with the ESC R command. You
can select additional characters with the
ESC ( ^ command.
You can change the following default settings from the
printer’s control panel:
Setting
Options
Font
Courier, Roman, Sans Serif, Prestige, Script, Roman T, Sans
Serif H, Draft
Character
table
Italic U.S.A., Italic France, Italic Germany, Italic U.K., Italic
Denmark 1, Italic Sweden, Italic Italy, Italic Spain 1, PC 437
(U.S./Standard Europe), PC850 (Multilingual), PC860
(Portuguese), PC861 (Icelandic), PC863 (Canadian-French),
PC865 (Nordic), Abicomp, BRASCII, Roman 8, ISO Latin 1
Follow these steps to change the settings listed above:
1. Make sure the printer is turned off and has paper loaded (at
least 8.27 inches [210 mm] wide).
2. Hold down the R cleaning button and press the P power
button. The printer prints instructions for changing settings
and choosing a language for the instructions.
3. Press the E load/eject button to print a list of current
settings (indicated with arrows) and additional instructions.
4. After you make the changes you want, turn the printer off
to save the settings. The settings remain in effect until you
change them again.
4/99
EPSON Stylus COLOR 740i - 5
EPSON Stylus COLOR 740i
Interfaces
Control Panel
power
button
USB interface
Specification
Description
Standard
Based on Universal Serial Bus Specifications
Revision 1.0, Universal Serial Bus Device Class
Definition for Printing Devices Version 1.0
Bit rate
12 Mbps (full speed device)
Data encoding
NRZI
Adaptable connector
USB Series B
Recommended
cable length
6.5 feet (2 meters) maximum
paper out
light
black ink
out light
color ink
out light
cleaning
button
load/eject
button
Follow these guidelines when the control panel lights come on
or flash:
Serial interface
Specification
Description
Standard
Based on RS-423
Synchronization
Synchronous
Bit rate
Approximately 1.8M bps
Handshaking
X-ON/X-OFF and DTR protocol
Word format
Data bit: 8 bits
Parity bit: None
Start bit: 1 bit
Stop bit: 1 bit
Connector
8-pin mini-DIN
Recommended cable
power
light
S
When the S paper out light comes on, your
paper ran out or is incorrectly loaded. Load
paper in the feeder and then press the
E load/eject button.
B or A
®
Apple System Peripheral-8 cable (preferably
Belkin brand)
Forward channel
Description
Data format
8-bit parallel, IEEE-1284 compatibility mode
Synchronization
STROBE pulse
Handshake timing
BUSY and ACKNLG signals
Signal level
TTL compatible
Connector
57-30360 Amphenol connector or equivalent
P S B A When the P power and S paper out lights
flash and the B black and A color ink out
lights come on, jammed paper may be blocking
movement of the print head. Turn off the
printer, wait a few seconds, and turn it back
on.
When all the lights flash, your printer may have
an internal error. Make sure you removed all
the packing material as described on the
unpacking sheet in your printer box. Then
turn off the printer, wait a few seconds, and
turn it on again.
Reverse channel
Specification
Description
Transmission mode
IEEE-1284 Nibble mode
Adaptable connector
57-30360 Amphenol connector or
equivalent
Synchronization
Refer to the IEEE-1284 specification
Handshaking
Refer to the IEEE-1284 specification
Signal level
IEEE-1284 Level 1 device
Data transmission timing
Refer to the IEEE-1284 specification
6 - EPSON Stylus COLOR 740i
When an ink out light flashes, your ink supply
is low. Make sure you have a replacement
cartridge.
When an ink out light comes on, you need to
replace the ink cartridge. See “Replacing an Ink
Cartridge” on page 11 for instructions.
Parallel interface
Specification
When the S paper out light flashes, paper is
jammed in the printer. Turn off the printer,
remove all the paper (including any pieces torn
off inside), then reload the stack. Turn on the
printer and press the E load/eject button.
4/99
EPSON Stylus COLOR 740i
5. Lift up the two ink cartridge clamps.
Installing an Ink Cartridge for the First
Time
Follow these steps to install ink cartridges for the first time:
1. Plug the printer’s power cord into a grounded outlet.
Caution:
Don’t use an outlet that can be turned off by a wall
switch or timer, or one on the same circuit as a large
appliance. This may disrupt the power, which can erase
the printer’s memory or damage its power supply.
6. Place the cartridges into their holders with the labels facing
up and toward the back of the printer. Then press down the
clamps until they lock into place.
2. Remove the ink cartridges from their packages. Then
remove only the yellow part of the tape seal on top as
shown.
black cartridge
WARNING:
If ink gets on your hands, wash them thoroughly with
soap and water. If ink gets in your eyes, flush them
immediately with water.
color cartridge
Caution:
Use the ink cartridges packed with your printer the first
time you install them or your printer won’t charge ink
properly. You must remove the yellow tape from the
cartridge or you will permanently damage it. Don’t pull
off the blue portion or try to remove the clear seal from
the bottom of the cartridge; ink will leak out.
7. Press the R cleaning button to begin charging the ink
delivery system and close the printer cover.
Charging takes about a minute. The P power light flashes
and the printer makes various sounds until it’s finished.
Don’t turn off the printer or interrupt the charging
process or it will start over, using more ink than necessary.
Charging is finished when the P power light stops
flashing and stays on.
3. Lower the printer’s output tray and open the cover.
Caution:
Never turn off the printer while the P power light is
flashing, unless the printer hasn’t moved or made any
noise for more than 5 minutes.
4. Press the Ppower button to turn on the printer.The
P power light flashes and the B black and A color ink out
lights come on. The ink cartridge holders move into loading
position.
Caution:
Always use the power button to turn the printer on or
off. Never use an external switch, such as a power strip
switch.
4/99
EPSON Stylus COLOR 740i - 7
EPSON Stylus COLOR 740i
4. Hold down the E load/eject button and press the P power
button. Hold down the E load/eject button until the
P power light starts to flash, then release it.
Loading Paper
1. Open the output tray and its extensions. Slide the left edge
guide right until it is a little wider than your paper.
The printer prints its ROM version number and a nozzle
check pattern (shown in “Examining the Nozzle Check
Pattern” on page 13).
5. To end the check, turn off the printer. Then reconnect the
interface cable and turn on your printer and computer.
Confirming the Printer ID Number
If you’re using Windows® 95, 98, or NT® 4.0, you can use the
Printer and Option Information utility to confirm the Printer
ID. Color quality may improve after you confirm the ID
number.
2. Load a stack of plain paper with the printable side up and
place it against the right edge guide. Then slide the left edge
guide up against the paper’s left edge. Don’t load paper
higher than the arrow on the guide.
Load paper only up to
this arrow
If you’re using Status Monitor 2, this information is updated
automatically. However, if a message appears prompting you
to enter settings or if you change the printer’s configuration,
you’ll need to update the Printer ID manually.
1. Make sure letter-size paper is loaded in your printer.
Slide paper against the
right edge guide
2. Access the main printer settings dialog box.
3. Click the Utility tab. Then click the Printer and Option
Information icon.
4. Click the Settings Sheet button. The printer prints the
Printer ID on a sheet of paper.
5. Make sure the Printer ID shown in the Printer and Option
Information dialog box matches the ID on the Settings
Sheet. If they don’t match, change the ID numbers in the
dialog box to match those on the Settings Sheet.
6. Click OK to exit and save your settings.
Testing the Printer
You can run a printer operation check to determine whether
the problem comes from the printer or some other source.
❏ If the results are satisfactory, the problem lies in your
software settings, the interface cable, or your computer.
❏ If the check page does not print correctly, you have a
problem with your printer. See the Printer Basics book for
possible solutions.
1. Make sure both the printer and computer are turned off.
2. Disconnect the interface cable from the printer.
3. Make sure paper is loaded in the printer.
Caution:
Load paper that’s at least 8.27 inches (210 mm) wide.
This prevents ink from spraying inside the printer and
smudging your printouts.
8 - EPSON Stylus COLOR 740i
4/99
EPSON Stylus COLOR 740i
Letterhead, Preprinted Forms, and Legal-size Paper
Using Special Media
Load the top edge first. When you load long paper, pull up the
paper support extension and both output tray extensions.
Selecting Special Media
EPSON Photo Quality Glossy Paper, Film, and
Transparencies
When you print on special media, you need to choose the
correct Media Type and Paper Size settings in your printer
software. The table below lists the available EPSON media
and the corresponding Media Type setting for each one.
Before you load glossy film or transparencies, put a support
sheet (packed with the media) or a plain paper sheet beneath
the stack. (Don’t use a support sheet with Photo Quality
Glossy Paper.)
Media name
Media Type setting
EPSON 360 dpi Ink Jet Paper
360 dpi Ink Jet Paper
You can load up to 20 sheets of glossy paper or glossy film, or
up to 30 transparencies.
Photo Quality Ink Jet
Paper
On Photo Quality Glossy Film, you may get better results by
loading one sheet at a time. With multiple sheets loaded, the
minimum top margin you can use is 1.2 inches (30 mm). If
you want to use a smaller top margin, load and print one sheet
at a time.
EPSON Iron-On Cool Peel Transfer Paper
EPSON High Quality Ink Jet Paper
EPSON Photo Quality Ink Jet Paper
EPSON Photo Quality Ink Jet Cards
EPSON Photo Quality Self Adhesive Sheets
EPSON Photo Quality Glossy Paper
Photo Paper
If your media has a cut corner, position it in the printer as
shown here.
EPSON Photo Paper
EPSON Photo Quality Glossy Film
EPSON Photo Stickers
EPSON Ink Jet Transparencies
Photo Quality Glossy
Film
cut corner
Ink Jet
Transparencies
Caution:
Don’t use the cleaning sheets that may be included with
your special media; they may jam inside the printer.
printable
side up
Media Loading and Handling Guidelines
The following tips help you get the best results on any type of
paper:
❏ Always handle sheets by the edges, and don’t touch the
printable surface.
Remove each sheet from the output tray immediately after it’s
printed. Make sure each sheet is dry before stacking.
❏ When you load paper, make sure the printable side is
facing up.
Note:
It is best not to use the Maximum printable area setting in the
printer software when printing on paper with a cut corner. Part of
your document may print in the cut out area.
❏ You can load paper up to the arrow mark on the left edge
guide.
❏ Return unused sheets and envelopes to their original
package as soon as possible. See “Paper” on page 3 for more
storage information.
EPSON Photo Stickers
Use these sheets of stickers to print small, decorated photos
for use on cards, invitations, or other items. You’ll need to use
an application that can create photo stickers, such as
StickerPix.™
❏ If your paper package included protective sheets, cover the
printed side of your paper with these sheets before stacking
your paper.
Load one sheet of Photo Stickers at a time. Make sure to place
support sheets A and B that came with the stickers beneath the
sheet.
❏ Use ink jet papers within one year of purchase. Use glossy
media and transparencies within six months.
When you’re ready to print, select Photo Quality Glossy Film
as the Media Type setting and A6 Index card 105 × 148 mm
as the Paper Size in your printer software.
❏ Follow any specific instructions for your paper in the
following sections.
4/99
EPSON Stylus COLOR 740i - 9
EPSON Stylus COLOR 740i
Note:
To keep your printouts looking their best, store them in a resealable
plastic bag or other airtight covering and protect them from heat,
humidity, and direct sunlight.
Envelopes
You can load up to 10 envelopes flap edge first, with the
printable side up, as shown below:
Be sure to support your Panoramic Photo Paper as it ejects from the
printer so it doesn’t fall onto the floor.
Keep the following in mind when using EPSON Photo Paper:
❏ Load the paper with the whiter (glossier) side facing up.
❏ If you’re loading Panoramic Photo Paper, pull up the paper
support extension. Then load the Panoramic paper and
hold up its top edge while you press the E load/eject button
to feed it into the printer.
Select Photo Paper as the Media Type setting and
Panoramic 210 × 594 mm as the Paper Size setting.
Note:
If the stack of envelopes is more than 0.4-inch (10 mm) thick, press
the envelope edges to flatten them before stacking or load one
envelope at a time.
❏ If you’re loading 4 × 6-inch Photo Paper, follow these steps:
1. Position the perforated margins as shown and load up to
20 sheets with support sheets A and B beneath the stack.
Select Plain paper as the Media Type and choose the correct
envelope size as the Paper Size setting in the printer software.
If ink smears when you print on envelopes or other thick
media, set the paper thickness lever to the + position as shown
below. (Return the lever to the 0 position before printing on
other media.)
2. When you create the
image you’ll print in
your application
software, size it to
4.25 × 6.25 inches so
the image covers the
perforations as shown.
EPSON Photo Paper
Printed
image size
Choose these printer software settings:
You can use EPSON Photo Paper to print photographs that
look almost as good as the ones you get from film processing.
4 × 6-inch Photo Paper is perforated around the edges, so you
can trim your printouts and “bleed” the photo—extend it to
the edge of the paper—on all sides.
Photo Paper as the Media Type setting
EPSON Photo Paper 4 × 6 in as the Paper Size setting
Maximum as the Printable Area setting.
3. After you print, fold the paper back and forth along the
perforations and carefully tear the margins off.
You can load up to 20 sheets of 4 × 6-inch, Letter-size, or
A4-size Photo Paper or 1 sheet of Panoramic paper at a time.
Make sure you place a support sheet beneath the paper if it is
included in the paper package.
10 - EPSON Stylus COLOR 740i
Trim size
4/99
EPSON Stylus COLOR 740i
EPSON Photo Quality Ink Jet Cards
Replacing an Ink Cartridge
You can load up to 30 cards at a time. Always place the
included support sheet under the cards and load them as
shown below.
When the B black or A color ink out light flashes, the
indicated cartridge is low on ink. This is a good time to make
sure you have a new cartridge. When the light stays on, the
cartridge is empty and you need to replace it.
Use these EPSON ink cartridges within six months of
installing them and before the expiration date on the package:
Black ink cartridge: S020189
Color ink cartridge: S020191
Caution:
To ensure good results, use genuine EPSON cartridges
and do not refill them. Other products may cause
damage to your printer not covered by EPSON’s
warranty.
Make sure you set the paper thickness lever to the + position
as shown in “Envelopes” on page 10. When you’re ready to
print, set the Media Type to Photo Quality Ink Jet Paper and
the Paper Size setting to the card size in your printer
software.
If you need to replace an ink cartridge before the lights flash
(because the ink is too old, for example) follow the
instructions in “Replacing an Outdated Ink Cartridge” on
page 12.
EPSON Photo Quality Self Adhesive Sheets
Removing and Installing Ink Cartridges
Use these sheets to print labels or stickers. You can load one
sheet at a time. Make sure your adhesive sheets are fully
adhered to their backing sheet before you load them.
You can replace a cartridge when the B black or A color ink
out light is either flashing or on. (If you press the R cleaning
button when both ink out lights are off, the printer cleans the
print head, as described in “Cleaning the Print Head” on
page 12.) Follow these steps:
When you’re ready to print, select Photo Quality Ink Jet
Paper as the Media Type setting in your printer software.
1. Remove the new ink cartridge from its packaging.
EPSON Iron-On Cool Peel Transfer Paper
2. Remove only the yellow part of the tape seal on top as
shown below.
You can print photos, company logos, or anything else you
want on these transfer papers, and then iron your images onto
T-shirts or other cloth items.
Load one sheet of transfer paper at a time and select 360 dpi
Ink Jet Paper as the Media Type setting.
Make sure you reverse your image before you print it—
especially if it includes text—so it will read correctly when it’s
transferred. You can use the Flip Horizontal setting in your
printer software to do this (see the Printer Basics book for
instructions).
black cartridge
After you print, follow the instructions that came with the
paper to iron the image onto the shirt or other item.
color cartridge
Caution:
You must remove the yellow tape from the top of the
cartridge or you will permanently damage it. Don’t pull
off the blue portion or remove the clear seal from the
bottom of the cartridge; ink will leak out.
To avoid damaging the printer, never move the print
head by hand.
3. Make sure the printer is turned on and not printing, then
open the printer cover.
4/99
EPSON Stylus COLOR 740i - 11
EPSON Stylus COLOR 740i
4. Press the R cleaning button and hold it for about three
seconds until the print head moves left and the P power
light begins flashing.
Replacing an Outdated Ink Cartridge
If an ink cartridge is more than six months old, you may need
to replace it. How can you tell? You may notice that your
printouts don’t look as good as they used to. If print quality
doesn’t improve after cleaning and aligning the print head,
you can replace one or both cartridges.
(The print head returns to its home position if you don’t
proceed to step 5 within 60 seconds.)
5. Pull up the ink cartridge clamp. The cartridge rises up from
its holder.
Follow these steps to replace an ink cartridge before the
B black or A color ink out light is flashing or on:
1. Prepare your new ink cartridge for installation as described
in steps 1 and 2 of “Removing and Installing Ink
Cartridges” on page 11.
2. Make sure the printer is turned on and not printing, then
open the printer cover.
3. Press the E load/eject button and hold it down for three
seconds until the print head moves to the left. The P power
light begins flashing.
Caution:
Don’t open the clamp or remove a cartridge except to
replace it with a new one. Once you remove a cartridge,
you can’t reuse it, even if it contains ink.
Caution:
To avoid damaging the printer, never move the print
head by hand.
6. Lift the cartridge out of the printer and dispose of it
carefully.
Never turn off the printer while the P power light is
flashing, unless the printer hasn’t moved or made any
noise for more than 5 minutes.
WARNING:
If ink gets on your hands, wash them thoroughly with
soap and water. If ink gets into your eyes, flush them
immediately with water.
4. Remove the old ink cartridge and install the new cartridge
as described in steps 5 through 9 of “Removing and
Installing Ink Cartridges” above. Don’t press any control
panel buttons, however.
7. Lower the new ink
cartridge into its holder
with the label facing up
and toward the back of
the printer.
5. Press the E load/eject button and close the printer cover.
The printer moves the print head and begins charging the
ink delivery system. The P power light flashes and the
printer makes various sounds. Charging takes a couple
minutes. When it’s finished, the P power light stops
flashing and stays on.
8. Press down the ink
cartridge clamp until it
locks in place.
9. If you need to replace the other ink cartridge, repeat the
preceding steps before going on to step 10.
Cleaning the Print Head
10. Press the R cleaning button and close the printer cover.
The printer moves the print head and begins charging the
ink delivery system. (Even if you don’t press the button, ink
charging begins 60 seconds after you close the clamp.)
If your printed image is unexpectedly light or faint, or dots are
missing from the image, you may need to clean the print head.
This unclogs the nozzles so they can deliver ink properly.
The P power light flashes, and the printer makes various
sounds. Charging takes a couple minutes. When it’s
finished, the P power light stops flashing and stays on.
Cleaning the print head uses ink, so clean it only if print
quality declines. You can clean the print head in either of the
following ways:
❏ With the Head Cleaning utility in your printer software
(when connected to a local port, not over a network)
Caution:
Never turn off the printer while the P power light is
flashing, unless the printer hasn’t moved or made any
noise for more than 5 minutes.
12 - EPSON Stylus COLOR 740i
❏ Using the printer’s control panel buttons
4/99
EPSON Stylus COLOR 740i
3. After the P power light stops flashing, print a page to test
the print quality and reset the cleaning cycle.
Using the Head Cleaning Utility
Follow these steps to run the Head Cleaning utility:
If you’re connected directly to the printer, run a nozzle
check. Go to step 4.
1. Make sure the printer is turned on but not printing, and the
B black and A color ink out lights are off.
If you’re using DOS or printing over a network, open an
application and print a document containing black and
color data. Then go to step 8.
2. Start an application and open a document.
3. Access the printer settings dialog box as described in the
Printer Basics book.
4. Click the Utility tab (Windows) or the
(Macintosh). You see the Utility menu.
4. Start an application, open a document, and access the
printer settings dialog box.
Utility icon
5. Click the Utility tab (Windows) or the
(Macintosh). You see the Utility menu.
5. Click the Head Cleaning icon.
Utility icon
6. Make sure paper is loaded in the printer and click the
Nozzle Check icon, then click Next. The nozzle check
pattern prints on your printer; see “Examining the Nozzle
Check Pattern” below for details.
6. Follow the instructions on the screen to clean the print
head. Cleaning takes a couple minutes, during which the
printer makes some noise and the P power light flashes.
When the P power light stops flashing, run a nozzle check
to test the results and reset the cleaning cycle.
7. If the nozzle check pattern is complete, click Finish.
8. If the pattern is missing dots, click Clean to run another
cleaning cycle.
Caution:
Never turn off the printer while the P power light is
flashing, unless the printer hasn’t moved or made
any noise for more than 5 minutes.
9. If you don’t see any improvement after cleaning two or
three times, check the print quality solutions in the Printer
Basics book.
7. Make sure paper is loaded in the printer and click Print
nozzle check pattern (Windows) or Confirmation
(Macintosh). Then click Next. The nozzle check pattern
prints on your printer; see “Examining the Nozzle Check
Pattern” below for details.
Examining the Nozzle Check Pattern
Examine the nozzle check pattern you print. It should look
something like this, with the lower pattern colored magenta,
cyan, and yellow:
8. If the nozzle check pattern is complete, click Finish.
If the pattern is missing dots, click Clean to run another
cleaning cycle. If you don’t see any improvement after
cleaning two or three times, check the print quality
solutions in the Printer Basics book.
Using the Control Panel
Each staggered horizontal and straight vertical line should be
complete, with no gaps in the dot pattern. If your printout
looks okay, you’re done. If any dots are missing, as shown
below, clean the print head again; see “Cleaning the Print
Head” on page 12 for instructions.
Follow these steps to clean the print head:
1. Make sure the printer is turned on and not printing, and
that the B black and A color ink out lights are off.
2. Press the R cleaning button and hold it down for three
seconds. Cleaning takes a couple minutes, during which the
printer makes some noise and the P power light flashes.
Missing dots
Caution:
Never turn off the printer while the P power light is
flashing, unless the printer hasn’t moved or made any
noise for more than 5 minutes.
4/99
EPSON Stylus COLOR 740i - 13
EPSON Stylus COLOR 740i
Aligning the Print Head
Transporting the Printer
If your printouts contain misaligned vertical lines, you may
need to align the print head using the Print Head Alignment
utility in your printer software. Your printer must be
connected to a local port, not on a network, to use this utility.
Follow these steps:
If you move your printer some distance, you need to prepare it
for transportation in its original box. Follow these steps:
1. Turn on the printer and wait until the print head locks in
the far right position. Then turn off the printer.
Caution:
To avoid damage, always leave the ink cartridges
installed when transporting the printer.
1. Make sure the printer is turned on and paper is loaded.
Caution:
Load paper that’s at least 8.27 inches (210 mm) wide.
This prevents ink from spraying inside the printer and
smudging your printouts.
2. Unplug the power cord from the electrical outlet. Then
disconnect the interface cable from the printer.
3. Remove any paper from the printer and remove the paper
support.
For the best results, load EPSON ink jet paper in the
printer whenever you check the print head alignment.
4. Push in the output tray extensions and close the tray.
2. Start an application and open a document.
5. Repack the printer and attachments in the original box
using the protective materials that came with it. See the
unpacking sheet that was packed with your printer.
3. Access the printer settings dialog box as described in the
Printer Basics book.
4. Click the Utility tab (Windows) or the
(Macintosh). You see the Utility menu.
Utility icon
Be sure to keep the printer level as you transport it. If you
notice a decline in print quality after transporting the printer,
clean the print head (see “Cleaning the Print Head” on
page 12); if output is misaligned, align the print head (see
“Aligning the Print Head” on this page).
5. Click the Print Head Alignment icon.
6. Follow the instructions on the screen to print a test page
and select the correct alignment.
Related Documentation
Cleaning the Printer
TM-SC467
To keep your printer working at its best, you should clean it
several times a year, following these steps:
PL-SC740i
1. Turn off the printer, unplug the power cord, and
disconnect the printer cable.
CPD-8359
2. Remove all the paper from the sheet feeder.
CPD-8361
3. Clean the exterior of the printer with a soft, damp cloth.
ESC740i0399
4. Clean ink out of the printer’s interior with a soft, damp
cloth.
Caution:
Don’t touch the gears inside the printer.
Never use alcohol or thinner for cleaning; they can
damage the printer components and case.
Don’t use a hard or abrasive brush.
Don’t get water on the printer components.
Don’t spray lubricants or oils inside the printer.
14 - EPSON Stylus COLOR 740i
4/99
EPSON Stylus COLOR 440/640/740
Service Manual
EPSON Stylus COLOR 740i Parts Price
List
EPSON Stylus COLOR 740i Printer
Basics book
EPSON Stylus COLOR 740i Start Here
card
EPSON Stylus COLOR 740i Manual
(PDF)


