1
CS400 Series
Instruction Manual
Form 5833
October 2014
CS400 Series Commercial / Industrial
Pressure Reducing Regulators
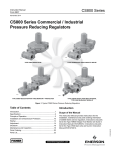
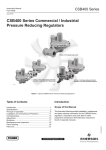
P1190
TYPICAL TYPE CS400 REGULATOR
P1426
P1424
TYPICAL TYPE CS403 REGULATOR WITH INTEGRAL
TRUE-MONITOR™ REGULATOR
TYPICAL TYPE CS404 REGULATOR WITH INTEGRAL
TYPE VSX4 SLAM-SHUT MODULE
Figure 1. Typical CS400 Pressure Reducing Regulators
Table of Contents
Introduction
Introduction................................................................1
Specifications.............................................................3
Principle of Operation................................................7
Installation and Overpressure Protection...................8
Startup..................................................................... 11
Adjustment............................................................... 11
Shutdown.................................................................12
Maintenance and Inspection....................................13
Parts Ordering.........................................................14
Parts List..................................................................14
Scope of the Manual
D103120X012
This Instruction Manual provides installation,
maintenance and parts ordering information for the
CS400 Series regulators. Instructions and parts lists for
other equipment mentioned in this Instruction Manual are
found in separate manuals.
www.fisherregulators.com
CS400 Series
Table 1. Available Configurations
TYPE NUMBER
C
S
4
OPTIONS
0
Overpressure Protection Module
0
Without Overpressure Protection Module
3
With Integral Monitor Module(1)(3)
4
With Slam-shut Module(2)(3)
Pressure Registration
E
External Registration(3)
I
Internal Registration
Relief
N
Non-Relief
T
Token Internal Relief
R
Internal Relief
Example: Type number CS404IT: CS400 regulator constructed with Type VSX4 slam-shut module,
with internal pressure registration and with token relief. 1. Reference Instruction Manual D103126X012 for information regarding the Integral Monitor module.
2. Reference Instruction Manual D103127X012 for information regarding the Type VSX4 safety shut-off module.
3. Available only with Non-Relieving or Token Relief options, not Internal Relief.
Table 2. Inlet Pressure Ratings and Flow and Sizing Coefficients
ORIFICE SIZE
TYPE
CS400,
CS403 and
CS404
MAXIMUM OPERATING
INLET PRESSURE
In.
mm
psig
bar
Cg
Cv
3/16
1/4
5/16
3/8
1/2
5/8
3/4
4.8
6.4
7.9
9.5
12
16
19
125
125
100
60
40
30
20
8.6
8.6
6.9
4.1
2.8
2.1
1.4
27
50
82
113
182
284
356
0.97
1.77
2.90
3.72
5.61
7.26
9.83
!
Warning
IEC Sizing Coefficients
C1
27.7
28.2
28.3
30.4
32.4
39.1
36.2
XT
FD
FL
0.50
0.50
0.50
0.58
0.66
0.97
0.83
0.91
0.92
0.94
0.89
0.82
0.74
0.72
0.89
Description
Failure to follow these instructions or
to properly install and maintain this
equipment could result in an explosion
and/or fire causing property damage and
personal injury or death.
CS400 Series regulators are typically installed on
industrial and commercial applications. See Table 1 for
available configurations. Constructions with External
Registration, e.g., Type CS400EN, require an external
control line.
Fisher® regulators must be installed,
operated and maintained in accordance
with federal, state and local codes,
rules and regulations and
Emerson Process Management, Inc.
(Emerson™) instructions.
Optional internal relief is available as well as low
capacity token relief. Additional overpressure
protection options include the Type CS403 that offers
True-MonitorTM Protection, which is provided by an
Integral Monitor installed on the inlet side of the valve
body that assumes control of the pressure to the
downstream system should the primary regulator cease
to regulate downstream flow. The Type CS404 offers
a slam-shut module that shuts off the flow of gas to
the downstream system in the event of outlet pressure
rising above or falling below the predefined levels.
If the regulator vents gas or a leak
develops in the system, service to the unit
may be required. Failure to correct trouble
could result in a hazardous condition.
Call a gas service person to service the
unit. Only a qualified person must install
or service the regulator.
2
FLOW COEFFICIENTS
(WIDE OPEN)
CS400 Series
Specifications
The Specifications section on the following page lists the specifications for the CS400 Series regulators. The following
information is stamped on the regulator at the factory: type number, date of manufacture, spring range, orifice size,
maximum inlet pressure, maximum operating outlet pressure and outlet pressure which may damage regulator parts.
Available Configurations
See Table 1
Operating Temperature (TS)(1)(2)
According to PED Standards:
All Types: -4 to 150°F / -20 to 66°C
Non-PED:
All Types: -20 to 150°F / -29 to 66°C
Body Sizes, End Connection Styles and
Pressure Rating(1)
See Table 4
Pressure Registration
Internal or External
Maximum Inlet Pressures(1)
Emergency: 175 psig / 12.1 bar
Operating: See Table 2
Approximate Weights
With Threaded Body
Type CS400: 9 lbs / 4 kg
Type CS403: 18.5 lbs / 8 kg
Type CS404: 11.2 lbs / 5 kg
With Flanged Body
Add 8.6 lbs / 4 kg to weights listed
Operating Pressure Ranges
Regulator: See Table 5
Integral Monitor Module: See Table 6
Slam-shut Module: See Tables 7 and 8
(1)
Maximum Outlet Pressures(1)
Emergency (Casing): 25 psig / 1.7 bar
To Avoid Internal Parts Damage:
5 psig / 0.34 bar over set pressure
Operating: 5.5 psig / 0.38 bar
PED Conformity Statement and Information
The CS400 Product Series is in conformity with the
Pressure Equipment Directive PED 97/23/EC.
The exception to this previous statement is the
Type CS403 which is not yet certified to conform
with the PED Directive.
Pressure regulator does not require any
supplementary upstream safety accessory for
protection against overpressure compared with its
design pressure PS, when upstream reducing
station is sized for a max downstream incidental
MIPd <= 1.1 PS.
Flow Coefficients and Orifice Sizes
See Table 2
IEC Sizing Coefficients
See Table 2
Spring Case Vent Connection
1 NPT
1. The pressure/temperature limits in this Instruction Manual and any applicable standard or code limitation should not be exceeded.
2. Product has passed Emerson™ testing for lockup, relief start-to-discharge and reseal down to -40 degrees.
Table 3. PED Information
TYPE
DESCRIPTION
PED CATEGORY
CS400
Base regulator
I
CS404
Regulator with Slam-Shut Module
IV
European EN Reference Standards
EN 334, EN 14382
FLUID GROUP
Groups 1 and 2 according to PED 97/23/EC, 1st and 2nd family gas according to
EN 437 or other gases (compressed air, nitrogen).
The gas must be non-corrosive, clean (filtration on inlet side necessary) and dry.
3
CS400 Series
relief valve sPRING
relief valve stem
relief sPRING
relief seat
Pressure Retaining PLUG
(DO NOt REMOVE WHILE UNIT
IS PRESSURIZED)
M1060
INLET PRESSURE
OUTLET PRESSURE
ATMOSPHERIC PRESSURE
Figure 2. Type CS400IR Internally Registered Regulator with Internal Relief Operational Schematic
Table 4. Body Sizes, Material, End Connections and Pressure Ratings
BODY MATERIAL
Gray Cast Iron
Ductile Iron
Steel
INLET SIZE
OUTLET SIZE
1-1/4
1-1/4
1-1/2
2
NPS 2 / DN 50
1-1/4
1-1/2
2
1-1/4
1-1/2
2
1-1/4
1-1/2
1-1/2
2
NPS 2 / DN 50
1-1/4
1-1/2
2
1-1/4
1-1/2
2
NPS 2 / DN 50
NPS 2 / DN 50
1-1/4
1-1/2
1-1/4
1-1/2
1-1/4
1-1/2
1-1/4
1-1/2
END CONNECTION
FACE-TO-FACE DIMENSION
In.
mm
NPT
CL125 FF
NPT
Rp
CL125 FF / CL150 FF
PN 10/16
NPT
Rp
4.5
114
5
10
4.5
4.5
5
4.5
4.5
5
10
10
4.5
4.5
4.5
4.5
127
254
114
114
127
114
114
127
254
254
114
114
114
114
BODY PRESSURE RATING
psig
bar
175
12.1
290
20.0
232
16.0
290
20.0
Table 5. Outlet Pressure Ranges
type
CS400,
CS403 and
CS404
4
OUTLET PRESSURE RANGE
PART NUMBER
SPRING
COLOR
9 to 12
GE30198X012
4.5 to 6.5
11 to 16
6 to 8
In. w.c.
mbar
3.5 to 5
spring wire diameter
spring free length
in.
mm
in.
mm
Red
0.098
2.49
4.18
106
GE30195X012
Purple
0.080
2.03
4.32
110
15 to 20
GE30188X012
Gold
0.108
2.74
4.18
106
7.5 to 11
19 to 27
GE30189X012
Blue
0.110
2.79
4.40
112
10 to 14
25 to 35
GE30224X012
Unpainted
0.110
2.79
4.40
112
12 to 19
30 to 47
GE30196X012
Green
0.112
2.85
4.70
119
18 in. w.c. to 1 psig
45 to 69
GE30225X012
Orange
0.120
3.05
4.94
125
1 to 2 psig
69 to 138
GE30190X012
Black
0.140
3.56
4.66
118
2 to 5.5 psig
138 to 380
GE30197X012
Yellow
0.172
4.37
4.42
112
CS400 Series
Table 6. Type CS403 Regulator and Integral Monitor Outlet Pressure Ranges
PRIMARY REGULATOR
Setpoint
Spring Part
Number
In. w.c.
mbar
4
10
GE30198X012
5
12
GE30195X012
7
17
GE30188X012
11
27
GE30189X012
14
35
GE30224X012
18
45
GE30196X012
1 psig
69
GE30225X012
2 psig
138
GE30190X012
3 psig
207
GE30197X012
4 psig
276
GE30197X012
5 psig
345
GE30197X012
tYPE
CS403
INTEGRAL MONITOR
Spring Range
Spring Part
Number
In. w.c.
mbar
Setpoint(1)
In. w.c.
mbar
Spring
Color
Red
Purple
Gold
Blue
Unpainted
Green
Orange
Black
Yellow
Spring
Color
14
35
GE30189X012
12 to 21
30 to 52
Blue
21
52
GE30196X012
18 to 30
45 to 75
Green
1 psig
1.5 psig
2.5 psig
3.5 psig
5 psig
6 psig
69
103
172
241
345
414
GE30225X012
GE30190X012
GE30190X012
GE35081X012
GE30192X012
GE33121X012
26 to 40
1.4 to 2.9 psig
1.4 to 2.9 psig
2.6 to 3.7 psig
3.6 to 6 psig
5.1 to 7.5 psig
65 to 99
97 to 200
97 to 200
179 to 255
248 to 414
352 to 517
Orange
Black
Black
Purple
Dark Blue
Red
1. Integral Monitor setpoints shown represent the minimum setpoint difference between the Integral Monitor and the Primary regulator. Higher monitor setpoints can be chosen, e.g., for
Primary regulator setpoint of 7 in. w.c. / 17 mbar, the Integral Monitor can also be set at 14, 21 in. w.c., 1 psig / 35, 52, 69 mbar or higher.
Table 7. Type CS404 Regulator and Slam-shut OPSO Pressure Ranges
slam-shut device
Overpressure Shutoff (OPSO)
REGULATOR
Setpoint
tYPE
In. w.c.
4
5
7
11
14
0.65 psig
0.72 psig
1 psig
1.5 psig
2 psig
3 psig
4 psig
5 psig
5.5 psig
CS404
Spring Range
mbar
10
12
17
27
35
45
50
69
103
138
207
276
345
380
Factory Setpoint(1)
In. w.c.
3.5 to 5
4.5 to 6.5
6 to 8
7.5 to 11
10 to 14
0.45 to 0.7 psig
mbar
9 to 12
11 to 16
15 to 20
19 to 27
25 to 35
30 to 47
0.65 to 1 psig
45 to 69
1 to 2 psig
69 to 138
2 to 5.5 psig
138 to 380
In. w.c.
18
19
21
0.9
1.1
1.4 psig
1.6 psig
2.5 psig
3.0 psig
3.5 psig
6.3 psig
7.3 psig
8.3 psig
8.8 psig
Spring Range
mbar
45
47
52
62
75
96
112
172
207
241
434
503
572
606
In. w.c.
mbar
Spring
Part Number
12 to 25
30 to 60
GF02168X012
0.58 to 1.6 psig
40 to 110
GF02169X012
30 to 44
75 to 110
GF02170X012
1.4 to 4.1 psig
95 to 280
GF02171X012
3.2 to 11 psig
220 to 760
GF02173X012
1. For Types CS404IT and CS404ET equipped with Token Relief, if Non-Factory slam-shut OPSO setpoints are specified, they must not encroach on the Token Relief Start-to-Discharge
values provided in Table 4 of the CS400 Bulletin.
Table 8. Type CS404 Regulator and Slam-shut OPSO and UPSO Pressure Ranges
REGULATOR
tYPE
CS404
Setpoint
Spring Range
psig
mbar
slam-shut device
Overpressure Shutoff (OPSO)
Underpressure Shutoff (UPSO)
Factory
Factory
Range
Range
Spring Part
Spring Part
Setpoint
Setpoint(1)
Number
Number
psig
mbar
psig
mbar
psig
mbar
psig
mbar
psig
mbar
0.51
35
0.36 to 0.51 25 to 35
1.1
75
0.65
45
0.45 to 0.70 30 to 48
1.4
96
0.72
50
1
69
1.5
103
2
138
3
207
4
276
5
345
5.5
380
0.65 to 1
45 to 69
1 to 2
69 to
138
2 to 5.5
138 to
380
1.6
112
2.5
172
3.0
207
3.5
241
6.3
434
7.3
503
8.3
572
8.8
606
0.73 to 1.9
50 to 130
GF02168X012
1.4 to 3.9
97 to 270
GF02169X012
2.2 to 5.5
3.8 to 8.7
150 to 380 GF02170X012
262 to 600 GF02171X012
5.8 to 16 400 to 1100 GF02172X012
0.32
22
0.4
30
0.4
30
0.58
40
0.73
50
1
69
1.75
121
2
140
2.9
200
3.6
250
0.14 to
10 to 75 T14169T0012
1.1
0.36 to
2.3
25 to
159
1.5 to
7.3
100 to
FA142869X12
500
T14170T0012
1. For Types CS404IT and CS404ET equipped with Token Relief, if Non-Factory slam-shut OPSO setpoints are specified, they must not encroach on the Token Relief Start-to-Discharge
values provided in Table 4 of the CS400 Bulletin.
5
CS400 Series
MONITOR
CONTROL
SPRING
MONITOR
ADJUSTING
SCREW
VALVE STEM
ADJUSTING
SCREW
CONTROL SPRING
GUIDED
STEM
MONITOR DISk
RELIEF
VALVE
SPRING
OPENING
SPRING
VALVE Disk
MONITOR LEVER
EXTERNAL
CONTROL
line PLUG
EXTERNAL CONTROL
LINE PLUG
(DO NOt REMOVE
WHILE UNIT IS
PRESSURIZED)
LEVER
MONITOR ORIFICE
PUSHER POST ASSEMBLY
oRIFICE
INTEGRAL MONITOR
Primary Regulator
M1061
Figure 3. Type CS403 Internally Registered Primary Regulator with Internally Registered Integral Monitor Operational Schematic
UPSO ADJUSTING
SCREW
ADJUSTING
SCREW
UPSO spring
OPSO ADJUSTING
SCREW
SLAM-SHUT
ORIFICE
OPSO SPRING
SLAM-SHUT
VENT
CONTROL SPRING
ORIFICE
RELIEF
SPRING
RESET KNOB
SLAM-SHUT DISk
VALVE STEM
DISk
TyPe VSX4 SlaM-ShuT Module
LEVER
PUSHER
POST
PRIMaRy RegulaToR
M1063
INLET PRESSURE
OUTLET PRESSURE
ATMOSPHERIC PRESSURE
Figure 4. Type CS404ET Externally Registered Regulator with Slam-shut Operational Schematic
6
EXTERNAL
CONTROL LINE
CONNECTION
(SENSE line)
CS400 Series
Principle of Operation
Type CS400 Base Regulator Operation
Refer to Figure 2. When downstream demand
decreases, the pressure under the diaphragm
increases. This pressure overcomes the regulator
setting (which is set by the regulator control spring).
Through the action of the pusher post assembly, lever
and valve stem, the valve disk moves closer to the
orifice and reduces gas flow. If demand downstream
increases, pressure under the diaphragm decreases.
Spring force pushes the pusher post assembly
downward, the valve disk moves away from the
orifice and the gas flow increases downstream as the
regulator opens in response to the decreased pressure
underneath the diaphragm.
The Type CS400IR regulator includes an internal
relief valve for overpressure protection. If the
downstream pressure exceeds the regulator setting
by 7 to 28 in. w.c. / 17 to 69 mbar (depending on the
main spring used), the relief valve opens and excess
gas is vented through the stabilizer vent in the upper
spring case.
The Types CS400IT and CS400ET provide a low
capacity/token relief. Token relief provides relief
from minor overpressure caused by nicks or dents
on the orifice or by thermal expansion of gas in the
downstream line. Token relief also provides a token
or signal, in the form of odor, that an overpressure
situation is occurring.
control by the primary regulator, the integral monitor will
assume control and regulate the flow to the downstream
system. See the Type TM600 Instruction Manual for
additional details of operation.
If token relief is present, it will relieve a small amount of
gas to the atmosphere as an indication that the Integral
monitor is controlling the downstream pressure.
Type CS404 Slam-shut Operation
The Type VSX4 slam-shut module on the Type CS404
regulator is a fast acting shut-off device that provides
overpressure (OPSO) or over and underpressure
(OPSO / UPSO) protection by completely shutting
off the flow of gas to the downstream system. See
Tables 7 and 8 for guidance regarding the typical
setpoints of the regulator and associated OPSO
and UPSO setpoints. The Type VSX4’s actions
are independent of the Type CS404 regulator and
of variations to the inlet pressure. The Type VSX4
provides the option of internal or external downstream
pressure registration. External registration requires a
downstream sensing line. See Figure 7 for guidance
regarding installation of the downstream control line.
Type CS403 Integral Monitor Operation
The Type VSX4 shut-off disk is normally in the open
(reset) position, see Figure 4. If the downstream
pressure below the slam-shut diaphragm increases (or
decreases) until it reaches the slam-shut setpoint, this
diaphragm moves upward (or downward) to release
the trip mechanism which allows the spring force on
the stem to push the disk against the seat, shutting off
all gas flow. To reset the slam shut after gas has been
shutoff, refer to Type VSX4 Instruction Manual for
additional details.
Type CS403 combines the operation of a conventional
two-regulator wide-open monitor set into one body, see
Figure 3. The Integral True-MonitorTM is installed on the
inlet side of the body and serves to throttle flow and
maintain an acceptable downstream pressure in the case
where the Primary regulator fails to regulate downstream
pressure. During normal operation the Integral Monitor
is in a wide-open state as its setpoint is set higher than
the primary regulator. See Table 6 for guidance regarding
the setpoints of the regulator and associated integral
monitor sets. If the downstream pressure should rise to
the setpoint of the internal monitor due to loss of pressure
In order for the Underpressure Shutoff (UPSO) of
any slam-shut to be triggered, the downstream pipe
pressure must drop below the UPSO setpoint.
In the case of a downstream line break, numerous
factors can prevent the downstream pipe pressure from
decreasing below the slam-shut UPSO setpoint. These
factors include the distance of pipe to the break, the
diameter of the pipe, size of the break and the number
of restrictions, such as valves, elbows and bends,
downstream of the regulator and/or slam-shut device.
Due to these factors additional protections should be
installed to stop flow in the event of a line break.
7
CS400 Series
protect vent pipe
with rain cap
CS400 SERIES
regulator
NPS 2 / dn 50
type 289h
relief valve
Regulator Vent
Pointed Downward
Figure 5. CS400 Series Regulator Installed with the Vent Pointed Downward and
with a Type 289H Relief Valve for High Capacity Relief
Installation and Overpressure
Protection
!
Warning
Personal injury or system damage
may result if this regulator is installed,
without appropriate overpressure
protection, where service conditions
could exceed the limits given in the
Specifications section and/or
regulator nameplate.
Regulator installations should
be adequately protected from
physical damage.
All vents should be kept open to permit
free flow of gas to the atmosphere.
Protect openings against entrance of
rain, snow, insects or any other foreign
material that may plug the vent or vent
line. On outdoor installations, point the
spring case vent downward to allow
condensate to drain (see Figures 5
through 7).
8
This minimizes the possibility of freezing
and of water or other foreign materials
entering the vent and interfering with
proper operation.
For the Type CS403 with the Integral
Monitor or the Type CS404 with
slam shut, point the vents of both
the Primary Regulator and Integral
Monitor or slam shut downward to allow
condensate to drain. From the factory,
the Integral Monitor or slam shut will
always point in the same direction as
that of the Primary Regulator.
Under enclosed conditions or indoors,
escaping gas may accumulate and be
an explosion hazard. In these cases,
the vent should be piped away from the
regulator to the outdoors.
CS400 Series
caution
The CS400 Series regulators have an
outlet pressure rating lower than their
inlet pressure rating. If actual inlet
pressure can exceed the outlet pressure
rating, outlet overpressure protection
is necessary. However, overpressuring
any portion of the regulators beyond
the limits in Specifications section may
cause leakage, damage to regulator
parts or personal injury due to bursting
of pressure-containing parts.
Some type of external overpressure
protection should be provided to the
CS400 Series if inlet pressure will be
high enough to damage downstream
equipment. Common methods of
external overpressure protection include
relief valves, monitoring regulators, shut
off devices and series regulation.
If the regulator is exposed to an
overpressure condition, it should be
inspected for any damage that may
have occurred. Regulator operation
below these limits does not preclude
the possibility of damage from external
sources or from debris in the pipeline.
General Installation Instructions
Before installing the regulator,
• If needed, a support may be used under the piping
and regulator/slam-shut body to avoid excessive
pressure force on the regulator/slam shut.
Installation Location
• The installed regulator should be adequately protected from vehicular traffic and damage from other external sources.
• Install the regulator with the vent pointed vertically down, see Figures 5 through 7. If the vent cannot be installed in a vertically down position, the regulator must be installed under a separate protective cover. Installing the regulator with the vent down allows condensation to drain, minimizes the entry of water or other debris from entering the vent and minimizes vent blockage from freezing precipitation.
• Do not install the Types CS400, CS403 or CS404 in a location where there can be excessive water accumulation or ice formation, such as directly beneath a downspout, gutter or roof line of building. Even a protective hood may not provide adequate protection in these instances.
• Install the Regulator so that any gas discharge through the vent or vent assembly is over 3 ft /
0.91 meters away from any building opening.
Regulators Subjected to Heavy
Snow Conditions
• Check for damage, which might have occurred
during shipment.
Some installations, such as in areas with heavy
snowfall, may require a hood or enclosure to protect
the regulator from snow load and vent freeze over.
• Check for and remove any dirt or foreign material,
which may have accumulated in the regulator body.
Downstream Control Line Installation
• Blow out any debris, dirt or copper sulfate in the copper tubing and the pipeline.
• Apply pipe compound to the male threads of the pipe before installing the regulator.
• Make sure gas flow through the regulator is in the same direction as the arrow on the body. “Inlet” and “Outlet” connections are clearly marked.
• When designing a pressure reducing station using
a CS400 Series regulator, make an analysis if it is
necessary to take into account the effects of wind,
snow and temperature to avoid unnecessary load
and movement to the flanges of the equipment.
A CS400 Series regulator with an EN or ET in the
type number has a blocked throat, an O-ring stem
seal and a 3/4 NPT control line tapping in the lower
diaphragm casing. A regulator with a downstream
control line is used for monitoring installations or
other applications where there is other equipment
installed between the regulator and the pressure
control point.
For Types CS400ET and CS400EN regulators,
connect downstream control line tubing to the lower
casing and run the tubing approximately 20 in. /
508 mm downstream. For best results, the outer
diameter of the control line tubing should be 3/8 in. /
9.5 mm or larger.
9
CS400 Series
primary regulator
Upstream Block Valve
20 in. / 508 mm
downstream Block Valve
CS400 Series
December 2008
M1062
Type CS404ET with Slam-Shut Module,
External Pressure Registration, and Token Relief
integral monitor
Figure 6. Type CS403 Downstream Control Line Connection
Primary REgulator
upstream
block valve
20 in. / 508 mm
downstream
block valve
M1063
INLET PRESSURE
OUTLET PRESSURE
ATMOSPHERIC PRESSURE
slam shut
Figure 7. Type CS404 Downstream Control Line Connection
10
CS400 Series
Downstream Control Line Installation with
Integral Monitor
Refer to Figure 6. When installing the Types CS403ET
and CS403EN regulators, connect downstream control
line tubing to the lower casing of the Primary Regulator
and run the tubing approximately 20 in. / 508 mm
downstream. Connect a second, separate downstream
control line tubing to the lower casing of the Integral
Monitor and run the tubing approximately 20 in. /
508 mm downstream. For best results, the outer
diameter of the control line tubing for both the Primary
Regulator and the Integral Monitor should be 3/8 in. /
9.5 mm or larger.
Downstream Control Line Installation
with Slam shut
Refer to Figure 7. When installing the Types CS404ET
and CS404EN regulators, connect downstream control
line tubing to the lower casing of the Regulator and run
the tubing approximately 20 in. / 508 mm downstream.
Connect a second, separate downstream control line
tubing to the lower casing of the slam shut and run the
tubing approximately 20 in. / 508 mm downstream.
For best results, the outer diameter of the control line
tubing for the regulator should be 3/8 in. / 9.5 mm or
larger. The outer diameter of the control line tubing for
the slam shut should be 1/4 in. / 6.4 mm or larger.
Installation with External Overpressure
Protection
If the regulator is used in conjunction with a Type 289H
relief valve, it should be installed as shown in Figure 5.
The outside end of the vent line should be protected with
a rainproof assembly. The Type 289H should be set
10 in. w.c. / 25 mbar higher than the outlet pressure
setting of the regulator, up to 30 in. w.c. / 75 mbar
outlet pressure. For pressure greater than this, set the
Type 289H 0.75 psi / 0.05 bar higher than the outlet
pressure setting of the regulator.
Vent Line Installation
The CS400 Series regulators have a 1 NPT
screened vent opening in the spring case. If
necessary to vent escaping gas away from the
regulator, install a remote vent line in the spring
case tapping. Vent piping should be as short and
direct as possible with a minimum number of bends
and elbows. The remote vent line should have the
largest practical diameter. Vent piping on regulators
with internal relief must be large enough to vent
all relief valve discharge to atmosphere without
excessive backpressure and resulting excessive
pressure in the regulator.
The Type CS403 offers an optional token relief. This
optional low capacity relief is located in the spring
case of the Primary Regulator. If necessary to vent
escaping gas away; install a remote vent line in the
spring case tapping of the Primarily Regulator as
described above.
Periodically check all vent openings to be sure that
they are not plugged.
CS400 Series Outlet pressure ranges are shown in
Table 5. Outlet pressure greater than 5 psi / 0.34 bar
above setpoint may damage internal parts such as
the diaphragm head and valve disk. The maximum
emergency (casing) outlet pressure is 25 psig /
1.7 bar.
Startup
caution
Pressure gauges should always be
used to monitor downstream pressure
during Startup.
With the downstream system depressurized, use the
following procedure to startup the regulator:
1. Check to see that all appliances are turned off.
2. Slowly open the upstream shut-off valve.
3. Check inlet and outlet pressure for correct values.
4. Check all connections for leaks.
5. Turn on utilization equipment and recheck
the pressures.
Adjustment
Note
For Types that include the Integral
Monitor module, refer to the instruction
manual for Type TM600 Integral Monitor
for Adjustment and Maintenance of the
Integral Monitor. For Types that include
the slam-shut module, refer to the
instruction manual for Type VSX4
slam shut for Adjustment and
Maintenance of the slam shut.
11
CS400 Series
The range of allowable pressure settings
is stamped on the nameplate. If the
required setting is not within this range,
substitute the correct spring (as shown
in Table 5). If the spring is changed,
change the nameplate to indicate the
new pressure range.
of the regulator and/or slam-shut device.
Due to these factors additional protections
should be installed to stop flow in the
event of a line break.
A pressure gauge should always be used to monitor
downstream pressure while adjustments are being made.
Equipment installed downstream the
Type VSX slam shut device can be
damaged if the following procedure
for resetting the Type VSX slam shut
device is not followed. This equipment
includes the integral Type VSX
regulator configurations.
1. Remove the closing cap (key 60, Figure 8).
2. To increase the outlet setting, turn the adjusting
screw (key 65, Figure 8) clockwise. To
decrease the outlet setting, turn the adjusting
screw counterclockwise.
3. Replace the closing cap.
CS400 Series with Integral Monitor Module
When adjusting the Primary Regulator and Integral
Monitor for operation, ensure that the pressure
differences between the Primary Regulator and the
integral monitor shown in Table 6 are observed. For
example, if the Primary Regulator setpoint is set at
7 in. w.c. / 17 mbar, than the Integral Monitor should
be set at a minimum of 14 in. w.c. / 35 mbar or higher.
To test the Integral Monitor operation, the Primary
regulator setpoint must be adjusted above the Integral
Monitor’s setpoint to simulate a failure of the primary
regulator. If the spring range of the Primary Regulator
is sufficiently high, it can simply be adjusted above the
Integral Monitor’s setpoint by following step 2 above.
Otherwise, a different spring with a setpoint higher
than the Integral Monitor’s setpoint must be installed to
check the operation of the Integral Monitor.
CS400 Series with Slam-shut Module
When adjusting the primary regulator and slam shut
for operation, reference Tables 7 and 8 for the OPSO
and UPSO setpoints of the slam shut for the given
regulator spring ranges.
!
Warning
In the case of a downstream line break,
numerous factors affect the capability to
evacuate gas from the pipeline. These
factors include the distance of pipe to the
break, the diameter of the pipe, size of the
break and the number of restrictions, such
as valves, elbows and bends, downstream
12
caution
Step 1:
To properly reset the Type VSX slam shut after it
has been tripped to the closed position, a flat-head
screwdriver must be inserted into the position shown
in Figure 8 on the backside of the reset button (key 30,
Figure 8).
Step 2:
The screwdriver should be slowly rotated to gradually
pull the reset button (key 30) away from the Type VSX
device. This slow movement allows for a slow bleed
of the pressure across the Type VSX slam shut’s disk
and seat area. The operator should be able to hear the
pressure bleeding through the system.
Step 3:
When the pressure has equalized and the air bleeding
sound has dissipated, the reset button (key 30)
should be pulled completely away from the Type VSX
slam shut device by hand until the internal shut-off
mechanism has been re-latched.
Step 4:
Once the operator feels the click of the re-latch
occurring, the reset button (key 30) should be pushed
completely back into its original position.
Shutdown
Installation arrangements may vary, but in any
installation it is important that the valves be opened
or closed slowly and that the outlet pressure be
vented before venting inlet pressure to prevent
damage caused by reverse pressurization of the
regulator. The steps in the following page apply to the
typical installation as indicated.
CS400 Series
1. Open valves downstream of the regulator.
2. Slowly close the upstream shut-off valve.
3. Inlet pressure will automatically be released downstream as the regulator opens in response to the lowered pressure on the diaphragm.
Maintenance and Inspection
!
Warning
To avoid personal injury or equipment
damage, do not attempt any maintenance
or disassembly without first isolating
the regulator from system pressure and
relieving all internal pressure as described
in “Shutdown”.
Regulators that have been disassembled
for repair must be tested for proper
operation before being returned to
service. Only parts manufactured by
Emerson™ should be used for repairing
Fisher® regulators. Relight pilot lights
according to normal startup procedures.
Due to normal wear or damage that may
occur from external sources, this regulator
should be inspected and maintained
periodically. The frequency of inspection
and replacement of parts depends upon
the severity of service conditions or the
requirement of local, state and federal
rules and regulations.
Periodic inspection must be performed
on the Types CS403 and CS404 to ensure
that the integral monitor or slam-shut
overpressure protection modules,
respectively, protect the downsteam
system in the event of a failure to the
primary regulator. This inspection must
test that the integral monitor or slam-shut
functions as intended. The frequency of
this inspection must be at intervals not
exceeding 15 months, but at least once
each calendar year.
Disassembly to Replace Diaphragm
1. Remove the closing cap (key 60, Figure 8). Turn
the adjusting screw (key 65) counterclockwise to
ease spring compression.
2. Remove the adjusting screw (key 65) and control spring (key 38).
3. Remove hex nuts (key 16) and cap screws
(key 15). Separate the upper spring case (key 1)
from the lower casing assembly (key 9).
Note
If disassembling a CS400 Series
regulator, lift the upper spring case
straight up in order to avoid hitting the
stem (key 44).
4. Slide the diaphragm head assembly (key 55) away from the body (key 70) to unhook the pusher post (key 51) from the lever (key 10). Lift off the diaphragm head assembly (key 55).
5. For none relieving units such as the
Types CS400IN and CS400EN, unscrew the screw retainer (key 45, Figure 9) using a
5/8 in. / 16 mm wrench. The screw retainer fastens
the lower spring seat (key 43) to the pusher
post (key 51). Unscrewing the screw retainer
will separate the lower spring seat (key 43),
diaphragm head assembly (key 55) and pusher
post (key 51). For units with internal relief
such as Type CS400IR, press down on the
upper spring retainer (key 42, Figure 10) using a
9/16 in. / 14 mm box-end wrench and remove the
E-ring (key 58). Slide the upper spring retainer
(key 42), the relief spring (key 41), the lower spring
seat (key 43) and the diaphragm assembly
(key 55) off of the relief valve stem (key 44).
6. Reassemble in reverse order of the above steps.
Disassembly to Replace Valve Disk
and Orifice
1. Remove the cap screws (key 71, Figure 8) which hold the lower spring casing (key 9) to the body (key 70). Separate the lower casing (key 9) from the body.
2. Check the body O-ring (key 21) for wear and replace as necessary.
3. Examine the valve disk (key 36) for nicks, cuts and other damage. Remove the disk clip (key 37)
that holds the disk to the stem (key 11) and
replace the disk if necessary.
4. Examine the seating edge of the orifice (key 25). If it is nicked or rough, remove the orifice (key 25)
from the body (key 70) using a 1-1/16 in. /
27 mm socket wrench. Coat the threads of the
replacement orifice with a good quality lubricant
and install.
13
CS400 Series
Change to a new part when reassembling the
regulator. Coat the threads of the replacement orifice with a good quality lubricant. (If the orifice
is being replaced with a different size, update the
nameplate to state the new size and maximum
inlet pressure).
5. Reassemble the regulator in reverse order of the above steps.
Regulator Reassembly
As indicated by the square callouts in Figures 8
through 12, it is recommended that a good quality pipe
thread sealant be applied to pressure connections
and fittings and a good quality lubricant be applied
to O-rings. Also apply an anti-seize compound to the
adjusting screw threads and other areas as needed.
Key Description
Part Number
13
Lever Pin, Stainless steel
T14397T0012
14
Lever Screw (2 required), Zinc-plated steel
GE34243X012
15
Cap Screw (8 required), Steel
GE32059X012
16
Nut (8 required), Steel
GE32060X012
17
Union Ring, Aluminum
GE26590X012
18
Snap Ring, Stainless steel
T1120637022
19*
O-ring, Nitrile (NBR)
1K594906562
20
Stem Guide, Aluminum
Internal Registration (Open Throat)
External Registration (Closed Throat)
GE25384X012
GE25385X012
21*
O-ring, Nitrile (NBR)
GE45216X012
22
Pipe Plug, 3/4 NPT, Steel
Internal Registration
GE34199X012
23
Screw, External Registration, Zinc-plated steel
1E175828982
24*
O-ring, External Registration, Nitrile (NBR)
17A0960X012
25*
Orifice, Aluminum
3/16 in. / 4.8 mm
1/4 in. / 6.4 mm
5/16 in. / 7.9 mm
3/8 in. / 9.5 mm
1/2 in. / 13 mm
5/8 in. / 16 mm
3/4 in. / 19 mm
T1122409012
T12522T0012
GE31233X012
T1122309012
T1122009012
GE31234X012
T1121909012
26*
OPP Orifice, 3/4 in. / 4.8 mm
True-MonitorTM, Aluminum
Type VSX4, Brass
GE30003X012
GE28684X012
27*
O-ring, Nitrile (NBR)
Type CS400 (1 required)
Type CS403 (2 required)
Type CS404 (2 required)
10A3802X022
10A3802X022
10A3802X022
28*
O-ring, Nitrile (NBR)
GE01439X012
36*
Valve Disk, Aluminum/Nitrile (NBR)
37
Disk Clip, Stainless steel
GE33771X012
38
Control Spring, Music Wire or Stainless steel
3.5 to 5 in. w.c. / 9 to 12 mbar, Red
4.5 to 6.5 in. w.c. / 11 to 16 mbar, Purple
6 to 8 in. w.c. / 15 to 20 mbar, Gold
7.5 to 11 in. w.c. / 19 to 27 mbar, Blue
10 to 14 in. w.c. / 25 to 35 mbar, Unpainted
12 to 19 in. w.c. / 30 to 47 mbar, Green
18 to 28 in. w.c. / 45 to 69 mbar, Orange
1 to 2 psig / 69 to 138 mbar, Black
2 to 5.5 psig / 138 to 380 mbar, Yellow
GE30198X012
GE30195X012
GE30188X012
GE30189X012
GE30224X012
GE30196X012
GE30225X012
GE30190X012
GE30197X012
41
R.V. Spring, Stainless steel
GE30194X012
42
Spring Retainer, Aluminum GE27296X012
43
Spring Seat, Zinc-plated steel
Non-Relief
Standard and Token Relief
GE27327X012
GE28947X012
44
Valve Stem, Aluminum
Standard Relief
Token Relief
GE27297X012
GE30895X012
45
Diaphragm Screw Retainer for
Non-Relief, Zinc-plated steel
GE30887X012
47*
Adjustable Upper Seat
Token Relief, Aluminum
GE33332X012
Parts Ordering
The type number, orifice size, spring range and date of
manufacture are stamped on the nameplate. Always
provide this information in any correspondence with
your local Sales Office regarding replacement parts or
technical assistance.
When ordering replacement parts, reference the key
number of each needed part as found in the following
parts list. Separate kit containing all recommended spare
parts is available.
Parts List
Key Description
Part Number
Spare Parts (Repair Parts Kit include
keys 19, 21, 27, 36, 55 and 62)
Type CS400 RCS400X0012
Type CS403 RCS403X0012
Type CS404 RCS404X0012
GE26497X012
1
Spring Case, Aluminum
2
Vent Screen, Stainless steel
T1121338982
3
Retaining Ring, Zinc-plated steel
T1120925072
4
Stabilizer Guide, Stainless steel
GE27061X012
5
Stabilizer
GE27063X012
6
Stabilizer Spring, Stainless steel
GE35010X012
7
Stabilizer Retaining Ring, Zinc-plated steel
GE27024X012
8
Stabilizer Screw (3 required), Zinc-plated
GE29724X012
9
Lower Casing, Aluminum
GE24289X012
10
Lever, Steel
GE27194X012
48
Token Restrictor Plate, Zinc-plated steel
GE28948X012
11
Stem, Aluminum
GE27402X012
51
12*
O-ring, External Registration, Nitrile (NBR)
Pusher Post, Aluminum
Non-Relief
Standard and Token Relief
ERAA00875A0
ERAA00876A0
* Recommended spare part.
14
GE24555X012
1E472706992
CS400 Series
Key Description
Part Number
Key Description
Part Number
53
Pusher Post Pin, Stainless steel
GE29761X012
70
54
Roller Pin, Brass
GE27060X012
Steel
55*
Diaphragm Head Assembly, Steel/Nitrile (NBR)
GE31248X012
1-1/4 NPT
GE26465X022
55a
Diaphragm
-----------
1-1/2 NPT
GE26466X022
55b
Diaphragm Head
-----------
Rp 1-1/4
GE26469X022
56
Retaining Ring, Pusher Post Pin, Steel
GE33772X012
Rp 1-1/2
GE26470X022
57
Slotted Spring Pin, Zinc-plated Steel
GE33668X012
71
Cap Screw, Steel (2 required)
GE32061X012
58
E-Ring (Standard Relief)
GE32969X012
72
Pipe Plug, 1/4 NPT
60
Closing Cap, Aluminum
GE29244X012
Steel
1C333528992
62*
O-ring, Nitrile (NBR)
T10275X0012
Stainless steel
1C3335X0012
65
Adjusting Screw, Aluminum
GE27828X012
74
Blanking Plug, Aluminum
GE31255X012
70
Globe Valve Body
75*
Metric O-ring, Nitrile (NBR)
GF03442X012
76
Half Flange, Plated steel (2 required)
GF01942X012
Gray Cast iron
Globe Valve Body (continued)
1-1/4 NPT
GE26446X012
77*
Metric O-ring, Nitrile (NBR)
GF03443X012
1-1/4 x 1-1/2 NPT
GE44458X012
80
Cap Screw, Steel (4 required)
GE38176X012
1-1/2 NPT
GE26448X012
90
Nameplate
-----------
2 NPT
GE26459X012
91
Warning Label
-----------
93
Information Label
-----------
94
Overlay Label
-----------
95
Grommet, Nitrile (NBR)
GE35358X012
GG05787X012
Flange
NPS 2 / DN 50, CL125 FF
GE26460X012
Ductile Iron
1-1/4 NPT
GE26465X012
96 Slip Disk, Stainless steel
1-1/2 NPT
GE26466X012
100
Lockwire, Stainless steel
2 NPT
GE26467X012
101
Slotted Spring Pin, Plated steel
Rp 1-1/4
GE26469X012
Rp 1-1/2
GE26470X012
Rp 2
GE26471X012
NPS 2 / DN 50, CL125 / CL150 FF
GE26480X012
NPS 2 / DN 50, PN 10/16 GE26481X012
T14088T0012
GE32724X012
* Recommended spare part.
15
CS400 Series
38
55
L1
L2
L1
L1
62
60
65
L1
100
96
torque:
15 to 30 in. LBS /
1.7 to 3.4 N•m
4
19
6
L2
5
7
20
37
L2
28
S
72
L1
95
8
torque:
15 to 30 in. LBS /
1.7 to 3.4 N•m
25
51
torque:
35 to 45 ft-lbs /
47 to 61 n•m
L2
27
36
21
18
11
13
14
10
torque:
15 to 30 in. Lbs /
1.7 to 3.4 N•m
L2
MAIN VALVE
ERAA03738
apply lubricant (L) / sealanT (S)(1):
L1 = ANTI-SEIZE LUBRICANT
l2 = Silicone grease
S = THREAD SEALANT
1. Lubricants and sealant must be selected such that they meet the temperature requirements.
Figure 8. CS400 Series Regulator Assemblies
16
L2
22
S
CS400 Series
70
71
torque:
10 to 13 ft-lbs /
14 to 18 N•m
2
17
3
15
torque:
63 to 90 IN. lbs /
7 to 10 N•m
1
9
16
ERAA03738
Figure 8. CS400 Series Regulator Assemblies (continued)
torque:
50 to 70 in. lbs /
5.6 to 7.9 N•m
44
47
55A
41
A 55B
43
55B
token relief
45
53
51
56
57
standard relief
56
57
ERAA03738
41
53
51
53
42
54
43
44
58
55A
54
torque:
50 to 70 in. LBS /
5.6 to 7.9 N•m
torque:
50 to 70 in. lbs /
5.6 to 7.9 N•m
A 55B
51
56
55A
43
48
57
A
L1
non relief
54
56
Apply Lubricant (l) / adhesive (A)(1):
L1 = ANTI-SEIZE LUBRICANT
A = ADHESIVE
1. Lubricants and adhesive must be selected such that they meet the temperature requirements.
Figure 9. CS400 Series Diaphragm and Stem Assemblies
17
CS400 Series
B
A
TORQUE:
15 TO 30 IN. lbs /
1.7 TO 3.4 N•m
L2
12
24
23
L2
20
ERAA03738
20
11
11
external registration
internal registration
Figure 10. CS400 Series Registration Options
torque:
35 to 45 ft-lbs /
47 to 61 N•m
L2
26
L2
L2
27
70
27
L1
25
true-monitor assembly
ORIFICE AND TRUE-MONITORTM ASSEMBLY
Apply LUBRICANT (L) :
L1 = ANTI-SEIZE LUBRICANT
l2 = Silicone grease
(1)
1. Lubricants must be selected such that they meet the temperature requirements.
Figure 11. CS400 Series Slam shut and Integral Monitor Modules
18
torque:
35 to 45 ft-lbs /
47 to 61 N•m
101
CS400 Series
torque:
35 to 45 ft-lbs /
47 to 61 N•m
L1
L2
26
27
70
L2
L1
27
25
torque:
35 to 45 ft-LBS /
47 to 61 N•m
101
slam-shut assembly
ORIFICE AND SLAM-SHUT ASSEMBLY
Figure 11. CS400 Series Slam shut and Integral Monitor Modules (continued)
72
80
70
S
torque:
10 to 13 ft-LBS /
14 to 18 N•m
gray cast iron
74
76
77
75
L2
L2
70
ductile iron or steel
apply lubricant (L) / sealanT (S)(1):
L1 = ANTI-SEIZE LUBRICANT
l2 = Silicone grease
S = THREAD SEALANT
1. Lubricants and sealant must be selected such that they meet the temperature requirements.
Figure 12. Gray Cast Iron, Ductile Iron and Steel Body Configurations
19
CS400 Series
Industrial Regulators
Natural Gas Technologies
TESCOM
Emerson Process Management
Regulator Technologies, Inc.
Emerson Process Management
Regulator Technologies, Inc.
Emerson Process Management
Tescom Corporation
USA - Headquarters
McKinney, Texas 75070 USA
Tel: +1 800 558 5853
Outside U.S. +1 972 548 3574
USA - Headquarters
McKinney, Texas 75070 USA
Tel: +1 800 558 5853
Outside U.S. +1 972 548 3574
USA - Headquarters
Elk River, Minnesota 55330-2445, USA
Tels: +1 763 241 3238
+1 800 447 1250
Asia-Pacific
Shanghai 201206, China
Tel: +86 21 2892 9000
Asia-Pacific
Singapore 128461, Singapore
Tel: +65 6770 8337
Europe
Selmsdorf 23923, Germany
Tel: +49 38823 31 287
Europe
Bologna 40013, Italy
Tel: +39 051 419 0611
Europe
Bologna 40013, Italy
Tel: +39 051 419 0611
Chartres 28008, France
Tel: +33 2 37 33 47 00
Asia-Pacific
Shanghai 201206, China
Tel: +86 21 2892 9499
Middle East and Africa
Dubai, United Arab Emirates
Tel: +971 4811 8100
Middle East and Africa
Dubai, United Arab Emirates
Tel: +971 4811 8100
For further information visit www.emersonprocess.com
The distinctive swirl pattern cast into every actuator
casing uniquely identifies the regulator as part of the
Fisher® brand Commercial Service Regulator family
and assures you of the highest-quality engineering,
performance, and support traditionally associated with Fisher, Tartarini™,
and Francel™ regulators. Visit www.fishercommercialservice.com to
access interactive applications.
The Emerson logo is a trademark and service mark of Emerson Electric Co. All other marks are the property of their prospective owners. Fisher is a mark owned by Fisher Controls International LLC,
a business of Emerson Process Management.
The contents of this publication are presented for informational purposes only, and while every effort has been made to ensure their accuracy, they are not to be construed as warranties or
guarantees, express or implied, regarding the products or services described herein or their use or applicability. We reserve the right to modify or improve the designs or specifications of such
products at any time without notice.
Emerson Process Management Regulator Technologies, Inc. does not assume responsibility for the selection, use or maintenance of any product. Responsibility for proper selection, use and
maintenance of any Emerson Process Management Regulator Technologies Inc. product remains solely with the purchaser.
©Emerson Process Management Regulator Technologies, Inc., 2008, 2014; All Rights Reserved