1
DVC-2000
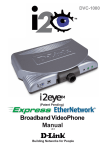
Stand-alone Videoconferencing
Over Broadband IP.
No Computer Needed
Broadband
Desktop
VideoPhone
Patent Pending
Before You Begin
•
•
Using the D-Link i2eye™ DVC-2000 VideoPhone requires a Broadband
Internet connection.
If you are sharing the Internet connection with another device (such as a
PC), you will also need a broadband router or residential gateway.
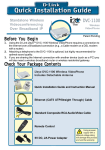
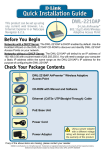
Check Your Package Contents
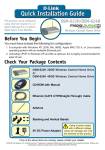
i2eye™ DVC-2000 VideoPhone
Quick Installation Guide and Instruction Manual
Ethernet (CAT5 UTP/Straight Through) Cable
Standard Composite RCA Audio/Video Cable
Standard Telephone Cable
12V DC, 1A Power Adapter
Using a power
supply with a
different voltage rating
will damage this product
and void the warranty.
If any of the above items are missing, please contact your reseller.
©2005 D-Link Systems, Inc. All rights reserved. Trademarks or registered trademarks are the property of their respective holders.
Software and specifications subject to change without notice. DVC-2000.06222005
Connecting the DVC-2000 VideoPhone
A. Place the DVC-2000 VideoPhone in a location where you can easily connect
to a phone jack, power outlet, and to your router or gateway.
B. Attach the supplied Ethernet cable (blue) to the blue colored port labeled
ETHERNET on the DVC-2000 and connect the other end to your Ethernet
network device (hub, switch, router, or broadband modem).
C. Attach the supplied standard telephone cable (grey) to a telephone wall
jack and connect the other end to the grey port labeled PHONE on the
DVC-2000.
D. Optional: If you want to use a television instead of the built in video display
screen, connect the supplied yellow and white RCA cables to the yellow
and white RCA connectors on the DVC-2000 and to the matching
audio/video jacks on the television or VCR.
Note: You must toggle the TV/LCD switch on the side on the unit if you want
to use the television output.
E. Plug the supplied AC power cable into an AC outlet and then connect the
other end to the DVC-2000.
D
B
C
2
E
Sharing a Broadband Connection
With the i2eye DVC-2000
If you are sharing your broadband connection with any other devices, use additional
Ethernet (CAT5 UTP) cables to connect your broadband equipment to a router or
residential gateway. When you have completed the steps in this Quick Installation
Guide, your connected VideoPhone should look similar to this:
Before using your D-Link DVC-2000 VideoPhone, you will want to
understand the network requirements for this device. If you are using a
residential gateway or router and sharing the broadband connection with
your DVC-2000, please read the section starting on Page 51 of the manual
included with the DVC-2000.
3
Hardware Overview
The DVC-2000 VideoPhone needs to be setup before use. There is an easy to
use Setup Wizard built into the DVC-2000 to accomplish the setup.
Video Camera
Self/Remote: Toggles between the
local camera view and the remote
camera view.
Full-Screen/Standard: Toggles
between full-screen and standard
mode display.
LCD Display
Speed Dial:
Opens up a
window with
the speed dial
list and manual
dialing options.
Cancel: Takes you
to the previous item.
Broadband: Toggles between
PSTN and Broadband modes.
Asterisk (*): Sometimes
referred to as a “star” key)
is used to enter a “.” (period
also called a “dot”.)
Numeric Keypad: Used when
numeric input is required, (e.g., a
telephone number or IP address)
lift up the receiver or press the
speakerphone button and you can
enter numbers directly.
Privacy: Used to
block video and/or
audio transmissions.
Speakerphone
Arrows: Used to move the position of
the on-screen cursor. When entering
alphanumeric information, the left arrow
key performs a backspace, deleting
the character to the left of the on-screen
cursor.
OK: Used to confirm a selection or to
bring up the on-screen keyboard.
4
Using the On-Screen Keyboard
Whenever you need to enter numbers or letters into a Setup screen, press OK
on the DVC-2000 and the on-screen keyboard appears:
Shift Key for UPPER,
lower case or shift lock
Use the arrow keys to move the cursor to the desired character. The cursor can
wrap around on the right and left side of the keyboard to assist you in “typing” a
character quickly.
To remove the keyboard from the screen highlight OK in the bottom right corner
of the keyboard window and press the OK button on the DVC-2000. The Cancel
button on the DVC-2000 can also be used to remove the keyboard from the screen
and will leave the information you typed on the screen.
5
The Setup Wizard
Press the power switch on the
back of the DVC-2000 and the
Welcome Screen appears.
Click Next
Personal Information Screen
Enter your name and phone
number (consisting of a
Country code, Area code and
Phone number.)
The phone number you
enter is one you create for
family, friends and others to
call you. You can use your
regular phone number or
make up a new one. The
Caller ID function displays
this name at the other end of
the connection. Your number
will not be visible to anyone
else.
Click Next
Note: The Country code for the United States and Canada is “1”. See
Page 68 of the DVC-2000 manual for Country codes of other countries.
6
The Setup Wizard (continued)
Network Address Screen
Choose one of the three available options that best suits your environment. If you
are not sure which option will work with your Internet connection, please contact
your ISP or network administrator for support.
Option 1: DHCP
Used when connecting
directly to a broadband
modem, router, gateway or
DHCP server that offers
dynamic IP addressing.
Click Next
Option 2: Fixed IP
Used when you are
connecting to a broadband
modem, router, or gateway
that is configured to use a
static IP address. This choice
requires the input of specific
IP address information.
Click Next
7
The Setup Wizard (continued)
DNS Screen
If you selected Fixed IP in the
Network Address screen,
you will see the screen for
setting DNS server addresses.
Only the primary DNS is
required, although entering
both a primary and secondary
is recommended.
Click Next
Option 3: PPPoE
Used when connecting directly
to a DSL modem that offers a
PPPoE connection. Your user
name and password for the
PPPoE account must be
entered in the provided fields.
Click Next
To configure a router to work with the DVC-2000, please see the
section starting on Page 51 of the DVC-2000 manual.
8
The Setup Wizard (continued)
Network Speed Screen
Select the type of broadband
Internet connection you use.
Click Next
System Restart
Click Yes
Your Setup is Complete!
9
Using the DVC-2000
The DVC-2000 offers two different operating modes, PSTN mode and Broadband
mode. PSTN Mode is the default startup mode and functions as a standard
telephone. The PSTN screen appears after you’ve completed the Setup Wizard
(as shown below). To dial, lift up the receiver or press the speakerphone button
and you can make a call as you normally would via your standard phone connection.
In PSTN mode neither party can see the party on the other end. The DVC-2000
functions solely as a standard telephone in PSTN mode with no video functionality.
To toggle between PSTN and Broadband mode, click on the Broadband button.
PSTN Mode: PSTN stands for Public Standard Telephone Network. This is the
international phone standard of transmitting analog voice data over copper wires.
In PSTN mode, your DVC-2000 functions as a standard telephone using your
standard phone line connection.
Broadband Mode: Broadband mode allows you to video conference via your
Internet connection using digital communication standards. You can connect to
anyone with a broadband connection and an i2eye™ device from anywhere in the
world.
10
Using the DVC-2000
Layout of the i2eye Broadband Screen
Status
Icons
Main
Window
Main
Settings
Buttons
Privacy
Status
Icons
Status
Message
Area
Self-View
Window
Banner
Window
When powered on and after completing the Setup Wizard, the DVC-2000 is in
PSTN Mode. To enter Broadband Mode, press the Broadband button on the
DVC-2000 and the screen above will appear. The larger Main Window displays
the self-view until a call is connected and then displays the party you are calling.
The smaller Self-View Window then displays the self-view when a call is
connected. To toggle the images that are in the Main Window and Self-View
Window, press the Self/Remote button.
For additional details on using the DVC-2000, please refer to the User Manual.
11
Techni
cal Support
echnical
You can find software updates and user documentation on the D-Link website.
D-Link provides free technical support for customers within the United States and
within Canada for the duration of the warranty period on this product.
U.S. and Canadian customers can contact D-Link technical support through our
website, or by phone.
Tech Support for customers within the United States:
D-Link Technical Support over the Telephone:
(877) 453-5465
24 hours a day, seven days a week
D-Link Technical Support over the Internet:
http://support.dlink.com
email:[email protected]
Tech Support for customers within Canada:
D-Link Technical Support over the Telephone:
(800) 361-5265
Monday to Friday 7:30am to 12:00am EST
D-Link Technical Support over the Internet:
http://support.dlink.ca
email:[email protected]