1
MA0506-EA
Operation Guide DQ-746
GENERAL GUIDE
ILLUSTRATION
INVALID
RESET
SNZ
ON
OFF
INVALID
°C/°F
RESET
SET
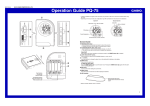
1 SNOOZE/LIGHT button
• Press this button to illuminate the display for about five seconds.
• Pressing this button while the alarm is sounding stops the alarm.
2 Alarm Mode selector
SNZ: Snooze alarm on
ON: Alarm on
OFF: Alarm off
3 + / – buttons
Use these buttons to change the alarm time or the setting that is flashing on the display.
4 °C/°F button
Press this button to toggle the temperature units between Celsius and Fahrenheit.
5 SET button
Use this button when setting the current time.
6 RESET button
Press this button to reset the clock after replacing its batteries.
• Buttons marked “INVALID” have no function.
USING THE CLOCK
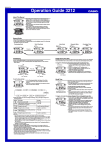
1. Press the SET button (5) to cycle through the setting screens as shown below.
°C/°F
SET
Normal Timekeeping Screen
Year Setting Screen
• A sticker is affixed to the glass of the clock when you purchase it. Be sure to remove the sticker before using the
clock.
• Depending on the clock model, its configuration may differ somewhat from that shown in the illustration.
Alarm Off
Snooze Alarm On
PM indicator
Current time
(Hour, minutes,
seconds)
Date
(month - day)
Snooze on
indicator
Month and Day
Setting Screen
Time Setting Screen
12-hour/24-hour
Timekeeping Screen
2. While the screen you want is displayed, use the + and – buttons
(3) to change the flashing digits.
• Holding down + or – changes the flashing digits at high speed.
• You can set the year in the range of 2000 to 2039. The day of the
Press – to
Press + to
week is set automatically in accordance with the date setting.
decrease
increase
• Pressing + or – while the Time Setting Screen is on the display
the flashing
the flashing
causes the seconds count to be reset to 00.
digits.
digits.
• Each press of + or – while the 12-hour/24-hour Timekeeping
Screen is on the display toggles between 12-hour and 24-hour
timekeeping.
3. After making the settings you want, use the SET button (5) to display the Normal Timekeeping Screen.
• The clock automatically returns to the Normal Timekeeping Screen if you leave a setting screen on the display for
about three minutes without performing any operation.
°C/°F
SET
Current
temperature
Day of the week
Alarm time
Alarm on indicator
1
Operation Guide DQ-746
USING THE ALARM
BATTERY REPLACEMENT
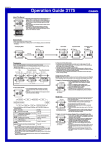
The alarm sounds when the alarm time you set is reached. You can also use the Alarm Mode selector (2) to
select the snooze alarm feature.
Replace batteries whenever the display of the clock becomes dim and difficult to read.
1. Open the battery compartment cover as shown in the illustration.
2. Remove both of the old batteries.
3. Load two new batteries. Make sure that their positive (+) and negative (–) ends face in the correct directions. If
you load batteries incorrectly, they can burst and damage the clock.
4. Press the RESET button (6). Be sure to press the RESET button (6) after replacing batteries.
5. Replace the battery compartment cover.
Setting the Alarm Time
Use the + and – buttons (3) to set the alarm time.
Pressing the + and – buttons (3) causes the alarm time to appear
in place of the date on the display.
• Holding down + or – changes the digits at high speed.
Turning the Alarm On and Off
Press – to
change the
alarm time
setting.
°C/°F
Press + to
change the
alarm time
setting.
SET
Use the Alarm Mode selector (2) on the side of the clock to turn the alarm on and off, and to select the snooze
feature.
Description
Alarm Mode selector
The alarm sounds at the preset time for one minute, and up to seven more times every
five minutes thereafter. Even if you stop the alarm by pressing the SNOOZE/LIGHT button
(1), the alarm sounds again five minutes later.
SNZ
• The indicator
ON
Battery precautions
• Keep batteries out of the reach of small children. If a battery is accidentally swallowed, contact your physician
immediately.
• Be sure to load the batteries with their positive (+) and negative (–) ends facing correctly.
• Never mix old and new batteries, or batteries of different brands.
• Never charge the batteries that come with the clock.
• Should batteries ever leak while in the clock, wipe out the fluid with a cloth, taking care not to let any get onto
your skin.
• Replace the batteries at least once a year, even if the current batteries are working properly.
• The batteries that come with the clock lose some of their power during transport and storage.
flashes on the display to indicate that the snooze feature is activated.
The alarm sounds at the preset time for one minute.
OFF
The alarm does not sound.
• The alarm time appears in place of the date on the display whenever the Alarm Mode selector (2) is set to ON
or SNZ.
• The light also turns on for the first four seconds that the alarm sounds.
• The alarm sound changes over four levels as it sounds.
Stopping the Alarm
• When alarm is sounding, press the SNOOZE/LIGHT button (1) to stop it. When the snooze feature is turned on,
the alarm will sound again in about five minutes.
• To turn off the snooze feature, slide the Alarm Mode selector (2) to OFF.
USING THE LIGHT
Pressing the SNOOZE/LIGHT button (1) turns on the light and illuminates the display for easy reading in the dark.
Important!
• Overuse of the light can shorten battery life.
THERMOMETER FUNCTIONS
• A built-in sensor measures temperature and shows the measured value on the display.
• The temperature display shows “LO” for temperatures below –50°C (–58°F) and “HI” for temperatures above
70°C (158°F).
• Though temperature readings are displayed up to 0°C (32°F) and greater than 41°C (105°F), note that such
readings are actually outside the guaranteed temperature range of this clock.
Switching between Celsius and Fahrenheit
• Push the °C/°F button (4) to select either Celsius (°C) or Fahrenheit (°F).
Celsius (°C)
Fahrenheit (°F)
°C/°F button (4)
°C
°F
2