1
Module No.1995
1995-1
ABOUT THIS USER’S GUIDE
Congratulations upon your selection of this CASIO watch. To get the most out of your purchase, be sure to carefully read this User’s Guide and keep it on hand for later reference when
necessary.
• Button operations are indicated using the letters shown in the illustration.
• This watch displays white figures on a black background, but all sample displays in this User’s Guide show black figures on a white background.
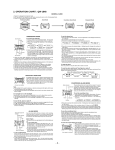
GENERAL GUIDE
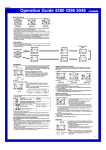
• Press C to change from mode to mode.
• The animation area shows different animated characters and graphics, depending on the mode and the operation being performed. Animated graphics also appear at the top of each
minute in the Timekeeping Mode.
• The watch automatically returns to the Timekeeping Mode if you do not perform any button operation for two or three minutes in any other mode.
Timekeeping Mode
Countdown Alarm Mode
Stopwatch Mode
Alarm Mode
Animation area
TIMEKEEPING MODE
• In the Timekeeping Mode, press B to switch between the month and the day of the
week screens. With the month screen, the animation area shows repeating characters that indicate the current day of the week. With the day of the week screen, it
shows a G-mark.
Day
Animation area
( T➔ U ➔ E )
Animation area
Day of the week
Month – Day
PM indicator
Seconds
Month Screen
Day of the Week Screen
To use the countdown timer
Press E while in the Countdown Alarm Mode to start the countdown timer.
• When the countdown reaches zero, an alarm sounds for 10 seconds or until you
stop the alarm by pressing any button. The countdown time is automatically reset
to its starting value after the alarm stops.
• Press E while a countdown operation is in progress to pause it. Press E again to
resume the countdown.
• To completely stop a countdown operation, first pause it (by pressing E ), and then
press D. This returns the countdown time to its starting value.
Press B
Hour : Minutes
3. Press D to increase the selected number. Holding down D changes the selection
at high speed.
• To set the starting value of the countdown time to 60 minutes, set 00'00".
4. After you set the countdown time, press A to return to the Countdown Alarm Mode.
• If you do not operate any button for a few minutes while a selection is flashing, the
flashing stops and the watch goes back to the Countdown Alarm Mode automatically.
• In the Timekeeping Mode, press D to switch between the 12-hour and 24-hour
formats.
• In the Timekeeping Mode, press E to illuminate the display for about two seconds.
About countdown indicators
An audible beep and the EL backlight keep you informed about the progress of the
countdown as noted in the following table.
Indication
Start
5'00"0
Time Up
To set the time and date
1. Hold down A while in the Timekeeping Mode until the seconds digits start to flash
on the display. The seconds flash because they are selected.
2. Press C to change the selection in the following sequence.
Seconds
Day
Hour
Month
Beep
1 second
1 second
10 seconds
Backlight
1 second
1 second
2 seconds
Minutes
Year
3. While the seconds digits are selected (flashing), press D to reset the seconds to
00. If you press D while the seconds count is in the range of 30 to 59, the seconds
are reset to 00 and 1 is added to the minutes. If the seconds count is in the range
of 00 to 29, the minutes count is unchanged.
4. While any other digits (besides seconds) are selected (flashing), press D to increase the number. Holding down D changes the current selection at high speed.
5. After you set the time and date, press A to return to the Timekeeping Mode.
• The day of the week is automatically set in accordance with the date.
• The date can be set within the range of January 1, 1995 to December 31, 2039.
• If you do not operate any button for a few minutes while a selection is flashing, the
flashing stops and the watch goes back to the Timekeeping Mode automatically.
STOPWATCH MODE
Animation area
( S➔ T➔ W)
Current time
To measure elapsed time
1. Press E to start the stopwatch.
2. Press E to stop the stopwatch.
• You can resume the measurement operation by pressing E again.
3. Press D to clear the stopwatch to all zeros.
About the backlight
Depending on the mode, pressing E or B turns on the backlight for about two seconds. See the sections that cover each mode for information on whether you should
press E or B.
• The backlight of the watch employs an electro-luminescent (EL) light, which loses
illuminating power after very long use.
• The illumination provided by the backlight may be hard to see when viewed under
direct sunlight.
• The watch will emit an audible sound whenever the display is illuminated. It does
not indicate malfunction of the watch.
• The backlight automatically stops illuminating whenever an alarm sounds.
COUNTDOWN ALARM MODE
Animation area
( T➔ M➔ R)
Current time
The countdown timer can be set within a range of 1 second to 60 minutes. When the countdown reaches zero,
an alarm sounds.
• In the Countdown Alarm Mode, press B to illuminate
the display for about two seconds. To illuminate the display while setting the countdown time (while the minutes or seconds digits are flashing), press E.
To set the countdown time
1. Hold down A while in the Countdown Alarm Mode until
the minutes digits start to flash on the display. The minutes digits flash because they are selected.
2. Press C to change the selection in the following sequence.
Minutes
Seconds
1/10 second
Minutes
Seconds
The Stopwatch Mode lets you measure elapsed time, split
times, and two finishes. You also get Auto-Start function.
The range of the stopwatch is 59 minutes, 59.99 seconds.
• In the Stopwatch Mode, press B to illuminate the display for about two seconds.
Minutes
Seconds
1/100 second
To record split times
1. Press E to start the stopwatch.
2. Press D to display the timing up to that point. Stopwatch timing continues internally.
3. Press D to clear the split time and to continue time measurement on the display.
• You can repeat steps 2 and 3 as many times as you want.
4. Press E to stop the time measurement.
5. Press D to clear the stopwatch to all zeros.
To time first and second place finishes
1. Press E
2. Press D
3. Press E
4. Press D
5. Press D
to start the stopwatch.
when the first finisher crosses the line, and record the time.
when the second finisher crosses the line.
to display the finishing time of the second finisher.
again to clear the stopwatch to all zeros.
1995-2
About the Auto-Start function
With the Auto-Start function, the watch performs a 5-second countdown. When the
countdown reaches zero, stopwatch operation starts automatically. During the final
three seconds of the countdown, a beeper sounds with each second.
To use the Auto-Start function
1. While the stopwatch display is showing all zeros
(00'00"00) in the Stopwatch Mode, press D.
• At this time the auto-start indicator appears on the display to indicate that auto-start is on. Press D again to
turn auto-start off (indicated when the auto-start indicator is not on the display).
2. Press E to start the countdown.
• Pressing E also causes the countdown time to appear
in place of the current time.
• When the countdown reaches zero, a tone sounds, the
Auto-start indicator
backlight illuminates the display, and a stopwatch timing operation starts automatically.
• To stop the Auto-Start countdown and return to the all-zeros display, press D.
• Pressing E while the Auto-Start countdown is in progress immediately start the
stopwatch.
ALARM MODE
Animation area
( A➔ L➔ M)
Current time
When the Daily Alarm is turned on, the alarm sounds for
20 seconds at the preset time each day. Press any button
to stop the alarm after it starts to sound.
When the Hourly Time Signal is turned on, the watch beeps
every hour on the hour.
• In the Alarm Mode (including alarm time setting), press
E to illuminate the display for about two seconds.
To set the alarm time
Alarm on
indicator
Hour :
Minutes
1. Hold down A while in the Alarm Mode until the hour
digits start to flash on the display. The hour digits flash
because they are selected.
• At this time, the alarm is automatically turned on.
2. Press C to change the selection in the following sequence.
Hourly time signal on
indicator
Hour
Minutes
3. Press D to increase the selected digits. Holding down D changes the selection at
high speed.
• The format (12-hour and 24-hour) of the alarm time matches the format you select
for normal timekeeping.
• When setting the alarm time using the 12-hour format, take care to set the time
correctly as morning (no indicator) or afternoon (P indicator).
4. After you set the alarm time, press A to return to the Alarm Mode.
• If you do not operate any button for a few minutes while a selection is flashing, the
flashing stops and the watch goes back to the Alarm Mode automatically.
To turn the Daily Alarm and Hourly Time Signal on and off
Press B while in the Alarm Mode to change the status of the Daily Alarm and Hourly
Time Signal in the following sequence.
[Alarm ON Indicator / Hourly Time Signal ON Indicator]
Both ON
Both OFF
Daily Alarm
Only
To test the alarm
Hold down D while in the Alarm Mode to sound the alarm.
Hourly Time
Signal only