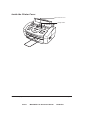
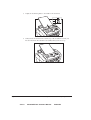
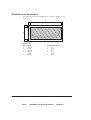
1
MultiPASSTM C50
User’s Guide
i
Preface
Canon
MultiPASS C50 User’s Guide
ENGLISH
Although this equipment can use either loop disconnect or DTMF signalling,
only the performance of the DTMF signalling is subject to regulatory
requirements for correct operation. It is therefore strongly recommended that
the equipment is set to use DTMF signalling for access to public or private
emergency services. DTMF signalling also provides faster call set up.
Copyright
Copyright E 1998 by Canon, Inc. All rights reserved. No part of this publication
may be reproduced, transmitted, transcribed, stored in a retrieval system, or
translated into any language or computer language in any form or by any means,
electronic, mechanical, magnetic, optical, chemical, manual, or otherwise, without
the prior written permission of Canon, Inc.
ii
Preface
Canon
MultiPASS C50 Hardware Manual
ENGLISH
Trademarks
Adobe PhotoshopH and Adobe PageMakerH are registered trademarks of Adobe
Corporation.
CanonH and BJH are registered trademarks and MultiPASSTM, UHQTM, and
Bubble JetTM are trademarks of Canon Inc.
CentronicsH is a registered trademark of Centronics Data Computer Corporation.
IEEETM is a trademark of Institute of Electrical and Electronics Engineers, Inc.
MicrosoftH and WindowsH are registered trademarks of Microsoft Corporation.
PhotoFinishTM is a trademark of Zsoft Corporation.
WordScanTM is a trademark of Caere Corporation.
Other brand and product names may be trademarks or registered trademarks of
their respective companies.
As an Energy StarH Partner, Canon has determined that the
MultiPASS C50 meets the Energy Star guidelines for energy
efficiency.
E PA
POL L UT I ON PRE VE NT E R
The International ENERGY STARH Office Equipment
Program is an international program that promotes energy
saving through the use of computers and other office
equipment. The program backs the development and
dissemination of products with functions that effectively
reduce energy consumption. It is an open system in which
business proprietors can participate voluntarily. The targeted
products are office equipment such as computers, displays,
printers, facsimiles, and copiers. Their standards and logos are
uniform among the participating nations.
iii
Preface
Canon
MultiPASS C50 Hardware Manual
ENGLISH
This CE Marking shows compliance of this equipment with Directive 73/23/EEC and Directive 89/336/EEC (as amended by
Directive 92/31/EEC), both as amended by Directive 93/68/EEC.
L’estampille CE indique que ce matériel est conforme aux dispositions de la Directive 73/23/CEE et de la Directive 89/336/
CEE (modifiée par la Directive 92/31/CEE), toutes deux modifiées par la Directive 93/68/CEE.
Diese CE-Markierung weist darauf hin, daß dieses Gerät mit Richtlinie 73/23/EWG und der durch Richtlinie 92/31/EWG
geänderten Richtlinie 89/336/EWG übereinstimmt, die beide durch Richtlinie 93/68/EWG geändert wurden.
Denne CE-mærkning indikerer, at dette udstyr følger Direktiv 73/23/EU og Direktiv 89/336/EU (som udvidet med Direktiv 92/
31/EU), begge som udvidet med Direktiv 93/68/EU.
CE Märkningen visar att denna utrustning följer direktiven 73/23/EEC och 89/336/EEC (komplement till 92/31/EEC) båda
som komplement till direktiv 93/68/EEC.
CE merkintä osoittaa tämän tuotteen yhteensopivuuden direktiivien 73/23/EEC ja 89/336/EEC (täydennetty direktiivillä 92/
31/EEC) kanssa, joita on täydennetty direktiivillä 93/68/EEC.
Dette CE merket viser at utstyret er i samsvar med EU direktivene 73/23 og 89/336 (med korreksjon av EU direktiv 92/31),
begge med korreksjon av EU direktiv 93/68.
Deze CE markering toont aan dat het product in overeenstemming is met de richtlijnen 73/23/EEC en 89/336/EEC (zoals
geammendeerd door richtlijn 92/31/EEC), welke beide zijn geammendeerd door de richtlijn 93/68/CEE.
Questo contrassegno CE indica che l’apparecchio è conforme alle Direttive CEE 73/23 e 89/336 (successivamente
modificata con la Direttiva 92/31), entrambe modificate con la Direttiva 93/68.
Este símbolo CE indica que el equipo cumple con las Directivas 73/23/EEC y 89/336/EEC (según la enmienda a la Directiva
92/31/EEC), ambas según la enmienda de la Directiva 93/68/EEC.
Esta marca CEE indica que este equipamento está de acordo com as Directivas 73/23/EEC e 89/336/EEC (conforme
amenda da directiva 92/31/EEC), ambas amendas da directiva 93/68/EEC.
Auth́ h CE sh́mansh dhlẃnei thn sumvwnı́a thŒ Suskeuh́Œ me thn Odhgı́a 73/23/EEC kai thn Odhgı́a 89/336/EEC
(ópwŒ tropopoih́chkan apó thn Odhgı́a 92/31/EEC), ópwŒ amvótereŒ éqoun tropopoihceı́ apó thn Odhgı́a 93/68/
EEC.
Oznaka CE prikazuje, da oprema ustreza predpisu 73/23/EEC, in kot to predpisuje predpis 93/68/EEC.
A CE jelzés tanúsítja, hogy a berendezés megfelel az EEC 92/31 és 93/68 előírásokkal módosított EEC 73/23 és 89/336
követelményrendszernek.
Oznaczenie CE jest potwierdzeniem zgodności niniejszego urza˛dzenia z wymaganiami Dyrektywy 73/23/EEC oraz
Dyrektywy 89/336/EEC (zgodnie ze zmianami Dyrektywy 92/31/EEC), obie uzupełnione przez Dyrektywe˛ 93/68/EEC.
Značka CE indikuje, že toto zařízení odpovídá Směrnici 73/23/EEC a Směrnici 89/336/EEC (doplněné Směrnicí 92/31/
EEC), které byly dále doplněny Směrnicí 93/68/EEC.
Käesolev CE-markeering näitab, et antud seade vastab Euroopa Liidu Direktiividele 73/23/EEC ja 89/336/EEC (koos
muudatustega vastavalt Direktiivile 92/31/EEC) ning võttes arvesse, et mõlemaid direktiive on muudetud vastavalt
Direktiivile 93/68/EEC.
CE marœ†jums nor¬da, ka š¢ iek¬rta atbilst pras¢b¬m, kas iek©autas EK direkt¢v¬s 73/23 un 89/336 (ar EK direkt¢v¬ 92/31
paredz†taj¬m izmai߬m), kur¬s veikti labojumi saska߬ ar EK direkt¢vu 93/68.
Ženklas CE rei£kia, kad £is ¢renginys atitinka direktyvas 73/23/EEC ir 89/336/EEC (atlikus pataisas direktyva 92/31/EEC),
kuriose buvo atliktos pataisos direktyva 93/68/EEC.
Markirovka SE ukazyvaet na to, ˆto dannoe oborudovanie sootvetstvuet Direktive 73/23/EEC i Direktive 89/
336/EEC (s izmeneniqmi v sootvetstvii s Direktivoj 92/31/EEC) s izmeneniqmi, predpisyvaemymi Direktivoj
93/68/EEC.
Fax III
iv
Preface
Canon
MultiPASS C50 Hardware Manual
ENGLISH
Contents
Chapter 1
Introducing the MultiPASS C50 ............................................................................... 1-1
Welcome ....................................................................................................................... 1-2
The Main Features of the MultiPASS C50 .............................................................. 1-3
Plain Paper Fax Features ................................................................................ 1-4
Colour Copier Features .................................................................................. 1-5
Telephone Features ......................................................................................... 1-5
Colour Printer Features .................................................................................. 1-6
Colour Scanner Features ................................................................................ 1-7
Using the MultiPASS C50 with the MultiPASS Desktop Manager
for WindowsH ........................................................................................................... 1-8
Supplies and Options .................................................................................................. 1-9
BJ Print Cartridges and Ink Tanks ................................................................ 1-9
Special Print Media ......................................................................................... 1-9
Canon Photo Kit ............................................................................................ 1-10
Using Your Documentation .................................................................................... 1-11
How to Use this Guide ................................................................................. 1-11
Type Conventions Used in this Guide ........................................................ 1-12
For Customer Support .............................................................................................. 1-13
Safety Instructions .................................................................................................... 1-14
Chapter 2
Setting Up Your MultiPASS C50 ............................................................................. 2-1
Choosing a Location for Your MultiPASS C50 ...................................................... 2-3
Unpacking Your MultiPASS C50 .............................................................................. 2-5
Do You Have Everything? ............................................................................. 2-5
Removing Shipping Materials ........................................................................ 2-8
Assembling the MultiPASS C50 ............................................................................. 2-11
Attaching Components ................................................................................. 2-11
Attaching the Sending Document Support .................................... 2-11
Attaching the Document Support .................................................... 2-12
Attaching the Output Tray Extension ............................................. 2-13
Making Connections ................................................................................................. 2-14
Connecting the MultiPASS C50 to Your PC .............................................. 2-14
Connecting the Telephone Line .................................................................. 2-16
Connecting the Optional Handset, a Telephone, or
Answering Machine ...................................................................................... 2-17
Connecting the Power Cord ......................................................................... 2-18
Getting Acquainted with Your MultiPASS C50 ................................................... 2-20
Front View ...................................................................................................... 2-20
Rear View ....................................................................................................... 2-21
The Handset (Option) .................................................................................. 2-21
Inside the Printer Cover ............................................................................... 2-22
The Operation Panel ..................................................................................... 2-23
Special Function Buttons .................................................................. 2-25
v
Contents
Canon
MultiPASS C50 Hardware Manual
ENGLISH
Selecting and Installing a BJ Cartridge .................................................................. 2-27
Guidelines for Using and Maintaining BJ Cartridges .............................. 2-27
Choosing the Best Cartridge ........................................................................ 2-29
Installing the BJ Cartridge ........................................................................... 2-31
Storing BJ Cartridges .................................................................................... 2-36
Selecting and Loading the Print Media ................................................................. 2-37
Selecting the Print Media ............................................................................. 2-37
Plain Media ......................................................................................... 2-37
Canon Media ...................................................................................... 2-38
The Printable Area ........................................................................................ 2-40
Plain Paper and Special Media ......................................................... 2-40
Envelopes ............................................................................................ 2-41
Adjusting the Paper Thickness Lever ......................................................... 2-42
Loading the Print Media .............................................................................. 2-44
Loading Print Media for Automatic Feed ...................................... 2-45
Loading Print Media for Manual Feed ........................................... 2-49
Using Canon’s Specialty Papers .................................................................. 2-50
Printing on High Resolution Paper HR-101 .................................. 2-50
Printing on FS-101 Fabric Sheets ..................................................... 2-52
Using the Paper Output Guides with the BC-22/22e and BC-29F
Cartridges ................................................................................................... 2-53
Entering User Information in the MultiPASS C50 .............................................. 2-54
Guidelines for Entering Information .......................................................... 2-55
Entering Numbers, Letters, and Symbols ....................................... 2-56
Editing Information ........................................................................... 2-57
Entering Your Identification Information .................................................. 2-58
Editing Your Identification Information ......................................... 2-60
The MultiPASS C50 Settings ................................................................................... 2-61
List of Settings ............................................................................................... 2-61
General Settings ................................................................................. 2-62
Sending Settings ................................................................................. 2-63
Receive Settings ................................................................................. 2-65
Speed Dialling Settings ...................................................................... 2-67
Other Options ..................................................................................... 2-67
The MultiPASS C50 Unit Settings .............................................................. 2-68
Accessing the MultiPASS C50 Settings ...................................................... 2-71
To Access the VOLUME CONTROL Settings (CALLING
VOLUME, KEYPAD VOLUME, ALARM VOLUME,
LINE MONITOR VOL) .................................................................. 2-71
To Access the RX CALL LEVEL, COLOR COPY MEDIA,
MID PAUSE SET, and DISPLAY LANGUAGE Settings ......... 2-72
Testing the MultiPASS C50 ..................................................................................... 2-74
vi
Contents
Canon
MultiPASS C50 Hardware Manual
ENGLISH
Chapter 3
Speed Dialling ............................................................................................................. 3-1
Speed Dialling Methods ............................................................................................. 3-2
One-Touch Speed Dialling ......................................................................................... 3-3
Storing Numbers for One-Touch Speed Dialling ........................................ 3-3
Changing a Number/Name Stored under a One-Touch Speed Dialling
Button ........................................................................................................... 3-5
Using One-Touch Speed Dialling .................................................................. 3-8
Coded Speed Dialling ............................................................................................... 3-10
Storing Numbers for Coded Speed Dialling .............................................. 3-10
Changing a Number/Name Stored under a Coded Speed Dialling
Code ................................................................................................................ 3-12
Using Coded Speed Dialling ........................................................................ 3-15
Group Dialling .......................................................................................................... 3-17
Creating Groups for Group Dialling .......................................................... 3-17
Using Group Dialling .................................................................................... 3-21
Chapter 4
Sending Faxes .............................................................................................................. 4-1
Preparing to Send a Fax ............................................................................................. 4-3
Setting the Resolution and Contrast ............................................................. 4-3
Setting the Scanning Resolution ........................................................ 4-3
Setting the Scanning Contrast ............................................................ 4-4
Sending Methods ............................................................................................. 4-6
Manual Sending Via the Handset ...................................................... 4-6
Memory Sending .................................................................................. 4-6
Dialling Methods ............................................................................................. 4-7
Sending Documents .................................................................................................... 4-8
Manual Sending Via the Handset .................................................................. 4-8
Memory Sending ............................................................................................ 4-10
Cancelling Sending ................................................................................................... 4-12
Removing the Document From the Automatic Document Feeder
(ADF) ............................................................................................................. 4-13
Redialling ................................................................................................................... 4-15
Manual Redialling ......................................................................................... 4-15
Automatic Redialling With Memory Sending ........................................... 4-15
Cancelling Automatic Redialling ..................................................... 4-16
Sequential Broadcasting ........................................................................................... 4-18
Sending a Document to More Than One Destination ............................. 4-18
Sending a Document Using Group Dialling .............................................. 4-19
Dialling Through a Switchboard ............................................................................. 4-20
Registering the Access Type and the Outside Line Number under
the R Button ................................................................................................... 4-20
Long Distance Dialling ............................................................................................ 4-22
How to Enter Pauses ..................................................................................... 4-22
Confirming a Dial Tone ............................................................................................ 4-23
Using Tone Dialling on a Pulse Line ...................................................................... 4-24
If a Power Cut Occurs .............................................................................................. 4-25
Memory Clear Report ................................................................................... 4-25
vii
Contents
Canon
MultiPASS C50 Hardware Manual
ENGLISH
Chapter 5
Receiving Faxes ........................................................................................................... 5-1
Different Ways to Receive a Fax .............................................................................. 5-2
Setting the Receive Mode .............................................................................. 5-3
Receiving Faxes and Phone Calls Automatically: Fax/Tel Mode .............. 5-4
Receiving Faxes Manually: MANUAL MODE .......................................... 5-6
Receiving Faxes Automatically: FAX ONLY MODE ................................ 5-8
Using an Answering Machine: ANS. MACHINE MODE ........................ 5-9
Using the MultiPASS C50 with an Answering Machine ................. 5-9
Documents Received in Memory ........................................................................... 5-10
Messages Displayed When Documents are Received in Memory ......... 5-10
Printing a Received Fax When Your Computer Is Off ........................................ 5-12
Receive While Registering, Copying, or Printing ................................................. 5-13
Cancelling an Incoming Fax .................................................................................... 5-14
Chapter 6
Scanning Documents and Making Copies ............................................................... 6-1
Scanning Documents .................................................................................................. 6-2
Types of Documents You Can Scan .............................................................. 6-2
Effective Image Size ............................................................................ 6-4
Selecting Automatic/Manual Document Feed ............................................. 6-5
Loading Documents for Automatic Feed ......................................... 6-6
Loading Documents for Manual Feed ............................................ 6-10
Adding Pages to the Document in the Automatic Document Feeder
(ADF) ......................................................................................................... 6-12
Making Copies ........................................................................................................... 6-13
Chapter 7
Printing From Your PC .............................................................................................. 7-1
Paper Handling ........................................................................................................... 7-2
Selecting Paper Types ..................................................................................... 7-2
Printing on Envelopes ..................................................................................... 7-2
Some Advice for Colour Printing ............................................................................. 7-6
Selecting Paper and Other Print Media ....................................................... 7-6
Understanding Your Application’s Capabilities .......................................... 7-6
Understanding Your Computer’s Monitor and Colour .............................. 7-7
Improving Print Speed .................................................................................... 7-8
Controlling Printing Costs .............................................................................. 7-9
viii
Contents
Canon
MultiPASS C50 Hardware Manual
ENGLISH
Chapter 8
Troubleshooting .......................................................................................................... 8-1
If You Cannot Solve the Problem ............................................................................ 8-3
Problems Index ........................................................................................................... 8-4
Paper Jams ........................................................................................................ 8-6
Jams in the Automatic Document Feeder (ADF) ........................... 8-6
Jams in the Sheet Feeder .................................................................... 8-8
Problems Feeding Paper into the Sheet Feeder .......................................... 8-9
Faxing Problems ............................................................................................. 8-12
Sending Faxes ..................................................................................... 8-12
Receiving Faxes .................................................................................. 8-14
Telephone Problems ...................................................................................... 8-17
Copying Problems ......................................................................................... 8-18
Printing Problems .......................................................................................... 8-19
Print Quality Problems ................................................................................. 8-24
Colour Printing and Copying Problems ..................................................... 8-26
General Problems .......................................................................................... 8-29
Error Codes, Messages, and Solutions ................................................................... 8-30
Chapter 9
Maintaining Your MultiPASS C50 ........................................................................... 9-1
Cleaning the MultiPASS C50 .................................................................................... 9-2
Cleaning the MultiPASS C50’s Exterior ....................................................... 9-2
Cleaning the MultiPASS C50’s Interior ........................................................ 9-2
Cleaning the Scanner Components ............................................................... 9-4
Maintaining BJ Cartridges ......................................................................................... 9-8
Printing the Nozzle Check Pattern ................................................................ 9-8
Cleaning and Testing the BJ Cartridge Print Head .................................... 9-9
When to Replace the BJ Cartridge ............................................................. 9-10
Replacing the BJ Cartridge .......................................................................... 9-12
Replacing an Ink Tank in the BC-21/21e Colour BJ Cartridge .............. 9-17
Transporting the MultiPASS C50 ............................................................................ 9-21
ix
Contents
Canon
MultiPASS C50 Hardware Manual
ENGLISH
Appendix A
Specifications .............................................................................................................. A-1
General ....................................................................................................................... A-2
Plain Paper Fax .......................................................................................................... A-3
Copier .......................................................................................................................... A-4
Telephone ................................................................................................................... A-5
Printer ......................................................................................................................... A-6
Printable Area: Papers .................................................................................. A-7
Printable Area: Envelopes ............................................................................ A-8
Scanner ...................................................................................................................... A-10
Document Sizes ....................................................................................................... A-11
PC Interface ............................................................................................................. A-13
MultiPASS Desktop Manager for WindowsH ...................................................... A-13
Appendix B
Options ........................................................................................................................ B-1
Optional Handset ....................................................................................................... B-2
Package Contents ........................................................................................... B-2
Attaching the Handset to Your Unit ........................................................... B-3
Control Panel and Functions ........................................................................ B-6
Maintaining Your Handset ............................................................................ B-8
Glossary
...................................................................................................................................... G-1
Index
....................................................................................................................................... I-1
x
Contents
Canon
MultiPASS C50 Hardware Manual
ENGLISH
Chapter 1
Introducing the MultiPASS C50
This chapter introduces you to your MultiPASS C50 and describes its main
features. It also explains the options and supplies available for use with your
MultiPASS C50.
Welcome ....................................................................................................................... 1-2
The Main Features of the MultiPASS C50 .............................................................. 1-3
Plain Paper Fax Features ................................................................................ 1-4
Colour Copier Features .................................................................................. 1-5
Telephone Features ......................................................................................... 1-5
Colour Printer Features .................................................................................. 1-6
Colour Scanner Features ................................................................................ 1-7
Using the MultiPASS C50 with the MultiPASS Desktop Manager
for WindowsH ........................................................................................................... 1-8
Supplies and Options .................................................................................................. 1-9
BJ Print Cartridges and Ink Tanks ................................................................ 1-9
Special Print Media ......................................................................................... 1-9
Canon Photo Kit ............................................................................................ 1-10
Using Your Documentation .................................................................................... 1-11
How to Use this Guide ................................................................................. 1-11
Type Conventions used in this Guide ......................................................... 1-12
For Customer Support .............................................................................................. 1-13
Safety Instructions .................................................................................................... 1-14
Chapter 1
Introducing the MultiPASS C50
Canon
MultiPASS C50 Hardware Manual
ENGLISH
1-1
Welcome
Thank you for purchasing the new Canon MultiPASS C50. We are sure that your
MultiPASS C50 will help you work more effectively and help you meet your fax
and phone requirements easily and conveniently, as well as your printing,
copying, and scanning needs.
1-2
Introducing the MultiPASS C50
Canon
MultiPASS C50 Hardware Manual
Chapter 1
ENGLISH
The Main Features of the MultiPASS C50
The MultiPASS C50 is a complete multifunction system for your home or small
office. The MultiPASS C50 combines the following essential office machines into
a single, convenient desktop unit:
J Plain-Paper Fax Machine
J Colour Printer
J Colour Copier
J Colour Scanner
J PC Fax
J Telephone*
Your MultiPASS C50 also includes the MultiPASS Desktop Manager for
WindowsH, version 2.50. This exclusive Canon software package provides you
with a ”PC Fax” – you can print, fax, scan, and use the telephone from within
your PC’s Windows environment.
The MultiPASS C50’s multitasking ability enables you to perform a number of
operations simultaneously. For example, you can print, scan a document, or make
copies at the same time you are sending a fax or receiving a fax into memory.
The compact size of the MultiPASS C50 (400 mm wide by 365 mm long by 205
mm high) makes it ideal for desktop use, and lets you use it in places where other
machines might not fit.
*Requires the optional handset, a telephone or an answering machine.
Chapter 1
Introducing the MultiPASS C50
Canon
MultiPASS C50 Hardware Manual
ENGLISH
1-3
Plain Paper Fax Features
UHQTM Image Processing System
The MultiPASS C50 uses Canon’s Ultra-High Quality Image Processing System
to provide enhanced definition in faxed photos.
Error Correction Mode (ECM)
Using the MultiPASS C50’s Error Correction Mode reduces transmission errors
when sending faxes to or receiving faxes from other fax machines that also have
ECM capability.
Automatic switching between fax and voice calls
The MultiPASS C50 can automatically distinguish between fax calls and normal
telephone calls, so that you can receive both through a single phone line.
Answering machine connection
You can connect an answering machine to the MultiPASS C50 to let it receive
telephone messages and faxes while you are away from your desk.
Transmission speed
The MultiPASS C50 uses G3 data encoding methods that increase transmission
speed to approximately 6 seconds* per page.
Memory sending/receiving
The MultiPASS C50 can store up to 42 fax pages* (either received or to be sent)
in its built-in memory, and can receive faxes while printing or even when your PC
is turned off.
Reduced-size printing
The MultiPASS C50 automatically scales received faxes to fit the size of the
paper loaded into the sheet feeder. So if your client is sending you a fax on lettersize paper and you have A4-size paper in your sheet feeder, the fax will be scaled
and printed on A4-size paper.
Automatic dialling and broadcasting
To make faxing even easier, the MultiPASS C50 provides several automatic
dialling methods: coded speed dialling, one-touch speed dialling, and group
dialling. The MultiPASS C50 also enables you to broadcast faxes or send delayed
faxes to as many as 57 locations at once.
Point-and-click dialling
The MultiPASS Desktop Manager enables you to select a fax number and dial
directly from your PC’s screen with a simple click of the mouse.
*Based on Canon FAX Standard Chart No.1, standard mode
1-4
Introducing the MultiPASS C50
Canon
MultiPASS C50 Hardware Manual
Chapter 1
ENGLISH
Colour Copier Features
Colour and black and white copying
The MultiPASS C50 can make full colour copies. It can also make up to 99 black
and white (including halftones) copies of a document at a time, at a rate of up to
three copies per minute.
360-dpi resolution
The MultiPASS C50 copies documents using a high resolution of 360 dpi (when
making single copies).
Copy reduction
The MultiPASS C50 can reduce copies to 70%, 80%, or 90% of their original
size. This allows you to copy legal-size documents onto A4-size paper, for
example.
Telephone Features
Automatic dialling
The MultiPASS C50’s three automatic dialling methods (one-touch speed
dialling, coded speed dialling, and group dialling) can be used to store phone and
fax numbers, for easy and efficient calling.
Connection for the optional handset, extension telephone, or answering machine
Connecting the optional handset or a telephone to the MultiPASS C50 lets you
use it to make and receive normal telephone calls. In addition, connecting an
answering machine allows you to receive faxes and phone messages while you are
away from your desk.
Point-and-click dialling
The MultiPASS Desktop Manager enables you to select a phone number and dial
directly from your PC’s screen with a simple click of the mouse.
Chapter 1
Introducing the MultiPASS C50
Canon
MultiPASS C50 Hardware Manual
ENGLISH
1-5
Colour Printer Features
Canon Bubble Jet (BJ) printing and ink cartridges
The MultiPASS C50 uses Canon’s Bubble Jet (BJ) printing and ink cartridges to
provide you with first-rate, crisp print and vibrant colours, along with convenient,
easy maintenance.
Excellent print quality and speed
The MultiPASS C50’s high-performance print head offers a precision of up to 720
dots per inch (dpi) horizontally by 360 vertically, providing you with highresolution colour, text, and graphics, all at exceptional speed – up to five pages
per minute.
Impressive output on a variety of media
The MultiPASS C50 can provide sharp black or vibrant colour printing on a wide
variety of media, including A4, letter, and legal plain paper, glossy paper,
envelopes, transparencies, back print film (for display on a backlit panel), and
fabric sheets.
Convenient paper handling
The unit’s sheet feeder holds up to 100 sheets* of A4, letter, or legal paper; 50
transparencies; 10 sheets of back print film; or 10 envelopes.
Economy ink-saving printing
The MultiPASS C50 includes an economy printing mode that uses up to 50% less
ink, resulting in longer cartridge life.
Photo Quality Printing
Canon’s optional Photo Kit enables the MultiPASS C50 to use halftones to print
photos beautifully.
*75 g/m2 paper
1-6
Introducing the MultiPASS C50
Canon
MultiPASS C50 Hardware Manual
Chapter 1
ENGLISH
Colour Scanner Features
Full colour and 256-level greyscale
The MultiPASS C50 Desktop Manager allows you to can scan images in full
colour or with 256 levels of grey, rather than just in black and white, ensuring that
the images are reproduced as clearly as possible.
Automatic Document Feeder (ADF)
The MultiPASS C50 includes an Automatic Document Feeder (ADF) that makes
it easy to fax or scan up to 20 pages at a time when using Windows applications
that support the TWAIN scanning standard (see below) and multi-page scans.
300-, 400-, or 600-dpi resolution
With the MultiPASS Desktop Manager, the MultiPASS C50 can scan documents
at 300 dpi, and electro-enhanced 400 dpi and 600 dpi. In addition, when using
applications that support the TWAIN scanning standard, such as ScanGear 4.0
TWAIN, you can adjust the resolution in 1 dpi increments from 30 to 600 dpi.
TWAIN compatible
The MultiPASS C50 supports the TWAIN scanning standard, which allows you to
scan images using any graphics or optical character recognition (OCR)
application that also supports the TWAIN standard.
Colour scanning is not possible from the MultiPASS Desktop Manager, but can
be done through any application that supports the TWAIN standard.
Chapter 1
Introducing the MultiPASS C50
Canon
MultiPASS C50 Hardware Manual
ENGLISH
1-7
Using the MultiPASS C50 with the MultiPASS
Desktop Manager for WindowsH
Canon’s MultiPASS Desktop Manager for Windows allows you to use the
MultiPASS C50’s printing, faxing, scanning, and telephone functions directly from
your PC:
J Use the MultiPASS C50 as the default printer for Windows applications
J Send faxes from the MultiPASS C50 using any Windows application that
allows printing
J Scan documents into the Desktop Manager or any Windows application that
supports the TWAIN scanning standard
J Store an unlimited list of fax or phone numbers in a fax/telephone address
book on your PC
J View faxes on your PC’s monitor, as well as save, rotate, or print them, or
copy them to the PC’s clipboard
J Broadcast faxes from your PC to any number of destinations
J Attach custom cover sheets to each fax you send from the PC
The MultiPASS Desktop Manager package also includes a utility program that
helps you troubleshoot the interface between your computer and the MultiPASS
C50.
For more details on using your MultiPASS C50 with the MultiPASS Desktop
Manager, refer to the MultiPASS Desktop Manager User’s Guide.
The MultiPASS Desktop Manager is designed to work with Windows 95/98 only.
1-8
Introducing the MultiPASS C50
Canon
MultiPASS C50 Hardware Manual
Chapter 1
ENGLISH
Supplies and Options
Your MultiPASS C50 uses Canon’s Bubble Jet (BJ) cartridges and ink tanks,
print media, and optional equipment, all designed to work with your MultiPASS
C50 to help you produce the finest output possible. These supplies are available
from your local authorised Canon dealer.
BJ Print Cartridges and Ink Tanks
The MultiPASS C50 uses Canon’s BJ (Bubble Jet) cartridges to provide you with
first-rate, crisp print and vibrant colours.
Canon’s BJ cartridges use advanced ink formulas that dry quickly, look great on
plain paper, are not easily affected by light, and resist smudging extremely well.
In addition, the print heads in the BJ cartridges cap themselves automatically
when not in use, thus saving ink by keeping the print heads from drying out.
BJ print cartridges are also easy to maintain. If your BC-21/21e Colour BJ
Cartridge runs out of ink, just replace the empty ink tank (black or colour). If the
BC-20 Black Cartridge, BC-22/22e Photo Colour Cartridge, or BC-29F
Fluorescent BJ Cartridge runs out of ink, just replace the entire cartridge.
To avoid printing problems, use only Canon BJ print cartridges and ink tanks.
Other cartridges can produce unsatisfactory results. In addition, use only BCI-21
Black and BCI-21 Colour ink tanks in the BC-21/21e Colour BJ cartridge.
Special Print Media
You can use plain paper with the MultiPASS C50 for excellent colour, and black
and white printing, but Canon has also developed a wide range of print media to
extend your printing capabilities. See ”Selecting the Print Media” on page 2-37
for detailed descriptions of these media.
If you plan to use a print medium other than those made by Canon, be sure to
test it in your MultiPASS C50 before ordering it in bulk. If you have any
questions about whether a particular medium is suitable for your MultiPASS C50,
please contact your local authorised Canon dealer.
Chapter 1
Introducing the MultiPASS C50
Canon
MultiPASS C50 Hardware Manual
ENGLISH
1-9
Canon Photo Kit
Canon’s optional Photo Kit enables the MultiPASS C50 to use halftones to print
photos beautifully. The kit includes the BC-22/22e Photo Colour BJ cartridge, the
SB-21 BJ cartridge container, and 60 sheets of Canon high-resolution paper
(HR-101).
1-10
Introducing the MultiPASS C50
Canon
MultiPASS C50 Hardware Manual
Chapter 1
ENGLISH
Using Your Documentation
Your MultiPASS C50 includes the following documentation to help you learn
how to use your unit quickly and easily:
J User’s Guide (this guide) – This guide provides detailed information on how
to set up, operate, maintain, and troubleshoot your MultiPASS C50.
J MultiPASS Desktop Manager for WindowsH User’s Guide – This guide
describes how to use your MultiPASS C50 to print, scan, and fax from within
your PC’s Windows environment. Refer to this guide whenever you need
information about printing, scanning, or faxing from your PC.
Please note that all settings of the MultiPASS C50 can be adjusted using your
MultiPASS Desktop Manager for WindowsH software. For details, refer to the
MultiPASS Desktop Manager User’s Guide.
How to Use this Guide
To make the best use of this user’s guide in learning how to set up and operate
your MultiPASS C50, be sure to do the following:
J Read this chapter to learn about the MultiPASS C50’s main features, available
supplies and options, and guidelines on using the unit safely.
J Carefully follow the instructions in Chapter 2, ”Setting Up Your MultiPASS
C50” to get your unit unpacked and assembled properly, and to learn how to
enter information in the MultiPASS C50.
J Read Chapter 3 ”Speed Dialling” to learn how to register numbers for speed
dialling, how to change them, and how to use speed dialling to send faxes.
J Read Chapters 4 through 7 to learn how to use the MultiPASS C50 to send
and receive faxes, scan documents, make copies, and print.
J If your MultiPASS C50 begins operating improperly, use Chapter 8,
”Troubleshooting,” to try to solve the problem.
Chapter 1
Introducing the MultiPASS C50
Canon
MultiPASS C50 Hardware Manual
ENGLISH
1-11
J Look over Chapter 9, ”Maintaining Your MultiPASS C50” to become familiar
with procedures for cleaning your MultiPASS C50, replacing its Bubble Jet
(BJ) print cartridge and ink tanks.
J Refer to Appendix A for the MultiPASS C50’s technical specifications.
If you still have questions about how to use your MultiPASS C50, please contact
your local authorised Canon dealer or the Canon help line. They will be happy to
answer your questions.
Type Conventions Used in this Guide
This guide uses the following conventions to emphasise certain information that
will help you use your MultiPASS C50 correctly and safely:
Cautions tell you how to avoid actions that could injure you or damage your
MultiPASS C50.
Notes provide advice for using your MultiPASS C50 more effectively, describe
operating restrictions, and tell how to avoid minor operating difficulties.
In addition, this guide uses bold capital letters to show the names of buttons and
switches on the MultiPASS C50, such as FUNCTION, STOP, and START/
COPY. Text that appears in the unit’s display is shown in plain capital letters:
RECEPTION OK.
1-12
Introducing the MultiPASS C50
Canon
MultiPASS C50 Hardware Manual
Chapter 1
ENGLISH
For Customer Support
Your MultiPASS C50 is designed with the latest technology to provide troublefree operation. If you have a problem with the unit’s operation, try to solve it by
using the information in Chapter 8, ”Troubleshooting”. If you cannot solve the
problem or if you think your MultiPASS C50 needs service, contact your local
authorised Canon dealer or the Canon help line.
Chapter 1
Introducing the MultiPASS C50
Canon
MultiPASS C50 Hardware Manual
ENGLISH
1-13
Safety Instructions
Read these safety instructions thoroughly before using your MultiPASS C50, and
keep them handy in case you need to refer to them later.
Except as specifically described in this manual, do not attempt to service the
MultiPASS C50 yourself. Never attempt to disassemble the unit: opening and
removing its interior covers will expose you to dangerous voltages and other
risks. For all service, contact your local authorised Canon dealer or the Canon
help line.
J Always follow all warnings and instructions marked on the MultiPASS C50.
J Use the MultiPASS C50 only on a sturdy, stable, level surface. If the
MultiPASS C50 falls, it could be seriously damaged.
J Do not use the MultiPASS C50 near water. If you spill liquid on or into the
unit, unplug it immediately and call your local authorised Canon dealer or
help line.
J The back and bottom of the MultiPASS C50 include slots and openings for
ventilation. To keep the MultiPASS C50 from overheating (which can cause it
to operate abnormally and create a fire risk), take care not to block or cover
these openings. Do not operate the unit on a bed, sofa, rug, or other similar
soft surface, or near a radiator or other heat source. Do not place the
MultiPASS C50 in a cupboard or cabinet or on shelves unless adequate
ventilation is available. See ”Choosing a Location for Your MultiPASS C50”
on page 2-3 for guidelines on how much space the unit needs for ventilation.
J Operate the MultiPASS C50 only from the type of power source indicated on
the unit’s label. If you are not sure of the type of power available from your
wall outlets, contact your local power company.
J Make sure the total amperage used by all devices plugged into the wall outlet
does not exceed the ampere rating of the outlet’s circuit breaker.
J Do not allow anything to rest on the power cord or place the MultiPASS C50
where the cord will be walked on. Make sure the cord is not knotted or
kinked.
1-14
Introducing the MultiPASS C50
Canon
MultiPASS C50 Hardware Manual
Chapter 1
ENGLISH
J Do not insert objects of any kind into the slots or openings on the MultiPASS
C50’s cabinet, as they could touch dangerous voltage points or short out parts,
and result in fire or electric shock.
J Do not allow small objects (such as pins, paper clips, or staples) to fall into the
MultiPASS C50. If something does fall into it, unplug the unit immediately
and call your local authorised Canon dealer or help line.
J Always unplug the MultiPASS C50 before moving or cleaning it.
J Whenever you unplug the MultiPASS C50, wait at least five seconds before
you plug it back in.
J Keep the MultiPASS C50 away from direct sunlight, as this can damage it. If
you have to place it near a window, install heavy curtains or blinds.
J Do not expose the MultiPASS C50 to extreme temperature fluctuations.
Install the unit in a place with temperatures in the 10!-32.5!C range.
J Always unplug the MultiPASS C50 during thunderstorms.
J Before you transport the MultiPASS C50, remove its BJ cartridge.
J Always lift the MultiPASS C50 as shown below. Never lift it by its sheet
feeder or document supports.
Chapter 1
Introducing the MultiPASS C50
Canon
MultiPASS C50 Hardware Manual
ENGLISH
1-15
Unplug the MultiPASS C50 and contact your local authorised Canon dealer or
the Canon help line in any of these situations:
J If the power cord or plug is damaged or frayed.
J If liquid spills into the unit, or if it is otherwise exposed to rain or liquids.
J If you notice smoke or unusual noises or odors coming from it.
J If the MultiPASS C50 does not operate normally when you follow the
operating instructions. Adjust only those controls that are covered by the
operating instructions in this user’s guide, or you can damage the unit and
require extensive repair work.
J If the MultiPASS C50 is dropped or its cabinet damaged.
J If the MultiPASS C50 begins performing poorly, and you cannot correct the
problem by using the procedures in Chapter 8, ”Troubleshooting”.
1-16
Introducing the MultiPASS C50
Canon
MultiPASS C50 Hardware Manual
Chapter 1
ENGLISH
Chapter 2
Setting Up Your MultiPASS C50
This chapter tells you how to unpack and assemble your MultiPASS C50, select
and install the Bubble Jet (BJ) print cartridge, load the paper, and enter your
user information – everything you need to know to get your MultiPASS C50
ready to use.
Choosing a Location for Your MultiPASS C50 ...................................................... 2-3
Unpacking Your MultiPASS C50 .............................................................................. 2-5
Do You Have Everything? ............................................................................. 2-5
Removing Shipping Materials ........................................................................ 2-8
Assembling the MultiPASS C50 ............................................................................. 2-11
Attaching Components ................................................................................. 2-11
Attaching the Sending Document Support .................................... 2-11
Attaching the Document Support .................................................... 2-12
Attaching the Output Tray Extension ............................................. 2-13
Making Connections ................................................................................................. 2-14
Connecting the MultiPASS C50 to Your PC .............................................. 2-14
Connecting the Telephone Line .................................................................. 2-16
Connecting the Optional Handset, a Telephone, or Answering
Machine ...................................................................................................... 2-17
Connecting the Power Cord ......................................................................... 2-18
Getting Acquainted with Your MultiPASS C50 ................................................... 2-20
Front View ...................................................................................................... 2-20
Rear View ....................................................................................................... 2-21
The Handset (Option) .................................................................................. 2-21
Inside the Printer Cover ............................................................................... 2-22
The Operation Panel ..................................................................................... 2-23
Special Function Buttons .................................................................. 2-25
Selecting and Installing a BJ Cartridge .................................................................. 2-27
Guidelines for Using and Maintaining BJ Cartridges .............................. 2-27
Choosing the Best Cartridge ........................................................................ 2-29
Installing the BJ Cartridge ........................................................................... 2-31
Storing BJ Cartridges .................................................................................... 2-36
Chapter 2
Setting Up Your MultiPASS C50
Canon
MultiPASS C50 Hardware Manual
ENGLISH
2-1
Selecting and Loading the Print Media ................................................................. 2-37
Selecting the Print Media ............................................................................. 2-37
Plain Media ......................................................................................... 2-37
Canon Media ...................................................................................... 2-38
The Printable Area ........................................................................................ 2-40
Plain Paper and Special Media ......................................................... 2-40
Envelopes ............................................................................................ 2-41
Adjusting the Paper Thickness Lever ......................................................... 2-42
Loading the Print Media .............................................................................. 2-44
Loading Print Media for Automatic Feed ...................................... 2-45
Loading Print Media for Manual Feed ........................................... 2-49
Using Canon’s Specialty Papers .................................................................. 2-50
Printing on High Resolution Paper HR-101 .................................. 2-50
Printing on FS-101 Fabric Sheets ..................................................... 2-52
Using the Paper Output Guides with the BC-22/22e and BC-29F
Cartridges ................................................................................................... 2-53
Entering User Information in the MultiPASS C50 .............................................. 2-54
Guidelines for Entering Information .......................................................... 2-55
Entering Numbers, Letters, and Symbols ....................................... 2-56
Editing Information ........................................................................... 2-57
Entering Your Identification Information .................................................. 2-58
Editing Your Identification Information ......................................... 2-60
The MultiPASS C50 Settings ................................................................................... 2-61
List of Settings ............................................................................................... 2-61
General Settings ................................................................................. 2-62
Sending Settings ................................................................................. 2-63
Receive Settings ................................................................................. 2-65
Speed Dialling Settings ...................................................................... 2-67
Other Options ..................................................................................... 2-67
The MultiPASS C50 Unit Settings .............................................................. 2-68
Accessing the MultiPASS C50 Settings ...................................................... 2-71
To Access the VOLUME CONTROL Settings (CALLING
VOLUME, KEYPAD VOLUME, ALARM VOLUME,
LINE MONITOR VOL) .............................................................. 2-71
To Access the RX CALL LEVEL, COLOUR COPY MEDIA,
MID PAUSE SET, and DISPLAY LANGUAGE Settings ..... 2-72
Testing the MultiPASS C50 ..................................................................................... 2-74
2-2
Setting Up Your MultiPASS C50
Canon
MultiPASS C50 Hardware Manual
Chapter 2
ENGLISH
Choosing a Location for Your MultiPASS C50
Before unpacking your MultiPASS C50, follow these guidelines to choose the
best location for it.
Please review the information provided in ”Safety Instructions” on page 1-14, to
make sure you are installing your MultiPASS C50 for safe use.
J Put the MultiPASS C50 in a cool, dry, clean, well ventilated place:
I
Make sure the area is free from dust.
I
Make sure the location is not affected by extreme temperature changes,
and always stays between 10! and 32.5!C.
I
Make sure the area’s relative humidity is always between 10% and 90%.
J Keep the MultiPASS C50 away from direct sunlight.
J If possible, put the MultiPASS C50 near an existing telephone outlet, to avoid
the expense of installing a new one.
J Place the unit near a standard 200-240 VAC power outlet.
J Place the MultiPASS C50 near the PC you will be connecting it to. Make sure
you can reach it easily, as you will be using it as a printer, fax machine, copier,
scanner, and telephone.
J Do not plug the MultiPASS C50 into the same circuit as an appliance such as
an air conditioner, electric typewriter, television, or copier. Such devices
generate electrical noise that can interfere with your MultiPASS C50’s ability
to send or receive faxes.
J Set the MultiPASS C50 on a flat, stable, vibration-free surface that is strong
enough to support its weight (about 5.6 kg).
J Make sure the location you choose provides enough space around the
MultiPASS C50 for adequate ventilation, and to allow paper to flow freely
into and out of the unit. The figure below shows the minimum space required
for the unit.
Chapter 2
Setting Up Your MultiPASS C50
Canon
MultiPASS C50 Hardware Manual
ENGLISH
2-3
618 mm
482 mm
281 mm
400 mm
365 mm
If you need help installing your MultiPASS C50 or have any questions about it,
please contact your local authorised Canon dealer or service centre.
2-4
Setting Up Your MultiPASS C50
Canon
MultiPASS C50 Hardware Manual
Chapter 2
ENGLISH
Unpacking Your MultiPASS C50
Follow the directions below to unpack your MultiPASS C50 properly, and to
make sure you have all of its components and documentation.
Do You Have Everything?
As you unpack the MultiPASS C50, save the carton and packing material in case
you want to move or ship the unit in the future.
1. Carefully remove all items from the box. You should have someone help by
holding the box while you lift the MultiPASS C50 and its protective
packaging out of the carton.
PARALLEL CABLE
TELEPHONE LINE
FERRITE CORE
POWER CORD
BC-20 BLACK BJ
CARTRIDGE
DOCUMENT
SUPPORT FOR
SCANNED
DOCUMENTS
OUTPUT TRAY
EXTENSION
MultiPASS C50 USER’S GUIDE
MULTIPASS DESKTOP MANAGER FOR
WINDOWSH PACKAGE
BC-21/21e COLOUR BJ CARTRIDGE
SB-21 BJ CARTRIDGE CONTAINER
SENDING
DOCUMENT
SUPPORT
MultiPASS C50 UNIT
Chapter 2
Setting Up Your MultiPASS C50
Canon
MultiPASS C50 Hardware Manual
ENGLISH
2-5
2. Make sure you have the following items:
MultiPASS C50 UNIT
SENDING DOCUMENT
SUPPORT
DOCUMENT SUPPORT
FOR SCANNED
DOCUMENTS
POWER CORD*
PARALLEL CABLE
TELEPHONE LINE**
BC-20 BLACK BJ CARTRIDGE
BC-21/22e COLOUR BJ
CARTRIDGE
MultiPASS C50 USER’S GUIDE
(This book)
DESKTOP MANAGER FOR
WINDOWSH SOFTWARE AND
PRINTER DRIVER CD-ROM
OUTPUT TRAY
EXTENSION
FERRITE CORE
SB-21 BJ CARTRIDGE
CONTAINER
DESKTOP MANAGER FOR
WINDOWSH SOFTWARE
USER’S GUIDE
*The shape of the power cord varies depending on the country of purchase.
**The shape of the telephone line varies depending on the country of purchase.
2-6
Setting Up Your MultiPASS C50
Canon
MultiPASS C50 Hardware Manual
Chapter 2
ENGLISH
J If any of the above items are damaged or missing, notify your Canon dealer
immediately.
Chapter 2
Setting Up Your MultiPASS C50
Canon
MultiPASS C50 Hardware Manual
ENGLISH
2-7
Removing Shipping Materials
When unpacking your MultiPASS C50, remove the tape and cardboard that are
inserted into the unit to protect it during shipping. Do this as follows:
1. Remove all pieces of shipping tape from the outside of the MultiPASS C50.
2. Remove the shipping tape and protective cardboard from the sheet feeder.
2-8
Setting Up Your MultiPASS C50
Canon
MultiPASS C50 Hardware Manual
Chapter 2
ENGLISH
3. Open the operation panel by grasping it with both hands and gently pulling it
toward you.
4. Remove the soft styrofoam sheet from the unit’s Automatic Document
Feeder (ADF), then gently push the operation panel shut until it clicks.
Chapter 2
Setting Up Your MultiPASS C50
Canon
MultiPASS C50 Hardware Manual
ENGLISH
2-9
5. Peel the clear protective sheet off of the LCD display.
2-10
Setting Up Your MultiPASS C50
Canon
MultiPASS C50 Hardware Manual
Chapter 2
ENGLISH
Assembling the MultiPASS C50
Use the following instructions to assemble your MultiPASS C50 main unit and
components. To see how the MultiPASS C50 will look fully assembled, see
”Getting Acquainted with Your MultiPASS C50” on page 2-20.
Attaching Components
Attaching the Sending Document Support
The sending document support holds documents as they feed into the Automatic
Document Feeder (ADF).
To install this support, insert one of its tabs into the corresponding slot above the
MultiPASS C50’s Automatic Document Feeder (ADF), then – firmly but gently –
insert the other.
Chapter 2
Setting Up Your MultiPASS C50
Canon
MultiPASS C50 Hardware Manual
ENGLISH
2-11
Attaching the Document Support
The document support catches documents as they come out of the MultiPASS
C50 after being faxed or scanned. You can operate the MultiPASS C50 with or
without this support.
The ends of the metal support fit into the slots on the front of the MultiPASS
C50, as shown below. To install it, slightly squeeze the ends of the support toward
each other, insert them in the slots, and gently release them. Then slide the
support into the unit until it clicks in position.
When the support is installed, you can pull it out or push it in to suit the size of
the document.
J When inserting the document support, make sure that it curves upwards, as
shown in the figures above.
J If you do not wish to use the support, you can remove it completely.
2-12
Setting Up Your MultiPASS C50
Canon
MultiPASS C50 Hardware Manual
Chapter 2
ENGLISH
Attaching the Output Tray Extension
The output tray extension catches printed pages as they come out of the
MultiPASS C50’s output tray.
The ends of the metal support fit into the slots on the output tray, as shown
below. To install it, squeeze the ends of the support toward each other, insert
them into the slots, and gently release them.
Chapter 2
Setting Up Your MultiPASS C50
Canon
MultiPASS C50 Hardware Manual
ENGLISH
2-13
Making Connections
Connecting the MultiPASS C50 to Your PC
Your MultiPASS C50 has an 8-bit, bi-directional parallel interface port that
allows you to connect it to your PC.
Use the parallel cable and ferrite core provided with your MultiPASS C50. If you
plan to use a cable or ferrite core other than those provided, make sure they are
IEEE 1284 compliant and that the cable is preferably no longer than two metres.
Connect the MultiPASS C50 to your computer as follows:
1. Make sure the computer is turned off and the MultiPASS C50 is unplugged.
2. Connect the parallel cable to your MultiPASS C50:
a. Align the cable connector with the interface port so their shapes match.
b. Gently press the cable connector into the port.
c. Secure the cable connector by snapping both wire clips (on the sides of the
port) into the cable connector, as shown below.
2-14
Setting Up Your MultiPASS C50
Canon
MultiPASS C50 Hardware Manual
Chapter 2
ENGLISH
3. Open the ferrite core and attach it to the parallel cable near the end closest to
the MultiPASS C50 unit.
4. Connect the other end of the cable to the parallel interface port on your
computer.
a. Align the cable connector with the interface port so their shapes match.
b. Gently press the cable connector into the port.
c. Secure the cable connector by snapping both wire clips (on the sides of the
port) into the cable connector.
Chapter 2
Setting Up Your MultiPASS C50
Canon
MultiPASS C50 Hardware Manual
ENGLISH
2-15
Connecting the Telephone Line
Connect the MultiPASS C50 to a telephone line as follows:
1. Connect one end of the supplied telephone line to the jack marked
side of the MultiPASS C50.
on the
2. Connect the other end of the line to your wall telephone jack.
2-16
Setting Up Your MultiPASS C50
Canon
MultiPASS C50 Hardware Manual
Chapter 2
ENGLISH
Connecting the Optional Handset, Extension Phone or
Answering Machine
To use your MultiPASS C50 to make or receive normal telephone calls, you must
connect the optional handset or an extension telephone. You can also attach an
answering machine (with or without an extension telephone).
Do this by connecting the line from the optional handset, extension phone or
on the side of the MultiPASS C50.
answering machine into the jack marked
J If you connect an answering machine to the MultiPASS C50, be sure to read
”Using an Answering Machine: ANS. MACHINE MODE” on page 5-9.
J Before using your MultiPASS C50, be sure to connect the optional handset,
telephone or answering machine to the unit.
Chapter 2
Setting Up Your MultiPASS C50
Canon
MultiPASS C50 Hardware Manual
ENGLISH
2-17
Connecting the Power Cord
Follow these guidelines when connecting your MultiPASS C50 to a power source:
J The MultiPASS C50 is intended for domestic use only and requires 200-240 V
AC. Do not use it outside the country where it was purchased.
J Use only the power cord that came with the unit. Using a longer cord or
extension cord can cause the MultiPASS C50 to malfunction.
J Unplug the unit only by pulling on the plug itself. Never pull on the cord.
J Do not plug the MultiPASS C50 into an outlet shared with an appliance such
as an air conditioner, computer, electric typewriter, or copier. These devices
generate electrical noise, which can interfere with the MultiPASS C50’s
operation.
J Make sure nothing is laying on the power cord, and that the cord cannot be
walked on or tripped over.
J Do not overload the electrical outlet. Make sure the total amperage used by
all the machines plugged into the outlet does not exceed the ampere rating of
the outlet’s circuit breaker.
J Make sure the operation panel of the MultiPASS C50 is properly closed, and
that there are no documents in this area.
Connect the power cord as follows:
1. Plug the supplied power cord into the power receptacle on the MultiPASS
C50.
2-18
Setting Up Your MultiPASS C50
Canon
MultiPASS C50 Hardware Manual
Chapter 2
ENGLISH
2. Plug the other end of the power cord into the outlet.
The MultiPASS C50 has no power switch, so its power is on as long as it is
plugged in. Once connected, though, the unit still needs to warm up before you
can use it. Depending on the number of pages accumulated in its memory, the
MultiPASS C50 can take up to four minutes to warm up.
J While the MultiPASS C50 is warming up, the message PLEASE WAIT
appears in the LCD display:
PLEASE WAIT
J When the time and receive mode appear, the MultiPASS C50 is in standby
mode and ready for use:
13:30
FaxOnly
If the BJ cartridge has not been installed yet, the message PUT IN
CARTRIDGE alternates with the standby mode display:
PUT IN CARTRIDGE
13:30
Chapter 2
FaxOnly
Setting Up Your MultiPASS C50
Canon
MultiPASS C50 Hardware Manual
ENGLISH
2-19
Getting Acquainted with Your MultiPASS C50
Before using your MultiPASS C50, look over the diagrams on these pages to
become familiar with the unit’s components and their functions.
Front View
Paper Rest
Sending Document Support
Paper Guide
Automatic Document Feeder
(ADF)
Sheet Feeder
Printer Cover
Document Guides
Operation Panel
Document Support For Scanned
Documents
Output Tray
Output Tray Extension
Paper Output Guides
2-20
Setting Up Your MultiPASS C50
Canon
MultiPASS C50 Hardware Manual
Chapter 2
ENGLISH
Rear View
Telephone
Line Jack
Optional
Handset/
Telephone/
Answering
Machine Jack
Power Connector
Manual Feeder
Bi-Directional Parallel Port
The Handset (Option)
For a description of the optional handset components, see Appendix B.
Chapter 2
Setting Up Your MultiPASS C50
Canon
MultiPASS C50 Hardware Manual
ENGLISH
2-21
Inside the Printer Cover
Paper Thickness Lever
Cartridge Holder
2-22
Setting Up Your MultiPASS C50
Canon
MultiPASS C50 Hardware Manual
Chapter 2
ENGLISH
The Operation Panel
C LCD Display
B Receive Mode
A Document Feed Lever
ABC
1
GHI
4
PQRS
7
2
JKL
5
TUV
8
D Resolution
E One-Touch Speed Dial/
Special Function Buttons
DEF
3
MNO
FUNCTION
CARTRIDGE RESUME
6
WXYZ
/PAUSE
RECEIVE MODE RESOLUTION
ALARM
1
9
CODED DIAL
4
0
2
5
TONE/+
F Numeric Buttons
3
PRINTER
RESET
6
D.T.
R
K Stop
G Redial/Pause
J Alarm
H Coded Dial
I Start/Copy
A Document feed lever
Set this lever to the left ( ) for automatic document feed, or to the right ( )
for manual document feed.
B RECEIVE MODE button
Use this button to select whether the MultiPASS C50 is set to receive faxes
manually (”MANUAL MODE”), to treat all calls as faxes (”FAX ONLY
MODE”), to use an answering machine to receive all calls (”ANS.
MACHINE MODE”), or to automatically switch between telephone and fax
receiving, depending on the type of call (”Fax/Tel Mode”).
C LCD display
This displays messages and prompts during operation, and displays selections,
text, numbers, and names when registering information.
D RESOLUTION button
Press this button to select the resolution the MultiPASS C50 will use for the
document you want to fax, copy, or scan.
Chapter 2
Setting Up Your MultiPASS C50
Canon
MultiPASS C50 Hardware Manual
ENGLISH
2-23
E One-Touch Speed Dial/Special Function buttons
Use these buttons for one-touch speed dialling, entering user information, and
to perform special operations. See pages 2-25 and 2-26 for details on the
special function buttons.
F Numeric buttons
Use these buttons to type numbers and names when entering information, and
to dial fax/telephone numbers that are not registered for automatic dialling.
G
(REDIAL)/PAUSE button
Press this button to redial the last number that was dialled using the number
buttons, or to enter pauses between digits when dialling fax numbers.
H CODED DIAL button
Press this button (followed by entering a two-digit code with the numeric
buttons) to dial a fax number that you have registered for coded speed
dialling.
I
(START/COPY) button
Press this button to begin sending, receiving, scanning, or other operations, or
to select functions when registering information.
J ALARM lamp
This lamp flashes when an error occurs, when the MultiPASS C50 is out of
paper or ink.
K
(STOP) button
Press this button to cancel sending, receiving, or any other operation.
2-24
Setting Up Your MultiPASS C50
Canon
MultiPASS C50 Hardware Manual
Chapter 2
ENGLISH
Special Function Buttons
FUNCTION
1
CARTRIDGE RESUME
2
4
3
5
TONE/+
PRINTER
RESET
6
D.T.
R
J FUNCTION button
Use this button to access different functions, such as when entering user
information, running the MultiPASS C50’s self-cleaning process, checking the
nozzles, or printing faxes stored in the MultiPASS C50’s memory. Also, use
this button to enable access to some of the special function buttons described
below.
J CARTRIDGE button
Press this button to release the MultiPASS C50’s BJ cartridge holder to its
centre position for installing or replacing the cartridge. (Press again after
installing the cartridge to return the cartridge holder back to its home
position.)
J RESUME button
Press this button when you want to form-feed paper when printing.
J Arrow buttons ( , ) 1 and 2
Use these buttons to scroll through menu selections or to move the cursor
when registering data.
J PRINTER RESET button 3
Press this button to reset the MultiPASS C50 if your PC crashes. This will
maintain all the faxes currently in memory. Do not unplug the MultiPASS C50
to reset the unit or the faxes in memory will be lost.
J TONE/+ button 4
Press this button to switch to tone dialling temporarily when your unit is set
for pulse dialling. See page 4-24 for details. Press also to enter a + sign when
registering your fax/telephone number.
Chapter 2
Setting Up Your MultiPASS C50
Canon
MultiPASS C50 Hardware Manual
ENGLISH
2-25
J D.T. button 5
Press this button to confirm the dial tone when dialling a telephone/fax
number. See page 4-23 for details.
J R button 6
Press this button to dial the outside line number when the unit is connected
through a switchboard (PBX). See page 4-20 for details.
2-26
Setting Up Your MultiPASS C50
Canon
MultiPASS C50 Hardware Manual
Chapter 2
ENGLISH
Selecting and Installing a BJ Cartridge
Canon offers a number of Bubble Jet (BJ) cartridges to meet a wide range of
printing requirements. This section describes how to select the best BJ cartridge
for your needs, as well as how to install and maintain the cartridge.
The MultiPASS C50 comes with one BC-20 Black BJ cartridge and one BC-21 or
BC-21e Colour BJ cartridge.
Guidelines for Using and Maintaining BJ Cartridges
The most important thing you can do to ensure the best possible print quality, as
well as extend the life of your MultiPASS C50, is to take care of the MultiPASS
C50’s BJ cartridges following these guidelines:
J Store cartridges at room temperature.
J Keep cartridges in their sealed containers until you are ready to use them.
J Install the cartridge immediately after removing its print head cap and
protective tape.
J Always use the cartridge within one year of unpacking it.
J When changing cartridges, always store the unused cartridge in the SB-21 BJ
cartridge container that comes with the MultiPASS C50.
J Do not remove the cartridge from the MultiPASS C50 unless necessary.
The ink in the BJ cartridges is difficult to clean up if spilled. To avoid spilling ink,
always be sure to follow these precautions when handling the cartridges:
J Do not attempt to disassemble or refill the cartridge.
J Do not shake or drop the cartridge, or tip the print head downwards.
J Keep BJ cartridges out of children’s reach.
Chapter 2
Setting Up Your MultiPASS C50
Canon
MultiPASS C50 Hardware Manual
ENGLISH
2-27
Hold the BJ cartridge by its sides only. Do not touch the print head, the sharp
edges around the print head, the silver plate on the bottom of the cartridge, or
the silver metal or circuit area on its side.
PRINT HEAD
J Make sure the BJ cartridge holder is in its home position (on the right side of
the unit) when you are not using the MultiPASS C50. If it is not in its home
position, press the CARTRIDGE button. Leaving it out of its home position
will dry out the print head on the cartridge.
J Clean the print head when print quality is no longer satisfactory. See
”Cleaning and Testing the BJ Cartridge Print Head” on page 9-9 for
instructions. If the print quality does not improve after five consecutive
cleanings, replace the ink tank or BJ cartridge.
J Do not use a BC-21/21e Colour BJ cartridge with either of its ink tanks
missing. Doing so can cause it to clog.
J Do not remove the ink tanks from the BC-21/21e Colour BJ cartridge
unnecessarily, or the ink in them may clog.
J Never attempt to refill an empty cartridge.
2-28
Setting Up Your MultiPASS C50
Canon
MultiPASS C50 Hardware Manual
Chapter 2
ENGLISH
Choosing the Best Cartridge
Canon offers several BJ print cartridges and ink tanks for use in the MultiPASS
C50. (BJ print cartridges contain the BJ print head and ink, while BJ ink tanks
contain only ink.) Use the following descriptions to decide which type of
cartridge best suits your particular needs.
To avoid printing problems, use only the BC-20 or BC-21/21e BJ cartridges for
normal printing. The BC-22/22e Photo Colour BJ Cartridge (sold separately) is
for printing photo-realistic colour images. Other cartridges can produce
unsatisfactory results. In addition, use only BCI-21 Black and BCI-21 Colour ink
tanks in the BC-21/21e Colour BJ cartridge.
BC-20 Black BJ Cartridge
This cartridge incorporates a BJ print head and black ink in
a single unit. The BC-20 can be used if most of your
printing is black, e.g. for receiving faxes, making copies, and
monochrome printing. It can print twice as fast as a colour
cartridge, and at higher resolution.
BC-21/21e Colour BJ Cartridge
The BC-21/21e incorporates a BJ print head and two
replaceable ink tanks (a BCI-21 Black and a BCI-21
Colour). Use this cartridge when printing in colour.
BCI-21 Black ink tank
Purchase this ink tank from your local Canon dealer as the
black ink runs out of the BC-21/21e Colour BJ cartridge.
BCI-21 Colour ink tank
Purchase this ink tank from your local Canon dealer as the
colour ink runs out of the BC-21/21e Colour BJ cartridge.
Chapter 2
B
MultiPASS C50 Hardware Manual
ENGLISH
B
Ca Ink
rtri
Cl-2 dge
Blac
k 1
Ma
Ja de
pa in
n
Ma
BC
de
in
-2
Jap
1
an
Ink
Cartrid
ge
BC
Blacl-21
k
Ma
Japde in
an
B
Ink
Cartrid
ge
C
Co l-21
lor
Ma
Japde in
an
Setting Up Your MultiPASS C50
Canon
Ca Ink
rtri
Cl-2 dge
Col
or 1
Ma
Ja de
pa in
n
CaColor
rtrid BJ
ge
2-29
BC-22/22e Photo Colour BJ Cartridge
Includes the print head and colour ink in a single unit. Use
this cartridge for printing photo-realistic colour images.
BC-29F Fluorescent BJ Cartridge
Includes the print head and colour ink in a single unit. Use
this cartridge for printing bright, attractive fluorescent
colours. For optimum print quality, use High Resolution
Paper HR-101.
BC
-29
F
The MultiPASS C50 cannot print incoming faxes or make copies while the
BC-22/22e or BC-29F cartridge is installed. This is an ink-saving feature: because
the BC-22/22e and BC-29F are single units (and do not have ink tanks that can
be replaced separately), using them to print faxes will use the black ink faster,
using up the cartridges while they still have a considerable amount of colour ink
remaining.
SB-21 BJ Cartridge Container
Use the SB-21 to store an extra BJ cartridge in a
convenient location, while keeping it from drying out.
2-30
Setting Up Your MultiPASS C50
Canon
MultiPASS C50 Hardware Manual
Chapter 2
ENGLISH
Installing the BJ Cartridge
To install your BJ cartridge, follow these steps:
1. Make sure the MultiPASS C50 is plugged in.
CARTRIDGE
2. Press CARTRIDGE.
J The cartridge holder moves toward the centre of the unit.
3. Open the printer cover by grasping the document guides and lifting.
J Do not try to manually move or stop the cartridge holder, or you may damage
the MultiPASS C50.
J Do not touch the ribbon cable, the small circuit board, the guide rail or the
round shaft.
CIRCUIT BOARD
GUIDE RAIL
ROUND SHAFT
RIBBON CABLE
Chapter 2
Setting Up Your MultiPASS C50
Canon
MultiPASS C50 Hardware Manual
ENGLISH
2-31
J Hold the BJ cartridge by its sides only. Do not touch the print head, the sharp
edges around the print head, the silver plate on the bottom of the cartridge, or
the silver metal or circuit area on its side.
PRINT HEAD
4. Raise the green cartridge lock lever (on the cartridge holder) by gently
pulling up on it.
DO NOT TOUCH THE
GUIDE RAIL
DO NOT TOUCH THE
RIBBON CABLE
DO NOT TOUCH THE
ROUND SHAFT
2-32
Setting Up Your MultiPASS C50
Canon
MultiPASS C50 Hardware Manual
Chapter 2
ENGLISH
5. Peel the protective foil off the new BJ cartridge’s protective packaging, and
remove the cartridge.
6. Lift the orange cap off the cartridge’s print head, then remove the orange
tape.
Discard the cap and tape immediately. Never attempt to re-attach the cap or tape
to the print head, or you can adversely affect the ink flow or quality of the ink
colour.
Chapter 2
Setting Up Your MultiPASS C50
Canon
MultiPASS C50 Hardware Manual
ENGLISH
2-33
7. Hold the cartridge so the label faces outward, tilt it slightly forward and to
the right, then slide it into the cartridge holder.
DO NOT TOUCH THE
GUIDE RAIL
DO NOT TOUCH THE
RIBBON CABLE
DO NOT TOUCH THE
ROUND SHAFT
8. Lower the green lock lever completely. The BJ cartridge is now locked into
position.
Do not try to manually move or stop the cartridge holder, or you may damage
the MultiPASS C50.
2-34
Setting Up Your MultiPASS C50
Canon
MultiPASS C50 Hardware Manual
Chapter 2
ENGLISH
9. Set the paper thickness lever. For printing on plain paper:
Cartridge
BC-21/21e Colour BJ Cartridge (black)
BC-21/21e Colour BJ Cartridge (colour)
BC-20 Black BJ Cartridge
BC-22/22e Photo Colour BJ Cartridge
BC-29F Fluorescent BJ Cartridge
Thickness Lever Position
centre
centre
left
centre
centre
See page 2-42 for more information on paper thickness settings.
10. Close the printer cover.
CARTRIDGE
11. Press CARTRIDGE.
J The MultiPASS C50 beeps twice, and the cartridge holder moves to its
home position on the right side of the unit.
J Once the cartridge holder is in its home position, the unit automatically
cleans the print head.
Unplug the MultiPASS C50 only when it is in standby mode (time and receiving
mode show in the LCD display). Do not unplug the MultiPASS C50 when the
cartridge holder is not in its home position on the right. If you unplug the unit
while it is printing, or move the cartridge holder from its home position, the
cartridge will not be capped and can dry out.
Chapter 2
Setting Up Your MultiPASS C50
Canon
MultiPASS C50 Hardware Manual
ENGLISH
2-35
Storing BJ Cartridges
Once a BJ cartridge is unwrapped, its print head must be kept from drying out,
or it can clog and fail to work properly. A cartridge installed in the MultiPASS
C50 is protected from drying out by automatically moving to the home position
at the right side of the unit and capping itself.
If you remove a partially used BJ cartridge from the MultiPASS C50, store it in
the SB-21 BJ cartridge container that came with your unit.
1. Insert the cartridge in the container with the cartridge’s label facing forward,
and the print head down.
Color
Slot
Black
Ink
Cartri
dge
BCl-2
Color1
Made
Japanin
Color
CartridBJ
ge
Slot
Ink
Cartri
dge
BCl-2
Blac 1
k
Made
Japanin
Made
in Jap
BC-2
an
1
2. Close the container lid, and snap it shut.
2-36
Setting Up Your MultiPASS C50
Canon
MultiPASS C50 Hardware Manual
Chapter 2
ENGLISH
Selecting and Loading the Print Media
The MultiPASS C50 can provide sharp black or vibrant colour printing on a wide
variety of media, including A4, letter, and legal plain paper, glossy paper,
envelopes, transparencies, back print film (for display on a backlit device), and
fabric sheets.
Whenever you change the size of the paper in the MultiPASS C50, you must also
use the MultiPASS Desktop Manager to set the MultiPASS C50 to use the new
size. For instructions, see the MultiPASS Desktop Manager User’s Guide.
Selecting the Print Media
The following describes a variety of media you can use with your MultiPASS C50.
Be sure to test the medium you intend to use before ordering it in bulk. If you
have any questions about whether a particular medium is suitable for your
MultiPASS C50, please contact your local authorised Canon dealer. For complete
paper specifications, see ”Printer” on page A-6.
Please note that not all print media mentioned here may be available in your
country. Contact your local authorised Canon dealer for more information on
product availability.
Plain Media
Plain paper
The MultiPASS C50 produces letter-quality print on most plain bond paper,
including cotton bond and photocopy paper. It can use A4, letter, or legal sizes.
The paper must be less than 0.2 mm thick, and have a weight of 64-90 g/m2.
You can also use paper weighing 90-105 g/m2 by manually feeding sheets, one at a
time.
Envelopes
The MultiPASS C50 can print on European DL (220 × 110 mm) and U.S.
Commercial No. 10 (9.5 × 4.1 inches) envelopes.
Chapter 2
Setting Up Your MultiPASS C50
Canon
MultiPASS C50 Hardware Manual
ENGLISH
2-37
Canon Media
Canon provides the following media, all specifically developed to extend the
printing capability of your MultiPASS C50. For details or purchase, contact your
local authorised Canon dealer.
Canon Bubble Jet Paper LC-301 (water resistant)
This water-resistant paper is specially developed for colour printing with Canon
Colour BJ printers such as the MultiPASS C50. Images printed on LC-301 paper
are bright and vivid, and will not run if liquid is spilled on them. Images printed
on this paper stand up to normal office highlighters, unlike images printed on
other papers.
Canon High-Resolution Paper HR-101
This paper is designed to produce near-photographic quality print output, with
sharp, vivid graphics and photographs. You must use this paper when printing
with the BC-22/22e Photo Colour BJ Cartridge. When using HR-101 paper, be
sure to print on the whiter side of the sheets, and after printing a pack of this
paper, use the cleaning sheet provided with it to clean the printer roller.
Canon Transparencies CF-102
These overhead transparencies are specially designed for Canon BJ colour
printers. Use these clear transparencies to produce crisp and professional
overhead presentations. Do not use normal transparencies in the MultiPASS C50,
as they do not absorb ink and can cause the ink to run.
Canon Back Print Film BF-102
This unique mylar-based translucent sheet allows you to print high-quality colour
output – including photographs and graphics – that you can view with a rear
illumination device such as a light box. This gives you sharp, bright, vivid images
you can use in meetings, trade shows, and other presentations.
If you are printing from an application outside Windows, your application or
printer driver must support mirror image printing in order to use back print film.
2-38
Setting Up Your MultiPASS C50
Canon
MultiPASS C50 Hardware Manual
Chapter 2
ENGLISH
Canon High-Gloss Film HG-101
This is a high-grade gloss film that lets you create sharper and more vivid colour
output than is possible with coated paper. This film provides the best colour print
quality for the BC-21/21e Colour BJ cartridge. Use this film for trade show
displays or other special presentations, and when printing at 720 × 360 dpi
resolution.
Fabric Sheets FS-101
These white cotton fabric sheets are specifically designed for Canon BJ Colour
printers, and enable you to print your own designs for cross stitch, pillows,
holiday stockings, and other craft projects.
T-Shirt Transfers TR-101
This special sheet allows you to print your own designs and transfer them to any
cotton or cotton/polyester blend t-shirt, sweatshirt, apron, tote bag, or other
fabric item.
Be sure to select Back Print Film Option when printing on the TR-101 T-Shirt
Transfers. See the MultiPASS Desktop Manager User’s Guide for instructions.
Chapter 2
Setting Up Your MultiPASS C50
Canon
MultiPASS C50 Hardware Manual
ENGLISH
2-39
The Printable Area
To ensure the best print quality, make sure the text or graphics you create stay
within the printable areas shown below. If not, you can get poor print quality or
line feeding problems. (For example, printing outside the bottom margin can
produce stains on the bottom edge of the medium.)
Plain Paper and Special Media
The shaded area in the figure below shows the printable area for papers.
a
b
b
d
c
e
Printable Area:
A4 size
a 210 mm
b 3.4 mm
c 297 mm
d 3.0 mm
e 7.0 mm
2-40
Letter size
a 8.5)
b 0.25)
c 11.0)
d 0.12)
e 0.27)
Legal size
a 8.5)
b 0.25)
c 14.0)
d 0.12)
e 0.27)
Setting Up Your MultiPASS C50
Canon
MultiPASS C50 Hardware Manual
Chapter 2
ENGLISH
Envelopes
The shaded portion below shows the printable area for envelopes.
a
b
c
e
d
f
Printable Area:
European DL
a 220 mm
b 6.4 mm
c 10.4 mm
d 110 mm
e 3.0 mm
f 7.0 mm
Chapter 2
U.S. Commercial No. 10
a 9.5)
b 0.25)
c 1.2)
d 4.1)
e 0.12)
f 0.27)
Setting Up Your MultiPASS C50
Canon
MultiPASS C50 Hardware Manual
ENGLISH
2-41
Adjusting the Paper Thickness Lever
Before loading a print medium into the MultiPASS C50, use the paper thickness
lever to adjust the gap between the print head and the print paper to suit the
paper’s thickness.
If the gap between the print head and the paper is not adjusted properly,
smudging or otherwise poor print quality can result.
Set the paper thickness lever as follows:
CARTRIDGE
1. Press CARTRIDGE to move the cartridge holder to the centre of the unit.
2. Open the printer cover by grasping the document guides and lifting.
DO NOT TOUCH THE RIBBON
CABLE
DO NOT TOUCH THE GUIDE
RAIL
DO NOT TOUCH THE ROUND
SHAFT
Do not try to move or stop the cartridge holder manually, or you may damage the
MultiPASS C50.
2-42
Setting Up Your MultiPASS C50
Canon
MultiPASS C50 Hardware Manual
Chapter 2
ENGLISH
3. Set the paper thickness lever to left, centre, or right according to the
following table:
Medium
Plain paper
LC-301 water resistant paper
Envelopes
HR-101 high-resolution paper
GP-101 glossy paper
CF-102 transparencies
BF-102 back print film
HG-101 high-gloss film
FS-101 fabric sheet
TR-101 T-shirt transfers
Lever position
Black
Left
Left
Colour
Centre
Centre
Right
Centre
Centre
Centre
Centre
Centre
Right
Right
DO NOT TOUCH THE RIBBON
CABLE
DO NOT TOUCH THE GUIDE
RAIL
DO NOT TOUCH THE ROUND
SHAFT
Do not try to manually move or stop the cartridge holder, or you may damage
the MultiPASS C50.
4. Close the printer cover.
CARTRIDGE
5. Press CARTRIDGE again to move the cartridge holder back to its home
position.
Chapter 2
Setting Up Your MultiPASS C50
Canon
MultiPASS C50 Hardware Manual
ENGLISH
2-43
Loading the Print Media
Keep the following in mind when selecting or loading media for your MultiPASS
C50:
J You can stack plain paper, envelopes, and other media in the MultiPASS
C50’s sheet feeder. The maximum size of the stack depends on the medium:
Medium
Plain paper
Envelopes
Transparencies
Back print film
Maximum stack size
100 sheets
(maximum 10 mm stack height)
10 envelopes
50 sheets
10 sheets
J To avoid paper jams and poor print quality, never try to print on damp, curled,
wrinkled, or torn paper.
J Store paper and other media flat, and leave it in its wrapper until you are
ready to use it. Store unused paper from opened packs in the original packing
in a cool, dry location.
J Store paper at 18!-24!C, 40%-60% relative humidity.
J If you have trouble with sheets skewing, double-feeding, or jamming when
using coated paper, transparencies, or back print film in the sheet feeder, use
manual feeding instead. (These problems are more common at cooler
temperatures.)
J Let the paper run out before you refill the sheet feeder. Avoid mixing ”new”
paper with paper remaining in the sheet feeder.
J Use cut-sheet paper only, not paper that comes on a roll (like fax paper).
J When using graph paper, the lines may not match because the 4.23 mm line
spacing of the MultiPASS C50 is slightly less than that of graph paper.
J If the print density of your page is very high, light paper stock may curl
slightly due to the large amount of ink. If you need to print dense graphics, try
printing on heavier stock.
J Do not use paper that is thicker than specified for the MultiPASS C50.
Printing with a paper that is thick enough to come in contact with the print
head nozzles may damage the BJ cartridge. For complete paper specifications,
see ”Printer” on page A-6.
2-44
Setting Up Your MultiPASS C50
Canon
MultiPASS C50 Hardware Manual
Chapter 2
ENGLISH
Loading Print Media for Automatic Feed
The MultiPASS C50’s sheet feeder can handle media of the following sizes:
Paper size:
A4
210 × 297 mm
Letter
8.5) × 11)
Legal
8.5) × 14)
Envelope size:
European DL envelopes
220 × 110 mm
U.S. Commercial No. 10 envelopes
9.5) × 4.1)
Paper weight:
64-90 g/m2
Paper or other media
Use the following procedure to load plain paper, CF-102 transparencies, BF-102
back print film, or HR-101 high-resolution paper into the MultiPASS C50’s sheet
feeder. (Instructions for other media are given in the following pages.)
1. Open the printer cover by grasping the document guides and lifting.
J Make sure the paper thickness lever is set properly for the type of media
you are using. See ”Adjusting the Paper Thickness Lever” on page 2-42.
To avoid paper jams, smearing, or other problems, never open the printer cover
to set the thickness lever, while the MultiPASS C50 is printing.
2. Pull the paper rest up until it stops.
Chapter 2
Setting Up Your MultiPASS C50
Canon
MultiPASS C50 Hardware Manual
ENGLISH
2-45
3. Pick up a stack of sheets and fan the edge that will feed into the MultiPASS
C50 first, then tap the stack on a flat surface to even its edges.
4. Insert the stack into the sheet feeder until its stops, so that the right edge of
the stack is aligned with the right side of the sheet feeder.
2-46
Setting Up Your MultiPASS C50
Canon
MultiPASS C50 Hardware Manual
Chapter 2
ENGLISH
Make sure the top of the stack is below the paper limit mark
.
PAPER LIMIT MARK
5. Slide the paper guide snugly against the sides of the stack. You are now ready
to print.
J Many media have a ”right” side for printing. If you are using such a medium,
make sure you set it in the sheet feeder with the print side facing upward:
N BF-102 back print film:
matte side up
N HR-101 high-resolution paper: lighter side up
J After printing a pack of HR-101 high-resolution paper, be sure to use the
provided cleaning sheet to clean the MultiPASS C50’s printer roller, see
”Printing on High Resolution Paper HR-101” on page 2-50.
Chapter 2
Setting Up Your MultiPASS C50
Canon
MultiPASS C50 Hardware Manual
ENGLISH
2-47
Glossy paper
Use the following procedure to load GP-101 glossy paper.
For best results, load only one sheet of glossy paper into the sheet feeder at a
time.
1. Open the printer cover by grasping the document guides and lifting.
J Make sure the paper thickness lever is set to the centre. See ”Adjusting
the Paper Thickness Lever” on page 2-42.
2. Close the printer cover.
3. Pull the paper rest up until it stops.
4. Insert a sheet of glossy paper – with the glossy side facing up – into the sheet
feeder until it stops, and align the paper guide with the edge of the sheet.
2-48
Setting Up Your MultiPASS C50
Canon
MultiPASS C50 Hardware Manual
Chapter 2
ENGLISH
Loading Print Media for Manual Feed
Follow the steps below to manually feed heavier-weight media (90-105 g/m2) into
the MultiPASS C50.
You will need to select manual feed from the print dialog box of your Windows
application before printing. (See the MultiPASS Desktop Manager User’s Guide
for instructions.) Load the sheet when the dialog box prompts you to do so. If
you attempt to load the sheet without selecting manual feed, the sheet will be
ejected.
1. Open the printer cover by grasping the document guides and lifting.
J Make sure the paper thickness lever is set properly for the type of media
you are using. See ”Adjusting the Paper Thickness Lever” on page 2-42.
2. Hold the sheet with its print side facing upward, and align the sheet with the
left edge of the manual feeder (located at the back of the unit).
3. Insert the sheet until it stops, and continue to hold the sheet until the
MultiPASS C50 ”grabs” the sheet and pulls it in to the proper position.
4. After the sheet is loaded, open the printer cover and make sure the sheet is
set straight. If necessary, pull the sheet out and load it again.
5. Close the printer cover.
Chapter 2
Setting Up Your MultiPASS C50
Canon
MultiPASS C50 Hardware Manual
ENGLISH
2-49
Using Canon’s Specialty Papers
Canon provides several different specialty papers you can use with your
MultiPASS C50.
Printing on High Resolution Paper HR-101
Use the following procedure to load High Resolution Paper HR-101:
1. Open the printer cover by grasping the document guides and lifting.
J Make sure the paper thickness lever is set to the centre. See ”Adjusting
the Paper Thickness Lever” on page 2-42.
2. Close the printer cover.
3. Pull the paper rest up until it stops.
4. Load the paper into the sheet feeder as described in ”Loading Print Media
for Automatic Feed” on page 2-45.
5. Raise the output guides as described in ”Using the Paper Output Guides with
the BC-22/22e and BC-29F Cartridges” on page 2-53.
6. When you are finished printing, remove the remainder of the HR-101 paper
from the sheet feeder.
Using the Cleaning sheet (included in the HR-101 package)
The HR-101 package includes a cleaning sheet used to clean the MultiPASS C50
rollers. Use this sheet after printing on 100 sheets (the contents of the package).
1. Remove the covers of the two pieces of tape on the cleaning sheet.
2-50
Setting Up Your MultiPASS C50
Canon
MultiPASS C50 Hardware Manual
Chapter 2
ENGLISH
2. With the sticky side up and near the bottom of the cleaning sheet, align the
sheet with the right edge of the sheet feeder and slide it in until it stops.
3. Adjust the paper guide to the edge of the cleaning sheet.
FUNCTION
1
4. Press FUNCTION, then use
or
to select ROLLER CLEANING.
J The cleaning sheet is fed into the MultiPASS C50. The cleaning procedure
is completed when the sheet comes out of the unit.
2
Chapter 2
Setting Up Your MultiPASS C50
Canon
MultiPASS C50 Hardware Manual
ENGLISH
2-51
Printing on FS-101 Fabric Sheets
Follow these steps to load and print on Canon’s FS-101 fabric sheets.
J Read and follow the precautions and handling instructions included with the
FS-101 fabric sheets.
J Do not use the fixing agent that is supplied with the FS-101 fabric sheet. This
agent is not needed when printing with the MultiPASS C50.
J Do not touch the printing on a newly printed fabric sheet until the ink has
dried completely (normally about an hour).
1. Open the printer cover by grasping the document guides and lifting.
J Make sure the paper thickness lever is set to the right. See ”Adjusting the
Paper Thickness Lever” on page 2-42.
2. With the cloth side facing you and the open end up, insert one sheet into the
sheet feeder until it stops, and align the paper guide with the edge of the
sheet. You are now ready to print.
OPEN END AT THE TOP
2-52
Setting Up Your MultiPASS C50
Canon
MultiPASS C50 Hardware Manual
Chapter 2
ENGLISH
Using the Paper Output Guides with the BC-22/22e and
BC-29F Cartridges
When printing with the BC-22/22e Photo Colour or BC-29F BJ Fluorescent
cartridge on HR-101 high-resolution paper, you should use the guides on the
MultiPASS C50’s paper output tray to help support the document as it exits the
unit. This will keep the sheet from sagging and pulling through the unit as it exits,
which can lead to poor print quality.
1. Raise both paper output guides until they are vertical.
J Always raise both paper output guides.
J Always use the paper output guides when printing on HR-101 high resolution
paper, even when using the BC-20 or BC-21/21e cartridges.
2. When you finish using the BC-22/22e or BC-29F cartridge, return the paper
output guides to their original position.
When the paper output guides are raised, the output tray can hold a maximum of
20 sheets. Always lower the paper output guides when using the MultiPASS C50
as a fax machine, or they can cause the faxes to pile up and jam.
Chapter 2
Setting Up Your MultiPASS C50
Canon
MultiPASS C50 Hardware Manual
ENGLISH
2-53
Entering User Information in the MultiPASS
C50
When sending documents, you can have your fax number, your name, and the
current date and time printed out by the receiving fax. This information is called
your Transmit Terminal Identification, or TTI, and appears at the top of the
received fax in small type.
16/12 98 WED 10:12
FAX 321 456 7777
CANON U.S.A.
→→→ CANON USA FAX
.
001
THE DATE AND TIME YOU SENT
THE DOCUMENT
THE SLEREXE COMPANY LIMITED
SAPORS LANE - BOOLE - DORSET - BH 25 8 ER
TELEPHONE DOOLE ( 945 13 ) 51617
YOUR FAX/TELEPHONE
NUMBER
YOUR NAME OR COMPANY NAME
TELEX 123456
Our Ref. 350/PJC/EAC
THE NAME OF THE PARTY WHO IS
RECEIVING THE DOCUMENT*
THE PAGE NUMBER
*If you send a fax using speed dialling, the top line also includes the name registered under the speed
dialling button or code you entered.
You can enter this information in two ways:
Method 1: MultiPASS C50 Operation Panel
You can enter the user information directly into the MultiPASS C50 using the
instructions on the following pages. This allows you to use the MultiPASS C50 as
a fax machine even if you do not have a PC connected to it.
Method 2: MultiPASS Desktop Manager
You can also enter the user information using the MultiPASS Desktop Manager.
Entering information in this way will override any information entered directly
into the MultiPASS C50. See the MultiPASS Desktop Manager User’s Guide for
more information.
2-54
Setting Up Your MultiPASS C50
Canon
MultiPASS C50 Hardware Manual
Chapter 2
ENGLISH
Guidelines for Entering Information
The following section explains how to enter user information into the MultiPASS
C50.
J If you pause while entering information and do not make an entry for more
than 60 seconds, the MultiPASS C50 returns to standby mode and loses all
information you had entered up to that point. You will then have to start
again.
J If the MultiPASS C50 rings while you are entering information, press the
(STOP) button and lift the optional handset or telephone: The MultiPASS
C50 will automatically save all the information you have entered up to the last
(START/COPY) button.
time you pressed the
Chapter 2
I
If you hear nothing or a slow beep, someone is trying to send a fax: press
(START/COPY) button.
the
I
If you hear a voice, you are receiving a normal telephone call.
I
If your MultiPASS C50 is set to receive faxes automatically, you do not
(STOP) button, the MultiPASS C50 will
have to press the
automatically receive the fax. See Chapter 5, ”Receiving Faxes”.
Setting Up Your MultiPASS C50
Canon
MultiPASS C50 Hardware Manual
ENGLISH
2-55
Entering Numbers, Letters, and Symbols
Each numeric button has a number and a group of uppercase and lowercase
letters assigned to it. Use the chart below to determine which number button to
press for each character.
Button
Uppercase
Lowercase
2
ABCÅÄÁÀÃÂÆÇ
abcåäáàãâæç
3
DEFÐËÉÈÊ
defðëéèê
4
GHIÏÍÌÎ
ghiïíìî
5
JKL
jkl
6
MNOÑØÖÓÒÕÔ
mnoñøöóòõô
7
PQRS Þ
pqrs þ
8
TUVÜÚÙÛ
tuvüúùû
9
WXYZÝ
wxyzý
1
0
*
Uppercase Q Lowercase Q Number
#
–.*#!“,;: ˆ `
=/ ’?$6%&+()[]IJ‹›
Press the * button to change between number mode, uppercase letter mode and
lowercase letter mode.
When you are in number mode, ”1” appears on the right of the display.
:1
When you are in uppercase letter mode, ”A” appears on the right of the display.
:A
When you are in lowercase mode, ”a” appears on the right of the display.
:a
To enter a symbol, press # repeatedly until the symbol you want appears. Press
any other button or to enter the symbol and move the cursor to the right.
2-56
Setting Up Your MultiPASS C50
Canon
MultiPASS C50 Hardware Manual
Chapter 2
ENGLISH
Entering a single letter
For example, you would enter a lowercase letter ”b” like this:
1. Press * until an ”a” appears on the right of the display.
:a
ABC
2. Press 2 twice to display ”b” on the left of the display.
2
b
:a
Entering two letters from the same group
To enter two letters from the same group, you have to use the right arrow button
( ). For example, you would enter ”AA” like this:
1. Press * until an ”A” appears on the right of the display, then press 2 once to
display the first ”A”.
ABC
2
A
2. Press
2
:A
to enter the ”A” and move the cursor to the right.
A
ABC
:A
3. Press 2 until the second ”A” is displayed.
2
AA
:A
Editing Information
If you make a mistake while entering a name, you can correct it by using the
and buttons:
button to scroll to the incorrect character.
2
1. Use the
1
2. Press the button once to erase the character above the cursor. (The cursor
moves one space to the left.)
2
3. Press the button to move back to the empty space and type in the correct
character.
Chapter 2
Setting Up Your MultiPASS C50
Canon
MultiPASS C50 Hardware Manual
ENGLISH
2-57
Entering Your Identification Information
The following pages show you how to enter your name or company name, your
fax number, and the date and time, and how to select the type of telephone line
connected to your MultiPASS C50.
FUNCTION
1. Press FUNCTION.
FUNCTION
1
2. Use
2
or
to select USER SETTINGS, then press START/COPY.
DATE & TIME
3. Press START/COPY once more.
J The currently set date and time appear.
22/11 98
ABC
1
GHI
4
PQRS
3
MNO
5
TUV
7
DEF
2
JKL
6
WXYZ
8
9
13:30
4. Use the numeric buttons to type in the correct date and time.
J Use the DD/MM YY format for the date and use the 24-hour clock for
the time, so 2:38 p.m. would be 14:38, for example.
0
23/12 98
14:38
5. Press START/COPY to save the date and time.
UNIT TELEPHONE #
6. Press START/COPY again and enter your fax/telephone number using the
numeric buttons.
ABC
1
GHI
4
PQRS
3
8
0
TEL=541 766 3452
MNO
5
TUV
7
DEF
2
JKL
6
WXYZ
9
J You can enter up to 20 digits for your fax/telephone number.
J You can enter spaces with the
2-58
button to make the number easier to read.
Setting Up Your MultiPASS C50
Canon
MultiPASS C50 Hardware Manual
Chapter 2
ENGLISH
7. Press START/COPY to save the fax/telephone number.
UNIT NAME
8. Press START/COPY again, then use the numeric buttons to enter your name
or your business name.
ABC
1
GHI
4
PQRS
3
8
CANON
MNO
5
TUV
7
DEF
2
JKL
6
:A
WXYZ
9
J For more details on entering letters, see page 2-56.
0
J You can enter up to 24 characters for your name or business name.
9. Press START/COPY to save the name, then press
TYPE.
1
2
to select TEL LINE
TEL LINE TYPE
10. Press START/COPY , then use
type.
1
or
2
or
to select the correct telephone line
TOUCH TONE
ROTARY PULSE
Contact your local phone company if you are not sure what type of phone line
you have.
11. Press START/COPY to save the telephone line type.
COLOR COPY MEDIA
12. Press STOP to return to standby mode.
14:38
Chapter 2
FaxOnly
Setting Up Your MultiPASS C50
Canon
MultiPASS C50 Hardware Manual
ENGLISH
2-59
Editing Your Identification Information
If you ever need to change the user name, fax number, or phone line type, or to
reset the date or time, you can use the procedures above to display the settings
you need to change, then edit them using the numeric buttons and the and
buttons.
2-60
Setting Up Your MultiPASS C50
Canon
MultiPASS C50 Hardware Manual
Chapter 2
ENGLISH
The MultiPASS C50 Settings
To customise the MultiPASS C50 to your particular needs, you can adjust general
operation, sending, receiving, and speed dialling settings. There are two methods
of customising these settings:
Method 1: Using the MultiPASS Desktop Manager
The MultiPASS Desktop Manager software included with your MultiPASS C50
enables you to adjust settings for the MultiPASS C50 from your PC. For a list of
the adjustable settings, see below, and for detailed instructions on setting these
options, refer to the MultiPASS Desktop Manager User’s Guide.
Method 2: Using the MultiPASS C50 operation panel
Some of the settings that can be adjusted from the MultiPASS Desktop Manager
can also be adjusted directly from the MultiPASS C50 operation panel. Adjusting
these settings through the operation panel is convenient when you do not have
your MultiPASS C50 connected to a PC. Also, certain settings can only be set
from the operation panel.
We recommend that settings that can be adjusted from both the MultiPASS
Desktop Manager and the operation panel be set using the MultiPASS Desktop
Manager. Using the MultiPASS Desktop Manager enables you to customise more
settings. In addition, changes made via the MultiPASS Desktop Manager will
override any corresponding settings made directly from the operation panel, and
changes made to settings via the operation panel will not be displayed in the
MultiPASS Desktop Manager.
List of Settings
The following pages list the settings that can be adjusted from the MultiPASS
Desktop Manager as well as those adjustable directly from the MultiPASS C50
operation panel. For details on adjusting settings via the operation panel, refer to
the page number indicated. For instructions on adjusting settings using the
MultiPASS Desktop Manager, refer to the MultiPASS Desktop Manager User’s
Guide.
Chapter 2
Setting Up Your MultiPASS C50
Canon
MultiPASS C50 Hardware Manual
ENGLISH
2-61
General Settings
Setting Description
Desktop Manager Setting Name
Setting the date and time
*
Operation Panel Setting Name
DATE & TIME
See page 2-58
Setting the date format
Date Format
Setting the language used on
the MultiPASS C50 LCD
display
Display Language
Setting whether you want to
be prompted to confirm when
you delete a document from
the MultiPASS Desktop
Manager
Confirm before Deleting
–
Setting the printing spooler
Printing Spooler
–
Setting whether the optional
handset or a telephone is
connected to your MultiPASS
C50 unit
Telephone Attached to Unit
–
Setting the volume
–
–
–
–
Incoming Ring
Keypad
Alarm
Speaker
–
DISPLAY LANGUAGE
See page 2-72
– CALLING VOLUME
– KEYPAD VOLUME
– ALARM VOLUME
– LINE MONITOR VOL
– RX CALL LEVEL
See pages 2-71, 2-72
*Uses your PC system date and time
2-62
Setting Up Your MultiPASS C50
Canon
MultiPASS C50 Hardware Manual
Chapter 2
ENGLISH
Sending Settings
Setting Description
Desktop Manager Setting Name
Operation Panel Setting Name
Setting the name that appears
in the header of the faxes you
send
– Heading
– Company
UNIT NAME
See page 2-58
Setting the fax/telephone
number that appears in the
header of the faxes you send
Fax Number
UNIT TELEPHONE #
See page 2-58
Setting the telephone line type Phone Line Type
TEL LINE TYPE
See page 2-58
Setting a prefix to access an
outside phone line
Outside Dialling Prefix
–
Setting automatic redialling
preferences
– Automatic Retries Number
– Wait between Retries
–
Setting whether a sending
report is printed, and when it
is printed out
– Automatic Report Print
– Include Fax Image
–
Setting the modem speed used Speed
to send faxes
–
Setting the length of the pause Pause Duration
MID PAUSE SET
See page 2-72
Setting Error Correction
Error Correction (ECM)
Mode (ECM) on or off for fax
sending
–
Setting whether the
MultiPASS C50 unit starts
sending automatically
Auto Start Send
–
Setting whether the alarm
sounds if the handset is off its
hook
Off Hook Alarm
–
Chapter 2
Setting Up Your MultiPASS C50
Canon
MultiPASS C50 Hardware Manual
ENGLISH
2-63
Setting Description
Desktop Manager Setting Name
Operation Panel Setting Name
Setting the contrast of the
faxes you send
Image Contrast
SCAN CONTRAST
See page 4-4
Setting the position of the fax
heading information (TTI)
Fax Heading Position
–
Setting whether the
MultiPASS C50 redials if an
error occurs, and which pages
are resent
On Error Resend
–
Setting the R button options
R-Key
R-KEY SETTING
See page 4-20
Setting the phone lock options Phone Lock
to restrict sending and making
calls
2-64
–
Setting Up Your MultiPASS C50
Canon
MultiPASS C50 Hardware Manual
Chapter 2
ENGLISH
Receive Settings
Setting Description
Desktop Manager Setting Name
Operation Panel Setting Name
Setting the size of the paper
used for printing a fax
Paper Size
–
Setting whether an incoming
fax is reduced to fit on the
paper
Reduction
–
Setting the receive mode
Answer Receive Mode
Setting whether the
MultiPASS C50 unit rings for
an incoming fax and the
number of times it rings
– Silent Receive
– Number of Rings
–
Setting how incoming faxes
are handled when your
computer is turned on or off
Receive Fax Options
–
Report Print
–
*
See page 5-3
You can also set how faxes are
handled when the MultiPASS
C50 runs out of paper.
Setting whether a reception
report is printed, and when it
is printed out
Setting the modem speed used Speed
to receive faxes
–
Error Correction (ECM)
Setting Error Correction
Mode (ECM) on or off for fax
reception
–
*Can be adjusted with the RECEIVE MODE button.
Chapter 2
Setting Up Your MultiPASS C50
Canon
MultiPASS C50 Hardware Manual
ENGLISH
2-65
Setting Description
Desktop Manager Setting Name
Operation Panel Setting Name
Setting whether you want to
print documents in the
Desktop Manager using a
reduced amount of ink
Ink Saver Mode
–
Setting fax/telephone
switching options
–
–
–
–
–
Setting whether in manual
mode, the MultiPASS C50
automatically switches to fax
receiving after a specified ring
time
Manual/Auto Switch
–
Setting options when an
answering machine is
connected to the MultiPASS
C50 unit
Answering Machine Mode
Options
–
Listen Time before Ringing
Ring Time
Ring Tone
Default Action if No Answer
to Telephone
– Remote Receive
Setting whether remote
receive is enabled, and setting – Remote Identification
Number
the identification number used
to receive
2-66
–
Setting Up Your MultiPASS C50
Canon
MultiPASS C50 Hardware Manual
Chapter 2
ENGLISH
Speed Dialling Settings
Setting Description
Desktop Manager Setting Name
Operation Panel Setting Name
Setting one-touch speed
dialling numbers
See the Speed Dial tab
1-TOUCH SPD DIAL
See page 3-3
Setting coded speed dialling
numbers
See the Speed Dial tab
CODED SPEED DIAL
See page 3-10
Setting group dialling numbers See the Speed Dial tab
GROUP DIAL
See page 3-17
Other Options
Setting Description
Desktop Manager Setting Name
Operation Panel Setting Name
Printing a fax stored in
memory instead of uploading
it to your PC
–
FILE PRINT
See page 5-12
Cleaning the BJ cartridge
print head
–
HEAD CLEANING
See page 9-9
Cleaning the MultiPASS C50
rollers
–
ROLLER CLEANING
See page 2-50
Setting the print media for
colour copying (plain paper or
high resolution paper)
–
COLOR COPY MEDIA
See page 2-72
Printing a test pattern to check
the BJ cartridge
–
NOZZLE CHECK
See page 9-8
Chapter 2
Setting Up Your MultiPASS C50
Canon
MultiPASS C50 Hardware Manual
ENGLISH
2-67
The MultiPASS C50 Unit Settings
Details on the settings that can be adjusted from the MultiPASS C50 operation
panel are listed in the table below. For detailed instructions on accessing these
settings, refer to the page numbers indicated in the table.
The factory default settings in the table below are shown in bold type.
Setting
Description
TEL REGISTRATION
1-TOUCH SPD DIAL
CODED SPEED DIAL
GROUP DIAL
See ”One-Touch Speed Dialling”.
See ”Coded Speed Dialling”.
See ”Group Dialling”
USER SETTINGS
DATE & TIME
UNIT TELEPHONE #
UNIT NAME
SCAN CONTRAST
VOLUME CONTROL
CALLING VOLUME
KEYPAD VOLUME
2-68
Settings
Page
–
–
–
3-3
3-10
3-17
Enter the date and time.
Enter your fax/telephone number.
Enter your name or company name.
Sets the scanning contrast of the faxes you
send.
–
–
–
STANDARD
/DARKER/LIGHTER
2-58
2-58
2-58
4-4
Sets the volume of the ring produced when
the MultiPASS C50 detects a voice call
during fax/tel switchover.
Sets the volume of the keypad touch beep.
VOL MID/VOL MAX/
VOL MIN
2-71
VOL MID/VOL MAX/
OFF/VOL MIN
2-71
Setting Up Your MultiPASS C50
Canon
MultiPASS C50 Hardware Manual
Chapter 2
ENGLISH
Setting
Description
Settings
Page
ALARM VOLUME
Sets the volume of the error alarm sound.
2-71
LINE MONITOR VOL
Sets the volume of the line monitor
(sound during dialling).
Sets the volume of incoming calls.
Sets the dialling method the MultiPASS
C50 uses to match the type of line you
have.
Sets the print media type when making
copies.
Sets the PBX type through which your
unit is connected.
VOL MID/VOL MAX/
OFF/VOL MIN
VOL MID/VOL MAX/
OFF/VOL MIN
STANDARD/HIGH
ROTARY PULSE/
TOUCH TONE
RX CALL LEVEL
TEL LINE TYPE
COLOR COPY MEDIA
R-KEY SETTING
Chapter 2
PLAIN PAPER/HIGH
RES. PAPER
PSTN/PBX
Setting Up Your MultiPASS C50
Canon
MultiPASS C50 Hardware Manual
ENGLISH
2-71
2-72
2-58
2-72
4-20
2-69
Setting
Description
Settings
Page
DISPLAY LANGUAGE
Sets the language for the message displayed
in the LCD during operation of the unit.
ENGLISH/FRENCH/
SPANISH/GERMAN/
ITALIAN/DUTCH/
FINNISH/
PORTUGUESE/
NORWEGIAN/
SWEDISH/DANISH/
SLOVENE/CZECH/
HUNGARIAN
2-72
FILE PRINT
Prints faxes stored in the MultiPASS C50’s
memory instead of uploading them to your
PC.
–
5-12
ROLLER CLEANING
Cleans the rollers that feed the recording
paper into the MultiPASS C50.
–
2-50
HEAD CLEANING
Cleans the BJ cartridge’s print head.
–
9-9
NOZZLE CHECK
Prints a test pattern to check whether the BJ
cartridge is functioning normally.
–
9-8
2-70
Setting Up Your MultiPASS C50
Canon
MultiPASS C50 Hardware Manual
Chapter 2
ENGLISH
Accessing the MultiPASS C50 Unit Settings
The following section describes how to access some of the settings listed on pages
2-68 to 2-70.
To Access the VOLUME CONTROL Settings (CALLING
VOLUME, KEYPAD VOLUME, ALARM VOLUME, LINE
MONITOR VOL)
FUNCTION
1. Press FUNCTION.
FUNCTION
1
2
2. Use
or
to select USER SETTINGS.
Ex:
USER SETTINGS
3. Press START/COPY.
DATE & TIME
1
2
4. Use
or
to select VOLUME CONTROL.
Ex:
VOLUME CONTROL
5. Press START/COPY.
Ex:
CALLING VOLUME
1
2
6. Use
or
to select the setting you want to set or change.
Ex:
KEYPAD VOLUME
J Select CALLING VOLUME, KEYPAD VOLUME, ALARM VOLUME,
or LINE MONITOR VOL.
7. Press START/COPY.
Ex:
VOL MID
J The current setting is displayed.
Chapter 2
Setting Up Your MultiPASS C50
Canon
MultiPASS C50 Hardware Manual
ENGLISH
2-71
1
2
8. Use
or
to select the new setting.
Ex:
VOL MAX
9. Press START/COPY.
Ex:
ALARM VOLUME
J The new setting will not be effective until you press the
COPY) button.
(START/
10. Press STOP to return to standby mode.
13:00
FaxOnly
To Access the RX CALL LEVEL, COLOR COPY MEDIA,
MID PAUSE SET, and DISPLAY LANGUAGE Settings
FUNCTION
1. Press FUNCTION.
FUNCTION
1
2
To access the RX CALL LEVEL and COLOR COPY MEDIA settings:
2. Use or to select USER SETTINGS.
Ex:
USER SETTINGS
3. Press START/COPY.
DATE & TIME
1
2
4. Use
or
to select the setting you want to set or change.
Ex:
RX CALL LEVEL
J Select RX CALL LEVEL or COLOR COPY MEDIA.
2-72
Setting Up Your MultiPASS C50
Canon
MultiPASS C50 Hardware Manual
Chapter 2
ENGLISH
5. Press START/COPY.
Ex:
STANDARD
J The current setting is displayed.
6. Continue with Step 4 below.
1
2
To access the MID PAUSE SET and DISPLAY LANGUAGE settings:
2. Use or to select the setting you want to set or change.
Ex:
MID PAUSE SET
J Select MID PAUSE SET or DISPLAY LANGUAGE.
3. Press START/COPY.
Ex:
04SEC
J The current setting is displayed.
1
2
4. Use
or
to select the new setting.
5. Press START/COPY.
J The new setting will not be effective until you press the
COPY) button.
(START/
6. Press STOP to return to standby mode.
13:00
Chapter 2
FaxOnly
Setting Up Your MultiPASS C50
Canon
MultiPASS C50 Hardware Manual
ENGLISH
2-73
Testing the MultiPASS C50
After you have assembled your MultiPASS C50, installed a BJ cartridge, loaded
the print media, and entered your user identification information, you can make
sure the MultiPASS C50 is printing properly by making several copies of a
document. For instructions, see ”Making Copies” on page 6-13.
J If you are printing on plain paper, note the following:
I
If the printed sheets are curled as they exit the MultiPASS C50, remove
them from the output tray immediately to avoid paper jams.
I
Make sure your text or graphics fall within the printable area.
I
If the print head is printing past the edge of the paper and directly on the
platen, clean the platen. See ”Cleaning the MultiPASS C50’s Interior” on
page 9-2.
J If you are printing on transparencies or back print film, note the following:
2-74
I
Remove each sheet of film after it exits from the unit. Do not let film
stack up on the output tray.
I
Allow printed film to dry before storing it. (Canon film needs about 15
minutes to dry properly.)
I
After the film dries, cover each printed side with a sheet of plain paper
before storing. This is necessary even if you put the film in a clear file.
Setting Up Your MultiPASS C50
Canon
MultiPASS C50 Hardware Manual
Chapter 2
ENGLISH
Chapter 3
Speed Dialling
This chapter describes how to register and use the speed dialling features of the
MultiPASS C50.
Speed Dialling Methods ............................................................................................. 3-2
One-Touch Speed Dialling ......................................................................................... 3-3
Storing Numbers for One-Touch Speed Dialling ........................................ 3-3
Changing a Number/Name Stored under a One-Touch Speed Dialling
Button ........................................................................................................... 3-5
Using One-Touch Speed Dialling .................................................................. 3-8
Coded Speed Dialling ............................................................................................... 3-10
Storing Numbers for Coded Speed Dialling .............................................. 3-10
Changing a Number/Name Stored under a Coded Speed
Dialling Code ............................................................................................. 3-12
Using Coded Speed Dialling ........................................................................ 3-15
Group Dialling .......................................................................................................... 3-17
Creating Groups for Group Dialling .......................................................... 3-17
Using Group Dialling .................................................................................... 3-21
Chapter 3
Speed Dialling
Canon
MultiPASS C50 Hardware Manual
ENGLISH
3-1
Speed Dialling Methods
In addition to manual dialling, the MultiPASS C50 provides several ways to dial
fax numbers automatically.
J One-touch speed dialling
Dial a fax number by pressing the one-touch speed dialling button that the
number is assigned to.
J Coded speed dialling
Dial a fax number by pressing the CODED DIAL button followed by the
two-digit code assigned to that fax number.
J Group dialling
Send a fax to a pre-defined group of fax numbers. (The numbers must already
be stored as one-touch speed dialling numbers or coded speed dialling
numbers.)
3-2
Speed Dialling
Canon
Chapter 3
MultiPASS C50 Hardware Manual
ENGLISH
One-Touch Speed Dialling
Storing Numbers for One-Touch Speed Dialling
Your MultiPASS C50 can store up to 6 of your most frequently dialled numbers
under the one-touch speed dialling buttons. You can register the numbers directly
from the MultiPASS C50 operation panel or from the Desktop Manager. See the
MultiPASS Desktop Manager User’s Guide for instructions on entering numbers
from your PC.
FUNCTION
1. Press FUNCTION.
FUNCTION
1
2
2. Press
or
to select TEL REGISTRATION.
TEL REGISTRATION
3. Press START/COPY twice.
1-TOUCH SPD DIAL
01=
1
2
4. Use
or
to select a one-touch speed dialling button between 01 and 06.
04=
J If a number is already stored under the button you select, that number
appears.
J If the button you select is registered for group dialling, GROUP DIAL
appears.
5. Press START/COPY.
TELEPHONE NUMBER
Chapter 3
Speed Dialling
Canon
MultiPASS C50 Hardware Manual
ENGLISH
3-3
6. Press START/COPY again, then use the numeric buttons to enter the
telephone/fax number you want to store.
ABC
1
GHI
4
PQRS
3
MNO
5
TUV
7
Ex:
DEF
2
JKL
TEL=516 488 6700
6
WXYZ
8
9
J The telephone/fax number can be up to 120 digits long.
0
J Press the button to enter spaces between numbers (spaces are optional
and are ignored during dialling).
J If you want to clear a mistaken entry, press the
J To enter a pause in the number, press the
one or more times.
button.
(REDIAL)/PAUSE button
7. Press START/COPY.
NAME
8. Press START/COPY again, then use the numeric buttons to store the name
that goes with the number.
ABC
1
GHI
4
PQRS
3
MNO
5
TUV
7
8
Ex:
DEF
2
JKL
CANON U.S.A.
6
:A
WXYZ
9
J See page 2-56 for details on entering letters.
0
J You can store up to 16 characters for the name.
9. Press START/COPY.
05=
10. To continue registering numbers and names repeat steps, 4 to 9.
-orIf you have finished registering numbers and names, press STOP to return to
the standby mode.
14:38
3-4
FaxOnly
Speed Dialling
Canon
Chapter 3
MultiPASS C50 Hardware Manual
ENGLISH
Changing a Number/Name Stored under a One-Touch
Speed Dialling Button
Follow these steps if you want to change a number and/or name registered under
a one-touch speed dialling button, or if you want to delete all information stored
in a button.
FUNCTION
1. Press FUNCTION.
FUNCTION
1
2
2. Press
or
until TEL REGISTRATION is displayed.
TEL REGISTRATION
3. Press START/COPY twice.
1-TOUCH SPD DIAL
01=
1
2
538 4500
4. Use or to select the one-touch speed dialling button you want to change
(between 01 and 06).
04=516 488 6700
J If the button you select is registered for group dialling, GROUP DIAL is
displayed.
5. Press START/COPY twice.
TELEPHONE NUMBER
TEL=516 488 6700
Chapter 3
Speed Dialling
Canon
MultiPASS C50 Hardware Manual
ENGLISH
3-5
To delete a number:
6. Press until the whole number is deleted, then press START/COPY.
1
NAME
J When you delete a number, the name registered for that number is also
deleted.
7. When you have finished deleting numbers, press STOP to return to standby
mode.
14:38
ABC
1
GHI
4
PQRS
2
JKL
3
MNO
5
TUV
7
DEF
6
To change the number and/or name:
6. To change the number, use the numeric buttons to enter the new number
over the previous number.
WXYZ
8
FaxOnly
Ex:
9
TEL=
0
2131 1250
J The telephone/fax number can be up to 120 digits long.
J If you only want to change the name, ignore this step and go to step 7.
7. Press START/COPY twice to display the registered name.
NAME
CANON U.S.A
ABC
1
GHI
4
PQRS
3
MNO
5
TUV
7
DEF
2
JKL
8
6
:A
8. To change the name, use the numeric buttons to enter the new name over the
previous name.
WXYZ
9
CANON Deutsch.:a
0
J See page 2-56 for details on entering letters.
J You can enter up to 16 characters for the name.
J If you want to keep the same name, do not enter a new name and go to
step 9.
3-6
Speed Dialling
Canon
Chapter 3
MultiPASS C50 Hardware Manual
ENGLISH
9. Press START/COPY.
05=905 795 1111
J To change additional numbers and/or names repeat steps 4 to 9.
10. When you are finished changing numbers and/or names, press STOP to
return to standby mode.
14:38
FaxOnly
Chapter 3
Speed Dialling
Canon
MultiPASS C50 Hardware Manual
ENGLISH
3-7
Using One-Touch Speed Dialling
After registering your one-touch speed dialling numbers, you can use them to
send documents as follows:
Be sure to adjust the document feed lever before loading your document. See
page 6-5 for details.
1. Prepare the document and load it, face down, into the Automatic Document
Feeder (ADF).
J If necessary, you can adjust the resolution and contrast. See page 4-3 for
details.
1
~6
R
2. Press the one-touch speed dialling button assigned to the number to which
you wish to fax.
Ex:
TEL=
2131 1250
J The number registered under that one-touch speed dialling button is
displayed.
(STOP) button. Then
J If you make a mistake while dialling, press the
press the correct one-touch speed dialling button.
J If no fax number is assigned to the one-touch dialling button you press,
the LCD displays NO TEL #. If this happens, make sure you pressed the
correct button, and that the number you want to dial is registered under
that button.
3. Press START/COPY.
DIALING
J The display then shows TX, the number of pages it has scanned, and the
transaction number.
3-8
Speed Dialling
Canon
Chapter 3
MultiPASS C50 Hardware Manual
ENGLISH
J If you do not press the
(START/COPY) button within five seconds, the
MultiPASS C50 will begin sending automatically.
J If an error occurs during sending, the MultiPASS C50 will print an error
report. If this happens, try sending the fax again. See ”Faxing Problems”
on page 8-12 for details on errors.
You can also use the one-touch speed dialling buttons to send a document to
more than one location at a time. For details, see ”Sequential Broadcasting” on
page 4-18.
Chapter 3
Speed Dialling
Canon
MultiPASS C50 Hardware Manual
ENGLISH
3-9
Coded Speed Dialling
Storing Numbers for Coded Speed Dialling
You can store up to 50 telephone/fax numbers for coded speed dialling. As with
one-touch speed dialling, you can register the numbers directly from the
operation panel of the MultiPASS C50 or from the Desktop Manager. For more
details on entering numbers from your PC, refer to the MultiPASS Desktop
Manager User’s Guide.
FUNCTION
1. Press FUNCTION.
FUNCTION
1
2
2. Press
or
until TEL REGISTRATION is displayed.
TEL REGISTRATION
3. Press START/COPY , then use
1
2
or
to display CODED SPEED DIAL.
CODED SPEED DIAL
4. Press START/COPY.
*00=
1
2
5. Use
or
to select a two digit code (00-49) in the display.
*05=
J If a number is already registered at the code you select, that number is
displayed.
J If the code you select is registered for group dialling, GROUP DIAL
appears.
6. Press START/COPY twice.
TELEPHONE NUMBER
TEL=
3-10
Speed Dialling
Canon
Chapter 3
MultiPASS C50 Hardware Manual
ENGLISH
ABC
1
GHI
4
PQRS
3
MNO
5
TUV
7
DEF
2
JKL
6
7. Use the numeric buttons to enter the telephone/fax number you want to
store.
WXYZ
8
Ex:
9
TEL=
0
7390802
J The telephone/fax number can be up to 120 digits long.
J Press the button to enter spaces between numbers (spaces are optional
and are ignored during dialling).
J If you want to clear a mistaken entry, press the
J To enter a pause in the number, press the
one or more times.
button.
(REDIAL)/PAUSE button
8. Press START/COPY.
NAME
9. Press START/COPY again, then use the numeric buttons to store the name
that goes with the number.
ABC
1
GHI
4
PQRS
3
MNO
5
TUV
7
8
Ex:
DEF
2
JKL
ANON HONG KONG:A
6
WXYZ
9
J See page 2-56 for details on entering letters.
0
J You can store up to 16 characters for the name.
10. Press START/COPY.
*06=
11. To continue registering numbers and names repeat steps, 5 to 10.
-orIf you have finished registering numbers and names, press STOP to return to
the standby mode.
14:38
FaxOnly
Chapter 3
Speed Dialling
Canon
MultiPASS C50 Hardware Manual
ENGLISH
3-11
Changing a Number/Name Stored under a Coded Speed
Dialling Code
Follow these steps if you want to change the number and/or name registered
under a coded speed dialling code, or if you want to delete all information stored
under a code.
FUNCTION
1. Press FUNCTION.
FUNCTION
1
2
2. Press
or
until TEL REGISTRATION is displayed.
TEL REGISTRATION
3. Press START/COPY, then use
1
2
or
to display CODED SPEED DIAL.
CODED SPEED DIAL
4. Press START/COPY.
*00=
1
2
63 9399
5. Press or to select the coded speed dialling code you want to change
(between 00 and 49).
*05=
7390802
J If the button you select is registered for group dialling, GROUP DIAL is
displayed.
6. Press START/COPY twice.
TELEPHONE NUMBER
TEL=
3-12
7390802
Speed Dialling
Canon
Chapter 3
MultiPASS C50 Hardware Manual
ENGLISH
To delete a number:
7. Press until the whole number is deleted, then press START/COPY.
1
NAME
J When you delete a number, the name registered for that number is also
deleted.
8. When you are finished deleting numbers, press STOP to return to the standby
mode.
14:38
ABC
1
GHI
4
PQRS
2
JKL
3
MNO
5
TUV
7
DEF
6
To change the number and/or name:
7. To change the number, use the numeric buttons to enter the new number
over the previous number.
WXYZ
8
FaxOnly
Ex:
9
TEL=
0
545 8545
J The telephone/fax number can be up to 120 digits long.
J If you only want to change the name, ignore this step and go to step 8.
8. Press START/COPY twice to display the registered name.
NAME
Ex:
CANON HONG KON:A
ABC
1
GHI
4
PQRS
3
MNO
5
TUV
7
DEF
2
JKL
8
6
9. To change the name, use the numeric buttons to enter the new name over the
previous name.
WXYZ
Ex:
9
CANON EUROPA
0
:A
J See page 2-56 for details on entering letters.
J You can enter up to 16 characters for the name.
J If you want to keep the same name, do not enter a new name and go to
step 10.
Chapter 3
Speed Dialling
Canon
MultiPASS C50 Hardware Manual
ENGLISH
3-13
10. Press START/COPY.
*06=
49 39 25 25
J To change additional number and/or names, repeat steps 5 to 10.
11. Press STOP to return to the standby mode.
14:38
3-14
FaxOnly
Speed Dialling
Canon
Chapter 3
MultiPASS C50 Hardware Manual
ENGLISH
Using Coded Speed Dialling
After registering your coded speed dialling numbers, you can use them to send
documents as follows:
Be sure to adjust the document feed lever before loading your document. See
page 6-5 for details.
1. Prepare the document and load it, face down, into the Automatic Document
Feeder (ADF).
J If necessary, you can adjust the resolution and contrast. See page 4-3 for
details.
CODED DIAL
2. Press CODED DIAL :
*
ABC
1
GHI
4
PQRS
3
MNO
5
TUV
7
DEF
2
JKL
8
6
3. Use the numeric buttons to enter the two-digit code assigned to the fax
number:
WXYZ
9
*03
0
Ex:
TEL=
545 8545
J The number registered under that coded speed dialling button is
displayed.
(STOP) button. Then
J If you make a mistake while dialling, press the
press CODED DIAL and enter the correct code.
J If no fax number is assigned to the code you enter, the LCD displays NO
TEL #. If this happens, make sure you entered the correct code, and that
the number you want to dial is registered under that code.
4. Press START/COPY.
DIALING
J The display then shows TX, the number of pages it has scanned, and the
transaction number.
Chapter 3
Speed Dialling
Canon
MultiPASS C50 Hardware Manual
ENGLISH
3-15
J If you do not press the
(START/COPY) button within five seconds, the
MultiPASS C50 will begin sending automatically.
J If an error occurs during sending, the MultiPASS C50 will print an error
report. If this happens, try sending the fax again. See ”Faxing Problems”
on page 8-12 for details about errors.
You can also use coded speed dialling to send a document to more than one
location at a time. For details, see ”Sequential Broadcasting” on page 4-18.
3-16
Speed Dialling
Canon
Chapter 3
MultiPASS C50 Hardware Manual
ENGLISH
Group Dialling
If you frequently send faxes to the same group of people, you can create a
”group.” Groups are stored under one-touch speed dialling buttons or coded
speed dialling codes and are entered from the MultiPASS C50 operation panel or
from the MultiPASS Desktop Manager. For details on entering groups from your
PC, refer to the MultiPASS Desktop Manager User’s Guide.
Creating Groups for Group Dialling
The numbers you use in a group must already be stored under one-touch speed
dialling buttons or coded speed dialling codes. Each group is stored under a onetouch speed dialling button or a coded speed dialling code.
Create groups for group dialling as follows:
FUNCTION
1. Press FUNCTION.
FUNCTION
1
2
2. Press
or
until TEL REGISTRATION is displayed.
TEL REGISTRATION
3. Press START/COPY, then use
1
or
to select GROUP DIAL.
GROUP DIAL
2
4. Press START/COPY.
Chapter 3
Speed Dialling
Canon
MultiPASS C50 Hardware Manual
ENGLISH
3-17
1
To store a group under a one-touch speed dialling button:
5. Use or buttons to select an unused one-touch speed dialling button (01 to
06).
2
01=
J If a group or number is already registered under the button you select,
GROUP DIAL or 1-TOUCH SPD DIAL is displayed.
CODED DIAL
ABC
1
GHI
4
PQRS
8
*07=
3
MNO
5
TUV
7
DEF
2
JKL
To store a group under a coded speed dialling code:
5. Press CODED DIAL, then use the numeric buttons to enter an unused twodigit code (00 to 49).
6
WXYZ
J If a group or number is already registered under the button you select,
GROUP DIAL or CODED SPD DIAL is displayed.
9
0
J Each one-touch speed dialling button or coded speed dialling code can store
either a name and number for speed dialling or a group. Be careful not to
override speed dialling numbers and names when creating and registering
groups.
J If you wish to register a group under a one-touch speed dialling button or
coded speed dialling code already registered for speed dialling, or if you want
to re-enter a group, you must delete the previous information first. (For
further details see pages 3-5 and 3-12.)
6. Press START/COPY twice.
TELEPHONE NUMBER
TEL=
3-18
Speed Dialling
Canon
Chapter 3
MultiPASS C50 Hardware Manual
ENGLISH
FUNCTION
7. Enter the speed dialling numbers you want to store in the group:
J To enter a number stored under a one-touch speed dialling button, press
FUNCTION, press the desired one-touch speed dialling button(s), then
FUNCTION again.
~6
1
R
FUNCTION
J To enter a number stored under a coded speed dialling code, press
CODED DIAL, then enter the two-digit code for the number using the
numeric buttons. (For multiple entries, press CODED DIAL between
each entry.)
CODED DIAL
ABC
1
GHI
4
PQRS
3
MNO
5
TUV
7
DEF
2
JKL
8
6
WXYZ
9
0
J You cannot register numbers in the groups that have not been registered for
speed dialling.
J You can review the numbers registered under the group by pressing the
button.
I
If you want to delete one of these numbers from the group, press
(ERASING END is displayed) and then the
(START/COPY) button.
I
If you want to delete all numbers in the group, press repeatedly until all
(START/COPY) button.
numbers are deleted, and then press the
Deleting all numbers will cancel the group.
I
If you want to add a number to the group, press the one-touch speed
dialling button or coded speed dialling code the number is registered
(START/COPY) button. The number will be
under, and then press the
added to the group.
J You can cancel registering numbers and return to standby mode by pressing
(STOP) button anytime before press the
(START/COPY) button in
the
step 8.
Chapter 3
Speed Dialling
Canon
MultiPASS C50 Hardware Manual
ENGLISH
3-19
8. Press START/COPY twice, then use the numeric buttons to enter a name for
the group.
NAME
ABC
1
GHI
4
PQRS
JKL
3
MNO
5
TUV
7
DEF
2
8
6
CANON GROUP 1 :1
WXYZ
9
0
J See page 2-56 for details on entering letters.
J You can enter up to 16 characters for the name.
9. Press START/COPY.
10. To enter additional group, repeat steps 5 to 9.
-orIf you have finished registering groups press STOP to return to standby
mode.
14:38
3-20
FaxOnly
Speed Dialling
Canon
Chapter 3
MultiPASS C50 Hardware Manual
ENGLISH
Using Group Dialling
To send a fax to a group, follow these instructions.
Be sure to adjust the document feed lever before loading your document. See
page 6-5 for details.
1. Prepare the document and load it, face down, into the Automatic Document
Feeder (ADF).
J If necessary, you can adjust the resolution and contrast. See page 4-3 for
details.
~6
1
R
and/or
2. Use the one-touch speed dialling buttons and/or the CODED DIAL button
(along with the two-digit codes) to select the groups registered under those
buttons and/or codes.
CODED DIAL
ABC
1
GHI
4
PQRS
3
MNO
5
TUV
7
8
(STOP) button
DEF
2
JKL
J If you make a mistake when selecting a group, press the
and start again.
6
WXYZ
9
0
J You can make up to 55 groups.
J If you press a one-touch speed dialling button or coded speed dialling code
that has no group (or fax number) registered under it, the LCD displays NO
TEL #. Make sure you pressed the correct one-touch speed dialling button or
entered the correct coded speed dialling code, and that the group you want
has been registered correctly under that button or code.
J After entering a one-touch speed-dialling button or coded speed dialling code,
you have five or ten seconds to press each subsequent speed-dialling button or
code before the MultiPASS C50 begins sending.
3. When you finish entering groups, press START/COPY.
J The MultiPASS C50 then scans the document into memory, and begins
dialling the numbers in the groups.
Chapter 3
Speed Dialling
Canon
MultiPASS C50 Hardware Manual
ENGLISH
3-21
3-22
Speed Dialling
Canon
Chapter 3
MultiPASS C50 Hardware Manual
ENGLISH
Chapter 4
Sending Faxes
This chapter describes how to use your MultiPASS C50 to send faxes.
Preparing to Send a Fax ............................................................................................. 4-3
Setting the Resolution and Contrast ............................................................. 4-3
Setting the Scanning Resolution ........................................................ 4-3
Setting the Scanning Contrast ............................................................ 4-4
Sending Methods ............................................................................................. 4-6
Manual Sending Via the Handset ...................................................... 4-6
Memory Sending .................................................................................. 4-6
Dialling Methods ............................................................................................. 4-7
Sending Documents .................................................................................................... 4-8
Manual Sending Via the Handset .................................................................. 4-8
Memory Sending ............................................................................................ 4-10
Cancelling Sending ................................................................................................... 4-12
Removing the Document From the Automatic Document
Feeder (ADF) ............................................................................................ 4-13
Redialling ................................................................................................................... 4-15
Manual Redialling ......................................................................................... 4-15
Automatic Redialling With Memory Sending ........................................... 4-15
Cancelling Automatic Redialling ..................................................... 4-16
Sequential Broadcasting ........................................................................................... 4-18
Sending a Document to More Than One Destination ............................. 4-18
Sending a Document Using Group Dialling .............................................. 4-19
Dialling Through a Switchboard ............................................................................. 4-20
Registering the Access Type and the Outside Line Number under
the R Button ............................................................................................... 4-20
Long Distance Dialling ............................................................................................ 4-22
How to Enter Pauses ..................................................................................... 4-22
Confirming a Dial Tone ............................................................................................ 4-23
Using Tone Dialling on a Pulse Line ...................................................................... 4-24
If a Power Cut Occurs .............................................................................................. 4-25
Memory Clear Report ................................................................................... 4-25
Chapter 4
Sending Faxes
Canon
MultiPASS C50 Hardware Manual
ENGLISH
4-1
4-2
Sending Faxes
Canon
Chapter 4
MultiPASS C50 Hardware Manual
ENGLISH
Preparing to Send a Fax
Before you can send a fax, you need to load the document into the MultiPASS
C50’s Automatic Document Feeder (ADF). For instructions and information
about the types of documents the MultiPASS C50 can scan, see ”Types of
Documents You Can Scan” on page 6-2.
Setting the Resolution and Contrast
Setting the Scanning Resolution
Canon’s Ultra High Quality (UHQTM) imaging technology enables you to send
faxes with a print quality that is very close to that of the original document. The
MultiPASS C50 also lets you adjust the resolution it uses in sending faxes to best
suit your particular document.
The MultiPASS C50 has three resolution settings:
J STANDARD resolution (8 pels/mm × 3.85 lines/mm) is adequate for most
text documents.
J FINE resolution (8 pels/mm × 7.7 lines/mm) is suitable for documents with
fine print (smaller than the print in this sentence).
J PHOTO resolution (8 pels/mm × 7.7 lines/mm, with halftones) is for
documents that contain photographs. With this setting, areas of the document
that contain photos are automatically scanned with 64 levels of grey, rather
than just two (black and white). This gives a much better reproduction of the
photos, though transmission time is longer.
Set the resolution as follows:
RESOLUTION
1. Press RESOLUTION.
J The LCD display shows the current scanning resolution.
STANDARD
When the RESOLUTION button is pressed, the LCD display shows the current
resolution for about five seconds before returning to standby mode.
Chapter 4
Sending Faxes
Canon
MultiPASS C50 Hardware Manual
ENGLISH
4-3
RESOLUTION
2. Press RESOLUTION to display the resolution you want.
FINE
PHOTO
(FINE resolution with halftone)
STANDARD
3. Continue with the operation you wish to complete.
J If you do not proceed with any other operation, the LCD display returns
to standby mode after about 5 seconds.
14:38
FaxOnly
Setting the Scanning Contrast
Contrast is the difference in brightness between the lightest and darkest parts of
a printed document. You can adjust the contrast the MultiPASS C50 uses for
sending faxes (DARKER, STANDARD, or LIGHTER) through the operation
panel of the MultiPASS C50 or through the MultiPASS Desktop Manager.
STANDARD is the default, and is adequate for most documents. To darken a
light original, choose DARKER; to lighten a dark original, use LIGHTER.
FUNCTION
1. Press FUNCTION.
FUNCTION
1
2
2. Press
or
to select USER SETTINGS.
USER SETTINGS
4-4
Sending Faxes
Canon
Chapter 4
MultiPASS C50 Hardware Manual
ENGLISH
3. Press START/COPY, then use
1
or to select SCAN CONTRAST.
SCAN CONTRAST
2
4. Press START/COPY.
J The currently set contrast setting appears.
STANDARD
1
2
5. Press
or
to select the scanning contrast you want.
J You can select STANDARD, DARKER, or LIGHTER.
(STOP)
J You can cancel and return to standby mode by pressing the
(START/COPY) button in step 6.
button any time before pressing the
6. Press START/COPY to save your selection, then press STOP to return to
standby mode.
14:38
FaxOnly
Chapter 4
Sending Faxes
Canon
MultiPASS C50 Hardware Manual
ENGLISH
4-5
Sending Methods
Manual Sending Via the Handset
Use manual sending via the handset if you want to speak with the other party
before sending a fax to them. With manual sending via the handset, you dial,
converse normally and when they are ready to receive your fax, press the
(START/COPY) button to begin sending. See page 4-8 for more details on
manual sending via the handset.
Memory Sending
Memory sending allows you to send a document easily and quickly. This method
of sending scans the document into memory, and as the first page of a multipage
document is being scanned, the MultiPASS C50 already begins calling the other
party and transmitting the information even as the remaining pages are being
scanned.
To use memory sending, you load the document, dial the fax number and press
(START/COPY) button. See page 4-10 for more details on memory
the
sending.
Since the MultiPASS C50 is multitasking, you can even scan a document into the
memory while sending a document, receiving a document, or printing a
document.
4-6
Sending Faxes
Canon
Chapter 4
MultiPASS C50 Hardware Manual
ENGLISH
Dialling Methods
There are several ways of dialling the number of the party you want to send to:
J Regular dialling
Use the numeric buttons to dial the recipient’s fax number.
J One-touch speed dialling
Press the one-touch speed dialling button (1 to 6) under which you have
registered the number you want to send to. See Chapter 3 ”Speed Dialling”
for details on registering and using one-touch speed dialling.
J Coded speed dialling
Press CODED DIAL and enter the two-digit code (00 to 49) under which you
have registered the number you want to send to. See Chapter 3 ”Speed
Dialling” for details on registering and using coded speed dialling.
J PC dialling
Dial a fax number from your PC using the MultiPASS Desktop Manager. See
the MultiPASS Desktop Manager User’s Guide for details.
Chapter 4
Sending Faxes
Canon
MultiPASS C50 Hardware Manual
ENGLISH
4-7
Sending Documents
This section describes how to send faxes with the MultiPASS C50.
Manual Sending via the Handset
If you have the optional handset or an extension phone connected to your
MultiPASS C50, you can send faxes manually. This allows you to talk to the other
party before sending the fax, which can be useful if the other party uses a single
line for both voice and fax transmissions.
Be sure to adjust the document feed lever before loading your document. See
page 6-5 for details.
1. Prepare the document and load it, face down, into the Automatic Document
Feeder (ADF).
J Once the document is loaded, the LCD display shows the following:
MEMORY USED
0%
(Currently used image memory)
STANDARD
(Current resolution)
DOCUMENT READY
(Standby to scan)
J If necessary, you can adjust the resolution and contrast. See page 4-3 for
details.
2. Lift the handset, and dial the number.
LINE IN USE
Ex:
TEL=15037537984
J Use one of the dialling methods described on page 4-7.
4-8
Sending Faxes
Canon
Chapter 4
MultiPASS C50 Hardware Manual
ENGLISH
3. If a person answers, you can converse normally. When you are ready to send
the fax, ask the person to press the start button on their fax, or set their fax
machine to receive. Then press START/COPY on the MultiPASS C50 and
hang up.
TX
TX/RX NO.
0012
J The LCD displays TX and the transmission number (TX/RX NO.).
Be sure to press the
disconnect the call.
(START/COPY) button before you hang up, or you will
Chapter 4
Sending Faxes
Canon
MultiPASS C50 Hardware Manual
ENGLISH
4-9
Memory Sending
Memory sending is a quick and easy way to send a fax. When you use memory
sending, the MultiPASS C50 scans the document into its memory as it dials the
fax number. If the line is free, the MultiPASS C50 begins sending the fax as it
scans the rest of the document.
The MultiPASS C50 has enough memory to store up to 42 pages (fewer if the
document contains many graphics or particularly dense text).
Since the MultiPASS C50 is a multitasking device, you can use memory sending
to scan one document into memory and at the same time send another fax,
receive a fax, or print a document. Follow the instructions below to send a
document with memory sending:
Be sure to adjust the document feed lever before loading your document. See
page 6-5 for details.
1. Prepare the document and load it, face down, into the Automatic Document
Feeder (ADF).
J Once the document is loaded, the LCD display shows the following:
MEMORY USED
0%
(Currently used image memory)
STANDARD
(Current resolution)
DOCUMENT READY
(Standby to scan)
J If necessary, you can adjust the resolution and contrast. See page 4-3 for
details.
J You may not be able to use memory sending if the percentage shown in
the MEMORY USED display is close to 100%. In this case, use manual
sending via the handset to send your document.
4-10
Sending Faxes
Canon
Chapter 4
MultiPASS C50 Hardware Manual
ENGLISH
ABC
1
GHI
4
PQRS
3
8
2. Use the numeric buttons to dial the other party’s fax number.
MNO
5
TUV
7
DEF
2
JKL
Ex:
6
WXYZ
TEL=9p1503753798
9
0
J Use one of the dialling methods described on page 4-7.
J If you must first dial a digit to get an outside line (e.g. ”9”), press the
(REDIAL)/PAUSE button to add a pause after that digit, as shown in the
example above.
3. Press START/COPY.
J The MultiPASS C50 then begins scanning the document into memory, and
dials the number:
TX
After a few seconds, the display shows the following messages:
TX/RX NO.
0001
SCANNING
P.001
(Transaction number for the fax)
(Number of pages it has scanned)
CALLING
TEL=9p1503753798
(The number you dialled)
The display continues to show these displays while the fax is sending.
J When the MultiPASS C50 finishes sending the fax, the display shows the
TRANSMITTING OK message:
TRANSMITTING OK
J The transaction number (TX/RX NO.) is a unique number the MultiPASS
C50 assigns to the document you are sending or receiving, and is used to
identify the document in transaction reports.
J If an error occurs during sending, the MultiPASS C50 will print out an error
report. If this happens, try sending the fax again. See ”Faxing Problems” on
page 8-12 for details about errors.
Chapter 4
Sending Faxes
Canon
MultiPASS C50 Hardware Manual
ENGLISH
4-11
Cancelling Sending
If you want to stop sending before the fax is finished, do the following.
1. Press STOP.
J If you are sending manually, the transmission is cancelled immediately.
J If you are sending from memory, the following appears in the display:
CANCEL?
*YES
#NO
2. To cancel sending, press *:
TX/RX CANCELLED
J If you change your mind and want the unit to continue sending, press the
# button. The MultiPASS C50 will continue sending normally.
After you cancel a fax, you may need to open the operation panel to remove the
document from the Automatic Document Feeder (ADF). See ”Removing the
Document From the Automatic Document Feeder (ADF)” on the following
page.
4-12
Sending Faxes
Canon
Chapter 4
MultiPASS C50 Hardware Manual
ENGLISH
Removing the Document From the Automatic Document
Feeder (ADF)
Do not try to pull the document out without opening the operation panel, or you
might tear or smudge the document.
1. Open the operation panel by gently pulling it toward you.
2. Remove the jammed page by pulling it in either direction.
If the paper does not pull out easily, do not force it. Contact your local authorised
Canon dealer or the Canon help line.
Chapter 4
Sending Faxes
Canon
MultiPASS C50 Hardware Manual
ENGLISH
4-13
3. When you are finished, close the operation panel by pressing it down from
the centre as shown.
Be sure to close the operation panel until it locks into place. Otherwise the unit
will not function properly.
4-14
Sending Faxes
Canon
Chapter 4
MultiPASS C50 Hardware Manual
ENGLISH
Redialling
Manual Redialling
If you are sending a fax manually (using the handset), you can redial by pressing
(REDIAL)/PAUSE button. This redials the last number that was dialled
the
with the numeric buttons. (This also starts redialling regardless of whether
automatic redialling is enabled.)
To cancel manual redialling, simply press the
(STOP) button.
Automatic Redialling with Memory Sending
With memory sending, you can set the MultiPASS C50 to automatically dial the
fax number again if the receiving fax machine does not answer, if the line is busy,
or if an error occurs during sending. You can also control how many times the
MultiPASS C50 will redial the number, how long it will wait between dialling
attempts, and how much of the fax the MultiPASS C50 will resend if an error
occurs. For instructions, see the MultiPASS Desktop Manager User’s Guide.
When automatic redialling is in use, the MultiPASS C50 alternately displays
AUTO REDIAL and the transaction number while it is waiting to redial:
AUTO REDIAL
TX/RX NO.
0002
When it begins redialling, the LCD display continuously shows the following:
During dialling:
DIALING
503 555 1776
(Fax number you dialled)
Chapter 4
Sending Faxes
Canon
MultiPASS C50 Hardware Manual
ENGLISH
4-15
During sending:
TX/RX NO.
0002
503 555 1776
(Transaction number)
(Fax number you dialled)
CALLING
J If you used one-touch or coded speed dialling to dial the number, the
name registered under that button or code will also be displayed.
If the receiving fax machine does not answer on the last attempt, the MultiPASS
C50 displays BUSY/NO SIGNAL (if the unit is set not to print a report).
BUSY/NO SIGNAL
If this happens, try sending again later.
Cancelling Automatic Redialling
Automatic redialling cannot be cancelled with the
(STOP) button while the
unit is waiting to redial. To cancel automatic redialling, do the following:
1. Wait until the MultiPASS C50 begins redialling.
DIALING
2. Press STOP. The MultiPASS C50 asks you to confirm that you want to
cancel:
CANCEL?
4-16
*YES
#NO
Sending Faxes
Canon
Chapter 4
MultiPASS C50 Hardware Manual
ENGLISH
3. To cancel the redialling, press *. The MultiPASS C50 beeps and alternates
the following displays:
TX/RX CANCELLED
TX/RX NO.
0002
J The unit then prints an error report (if set to print one):
PRINTING REPORT
If the Automatic Report setting in the Send Fax tab of the MultiPASS Desktop
Manager is set to off, the error report will not be printed out. For details on
changing the setting, refer to the MultiPASS Desktop Manager User’s Guide.
Chapter 4
Sending Faxes
Canon
MultiPASS C50 Hardware Manual
ENGLISH
4-17
Sequential Broadcasting
Sending a Document to More Than One Destination
The MultiPASS C50’s sequential broadcasting feature lets you send your fax to a
sequence of up to 57 fax numbers, using any combination of dialling methods as
follows:
J One-touch speed dialling: up to 6 destinations
J Coded speed dialling: up to 50 destinations
J Manual dialling (with the numeric buttons): 1 destination only
You can enter the one-touch speed dialling and coded speed dialling destinations
in any order. You can also include one destination that you dial manually using
the numeric buttons.
To send a fax using sequential broadcasting, do the following:
Be sure to adjust the document feed lever before loading your document. See
page 6-5 for details.
1. Prepare the document and load it, face down, into the Automatic Document
Feeder (ADF).
J If necessary, you can adjust the resolution and contrast. See page 4-3 for
details.
2. Enter up to 57 fax numbers using the following three methods:
J One-touch speed dialling: press the desired one-touch speed dialling
button(s).
~6
1
R
J Coded speed dialling: press CODED DIAL, then enter the two-digit code
using the numeric buttons (be sure to press CODED DIAL before each
code).
CODED DIAL
ABC
1
GHI
4
PQRS
3
MNO
5
TUV
7
DEF
2
JKL
8
6
WXYZ
9
0
4-18
Sending Faxes
Canon
Chapter 4
MultiPASS C50 Hardware Manual
ENGLISH
ABC
1
GHI
4
PQRS
3
MNO
5
TUV
7
DEF
2
JKL
8
6
WXYZ
9
J Manual dialling: enter the number using the numeric buttons, then press
START/COPY to add the number to the broadcast list. (You can only enter
one number manually.)
0
J After entering the first one-touch speed dialling button or coded speed
dialling code, you have five seconds to enter another speed dialling button or
code before the MultiPASS C50 begins sending automatically. If you have
entered more than one speed dialling button or code, the MultiPASS C50
waits for 10 seconds before it begins sending.
J If you want to review the numbers you entered, press the FUNCTION button
and use the or button to scroll through the numbers.
3. When you finish entering numbers, press START/COPY to begin sending, or
wait a few seconds for the MultiPASS C50 to begin sending automatically.
J The MultiPASS C50 then scans the document into memory, and begins
sending it to the destinations in numerical order, starting with the coded
dial numbers, then the one-touch numbers, and finally the manual
number.
If the MultiPASS C50’s memory becomes full while scanning your document,
MEMORY FULL appears in the LCD. If this happens, remove the remainder of
the document from the Automatic Document Feeder (ADF) (you may need to
open the operation panel to do so), then divide the document into several
sections and send each section individually.
Sending a Document Using Group Dialling
If you frequently send faxes to the same group of people, you can create a
”group.” Groups are stored under one-touch speed dialling buttons or coded
speed dialling codes. See Chapter 3, ”Speed Dialling” for details on registering
numbers under groups and using group dialling.
Chapter 4
Sending Faxes
Canon
MultiPASS C50 Hardware Manual
ENGLISH
4-19
Dialling Through a Switchboard
A PBX (Private Branch Exchange) is an on-site telephone switchboard. If your
MultiPASS C50 is connected through a PBX or other telephone switching system,
you have to dial the outside line access number first, and then dial the number of
the party you are calling.
You can register the type of access and the outside line access number under the
R button, so that you only have to press the FUNCTION and R buttons before
dialling the telephone or fax number you wish to reach. Follow the instructions
below for registering the R button.
Registering the Access Type and the Outside Line Number
under the R button
Follow these steps for registering the access type and the outside line number
under the R button:
FUNCTION
1. Press FUNCTION.
FUNCTION
1
2
2. Press
or
to select USER SETTINGS.
USER SETTINGS
3. Press START/COPY, then press
1
2
4-20
to select R-KEY SETTING.
or
to select PBX.
R-KEY SETTING
4. Press START/COPY, then press
1
or
2
PBX
Sending Faxes
Canon
Chapter 4
MultiPASS C50 Hardware Manual
ENGLISH
5. Press START/COPY, then press
switching system.
1
or
to select the access line type for the
2
PREFIX
HOOKING
EARTH CONNECTION
6. Press START/COPY.
ABC
1
GHI
4
PQRS
2
JKL
3
MNO
5
TUV
7
8
If you selected PREFIX in step 5
7. Enter the outside line access number using the numeric buttons.
DEF
Ex:
6
WXYZ
123456
9
0
J You can enter up to 19 digits for the outside line access number.
/PAUSE
8. Press
REDIAL/PAUSE.
123456P
9. Press START/COPY, then press STOP to return to standby mode.
14:38
FaxOnly
If you selected EARTH CONNECTION or HOOKING in step 5
7. Press START/COPY, then press STOP to return to standby mode.
14:38
FaxOnly
Chapter 4
Sending Faxes
Canon
MultiPASS C50 Hardware Manual
ENGLISH
4-21
Long Distance Dialling
When you register a long distance number, you may have to insert a pause either
within or after the number. For long distance dialling, the location and length of
the pause may differ depending on the telephone system.
How to Enter Pauses
Use this procedure to enter pauses within or at the end of numbers.
ABC
1
GHI
4
PQRS
3
MNO
5
TUV
7
DEF
2
JKL
8
6
1. During dialling registration, when you come to a step that asks you to enter a
number for dialling, use the numeric buttons to enter the number.
WXYZ
9
0
/PAUSE
2. To enter a pause within a number, press
/PAUSE.
J To enter a pause at the end of a number, press the
(REDIAL)/PAUSE
button and then press the
(START/COPY) button.
J A pause entered within a number (p) is four seconds long.
(REDIAL)/
J To make a longer pause within a number, press the
PAUSE button again. Each pause adds four seconds to the length of the
pause.
J A pause at the end of a number (P) is fixed to ten seconds.
4-22
Sending Faxes
Canon
Chapter 4
MultiPASS C50 Hardware Manual
ENGLISH
Confirming a Dial Tone
Use this feature only when you register a number. In some areas you may have to
confirm the dial tone in the middle of the facsimile number before dialling the
rest of the number. This is called dial tone detection.
ABC
1
GHI
4
PQRS
3
MNO
5
TUV
7
1. Use the numeric buttons to enter the first part of the number until dial tone
detection is required.
DEF
2
JKL
6
WXYZ
8
9
TEL=
0
FUNCTION
348
2. Press FUNCTION.
FUNCTION
3. When a dial tone detection is required, press D.T.
5
D.T.
TEL=
348.
J Where the dial tone is inserted, you will see a small dot. During dialling
this is where the unit waits for the dial tone.
ABC
1
GHI
4
PQRS
3
8
4. Use the numeric buttons to enter the remainder of the number.
MNO
5
TUV
7
DEF
2
JKL
6
WXYZ
9
0
Chapter 4
Sending Faxes
Canon
MultiPASS C50 Hardware Manual
ENGLISH
4-23
Using Tone Dialling on a Pulse Line
Even if you have a pulse line, the MultiPASS C50 enables you to use tone dialling
once you have connected to the number you are calling. This lets you take
advantage of many services that require tones, such as selecting options from
telephone ”touch-line” services.
ABC
1
DEF
2
GHI
JKL
4
3
5
PQRS
TUV
7
8
1. Pick up the handset and dial the number using the numeric buttons.
J The unit connects using the pulses required by your phone line.
MNO
6
WXYZ
9
0
FUNCTION
2. Press FUNCTION, then press TONE/+ to switch to tone dialling.
J When the TONE/+ button is pressed, T is displayed in the LCD.
4
J Numbers entered after pressing the TONE/+ button will be dialled using
tone dialling.
TONE/+
3. When you have finished, hang up the handset.
When registering one-touch speed dialling and coded speed dialling numbers, if
you enter the TONE/+ button after the number, you will switch to tone dialling
after the phone connection is made.
Example:
Operation
/PAUSE
1 2 3
4 5 6
/PAUSE
/PAUSE
4
TONE/+
3
Display
TEL=123456pppT*3
After the number (123456) is dialled, it will pause for 12 seconds (ppp) to allow
the other party to answer and then it will switch to tone (T). Now you can follow
the instructions that were recorded by the party you called.
4-24
Sending Faxes
Canon
Chapter 4
MultiPASS C50 Hardware Manual
ENGLISH
If a Power Cut Occurs
If power to the MultiPASS C50 is cut off, any documents stored in its fax memory
will be lost. (The MultiPASS C50 automatically prints a list of the lost documents
when power is restored.) Because of this, you should be sure to print documents
stored in memory or resend them as soon as possible.
While power is off, you can only use the MultiPASS C50 to receive telephone
calls (if you have an extension telephone connected). You cannot make calls, or
send or receive faxes.
Memory Clear Report
If you experience a power failure, all documents stored in memory will be lost.
As soon as power is restored, the MultiPASS C50 will automatically print a list of
documents that were stored in memory before the power failure.
16/12 98 WED 10:12 FAX 321 456 7777
CANON U.S.A.
.
001
* * * * * * * * * * * * * * *
*
MEMORY CLEAR REPORT
*
* * * * * * * * * * * * * * *
TX/RX NO
0001
MODE
B’CAST
0002
TRANSMIT
MEMORY FILES DELETED
CONNECTION TEL/ID
PGS.
SET TIME
[ 01] Canon TOKYO
3
17/12 98 09:07
[ 02] Canon ESPAÑA
[ 02] Canon TOKYO
1
17/12 98 10:02
ST. TIME
04:30
02:00
If there are one or more documents in the image memory when the power is cut
off, the LCD will display PRINTING REPORT when the power is restored. If
there is no paper in the sheet feeder at this time, the LCD will also display
LOAD PAPER. If this happens, load paper in the sheet feeder, press the
(START/COPY) button and wait for the unit to print the Memory Clear Report.
You will be unable to send documents or receive faxes in memory until you do
this. If you have no paper available and you urgently need to send a document or
(STOP) button to enable sending and
receive a fax in memory, press the
receiving. However, please note that once you have pressed the
(STOP)
button, the unit will no longer print the Memory Clear Report.
Chapter 4
Sending Faxes
Canon
MultiPASS C50 Hardware Manual
ENGLISH
4-25
4-26
Sending Faxes
Canon
Chapter 4
MultiPASS C50 Hardware Manual
ENGLISH
Chapter 5
Receiving Faxes
This chapter describes how to use your MultiPASS C50 to receive faxes.
Different Ways to Receive a Fax .............................................................................. 5-2
Setting the Receive Mode .............................................................................. 5-3
Receiving Faxes and Phone Calls Automatically: Fax/Tel Mode .............. 5-4
Receiving Faxes Manually: MANUAL MODE .......................................... 5-6
Receiving Faxes Automatically: FAX ONLY MODE ................................ 5-8
Using an Answering Machine: ANS. MACHINE MODE ........................ 5-9
Using the MultiPASS C50 with an Answering Machine ................. 5-9
Documents Received in Memory ........................................................................... 5-10
Messages Displayed When Documents are Received in Memory ......... 5-10
Printing a Received Fax When Your Computer Is Off ........................................ 5-12
Receiving While Registering, Copying, or Printing ............................................. 5-13
Cancelling an Incoming Fax .................................................................................... 5-14
Chapter 5
Receiving Faxes
Canon
MultiPASS C50 Hardware Manual
ENGLISH
5-1
Different Ways to Receive a Fax
The MultiPASS C50 provides you with four different modes for receiving faxes.
To decide which mode will best suit your requirements, consider how you want to
use the MultiPASS C50:
J Fax/Tel Mode: Use this mode if you will occasionally use the MultiPASS C50
as a telephone. In this mode, if an incoming call is a fax, the MultiPASS C50
then receives fax calls automatically, without ringing; if the call is from a
person, the MultiPASS C50 rings to alert you to pick up the handset to answer
the call. This mode is economical, in that it allows you to have phone and fax
service without the expense of an additional phone line.
This mode also includes settings that let you control precisely how it handles
incoming calls. For details and instructions, see the MultiPASS Desktop
Manager User’s Guide.
J MANUAL MODE: Use this mode if you will frequently use the MultiPASS
C50 as a telephone and want to answer every call yourself, including fax calls.
The MultiPASS C50 then rings for every call, whether phone or fax, and you
(START/COPY) button to begin receiving a fax.
must press the
J FAX ONLY MODE: Use this mode if the MultiPASS C50 will be connected
to a separate telephone line used only for transmitting faxes. The MultiPASS
C50 answers all calls, but accepts only those from fax machines and
disconnects all others.
J ANS. MACHINE MODE: Use this mode if you plan to connect an answering
machine to the MultiPASS C50 to receive faxes and phone messages. The
MultiPASS C50 then receives incoming faxes normally, and routes incoming
phone calls to the answering machine.
Once you have decided which mode you want, set the mode as described in
”Setting the Receive Mode” on page 5-3. You can change the mode at any time.
The MultiPASS C50 also offers these additional features to let you customise its
function to suit your needs:
J The MultiPASS Desktop Manager allows you to receive faxes directly into
your PC, where they will be stored as scanned images.
J The MultiPASS C50’s Error Correction Mode (ECM) corrects damaged data
caused by line errors when receiving from a fax machine that also has ECM
capability.
See the MultiPASS Desktop Manager User’s Guide for details on these and other
functions, and instructions on enabling them.
5-2
Receiving Faxes
Canon
Chapter 5
MultiPASS C50 Hardware Manual
ENGLISH
Setting the Receive Mode
Set the MultiPASS C50’s receive mode as follows:
RECEIVE MODE
1. Press RECEIVE MODE.
J The LCD display shows the current receive mode setting.
FAX ONLY MODE
RECEIVE MODE
2. If you want to change the receive mode, press RECEIVE MODE repeatedly
until the mode you want appears.
ANS.MACHINE MODE
Fax/Tel Mode
MANUAL MODE
FAX ONLY MODE
J After about five seconds, the MultiPASS C50 returns to standby mode and
displays the time and the new receive mode:
14:38
AnsMode
14:38
FaxTel
14:38
Manual
14:38
FaxOnly
Chapter 5
Receiving Faxes
Canon
MultiPASS C50 Hardware Manual
ENGLISH
5-3
Receiving Faxes and Phone Calls Automatically: Fax/Tel
Mode
See page 5-3 to select Fax/Tel Mode.
In Fax/Tel Mode, the MultiPASS C50 monitors all incoming calls to see whether
the call is from another fax machine or from a telephone:
Type of call
Telephone charges
begin for caller.
Telephone
Fax
Fax
Sending document manually
Sending documents
automatically
MultiPASS C50 answers without ringing
MultiPASS C50 listens for FAX TONE
(For 8 sec.)
Listen Time Before
Ringing
(Factory default setting =
8 sec.)
FAX TONE detected
Document received
automatically.
(FAX TONE is detected and
the MultiPASS C50
switches to receive mode.)
FAX TONE is not detected
F/T RING TIME
(Factory default setting =
22 sec.)
MultiPASS C50 starts ringing
Pick up the handset to
talk.
If you do not pick up the handset
(within 22 seconds)
Default Action if No Answer to Telephone
Choose between:
Receive (factory default setting) and Disconnect
DISCONNECT
MultiPASS C50 disconnects
the call.
RECEIVE
(Factory default setting)
5-4
Receiving Faxes
Canon
Chapter 5
MultiPASS C50 Hardware Manual
ENGLISH
J If the call is from a fax machine, the MultiPASS C50 receives the fax
automatically.
J If the call is a telephone call, the MultiPASS C50 rings to alert you to pick up
the handset. If you do not pick up the handset within 22 seconds, the
MultiPASS C50 stops ringing, checks again to make sure the call is not from a
fax machine, then hangs up. (You can use the MultiPASS Desktop Manager to
change the 22 seconds, increasing the amount of time the MultiPASS C50
rings before it hangs up.)
J Not all fax machines are capable of sending a FAX TONE. For those cases
you can set your MultiPASS C50 to switch to receive mode automatically and
start receiving the document. If no document comes in, it disconnects after
approximately 35 seconds. See the MultiPASS Desktop Manager User’s Guide
for instructions on setting this switch.
J If the MultiPASS C50 runs out of paper or if its BJ cartridge runs out of ink
while the unit is receiving a fax, it receives the remainder of the fax into its
memory.
J To stop receiving a fax before it is complete, press the
(STOP) button.
J If the ALARM light flashes, make sure the error is corrected and then press
(STOP) button. See ”The Alarm light comes on.…” under ”Printing
the
Problems” on page 8-19.
Chapter 5
Receiving Faxes
Canon
MultiPASS C50 Hardware Manual
ENGLISH
5-5
Receiving Faxes Manually: MANUAL MODE
See page 5-3 to select Manual Mode.
To use this feature, the optional handset or a telephone must be plugged into the
telephone jack of the MultiPASS C50. See ”Connecting the Optional Handset, a
Telephone or Answering Machine” on page 2-17. You must also use the
MultiPASS Desktop Manager to enable the REMOTE RX setting and select the
two-digit ID code (the default code is 25). For details, see the MultiPASS
Desktop Manager User’s Guide.
If you use your MultiPASS C50 with MANUAL MODE, answer incoming calls
as follows:
1. When the MultiPASS C50 rings, pick up the handset.
If you hear a person’s voice:
2. Start your conversation. If the caller wants to send a document after talking
to you, wait on the line until you hear a slow beep, then press START/COPY
to begin receiving the document.
If you hear a slow beep or silence:
2. A fax machine is trying to send you a document.
Press START/COPY on the MultiPASS C50.
-orEx:
2
5
Enter the two-digit ID code from the extension phone, then hang up.
J The MultiPASS C50 then begins receiving the document. (This is
particularly convenient if your extension phone is located away from the
MultiPASS C50.)
J If you do not hang up after pressing the two-digit ID code, the unit beeps
intermittently for a few seconds after you receive the document. (You can
turn the beeping off by disabling the OFFHOOK ALARM from the
Desktop Manager. See the MultiPASS Desktop Manager User’s Guide for
details.)
5-6
Receiving Faxes
Canon
Chapter 5
MultiPASS C50 Hardware Manual
ENGLISH
If you have an answering machine connected to your MultiPASS C50 that can
carry out remote-control operations (controlling your answering machine from a
remote telephone), the security code for this function may be the same as the
two-digit ID code described above. If so, make sure you change the MultiPASS
C50’s two-digit ID code to make it distinct from the answering machine’s security
code. See the MultiPASS Desktop Manager User’s Guide for instructions on
changing the two digit ID code.
Chapter 5
Receiving Faxes
Canon
MultiPASS C50 Hardware Manual
ENGLISH
5-7
Receiving Faxes Automatically: FAX ONLY MODE
When the MultiPASS C50 is set up for a dedicated line, set FAX ONLY MODE
to automatically receive documents whenever a call comes over the fax line.
1. Make sure the MultiPASS C50 is set up to receive over a dedicated fax line.
RECEIVE MODE
2. Press RECEIVE MODE to select FAX ONLY MODE.
FAX ONLY MODE
J The MultiPASS C50 assumes all incoming calls are from fax machines
sending documents. It receives the documents automatically and
disconnects all voice calls.
J In FAX ONLY MODE, you can control whether or not the MultiPASS
C50 rings when it receives a fax call by enabling or disabling the Silent
Receive setting with the MultiPASS Desktop Manager. However, please
note that even if you enable this setting, the MultiPASS C50 will only ring
if you have a telephone or the optional handset connected to it. See the
MultiPASS Desktop Manager User’s Guide for details.
5-8
Receiving Faxes
Canon
Chapter 5
MultiPASS C50 Hardware Manual
ENGLISH
Using an Answering Machine: ANS. MACHINE MODE
Connecting an answering machine to the MultiPASS C50 allows you to receive
faxes and phone messages while you are out of the office.
In ANS. MACHINE MODE, the MultiPASS C50 allows the answering machine
to answer incoming calls, then listens for a fax tone or for four seconds of silence
(also an indication that a fax is coming in), and automatically receives the fax if it
detects the fax tone or a four-second silence.
For instructions on connecting an answering machine to the MultiPASS C50, see
”Connecting the Optional Handset, a Telephone, or Answering Machine” on
page 2-17.
Canon does not recommend using an ”answering service” (like those offered by
local telephone companies that provide voice mail) on the telephone line you are
connecting to the MultiPASS C50. If you do subscribe to an answering service,
you may want to dedicate a separate line for fax communication only and
connect that line to the MultiPASS C50.
Using the MultiPASS C50 with an Answering Machine
Follow these guidelines in using the MultiPASS C50 with an answering machine:
J Set the answering machine to answer on the first or second ring.
J If the MultiPASS C50 runs out of paper or ink in ANS. MACHINE MODE, it
receives all faxes into memory. The faxes then print automatically when you
add paper or replace the BJ ink cartridge.
J When recording the outgoing message on the answering machine:
I
Leave a four-second pause at the beginning of the message.
I
The entire message, including the four-second pause, must be no more
than 15 seconds long.
I
In the message, tell your callers how to send a fax. For example:
”Hello. I can’t answer the phone right now, but please leave a message
after the beep. I’ll return your call as soon as possible. If you would
like to send a fax, press the start button on your fax machine after you
leave your message. Thank you.”
Chapter 5
Receiving Faxes
Canon
MultiPASS C50 Hardware Manual
ENGLISH
5-9
Documents Received in Memory
The MultiPASS C50 will automatically receive incoming faxes into its memory if
it encounters a problem that prevents it from printing normally. The LCD will
display REC’D IN MEMORY and a message showing the problem. See below
for correcting the problem.
J The MultiPASS C50 memory can store up to approximately 42 A4-size pages.
J Once the problem is solved, press the
(STOP) button. The MultiPASS C50
will then print the stored faxes, and delete them from memory.
Messages Displayed When Documents are Received in
Memory
If the MultiPASS C50 receives a document into its memory, the LCD displays
one of the following messages. These messages show the action you must take to
correct the problem.
CHANGE CARTRIDGE
Cause:
The BJ cartridge ran out of ink or is not installed properly.
Action:
Make sure the cartridge is installed properly, and install a new one if
needed. See ”Replacing the BJ Cartridge” on page 9-12 or ”Replacing
an Ink Tank in the BC-21/21e Colour BJ Cartridge” on page 9-17.
PUT IN CARTRIDGE
5-10
Cause:
There is no BJ cartridge in the MultiPASS C50.
Action:
Install a BJ cartridge. See ”Installing the BJ Cartridge” on page 2-31.
Receiving Faxes
Canon
Chapter 5
MultiPASS C50 Hardware Manual
ENGLISH
LOAD PAPER
Cause:
The MultiPASS C50 ran out of paper.
Action:
Add paper to the sheet feeder and press the
(STOP) button. See
”Loading Print Media for Automatic Feed” on page 2-45.
CLEAR PAPER JAM
Cause:
A paper jam occurred.
Action:
Clear the jam, then press the
page 8-6.
(STOP) button. See ”Paper Jams” on
Chapter 5
Receiving Faxes
Canon
MultiPASS C50 Hardware Manual
ENGLISH
5-11
Printing A Received Fax When Your Computer
Is Off
To print received faxes rather than transferring them to your PC, do not turn on
your PC and follow these steps:
FUNCTION
1. Press FUNCTION.
FUNCTION
1
2
2. Press
or
to select FILE PRINT.
FILE PRINT
3. Press START/COPY.
J The MultiPASS C50 then prints all received faxes currently in memory.
When you print the fax, it is erased from memory and can no longer be
transferred to the PC.
5-12
Receiving Faxes
Canon
Chapter 5
MultiPASS C50 Hardware Manual
ENGLISH
Receiving While Registering, Copying, or
Printing
Since the MultiPASS C50 is a multitasking device, it can receive faxes and phone
calls while you are entering your user information or other settings, making
copies, or printing a report.
If your MultiPASS C50 is set to print received faxes, the faxes are stored in
memory if they arrive while you are making copies or printing. Then, as soon as
you finish making copies or printing, the MultiPASS C50 automatically prints the
fax. If you are entering registration information, the fax is printed as soon as it is
received, and does not go into memory.
Chapter 5
Receiving Faxes
Canon
MultiPASS C50 Hardware Manual
ENGLISH
5-13
Cancelling an Incoming Fax
To cancel an incoming fax, follow this procedure:
1. Press STOP.
CANCEL?
*YES
#NO
2. Press * to stop receiving, or # to resume receiving a fax.
5-14
Receiving Faxes
Canon
Chapter 5
MultiPASS C50 Hardware Manual
ENGLISH
Chapter 6
Scanning Documents and Making
Copies
This chapter describes how to load documents into the MultiPASS C50 for faxing,
copying, or scanning, and tells how to make copies.
Scanning Documents .................................................................................................. 6-2
Types of Documents You Can Scan .............................................................. 6-2
Effective Image Size ............................................................................ 6-4
Selecting Automatic/Manual Document Feed ............................................. 6-5
Loading Documents for Automatic Feed ......................................... 6-6
Loading Documents for Manual Feed ............................................ 6-10
Adding Pages to the Document in the Automatic Document Feeder
(ADF) ......................................................................................................... 6-12
Making Copies ........................................................................................................... 6-13
Chapter 6
Scanning Documents and Making Copies
Canon
MultiPASS C50 Hardware Manual
ENGLISH
6-1
Scanning Documents
The first step in scanning a document is to load the document into the MultiPASS
C50’s Automatic Document Feeder (ADF). You can then use the MultiPASS
Desktop Manager to scan documents and save the scanned images as .TIF, .BMP,
.PCX, or .DCX files. The MultiPASS C50 can also scan documents directly into
any Windows application with a TWAIN-compatible interface.
Once you have scanned the document, you can use the Desktop Manager to view
the document on your PC’s monitor, as well as save, rotate, print, or copy it to the
PC’s clipboard. You can also process the scanned image using applications such
as Adobe PageMakerH, Adobe PhotoshopH, Zsoft PhotoFinishTM, and Caere
WordScanTM.
This chapter describes the types of documents you can scan and how to load the
documents for scanning. For instructions on faxing a scanned document, see
Chapter 4, ”Sending Faxes.” For instructions on using the MultiPASS Desktop
Manager to scan documents, see the MultiPASS Desktop Manager User’s Guide.
For information on using other applications to scan documents or process images,
refer to the application’s documentation.
Types of Documents You Can Scan
The documents you load into the MultiPASS C50 must meet these requirements:
When the document feed lever is set to Automatic Document Feed:
Quantity:
N
N
N
Thickness:
N
Weight:
N
N
N
Size:
6-2
Maximum: 216 mm × approx. 1m
Minimum: 210 × 148 mm
Up to 20 A4-size, 20 letter-size, or 10 legal-size pages
(1 page for sizes other than these)
0.08-0.13 mm
(For pages thicker than this, load one page at a time)
All sheets should be of the same thickness.
75-90 g/m2
All sheets should be of the same weight.
Scanning Documents and Making Copies
Canon
MultiPASS C50 Hardware Manual
Chapter 6
ENGLISH
When the document feed lever is set to Manual Document Feed:
Size:
Quantity:
Thickness:
Weight:
N
N
N
N
N
Maximum: 216 mm × approx. 1m
Minimum: 80 × 45 mm
1 page
0.08-0.43 mm
90-340 g/m2
Problem documents
J To prevent paper jams in the Automatic Document Feeder (ADF), do not use
any of the following in the MultiPASS C50:
WRINKLED OR
CREASED PAPER
CURLED OR ROLLED
PAPER
TORN PAPER
CARBON PAPER OR
CARBON-BACKED
PAPER
COATED PAPER
ONION SKIN OR THIN
PAPER
J Remove all staples, paper clips, or any other fasteners before loading the
document into the Automatic Document Feeder (ADF).
J Make sure any glue, ink, or correction fluid on the paper is completely dry
before loading the document into the Automatic Document Feeder (ADF).
J If you have a document that will not feed into the MultiPASS C50 properly,
make a photocopy of the document, then load the copy instead.
Chapter 6
Scanning Documents and Making Copies
Canon
MultiPASS C50 Hardware Manual
ENGLISH
6-3
Effective Image Size
The MultiPASS C50 does not scan the areas within the maximum margins of
4.5 mm on either side of the sheet and 4.0 mm on the top and bottom. Make sure
your document’s text and graphics do not extend into these margins.
MAX. 4.0 mm
A4
MAX. 4.0 mm
MAX. 4.5 mm
6-4
MAX. 4.5 mm
Scanning Documents and Making Copies
Canon
MultiPASS C50 Hardware Manual
Chapter 6
ENGLISH
Selecting Automatic/Manual Document Feed
The document feed lever allows you to select whether the Automatic Document
Feeder (ADF) feeds documents automatically. If set to automatic document feed,
a multipage document will automatically feed page by page through the
Automatic Document Feeder (ADF). The icons below the document feed lever
show you which setting you should use according to your document: the icon
showing several sheets ( ) is for automatic document feed, and the icon showing
a single sheet ( ) is for manual feed.
Use automatic document feed ( ) for documents that meet the requirements on
page 6-2. However, if you have difficulty sending with this setting, or find that
several sheets feed into the Automatic Document Feeder (ADF) at the same
time, try using manual feed ( ).
For documents that do not meet the requirements on page 6-2, use manual
document feed ( ) and load one sheet at a time. These documents include very
thick or thin paper, small documents (postcards, business cards), documents with
uneven surfaces, photos, special types of paper (thick paper with a glossy finish,
for example), and carrier sheets.
In order to protect the surface or your photos and other delicate documents from
being damaged when feeding through the Automatic Document Feeder (ADF),
place the document in a carrier sheet. For details on the carrier sheet, contact
your authorised Canon dealer or the Canon help line.
Automatic document feed
Chapter 6
Manual document feed
Scanning Documents and Making Copies
Canon
MultiPASS C50 Hardware Manual
ENGLISH
6-5
Loading Documents for Automatic Feed
1. Make sure the document feed lever is set to automatic document feed.
2. If the document has multiple pages, tap it on a flat surface to even the stack’s
edges.
6-6
Scanning Documents and Making Copies
Canon
MultiPASS C50 Hardware Manual
Chapter 6
ENGLISH
3. Adjust the document guides to the width of the document.
A4
LTR
4. Gently insert the document face-down (top of the document towards you)
into the Automatic Document Feeder (ADF) until you hear a beep.
Chapter 6
Scanning Documents and Making Copies
Canon
MultiPASS C50 Hardware Manual
ENGLISH
6-7
The document is now ready for scanning. The MultiPASS C50 automatically
feeds the pages one by one from the bottom of the stack.
6-8
Scanning Documents and Making Copies
Canon
MultiPASS C50 Hardware Manual
Chapter 6
ENGLISH
Trouble With Multipage Documents
If you have trouble feeding a multipage document, do the following:
1. Remove the stack and tap it on a flat surface to even the edges.
2. ”Slant” the stack so that its front edge is bevelled as shown below, then insert
the stack into the Automatic Document Feeder (ADF).
J If you have further trouble with page jams while feeding, see ”Jams in the
Automatic Document Feeder (ADF)” on page 8-6.
J You cannot feed a multipage document of thick media, such as postcards or
business cards.
J Wait until all pages of your document have been scanned completely before
starting a new scanning job.
Chapter 6
Scanning Documents and Making Copies
Canon
MultiPASS C50 Hardware Manual
ENGLISH
6-9
Loading Documents for Manual Feed
1. Make sure the document feed lever is set to manual document feed.
When using manual feed, use a carrier sheet to avoid scratching the surface of
important documents (photographs, for example).
2. Adjust the document guides to the width of the document.
A4
6-10
LTR
Scanning Documents and Making Copies
Canon
MultiPASS C50 Hardware Manual
Chapter 6
ENGLISH
3. Gently insert the document face-down (top of the document towards you)
into the Automatic Document Feeder (ADF) until you hear a beep.
The document is now ready for scanning.
Chapter 6
Scanning Documents and Making Copies
Canon
MultiPASS C50 Hardware Manual
ENGLISH
6-11
Adding Pages to the Document in the Automatic Document
Feeder (ADF)
When the MultiPASS C50 is set for automatic document feed, the Automatic
Document Feeder (ADF) can hold up to 20 A4-size, 20 letter-size, or 10 legal-size
pages at a time (75-90 g/m2 paper, between 0.08 and 0.13 mm thick). If your
document has more pages than this, you can add pages while the MultiPASS C50
is scanning, as follows:
1. Wait until the last sheet in the Automatic Document Feeder (ADF) starts
feeding.
2. Load up to 20 additional sheets (10 legal size).
J Insert the first new page so that it overlaps the last page by about 2.5 cm.
2.5 cm
6-12
Scanning Documents and Making Copies
Canon
MultiPASS C50 Hardware Manual
Chapter 6
ENGLISH
Making Copies
One of the MultiPASS C50’s convenient features is its ability to make up to 99
high-quality copies of a document. To make copies, do the following:
Be sure to adjust the document feed lever before loading your document. See
page 6-5 for details.
1. Prepare the document and load, face down, into the Automatic Document
Feeder (ADF).
J Once the document is loaded, the LCD display shows the following:
MEMORY USED
0%
(Currently used memory)
FINE
(Current resolution for fax sending)
DOCUMENT READY
(Standby to scan)
2. Press START/COPY.
J The display now shows COPY, the reduction size the copy will be printed
at (the default is 100%), and the number of copies (the default is 1):
COPY
RESOLUTION
100%
01
3. To change the copying resolution, press RESOLUTION.
FINE
PHOTO
(FINE resolution with halftone)
COLOR FINE
COLOR DRAFT
COLOR SNAPSHOT
Chapter 6
Scanning Documents and Making Copies
Canon
MultiPASS C50 Hardware Manual
ENGLISH
6-13
J When copying in black and white:
I
You cannot make copies in STANDARD resolution, but must use FINE
or PHOTO resolution instead. (STANDARD does not appear as one of
the available resolutions.)
I
FINE resolution works well for copying most text documents.
I
Use PHOTO resolution when copying documents that contain
photographs. This scans areas of the document that contain photos with
256 levels of grey, and results in a much better reproduction of the
photograph.
J When copying in colour:
I
COLOR FINE resolution takes longer than other settings, but its 360 ×
360 dpi results in a much better quality reproduction.
I
COLOR DRAFT resolution is 180 × 360 dpi.
I
Use COLOR SNAPSHOT when scanning photos that are less than 102
mm wide. The resolution is 360 × 360 dpi.
J Colour copying speeds are as follows:
I
COLOR FINE resolution, A4-size page: 9 minutes, 44 seconds.
I
COLOR DRAFT resolution, A4-size page: 6 minutes, 3 seconds.
I
Use COLOR SNAPSHOT resolution, 102 × 152 mm photograph: 3
minutes, 51 seconds.
J You cannot use the BC-22/22e Photo Colour BJ cartridge nor the BC-29F
Fluorescent BJ cartridge for making copies. These cartridges are only to be
used for printing colour documents from your PC.
1
4. If you want to reduce the size of the copies, use the and buttons to select
the reduction percentage you want (70%, 80%, 90%, or 100%).
2
Ex:
COPY
ABC
1
GHI
4
PQRS
3
MNO
5
TUV
7
DEF
2
JKL
8
6
WXYZ
9
80%
01
5. If you want to make multiple copies, use the numeric buttons to enter the
number of copies (up to 99):
J You can only make one colour copy at a time.
0
COPY
6-14
80%
35
Scanning Documents and Making Copies
Canon
MultiPASS C50 Hardware Manual
Chapter 6
ENGLISH
6. Press START/COPY to begin copying:
COPY
J To stop copying, press
(STOP). You may then need to lift the operation
panel to remove the document. See ”Jams in the Automatic Document
Feeder (ADF)” on page 8-6.
J If an error occurs during copying, the message START AGAIN appears in
the display, and you will need to reload the document and start copying
again.
If MEMORY FULL appears in the display while you are making multiple copies
of a document, you will not be able to use the multiple copy feature for copying
the document. Instead, you will need to make single copies of the document (as
many times as required). To correct this situation, print out any documents stored
in memory. See page 5-12.
Chapter 6
Scanning Documents and Making Copies
Canon
MultiPASS C50 Hardware Manual
ENGLISH
6-15
6-16
Scanning Documents and Making Copies
Canon
MultiPASS C50 Hardware Manual
Chapter 6
ENGLISH
Chapter 7
Printing From Your PC
This chapter describes how to use the MultiPASS C50 to print from your PC. It
describes how to prepare the print media, and gives some advice on printing with
colour.
Paper Handling ........................................................................................................... 7-2
Selecting Paper Types ..................................................................................... 7-2
Printing on Envelopes ..................................................................................... 7-2
Some Advice for Colour Printing ............................................................................. 7-6
Selecting Paper and Other Print Media ....................................................... 7-6
Understanding Your Application’s Capabilities .......................................... 7-6
Understanding Your Computer’s Monitor and Colour .............................. 7-7
Improving Print Speed .................................................................................... 7-8
Controlling Printing Costs .............................................................................. 7-9
Chapter 7
Printing From Your PC
Canon
MultiPASS C50 Hardware Manual
ENGLISH
7-1
Paper Handling
This section describes how to prepare the print media for use in your
MultiPASS C50.
Selecting Paper Types
One of the most important things you can do to achieve the best possible print
quality is to select the best medium for your particular print requirements. See
”Selecting the Print Media,” on page 2-37 for guidelines to help you choose the
right media.
Printing on Envelopes
The MultiPASS C50’s sheet feeder can hold up to 10 envelopes. European DL
envelopes and U.S. Commercial No. 10 (COM10) envelopes are recommended.
You may be able to stack envelopes of other sizes in the sheet feeder, but Canon
cannot guarantee consistent performance on envelope sizes other than DL or
Commercial No. 10.
Avoid printing on any of the following, as they can cause jams or smears, or
damage your MultiPASS C50:
J Envelopes with windows, holes, perforations, cutouts, or double flaps
J Envelopes made with special coated paper or deeply embossed paper
J Envelopes using peel-off sealing strips
J Envelopes containing letters
7-2
Printing From Your PC
Canon
MultiPASS C50 Hardware Manual
Chapter 7
ENGLISH
Follow these steps to stack envelopes in the sheet feeder.
1. Arrange the stack of envelopes on a firm, clean surface and press down firmly
on the envelopes’ edges to make the folds crisp.
J Press all the way around the envelopes to remove any curls and expel air
from inside the envelopes. Also, press firmly on the area that corresponds
to the edges of the flap.
FLAP
PRESS DOWN FIRMLY ON THE EDGES OF THE FLAP.
2. Remove any curling from the envelopes by holding the edge of the envelopes
diagonally and bending them gently.
Chapter 7
Printing From Your PC
Canon
MultiPASS C50 Hardware Manual
ENGLISH
7-3
3. Make sure the flaps of the envelopes are flat and not curled.
FLAP
4. Open the printer cover by grasping the document guides and lifting to make
sure the paper thickness lever is set properly.
J For more details, see ”Adjusting the Paper Thickness Lever”
on page 2-42.
DO NOT TOUCH THE
GUIDE RAIL
DO NOT TOUCH THE
RIBBON CABLE
5. Close the printer cover.
7-4
Printing From Your PC
Canon
MultiPASS C50 Hardware Manual
Chapter 7
ENGLISH
6. Slide the stack of envelopes into the sheet feeder until it stops.
J Align the paper guide with the left edge of the stack.
ON
PAR AVI
PHONE
:(044)8
3-16-1,
11-211
1
SHIMO
CANON
NOGE
INC.
, TAKAT
UKU,
TAMAG
AWA
KAWA
SAKI-S
PLANT
HI, KANAG
AWA
213,
JAPAN
The MultiPASS C50 is now ready to print envelopes.
Chapter 7
Printing From Your PC
Canon
MultiPASS C50 Hardware Manual
ENGLISH
7-5
Some Advice for Colour Printing
Your Canon MultiPASS C50 is a powerful colour printer. If this is the first time
you have used a colour printer, read this section for some tips on printing with
colour effectively.
Colour lets you strengthen the visual impact of reports, memos, and
presentations. Colour captures your readers’ attention, holds their interest, and
increases their understanding of your message. You do not have to be an artist or
a graphic designer to use colour effectively, but you do need software that
supports colour printing, and you need to spend some time thinking about how
best to use colour to highlight important information. Without careful planning,
you can overuse colour, and actually detract from the document’s content.
Selecting Paper and Other Print Media
Selecting the right print media is crucial for achieving the best possible print
quality. See ”Selecting the Print Media” on page 2-37 for guidelines to help you
choose the right media for your particular print requirements.
If you use coated paper, the colours may print out differently from what you
expect.
Understanding Your Application’s Capabilities
It is important that you know how to correctly use the application you will be
printing from, and its capabilities and limitations for colour printing.
Your MultiPASS C50 can reproduce up to 16.7 million different colours, but the
number you can actually print depends on the application you use. Some
applications have restrictions on how they can use colour: see your application’s
documentation to see if it has any such restrictions.
7-6
Printing From Your PC
Canon
MultiPASS C50 Hardware Manual
Chapter 7
ENGLISH
Your application may also offer a number of colour-control functions, such as
dithering, intensity, or hue:
J Dithering creates colours with patterns of alternating dots. For example, an
alternating red and white dither pattern can create pink.
J Intensity (saturation) lets you adjust the depth of a colour if the printout
appears lighter or darker than the image on the monitor.
J Hue allows you to change a colour’s hue. For example, you can adjust the hue
of red to make it more purple.
For details about these functions, see your application’s documentation.
Understanding Your Computer’s Monitor and Colour
Be sure you know what type of monitor your PC has. Monitors are classified by
their resolution and by the number of different colours they can display. The
following factors can affect how well the colours on your printed page match the
colours displayed on your monitor:
Monitors create the colours they display by combining red, green, and blue at
different intensities. Printers create colours by combining overlaying dots of cyan,
yellow, magenta, and black in a variety of combinations with varying amounts of
ink.
The MultiPASS C50 is optimised to provide the best colour match possible of
printed output with popular monitors. Yet, because monitors and printers use
such different methods to create colour, achieving an accurate match between
your printed image and the image on your monitor can be extremely difficult in
some cases.
To maximise the colour-matching capabilities of your MultiPASS C50, use a 24bit colour monitor and video card. For details about your monitor’s ability to
display colour, see the monitor’s documentation.
Chapter 7
Printing From Your PC
Canon
MultiPASS C50 Hardware Manual
ENGLISH
7-7
Improving Print Speed
The MultiPASS C50 can produce a full spectrum of up to 16.7 million colours.
When printing with black ink only, the driver only has to process information for
one colour. When printing in colour, however, the MultiPASS C50 has to process
significantly more information and prints more slowly.
To improve colour printing speed, try the following:
J Increase the amount of RAM in your computer.
J Use a computer with a faster processor.
J Use only one application at a time, and turn off any screen savers or other
memory-resident applications.
J Limit the number of colours you use.
J Use smaller graphics and more white space in your documents.
J When printing presentation graphics, use only the MultiPASS C50’s primary
colours: black, cyan, magenta, and yellow.
J Use Draft mode printing when not producing a final copy.
J Use plain paper and set the Media Type to Plain Paper on your PC. This sets
the MultiPASS C50 to make only one pass for each printed line. See the
MultiPASS Desktop Manager User’s Guide.
J Print drafts in black only, or in Draft colour mode. This both reduces your
colour ink consumption and speeds up printing.
J See the MultiPASS Desktop Manager User’s Guide for other suggestions for
improving print speed.
7-8
Printing From Your PC
Canon
MultiPASS C50 Hardware Manual
Chapter 7
ENGLISH
Controlling Printing Costs
Printing in colour costs more than printing in black. To keep your colour printing
costs down, follow these guidelines:
J Use Draft mode with the BC-21/21e Colour BJ cartridge or the BC-22/22e
Photo Colour BJ cartridge to print drafts. Or use the BC-20 Black BJ
cartridge.
J For graphs and charts, set the fill option to coloured hatch patterns instead of
solid colours. Hatch patterns require less ink.
J Use lighter colours that incorporate more white space. For example, use pink
instead of red. The MultiPASS C50 produces light colours by alternating
coloured dots with white (unprinted) dots, and so uses less ink.
J Avoid full-colour backgrounds. If you must use one, do not set the
background for colour until you are ready for final printing.
J Some applications allow you to condense several pages of data onto a single
page for draft printing.
Chapter 7
Printing From Your PC
Canon
MultiPASS C50 Hardware Manual
ENGLISH
7-9
7-10
Printing From Your PC
Canon
MultiPASS C50 Hardware Manual
Chapter 7
ENGLISH
Chapter 8
Troubleshooting
If You Cannot Solve the Problem ............................................................................ 8-3
Problems Index ........................................................................................................... 8-4
Paper Jams ........................................................................................................ 8-6
Jams in the Automatic Document Feeder (ADF) ........................... 8-6
Jams in the Sheet Feeder .................................................................... 8-8
Problems Feeding Paper Into the MultiPASS C50 Sheet Feeder ............. 8-9
Faxing Problems ............................................................................................. 8-12
Sending Faxes ..................................................................................... 8-12
Receiving Faxes .................................................................................. 8-14
Telephone Problems ...................................................................................... 8-17
Copying Problems ......................................................................................... 8-18
Printing Problems .......................................................................................... 8-19
Print Quality Problems ................................................................................. 8-24
Colour Printing and Copying Problems ..................................................... 8-26
General Problems .......................................................................................... 8-29
Error Codes, Messages, and Solutions ................................................................... 8-30
Chapter 8
Troubleshooting
Canon
MultiPASS C50 Hardware Manual
ENGLISH
8-1
If your MultiPASS C50 is not operating properly, use the information and
suggestions in this chapter to try to solve the problem.
In addition, while some problems will have a single cause, others will have a
combination of causes. In the latter cases, you may need to use a process of
elimination to find the cause and correct the problem. For example, many
printing problems are related to how your software interacts with the MultiPASS
C50. If you were having trouble printing, but found that your MultiPASS C50
could make copies correctly, you would know that the problem was with your
computer, software, or cables, and not with the MultiPASS C50 itself.
If the MultiPASS C50 makes strange noises, emits smoke, or strange smells,
unplug it immediately and contact your local authorised Canon dealer or the
Canon help line. Do not attempt to disassemble or repair the unit yourself.
8-2
Troubleshooting
Canon
Chapter 8
MultiPASS C50 Hardware Manual
ENGLISH
If You Cannot Solve the Problem
If you have a problem with your MultiPASS C50 and cannot solve it using the
information in this chapter, contact your local authorised Canon dealer or the
Canon help line.
Attempting to repair the MultiPASS C50 yourself may void the limited warranty.
Before contacting your local authorised Canon dealer or the Canon help line,
make sure you have the following information about your MultiPASS C50:
J The unit’s name: MultiPASS C50
J The MultiPASS C50’s serial number (on a label on the back of the
MultiPASS C50)
CANON INC.
H12103
MADE IN JAPAN
SERIAL No. X X X X X X X
J The MultiPASS C50’s ROM version number (to find this, contact the Canon
help line)
J The MultiPASS Desktop Manager version number (see the MultiPASS
Desktop Manager User’s Guide )
J Where you purchased the unit
J A detailed description of the problem
J The steps you have taken to solve the problem, and the results
Chapter 8
Troubleshooting
Canon
MultiPASS C50 Hardware Manual
ENGLISH
8-3
Problems Index
Problem
See page
Problems Feeding Paper Into the MultiPASS C50 Sheet Feeder
Paper does not feed into the MultiPASS C50 sheet feeder ............ 8-9
Printing is skewed ................................................................................ 8-9
Several sheets load into the MultiPASS C50 at once .................... 8-10
Transparencies or back print film do not feed correctly ............... 8-10
The paper jams repeatedly ................................................................ 8-10
Envelopes will not feed ..................................................................... 8-11
Faxing Problems
You cannot send a fax ....................................................................... 8-12
Images on faxes received from the MultiPASS C50 are
spotted or dirty ............................................................................... 8-13
The MultiPASS C50 cannot send a fax using ECM ...................... 8-13
Errors occur frequently while sending faxes .................................. 8-13
The MultiPASS C50 cannot receive faxes automatically .............. 8-14
The MultiPASS C50 will not switch between telephone and fax
calls automatically .......................................................................... 8-15
The MultiPASS C50 will not receive faxes manually .................... 8-15
The print quality is poor .................................................................... 8-16
The MultiPASS C50 cannot receive faxes using ECM .................. 8-16
Nothing prints ..................................................................................... 8-16
Received faxes are blotched or uneven .......................................... 8-17
Errors occur frequently while receiving .......................................... 8-17
Telephone Problems
The MultiPASS C50 cannot dial ...................................................... 8-17
The phone disconnects while you are talking on the line ............. 8-17
Copying Problems
The MultiPASS C50 will not make a copy ...................................... 8-18
MEMORY FULL appears in the LCD display when you are
making multiple copies .................................................................. 8-18
8-4
Troubleshooting
Canon
Chapter 8
MultiPASS C50 Hardware Manual
ENGLISH
Problem
See page
Printing Problems
The ALARM light comes on and the MultiPASS C50 beeps
while printing .................................................................................. 8-19
Nothing prints ..................................................................................... 8-20
The BJ cartridge moves, but no print appears on the paper ........ 8-21
The MultiPASS C50 suspends printing after each line ................. 8-21
Your PC indicates a device time-out ............................................... 8-21
The printed output is not what you expected ................................ 8-22
Printout does not match paper size ................................................. 8-23
The printout curls ............................................................................... 8-23
Print Quality Problems
Print is not clear ................................................................................. 8-24
Output appears jagged ...................................................................... 8-24
The printout has dots of ink splashed on it .................................... 8-24
The printout has white streaks or missing dots .............................. 8-24
Output is faint ..................................................................................... 8-25
Printing takes too much time ............................................................ 8-25
The printout contains blurred or smudged ink .............................. 8-25
Colour Printing and Copying Problems
Colours are missing, and the output contains only black ink ....... 8-26
Colours are broken or uneven .......................................................... 8-26
Colours generally print incorrectly .................................................. 8-27
Colours in a line are uneven or different from those in
previous lines .................................................................................. 8-27
Hue changes ........................................................................................ 8-28
Printed blue looks purple .................................................................. 8-28
Colour images are missing some detail ........................................... 8-28
General Problems
The MultiPASS C50 has no power .................................................. 8-29
The MultiPASS C50 will not print reports ...................................... 8-29
Nothing appears in the LCD display ............................................... 8-29
Chapter 8
Troubleshooting
Canon
MultiPASS C50 Hardware Manual
ENGLISH
8-5
Paper Jams
On occasion, the document feeding into the MultiPASS C50’s Automatic
Document Feeder (ADF) or the paper in its sheet feeder may misfeed or jam. If
this happens, you can usually fix the problem using one of the following
procedures.
You do not need to unplug the MultiPASS C50 while clearing paper jams.
Jams in the Automatic Document Feeder (ADF)
Use this procedure if the document in the MultiPASS C50’s Automatic
Document Feeder (ADF) jams or misfeeds. (If this occurs, the message CHECK
DOCUMENT appears in the display.)
1. Press STOP.
Do not try to pull the document out without opening the operation panel, or you
may tear or smudge the document.
2. Open the operation panel by gently pulling it toward you.
8-6
Troubleshooting
Canon
Chapter 8
MultiPASS C50 Hardware Manual
ENGLISH
3. Remove the jammed page by pulling it in either direction.
If the paper does not pull out easily, do not force it. Contact your local authorised
Canon dealer or the Canon help line.
4. Gently push the operation panel shut until it clicks.
5. Press STOP to clear the error message.
6. If you have a multipage document, remove the entire document from the
Automatic Document Feeder (ADF), and reload it, following the instructions
in ”Loading Documents for Automatic Feed” on page 6-6.
Chapter 8
Troubleshooting
Canon
MultiPASS C50 Hardware Manual
ENGLISH
8-7
Jams in the Sheet Feeder
Use this procedure if the recording paper jams or misfeeds in the sheet feeder. If
this happens, the message CLEAR PAPER JAM appears in the display.
1. Gently pull any jammed paper out of the unit as shown.
2. Remove the paper stack from the sheet feeder and reload it, following the
instructions in ”Loading Print Media for Automatic Feed” on page 2-45.
J Make sure you push the paper to the back and right of the sheet feeder,
). See page
and that the stack is not higher than the paper limit mark (
2-47 for more details.
3. Press STOP to clear the error message.
J If the ALARM light is on, press the RESUME button to clear the error
message.
J If you are printing from a Windows application, follow the instructions
displayed by the software on your PC.
If the paper jam occurred while a fax was being received into the MultiPASS
C50’s memory, that fax will print automatically when the jam is cleared.
8-8
Troubleshooting
Canon
Chapter 8
MultiPASS C50 Hardware Manual
ENGLISH
Problems Feeding Paper into the Sheet Feeder
If you are having problems feeding paper or other media into the MultiPASS
C50’s sheet feeder, check the following table.
Whenever you correct one of these problems, be sure to remove the paper from
the sheet feeder and load it again. See page 2-45.
The following problems can also cause the paper to jam in the unit. See page 8-6
for instructions on clearing paper jams.
Problem
Possible cause
Solution
Paper does not feed into the
MultiPASS C50 sheet feeder
The sheet feeder may contain
too many sheets.
Make sure the sheet feeder is
not filled past the limit mark
). See page 2-47.
(
Paper may not be inserted in
the sheet feeder correctly.
Make sure paper is inserted all
the way into the sheet feeder.
See page 2-45.
Paper may not be stacked
correctly in the sheet feeder.
Make sure the stack of paper is
straight in the sheet feeder.
Printing is skewed
Make sure the right side of the
stack of paper is aligned with the
right side of the sheet feeder,
and that the paper guide is
aligned against the left side of
the stack. See page 2-47.
Make sure the paper exit path is
clear.
Chapter 8
Troubleshooting
Canon
MultiPASS C50 Hardware Manual
ENGLISH
8-9
Problem
Possible cause
Solution
Several sheets load into the
MultiPASS C50 at once
Paper may not be loaded in
the sheet feeder correctly.
Make sure paper is inserted
correctly in the sheet feeder. See
page 2-45.
Sheets of paper may be
sticking together.
Make sure the paper is not
sticking together. Be sure to fan
the stack of paper before placing
it in the sheet feeder.
The sheet feeder may contain
too many sheets.
Make sure the sheet feeder is not
).
filled past the limit mark (
See page 2-47.
Do not force the stack into the
sheet feeder.
The sheet feeder may contain
more than one type of paper.
Load only one type of paper at a
time.
Make sure the paper you use
meets the specifications for
media in Appendix A,
”Specifications.”
Transparencies or back print
film do not feed correctly
The sheets may not be loaded
correctly.
Make sure you load no more
than 50 sheets of transparencies
or 10 sheets of back print film in
the sheet feeder.
The paper jams repeatedly
The paper itself may be
causing the jams.
Fan the paper before stacking it
in the sheet feeder. This keeps
the sheets from sticking together.
Make sure the paper you are
using and your printing
environment meet the
specifications given in Appendix
A, ”Specifications”.
8-10
Troubleshooting
Canon
Chapter 8
MultiPASS C50 Hardware Manual
ENGLISH
Problem
Possible cause
Solution
Envelopes will not feed
The envelopes may not be
loaded correctly.
Make sure the envelopes are
loaded properly. See page 7-2.
Make sure there are no more
than 10 envelopes in the sheet
feeder.
The correct envelope size may
not be selected in your printer
driver.
Make sure you select the correct
envelope size in the Paper
Setting dialog box on your PC.
See the MultiPASS Desktop
Manager User’s Guide.
The envelopes may not meet
the MultiPASS C50’s
specifications.
Envelopes must be European DL
(220 × 110mm) or U.S.
Commercial No. 10 (9.5 × 4.1
in.).
Chapter 8
Troubleshooting
Canon
MultiPASS C50 Hardware Manual
ENGLISH
8-11
Faxing Problems
Use the following tables to solve problems that can occur when sending and
receiving faxes with the MultiPASS C50.
Sending Faxes
Problem
Possible cause
Solution
You cannot send a fax
The MultiPASS C50 may have
over-heated and shut itself down.
If you suspect this, unplug the
MultiPASS C50 and let it cool for
several minutes, then try sending
again.
The MultiPASS C50 may not be
set for the type of telephone line
you have (pulse/tone).
Make sure the MultiPASS C50 is set
for the phone line you have. See
page 2-58. (If you are not sure what
type of line you have, contact your
local telephone company.)
The document may not have
been set in the Automatic
Document Feeder (ADF)
properly.
Remove the document, stack it, and
feed it into the Automatic Document
Feeder (ADF) again. See page 6-6.
The one-touch or coded speed
dialling number you used may
not be registered.
Check the content of the one-touch
or coded speed dialling button and
make sure it was registered correctly.
The receiving fax machine may
be out of paper.
Call the other party and be sure they
have paper in their fax machine.
The MultiPASS C50 may be
sending another document from
memory.
Allow time for the current document
to finish sending.
An error may have occurred
during sending.
Print an activity report and check for
an error code. See the MultiPASS
Desktop Manager User’s Guide.
There may be a problem with the
telephone line.
Make sure you have a dial tone on
the handset. If not, contact your
local telephone company.
The receiving fax machine may
not be a G3 fax machine.
Make sure the receiving fax machine
is compatible with the MultiPASS
C50 (which is a G3 fax machine).
If none of the above solve the problem, try unplugging the MultiPASS C50 for at
least five seconds, then plugging it back in. If the problem persists, contact your
local authorised Canon dealer or help line. Please note that any documents stored
in memory will be erased when the MultiPASS C50 is unplugged.
8-12
Troubleshooting
Canon
Chapter 8
MultiPASS C50 Hardware Manual
ENGLISH
Problem
Possible cause
Solution
Images on faxes
received from the
MultiPASS C50 are
spotted or dirty
The receiving fax machine may
not be working properly.
Check the MultiPASS C50 by
making a copy. If the copy is clear,
the problem may be in the receiving
fax machine.
The document may not be
properly inserted in the
Automatic Document Feeder
(ADF).
Remove the document and feed it
correctly into the Automatic
Document Feeder (ADF). See page
6-6.
The receiving fax machine may
not support ECM.
If the receiving fax does not support
ECM, then the MultiPASS C50
sends the fax in normal mode
without error checking.
ECM receiving on the receiving
fax machine may not be turned
on.
If the receiving fax does support
ECM reception, call the other party
and have them check if ECM
reception is turned on.
The phone line may be in poor
condition, or you may have a
poor connection.
Lower the speed at which the unit
starts sending faxes in the Speed
option in the Send Fax tab. See the
MultiPASS Desktop Manager User’s
Guide.
The MultiPASS C50
cannot send a fax using
ECM (ECM TX does
not appear in the LCD
display when sending)
Errors occur frequently
while sending faxes
Chapter 8
Troubleshooting
Canon
MultiPASS C50 Hardware Manual
ENGLISH
8-13
Receiving Faxes
Problem
Possible cause
Solution
The MultiPASS C50 cannot
receive faxes automatically
The MultiPASS C50 may not
be set to receive faxes
automatically.
For the MultiPASS C50 to
receive faxes automatically, it
must be in FaxOnly, AnsMode,
or FaxTel mode. See page 5-2.
The MultiPASS C50 may have
a document in memory,
leaving little or no memory
available.
Print out any documents stored
in memory. See page 5-12.
An error may have occurred
during reception.
Check the LCD display for an
error message. See page 8-30 for
a listing of the MultiPASS C50’s
error messages.
The sheet feeder may be
empty.
Make sure the sheet feeder has
paper in it.
The telephone line may not
be connected properly.
Make sure all phone line
connections are secure.
8-14
Troubleshooting
Canon
Chapter 8
MultiPASS C50 Hardware Manual
ENGLISH
Problem
Possible cause
Solution
The MultiPASS C50 will not
switch between telephone and
fax calls automatically
The MultiPASS C50 may not
be in Fax/Tel Mode.
For the MultiPASS C50 to switch
automatically between telephone
and fax calls, it must be in Fax/
Tel mode. See page 5-2.
The MultiPASS C50 may have
a document in memory.
Print out any document stored in
memory. See page 5-12.
An error may have occurred
during reception.
Check the LCD display for an
error message. See page 8-30 for
a listing of the MultiPASS C50’s
error messages.
Print an activity report and look
for an error code. See the
MultiPASS Desktop Manager
User’s Guide.
The MultiPASS C50 will not
receive faxes manually
The sheet feeder may be
empty.
Make sure the sheet feeder has
paper in it.
The sending fax machine may
not send the CNG signal that
tells the MultiPASS C50 that
the incoming signal is a fax.
In such cases, you will have to
receive the document manually.
See page 5-6.
You may not have pressed the
(START/COPY) button
before hanging up the
handset.
Always press the
(START/
COPY) button before hanging up
the handset. If you hang up
(START/
before pressing the
COPY) button, you will
disconnect the call.
Chapter 8
Troubleshooting
Canon
MultiPASS C50 Hardware Manual
ENGLISH
8-15
Problem
Possible cause
Solution
The print quality is poor
You may not be using the
correct paper.
Make sure the paper in the sheet
feeder meets the specifications
given in Appendix A.
The sending fax machine may
not be operating properly.
Make a copy with your
MultiPASS C50. If the copy looks
OK, then your MultiPASS C50 is
operating properly. Contact the
sender and have them check their
fax machine.
Also see ”Printing Problems” on page 8-19.
The MultiPASS C50 cannot
receive faxes using ECM
(ECM RX does not appear in
the LCD display when
receiving)
Nothing prints
8-16
The sending fax machine may
not support ECM.
If the sending fax does not
support ECM, then the
MultiPASS C50 receives the fax
in normal mode without error
checking.
ECM reception may not be
selected.
Make sure the ECM option in
the Receive Fax tab is selected.
See the MultiPASS Desktop
Manager User’s Guide.
The orange tape may not
have been removed from the
BJ cartridge when it was
installed.
Be sure to remove the tape from
the BJ cartridge when you install
it. See page 2-33.
The BJ cartridge may not
have been installed properly.
Make sure the cartridge is
installed correctly. See page 2-31.
The print head unit may need
cleaning.
Clean the print head. See page
9-9.
The BJ cartridge may need to
be replaced.
See page 9-10.
Troubleshooting
Canon
Chapter 8
MultiPASS C50 Hardware Manual
ENGLISH
Problem
Possible cause
Solution
Received faxes are blotched
or uneven
The telephone lines may be in
poor condition, or you may
have a bad connection.
Use ECM receiving to try
eliminate such problems.
However, if the telephone lines
are in poor condition, you may
need to have the fax sent again.
The sending fax machine may
not be functioning properly.
The sending fax machine usually
determines the fax’s quality. Call
the sender and have them make
sure the top cover and scanning
glass on their fax machine are
clean.
The telephone lines may be in
poor condition, or you may
have a bad connection.
Lower the speed at which the
unit receives faxes in the Speed
setting in the Receive Fax tab.
See the MultiPASS Desktop
Manager User’s Guide.
Errors occur frequently while
receiving
Telephone Problems
Problem
Possible cause
Solution
The MultiPASS C50 cannot
dial
The telephone line may not
be connected properly.
Make sure the telephone line is
securely connected to the
MultiPASS C50. See page 2-16.
The MultiPASS C50 may not
be set for the type of
telephone line you have
(pulse/tone).
Make sure the MultiPASS C50 is
set for the type of phone line you
have. See page 2-58. (If you are
not sure what type of line you
have, contact your local
telephone company.)
The MultiPASS C50 may not
be plugged in properly.
Make sure the MultiPASS C50 is
correctly plugged into a wall
outlet.
The phone disconnects while
you are talking on the line
Chapter 8
Troubleshooting
Canon
MultiPASS C50 Hardware Manual
ENGLISH
8-17
Copying Problems
Problem
Possible cause
Solution
The MultiPASS C50 will not
make a copy
The MultiPASS C50 may have
a BC-21/21e Colour BJ
cartridge installed, and its
black ink tank may be empty.
Replace the empty ink tank. See
page 9-17.
The MultiPASS C50 may have
a BC-22/22e Photo Colour BJ
cartridge or a BC-29F
Fluorescent BJ cartridge
installed.
The MultiPASS C50 does not
make copies while the BC-22/22e
Photo Colour BJ cartridge or a
BC-29F Fluorescent BJ cartridge
is installed. Replace the cartridge
with a BC-21/21e Colour BJ
cartridge or BC-20 Black BJ
cartridge.
The handset may be off its
hook.
Make sure the handset is on its
cradle.
The document may not be
placed in the Automatic
Document Feeder (ADF)
correctly.
Make sure the document you are
copying is set in the Automatic
Document Feeder (ADF)
properly, and the LCD display
shows DOCUMENT READY.
See page 6-6.
Make sure the document feed
lever is set correctly. See page 6-5
for details.
MEMORY FULL appears in
the LCD display when you
are making multiple copies
The MultiPASS C50 may not
be operating properly.
Print a document from your PC
to make sure the MultiPASS C50
is working properly. See the
MultiPASS Desktop Manager
User’s Guide.
The MultiPASS C50’s
memory is full.
Print out any received faxes
stored in memory, then start
making copies again. See
page 5-12.
For colour copying problems, see ”Colour Printing and Copying Problems”on
page 8-26.
8-18
Troubleshooting
Canon
Chapter 8
MultiPASS C50 Hardware Manual
ENGLISH
Printing Problems
If you are having problems printing with the MultiPASS C50, check the problems
and solutions listed in the following table.
Problem
Possible cause
Solution
The ALARM light comes on
and the MultiPASS C50 beeps
while printing
The MultiPASS C50 may have
a paper jam.
Clear any paper jams as
described above.
If the MultiPASS C50 has no
paper jam, unplug it, wait 5
seconds, then plug it in again. If
the problem is fixed, the
ALARM light will be off, the BJ
cartridge will move to its home
position, and the LCD display
will show the time and receiving
mode (standby mode).
If the ALARM light stays on,
call your local authorised Canon
dealer or the Canon help line.
Chapter 8
Troubleshooting
Canon
MultiPASS C50 Hardware Manual
ENGLISH
8-19
Problem
Possible cause
Solution
Nothing prints
The power cord may not be
plugged in securely.
Make sure the power cord is
plugged securely into the unit
and into a wall outlet.
The interface cable may not
be securely connected to the
MultiPASS C50 and the
computer.
Check the interface cable’s
connections. See page 2-14.
The interface cable may not
be the correct type.
Make sure you are using the
parallel cable supplied with your
MultiPASS C50. See page 2-14.
The MultiPASS C50 or
computer were turned on
while you were connecting the
interface cable.
Unplug the MultiPASS C50 and
turn the computer off, then plug
the MultiPASS C50 in and turn
the computer on again.
The orange tape may not
have been removed from the
BJ cartridge when it was
installed.
Be sure to remove the tape from
the BJ cartridge when you install
it. See page 2-33.
The BJ cartridge may not
have been installed properly.
Make sure the cartridge is
installed correctly. See page 2-31.
The print head unit may need
cleaning.
Clean the print head. See page
9-9.
The BJ cartridge may need to
be replaced.
Replace the BJ cartridge. See
page 9-12.
The application you are
printing from may not be set
up properly.
Check the computer and the
application to make sure they are
configured correctly.
The application may not have
the correct printer selected.
Make sure the Print Setup option
in your application has
MultiPASS C50 Printer Driver
selected as the printer.
The printer driver may be
configured with the wrong
port.
Make sure the MultiPASS C50
MultiPASS Printer Driver is
configured to use the PC’s
parallel port. See the MultiPASS
Desktop Manager User’s Guide.
The computer’s parallel port
may be disabled.
Make sure your PC’s CMOS has
the primary parallel port set to
LPT1. (Your PC should have a
setup program that lets you do
this.) See your computer’s
documentation.
8-20
Troubleshooting
Canon
Chapter 8
MultiPASS C50 Hardware Manual
ENGLISH
Problem
Possible cause
Solution
The BJ cartridge moves, but
no print appears on the paper
The BJ cartridge or an ink
tank may not be installed
properly.
Make sure the BJ cartridge and
any ink tanks are properly
installed. See page 2-31.
The BJ cartridge print head
may need cleaning.
Clean the print head. See page
9-9.
An ink tank may be empty.
Replace empty ink tanks as
needed. See page 9-17.
The MultiPASS C50 suspends
printing after each line
The print head may have
become too hot. If this
happens, the MultiPASS C50
slows down to cool the print
head.
You do not need to do anything.
Allow the MultiPASS C50 to
finish the current print job and
then let it sit awhile to cool.
Your PC indicates a device
time-out
A device time-out occurs
when the PC sends data to the
MultiPASS C50, but the
MultiPASS C50 does not
respond. The MultiPASS C50
may be unplugged, not
connected to the PC, or have
a paper jam.
Make sure the MultiPASS C50 is
plugged in, and that its interface
cable is securely attached to the
MultiPASS C50 and the PC.
Clear any paper jams, and make
sure paper is loaded properly in
the sheet feeder.
Chapter 8
Troubleshooting
Canon
MultiPASS C50 Hardware Manual
ENGLISH
8-21
Problem
Possible cause
Solution
The printed output is not
what you expected
There may be a
communication problem
between the MultiPASS C50
and your PC.
Make sure the PC and the
application are configured
correctly for communicating with
the MultiPASS C50. See the
MultiPASS Desktop Manager
User’s Guide.
The interface cable may not
be securely connected to the
MultiPASS C50 and the
computer.
Check the interface cable’s
connections. See page 2-14.
The interface cable may not
be the correct type.
Make sure you are using the
parallel cable supplied with the
MultiPASS C50 unit. See
page 2-14.
The interface cable may be
too long.
Make sure your parallel cable is
less than 2 metres long.
You may not be using the
correct printer driver.
Make sure you have selected the
MultiPASS C50 Printer Driver in
the Printer’s dialog box or from
your application’s printer dialog.
See the MultiPASS Desktop
Manager User’s Guide.
You may not have the best
media type selected.
Try selecting Coated Paper for
the Media Type rather than Plain
Paper. See the MultiPASS
Desktop Manager User’s Guide.
Previous software settings
may not be cleared.
Make sure the MultiPASS C50
was cleared of the previous
software settings before the print
job started. See the application’s
documentation.
8-22
Troubleshooting
Canon
Chapter 8
MultiPASS C50 Hardware Manual
ENGLISH
Problem
Possible cause
Solution
Printout does not match
paper size
Paper may not be loaded and
aligned correctly in the sheet
feeder.
Make sure the paper is loaded
and aligned correctly. See
page 2-45.
The application’s page size
and margin settings may be
incorrect.
Make sure the paper size and
margin set in your application are
correct for the paper in the sheet
feeder. See your application’s
documentation for setting the
paper size.
The selected printer driver
may be incorrect.
Make sure you select the
MultiPASS C50 Printer Driver.
See the MultiPASS Desktop
Manager User’s Guide.
If the print head prints on the platen, clean the ink off the platen by launching
Notepad and setting the application to print 2 or 3 blank sheets of paper.
The printout curls
Your pages may include a
large amount of ink.
Chapter 8
Remove the printout as soon as it
exits the MultiPASS C50 and let
it dry, then roll it in the direction
opposite of the curl.
Troubleshooting
Canon
MultiPASS C50 Hardware Manual
ENGLISH
8-23
Print Quality Problems
If your print quality is not what you expect it to be, check the problems and
solutions below.
Problem
Possible cause
Solution
Print is not clear
The medium you are using
may not be supported by the
MultiPASS C50.
Use only print media specified in
”Selecting the Print Media” on
page 2-37.
You may be printing on the
wrong side of the paper.
Many types of paper have a
”correct” side for printing. If
your paper does, make sure that
side is facing up. If the paper has
no obvious correct side, try
turning the paper over and
printing on the other side.
The print head nozzles may
be clogged.
Clean the print head. See page
9-9.
Output appears jagged
You may be using Draft mode
(180 dpi), which can give
output a jagged look.
Change the resolution to
standard on your PC. See the
MultiPASS Desktop Manager
User’s Guide.
The printout has dots of ink
splashed on it
The print head nozzles may
be clogged with ink.
Clean the print head. See page
9-9.
The printout has white streaks
or missing dots
The print head nozzles may
be clogged with dust.
Clean the print head. See page
9-9.
An ink tank may be empty.
Replace empty ink tanks as
needed. See page 9-17.
The BJ cartridge or an ink
tank may be installed
incorrectly.
Make sure the BJ cartridge and
any ink tanks are installed
correctly.
The medium you are using
may not be supported by the
MultiPASS C50.
Use only print media specified in
”Selecting the Print Media” on
page 2-37.
The print head may be worn
out.
Check the BJ cartridge print
head. It may need to be replaced.
See page 9-9.
8-24
Troubleshooting
Canon
Chapter 8
MultiPASS C50 Hardware Manual
ENGLISH
Problem
Possible cause
Solution
Output is faint
You may be using Draft print
quality or Fine mode.
Try using Standard mode. See the
MultiPASS Desktop Manager
User’s Guide.
Printing takes too much time
You may be using Fine mode.
Try using Standard mode. See the
MultiPASS Desktop Manager
User’s Guide.
The printout contains blurred
or smudged ink
The medium you are using
may not be supported by the
MultiPASS C50.
Use only print media specified in
”Selecting the Print Media” on
page 2-37.
You may be printing on the
wrong side of the paper.
Many types of paper have a
”correct” side for printing. If
your paper does, make sure that
side is facing up. If the paper has
no obvious correct side, try
turning the paper over and
printing on the other side.
Chapter 8
Troubleshooting
Canon
MultiPASS C50 Hardware Manual
ENGLISH
8-25
Colour Printing and Copying Problems
Use the following to correct problems you may have while using the MultiPASS
C50 to print in colour.
Problem
Possible cause
Solution
Colours are missing, and the
output contains only black ink
The MultiPASS C50 Printer
Driver may not be selected.
Make sure you selected the
MultiPASS C50 Printer Driver or
other compatible colour printer
driver. See the MultiPASS
Desktop Manager User’s Guide.
The printer driver may not be
selecting colour.
Make sure the PC is set to use
Colour On Screen – Matched
Colour. See the MultiPASS
Desktop Manager User’s Guide.
The colour BJ cartridge may
not be working properly.
Print the NOZZLE CHECK test
pattern to make sure the Colour
BJ cartridge and ink tanks are
firing correctly. See page 9-8.
An ink tank may be empty.
Replace empty ink tanks as
needed. See page 9-17.
The print head unit may need
cleaning.
Clean the print head. See page
9-9.
The application you are
printing from may not support
colour printing.
Check your application’s
documentation.
You may be using the wrong
print mode.
If you are printing dense graphics
on plain paper, set the Media
Type to Coated Paper on your
PC. See the MultiPASS Desktop
Manager User’s Guide.
If you are printing a thin line
with a non-primary colour,
your software may be telling
the unit to place a colour
every other dot, with white in
between.
Choose cyan, yellow, magenta, or
black instead.
Colours are broken or uneven
8-26
Troubleshooting
Canon
Chapter 8
MultiPASS C50 Hardware Manual
ENGLISH
Problem
Possible cause
Solution
Colours generally print
incorrectly
The MultiPASS C50 Printer
Driver may not be selected.
Make sure you are using the
MultiPASS C50 Printer Driver.
See the MultiPASS Desktop
Manager User’s Guide.
The printer driver may not be
selecting colour.
Make sure you selected Colour
or Screen Matched Colour on
your PC. See the MultiPASS
Desktop Manager User’s Guide.
The printer driver may not be
selecting the right media.
Make sure you selected the
correct media type on the PC.
See the MultiPASS Desktop
Manager User’s Guide.
Some colours are impossible to match exactly, though the MultiPASS C50 is
designed to come as close as possible.
Colours in a line are uneven
or different from those in
previous lines
The print settings may not be
the best for the images you
are printing.
Chapter 8
If you are printing dense colour
graphics on plain paper, change
the Media Type setting from
Plain Paper to Coated Paper on
the PC. See the MultiPASS
Desktop Manager User’s Guide.
Troubleshooting
Canon
MultiPASS C50 Hardware Manual
ENGLISH
8-27
Problem
Possible cause
Solution
Hue changes
The print head nozzles may
be clogged with dust.
Clean the print head. See page
9-9.
An ink tank may be empty.
Replace empty ink tanks as
needed. See page 9-17.
Blue prints as purple because
of the different technologies
used by the PC’s monitor and
the MultiPASS C50: the
monitor uses RGB (Red,
Green, Blue) colour, while the
MultiPASS C50 uses CMYK
(Cyan, Magenta, Yellow,
Black) colour. Thus, the
printed blue (a mix of cyan
and magenta) looks darker
and more purple than the
blue on the monitor.
On the PC, select Match colour
(screen matching) to provide a
lighter colour blue.
You may not have the
optimum settings selected on
the PC.
On your PC, make sure to select
Plain Paper, Colour Mode, and
Halftoning = Pattern. If these are
already selected, change the
Media Type setting from Plain
Paper to Coated Paper. See the
MultiPASS Desktop Manager
User’s Guide.
Printed blue looks purple
Colour images are missing
some detail
8-28
If you are not using screen
matching, decrease the amount
of magenta by 30% to produce a
royal blue.
If you just want a nice blue
colour, try cyan. It prints
beautifully and quickly, and is
available in almost all
applications that support colour.
See the MultiPASS Desktop
Manager User’s Guide.
Troubleshooting
Canon
Chapter 8
MultiPASS C50 Hardware Manual
ENGLISH
General Problems
Problem
Possible cause
Solution
The MultiPASS C50 has no
power
The power cord may not be
securely plugged into the unit.
Make sure the power cord is
plugged securely into the unit
and into a wall outlet.
If the power cord is connected to
a power strip, make sure the strip
is connected to an outlet and
turned on.
The power cord may not be
supplying power.
Check the power cord by
substituting another, or by using
a voltameter to test it for
continuity.
The MultiPASS C50 will not
print reports
The MultiPASS C50 may have
a BC-21/21e Colour BJ
cartridge installed, and its
black ink tank may be empty.
Replace the empty ink tank. See
page 9-17.
Nothing appears in the LCD
display
The MultiPASS C50 may not
be receiving power.
Check the plug and be sure it is
firmly plugged into the power
connector and the wall outlet.
If the display remains blank,
unplug the MultiPASS C50, wait
five seconds, then plug it in again.
If the display still remains blank,
call your local authorised Canon
dealer or the Canon help line.
Chapter 8
Troubleshooting
Canon
MultiPASS C50 Hardware Manual
ENGLISH
8-29
Error Codes, Messages, and Solutions
This table lists the error messages that appear in the MultiPASS C50’s LCD
display and the corresponding error codes that appear in activity reports, and
tells what to do for each.
Message
Error Code
AUTO REDIAL
BUSY/NO SIGNAL
Cause
Action
–
The receiving fax
machine was busy and
the MultiPASS C50 is
waiting to redial.
#005/018
The telephone number
you dialled is busy.
Try sending the document
again later.
The other party’s fax
machine is not working
properly.
Contact the other party
and have them check their
fax machine.
The other party is not
using a G3 fax machine.
Contact the other party
and have them send or
receive the document using
a G3 machine.
The telephone line type
setting on your
MultiPASS C50 is
incorrect.
Set your MultiPASS C50
for your telephone line
(tone or pulse).
The receiving fax
machine did not answer
within 55 seconds.
Contact the other party
and have them check their
fax machine. You can also
try to send the document
manually. For an overseas
call, add pauses to the
registered number.
–
CALLING
–
The MultiPASS C50 is
dialling the receiving
fax machine.
If you want to cancel the
transmission, press the
(STOP) button.
CARTRIDGE JAMMED
–
The cartridge is
jammed.
Open the printer cover,
check for any jammed
paper in the unit, and
remove if necessary. Do
not try to manually move
or stop the cartridge
holder.
8-30
Troubleshooting
Canon
Chapter 8
MultiPASS C50 Hardware Manual
ENGLISH
Message
Error Code
CHANGE CARTRIDGE
CHECK DOCUMENT
#052
#001
Cause
Action
The BJ cartridge is
empty or its ink has
dried out.
Make a copy or print a
document. If the printout is
light or blank, replace the
BJ cartridge. Documents
received in memory will
then be printed
automatically.
The MultiPASS C50’s
image memory may be
full because the BJ
cartridge ran out of ink.
Replace the BJ cartridge
and have the other party
send the fax again.
A document is jammed
in the Automatic
Document Feeder
(ADF).
Remove the document you
are trying to send or copy
and load it again.
The document feed
lever is set to manual
document feed.
Set the document feed
lever to automatic
document feed.
CHECK PAPER SIZE
–
The size of the paper in
the sheet feeder differs
from that specified in
the Paper Size option
in the Receive Fax tab.
Set the correct paper size
in the Paper Size option in
the Receive Fax tab.
CHECK PRINTER
–
The BJ cartridge in the
MultiPASS C50 is
defective.
(STOP)
1. Press the
button.
2. Reinstall the cartridge.
3. Unplug the MultiPASS
C50, wait 5 seconds,
then plug it in again. If
the display does not
change, call for service.
CLEAR PAPER JAM
#009
The MultiPASS C50
has no paper in its
sheet feeder, or has a
paper jam.
Add paper or clear the
jam, then press the
(STOP) button. If a
document was received in
memory, the fax is
automatically printed from
memory.
COMMUNICATING
PLEASE WAIT
–
You tried to use
manual sending while
the fax was sending
from memory.
Wait until the fax is sent
and try again, or use
memory sending.
Chapter 8
Troubleshooting
Canon
MultiPASS C50 Hardware Manual
ENGLISH
8-31
Message
Error Code
DOC TOO LONG
#003
Cause
Action
It took more than 32
minutes to send or
copy a document.
Divide the document and
send or copy each part
separately.
It took more than 32
minutes to receive a
document.
Contact the sender, and
have them divide the
document and send each
part separately.
The document is longer
than 1 metre.
Use a copy machine to
copy each page of the
document and send the
copy.
DOCUMENT READY
–
The document in the
Automatic Document
Feeder (ADF) is ready
for scanning.
Send the fax, scan the
document, or make a copy.
ECM RX
–
The MultiPASS C50 is
receiving a fax using
ECM.
Faxes can take longer to
receive when using ECM.
Try turning ECM off if you
need to receive quickly, or
if you know your local
telephone lines are in good
condition.
ECM TX
–
The MultiPASS C50 is
sending a fax using
ECM.
Faxes can take longer to
send when using ECM. Try
turning ECM off if you
need to send quickly, or if
you know your local
telephone lines are in good
condition.
HANG UP PHONE
–
The handset is off its
hook.
Place the handset properly
onto its hook.
INSTALL BC-21
–
The BC-20, BC-22/22e,
or BC-29F BJ
Cartridge is installed.
Remove the BC-20, BC-22/
22e, or BC-29F BJ
Cartridge and install the
BC-21/21e BJ Cartridge.
INSTALL BC-21/20
–
The BC-22/22e or
BC-29F BJ Cartridge is
installed, so the
MultiPASS C50 cannot
print any received
faxes, or make copies.
Remove the BC-22/22e or
BC-29F BJ Cartridge and
install the BC-21/21e or
BC-20 BJ Cartridge.
LOAD PAPER
–
The MultiPASS C50 is
out of recording paper.
Add paper to the sheet
feeder. Make sure the
stack is below the limit
). Then press
mark (
(STOP) button.
the
8-32
Troubleshooting
Canon
Chapter 8
MultiPASS C50 Hardware Manual
ENGLISH
Message
Error Code
MEMORY FULL
#037
Cause
Action
The MultiPASS C50’s
memory is full because
it has received too
many documents, or a
very long or detailed
document.
Print out any documents
that are stored in memory.
Then start the operation
again. See page 5-12.
The memory is full
because you sent too
many pages at once, or
a very long or detailed
document.
Divide the document and
send each part separately.
If the memory contains any
faxes, you do not need to
delete them.
MEMORY FULL
PLEASE WAIT
–
The MultiPASS C50 is
sending a fax and its
memory is full.
Wait until the fax is sent.
The MultiPASS C50
continues to send the fax
as memory becomes
available.
MEMORY USED nn%
–
Shows how much of the
MultiPASS C50’s
memory is in use.
If you need more memory,
print or send any
documents stored in
memory.
NO ANSWER
#005
The receiving fax
machine does not
answer.
Make sure you dialled the
correct number. Try again
later.
NO TEL #
#022
The one-touch or
coded speed dialling
number has not been
registered.
Register the number.
NOT AVAILABLE
–
In manual sending via
the handset, you tried
to use a one-touch
speed dialling button or
a coded speed dialling
code that has a group
registered in it.
In manual sending via the
handset, you cannot send a
document to multiple
destinations. Send the
document to one
destination at a time.
PLEASE WAIT
–
The MultiPASS C50 is
warming up.
Wait until the time and
receiving mode appear in
the LCD display, then
begin.
PUT IN CARTRIDGE
–
The BJ cartridge is not
installed properly.
Make sure the BJ cartridge
is installed properly and
the green lock lever is set
properly.
Chapter 8
Troubleshooting
Canon
MultiPASS C50 Hardware Manual
ENGLISH
8-33
Message
Error Code
Cause
Action
REC’D IN MEMORY
–
The paper or ink ran
out, or a paper jam
occurred, so the
MultiPASS C50
received the document
in memory.
Add paper to the sheet
feeder, change the BJ
cartridge, or clear the
paper jam, as needed. Print
the document from
memory by pressing the
(STOP) button.
RECEIVED IN FILE
–
The PC was off and a
document was received
in the MultiPASS C50
memory.
Print the file from the PC.
START AGAIN
–
An error occurred in
the phone line or in the
system.
Start the procedure again
from the beginning.
TX/RX CANCELLED
–
You pressed the
(STOP) button to
cancel the transmission.
TX/RX NO. nnnn
–
When the MultiPASS
C50 sends or receives a
fax, it assigns a unique
identification number
to it.
8-34
–
Write the number down if
you will need it later. You
can also print an activity
management report after
the transmission to check
the TX/RX number if
necessary.
Troubleshooting
Canon
Chapter 8
MultiPASS C50 Hardware Manual
ENGLISH
Chapter 9
Maintaining Your MultiPASS C50
Your MultiPASS C50 requires no maintenance other than periodic cleaning, and
replacing the BJ ink cartridges or tanks as needed.
Cleaning the MultiPASS C50 .................................................................................... 9-2
Cleaning the MultiPASS C50’s Exterior ....................................................... 9-2
Cleaning the MultiPASS C50’s Interior ........................................................ 9-2
Cleaning the Scanner Components ............................................................... 9-4
Maintaining BJ Cartridges ......................................................................................... 9-8
Printing the Nozzle Check Pattern ................................................................ 9-8
Cleaning and Testing the BJ Cartridge Print Head .................................... 9-9
When to Replace the BJ Cartridge ............................................................. 9-10
Replacing the BJ Cartridge .......................................................................... 9-12
Replacing an Ink Tank in the BC-21/21e Colour BJ Cartridge .............. 9-17
Transporting the MultiPASS C50 ............................................................................ 9-21
Chapter 9
Maintaining Your MultiPASS C50
Canon
MultiPASS C50 Hardware Manual
ENGLISH
9-1
Cleaning the MultiPASS C50
Clean your MultiPASS C50 regularly to keep it in good operating condition.
Follow these precautions whenever you clean the MultiPASS C50:
J When the power cord is disconnected, the image memory is completely
erased. Therefore, before you begin cleaning the MultiPASS C50, be sure to
print any faxes stored in its memory. If REC’D IN MEMORY or
RECEIVED IN FILE appear in the LCD display, follow the steps on pages 510 or 5-12 to print out the documents.
J If you disconnect the MultiPASS C50 while it is waiting to send a document,
you will have to set the MultiPASS C50 to send your document again once
you finish cleaning the unit.
J Do not use tissue paper, paper towels, or similar materials for cleaning; they
can stick to the components or generate static charges.
Cleaning the MultiPASS C50’s Exterior
Clean the MultiPASS C50’s outer casing as follows.
1. Disconnect the power cord from the MultiPASS C50.
2. Wipe the MultiPASS C50’s exterior with a clean, soft, lint-free cloth
moistened with water or diluted dishwashing detergent solution.
Never use thinner, benzene, alcohol, or any other organic solvent to clean the
MultiPASS C50, as these can damage the MultiPASS C50’s surface.
3. Plug the power cord back in.
Cleaning the MultiPASS C50’s Interior
To prevent ink spots and paper dust from accumulating inside the MultiPASS
C50 and affecting print quality, clean the unit’s print area periodically as follows.
9-2
Maintaining Your MultiPASS C50
Canon
MultiPASS C50 Hardware Manual
Chapter 9
ENGLISH
J Never use volatile liquids such as thinners, benzene, acetone, or any other
chemical cleaner to clean the interior of the MultiPASS C50, as they can
damage its components.
J Avoid touching the print head or ribbon cable inside the MultiPASS C50.
DO NOT TOUCH THE
PRINT HEAD
DO NOT TOUCH THE RIBBON
CABLE
1. Disconnect the power cord from the MultiPASS C50.
2. Open the printer cover by grasping the document guides and lifting.
3. Use a clean, soft, dry, lint-free cloth to remove any ink or paper debris from
the unit’s interior, especially around the platen. Be careful not to touch the
cartridge.
4. Check the small black rollers. If they are dirty, clean them with a soft, dry
toothbrush.
5. When finished, close the printer cover, and plug the MultiPASS C50 back in.
Chapter 9
Maintaining Your MultiPASS C50
Canon
MultiPASS C50 Hardware Manual
ENGLISH
9-3
Cleaning the Scanner Components
Periodically check and clean the scanning components as explained here.
When you unplug the unit, any faxes stored in memory will be erased. Be sure to
print out any documents received in memory before unplugging the unit. See
pages 5-10 to 5-12.
1. Disconnect the power cord from the MultiPASS C50.
2. Open the operation panel by gently pulling it towards you.
9-4
Maintaining Your MultiPASS C50
Canon
MultiPASS C50 Hardware Manual
Chapter 9
ENGLISH
3. Clean the components as described below.
SEPARATION GUIDE
SCANNING GLASS
SEPARATION ROLLER
Separation roller
Wipe with a soft, dry clean cloth to clean the rollers.
Separation guide
Wipe with a dry, soft cloth.
White sheet and scanning glass
Use a clean, soft, lint-free cloth moistened with water to clean the white sheet
and scanning glass, then wipe them with a soft, dry, lint free cloth.
J If the scanning components are dirty, the documents you send or print will
also be dirty.
J Be sure to use a soft cloth to avoid scratching the components.
Do not use tissue paper. Dust from the tissue paper causes static electricity.
Chapter 9
Maintaining Your MultiPASS C50
Canon
MultiPASS C50 Hardware Manual
ENGLISH
9-5
4. Clean the shaded areas of the operation panel and the unit.
J Dirt and dust particles that collect on the underside of the operation panel
also affect the quality of the documents you copy or send.
5. Use a soft, dry clean cloth to wipe up paper dust around the rollers.
9-6
Maintaining Your MultiPASS C50
Canon
MultiPASS C50 Hardware Manual
Chapter 9
ENGLISH
6. When you are finished, close the operation panel by pressing it down from
the centre as shown.
Be sure to close the operation panel until it locks into place, or the unit will not
function properly.
7. Plug the unit back in.
Chapter 9
Maintaining Your MultiPASS C50
Canon
MultiPASS C50 Hardware Manual
ENGLISH
9-7
Maintaining BJ Cartridges
One of the most important elements in maintaining your MultiPASS C50’s
excellent print quality is to clean the BJ cartridge’s print head regularly, and to
replace the BJ ink cartridges and tanks promptly when needed.
Printing the Nozzle Check Pattern
Print the nozzle check pattern to test the BJ cartridge installed in the MultiPASS
C50. This pattern shows if each print head nozzle is operating properly.
FUNCTION
1. Press FUNCTION.
FUNCTION
1
2
2. Use
or
to select NOZZLE CHECK.
NOZZLE CHECK
3. Press START/COPY.
J The MultiPASS C50 prints the nozzle check pattern.
J If results are unsatisfactory, clean the print head as described on the next
page and then print the nozzle check pattern again. If results are still
unsatisfactory after about 4 cleanings, it may be time to replace the BJ
cartridge.
9-8
Maintaining Your MultiPASS C50
Canon
MultiPASS C50 Hardware Manual
Chapter 9
ENGLISH
Cleaning and Testing the BJ Cartridge Print Head
The print head in the BJ print cartridge contains nozzles through which ink is
propelled onto the paper. To maintain the best possible print quality, these
nozzles need to be cleaned from time to time. Your MultiPASS C50 is equipped
with a print head cleaning function that does this.
If your printouts become faint or streaked, or if their quality otherwise decreases,
clean the print head as described below.
If your printing is faded, you can often correct the problem by adjusting the print
density (contrast) and printing speed. (For instructions, see the MultiPASS
Desktop Manager User’s Guide.) Try this before cleaning the print head.
Cleaning the print head uses a small amount of ink. Cleaning too often
significantly reduces the amount of ink in the cartridge, so clean only when
necessary.
1. Make sure the MultiPASS C50 is plugged in.
2. Press FUNCTION.
FUNCTION
3. Use
or
to select HEAD CLEANING.
HEAD CLEANING
4. Press START/COPY.
J The MultiPASS C50 beeps once when cleaning is finished, and returns to
standby mode.
5. Check whether cleaning corrected the problem by printing the nozzle check
pattern. See page 9-8.
6. If necessary, repeat this procedure up to four more times (giving five
cleanings in all). If the problem persists after this, install a new BJ cartridge.
See ”Replacing the BJ Cartridge” on page 9-12.
Chapter 9
Maintaining Your MultiPASS C50
Canon
MultiPASS C50 Hardware Manual
ENGLISH
9-9
When to Replace the BJ Cartridge
How frequently you need to replace your MultiPASS C50’s BJ cartridge or one of
its ink tanks depends on how you use your MultiPASS C50. If you print a good
deal of graphics, halftones, or greyscales, you will need to replace the cartridge
more often than if you print mainly text. (See page A-9 for details on the life
expectancy of BJ cartridges.)
To help ensure the maximum life for your cartridges, always follow the guidelines
for cartridge maintenance given in ”Guidelines for Using and Maintaining BJ
Cartridges” on page 2-27.
In general, you will need to replace the BJ cartridge in the following situations:
J If you have been using a BC-21/21e Colour BJ cartridge for over six months
or the BC-20 Black BJ cartridge for over a year.
J If your printed output is not crisp and clear or has gaps in the characters
(missing dots), even after you have cleaned the print head five times as
described above.
J If your colour printouts appear to be missing a colour, even after you have
cleaned the print head five times as described above.
In addition:
J If you are using the BC-21/21e Colour BJ cartridge and your output is blank,
one of the ink tanks is probably empty and needs to be replaced. Print the
NOZZLE CHECK test pattern to check whether the BJ cartridge needs
replacing or not. See page 9-8 for details.
J If the message CHANGE CARTRIDGE appears in the LCD display, the BJ
cartridge may have run out of ink. This message also appears if the
MultiPASS C50 has to store a fax in its memory because the cartridge is out of
ink.
If this message appears, do the following:
1. Press START/COPY to print any faxes in memory.
N
If the printout appears normal, you do not need to replace the BJ
cartridge. (Sometimes cleaning the print head or re-installing the cartridge
will clear up the problem.)
N
If the print is light or shows gaps, go to step 2.
2. If there was no fax in memory, or if the fax’s print was light, blank, or showed
gaps, print or copy a document to make sure the problem is not with the
machine that sent the fax.
9-10
Maintaining Your MultiPASS C50
Canon
MultiPASS C50 Hardware Manual
Chapter 9
ENGLISH
3. If the document is light, blank, or shows gaps, clean the printing area. If this
doesn’t work, replace the cartridge.
Although Canon makes numerous BJ cartridges, the BC-21/21e Colour BJ
cartridge, the BC-20 Black BJ cartridge, the BC-22/22e Colour Photo BJ
cartridge, and the BC-29F Fluorescent BJ cartridge are designed specifically for
Canon’s colour BJ printers, and are the only ones Canon recommends.
Also, the BCI-21 Colour and BCI-21 Black ink tanks are designed specifically for
the BC-21/21e Colour BJ cartridge, and are the only ones Canon recommends for
the BC-21/21e.
Chapter 9
Maintaining Your MultiPASS C50
Canon
MultiPASS C50 Hardware Manual
ENGLISH
9-11
Replacing the BJ Cartridge
When replacing BJ cartridges, always follow the precautions and cartridge
selection guidelines given in ”Guidelines for Using and Maintaining BJ
Cartridges” on page 2-27.
Replace the BJ print cartridge as follows.
1. Make sure the MultiPASS C50 is plugged in.
CARTRIDGE
2. Press CARTRIDGE.
J The cartridge holder moves to the centre of the unit.
3. Open the printer cover by grasping the document guides and lifting.
DO NOT TOUCH THE
RIBBON CABLE
DO NOT TOUCH THE GUIDE
RAIL
DO NOT TOUCH THE
ROUND SHAFT
J Do not try to move the cartridge holder manually or you may damage the
MultiPASS C50.
J The MultiPASS C50 includes an automatic protection feature that helps keep
it from overheating. If the cartridge holder does not move and the unit beeps
several times, unplug the MultiPASS C50 and let it cool for several minutes.
When it has cooled, plug it in again, and press the CARTRIDGE button to
move the cartridge holder.
9-12
Maintaining Your MultiPASS C50
Canon
MultiPASS C50 Hardware Manual
Chapter 9
ENGLISH
Hold the BJ cartridge by its sides only. Do not touch the print head, the sharp
edges around the print head, the silver plate on the bottom of the cartridge, or
the silver metal or circuit area on its side.
PRINT HEAD
4. Raise the green cartridge lock lever (on the cartridge holder) by gently
pulling up on it.
DO NOT TOUCH THE GUIDE
RAIL
DO NOT TOUCH THE RIBBON
CABLE
DO NOT TOUCH THE ROUND
SHAFT
5. Remove and dispose of the old BJ cartridge, or store it in the SB-21 BJ
cartridge container.
DO NOT TOUCH THE GUIDE
RAIL
C In
a
B rtrkid
C
C l- ge
o 21
lo
M
a r
Jade
pa in
n
DO NOT TOUCH THE RIBBON
CABLE
DO NOT TOUCH THE ROUND
SHAFT
Chapter 9
Maintaining Your MultiPASS C50
Canon
MultiPASS C50 Hardware Manual
ENGLISH
9-13
6. Peel the foil off of the new BJ cartridge’s protective packaging, and remove
the cartridge.
7. Pull the orange cap off of the cartridge’s print head, then remove the orange
tape.
Discard the cap and tape immediately. Never attempt to re-attach the cap or tape
to the print head, or you can adversely affect the ink’s colour and flow.
9-14
Maintaining Your MultiPASS C50
Canon
MultiPASS C50 Hardware Manual
Chapter 9
ENGLISH
8. Hold the cartridge so that its label faces outward, tilt it slightly forward and
to the right. Slide it into the cartridge holder.
DO NOT TOUCH THE
GUIDE RAIL
C In
a
B rtrkid
C
C l- ge
o 21
lo
M
a r
Jade
pa in
n
C In
a
B rtrk
C id
DO NOT TOUCH THE RIBBON
CABLE
B l- ge
la 2
ck1
M
a
Jade
pa in
n
DO NOT TOUCH THE ROUND
SHAFT
9. Make sure the cartridge is pressed against the back of the holder, then lower
the green lock lever completely. The BJ cartridge is now locked into position.
Ca Ink
B rtrid
C g
Col-21e
lo
r
M
ad
Ja e in
pa
n
C In
a
B rtrkid
C
B l-2ge
la 1
ck
M
a
Jade
pa in
n
Do not manually move the mechanism that houses the BJ cartridge or you will
damage the unit.
CARTRIDGE
10. Close the printer cover, then press CARTRIDGE.
J The MultiPASS C50 beeps twice, and the cartridge holder moves to its
home position on the right side of the unit.
Chapter 9
Maintaining Your MultiPASS C50
Canon
MultiPASS C50 Hardware Manual
ENGLISH
9-15
Do not unplug the MultiPASS C50 unless the cartridge holder is in its home
position on the right. If you unplug the unit while it is printing, or move the ink
cartridge from the home position, the cartridge will not be capped and can dry
out.
9-16
Maintaining Your MultiPASS C50
Canon
MultiPASS C50 Hardware Manual
Chapter 9
ENGLISH
Replacing an Ink Tank in the BC-21/21e Colour BJ Cartridge
If you are using the BC-21/21e Colour BJ cartridge and perform a print operation
correctly but the output is blank, one of the BC-21/21e’s ink tanks may be out of
ink. If this happens, clean the print head up to five times as described in
”Cleaning and Testing the BJ Cartridge Print Head,” on page 9-9. If the
MultiPASS C50’s output is still blank, replace the empty ink cartridge as follows:
1. Make sure the MultiPASS C50 is plugged in.
CARTRIDGE
2. Press CARTRIDGE.
J The cartridge holder moves to the centre of the unit.
The MultiPASS C50 includes an automatic protection feature that helps keep it
from overheating. If the cartridge holder does not move and the unit beeps
several times, unplug the MultiPASS C50 and let it cool for several minutes.
When it has cooled, plug it in again, and press the CARTRIDGE button to move
the cartridge holder.
3. Open the printer cover by grasping the document guides and lifting.
DO NOT TOUCH THE
RIBBON CABLE
DO NOT TOUCH THE GUIDE
RAIL
DO NOT TOUCH THE
ROUND SHAFT
Do not try to move the cartridge holder manually or you may damage the
MultiPASS C50.
Chapter 9
Maintaining Your MultiPASS C50
Canon
MultiPASS C50 Hardware Manual
ENGLISH
9-17
The colour ink tank is on the left, and the black ink tank is on the right.
BCI-21 COLOUR INK TANK
Color Slot
Black Slot
Ink
Cartridge
Ink
Cartridge
BCl-21
Color
BCl-21
Black
Made in
Japan
Made in
Japan
BCI-21 BLACK INK TANK
Made in Japan
Color BJ
Cartridge
BC-21
4. Remove the empty ink tank by grasping the tab on the top of the empty tank
and pulling forward to release it. Then lift out the ink tank from the BJ
cartridge.
DO NOT TOUCH THE GUIDE
RAIL
C In
a
Brtkrid
C
C l-ge
ol21
o
M r
ad
Jae
pain
n
C In
a
B rtrkid
C
B l-2ge
la 1
ck
M
a
Jade
pa in
n
DO NOT TOUCH THE RIBBON
CABLE
DO NOT TOUCH THE ROUND
SHAFT
5. Dispose of the ink tank properly.
J You may want to place it in a plastic bag to keep any residual ink from
spilling.
9-18
Maintaining Your MultiPASS C50
Canon
MultiPASS C50 Hardware Manual
Chapter 9
ENGLISH
6. Take the new ink tank out of its bag and remove its orange cap.
Be careful not to touch the bottom of the ink tank, as you may get ink on your
hands.
DO NOT TOUCH
Chapter 9
Maintaining Your MultiPASS C50
Canon
MultiPASS C50 Hardware Manual
ENGLISH
9-19
7. Slide the new ink tank into the empty slot.
DO NOT TOUCH THE GUIDE
RAIL
C In
a
Brtkrid
C
C l-ge
ol21
o
M r
C In
a
Brtkrid
C
C l-ge
ol21
o
M r
a
Jdae
pain
n
ad
Jae
p
ain
n
C In
a
B rtrkid
C
B l-2ge
la 1
ck
M
C In
a
B rtrkid
C
B l-2ge
la 1
ck
M
a
Jade
pa in
n
DO NOT TOUCH THE RIBBON
CABLE
a
Jade
pa in
n
DO NOT TOUCH THE ROUND
SHAFT
8. Press firmly on the tab on top of the new ink tank, in the direction shown
below, until the tab snaps into place.
DO NOT TOUCH THE GUIDE
RAIL
Ca Ink
B rtrid
C g
Col-21e
lo
r
M
ad
Ja e in
pa
n
C In
a
B rtrkid
C
B l-2ge
la 1
ck
M
a
Jade
pa in
n
DO NOT TOUCH THE
RIBBON CABLE
DO NOT TOUCH THE
ROUND SHAFT
9. If you need to replace the other tank, repeat steps 4 through 8.
10. Make sure each tank is properly seated in its slot.
CARTRIDGE
11. Close the printer cover, then press CARTRIDGE.
J The MultiPASS C50 beeps twice, then the cartridge holder moves to its
home position on the right side of the unit.
Do not unplug the MultiPASS C50 unless the BJ cartridge is in its home position
on the right. If you unplug the unit while it is printing, or move the cartridge
from the home position, the cartridge will not be capped and may dry out.
9-20
Maintaining Your MultiPASS C50
Canon
MultiPASS C50 Hardware Manual
Chapter 9
ENGLISH
Transporting the MultiPASS C50
Whenever you plan to transport the MultiPASS C50, you need to prepare it so it
will not be damaged during the move.
1. Do NOT remove the BJ cartridge from the unit.
2. Make sure the cartridge holder is in its home position at the right side of the
unit.
J If it is not in its home position, press the CARTRIDGE button.
3. Disconnect the power cord.
4. Tape the cartridge holder in place.
5. Disconnect the optional handset, extension phone or answering machine (if
using them), the telephone line, and the parallel cable to the PC.
6. Remove the sending document support, document support for scanned
documents, and output tray extension. See ”Attaching Components” on page
2-11.
7. Remove the optional handset if you have attached it to the MultiPASS C50.
See Appendix B.
8. Replace all tapes and shipping materials you removed when you first
unpacked the MultiPASS C50. See ”Removing Shipping Materials” on
page 2-8.
9. Pack the MultiPASS C50 and all its components into its original shipping
carton. Use the illustration on page 2-5 for reference.
If you no longer have the shipping carton your MultiPASS C50 came in, pack the
unit in a suitably sized, sturdy cardboard box, using bubble wrap, foam peanuts,
or other suitable packing materials.
Chapter 9
Maintaining Your MultiPASS C50
Canon
MultiPASS C50 Hardware Manual
ENGLISH
9-21
9-22
Maintaining Your MultiPASS C50
Canon
MultiPASS C50 Hardware Manual
Chapter 9
ENGLISH
Appendix A
Specifications
The specifications of the MultiPASS C50 are listed in this section.
General ....................................................................................................................... A-2
Plain Paper Fax .......................................................................................................... A-3
Copier .......................................................................................................................... A-4
Telephone ................................................................................................................... A-5
Printer ......................................................................................................................... A-6
Printable Area: Papers .................................................................................. A-7
Printable Area: Envelopes ............................................................................ A-8
Scanner ...................................................................................................................... A-10
Document Sizes ....................................................................................................... A-11
PC Interface ............................................................................................................. A-13
MultiPASS Desktop Manager for WindowsH ...................................................... A-13
Appendix A
Specifications
Canon
MultiPASS C50 Hardware Manual
ENGLISH
A-1
General
Applicable line:
Public Switched Telephone Network
Compatibility:
G3
Data compression system:
MH, MR, MMR (ECM-MMR)
Modem type:
FAX modem
Modem speed:
14400, 9600, 7200, 4800, 2400 bps (automatic
fallback)
Transmission speed:
Approximately 6 seconds/page* (transmitting
from memory)
Transmission/reception
memory:
N
N
N
N
Liquid crystal display:
16 × 1
Display languages:
English, French, Spanish, Italian, Finnish,
German, Danish, Swedish, Dutch, Norwegian,
Portuguese, Slovene, Czech, and Hungarian
Power source:
200-240 V/50-60 Hz
Power consumption:
N
N
Dimensions (W×D×H):
400 × 365 × 205 mm (main unit only, no trays, no
handset)
Weight:
Approximately 5.6 kg
672 KB DRAM, MR storage
Approximately 42 pages**
LCD displays memory used
Uses direct transmission when memory is full
Maximum: approximately 47.2 W
Minimum: approximately 7.8 W (standby
mode)
*Based on Canon FAX Standard Chart No.1 (ECM-MMR Standard Mode)
**Based on Canon FAX Standard Chart No.1 (Standard Mode)
A-2
Specifications
Canon
Appendix A
MultiPASS C50 Hardware Manual
ENGLISH
Environmental requirements:
N
N
Temperature:
Humidity:
Applicable standards:
N
N
N
N
Electrical safety: GS, FIMKO
Radiation:
CISPR Pub22 ClassB
PTT
Energy Star compliant
Interface:
IEEE 1284 compatible parallel interface
10!-32.5!C
10%-90% RH
Plain Paper Fax
Transmission time:
Approx. 6 seconds* (G3 ECM MMR)
Resolution:
N
N
Fine mode: 8 pels/mm × 7.7 lines/mm
Standard mode: 8 pels/mm × 3.85 lines/mm
Automatic document feeder
capacity:**
N
N
20 A4- or letter-size sheets
10 legal-size sheets
Document sizes (W × L):
Maximum: 216 × 1000 mm
Minimum: 210 × 148 mm
Effective scanning width:
208 mm
Scanning image processing:
N
N
GENESIS/Ultra-High-Quality Image
Processing System (UHQ)
Halftones: 256 levels of grey
Recording method:
Bubble Jet printing
Fax printing speed:
Approx. 4 pages/minute*
*Based on Canon FAX Standard Chart No.1 (Standard Mode)
**75 g/m2 paper
Appendix A
Specifications
Canon
MultiPASS C50 Hardware Manual
ENGLISH
A-3
N
Dialling:
N
N
Automatic dialling:
– One-touch speed dialling (6 locations)
– Coded speed dialling (50 locations)
– Group dialling (55 locations)
Regular dialling (with numeric buttons)
Automatic redialling (including error
redialling)
Manual redialling
Pause button
Networking:
N
N
N
N
Sequential broadcast (up to 57 locations)
Automatic receiving
Non-ring reception
Deactivate ECM
Report/reference:
N
N
N
Activity report (up to 20 transactions)
Non-delivery report
TTI (Transmitter Terminal Identification)
Ink saver:
Economy mode for printing received faxes
approximately doubles cartridge life
Scanning resolution:
N
N
N
Copier
N
N
N
N
A-4
FINE: 8 pels/mm × 7.7 lines/mm
(memory copy)
360 × 360 dpi (direct copy)
PHOTO: 8 pels/mm × 7.7 lines/mm with
halftone (memory copy)
360 × 360 dpi (direct copy)
COLOR FINE: 360 × 360 dpi, full colour
COLOR DRAFT: 360 × 180 dpi, full colour
COLOR SNAPSHOT: 360 × 360 dpi, full
colour (102 mm width)
Printing resolution:
360 × 360 dpi
Default size:
100%
Specifications
Canon
Appendix A
MultiPASS C50 Hardware Manual
ENGLISH
Reduction sizes:
70%, 80%, 90%
Copy speed:
Black and white copy:
N Initial copy: 45 seconds
N Subsequent copies: 20 seconds
Colour copy:
N COLOR FINE mode, A4 size:
9 minutes, 44 seconds
N COLOR DRAFT mode, A4 size:
6 minutes, 3 seconds
N COLOR SNAPSHOT mode, 102 × 152 mm
photograph: 3 minutes, 51 seconds
Multiple copies:
N
N
Up to 99 copies of a black and white
document
1 copy of a colour document
Telephone
N
N
N
N
N
N
N
Automatic FAX/TEL switchover
Answering machine connection (CNG detecting signal, no sound)
Optional handset connection
Extension phone connection
Remote reception by extension phone (Default reception ID: 25)
Tone button
Pause button
Appendix A
Specifications
Canon
MultiPASS C50 Hardware Manual
ENGLISH
A-5
Printer
Printing method:
Bubble Jet ink on-demand
Printing resolution:
720 × 360 dpi
Paper handling:
Automatic feed/Manual feed
Sheet feeder capacity:
N
N
N
N
100 sheets of A4/letter/legal (75 g/m2)
50 sheets of transparencies
10 sheets of back print film
10 envelopes
Paper sizes:
N
N
N
A4 (210 × 297 mm)
Letter (8.5 × 11 in.)
Legal (8.5 × 14 in.)
Envelope sizes:
N
N
European DL envelope (220 × 110 mm)
U.S. Commercial No. 10 envelope
(9.5 × 4.1 in.)
Media types:
N
N
N
N
N
N
N
N
Plain paper
Coated paper (Canon LC-301 and HR-101)
Overhead projector film (Canon CF-102)
Back print film (Canon BF-102)
High-gloss film (Canon HG-101)
Fabric sheet (Canon FS-101)
Glossy paper (Canon GP-101)
Envelope (European DL or Commercial
No. 10)
Paper weight:
64-90 g/m2 for automatic feed
90-105 g/m2 for manual feed
Line-feed speed:
Approximately 60 ms/line at 1/6-in./line
Printing speed:
N
N
N
Printing width:
A-6
BC-21/21e Colour BJ Cartridge (Black
printing): up to 2 pages per minute
BC-21/21e Colour BJ Cartridge (Colour
printing): approximately 0.3-0.8 pages per
minute (full coverage of printable area)
BC-20 Black BJ Cartridge: up to 5 pages per
minute
Maximum 203 mm
Specifications
Canon
Appendix A
MultiPASS C50 Hardware Manual
ENGLISH
Printable Area: Papers
The shaded area in the following figure shows the printable area for papers.
a
b
b
d
c
e
Printable area:
A4 size
a
210 mm
b
3.4 mm
c
297 mm
d
3.0 mm
e
7.0 mm
Letter size
a
8.5)
b
0.25)
c
11.0)
d
0.12)
e
0.27)
Appendix A
Legal size
a
8.5)
b
0.25)
c
14.0)
d
0.12)
e
0.27)
Specifications
Canon
MultiPASS C50 Hardware Manual
ENGLISH
A-7
Printable Area: Envelopes
The shaded portion in the following figure shows the printable area for
envelopes.
a
b
c
e
d
f
Printable area:
European DL
a
220 mm
b
6.4 mm
c
10.4 mm
d
110 mm
e
3.0 mm
f
7.0 mm
A-8
U.S. Commercial No. 10
a
9.5)
b
0.25)
c
1.2)
d
4.1)
e
0.12)
f
0.27)
Specifications
Canon
Appendix A
MultiPASS C50 Hardware Manual
ENGLISH
BC-20 Black BJ cartridge
N Print head:
128 nozzles
N
Ink colour:
Black
N
Contents:
Isopropyl alcohol 67-63-0, glycerine 56-81-5,
ethylene glycol 107-21-1
N
Cartridge life/cartridge
yield:
Approx. 900 pages at 5% coverage
BC-21/21e Colour BJ cartridge
N Print head:
N
N
64 nozzles for black
24 nozzles each for cyan, magenta, yellow
N
Ink tanks:
N
N
N
Ink colours:
Black, cyan, magenta, yellow
N
Contents/black:
Isopropyl alcohol 67-63-0, glycerine 56-81-5,
ethylene glycol 107-21-1
N
Contents/colour:
Glycerine 56-81-5
N
Ink tank yield:
N
N
BC-22/22e Photo BJ cartridge
N Print head:
N
N
BCI-21 Colour (cyan, magenta, yellow)
BCI-21 Black
BCI-21 Colour: approx. 100 pages/tank at
7.5% coverage for each colour
BCI-21 Black: approx. 150 pages/tank at
7.5% coverage
64 nozzles for black
24 nozzles each for cyan, magenta, yellow
N
Ink colours:
Black, cyan, magenta, yellow
N
Cartridge yield:
Approx. 50 pages/cartridge at 7.5% coverage for
each colour
BC-29F Fluorescent BJ cartridge
N Print head:
N
N
64 nozzles for black
24 nozzles for colour
N
Ink colours:
Fluorescent magenta, yellow, normal cyan, black
N
Cartridge yield:
Approx. 100 pages/cartridge at 7.5% coverage
for each colour
Appendix A
Specifications
Canon
MultiPASS C50 Hardware Manual
ENGLISH
A-9
Scanner
Scanning method:
Solid-state electronic scanning by contact colour
image sensor
Scanning image processing:
N
N
N
Ultra-High-Quality Image Processing System
(UHQTM)
Halftones: 256 levels of grey
Colour: 16.7 million colours
Scanning resolution:
N
N
Standard 300 dpi
Enhanced 30-600 dpi (Set from within a
TWAIN application)
Automatic document feeder
capacity:*
N
N
20 A4- or letter-size sheets
10 legal-size sheets
Document sizes (W × L):
Maximum: 216 × 1000 mm
Minimum: 80 × 45 mm
Effective scanning width:
214 mm
Compatibility:
TWAIN
Scanning speed:**
N
N
N
N
N
N
N
N
N
B&W Text (30-150 dpi):
9 sec/page, 5 ms/line
B&W Text (151-300 dpi):
18 sec/page, 5 ms/line
B&W Text (301-600 dpi):
5 sec/page, 5 ms/line
Greyscale (30-150 dpi):
13 sec/page, 7 ms/line
Greyscale (151-300 dpi):
25 sec/page, 7 ms/line
Greyscale (301-600 dpi):
78 sec/page, 11 ms/line
Colour (30-150 dpi):
39 sec/page, 21 ms/line
Colour (151-300 dpi):
75 sec/page, 21 ms/line
Colour (301-600 dpi):
234 sec/page, 33 ms/line
*Based on 75 g/m2 paper
**Scanning size: A4. Does not include forward time or data transfer time.
A-10
Specifications
Canon
Appendix A
MultiPASS C50 Hardware Manual
ENGLISH
Document Sizes
The following illustrations show the largest and smallest documents you can feed
into the MultiPASS C50.
When the document feed lever is set to Automatic document feed
Maximum Document Size
Minimum Document Size
210 mm
216 mm
148 mm
UP TO A MAXIMUM
OF 32 MINUTES FOR
EACH PAGE OR 1
METRE IN LENGTH
When the document feed lever is set to Manual document feed
Note that the scanning length may be shorter than the length of the actual
document.
Maximum Document Size
Minimum Document Size
216 mm
80 mm
45 mm
UP TO A MAXIMUM
OF 32 MINUTES FOR
EACH PAGE OR
APPROX. 1 METRE
IN LENGTH
Appendix A
Specifications
Canon
MultiPASS C50 Hardware Manual
ENGLISH
A-11
The figure below shows how much of an A4-size document the MultiPASS C50
scans when faxing or scanning.
Max. 4.0 mm
A4
Max. 4.0 mm
Max. 4.5 mm
Max. 4.5 mm
A margin of up to 4.5 mm on either side of the sheet and up to 4.0 mm on the top
and bottom are outside the MultiPASS C50’s scanning area.
A-12
Specifications
Canon
Appendix A
MultiPASS C50 Hardware Manual
ENGLISH
PC Interface
Type:
Bi-directional parallel
Mode:
Compatible, Nibble, ECP
MultiPASS Desktop Manager for WindowsH
System requirements:
N
N
N
N
N
N
PC Fax:
N
N
N
N
N
N
IBM compatible PC, 486 or faster processor
(i486 DX or faster recommended)
8 MB of RAM (16 MB recommended)
25 MB of free hard disk space
WindowsH 95/98
Bidirectional parallel cable
CD-ROM Drive
Canon proprietary MultiPASS Desktop
Manager for Windows
Fax/Telephone address book
Fax Viewer
Fax Log
Fax distribution lists
Real-time MultiPASS C50 hardware status
available through PC
Appendix A
Specifications
Canon
MultiPASS C50 Hardware Manual
ENGLISH
A-13
A-14
Specifications
Canon
Appendix A
MultiPASS C50 Hardware Manual
ENGLISH
Appendix B
Options
This section describes the optional equipment available for use with the
MultiPASS C50.
Optional Handset ....................................................................................................... B-2
Package Contents ........................................................................................... B-2
Attaching the Handset to Your Unit ........................................................... B-3
Control Panel and Functions ........................................................................ B-6
Maintaining Your Handset ............................................................................ B-8
Appendix B
Options
Canon
MultiPASS C50 Hardware Manual
ENGLISH
B-1
Optional Handset
The optional handset available for connection to your MultiPASS C50. Contact
your Canon dealer for more information.
Package Contents
Make sure you have the following items. If anything is damaged or missing,
notify your Canon dealer immediately.
HANDSET
SCREWS WITH PLUGS
HANDSET CRADLE
SCREWS
(NOT USED FOR THE
MultiPASS C50)
The two screws with a plastic white head are not for use with the MultiPASS C50.
You only need the two screws with plugs provided.
B-2
Options
Appendix B
Canon
MultiPASS C50 Hardware Manual
ENGLISH
Attaching the Handset to Your Unit
To attach the handset to your unit, follow these steps:
1. Use a screwdriver to remove the two covers on the left side of the unit.
2. Remove the screws from the plugs and insert the plugs in the holes on the
handset cradle.
Appendix B
Options
Canon
MultiPASS C50 Hardware Manual
ENGLISH
B-3
3. Insert the plugs with the handset cradle in the holes on the unit.
If you have difficulty inserting the plugs, turn the unit so that the left side is
facing you and the right side is placed against a wall. This will allow you to insert
the plugs without the unit moving.
4. Insert the screws into the plugs and push them in with your finger.
J If you cannot push the screws in with your finger, use a phillips screwdriver to
push them in. (Do not screw them in as the screws may break.)
J Make sure the screws are inserted all the way into the plugs.
B-4
Options
Appendix B
Canon
MultiPASS C50 Hardware Manual
ENGLISH
5. Connect the handset cord to the input jack marked
unit.
on the left side of the
When carrying the unit, do not lift it by the handset cradle as it may break.
If you need to remove the handset cradle after it is installed, use a small phillips
screwdriver to remove the two screws.
Appendix B
Options
Canon
MultiPASS C50 Hardware Manual
ENGLISH
B-5
Control Panel and Functions
This section describes the parts of your handset and its functions.
RECEIVER
HOOK BUTTON
D NUMERIC BUTTONS
A R BUTTON
B RINGER SWITCH
TRANSMITTER
C TONE/PULSE SWITCH
TELEPHONE LINE CABLE
For details on the functions see the following pages.
B-6
Options
Appendix B
Canon
MultiPASS C50 Hardware Manual
ENGLISH
A R Button
This button can be used when the handset is connected to a PABX or a System
’X’ exchange. The R button is used to obtain a second line to the PABX while
holding the original line (for example, when transferring a call from one
extension to another or when using some of the new features of the System ’X’
exchange*). See your PABX user guide, or contact your service provider for
details. See also page 4-20 of this user’s guide.
This telephone has two methods of recall:
J EARTH (ETH): EARTH LOOP RECALL
J BREAK (TLB): TIMED BREAK RECALL
Use the ETH/TLB switch to select the recall method you wish to use.
B Ringer Switch
The ringer switch allows you to select the ring volume of the handset for
incoming calls. Set to HI, LO, or OFF according to your preference.
C TONE/PULSE Switch
The handset is designed to operate on both Multi-Frequency (Tone) and Loop
Disconnect (Pulse) telephone lines.
The tone/pulse switch enables you to switch from tone dialling to pulse dialling or
vice versa. Contact your service provider for further information.
Use a pointed instrument to set this switch to P (pulse dialling) or T (tone
dialling).
D Numeric Buttons
Use the numeric buttons to dial the number of the party you wish to call.
* Button
Press this button to enter a pause between numbers. (For pulse dialling only.)
# Button
Press this button to redial the last number you called. (For pulse dialling only.)
*System ’X’ exchange features include THREE WAY CALLING, and CALL WAITING.
Appendix B
Options
Canon
MultiPASS C50 Hardware Manual
ENGLISH
B-7
Maintaining Your Handset
Follow these guidelines to maintain your handset in top working condition.
J Do not leave your handset exposed to direct sunlight.
J Do not install your handset in hot or humid conditions.
J Do not spray aerosol polishes on your handset as they may enter the holes on
your handset and cause damage.
J Use a damp cloth to clean your handset.
B-8
Options
Appendix B
Canon
MultiPASS C50 Hardware Manual
ENGLISH
Glossary
A
AC
Alternating current. The type of electrical current available from a wall outlet.
Activity report
A journal of the MultiPASS C50’s fax transactions, both sent and received.
Address Book
The MultiPASS Desktop Manager for Windows provides you with an electronic
Address Book that allows you to create a list of people with their phone/fax
numbers. In the Address Book you can add new entries, create a fax group, edit
existing entries, and sort the entries based on last, first or company name. You
can import an existing text file of addresses or export the Address Book to a text
file. You can send faxes and make telephone calls using the Address Book. See
Registering.
Application program
Software prepared for a specific function or set of functions. Examples include
word-processing programs and the MultiPASS Desktop Manager. Developers
who make application programs include driver’s that support different types of
printers.
ASCII
Acronym for American Standard Code for Information Interchange. A set of
definitions for the bit composition of characters and symbols. ASCII defines 128
symbols using 7 binary bits and 1 parity bit.
Auto FAX/TEL switching
See FAX/TEL switching.
Automatic dialling
Dialling fax or telephone numbers by pressing one or three buttons. To use
automatic dialling, you must register the numbers in the MultiPASS C50’s
memory. See also One-touch speed dialling, Coded speed dialling, Group dialling,
and Address Book.
G-1
Glossary
Canon
MultiPASS C50 Hardware Manual
ENGLISH
Automatic Document Feeder (ADF)
The device included in the MultiPASS C50 that automatically feeds the document
being faxed, copied, or scanned into the MultiPASS C50.
Automatic image reduction
The MultiPASS C50 can print the date, time, company name, and a fax number at
the top of the faxes it receives. To prevent this information from crowding the
faxed image on the page and possibly lengthening the fax, the MultiPASS C50
automatically reduces the size of the image on the page.
Automatic redialling
When the receiving fax machine is busy or does not answer, or when an error
occurs while sending, the MultiPASS C50 waits a specified time and then
automatically redials the number. If the receiving fax is still busy or does not
answer, the MultiPASS C50 waits the specified time and dials again. If the fax still
doesn’t go through, the MultiPASS C50 prints an activity report.
B
Bi-directional parallel interface port
An interface connection that can send and receive signals. For example, when
you print or send a fax from your computer, data goes from your computer to the
MultiPASS C50; when you scan or receive a fax into your computer, data goes
from the MultiPASS C50 to your computer.
BJ cartridge
The printing mechanism that contains the print head unit and ink cartridges.
Bold
A characteristic of a printed character that indicates wider, darker representation.
Also referred to as emphasised or double-strike printing.
bps
Bits per second. Refers to the speed with which a fax machine sends and receives
data.
Broadcasting
Transmitting documents to more than one location (through the MultiPASS C50’s
memory).
G-2
Glossary
Canon
MultiPASS C50 Hardware Manual
ENGLISH
Bubble Jet (BJ) printing
An ink-jet type printer that heats the ink to a boiling point in a nozzle to form a
bubble. When the bubble expands, there is no room left in the nozzle for the ink
and the ink is projected onto paper.
C
Centronics
An interface standard for parallel data transmission. The interface on the
MultiPASS C50 is a Centronics-type parallel interface.
Character set
A complete collection of the characters and symbols that constitute all the
elements of a language or discipline (mathematics, for example), including
punctuation and numbers, with a one-to-one correspondence to the ASCII codes
00-7F (hexadecimal). The printer uses these characters to determine its printing
and nonprinting activities after it receives data from the host computer.
CMYK
Acronym for cyan, magenta, yellow, and black; the four colours used in the
standard colour model of the printing industry. Refers to a method of specifying
colour using CMYK colour values. (K is used for black because B is used to
represent blue in RGB.)
CNG
Calling Tone. This is a signal sent by fax machines to identify the call as an
incoming document. When the receiving fax detects this signal, it automatically
starts to receive the fax transmission. The majority of fax machines in use today
can send and detect CNG signals.
Code page
A set of 256 graphic designs (characters) associated with unique extended ASCII
code values from 0 through 255. Code Page 437 is USA and Code Page 850 is
Multilingual.
Coded speed dialling
An automatic dialling method that allows you to dial a fax or telephone number
by pressing the CODED DIAL button and a two-digit code using the numeric
buttons.
G-3
Glossary
Canon
MultiPASS C50 Hardware Manual
ENGLISH
Composite black
The black colour formed by mixing cyan, magenta, and yellow ink so that they
appear almost black on a printout.
Control code
Special data that invokes nonprinting functions of the printer, such as line feed or
carriage return. In the ASCII chart, control codes are represented by decimal
numbers 0-31, 127, 128, 159, and 255.
cpi
Characters per inch. A unit of measurement relevant to a fixed-space font.
Because all characters have the same width, you can calculate the number of
characters printed per inch.
cps
Characters per second. A unit of measurement that indicates the printer’s speed.
Cursor
The underline symbol you see on the LCD display when you register numbers
and names in the MultiPASS C50. Press the arrow buttons to move the cursor.
D
dB(A)
Stands for decibel level (a decibel being a unit of measurement for the intensity of
the sound coming from the unit), adjusted for background noise.
Delayed sending
The ability to send a document at a preset time in the future. You do not have to
be in your office to use delayed sending to one or more destinations. (You can set
up only one delayed transmission at a time with the MultiPASS Desktop
Manager for WindowsH software.)
Dialling methods
Ways of pressing one or more buttons to access a number to connect to an
outside party or fax machine. Dialling methods include one-touch, coded speed
dialling, group dialling, and manual (regular).
G-4
Glossary
Canon
MultiPASS C50 Hardware Manual
ENGLISH
Dithering
A method by which colour dots are combined on a page to produce a wide
spectrum of colours.
Document
The sheet of paper containing the data that you send to, or receive from a unit.
dpi
Dots per inch. A unit of measurement for indicating a printer’s resolution. Your
MultiPASS C50 can produce a resolution up to 720 dpi precision (horizontal)
depending on the printer control mode and the application you are using.
Dual access (Multitasking)
Enables the MultiPASS C50 to receive a fax, even if it is copying or printing a
document. Also enables you to load other faxes into memory, make copies, print
out reports, print documents or register information while the MultiPASS C50
sends a fax from memory.
E
ECM
Error Correction Mode. The ability of your MultiPASS C50 to reduce system and
line errors when sending or receiving from another fax with ECM capability.
ECM is most effective in areas where the telephone lines are in poor condition or
there is frequent interference on the line. Do not use ECM if you need to send a
document quickly and you are sure the other party can read your transmission
without it (turning off ECM also turns off MMR).
Extension
A telephone connected to the MultiPASS C50 that is used in place of the
handset. You can use the extension telephone to activate incoming reception of
documents manually.
F
Factory default
The MultiPASS C50 is preprogrammed in the factory with settings that we
recommend. These are known as Factory Default Settings. You can customise
your MultiPASS C50 by programming settings other than the Factory Default
Settings.
G-5
Glossary
Canon
MultiPASS C50 Hardware Manual
ENGLISH
FAX/TEL switching
This option allows you to set the MultiPASS C50 to automatically detect whether
a call is from a fax or telephone. If the call is from another fax, the transmission is
automatically received. If the call is from a telephone, the MultiPASS C50 rings
to let you know, so you can pick up the handset. With this feature, one telephone
line can be shared by both the telephone and the fax.
FINE
The resolution setting for documents with very small characters and lines.
Form feed
A printer function that automatically ejects the current page and advances the
printer to the top of the next page.
G
G3, Group 3 fax machine
Defined by CCITT. Uses encoding schemes to transmit image data while reducing
the amount of data that needs to be transmitted, thus reducing transmission time.
G3 fax machines can transmit one page in less than one minute. Encoding
schemes for G3 fax machines are Modified Huffman (MH), Modified READ
(MR), and Modified Modified READ (MMR).
Graphic
A written, printed, or electronically displayed symbol or drawing. Also characters
or text that have been generated by a computer graphics application program.
Greyscale
Representing colour in black and white as a result of different intensities of
colour. Different colours and intensities of colours appear as different shades of
grey.
Group dialling
A dialling method that enables you to dial up to 55 registered one-touch speed
dialling or coded speed dialling numbers together as a group. This means that you
can press just one or three buttons to enter numbers when sending the same
document to many destinations.
G-6
Glossary
Canon
MultiPASS C50 Hardware Manual
ENGLISH
H
Halftone
Using this method, the MultiPASS C50 produces shades of grey or of colours by
mapping dots to be printed. For colour printing, different coloured dots of ink are
placed closely together to create illusions of other colours.
Hue
A colour in the colour spectrum. Examples are red, green, and violet.
I
IEEE 1284
IEEE 1284 is the new specification standard for PC-to-peripheral bi-directional
parallel interface communications. The new standard was adopted by IEEE,
Institute of Electrical and Electronic Engineers, Inc., in 1993. Some of the
benefits it provides are: bi-directional communication between PCs and
peripheral devices, a higher speed data transfer rate, and protection against data
loss due to noise interference.
Ink Jet printer
A nonimpact printer that ejects ink into paper to form characters. The
MultiPASS C50 has a special type of ink jet printer built in called a Bubble Jet
printer.
Ink saver
You can enable or disable economy printing (ink saving feature) when receiving
faxes. By enabling the INKSAVER mode, ink consumption can be decreased by
as much as fifty percent, resulting in a longer effective cartridge life.
Ink tank
The special type of ink container housed by the BJ cartridge. The BC-21/21e
Colour BJ cartridge contains two ink tanks: one colour (which includes cyan,
yellow, magenta) and one black.
Intensity
The amount of colour. More intense or more saturated colours are more pure.
Less intense or less saturated colours are less vivid.
Interface
The connection between two devices that makes it possible for them to
communicate with each other. This MultiPASS C50 features a parallel interface,
which makes it compatible with IBM and similar personal computers.
G-7
Glossary
Canon
MultiPASS C50 Hardware Manual
ENGLISH
Interface cable
The cable used to create the interface between a printer and a computer.
Interface port
The MultiPASS C50 comes with one Centronics, 8-bit, bi-directional parallel
interface port, located on the back of the unit. You attach the cable that connects
your computer and MultiPASS C50 to this port.
J
Jack
The telephone receptacles on your wall or in your MultiPASS C50 used to
connect the MultiPASS C50 to the telephone line, answering machine, or
extension phone.
L
Landscape orientation
Refers to printing across the length of the page (as opposed to portrait
orientation printing across the width of the page). The term landscape is derived
from pictures of the landscape, which are usually horizontal in format.
Line feed
A printer function that advances the paper one line.
Line weight
The thickness of lines used in a graphic image or the stroke weight of text
characters.
M
Manual receiving
A method of receiving faxes in which you answer all incoming calls using the
extension phone. If you hear a slow beep it indicates an incoming fax
(START/COPY) button to
transmission from another machine. Just press the
receive the incoming fax.
Manual redialling
When you use Regular dialling, you can redial a number manually simply by
(REDIAL)/PAUSE button on the operation panel. The last
pressing the
number called is the number redialled.
G-8
Glossary
Canon
MultiPASS C50 Hardware Manual
ENGLISH
Memory broadcast
Allows you to send a scanned fax to as many as 57 locations at once, using a
combination of one-touch speed dialling, coded speed dialling, or manual dialling.
Memory sending
Scans a document into memory before the MultiPASS C50 dials the numbers and
sends it. This method allows you to retrieve your original document immediately
after scanning.
Modem
A device that converts (MOdulates) digital data for transmission over telephone
lines. At the receiving end, this device converts the modulated data
(DEModulates) to digital format that the computer understands.
MultiPASS Desktop Manager for Windows software
Canon’s exclusive software package that allows you to use the MultiPASS C50
with your Windows software applications. You must install the MultiPASS
Desktop Manager to use your MultiPASS C50 as a printer, scanner, or PC fax.
N
Noise
A term applied to a variety of problems that impair the operation of telephone
lines used for faxing.
Noise level
See dB(A).
Nonbleed
A special mode in colour print quality selection whereby the printer changes
from true black to composite black when directly adjacent to an area of colour.
Numeric buttons
The round, numbered buttons on the operation panel marked the same as a
standard telephone keypad. Press them to perform regular dialling. You also use
the numeric buttons to enter numbers and letters when you register numbers and
names, and for entering coded speed dialling codes.
G-9
Glossary
Canon
MultiPASS C50 Hardware Manual
ENGLISH
O
Off-line
The printer’s communication status in which you cannot transfer data from your
computer to the printer.
On-line
The printer’s communication status in which it is being controlled by your
computer and is ready to receive data.
One-touch speed dialling
An automatic dialling method that allows you to dial a fax or telephone number
by pressing a single one-touch speed dialling button. The MultiPASS C50 can
store up to 6 numbers for one-touch speed dialling.
One-touch speed dialling buttons
The buttons numbered 1 to 6 on the operation panel, each of which may be
registered as a fax or telephone number. Once a number is registered, you press
one button to dial the entire number.
P
Page orientation
Refers to the direction of print on the page. Printing across the width of a page is
called portrait orientation. Printing across the length of a page is called landscape
orientation.
Paper feed
Refers to guiding a sheet of paper into the printer’s paper path.
Parallel interface
An interface that transmits multiple bits simultaneously (usually in one-byte
segments). Your MultiPASS C50 has a built-in, Centronics-type bi-directional
parallel interface. See also Interface port.
Pause
A timing entry required for registering certain long distance numbers and for
dialling out through some telephone systems or switchboards. Pressing the
(REDIAL)/PAUSE button enters a pause between digits of a telephone/fax
number.
PC fax
An electronic way to send and receive faxes. A PC fax is sent from or received in
a computer. Using the MultiPASS C50 allows you to send and receive PC faxes
and the MultiPASS Desktop Manager lets you save, sort, and print the PC faxes.
G-10
Glossary
Canon
MultiPASS C50 Hardware Manual
ENGLISH
Photo
The document setting you use for sending or copying documents with
intermediate tones, such as photographs.
Platen
The printer component that holds the paper in position during ink transfer.
Point size
Character height is defined in points; one point is 1/72 inch. For instance, this text
is printed using a 10-point font.
Portrait orientation
Refers to printing across the width of the page (letter style). This is the opposite
of landscape orientation, which is printing across the length of the page.
Print head
The printing mechanism that contains print nozzles and ejects the ink for
printing.
Print head capping
An automatic protection function that prevents the print head unit and ink
cartridges from drying out or becoming clogged with dust.
Printable area
The area of a sheet of paper on which a printer can reproduce text or graphics
(the printing area is smaller than the paper). On this unit, the printing area varies
depending on the type of paper being used.
Printer driver
Software that sends printing instructions to a printer (in this case, the MultiPASS
C50). The printer driver keeps track of the attributes of a printer and the codes
the program must send to access those attributes.
Proportional spacing
The spacing of characters according to the width of each character. This variable
spacing between each character closes up awkward space and makes text easier
to read.
Proportionally spaced font
A font in which each character is given an amount of space proportional to its
size–less for an i and more for a w.
Pulse
See Rotary pulse.
G-11
Glossary
Canon
MultiPASS C50 Hardware Manual
ENGLISH
Q
Quick-on-line sending
Quick-on-line sending is the easiest and quickest way to send a document. After
a document is set in the Automatic Document Feeder (ADF), the MultiPASS
C50 begins to scan the entire document into the memory. As the first page of a
multiple page document is being scanned, your MultiPASS C50 will begin to call
the other party, and transmit the information even as the remaining pages are
being scanned. The MultiPASS C50 scans the document quickly so you can get it
back in a few moments and return to work.
R
RAM
Random Access Memory. Memory that is used for temporary storage of
information such as: documents you want to print, scanned and received
documents, and downloaded fonts.
RECEIVE MODE
The button that controls how the MultiPASS C50 receives fax and telephone
calls.
Receiving
Receiving transmission is also defined as RX or Reception.
The MultiPASS C50 can be customised to receive fax documents in many ways:
J Receive fax documents only (FAX ONLY MODE)
J Receive both telephone calls and fax documents on the same line (Fax/Tel
Mode)
J Receive telephone calls and fax documents manually (MANUAL MODE)
J Receive documents directly into your PC (PC Faxing)
Reception
See Receiving.
G-12
Glossary
Canon
MultiPASS C50 Hardware Manual
ENGLISH
Redialling-automatic
When the fax you dial does not answer or a sending error occurs, the MultiPASS
C50 waits for a specified interval and then redials the same fax number. You can
adjust the number of redials and the length of time between redialling.
Redialling-manual
When you use the regular dialling method, you can quickly call the last number
(REDIAL)/PAUSE button.
dialled by pressing the
Reduction mode
The MultiPASS C50’s automatic feature that slightly reduces the received image
to allow room at the top of the page for the sender’s ID information. You can
also reduce the size of large incoming documents using the Reduction option in
the Receive Fax tab.
Registering
A process by which you place fax or telephone numbers and names in the
MultiPASS C50’s memory for automatic dialling so that you can save time
dialling frequently called destinations. See Address Book.
Regular dialling
Pressing the individual numeric buttons to dial a fax or telephone number.
Remote receiving ID
The two-digit code that enables you to manually activate a fax using an extension
phone that is connected to the MultiPASS C50.
Remote reception
Activating a fax by answering an extension telephone that is connected to the
MultiPASS C50, but that is not located near the MultiPASS C50. You need to dial
a remote receiving ID number to start remote reception.
Reports
A document printed by the MultiPASS C50 and containing information about the
faxes it has sent or received.
Reset
A way to clear printer errors; turn the printer mode off and then back on
again.
G-13
Glossary
Canon
MultiPASS C50 Hardware Manual
ENGLISH
Resolution
The density of dots for any given output device. Expressed in terms of dots per
inch (dpi). Low resolution causes font characters and graphics to have a jagged
appearance. Higher resolution means smoother curves and angles as well as a
better match to traditional typeface designs. Resolution values are represented by
horizontal data and vertical data, for example, 360 × 360 dpi. This printer can
produce output with resolutions up to 720 × 360 dpi precision.
RGB
An acronym for Red, Green, and Blue; the three primary colours used in the
additive process to form a wide spectrum of colours.
ROM
Read-Only Memory. You cannot modify this printer memory. When the printer is
turned off, ROM memory remains intact. In this unit, the default settings and the
resident fonts are stored in ROM.
Rotary pulse
A telephone dialling system where a dial is rotated to send pulses to the
telephone switching system. When you pulse dial, you hear clicks. When you
touch-tone dial, the most common dialling system, you hear tones. Rotary pulse
dialling requires certain setting adjustments.
RX
See Receiving.
S
Saturation
The vividness or amount of a colour. See Intensity.
Scanning contrast
A setting that darkens or lightens the scanning of documents.
G-14
Glossary
Canon
MultiPASS C50 Hardware Manual
ENGLISH
Sender ID
Information printed at the top of a fax (also called TTI or Transmit Terminal ID):
J Date and time the fax was sent
J Sender’s fax/phone number
J Sender’s name
J Your name or company name
J Page number
Sending
A fax document that has been scanned by a facsimile machine and sent over
telephone lines, in the form of electrical pulses, to another facsimile machine.
Also called TX or Transmit. The MultiPASS C50 also allows you to send a
document directly from your PC (PC Faxing).
Sending speed
The rate at which faxes are transmitted through the phone line. See also bps (bits
per seconds).
Serif
Short lines crossing and embellishing the ends of a letter’s main strokes.
Smoothing mode
A printer mode in which the printer enhances the horizontal resolution of black
ink. The printer automatically initiates this mode to produce 720 × 360 dpi for
black ink.
STANDARD
A document setting for sending normal typewritten or printed documents
containing only text and no drawings, photographs, or illustrations.
Standby
The mode in which the MultiPASS C50 is on and ready to use. All operations
start from standby mode when the LCD displays the date and time.
Subtractive colours
The three primary colours (cyan, yellow, and magenta); when combined through
a subtractive process give a spectrum of colours.
G-15
Glossary
Canon
MultiPASS C50 Hardware Manual
ENGLISH
T
Timed sending
See Delayed sending.
TONE
A button that allows you to temporarily switch to touch-tone from pulse dialling.
In some countries, on-line data services may require that you use tone dialling.
Tone/pulse setting
The ability to set the MultiPASS C50 to match the telephone dialling system your
telephone line uses: touch-tone or rotary pulse.
Transaction number
A unique number assigned to each fax document sent (TX NO.) or received (RX
NO.) by the MultiPASS C50 and used to identify that particular fax document.
Transmit
See Sending.
True black
In comparison to composite black, true black colour on a printout is obtained
with the use of black ink.
TrueType font
The scalable font technology built into Microsoft Windows 95/98. It offers you
the same font images both on computer displays and printer outputs.
TTI
Transmit Terminal ID. See Sender ID.
TWAIN
Both a protocol and an application programming interface (API) that allows you
to input image data directly from any source (for example: desktop and handheld
scanners, video capture boards, digital cameras, and other imaging equipment)
without requiring users to switch out of the application. It provides compatibility
between image input devices and applications by acting as the liaison between
hardware devices and software applications. Because your MultiPASS C50
supports TWAIN, you can use the scanning features of the MultiPASS C50 with
any Windows application that also supports TWAIN. TWAIN, the industry
standard, was developed by the TWAIN working group which consists of
representatives from many leaders in the scanner hardware and software industry.
G-16
Glossary
Canon
MultiPASS C50 Hardware Manual
ENGLISH
TX
See Sending.
Typeface
The printed design of characters. For instance, Courier, Script, and Roman
typefaces all print characters of different designs.
Typestyle
Refers to how the typeface appears: slanted (italic) or upright.
U
UHQTM (Ultra High Quality)
An exclusive Canon digital image processing system that incorporates 64 shades
of grey along with a special edge enhancement feature which ensures that text
and photos are transmitted with ultimate clarity.
G-17
Glossary
Canon
MultiPASS C50 Hardware Manual
ENGLISH
G-18
Glossary
Canon
MultiPASS C50 Hardware Manual
ENGLISH
Index
1-TOUCH SPEED DIAL setting 2-67, 2-68,
3-3
A
Access type
registering 4-20, 4-21
Accessing
unit settings 2-71 to 2-73
Adding pages
to document 6-12
ADF See Automatic Document Feeder
Adjusting
paper thickness lever 2-35, 2-42, 2-43
ALARM lamp 2-24
Alarm setting 2-62
ALARM VOLUME setting 2-62, 2-69, 2-71
ANS. MACHINE MODE
description 5-2
setting 5-3
using 5-9
AnsMode display See ANS. MACHINE
MODE
Answer Receive Mode setting 2-65
Answering machine
connecting 2-17
jack 2-17, 2-21
mode 5-9
using 5-9
Answering Machine Mode Options
setting 2-66
Application 7-6
Arrow buttons 2-25
Assembling
unit 2-11 to 2-13
Attaching
components 2-11 to 2-13
document support 2-12
ferrite core 2-14, 2-15
output tray extension 2-13
sending document support 2-11
AUTO REDIAL message 8-30
Auto Start Send setting 2-63
Automatic
document feed 6-2, 6-5, 6-6 to 6-8
fax/tel switching 5-2, 5-4, 5-5
feeding 2-45
receiving 5-2, 5-8
redialling with memory sending 4-15
Automatic dialling 3-2, 4-7
coded 3-2, 3-10 to 3-16, 4-7
group 3-2, 3-17 to 3-21
one-touch 3-2, 3-3 to 3-9, 4-7
Automatic Document Feeder (ADF) 1-7, 2-20
adding pages 6-12
jams 8-6, 8-7
loading documents 6-6 to 6-11
removing document 4-13, 4-14
Automatic Report Print setting 2-63
Automatic Retries Number setting 2-63
I-1
Index
Canon
MultiPASS C50 Hardware Manual
ENGLISH
B
C
Back Print Film BF-102 2-38
BC-20 Black BJ cartridge 2-6, 2-29
BC-21/21e Colour BJ cartridge 2-6, 2-29
BC-22/22e Photo Colour BJ cartridge 2-30
BC-29F Fluorescent BJ cartridge 2-30
BCI-21 Black ink tank 2-29
BCI-21 Colour ink tank 2-29
BF-102 See Back Print Film BF-102
Bi-directional parallel port 2-21
connecting to 2-14
BJ cartridge See Cartridge
Broadcasting
sequential 4-18, 4-19
Bubble Jet Paper LC-101 2-38
BUSY/NO SIGNAL message 8-30
Button
arrow 2-25
CARTRIDGE 2-25
CODED DIAL 2-24
D.T. 2-26, 4-23
FUNCTION 2-25
numeric 2-24
one-touch speed dial 2-24
PRINTER RESET 2-25
R 2-26, 4-20, 4-21
RECEIVE MODE 2-23
REDIAL/PAUSE 2-24
RESOLUTION 2-23
RESUME 2-25
special function 2-24, 2-25 to 2-26
START/COPY 2-24
STOP 2-24
TONE/+ 2-25, 4-24
CALLING message 8-30
CALLING VOLUME setting 2-62, 2-68, 2-71
Cancelling
automatic redialling 4-16, 4-17
manual redialling 4-15
receiving 5-14
sending 4-12
Canon media 2-38, 2-39
Photo Kit 1-10
Cartridge
BC-20 Black BJ 2-29
BC-21/21e Colour BJ 2-29
BC-22/22e Photo BJ 2-30
BC-29F Fluorescent BJ 2-30
guidelines 2-27
holder 2-22
installing 2-31 to 2-35
maintaining 2-27, 2-28
print head 9-9
replacing 9-10 to 9-16
SB-21 BJ Container 2-6, 2-30, 2-36
selecting 2-29 to 2-30
storing 2-36
types 2-29, 2-30
using 2-27, 2-28
I-2
Index
Canon
MultiPASS C50 Hardware Manual
ENGLISH
CARTRIDGE button 2-25
CARTRIDGE JAMMED message 8-30
CF-102 See Transparencies CF-102
CHANGE CARTRIDGE message 5-10, 8-31,
9-10
CHECK DOCUMENT message 8-31
CHECK PAPER SIZE message 8-31
CHECK PRINTER message 8-31
Cleaning
exterior 9-2
interior 9-2, 9-3
print head 9-9
scanner components 9-4 to 9-7
sheet 2-50, 2-51
CLEAR PAPER JAM 5-11, 8-31
Code
error 8-30 to 8-34
CODED DIAL button 2-24
CODED SPEED DIAL setting 2-67,
2-68, 3-10
Coded speed dialling
changing names 3-12 to 3-14
changing numbers 3-12 to 3-14
deleting numbers 3-12, 3-13
description 3-2, 4-7
storing 3-10, 3-11
using 3-15, 3-16
with sequential broadcasting 4-18
COLOR COPY MEDIA setting 2-67,
2-69, 2-72
Colour copier
features 1-5
problems 8-26 to 8-28
Colour printing
advice 7-6
features 1-6
monitors and 7-7
problems 8-26 to 8-28
selecting paper 7-6
Colour scanner
features 1-7
COMMUNICATING PLEASE WAIT
message 8-31
Company setting 2-63
Components 2-6, 2-20 to 2-26
attaching 2-11 to 2-13
unpacking 2-5
Confirm before Deleting setting 2-62
Connecting See Connection
Connection
answering machine 2-17
optional handset 2-17
PC 2-14, 2-15
power cord 2-18, 2-19
telephone 2-17
telephone line 2-16
Connector
power 2-21
Contrast
setting 4-4, 4-5
Convention
type 1-12
Copier See also Copying
features 1-5
problems 8-26 to 8-28
Copying 6-13 to 6-15
problems 8-18, 8-26 to 8-28
receiving while 5-13
reduction 1-5, 6-13 to 6-15
setting resolution 6-13
Customer support 1-13, 8-3
I-3
Index
Canon
MultiPASS C50 Hardware Manual
ENGLISH
D
E
D.T. button 2-26
using 4-23
DATE & TIME setting 2-58, 2-62, 2-68
Date Format setting 2-62
Default Action if No Answer to Telephone
setting 2-66
Desktop Manager See MultiPASS Desktop
Manager
Dial tone
confirming 4-23
Dialling
automatic 3-2, 4-7
coded speed 3-2, 3-10 to 3-16, 4-7
group 3-2, 3-17 to 3-21
long distance 4-22
methods 4-7
one-touch 3-2, 3-3 to 3-9, 4-7
PC 4-7
point and click 1-4, 1-5
regular 4-7
speed 3-2
through a switchboard 4-20, 4-21
tone on pulse line 4-24
Dimensions 2-4
Display Language setting 2-62
DISPLAY LANGUAGE setting 2-62,
2-70, 2-72
Dithering 7-7
DOC. TOO LONG message 8-31, 8-32
Document
adding pages 6-12
copying 6-13 to 6-15
guides 2-20
in memory 5-10, 5-12
loading 6-6 to 6-11
problem 6-3
problems with 6-9
removing from ADF 4-13, 4-14
scanning 6-2 to 6-12
Document feed lever 2-23, 6-2, 6-3
selecting 6-5
DOCUMENT READY message 8-32
Document support 2-6, 2-20
attaching 2-12
Documentation 1-11
ECM See Error Correction Mode
ECM RX message 8-32
ECM TX message 8-32
Editing
information 2-57
user information 2-60
Entering
date 2-58
guidelines 2-55
letters 2-56, 2-57
numbers 2-56, 2-57
pauses 4-22
symbols 2-56, 2-57
telephone line type 2-59
time 2-58
unit name 2-58
unit telephone number 2-58
user information 2-54, 2-58, 2-60
via MultiPASS Desktop Manager 2-54, 2-61
via operation panel 2-54, 2-61
Envelopes
loading 2-44, 2-45
printable area 2-41
printing 7-2 to 7-5
selecting 2-37
Error codes 8-30 to 8-34
Error Correction (ECM) setting 2-63, 2-65
Error Correction Mode 1-4
I-4
Index
Canon
MultiPASS C50 Hardware Manual
ENGLISH
F
G
Fabric Sheets FS-101 2-39
printing 2-52
Fax
cancelling 4-12
cancelling incoming 5-14
features 1-4
printing 5-12
problems 8-12 to 8-17
sending 4-8 to 4-11
Fax Heading Position setting 2-64
Fax Number setting 2-63
FAX ONLY MODE
description 5-2
setting 5-3
using 5-8
Fax/Tel Mode
description 5-2
setting 5-3
using 5-4, 5-5
FaxOnly display See FAX ONLY MODE
FaxTel display See Fax/Tel Mode
Features
colour copier 1-5
colour printer 1-6
colour scanner 1-7
fax 1-4
main 1-3 to 1-7
telephone 1-5
Feeding
problems 8-9 to 8-11
Ferrite core 2-6
attaching 2-14, 2-15
FILE PRINT setting 2-67, 2-70, 5-12
Film
Back Print Film BF-102 2-38
High-Gloss Film HG-101 2-39
FS-101 See Fabric Sheets FS-101
FUNCTION button 2-25
GROUP DIAL setting 2-67, 2-68, 3-17
Group dialling
creating groups 3-17 to 3-20
description 3-2, 4-19
using 3-21
H
Handset
attaching See Appendix B
connecting 2-17
jack 2-17, 2-21
HANG UP PHONE message 8-32
HEAD CLEANING setting 2-67, 2-70, 9-9
Heading setting 2-63
HG-101 See High-Gloss Film HG-101
High-Gloss Film HG-101 2-39
High Resolution Paper HR-101 2-38
cleaning sheet 2-50, 2-51
printing 2-50
HR-101 See High Resolution Paper HR-101
Hue 7-7
Humidity
location 2-3
paper storage 2-44
I-5
Index
Canon
MultiPASS C50 Hardware Manual
ENGLISH
I
K
Image Contrast setting 2-64
Include Fax Image setting 2-63
Incoming Ring setting 2-62
Ink Saver Mode setting 2-66
Ink tank 1-9, 2-29
BCI 21 Black 2-29
BCI-21 Colour 2-29
replacing 9-17 to 9-20
INSTALL BC-21 message 8-32
INSTALL BC-21/20 message 8-32
Installing
BJ cartridges 2-31 to 2-35
Intensity 7-7
Keypad setting 2-62
KEYPAD VOLUME setting 2-62, 2-68, 2-71
J
Jack
answering machine 2-17, 2-21
handset 2-17, 2-21
telephone 2-17, 2-21
telephone line 2-16, 2-21
Jams
Automatic Document Feeder (ADF) 8-6,
8-7
sheet feeder 8-8
L
Lamp
ALARM 2-24
LC-301 See Bubble Jet Paper LC-301
LCD display 2-23
messages 8-30 to 8-34
Letters
editing 2-57
entering 2-56, 2-57
Lifting unit 1-15
Line
connecting 2-16
jack 2-16, 2-21
LINE MONITOR VOL setting 2-62, 2-69, 2-71
Listen Time before Ringing setting 2-66
LOAD PAPER message 5-11, 8-32
Loading documents
automatic feed 6-6 to 6-8
manual feed 6-10, 6-11
Loading print media
automatic feed 2-45 to 2-48
manual feed 2-49
Location
selecting 2-3, 2-4
Long distance dialling 4-22
I-6
Index
Canon
MultiPASS C50 Hardware Manual
ENGLISH
M
Maintaining
BJ cartridge 9-8 to 9-20
cleaning 9-2 to 9-7
Manual
document feed 6-3, 6-5, 6-10, 6-11
feeder 2-21
feeding 2-49
receiving 5-2, 5-3, 5-6, 5-7
sending 4-6
Manual display See MANUAL MODE
Manual document feed 6-3, 6-5, 6-10, 6-11
MANUAL MODE
description 5-2
setting 5-3
using 5-6, 5-7
Manual sending via the handset
cancelling 4-12
description 4-6
redialling 4-15
using 4-8, 4-9
Manual/Auto Switch setting 2-66
Memory
documents received 5-10, 5-12
messages 5-10, 5-11
Memory Clear report 4-25
MEMORY FULL message 6-15, 8-33
MEMORY FULL PLEASE WAIT message
8-33
Memory sending
automatic redialling 4-15, 4-16
cancelling 4-12
description 4-6
using 4-10, 4-11
MEMORY USED nn% message 8-33
Messages 5-10, 5-11, 8-30 to 8-34
MID PAUSE SET setting 2-63, 2-69, 2-72
Monitor 7-7
Multifunction 1-3
Multitasking 1-3, 5-13
MultiPASS Desktop Manager 1-8, 2-54
CD-ROM 2-6
user’s guide 1-11, 2-6
N
NO ANSWER message 8-33
NO TEL # message 8-33
NOT AVAILABLE message 8-33
Nozzle check pattern 9-8
NOZZLE CHECK setting 2-67, 2-70, 9-8
Number of Rings setting 2-65
Numbers
editing 2-57
entering 2-56, 2-57
storing for speed dialling 3-3, 3-4, 3-10, 3-11
Numeric buttons 2-24
I-7
Index
Canon
MultiPASS C50 Hardware Manual
ENGLISH
O
Off Hook Alarm setting 2-63
On Error Resend setting 2-64
One-touch speed dial buttons 2-24
One-touch speed dialling
changing names 3-5 to 3-7
changing numbers 3-5 to 3-7
deleting numbers 3-5, 3-6
description 3-2, 4-7
storing 3-3, 3-4
using 3-8, 3-9
with sequential broadcasting 4-18
Operation panel 2-20, 2-23, 2-24, 2-54
Optional handset
attaching See Appendix B
connecting 2-17
Output tray 2-20
Output tray extension 2-6, 2-20
attaching 2-13
Outside Dialling Prefix setting 2-63
Outside line number
registering 4-20, 4-21
P
Paper
Bubble Jet LC-301 2-38
guide 2-20
handling 7-2 to 7-5
High Resolution HR-101 2-38, 2-50
jams 8-6 to 8-8
loading 2-44, 2-45
output guides 2-20, 2-53
printable area 2-40
problems feeding 8-9 to 8-11
rest 2-20
selecting 2-37
Paper Size setting 2-65
Paper thickness lever 2-22
adjusting 2-35, 2-42, 2-43
setting 2-35, 2-42, 2-43
Parallel cable 2-6
connecting 2-14, 2-15
Pause Duration setting 2-63
Pauses
entering 4-22
PBX 4-20
PC
connecting 2-14, 2-15
dialling 4-7
Phone Line Type setting 2-63
Phone Lock setting 2-64
Photo Kit 1-10
Plain paper See paper
Plain paper fax
features 1-4
PLEASE WAIT message 8-33
Port
bi-directional parallel 2-21
interface 2-14
Power connector 2-21
Power cord 2-6
connecting 2-18, 2-19
Power cut 4-25
Print head
cleaning 9-9
testing 9-9
I-8
Index
Canon
MultiPASS C50 Hardware Manual
ENGLISH
Print media 1-9
Back Print Film BF-102 2-38
Bubble Jet Paper LC-301 2-38
Canon 2-38, 2-39
envelopes 2-37
Fabric Sheets FS-101 2-39
High-Gloss Film HG-101 2-39
High Resolution Paper HR-101 2-38, 2-50
loading 2-44 to 2-52
plain 2-37
selecting 2-37
T-Shirt Transfers TR-101 2-39
Transparencies CF-102 2-38
Print quality
problems 8-24, 8-25
Printable area
envelopes 2-41
plain paper 2-40
special media 2-40
Printer
cover 2-20
features 1-6
PRINTER RESET button 2-25
Printing
colour 7-6, 7-7
cost 7-9
envelopes 7-2 to 7-5
problems 8-19 to 8-23, 8-26 to 8-28
received fax 5-12
receiving while 5-13
selecting paper 7-2
speed 1-6, 7-8
Printing Spooler setting 2-62
Problems
cannot solve 8-3
colour copying 8-26 to 8-28
colour printing 8-26 to 8-28
copying 8-18
faxing 8-12 to 8-17
feeding paper 8-9 to 8-11
general 8-29
index 8-4, 8-5
paper jams 8-6 to 8-8
print quality 8-24, 8-25
printing 8-19 to 8-23
telephone 8-17
Pulse line
using tone dialling on 4-24
PUT IN CARTRIDGE message 5-10, 8-33
R
R button 2-26
registering 4-20, 4-21
R-Key setting 2-64
R-KEY SETTING 2-64, 2-69, 4-20
REC’D IN MEMORY message 8-34
Receive Fax Options setting 2-65
RECEIVE MODE button 2-23, 5-3
RECEIVED IN FILE message 8-34
Receiving
ANS.MACHINE MODE 5-2, 5-3, 5-9
answering machine 5-2, 5-3, 5-9
automatic switchover 5-2, 5-3, 5-4, 5-5
automatically 5-2, 5-3, 5-8
cancelling 5-14
FAX ONLY MODE 5-2, 5-3
Fax/Tel Mode 5-2, 5-3, 5-4, 5-5
MANUAL MODE 5-2, 5-3, 5-6, 5-7
manually 5-2, 5-3, 5-6, 5-7
modes 5-2
problems 8-14 to 8-17
remote 5-6
setting mode 5-3
REDIAL/PAUSE button 2-24
Redialling
automatic 4-15, 4-16
cancelling 4-15, 4-16, 4-17
manual 4-15
Reduction
copying 1-5, 6-13 to 6-15
Reduction setting 2-65
Registering
access type 4-20, 4-21
outside line number 4-20, 4-21
receiving while 5-13
I-9
Index
Canon
MultiPASS C50 Hardware Manual
ENGLISH
Regular dialling 4-7
Remote Identification Number setting 2-66
Remote Receive setting 2-66
Remote reception 5-6, 5-7
Removing
document from ADF 4-13, 4-14
shipping materials 2-8 to 2-10
Replacing
BJ cartridge 9-12 to 9-16
ink tanks 9-17 to 9-20
Report
Memory Clear 4-25
Report Print setting 2-65
Resolution
changing 4-3, 4-4, 6-13
copying 1-5, 6-14
printing 1-6
scanner 1-7
setting 4-3
RESOLUTION button 2-23
RESUME button 2-25
Ring Time setting 2-66
Ring Tone setting 2-66
ROLLER CLEANING setting 2-50, 2-51, 267, 2-70
RX CALL LEVEL setting 2-62, 2-69, 2-72
S
Safety instructions 1-14 to 1-16
SB-21 BJ Cartridge container 2-6, 2-30, 2-36
SCAN CONTRAST setting 2-64, 2-68, 4-4, 4-5
Scanning
components 9-4 to 9-7
contrast 4-4, 4-5
documents 6-2
features 1-7
image size 6-4
resolution 4-3
Sending
cancelling 4-12
group dialling 4-19
manual via the handset 4-6, 4-8, 4-9
memory 4-6, 4-10, 4-11
methods 4-6
preparing for 4-3 to 4-7
problems 8-12 to 8-14
several destinations 4-18, 4-19
through switchboard 4-20
Sending document support 2-6, 2-20
attaching 2-11
Sequential broadcasting 4-18
using 4-18, 4-19
I-10
Index
Canon
MultiPASS C50 Hardware Manual
ENGLISH
Serial number 8-3
Settings 2-61 to 2-73
accessing 2-71 to 2-73
general 2-62
list 2-61 to 2-70
other 2-67
receive settings 2-65
sending 2-63
speed dialling settings 2-67
unit 2-68 to 2-70
Sheet feeder 2-20
jams 8-8
problems feeding 8-9 to 8-11
Shipping materials
removing 2-8 to 2-10
Silent Receive setting 2-65
Speaker setting 2-62
Special function buttons 2-24, 2-25, 2-26
Specifications See Appendix A
Speed
copying 6-14
printing 1-6
transmission 1-4
Speed dialling
coded 3-2, 3-10 to 3-16
group dialling 3-2, 3-17 to 3-21
methods 3-2
one-touch 3-2, 3-3 to 3-9
Speed setting 2-63, 2-65
START AGAIN message 8-34
START/COPY button 2-24
STOP button 2-24
Supplies 1-9, 1-10
BJ cartridge 1-9
ink tank 1-9
photo kit 1-10
print media 1-9
Support See Customer support
Switchboard 4-20, 4-21
Symbols
editing 2-57
entering 2-56, 2-57
T
T-Shirt Transfers TR-101 2-39
Tank See Ink tank
TEL LINE TYPE setting 2-58, 2-59, 2-63, 2-69
TEL REGISTRATION setting 2-68
Telephone
connecting 2-17
features 1-5
jack 2-17, 2-21
problems 8-17
Telephone Attached to Unit setting 2-62
Telephone line 2-6
connecting 2-16
jack 2-16, 2-21
Temperature
location 2-3
paper storage 2-44
Testing
print head 9-9
unit 2-74
Thickness lever See Paper thickness lever
Tone dialling
on a pulse line 4-24
TONE/+ button 2-25
using 4-24
TR-101 See T-Shirt Transfers TR-101
Transmission speed 1-4
Transparencies
CF-102 Transparencies 2-38
loading 2-44, 2-45
Transparencies CF-102 2-38
Transporting unit 9-21
TWAIN 1-7
TX/RX CANCELLED message 8-34
TX/RX NO. nnnn message 8-34
Type conventions 1-12
I-11
Index
Canon
MultiPASS C50 Hardware Manual
ENGLISH
U
V
UHQTM See Ultra High Quality
Ultra High Quality 1-4, 4-3
UNIT NAME setting 2-58, 2-59, 2-63, 2-68
UNIT TELEPHONE # setting 2-58, 2-63, 2-68
Unpacking unit 2-5 to 2-10
User information
entering 2-54, 2-58 to 2-60
USER SETTINGS 2-68
User’s guide 1-11, 2-6
MultiPASS Desktop Manager for
WindowsH 1-11, 2-6
type conventions 1-12
using 1-11
Ventilation 2-3, 2-4
Voltage 2-3, 2-18
VOLUME CONTROL setting 2-68, 2-71
W
Wait between Retries setting 2-63
Weight 2-3
Windows 95/98 1-8
I-12
Index
Canon
MultiPASS C50 Hardware Manual
ENGLISH