1
TESTING FOR SERVICEABILITY
CLEANING AND INSPECTION
OPERATING TEST
Clean all metal parts in cleaning solvent. Wipe rubber parts
dry with cloth.
1. Apply the brake valve and note that the stop light lights
before the delivery pressure reaches 7 psi.
2. Release the brake valve and note that the stop light goes
“off”.
LEAKAGE TEST
1. With the brakes fully applied, no leakage is permitted at
the stop light switch. If the stop light switch does not
function as described or if leakage is excessive, it is
recommended that it be replaced with a new unit or
repaired with genuine Bendix parts available at authorized
Bendix parts outlets.
Inspect contact points for pits or wear. If pitting is not too
severe, the points may be reconditioned by filing with a
distributor point file. If points cannot be reconditioned, they
should be replaced. The contact strip in the SL-4™ switch
may be turned over to use the other side of the contacts.
Check the spring for signs of deterioration; Replace if
discolored. The spring in the SL-3™ switch carries the current
of the electrical circuit involved; consequently, in the case of
excessive current, as might be caused by a short, the spring
will be overheated and ruined.
REMOVING
Inspect cover and body. If cracked or damaged, replace.
1. Disconnect electrical connections at the stop light switch.
Only genuine Bendix service parts should be used for
replacement.
2. Disconnect air line to the stop light switch.
3. Remove the stop light switch.
ASSEMBLY
INSTALLING
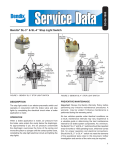
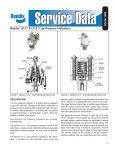
(SL-3™ Switch) (Figure 1)
1. Install in a convenient location for servicing.
1. Insert terminal screws (2) in cover (1), making sure the
terminal connector (7) is properly positioned.
2. Install with pipe tap pointing to the ground and keep it
high for adequate drainage.
3. Connect the stop light switch in series in the stop light
circuit.
2. Secure terminal screws with washers and nuts, or
terminal clips, as the case may be.
3. Place diaphragm (6) in body.
4. Keep the stop light switch terminals away from frame
members to avoid grounding.
4. Position contact plunger (4) on diaphragm.
5. Connect the pipe tap to the brake chamber supply line
so that the stop light switch will operate whether the
foot or hand valve is applied.
6. Place washer (5) on diaphragm and screw cover (1)
into body. Torque to 30 foot pounds. Make certain the
vent hole in the cover is open.
DISASSEMBLY
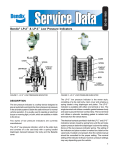
(SL-4™ Switch) (Figure 2)
(SL-3™ SWITCH)
1. Position terminals (9) in cover (8) and secure with washers
and nuts or terminal clips. Place vent plug (10) in cover.
1. Place hex portion of body in a vise.
2. Using a large end wrench on cover flats, turn cover (1)
in a counterclockwise direction and remove from body.
3. Remove terminal nuts, terminals (2) and terminal
connector (7) from cover.
4. Remove spring (3), plunger (4), washer (5) and
diaphragm (6) from body.
5. Position spring (3) on plunger.
2. Place o-ring diaphragm (14) and piston (13) in body.
O-ring diaphragm should be installed with its flat side
adjacent to the piston.
3. Place gasket (15) in place on body and contact strip
(12) on piston (13).
4. Position cover assembly on gasket and secure with
machine screws. Torque to 20 inch pounds.
(SL-4™ SWITCH)
1. Remove two machine screws (7) and remove cover (8).
TEST OF REBUILT STOP LIGHT SWITCH
2. Remove terminal nuts and terminals (9) from cover.
Both operating and leakage tests, as indicated under section
headed “Testing for Serviceability”, must be made after
rebuilding or repairing the stop light switch. The switch must
meet the following specifications;
3. Remove the vent plug (10) from cover.
4. Remove spring (11), contact strip (12), piston (13) and
o-ring diaphragm (14) from body.
1. No leakage is permissible at the stop light switch with
the brakes applied.
2. The stop light switch contact should close with not more
than 7 pounds of air pressure.
2