1
20
21
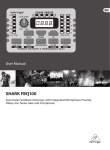
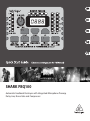
SHARK FBQ100
Quick Start Guide
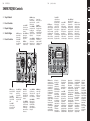
SHARK FBQ100 Getting started
(EN)Step 3: Getting started
(ES)Paso 3: Puesta en
marcha
(FR)Etape 3 : Mise en
oeuvre
(DE)
Schritt 3: Erste Schritte
(PT)Passo 3: Primeiros
Passos
(EN) Make all appropriate audio and
power connections to the FBQ100.
Leave the power for all devices off!
(ES) Realice todas las conexiones audio y
de alimentación adecuadas en el FBQ100.
¡No encienda ninguna de las unidades por
el momento!
(FR) Réalisez toutes les connexions nécessaires
au FBQ100. Laissez tous les équipements
hors tension !
(EN) Turn the power on for
all devices.
(ES) Encienda todas las unidades.
(FR) Placez tous les équipements sous tension.
(EN) Begin playing audio from your
mixer or other source.
(PT) Faça todas as conexões de audio e energia
para o FBQ100. Deixe a energia de todas as
unidades desligada!
(FR) Lancez le signal audio de console de
mixage ou autre.
(FR) Sélectionnez et réglez les niveaux avec
les touches INPUT et OUTPUT en fonction
de l'application.
(DE) Wählen Sie die geeigneten Pegel mit den
INPUT- und OUTPUT-Knöpfen für Ihre Aufgabe.
(PT) Selecione os nível apropriados com os
botões INPUT e OUTPUT para mudar
sua aplicação.
(DE) Beginnen Sie, Audio von Ihrem Mixer oder
von einer anderen Quelle abzuspielen.
(PT) Tocar audio de sua mesa de mixagem ou
outra fonte.
LED light.
(EN) If using a line-level source,
adjust the CLIP LEVEL knob to
optimize the FBQ100’s internal
operating level. Do not let the CLIP
(ES) Si está usando una fuente de nivel de línea,
ajuste el mando CLIP LEVEL para optimizar el
nivel operativo interno del FBQ100. No permita
que se ilumine el piloto CLIP.
(FR) Si vous utilisez un signal à niveau ligne,
réglez le bouton CLIP LEVEL pour optimiser le
niveau de fonctionnement interne du FBQ100.
Veillez à ce que la Led CLIP ne s'allume pas.
(DE) Wenn Sie eine Line-Level-Quelle verwenden,
justieren Sie den CLIP LEVEL-Knopf, um den
internen Betriebspegel von FBQ100 zu optimieren.
Achten Sie darauf, dass die CLIP LED nicht leuchtet.
(FR) Si la touche ACTIVE n'est pas allumée,
appuyez dessus pour activer les filtres
anti-larsen.
(DE) Falls die LED des ACTIVE-Knopfs nicht
leuchtet, drücken Sie den ACTIVE-Knopf, um
die Feedback-Filter zu aktivieren.
(PT) Se o botão ACTIVE LED não está asceso,
pressione o botão ACTIVE para ativar o
retorno dos filtros.
(PT) Ligue todas as unidades.
(ES) Empiece la reproducción
de señal audio desde su mesa de mezclas u
otra fuente.
(ES) Elija los niveles adecuados para su
aplicación con los botones INPUT y OUTPUT.
(PT) Se um microfone é ligado diretamente no
XLR INPUT, ajuste o botão CLIP LEVEL para o
centro (12:00). Ao falar ao microfone, ajuste o
MIC GAIN para sensibilidade. Não permita que a
luz CLIP LED se ascenda.
(DE) Schalten Sie den Strom für alle Geräte ein.
(DE) Stellen Sie alle notwendigen Verbindungen
zum FBQ100 her. Lassen Sie den Strom für alle
Geräte ausgeschaltet.
(EN) Select the proper levels with
the INPUT and OUTPUT buttons to
suit your application.
(PT) Se usar uma fonte linear, ajuste o botão
CLIP LEVEL para melhorar os níveis de operação
interna do FBQ100. Não permita que o CLIP LED
se ascenda.
(EN) If a microphone is plugged
directly into the XLR INPUT, set the
CLIP LEVEL knob to the center
(12:00) position. While speaking
into the microphone, adjust the MIC GAIN knob
to set the input sensitivity. Do not let the CLIP
LED light.
(ES) Si tiene un micrófono conectado
directamente en la toma XLR INPUT, ajuste el
mando CLIP LEVEL a la posición central (12:00).
Mientras habla o canta en el micro, gire el
mando MIC GAIN para ajustar la sensibilidad
de entrada. No permita que el piloto CLIP
se ilumine.
(FR) Si vous utilisez un micro connecté à l'entrée
XLR, placez le bouton CLIP LEVEL au centre.
Tout en parlant dans le micro, utilisez le bouton
MIC GAIN pour régler la sensibilité d'entrée.
Ne laissez pas la Led CLIP s'allumer.
(DE) Wenn ein Mikrofon direkt in XLR INPUT
eingesteckt ist, setzen Sie den CLIP LEVEL-Knopf
in die mittlere (12:00) Position. Sprechen Sie ins
Mikrofon und justieren Sie gleichzeitig den MIC
GAIN-Knopf, um die Eingangsempfindlichkeit
einzustellen. Achten Sie darauf, dass die CLIP
LED nicht leuchtet.
(EN) Hold the ACTIVE button for
3 seconds to reset all
feedback filters.
(ES) Mantenga pulsado el botón ACTIVE durante
unos 3 segundos para reiniciar todos los filtros
de realimentación.
(FR) Appuyez pendant 3 secondes sur la touche
ACTIVE, pour initialiser tous les filtres anti-Larsen.
(DE) Halten Sie den ACTIVE-Knopf 3 Sekunden
lang gedrückt, um alle FeedbackFilter zurückzusetzen.
(PT) Pressione o botão ACTIVE por 3 segundos
para reiniciar todos os filtros de retorno.
(EN) Log on to behringer.com to
download the full manual for
more details on the
FBQ100’s functionality.
(ES) Ingrese en behringer.com para
descargar el manual completo y así obtener
más detalles acerca de la funcionalidad
del FBQ100.
(FR) Téléchargez le mode d'emploi complet
sur le site behringer.com. Vous obtiendrez
ainsi toutes les informations et tous les
détails sur le FBQ100.
(DE) Melden Sie sich unter behringer.com
an, um die ganze Bedienungsanleitung
herunterzuladen, welche detailliertere
Informationen über die Funktionsweise von
FBQ100 enthält.
(EN) If the ACTIVE button LED is not
illuminated, press the ACTIVE
button to activate the
feedback filters.
(ES) Su la luz del botón de ENCENDIDO no está
iluminada, presione el botón para activar los
filtros de retroalimentación.
(PT) Acesse behringer.com para baixar
o manual de instruções e obter maiores
detalhes sobre a funcionalidade do FBQ100.