1
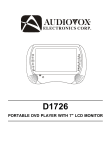
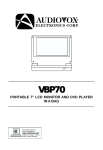
Model D1750T
PORTABLE 7" LCD MONITOR
AND DVD PLAYER
Owner’s Manual
INTRODUCTION
Thank you for choosing the 7” portable DVD player. The unit applies the
latest state of the art electronics and is designed for use in hotels, offices
or your home. The DVD Player is constructed to provide years of reliable,
trouble-free service, and is compact so that you can take it with you
anywhere and is designed for quick and easy setup.
Please read all
documentation prior to using this product. The documentation will assist
you in obtaining the best equipment performance. Save this manual for
later use.
IMPORTANT NOTICE
It is unlawful in most jurisdictions for a person to drive a motor vehicle
which is equipped with a television viewer or screen that is located in the
motor vehicle at any point forward of the back of the driver’s seat, or that
is visible, directly or indirectly, to the driver while operating the vehicle.
In the interest of safety, this system should never be installed where it
will be visible, directly or indirectly, by the operator of the motor vehicle.
SAFETY PRECAUTION
For safety reasons, when changing video media, it is recommended that
the vehicle is not in motion, and that you do not allow children to
unfasten seat-belts to change video media or make any adjustments to
the system.
Enjoy your entertainment system but always remember-safety of all
passengers remains the number one priority.
-1-
CAUTIONS AND WARNINGS
The lightning flash with arrowhead symbol, within an equilateral triangle,
is intended to alert the user to the presence of un-insulated “Dangerous
Voltage” within the product’s enclosure that may be of sufficient
magnitude to constitute a risk of electric shock.
The exclamation point within an equilateral triangle is intended to alert the
user to the presence of important operating and maintenance (servicing)
instructions in the literature accompanying the appliance.
1. Placement
To prevent fire or electric shock, do not expose this appliance to rain or moisture.
Do not place the set on an unstable cart, stand, tripod, bracket or table to prevent
it from falling. Keep the DVD Player away from strong magnets, heat sources,
direct sunlight, and excessive dust. If the DVD Player is brought directly from a
cold to a warm location, moisture may condense inside the DVD Player. When
you move it from a cold to a warm location, wait for about one hour before
operating the DVD Player, or remove the disc and leave the DVD Player turned
ON until the moisture evaporates.
3. Caution
Do not spill or spray liquid of any kind on or in the system (this may result in a fire
or electric shock). Do not place anything heavy on the DVD Player. To ensure
proper ventilation and proper operation, never cover or block the slots and
openings with a cloth or other material. Keep the DVD Player away from an open
flame such as fire, candle etc,.
It is hazardous to replace the battery incorrectly. Replace the battery only with the
2
same or equivalent type, in order to protect the environment, please dispose the
battery properly. Do not use the DVD Player in temperatures higher than 140
degrees Fahrenheit or 40 degrees Celsius.
4. Warning
To reduce the risk of electric shock, do not perform any servicing other than that
contained in the operating instructions unless you are qualified to do so. There are
no user-serviceable parts inside. Refer all servicing to qualified service personnel.
Servicing should be done only by qualified service personnel.
5. Cleaning DVD Player
When cleaning, make sure the system is unplugged from the power source. Do
not use liquid cleaners or aerosol cleaners. Use a cloth lightly dampened with
water for cleaning the exterior of the system only.
6. Disc
Do not use irregularly shaped discs such as heart or star-shaped discs as they
may cause the DVD Player to malfunction. Do not stick paper, tape or glue on the
disc. Do not expose the disc to direct sunlight or heat sources. Do not touch the
surface of disc. Handle the disc by its edge. Clean the disc by wiping the disc from
the center out with a cleaning cloth. Remove the disc from the DVD Player and
store it in its case after playing. Software producers may intentionally fix some
playback operations of discs. Since this DVD Player plays discs according to the
disc contents the software producers designed, some playback features may not
be available. Also refer to the instructions supplied with the discs.
-3-
Table Of Contents
INTRODUCTION_____________________________________________________ 1
CAUTIONS AND WARNINGS___________________________________________ 2
Table Of Contents ____________________________________________________ 4
MAIN FEATURES ____________________________________________________ 7
SCREEN AND SYSTEM PANEL CONTROLS ______________________________ 8
Front Panel Controls_______________________________________________ 8
SYSTEM SIDE PANEL CONTROLS______________________________________ 9
Left Side Panel Controls ____________________________________________ 9
Right Panel ______________________________________________________ 9
REMOTE CONTROL ________________________________________________ 10
Remote Control _________________________________________________ 10
SYSTEM CONNECTIONS ____________________________________________ 12
Power Supply Connection _________________________________________ 12
Connecting To a TV ______________________________________________ 12
Connecting to a Normal Amplifier ____________________________________ 13
Connecting to a Digital Ready Amplifier _______________________________ 13
PLAYBACK PREPARATIONS __________________________________________ 14
Usage of Remote Control __________________________________________ 14
Using Of Wireless Headphone ______________________________________ 14
DISC FORMATS SUPPORTED BY THIS PLAYER _________________________ 15
Care of Discs ___________________________________________________ 15
Storage of Discs _________________________________________________ 15
Cleaning of Discs ________________________________________________ 15
Power Adapter __________________________________________________ 16
Pre-Operation ___________________________________________________ 16
Using Headphones _______________________________________________ 16
POWER SUPPLY ___________________________________________________ 17
About Rechargeable Battery Pack ___________________________________ 17
Battery Pack Attaching And Placement _______________________________ 18
4
Charging the Battery Pack _________________________________________ 19
Detaching The Battery Pack ________________________________________ 19
Using a Vehicle DC Adapter ________________________________________ 20
DVD PLAYER OPERATION ___________________________________________ 20
Preparation _____________________________________________________ 20
Playback of DVD Disc ____________________________________________ 20
Pause _________________________________________________________ 20
Zoom _________________________________________________________ 20
Stop __________________________________________________________ 21
Screen Mode ___________________________________________________ 21
Title Menu ______________________________________________________ 21
Previous and Next _______________________________________________ 21
SYSTEM SETUP____________________________________________________ 21
Language Setup _________________________________________________ 22
Video Setup ____________________________________________________ 23
TV Aspect Ratio _________________________________________________ 23
Close Caption ___________________________________________________ 23
Audio Setup ____________________________________________________ 23
Downmix _______________________________________________________ 23
IR ____________________________________________________________ 24
Rating Setup ____________________________________________________ 24
Password ______________________________________________________ 24
Rating _________________________________________________________ 24
PLAYBACK FUNCTIONS _____________________________________________ 24
Fast Forward & Rewind ___________________________________________ 24
Slow Forward & Rewind ___________________________________________ 24
Repeat ________________________________________________________ 25
Subtitle ________________________________________________________ 25
Audio _________________________________________________________ 25
Backlight _______________________________________________________ 25
Search by time __________________________________________________ 25
-5-
Resume Playback________________________________________________ 26
Playing MP3”s _________________________________________________ 26
Playing a JPEG _________________________________________________ 27
Normal Playback ________________________________________________ 27
Picture Zoom ___________________________________________________ 27
TROUBLESHOOTING _______________________________________________ 28
SPECIFICATIONS___________________________________________________ 29
WARRANTY _______________________________________________________ 30
-6-
MAIN FEATURES
High Quality Audio and Video
Excellent Sound
Dolby Digital output to produce
excellent Audio output signal.
High Resolution
MPEG2 decoding format achieves
more than 500 lines of horizontal
resolution.
LCD (Liquid Crystal Display)
Screen
Designed with a color 7” LCD
screen.
Special Functions
Supports parental-lock features.
AV Input
External Audio, Video input can be
connected to most external AV
sources.
Digital Out
Convenient optical digital audio
output jack for connecting with
most amplifiers.
Headphone Output
Movie or music audio in private.
Switching Power Adapter
Automatically adapts to voltage
requirements in the U.S. and other
countries.
Advanced Playing Function
Compatibility
DVD, DVD-R, DVD-RW, CD,
CD-R, CD-RW, JPEG and MP3
discs are compatible.
-7-
ON-Screen Display
ON-screen displays in your choice
of English /Spanish French
/Chinese.
Viewing Performance
Multi-speed, fast forward, fast
backward, slow play and repeat
playback.
Zoom Function
Allows the viewer to zoom in the
picture.
Search By Time
Search for a certain time on a disc.
Last Memory Playback
Continues playing from a stopped
point as long as power is applied to
the DVD Player.
Region Code
DVD players and discs are coded
by region. These regional codes
must match the played discs. If the
codes don’t match, the disc cannot
be played. This player’s default
code is region 1.
SCREEN AND SYSTEM PANEL CONTROLS
Front Panel Controls
1) PIC button
Press to enter the brightness or
color level-adjusting mode.
Press for 1.5 seconds to shift
aspect ratio between 16:9, 4:3
and screen Off.
2) /-button
Press to go to beginning of
current track/chapter. Press
twice repeatedly to go to
beginning
of
a
previous
track/chapter.
Press
to
decrease
the
brightness or color level while in
the brightness or color level
adjusting mode.
3) Infrared (IR) Audio Signal
Emitter/ (IR) Remote Sensor
IR Transmitter for optical
wireless IR headphones.
IR Sensor for remote control
operation.
4) +/ button
Press to go to next
track/chapter. Press to increase
the brightness or color level
5)
6)
7)
8)
9)
10)
-8-
while in the brightness or color
level adjusting mode.
PLAY/PAUSE button
Press once to begin playback.
Press again to pause playback.
Power ON Indicator
Lights green when the player is
in operation.
STOP/ EJECT button
Press to stop playback. Press
again to go to the beginning of
the movie.
Press for 1.5
seconds to eject the disc.
POWER button
Press and hold for 1.5 seconds
to turn Power ON. Press again
for 1.5 seconds to turn OFF.
LCD Screen
Provides a high-resolution
picture.
Speakers
Provides high quality Audio
outputs.
SYSTEM SIDE PANEL CONTROLS
Left Side Panel Controls
4) Audio Input/Output and
Optical Digital Output Jack
5) AV IN/OUT’ Switch
Switch to IN, to input a video
game or camcorder signal.
Switch to OUT when the player
is connected to an external
monitor.
6) 12V Input Jack
Used to provide power to the
unit.
1) Headphone Jack
When connecting this jack, the
speakers will automatically turn
OFF.
2) Speaker/Headphone Volume
Adjusting control
Used to adjust the headphone
and speaker volume.
3) Video Input/Output Jack
Allows
for connection
to
external equipment.
Right Panel
1) Disc Tray
Used to load disc.
-9-
REMOTE CONTROL
Remote Control
1) PWR button
Press to turn unit ON or OFF.
2) SUBT button
When a DVD with subtitles is
playing, press to select a
subtitle language or to turn
subtitles OFF.
3) TITLE button
Press to display titles if present
on the disc.
4) Direction buttons
Press to select menu items.
5) ENTER button
Press to confirm the items or
settings.
6) SETUP button
Press to access the DVD
player’s setup menu.
- 10 -
7) Number buttons
Select numbers by pressing
these buttons.
8) PREV SKIP button
Press to go to beginning of
current track/chapter. Press
twice to go to beginning of a
previous track/chapter.
9) NEXT SKIP button
Press to go to next track
/chapter.
10) A-B Repeat button
Used to play a section of the
DVD from point A to point B.
Press once to select the starting
point (A) press again to select
the end point (B). Press a third
time to stop the A-B Repeat
11) REP button
Press to repeat a chapter, track,
title, or the entire disc.
12) EJECT button
Press to eject disc.
13) AUDIO button
Press to access various audio
languages, when the DVD disc
contains multiple audio
languages.
14) BACKLIGHT button
Press to turn the screen OFF
when playing a DVD on an
external monitor or when
listening to CD’s.
15) MENU button
Press to open the disc menu.
16) INFO button
Press for detailed information on
the disc. Keep pressing the
button to remove information
from screen.
17) STOP button
Press once to stop playback.
Press the PLAY/PAUSE button
to resume normal playback.
Press the button twice to stop
playback and return to the DVD
disc menu.
- 11 -
18) PLAY/PAUSE button
Press to start playback. Press
again to pause playback.
19) GOTO button
Press to select the desired disc
starting time, track or title.
20) +10 button
Select numbers greater than 9
by pressing the (+10) button
first, and then additional number
buttons as needed.
21) FWD SCAN button
Press to search forward.
22) REV SCAN button
Press to search backward.
23) SLOW button
Press to activate slow forward or
slow rewind.
24) ZOOM button
Press to enter and cycle through
zoom
functions,
use
the
direction buttons (4) to move
around the screen.
SYSTEM CONNECTIONS
NOTE: Before plugging the power cord into an AC outlet, make sure that all
the connections have been made as described below.
Power Supply Connection
Connect the supplied adapter to the side of the DVD player in the jack
marked “DC 12V In”. Plug the two-prong end of the power cord to an
AC100-240V outlet. If you have difficulty inserting the plug, turn it over and
reinsert it. If the DVD Player will not be used for a long time, disconnect the
plug from the outlet.
Connecting To a TV
Audio/video connections
Always ensure that the DVD player, TV and any other electrical equipment to
be connected to the DVD player is switched OFF.
The easiest way to connect the DVD player to a television is via the supplied
Audio/Video cable. Connect the audio/video cable from the DVD player to
the audio/video inputs of the TV.
NOTE: This player only supports a NTSC input signals. Make sure to
choose the NTSC input signal type. If the picture is distorted or colorless,
please check if the type of the input signal. Remove the signal input and
restart the player.
- 12 -
Connecting to a Normal Amplifier
The DVD player can be connected to an amplifier. Please refer to the
equipment’s manual before connecting. Also switch the AV/IN OUT switch
to OUT.
Connecting to a Digital Ready Amplifier
The DVD Player can be connected to an amplifier with a digital optical input.
The cable is not supplied, but can be purchased at most home electronics
retailer. Also switch the AV/IN OUT switch to OUT.
- 13 -
PLAYBACK PREPARATIONS
Usage of Remote Control
1)
2)
3)
4)
5)
6)
Using Of Wireless Headphone
Remove the empty battery
receptacle. Refer to the
drawing above.
Insert the battery into the
receptacle and insert the
receptacle into the
remote.
For best results, aim the
remote directly at the
player’s receiving window
within 15 feet, and angles
of not exceeding 60
degrees.
The path between the
remote control and remote
sensor should be free of
obstructions.
Under normal use the
battery will last for one
year.
Remove battery if the
remote is not to be used
for a long time or during
storage.
1)
2)
3)
- 14 -
For best results when
using wireless headphone
sit facing the screen,
within the range of 12 feet
and angles of 60 degrees.
There should be no
obstacles between wireless headphones and
infrared
audio
signal
emitter.
Set the IR to ON in the
audio setup menu first.
If there is no sound, make
sure the batteries in the
headphones are not
discharged.
DISC FORMATS SUPPORTED BY THIS PLAYER
DISC LOGO
DIAMETER
PLAYBACK TIME/
PLAYABLE SIDES
133 min (SS-SL)
12cm
242 mi n (SS-DL)
266 min (SS-SL)
484 mi n (SS-DL)
DVD
41 min (SS-SL)
8cm
75 min (SS-DL)
82 min (DS-SL)
150 min (DS-DL)
12cm
74 min
8cm
20 min
12cm
600 min
CD
MP3
The disc maker specifies the operation of some DVD discs. Please refer to
the instruction manual with the disc.
Care of Discs
Cleaning of Discs
Do not touch the playing surface of
the compact disc.
Do not stick paper labels on the
disc.
If a disc has fingerprints or dust on
it, lightly wipe the disc with soft
cloth from the center of the disc
outward in a circular manner.
Storage of Discs
Never use record cleaning sprays,
or any other solvents to clean your
discs.
Do not expose discs to direct
sunlight or excessive temperatures
- 15 -
Power Adapter
The DVD player is supplied with a switching power adapter.
1) Connect AC adaptor in the jack the on side of the unit.
2) Plug the of the power cord to a grounded AC Outlet.
NOTE: To prevent malfunction, turn the power to the DVD Player OFF
before removing the power cord from the AC Outlet
Pre-Operation
1)
2)
3)
4)
Connect DVD Player to power.
Press the “POWER” switch.
Handing the disc with its printed side toward you. (Referring to the
above picture), push the disc in about ¾ of the way. The disc will be
pulled into the player from the rest of the way automatically.
Adjust the volume with the “VOLUME” adjust knob (also adjusts
earphone volume if using headphones).
Using Headphones
Connect headphone into the headphone Jack on
the left side of the unit.
Quick Tips:
Excessively loud volume could damage your hearing.
Turn down the volume before you connect the headphones, and then raise
the volume to comfortable level. Sound from the DVD Player’s external
speaker will stop when headphones are connected.
- 16 -
POWER SUPPLY
About Rechargeable Battery Pack
Your portable DVD player comes with a lithium ion rechargeable battery that
attaches to the bottom of the player. Your new battery should be fully
charged before initial use. Charging time is normally about 4 hours. A fully
charged battery delivers about 2.5-3 hours of use, but playing time varies
from disc to disc. If the battery will not be used for a long period of time,
first fully charge the battery prior to storage.
Working conditions and precautions of the battery
•
New batteries should be fully charged before initial use.
•
Battery should only be used and charged when temperatures are
between 32-80F.
•
Never put the battery in fire or water.
•
Do not expose the battery to high temperatures or store in hot,
sunny places.
•
Maintain well-ventilated conditions around the product, avoiding
heat. Don’t put the product on bed, sofa or anything that may block
ventilation to the product.
•
Do not open the battery.
•
Never charge the battery for more than 8 hours. Detach battery
immediately after charging is complete if not being used. When
charging the battery pack, the light on the battery will turn red, when
the charging is complete or the battery is being used, the light will
turn green.
•
Detach battery when not in use.
•
When the battery is weak, the “Low Power” will appear on the LCD
screen, and about one minute later, the player will power OFF
automatically.
- 17 -
POWER SUPPLY
Battery Pack Attaching And Placement
The DVD Player’s power supply is the AC power adapter or the battery pack,
which are provided with the player. The battery pack also can be used as a
stand.
Refer to the following steps for attaching the Battery Pack:
Place the DVD Player on a soft and smooth surface with its back cover
facing UP (to avoid scratching the screen). Position the Battery Pack
directly toward the battery slot on the back cover of the DVD Player. Align
the pins on the battery pack with holes on the player.
With one hand on the DVD Player to prevent it from moving, and push the
battery pack into the DVD Player. Then slide the Battery Pack toward the
back of the DVD Player until you hear it click and lock into place.
After attaching the Battery Pack, place the DVD Player LCD screen in
normal position. The attached Battery Pack serves as a stand.
When used in a vehicle, the DVD Player is placed into a sturdy carrying
Bag/Mount. The Bag/Mount is easy to attach to a headrest and fits on most
vehicle headrest types. This is convenient for the rear seat passengers to
view the screen.
- 18 -
POWER SUPPLY
Charging the Battery Pack
The battery must be attached to the DVD player to charge it. Plug the
Power Adapter into the Player’s DC-IN 12 V Jack, which is located on left
Side of the DVD Player. Plug the other end of the Power Cord into a wall
Outlet.
Detaching The Battery Pack
If the DVD Player is not going to be used for long periods of time, the Battery
Pack should be detached. When the DVD Player is turned OFF, the DVD
Player is still consuming some power in STANDBY mode. This could lead to
discharging the battery.
Make sure the power is turned OFF before detaching the Battery Pack. After
detaching the battery pack, take care when handling the DVD Player.
1) Place the player on a soft and smooth surface with its back cover up to
avoid scratching the screen.
2)
Press the button located on the backside of the unit to unlock the
battery pack and while pressing the button pull the battery pack out from
the DVD Player.
NOTE: When attaching or detaching the battery pack, make sure to protect
the LCD screen.
- 19 -
POWER SUPPLY
Using a Vehicle DC Adapter
To use the Vehicle DC Adapter disconnect the Battery pack and connect the
supplied Vehicle Power Plug Adapter into the DVD Player’s Power Jack and
the other end into the Vehicle DC outlet (Cigarette Lighter Socket) as shown
below.
Note: Do not operate the unit or view video software while driving a
vehicle. Place the unit in a secure position for viewing. Do not leave battery
attached when using car adaptor as power source. Make sure the unit and
the car adapter are not connected when starting the car.
DVD PLAYER OPERATION
Read all instructions carefully before using your DVD Player for the first time.
Preparation
Turn the DVD Player ON by pressing the POWER button on the front of the
player.
Load disc with the label outward playback of the disc will begin
automatically.
Playback of DVD Disc
When the DVD menu appears press the direction buttons () to
select a feature.
Press the ENTER or Play/Pause.
Pause
Press the Play/Pause button once on remote control to pause playback.
Press the Play/Pause button again to resume normal playback.
Zoom
Press the ZOOM button on the remote control to cycle through the different
zoom settings. Q1 – Q2 – Q3 – QOFF. While in zoom mode use the
direction buttons to move around to different positions on the picture.
- 20 -
Stop
During playback, press the STOP button once on the remote control to stop
playback of a disc. Press the PLAY/PAUSE button again, and the DVD
Player will resume playback of the disc from the point where it stopped.
Screen Mode
Press the PIC button on the front panel for three (3) seconds to shift the
screen aspect ratio between 16:9, 4:3 and OFF.
(NOTE: OFF Mode can be used to turn the screen OFF when the unit is
attached to an external monitor or when listening to CD’s.)
Title Menu
To view the Title Menu during payback of a disc press the TITLE button on
the remote control. The will appear on the LCD screen.
Press direction button () or the number buttons to select the title or
disc option you wish to play. (NOTE: This feature is not available on all
discs.)
Press the ENTER button to start playback of a disc.
NOTE: Title and Menu are only available for DVD discs.
Previous and Next
Press the PREV button two (2) times repeatedly on the remote control, and
playback will start from the previous track.
Press the NEXT button on the remote control and playback of the disc will
start from the next track.
SYSTEM SETUP
Setup Menu
You can change the default settings to your own preference.
Press the ‘SETUP’ button on the remote control to display the settings
menu. The menu includes Language Setup, Video Setup, Audio Setup and
Rating setup. Press the Right/Left direction buttons (,) on the remote
control to select a category. All the items in the category will appear on the
screen. Press the ‘ENTER’ button to confirm and enter the category.
Language
Rating
Video
- 21 -
Audio
Language Setup
Press the ENTER button to enter the Language setup menu, the screen will
display the following:
Language Video Audio Rating
OSD Menu
English
Auto
Subtitle
Audio
English
English
DVD Menu
Restore Default
OK
In the language setup menu, use the UP/DOWN direction buttons () to
select folders. Press the ENTER button to enter. Use the UP/DOWN
direction buttons () to select items. Press the ENTER button to confirm
selection and return. Press the UP direction button () to return to the
previous menu.
OSD Menu
There are four (4) OSD menu languages that can be selected (English,
Chinese, French, Spanish).
Subtitle
You can select English, Chinese, French, Spanish, Auto or OFF. Selecting
Auto, the DVD Player will display the default subtitle on the screen. If the
disc is without subtitles, during playback, no subtitle will be displayed. Select
OFF and no subtitle will be displayed on the screen.
Audio
There are four (4) Audio languages available. You can select English,
Chinese, French or Spanish.
DVD Menu
There are four (4) different DVD menu languages available. You can select
English, Chinese, French or Spanish.
Restore Default
Select the item and press the ENTER button to confirm and return to the
original settings.
- 22 -
Video Setup
Press the Right direction button () to select Video setup menu, then press
the ENTER button to enter the video setup menu. The screen will display the
following:
Language Video Audio Rating
TV Shape
16:9
Close Caption
Off
In this menu, use the UP/DOWN direction buttons () to select an item.
Press the ENTER button to select, use the UP/DOWN direction buttons
() to select item. Press the ENTER button to confirm selection and
return. Press the UP direction button () to return to the previous menu.
TV Aspect Ratio
You can select 4:3 PS, 4:3LB or 16:9. Select the corresponding aspect ratio
for your TV shape or DVD aspect ratio (Full Screen 4:3/ Wide Screen 16:9).
Close Caption
You can set the captions to ON or OFF during playback of a disc.
Audio Setup
Press the Right direction button () to select Audio setup menu. Press the
ENTER button to enter the audio setup menu. The screen will display the
following:
Language Video Audio Rating
Downmix
IR
Stereo
Off
In this setup menu, use direction buttons to select the item, press the
ENTER button to select item. Press the UP direction button () to return to
the previous menu.
Downmix
You can select Stereo, Left, Right or Mix audio output mode.
- 23 -
IR
This item is used to set the infrared Audio signal to ON or OFF. When ON
is selected, there will be infrared Audio signal emitted from the infrared audio
signal emitter. When OFF is selected, no infrared Audio signal emitted.
NOTE: Using optical digital audio output: during CD, MP3 disc playback, the
digital audio is in PCM format; during DVD disc playback, the digital audio is
in Bitstream format.
Rating Setup
Press the Right direction button () to select Audio setup menu, then press
the ENTER button to enter the audio setup menu. The screen will display as
below:
Language Video Audio Rating
Password
--------Rating
Adult
Password
Parental control features are password protected. The original setting is
unlocked. This setting allows you to use number buttons to input any
password. NOTE: The default password is 3308.
Rating
DVD’s that are equipped with the child lock function are rated according to
their contents and settings vary from disc to disc. Depending on the disc, you
can replace or lock out violent scenes, or lock out playback of the disc
altogether. Access the parental controls on the sub-menu by pressing the
direction buttons () on the remote control, then press the ENTER
button. An interactive menu will appear on the screen.
PLAYBACK FUNCTIONS
Fast Forward & Rewind
Press the and buttons to Fast Forward or Fast Rewind a track on a
disc during playback (x2, x4, x8, x20).
Slow Forward & Rewind
Press the SLOW button to Slow Forward a track on a disc during playback
(1/2, 1/4,1/8, 1/16).
- 24 -
Repeat
Repeat a Title, Chapter or Track. Press the REP button on the remote
control. Continually pressing the REP button will display a menu as follows:
Repeat OFF, Repeat and Repeat All.
You can temporarily mark Chapter, Title section of a DVD that you would like
to play repeatedly. You do this by marking the start and the end of the
section using the A/B button. During playback press the A-B button on the
remote control at the beginning of the segment (point A) you wish to play
repeatedly. Press the A-B button again at the end of the segment (point B).
The DVD player will automatically return to point A and repeat playback of
the selected segment. (A-B). To resume normal playback, press the A-B
button again.
Subtitle
A DVD disc can be recorded with up to 32 subtitles.
Press the SUBT button on the remote control during playback to select the
one you prefer.
NOTE: This function is available on a DVD that is recorded with
multi-subtitles.
Audio
DVD’s contain up to 8 audio bitstreams. For Example: English, French etc.
To select the Audio bitstream. Press the AUDIO button on the remote
control during playback. The DVD Player will play the next audio bitstream
every time you press the AUDIO button.
NOTE: This function is only available for discs that contain several audio
bitstreams.
Backlight
Pressing this button will turn the LCD screen OFF. This function is useful
when the player is connected to an external monitor or when playing CD’s.
Turning the screen off while playing CD’s will conserve battery life.
Search by time
Use the GOTO button to search by Time, namely to start playback of the
disc from a specific time. During DVD playback, press the GOTO button
once and TV screen will display the three (3) items: Time, Title and Chapter.
You can use the up and down direction buttons to select any one of them.
Then use the number buttons to input the time (hour, minute, second) or title
(chapter) number you desired. Press the ENTER button, the DVD Player
will start to play from the selected time or play the title (chapter)
automatically.
- 25 -
Resume Playback
Press the STOP button at the point if you wish to stop the playback of a disc.
The DVD Player will memorize the location where playback of the disc was
stopped.
Press the Play/Pause button to resume normal playback. The DVD Player
will resume the playback of the disc from the location where it was stopped.
This function will not operate if the disc is removed from the DVD Player.
Press the STOP button twice (2). Playback of the disc will stop. When the
Play/Pause button is pressed again, playback of the disc will start from the
beginning of disc.
Playing MP3”s
MP3 is an Audio compression format, which compresses the audio signal at
the rate of 12:1. When using MP3 format, one disc can record more than 600
minutes of music, with sound quality that is similar to that of CD discs.
There are many different formats for storing MP3 songs. Usually, one MP3
disc includes many folders (directories) and every folder includes several
files (songs).
Insert a MP3 formatted disc into the DVD Player and a menu will be
displayed on the screen. The cursor on the track number (on the left side of
the menu) indicates the track is being played. The other cursor on the track
(on the right side of the menu) is for moving to select items. Use the direction
buttons to move the cursor on the track title to select the desired track, and
press the ENTER button to start playback of the disc. Or you can press the
number buttons directly to select the desired track, playback of the disc will
start automatically. During playback, press the PLAY/PAUSE button on the
remote control to pause playback, press it again to resume playback. Press
the STOP button twice to stop playback, then press the PLAY/PAUSE
button, it will start playback from the beginning of the disc.
•
•
•
During MP3 playback, press the previous or next skip button to turn the
page.
During MP3 disc playback, when the DVD Player is playing for about
one minute the screen display will automatically turn OFF. Press any
button except POWER to turn ON the screen display.
There is no search by time and slow playback function for MP3 discs.
- 26 -
Playing a JPEG
JPEG is a common picture format. Hundreds of pictures can be stored in a
disc in this format.
Normal Playback
Load a JPEG disc into the DVD Player. After reading the disc, the DVD
Player will display the images on the disc in sequence. Press the STOP
button to return to the root menu.
Press the MENU button to enter the preview menu. Use the direction
buttons to select the items you wish to view and then press the ENTER
button to confirm and start playback. During playback of the disc, use the buttons to select the picture forward and backward.
Picture Zoom
The ZOOM button is used to turn the zoom function on and off and move
function.
With the zoom function turned ON, use the direction buttons to move to a
desired position of the picture. There are six levels of zoom (Off, 4/3, 3/2, 2
1/4, 1/2).
When the ZOOM function is turned off, the picture will display normally.
Press the STOP button to return to the menu. Press the MENU button once
to activate the preview mode.
•
•
Some JPEG discs can be played normally but with no rotate or zoom
functions depending on how the disc was produced.
During JPEG format disc playback, when the DVD Player is idle for
about one minute, the screen display will automatically turn OFF. Press
any button except POWER to turn the screen display back ON.
- 27 -
TROUBLESHOOTING
Symptom
What To Check
The DVD Player will not
play.
• Make sure the AV IN/OUT switch ON the side of the
player is in the OUT position for standard play.
• Make sure a disc is loaded.
• Make sure the disc isn’t loaded backwards.
• Disc should be clean and not warped.
• Player’s region code should be the same as region
code of DVD disc.
• The DVD was exposed to humid conditions. If it
has, remove the disc and keep the DVD Player
powered up for at least two hours.
There is no sound.
•
•
•
•
There is no picture.
• Make TV is turned ON and in correct video mode.
• Make sure your system connections are correct.
Poor AV performance.
• Is your disc dirty or warped? Clean or replace disc.
• Make sure the TV type is NTSC. If it is not, please
remove the signal input, and restart the player.
Cannot continue to play or
plays a section repeatedly.
• Make sure the player is not in A-B repeat status.
• Press A-B button to cancel it A-B repeat status.
• Is your disc dirty or warped? Clean or replace disc.
There is no sound when
using wireless headphone
• Make sure the IR is set to ON in the audio setup
menu.
• Make sure the batteries of the headphone are fresh.
Make sure system connections are correct.
Make sure the speakers are turned ON.
Make sure the sound setup of DVD disc is correct.
Is the disc dirty or warped? Clean or replace disc.
•
The remote control does not
work.
Make sure there aren’t any obstructions between
the remote control and the DVD Player.
• Make sure you are pointing the remote control at
the DVD Player.
• Make sure batteries are inserted correctly (check
polarity).
• Replace weak batteries.
WARNING: Do not touch any metal objects to the Battery connectors, as
it will put the Battery in standby mode. To exit the standby mode,
connect the Battery and DVD Player to AC or DC power.
Other possibilities: Static or other external interference may cause the
player to function abnormally. Unplug the power-supply cord from the outlet
and plug it in again to reset the player so that normal operation can resume.
If you are still having problems, then disconnect the power to the DVD Player
and consult a qualified technician.
- 28 -
SPECIFICATIONS
TFT Screen Size
7 inches
Laser Wavelength
Wavelength: 780/650nm
Video System
NTSC
Frequency Response
20Hz 20KHz ±2.5dB
Audio Signal-To-Noise Rate
≥ 80 dB
Audio Distortion + Noise
≤ -70dB (1KHz)
Channel Separation
≥ 70dB (1KHz)
≥ 80dB (1KHz)
Dynamic Range
Audio
0.2
Audio Out
Analog
Video Out
Video Out
Power
AC100-240V 50/60Hz
Power Consumption
13W
Dimension w/o Battery
7.87”×6.06”× 1.6”/1.14” (L/W/H)
Weight w/o Battery
About 1.0kg / 2.2 Lbs
Out Level: 1.5V±1.0 , Load: 10KΩ
Out Level: 1VP-P±0.1, Load: 75Ω
Unbalanced Negative
DESIGN AND SPECIFICATIONS ARE SUBJECT TO CHANGE
WITHOUT NOTICE
Manufactured under license from Dolby Laboratories.
“Dolby” and the double-D symbol are trademarks of Dolby Laboratories.
Confidential unpublished works. © 1992 -1997 Dolby Laboratories.
All rights reserved.
- 29 -
WARRANTY
90 DAY LIMITED WARRANTY
Applies to Audiovox Video Products
AUDIOVOX ELECTRONICS CORP. (the Company) warrants to the original retail purchaser of this
product that should this product or any part thereof, under normal use and conditions, be proven
defective in material or workmanship within 90 days from the date of original purchase, such
defect(s) will be repaired or replaced with reconditioned product (at the Company's option) without
charge for parts and repair labor.
To obtain repair or replacement within the terms of this Warranty, the product is to be delivered with
proof of warranty coverage (e.g. dated bill of sale), specification of defect(s), transportation prepaid,
to the Company at the address shown below.
This Warranty does not extend to the elimination of externally generated static or noise, to
correction of antenna problems, to costs incurred for installation, removal or reinstallation of the
product, or to damage to tapes, discs, speakers, accessories, or electrical systems.
This Warranty does not apply to any product or part thereof which, in the opinion of the Company,
has suffered or been damaged through alteration, improper installation, mishandling, misuse,
neglect, accident, or by removal or defacement of the factory serial number/bar code label(s).
THE EXTENT OF THE COMPANY'S LIABILITY UNDER THIS WARRANTY IS LIMITED TO THE
REPAIR OR REPLACEMENT PROVIDED ABOVE AND, IN NO EVENT, SHALL THE COMPANY'S
LIABILITY EXCEED THE PURCHASE PRICE PAID BY PURCHASER FOR THE PRODUCT.
This Warranty is in lieu of all other express warranties or liabilities. ANY IMPLIED WARRANTIES,
INCLUDING ANY IMPLIED WARRANTY OF MERCHANTABILITY, SHALL BE LIMITED TO THE
DURATION OF THIS WRITTEN WARRANTY.
ANY ACTION FOR BREACH OF ANY
WARRANTY HEREUNDER INCLUDING ANY IMPLIED WARRANTY OF MERCHANTABILITY
MUST BE BROUGHT WITHIN A PERIOD OF 30 MONTHS FROM DATE OF ORIGINAL
PURCHASE. IN NO CASE SHALL THE COMPANY BE LIABLE FOR ANY CONSEQUENTIAL
OR INCIDENTAL DAMAGES FOR BREACH OF THIS OR ANY OTHER WARRANTY, EXPRESS
OR IMPLIED, WHATSOEVER. No person or representative is authorized to assume for the
Company any liability other than expressed herein in connection with the sale of this product.
Some states do not allow limitations on how long an implied warranty lasts or the exclusion or
limitation of incidental or consequential damage so the above limitations or exclusions may not
apply to you. This Warranty gives you specific legal rights and you may also have other rights,
which vary from state to state.
AUDIOVOX ELECTRONICS CORPORATION, 150 MARCUS BLVD. HAUPPAUGE, NEW YORK. 11788 1-800-645-4994
128-5556C
- 30 -
For Customer Service
Visit Our Website At
WWW.audiovox.com
Product Information, Photos,
FAQ’s Owner’s Manuals
© 2004 Audiovox Electronics Corp., 150 Marcus Blvd., Hauppauge, N.Y. 11788
- 31 -
128-7112